motocouture
-
Posts
475 -
Joined
-
Last visited
Content Type
Profiles
Forums
Events
Blogs
Gallery
Store
Everything posted by motocouture
-

Croc clutch!
motocouture replied to motocouture's topic in Purses, Wallets, Belts and Miscellaneous Pocket Items
Photo of my test runs on edge paint + pearlex pigment, and gussets in process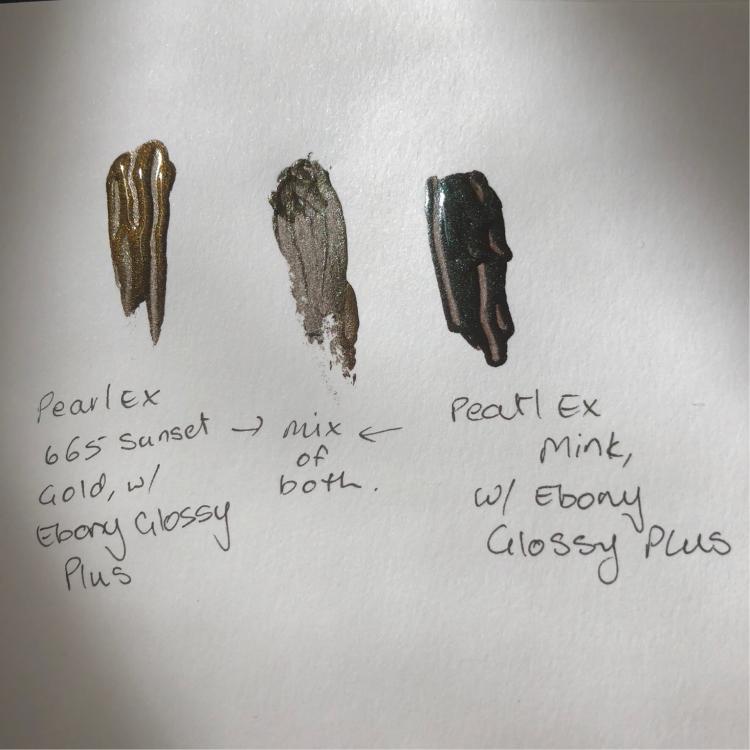

-
Croc clutch!
motocouture replied to motocouture's topic in Purses, Wallets, Belts and Miscellaneous Pocket Items
Thank you! The croc is great to work with, and a lot easier after doing a prototype Thanks, it’s a great color in person, too (hard to capture in the photos). Hopefully I’ll keep you and the popcorn entertained! -
Croc clutch!
motocouture replied to motocouture's topic in Purses, Wallets, Belts and Miscellaneous Pocket Items
Oh and just to warm up, finally got around to covering my dive weights (0.5 and 1lb) with some scrap Horween, instead of an old dish cloth, to use as pattern weights. Have also been experimenting with pigments, thanks to inspiration from @RockyAussie ! I mixed some pearlex dry pigment with the matte edge paint, and it gives a surprisingly nice sheen (especially since I was pretty rough and ready with the edges).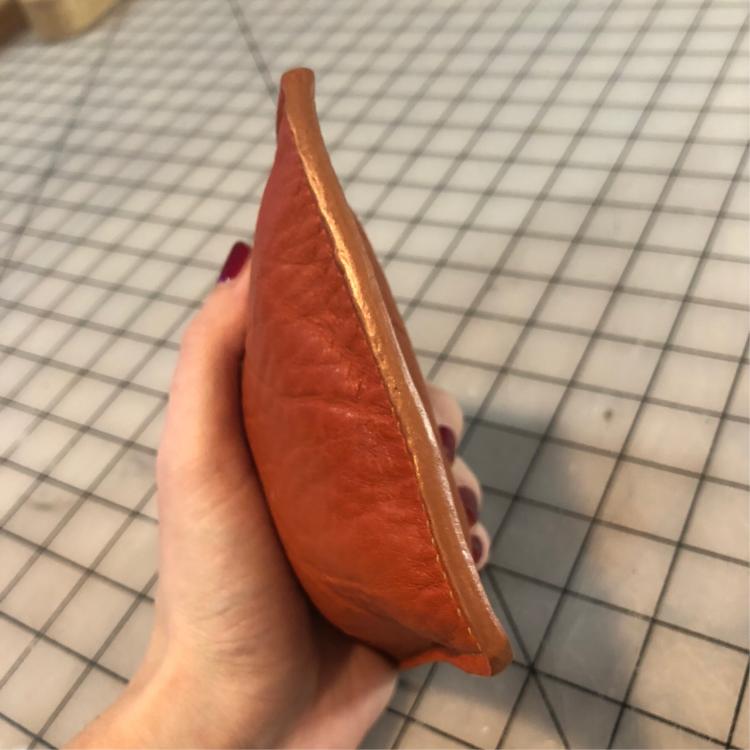
-
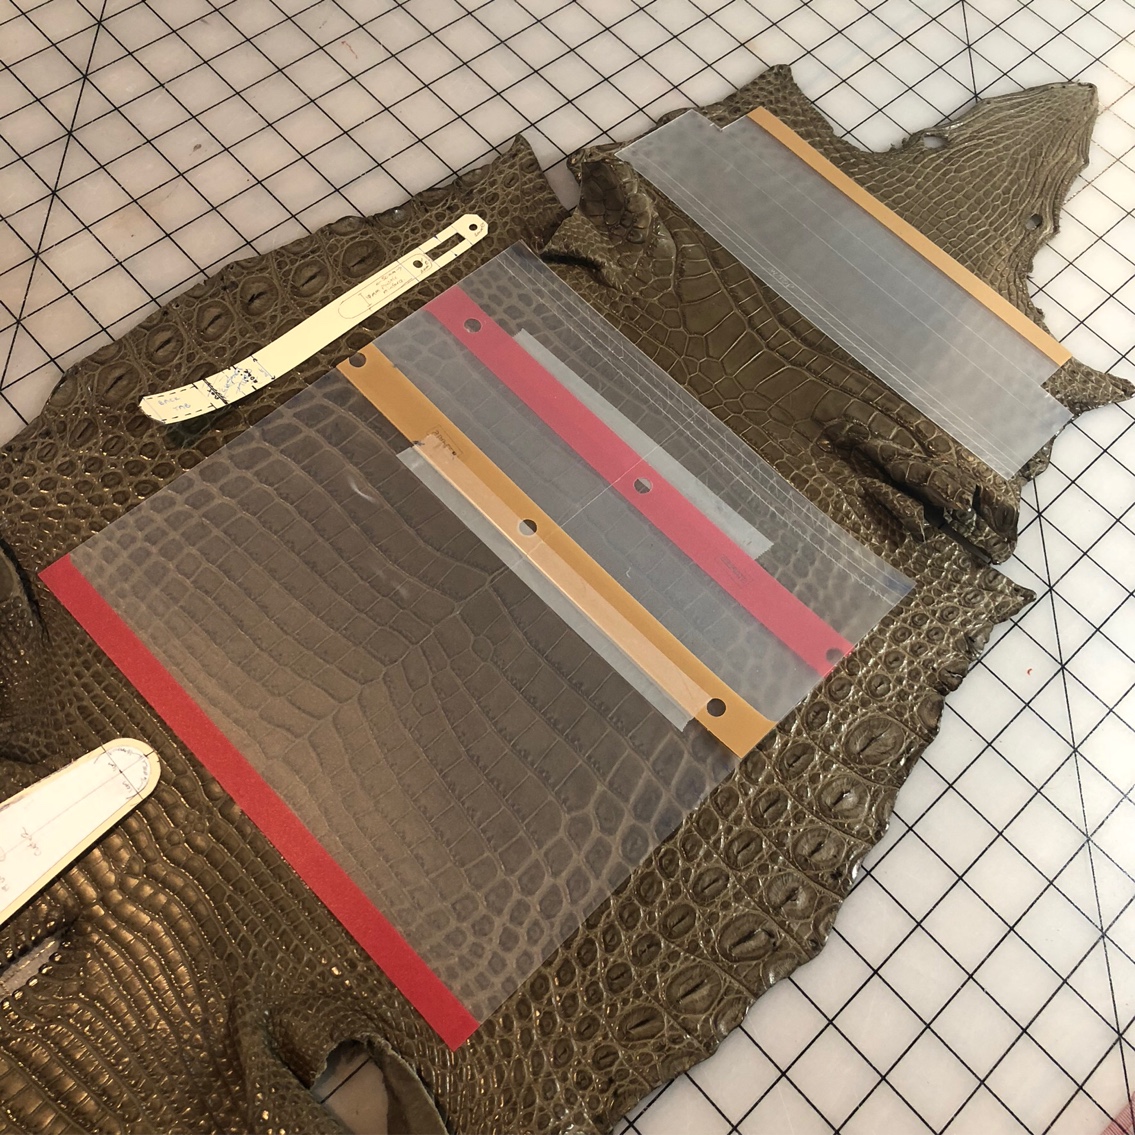
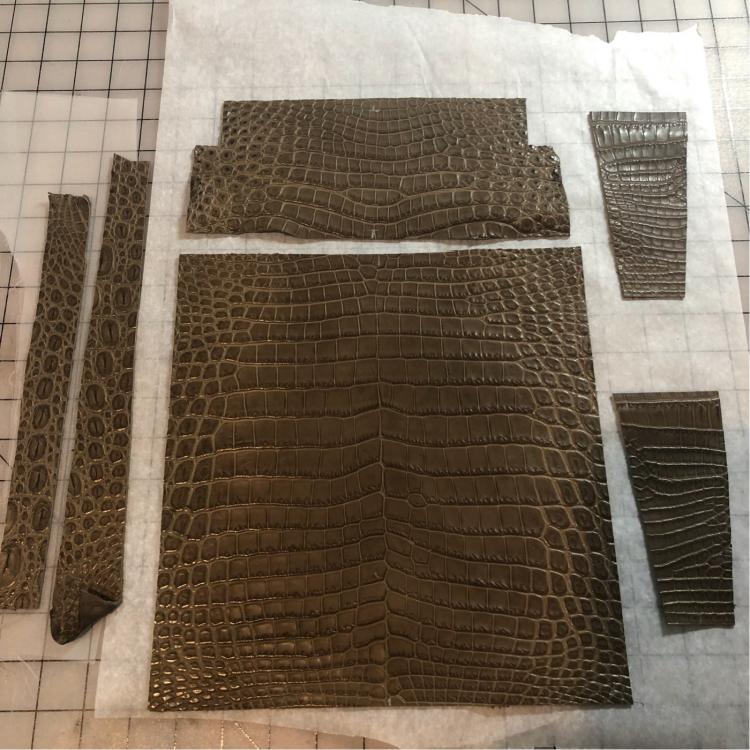
Sneaking in another project for myself before honoring my promise to hubby to make him another watch band for his Apple Watch (I think he’s getting a little spoiled, but it’s how I justify the leather stash ). This one will be the same design as the last clutch prototype, done this time in a mink-colored Nile croc. From memory, the croc hide was about 32cms wide, grade I/II, in a Millenium (matte) finish. Will be lining with some incredible olive HAAS calf (thanks @nstarleather!), with hardware from Ohio Bag Supply. Stitched in Lin Cable 532, with KS 3.00mm irons. First step was that terrifying moment where you have to make the first cut . Luckily all went well, and I managed to get all the pieces out and still have nearly the full tail left.

-
Looks so ‘life-like’, not sure I’d want to sit on it!!
-
Ah well, hopefully you at least got to consume some wine in the process! Good point!
-
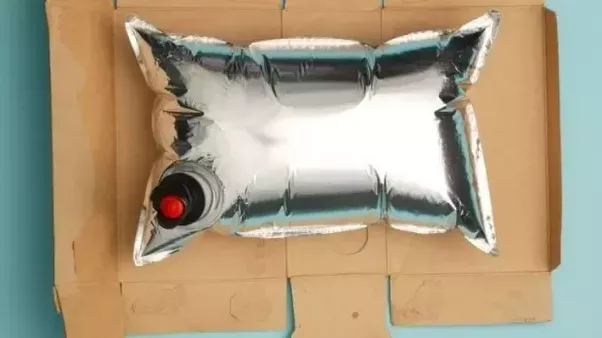
Just thinking, what about recycling a bag from one of those boxes of wine (‘cask wine’) with the spigot? I’m guessing you might be able to reshape the bag using heat to weld the seams. Or could maybe use a camelback water reservoir?

-
FYI, I use an iPad app called “Picture Resizer” to bring pics under the size limit (1.4 Mb from memory)....helps a lot for multiple photos
-
Nice, clean work and even stitching! Really good for your third project, and I hear you on innovating to cover supply line shortfalls
-
All feedback is greatly welcomed, thank you! I like your idea a lot. Ironically, I was mulling over that exact approach for the next version of this clutch, which I intend to do in croc. @RockyAussie on this forum shows some really good examples in his work of how the edges of the front and gusset are individually skived and turned under before stitching, so that there’s no raw edge. I think I see a skiving machine in my future lol...
-
Thank you so much, and I’m so glad my description was of some help! Yes, it’s a fine thread - I’m using Lin Cable (linen thread) size 532 in beige. It comes waxed, but I like to run it through a cake of beeswax a few times, then iron with a standard dressmakers steam iron (using a silk press cloth) before sewing with it. Helps keep it from knotting up too easily.
-
Ha! I know that feeling
-
I hear you! And once you start looking lol.... thanks so much, you’re way too kind! I feel like I still have so far to go. The heated edge tool does help hide a lot of sins, though
-
I use edge paint from the Buckleguy, along with an edge primer (also from Buckleguy). Still learning and experimenting. The process I used here was: - first coat, edge primer, then sanded lightly with 800 grit wet and dry - custom mixed two colors to get the dark brown I wanted, two coats of that, no sanding in between - smoothed edge with heated edge tool (Regad 3000), then sanded smooth (no shiny divets) with 800 grit - another coat of edge paint, 24 hrs drying time - used a 50/50 home made mix of beeswax and paraffin, rubbed along edges and buffed with a square of cotton canvas (thanks @RockyAussie for that tip, especially when traveling to hot climates!)
-
Thank you so much! Yes, developed my own pattern, with a lot of inspiration from a certain high end luxury brand . Couple of minor tweaks for next time (mostly on the gussets and adding a few mms in length to the straps), but hopefully the construction will go faster!
-
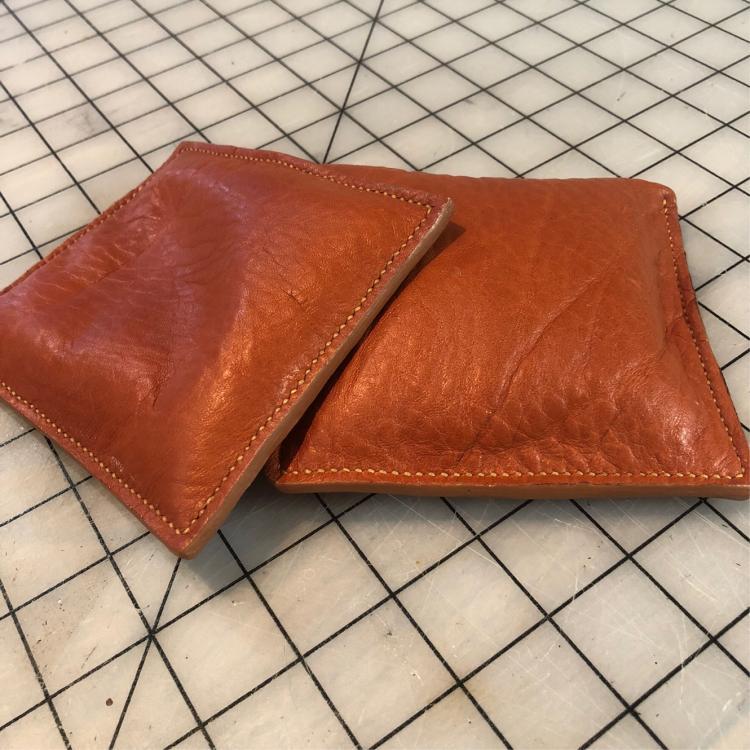
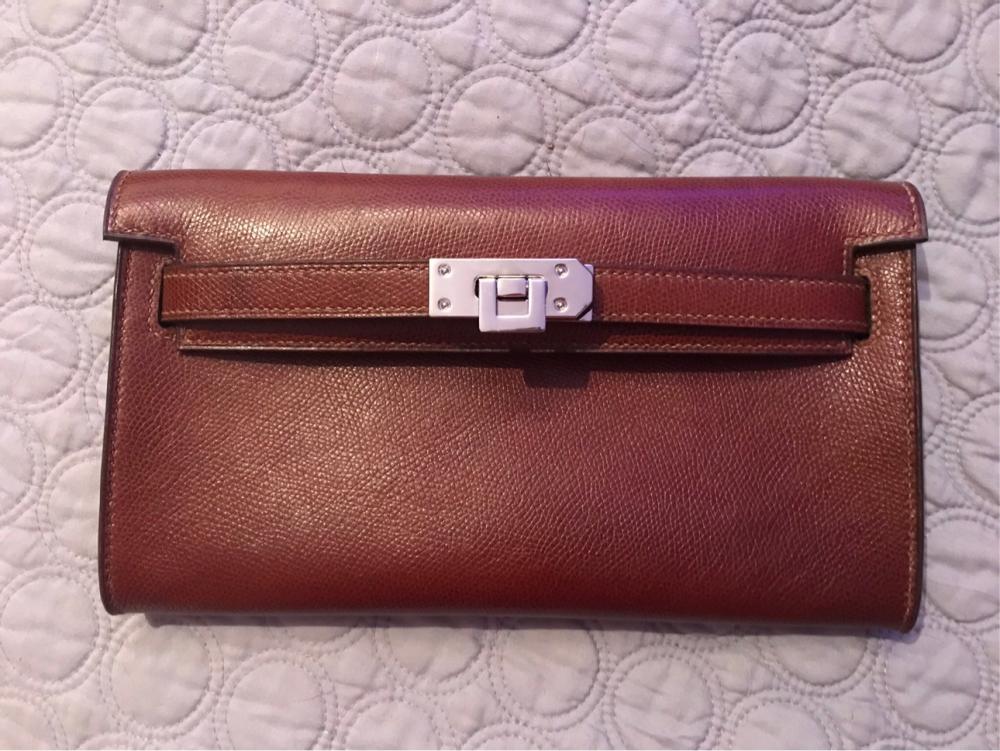
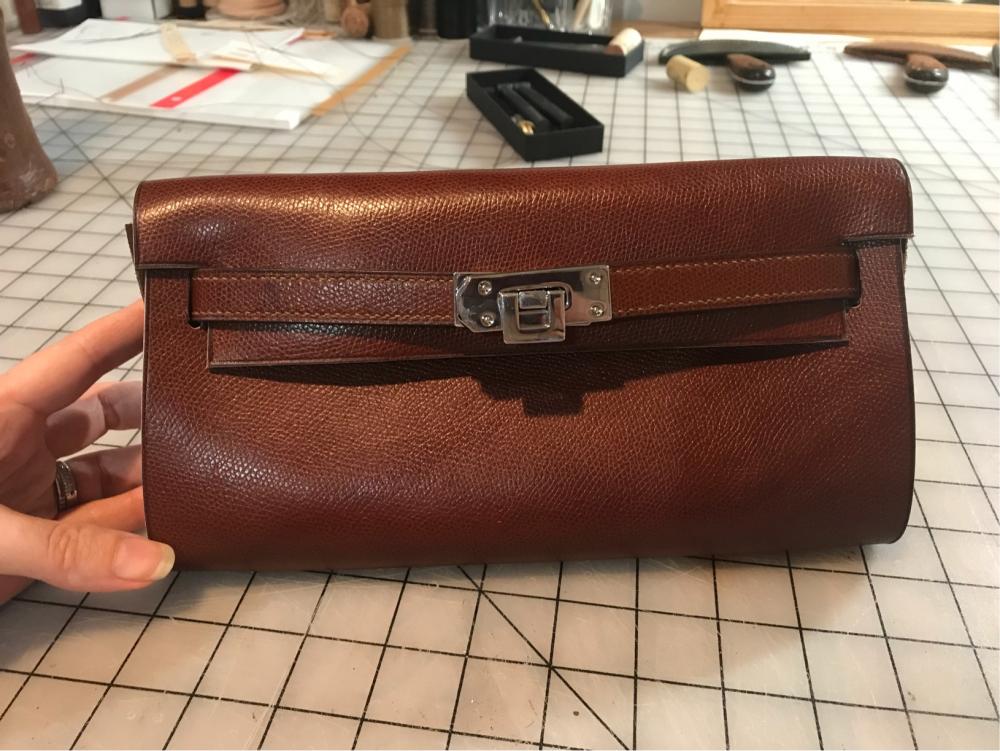
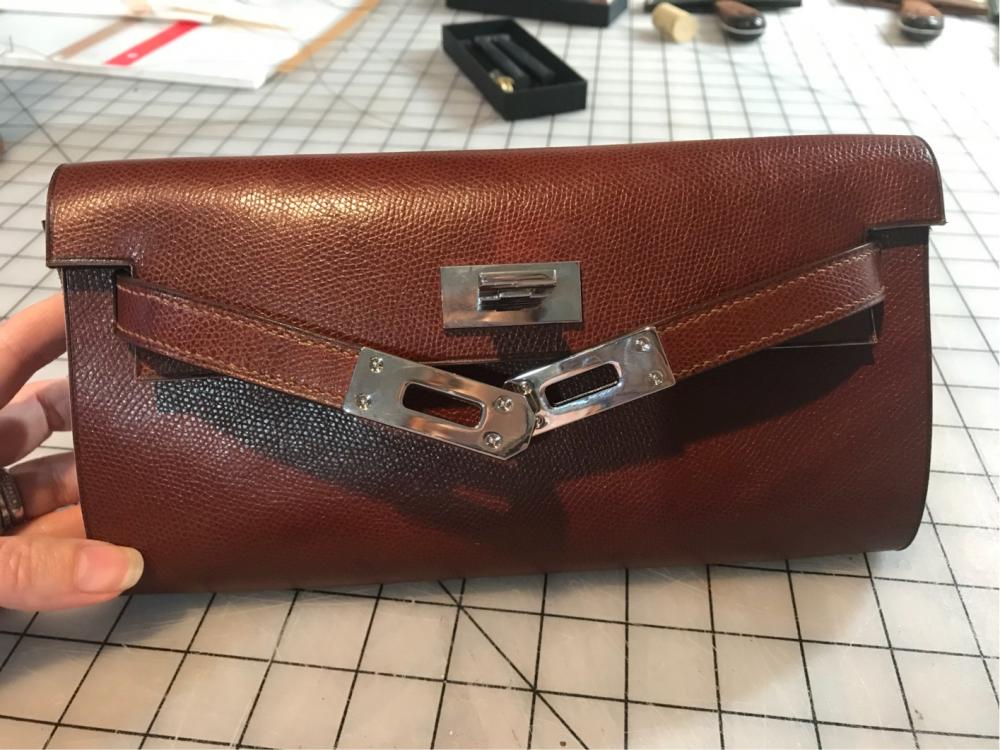
Last but not least, some pics of the finished clutch. I really like the size and shape, holds a passport, phone and pen perfectly for travel. Going forward, I think, I’ll skive the gusset edges a little more to create a leaner look (the stitching and lining add plenty of stiffness to retain the shape). Plan is to make one next out of croc
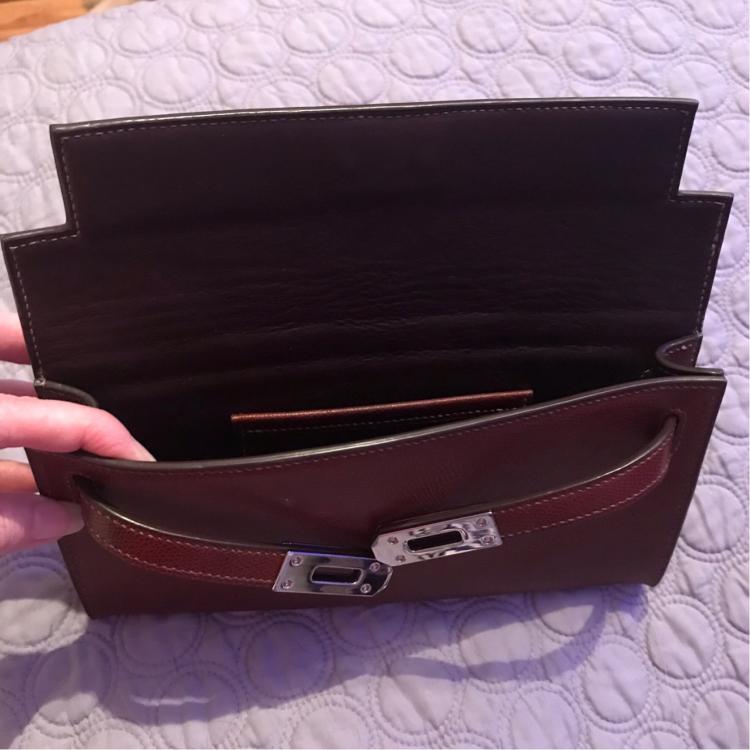
-
This pic shows the edging process (which I’m still horrid at). I custom mixed ebony and light brown to get the dark chocolate color I was after, applied two coats, used a heated edging tool to smooth, sanded with 800 wet and dry, then applied a final coat. Probably could’ve done with another coat or two, but hey, prototype
-
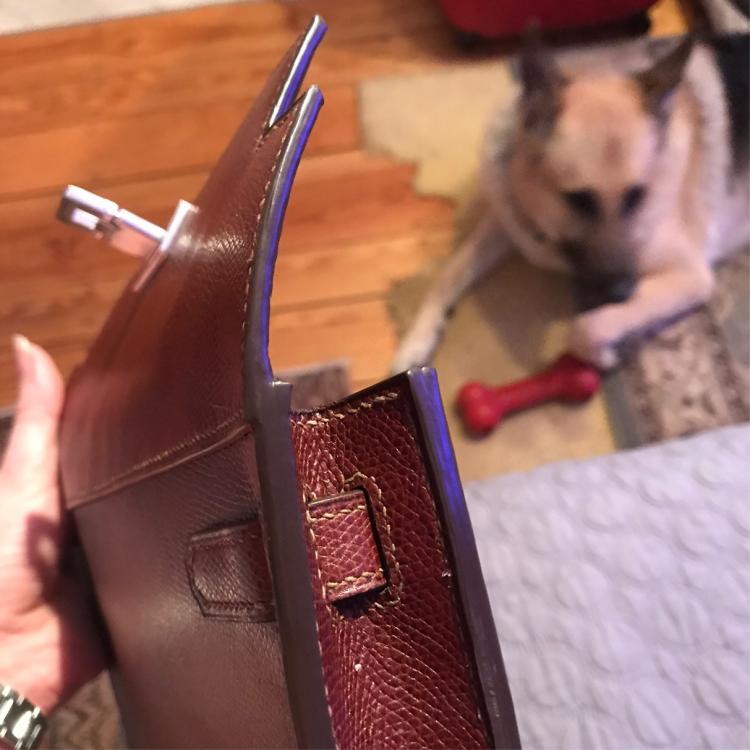
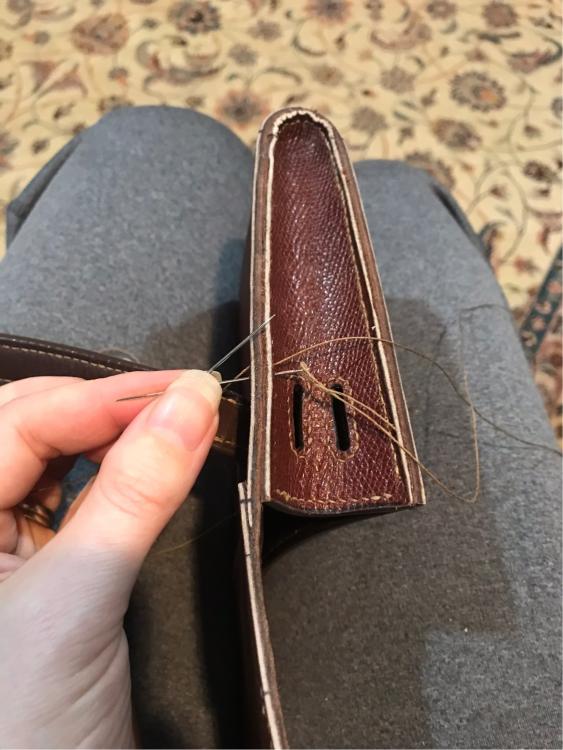
Ok, after some hectic business and personal travel, here are some progress updates and pics of the finished product. The gussets were a little tricky; I pre-punched the stitching holes on the tight bend at the base, glued on flat side of the gusset, punched stitching holes, stitched the flat and the tight bend at the bottom, then glued / punched the remainder.
-
Happy to give it a shot! Just need to finish my clutch first lol
-
Awesome! Love seeing old things given life again. Might have to try that candy red flake on my next Harley
-
Stunning!
-
Thanks, Brian! I’m always amazed at how cleanly and quickly you whip up bag designs! good luck with the fencing once those bulls get in their head to go a-visiting.....
-
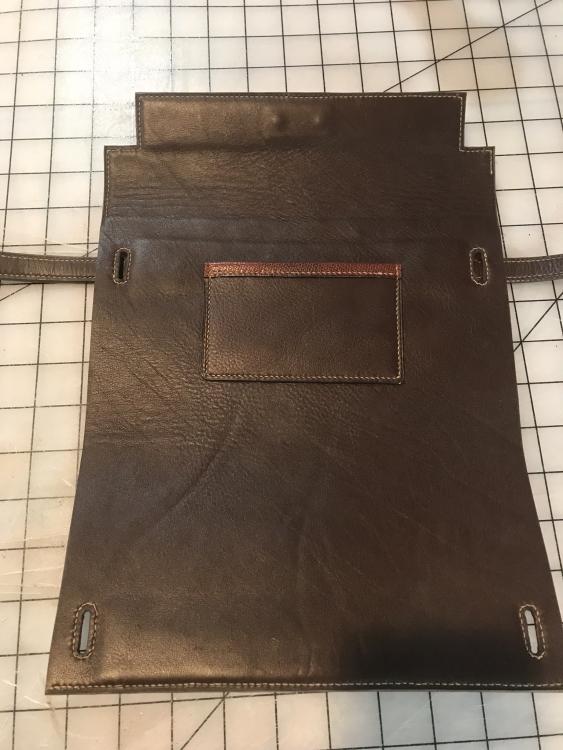
Thank you so much! You’re right, there is definitely some show through on the inner lining (as it’s a fairly soft temper), but luckily it gave a good degree of stiffness for the clutch. Although my opinion might change after trying to stitch the gussets . No worries on the pics - I’m flattered that it found a use outside of this thread! By the way, fencing sucks. Hope it goes as painlessly as possible for you.... Pic of the inside, after stitching, before adding the side gussets.
-
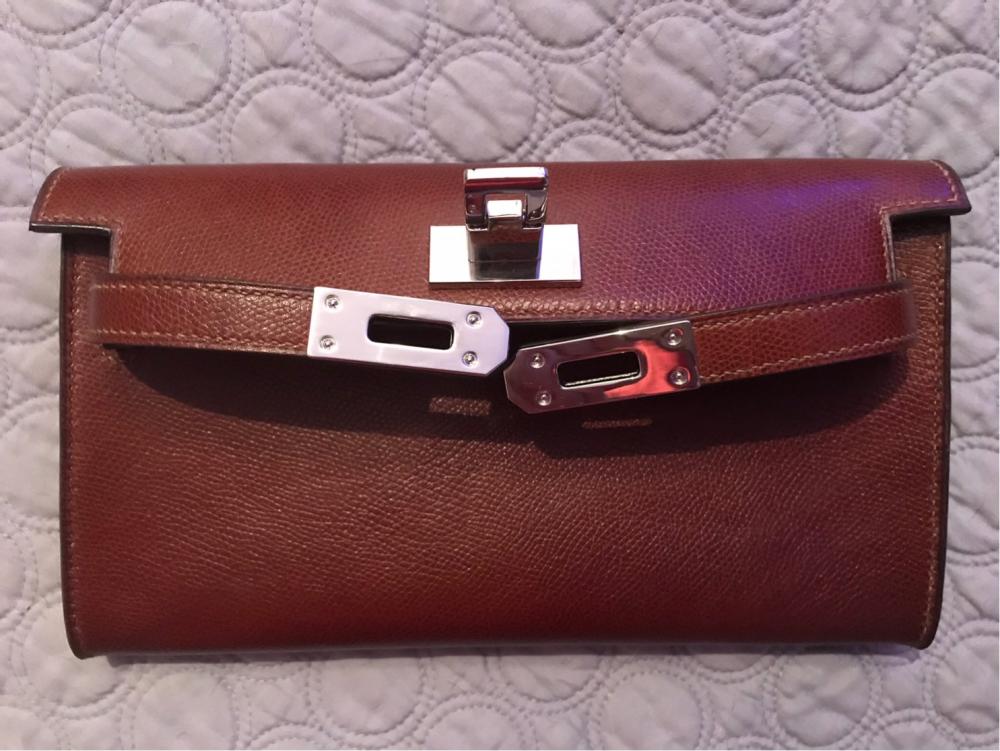
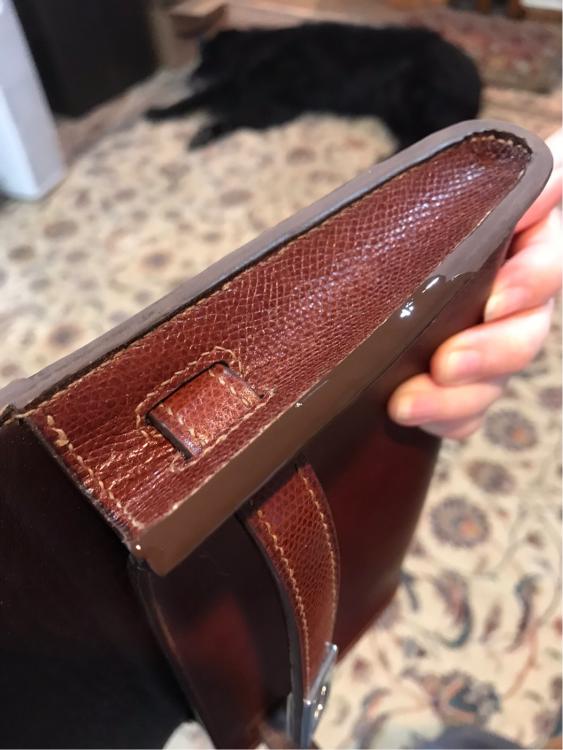
Then, of course, I folded up the clutch to see what it would look like with the shiny hardware on the straps . Took the strap hardware off again after so that I could crease all the edges, and stitch the top flap edge and inner body edge before attaching the gussets, along with stitching around another four of the oval slots....
-
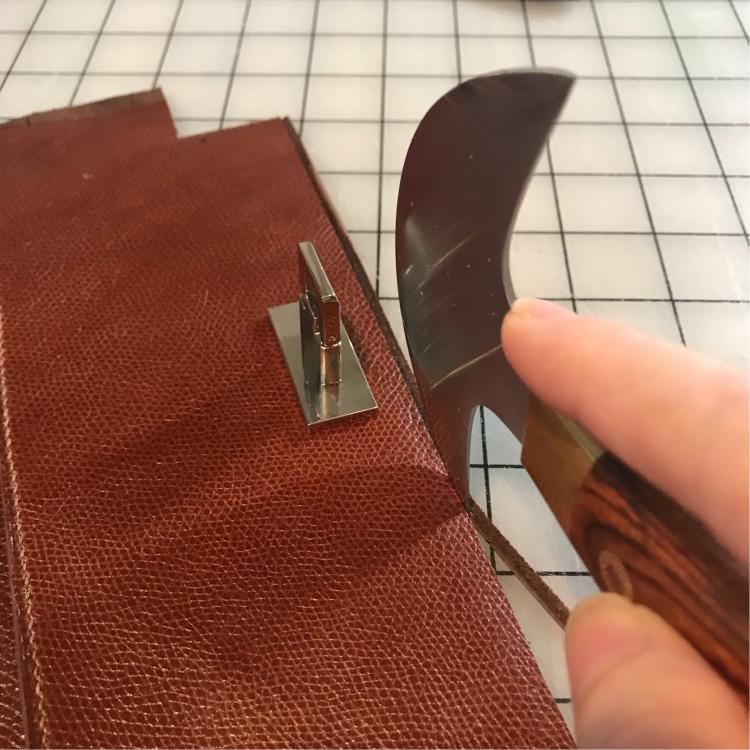
Next step (after impatiently waiting for it to dry), was to trim the edges with my trusty Knip knife. My Knip knives are amazing; I just strop before use each time and they cut beautifully. I always, always cut then put them straight back in the sheath. Barely brushed a knuckle against one when I was trimming, didn’t realize I’d cut myself until I saw the blood -they’re that sharp.