kgg
-
Posts
3,350 -
Joined
-
Last visited
Content Type
Profiles
Forums
Events
Blogs
Gallery
Store
Everything posted by kgg
-
@DieselTech @greygeist3191 @Brokenolmarine Thank you kgg
-
A lot better. Glad you got that pretty well solved. kgg
-
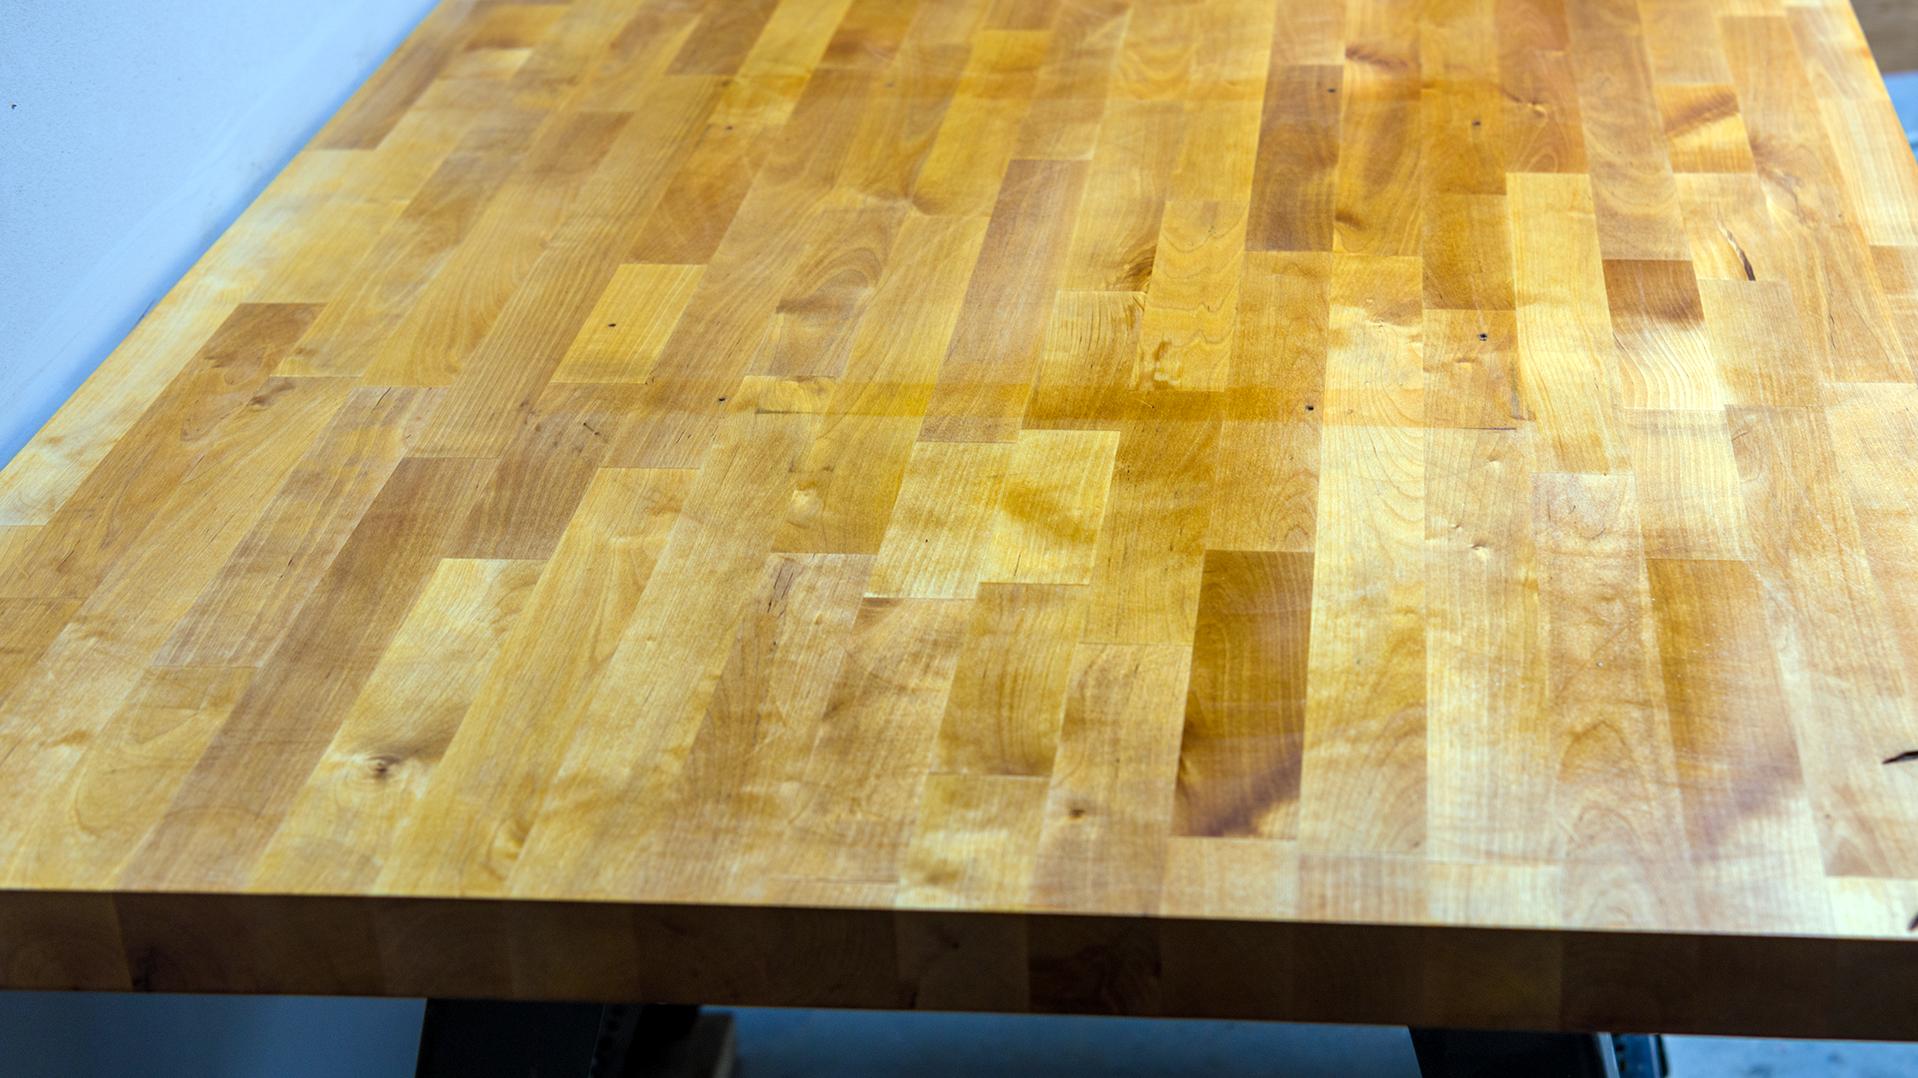
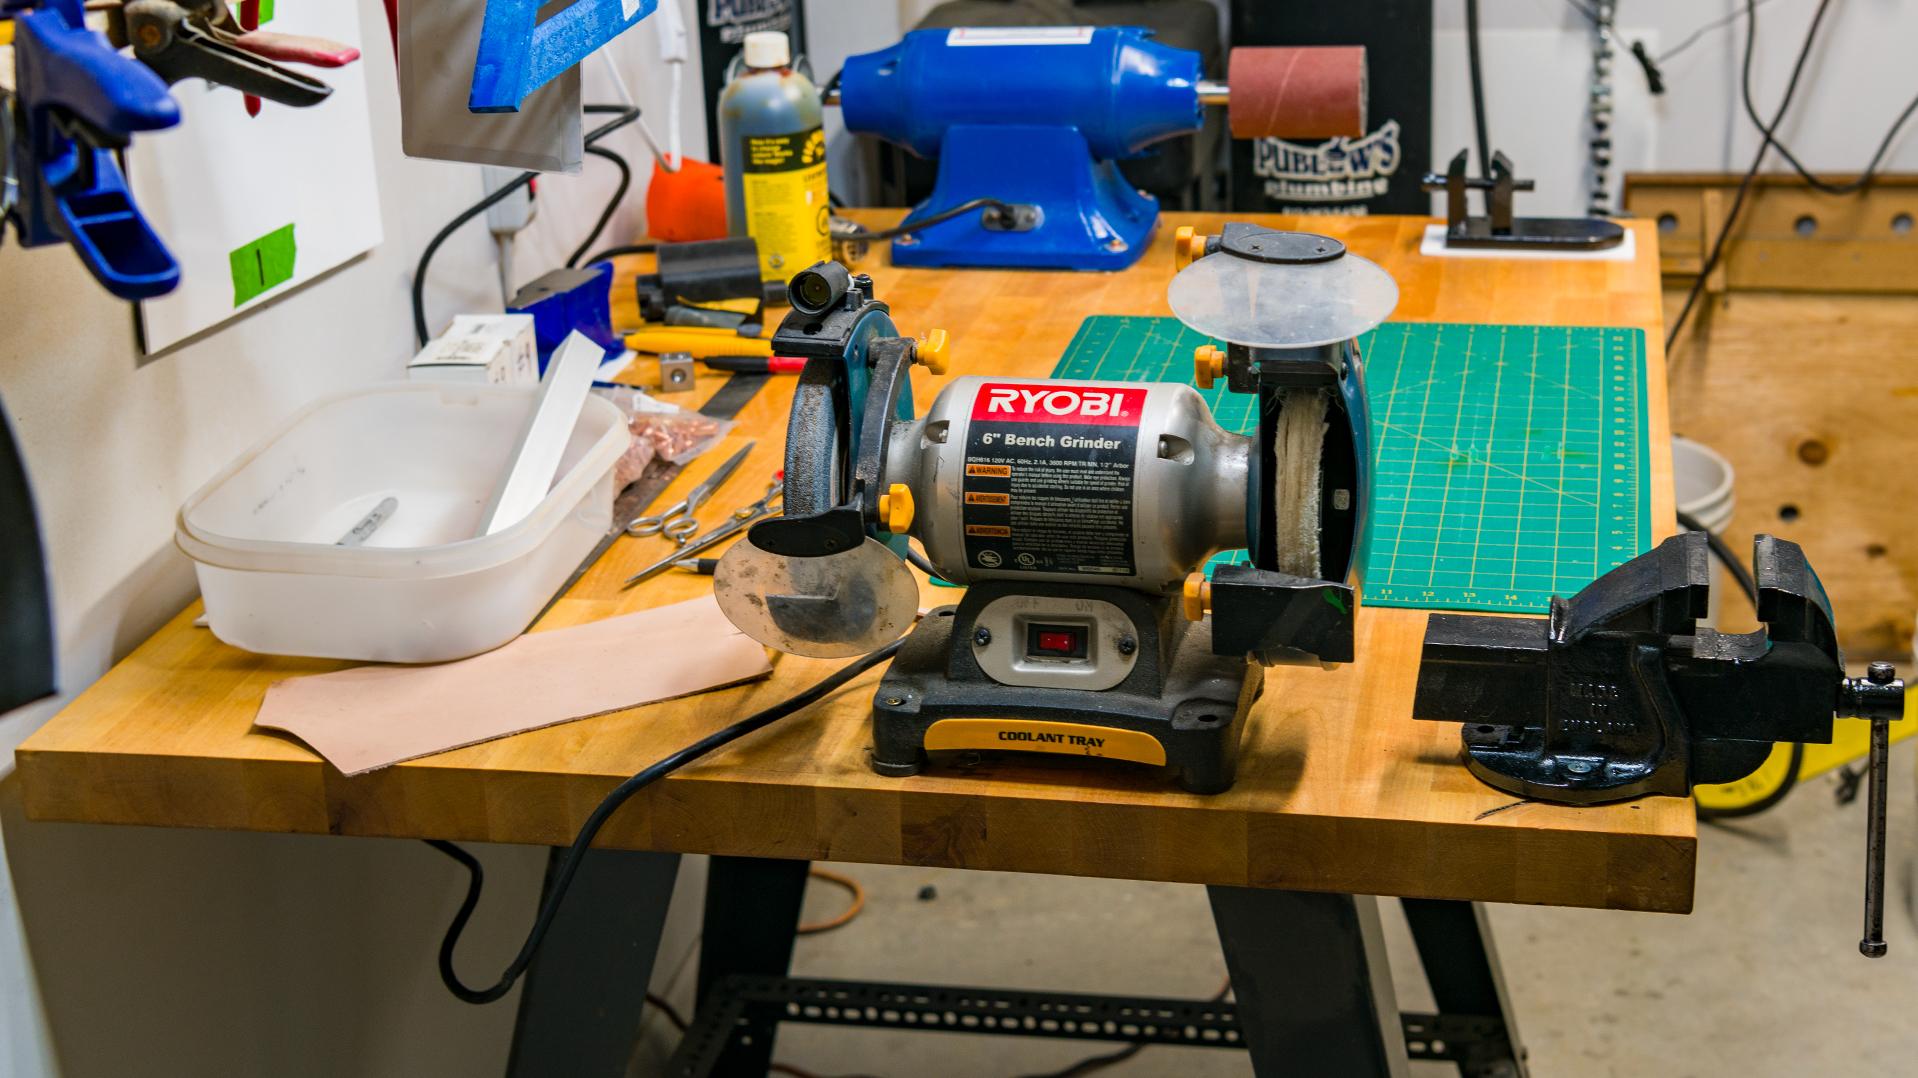
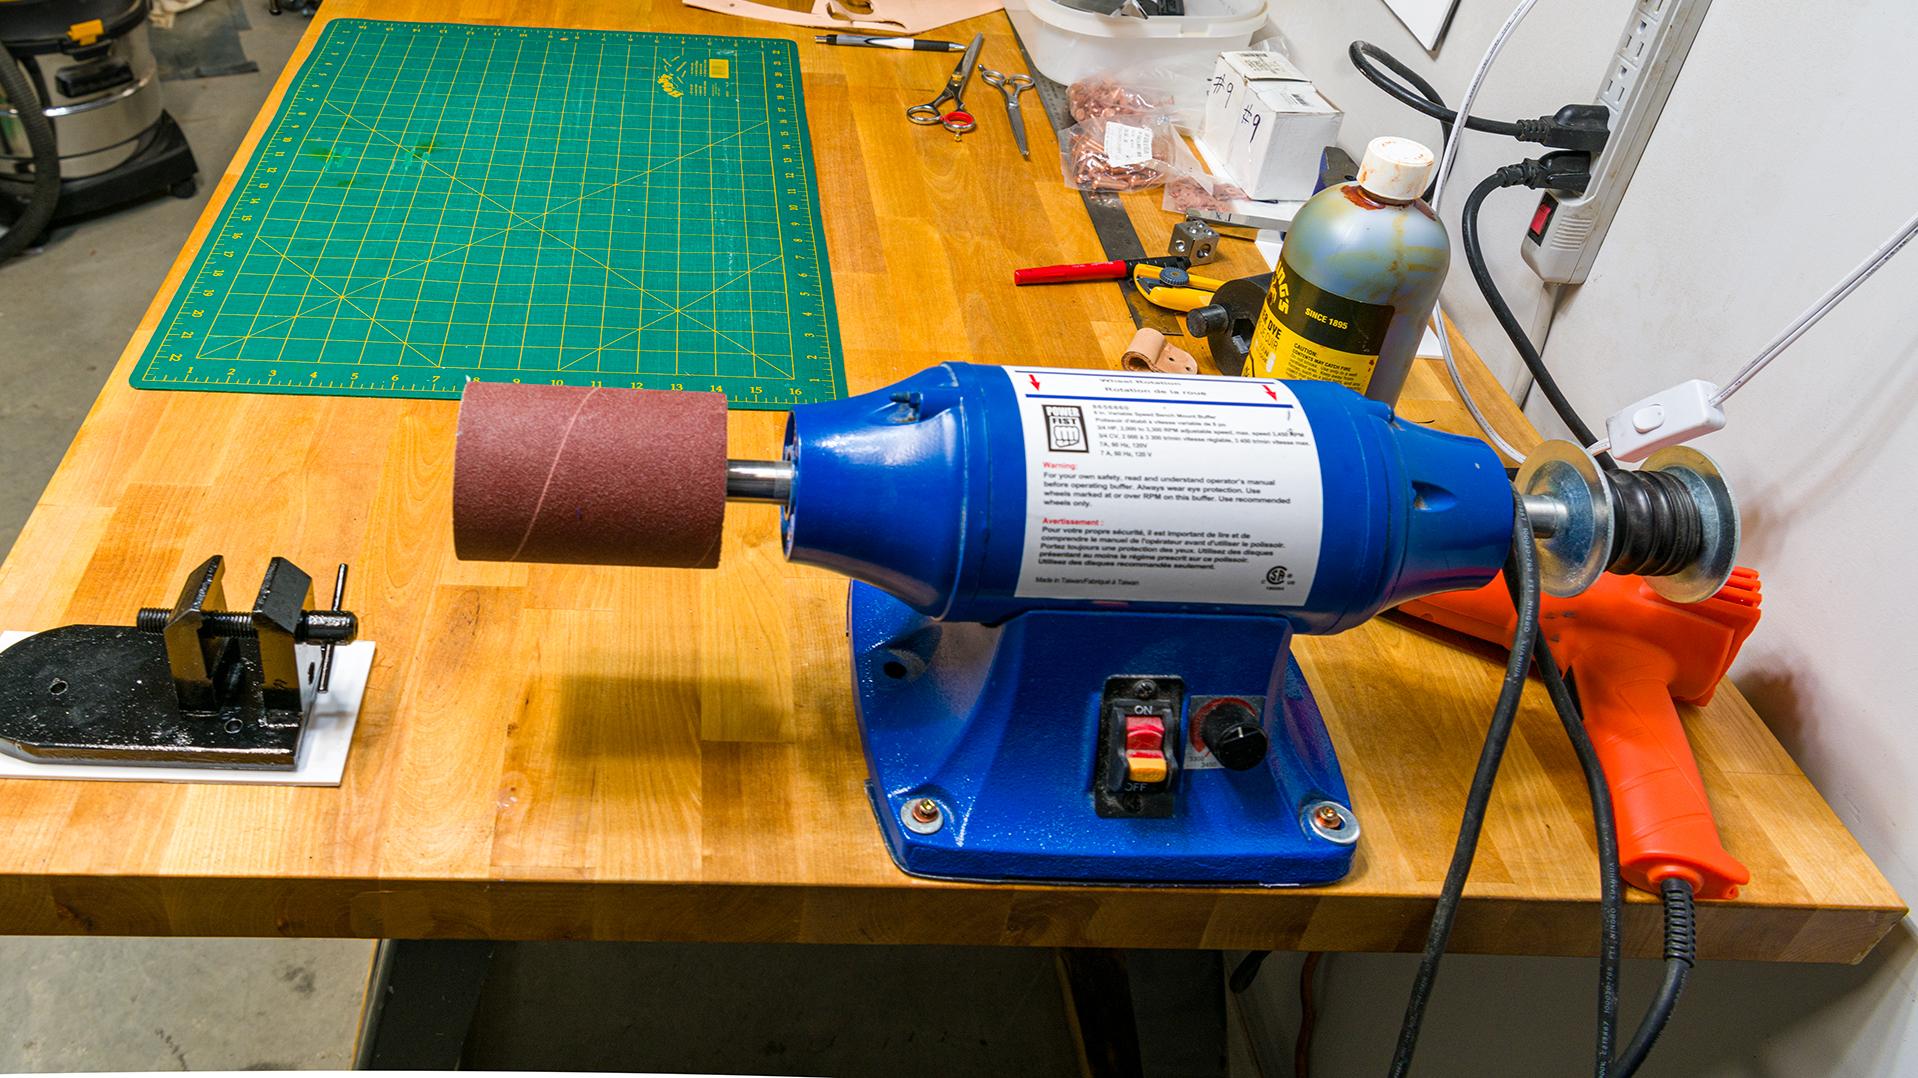
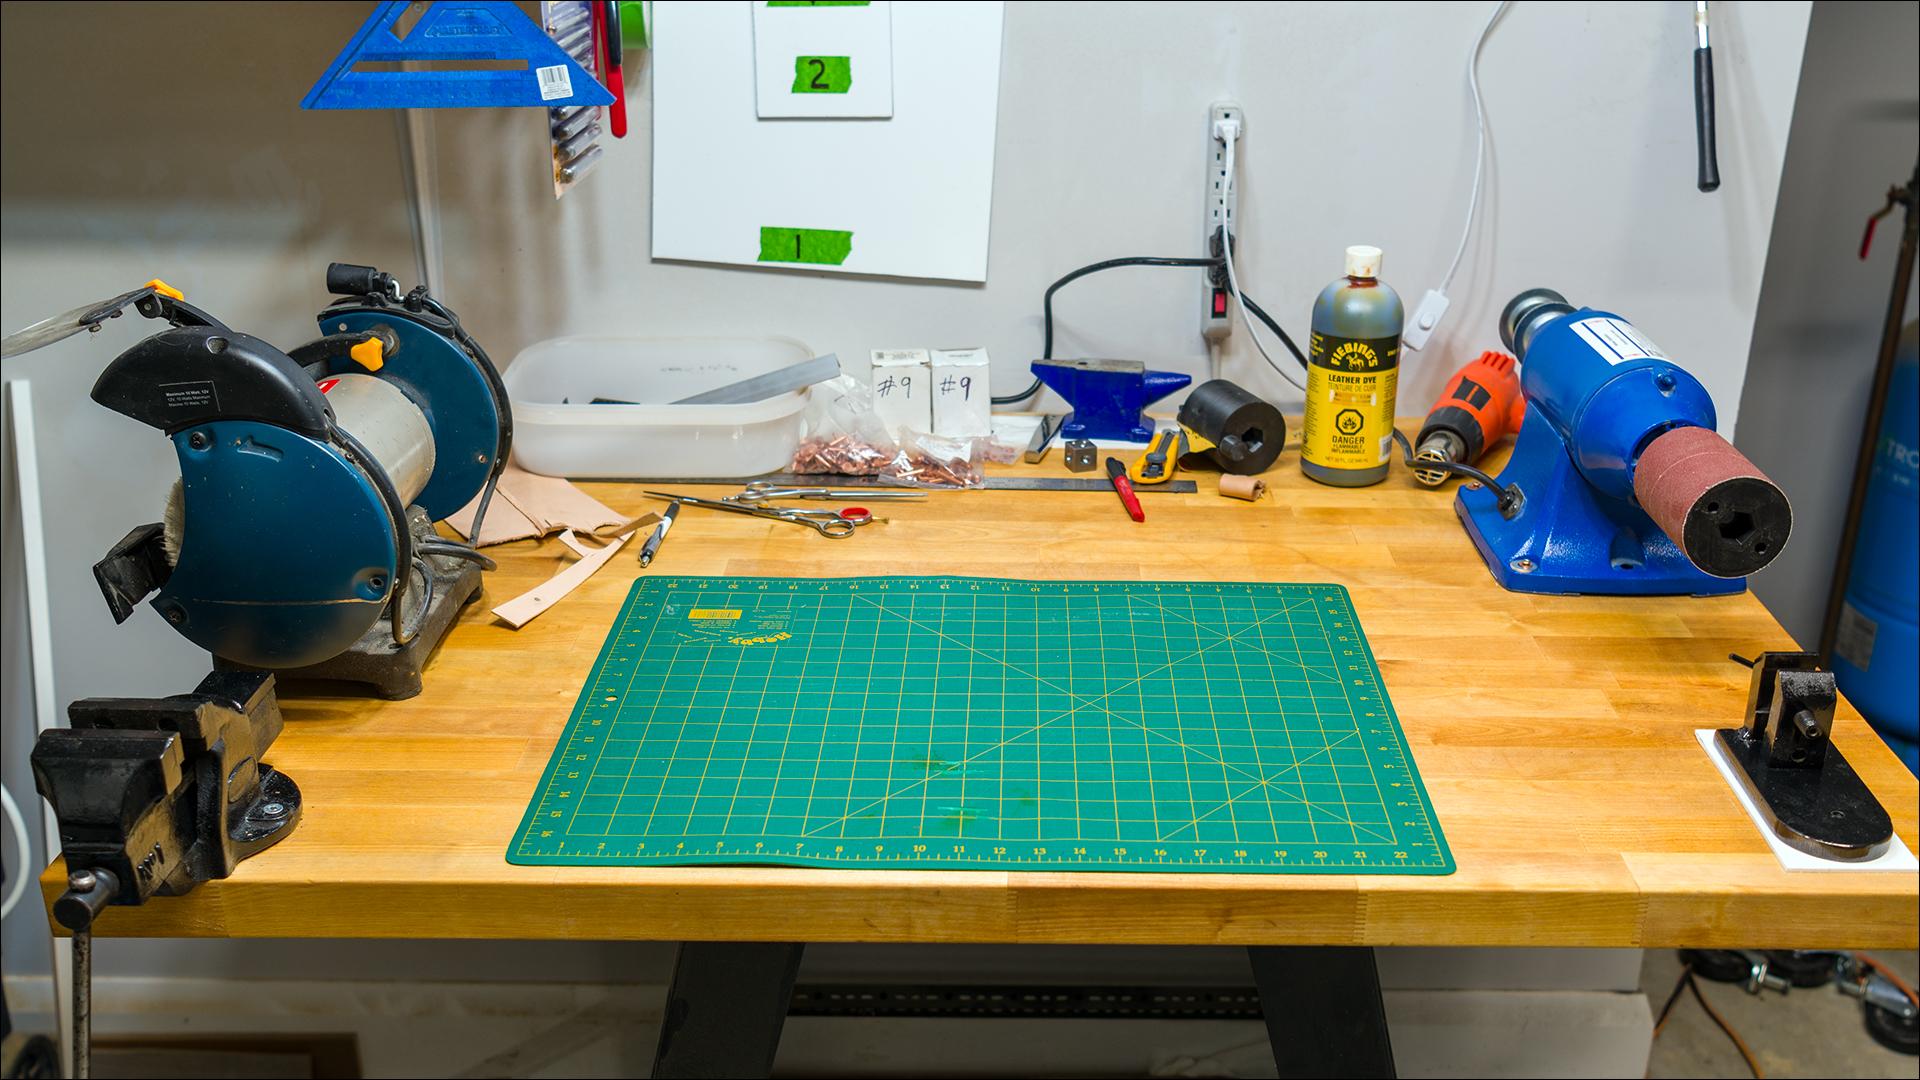
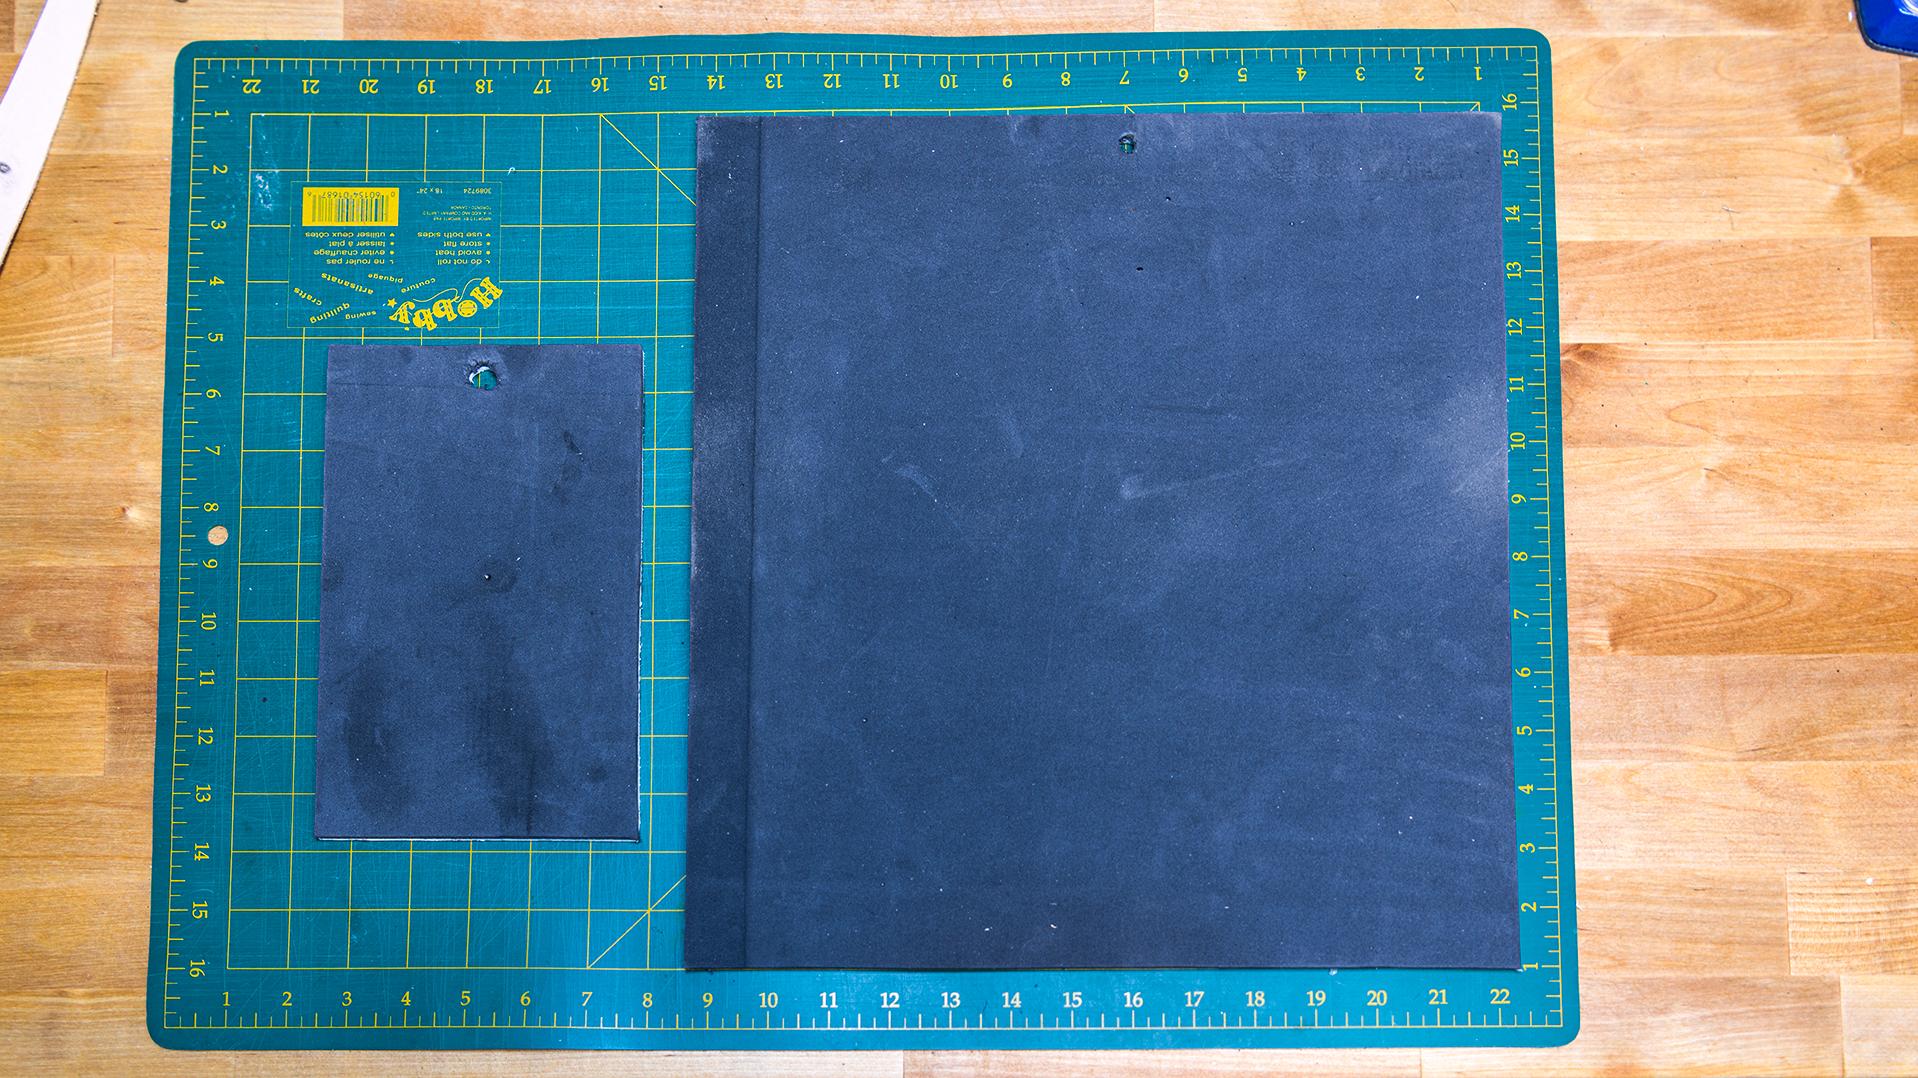
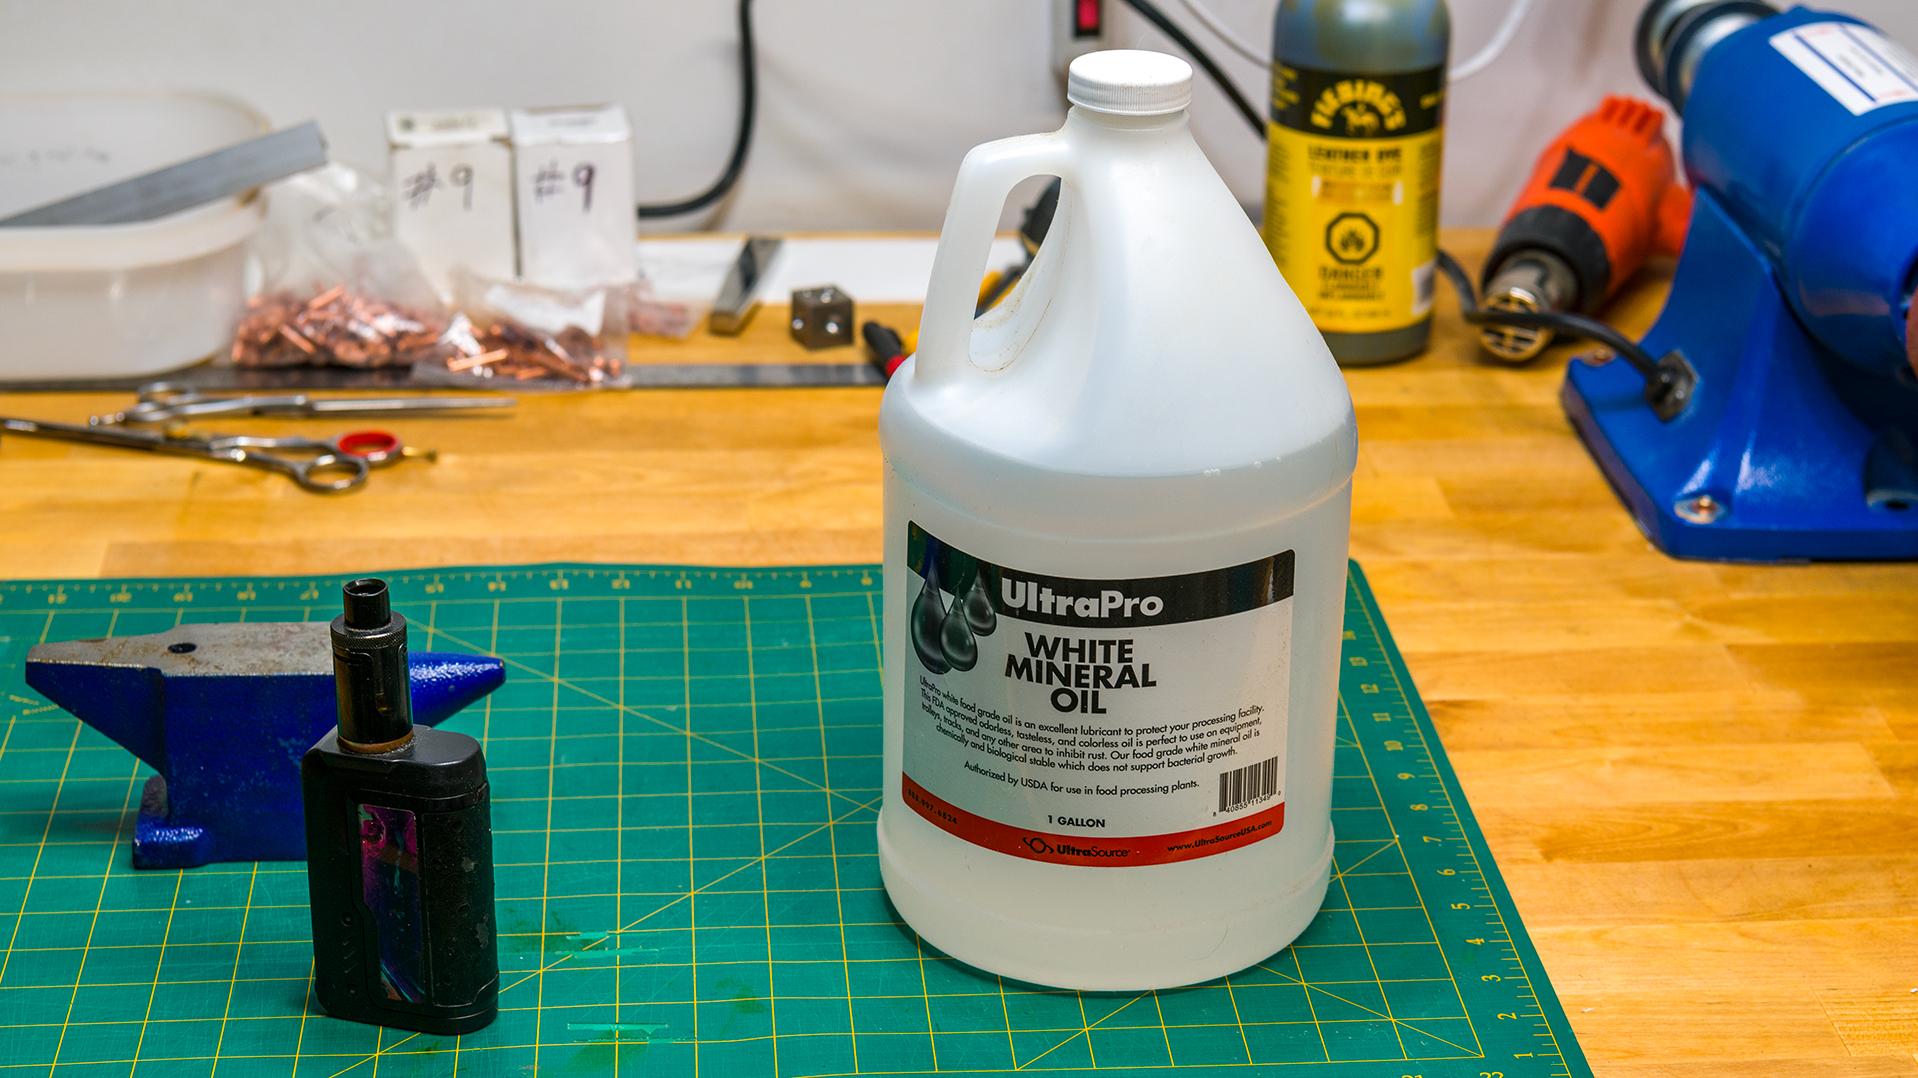
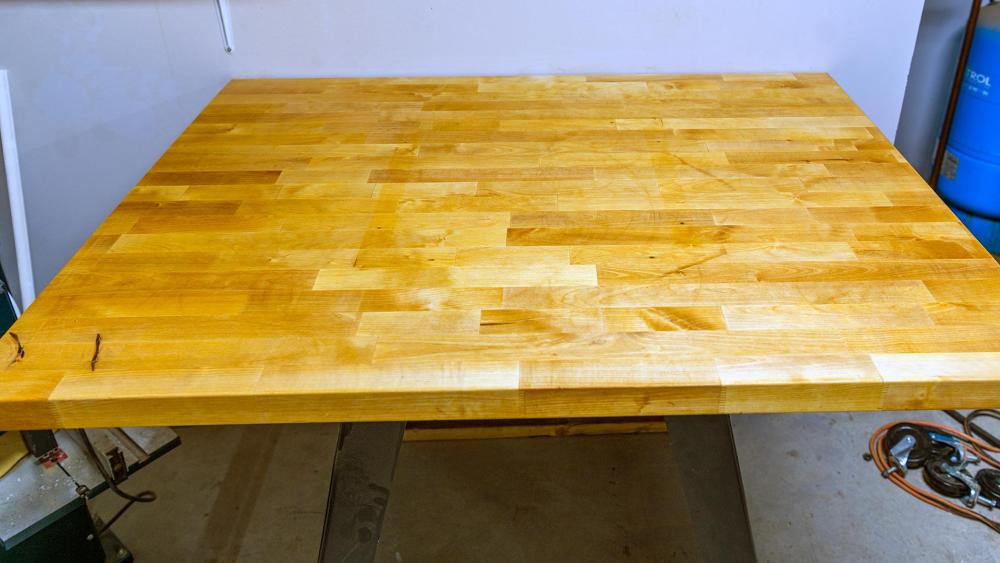
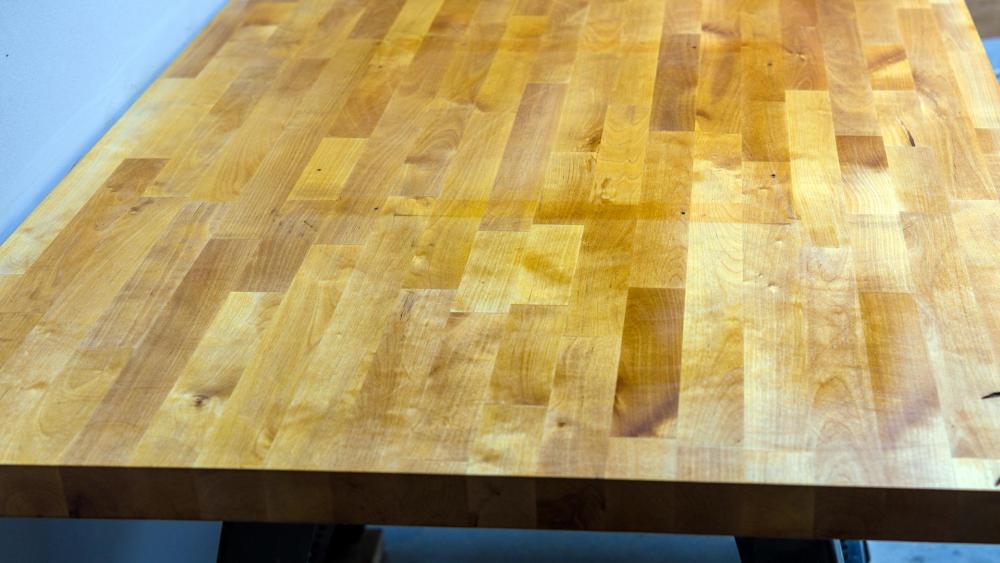
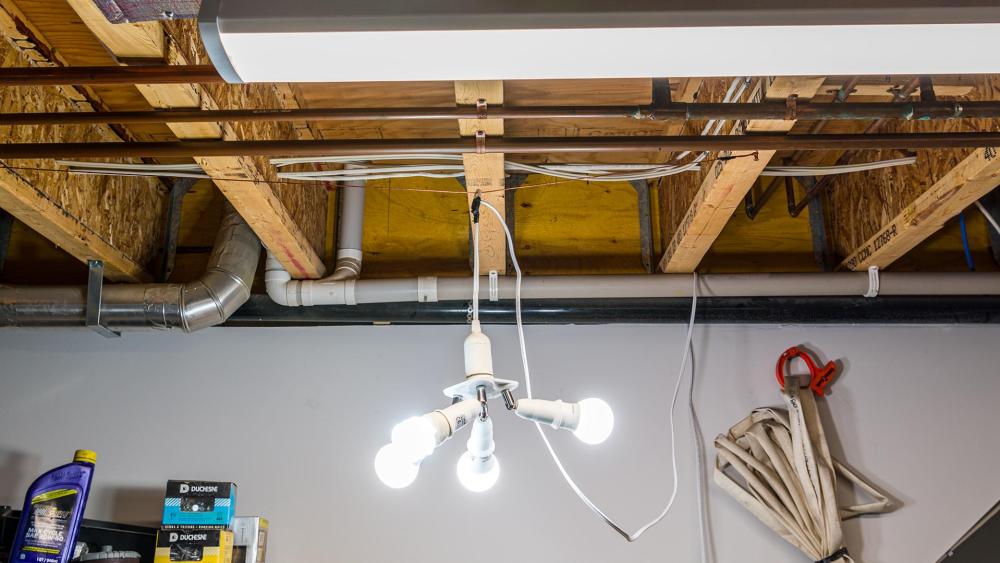
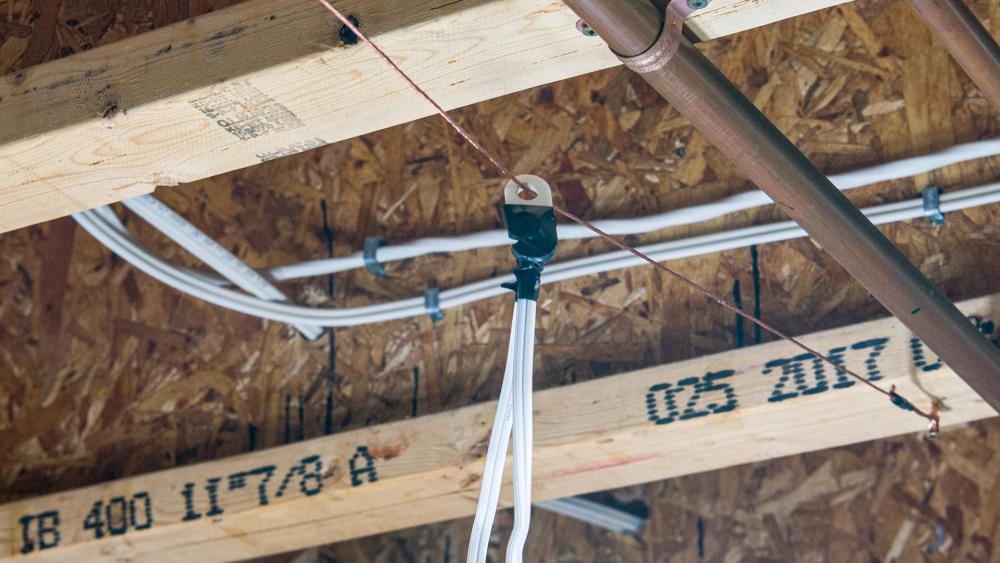
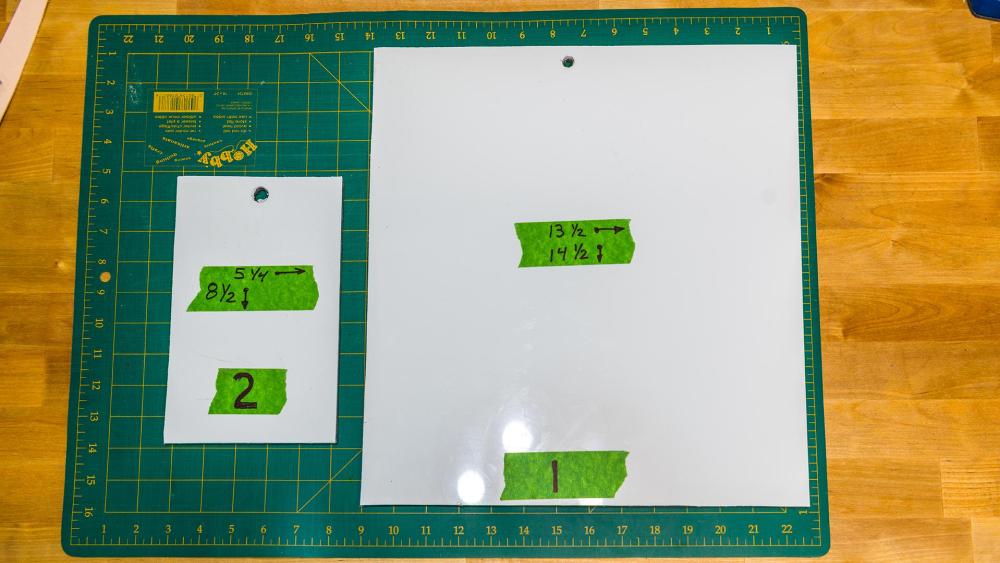
I had to revamp one of my work areas which takes up about a 4' x 4' area so what a better time then Labor Day Weekend. Work Table: i) I set the height of the work table so the top surface was equal to the top of my belt buckle. This height is to low for my son but I'm Short. The Butcher Block table top is one piece measuring 4' Long X 3' Wide X 1 3/4" Thick. ii) The Butcher Block top was sanded and then oiled three times with white mineral oil. The mineral oil was spread over the surface by hand using 80 grit sand paper as the applicator. The mineral oil was allowed to soak in for 24 hours between coats. I could have probably done another coat. iii) I spruced up an old vise and installed it on the left front side of the table top. The only markings I could find on the vise were in the casting " No. 1 " and " Made in England ". How old and made by who??? The other little vise on the right side of the table is a homemade one and mostly used a paper weight. iv) I installed my cheap Ryobi bench grinder / buffer on the left side of the table top. v) Then I installed my version of a variable speed Burnisher Machine on the right side of the table top. The sand paper side of the burnisher uses your standard 3" x 4 1/2 " sanding discs with a 3D printed adapter. If I want or need to use sheet sand paper I have another 3D printed adapter that allows for that, the black round thingy alongside the blue mini anvil. Lighting: The area does have 4' shop light but it was really to far out and didn't provide enough light and created shadows in certain areas of the table so I installed a Hanging Lantern Cord and a 4 Lamp Socket Adapter fixture that can be slide from one side of the table to the other. The lights are suspended on a plastic connector and slides on a #12 bare copper wire attached to the wooded "I" beam floor joists. Cutting Mat The old self sealing cutting mat had warped really bad. I was going to have to be replaced it but before I would through it out I figured I would try and flatten the waves out. What I did was use a heat gun and heated the back first then I heated the front in about 8" sections and placed a flat board with some heavy weights across that area of the mat. I would let it cool then I would do move onto the next 8" section. However I well give it another heat treatment this evening to get the couple minor waves flattened out. Now it is usable again. HDPE cutting boards I like HDPE more commonly known as puck board as a cutting surface but the main draw back is the surfaces are really slippery and can slide around. I have in the past tried different things and none really did work that well. My solution was to ruff up one side with 80 grit sand paper and glue some 3mm high density form to it. I used good old fashion contact cement, Heavy Duty Lepage. Now I get the added benefit of having a little cushioning while cutting. These pieces were left over 1/8" scrap. This my provide someone with some ideas so any and all comments are appreciated. kgg


-
In your first video when the machine was under power the noise not the dinky noise but the rough cranking noise did you get that straighten out? Was that caused by a dry speed reducer bushing and over tight belt? A video with the machine under power would be nice. kgg
-
Unequivocally the one and only Juki TSC-441. No harm in dreaming but that ain't happening anytime soon unless I win the lottery. kgg
-
The Cobra Class 26 is a hybrid clone of the Juki LS-341 and what appears to be bobbin assembly similar to that used in Durkopp Adler 867 ( https://www.youtube.com/watch?v=jpzfM0bsd6g ) kgg
-
I decided to go down further into this rabbit hole. I use A&E sewing thread which is made in Canada and the USA so I figured I could find some good info from a brand name manufacturer. 1. Nylon 66: Anefil Nylon® AB https://www.amefird.com/wp-content/uploads/2023/10/AE_Anefil_Nylon_AB_Product_Literature.pdf Constructed with 3 ply multifilament, bonded nylon 6.6 Tex 135 (V138) Strength: 23.8 lbs. Low-profile stitching 2. Bonded Nylon: Anefil Nylon® https://www.amefird.com/wp-content/uploads/2023/10/AE_Anefil_Nylon_Product_Literature.pdf Constructed with twisted multifilament, bonded nylon Tex 135 (V138) Strength: 23.8 lbs. Low-profile stitching According to A&E both threads have the same strength of 23.8 lbs. main difference other then construction appears to be in the threads application as Anefil Nylon® AB is used in the sewing of automobile air bags as an example. I wasn't able to get an accurate cost difference between the two. kgg
-
All the info I have seen tots N66 as being stronger but finding that difference is difficult to nail down. What I quickly found is from HighTex N66 Bonded Nylon Thread Technical Info Chart ( https://www.cowboysew.com/blog/heavy%20duty%20nylon%20sewing%20thread.pdf ) showing V138 thread to have a strength of 96.39 N which when converted is 21.7 lb. Basically 22 lbs. while your run of the mill V138 Bonded Nylon is rated as 22lbs. So do the other possible benefits of N66 justify any additional cost??? Now all bets are off with the cheap Chinese stuff. The needle 135 x 16 and 135 x 17 are identical except for the tips, the sharp end are different. The needles for leather are 135 x 16 which have a tip shaped like a diamond or wedge made to slice/cut through the leather where as the 135 x 17 tips are more rounded to separate the fibers of the fabric as cutting the fibers would weaken the material. kgg
-
Maybe you might want to send Leather Machine Co. an email with the video to determine what the clanging noise is. kgg
-
@MikeRock My replacements arrive about noon today which is really quick as I had only contacted the vendor yesterday about 1pm. I know I'm being anal but anyway here is what I found: i) Small cardboard box with rivets and burrs weighted in at 16.65 oz ii) Small cardboard box weighted in at 0.50 oz iii) Just the rivets weight in at 14.45 oz iv) Just the burrs 2.15 oz v) There were 77 #9 --- 1 1/2" solid copper rivets Does any have any info on the strength of #9 verses #12 solid copper rivets??? kgg
-
I did call them and they were willing to send me a catalog which did surprise me as I'm in Canada. An update on the #9 rivets and burrs I got in Canada. First I have to shout out to their excellent service. The box of #9 rivets / burrs arrived but it had no burrs and weight the little cardboard box it weighted 12.45 oz on my little digital scale that are for under 3lb. Called them and the owner once I mentioned the box had a "Opened" in hand writing on the top flap he knew it was sent out by mistake. Another 16 oz box of rivets and burrs is on it's the way with extra burrs for the short changed box with free shipping. I am pleased with how I was treated. It does show their are still some companies out there with excellent customer service. Once the new box arrives I will weight it and count how many #9 x 1 1/2" rivets are in it. kgg
-
Thank you, I will give them a call tomorrow. kgg
-
Thank you. Yes your link does show them. I thought $0.60 CAD per set delivered was a bit steep their price when converted from USD is $0.94 plus shipping. I am still looking for a manufacturer rather then a distributor / retailer. kgg
-
I needed some #9 solid copper rivets with a overall length of 1 1/2 " for a project. I even went to a couple of Chinese manufacturers with no luck unless I wanted to order 30,000. I did find a supplier in Ontario but they are a little pricey. So my question is who makes these in North American? kgg
-
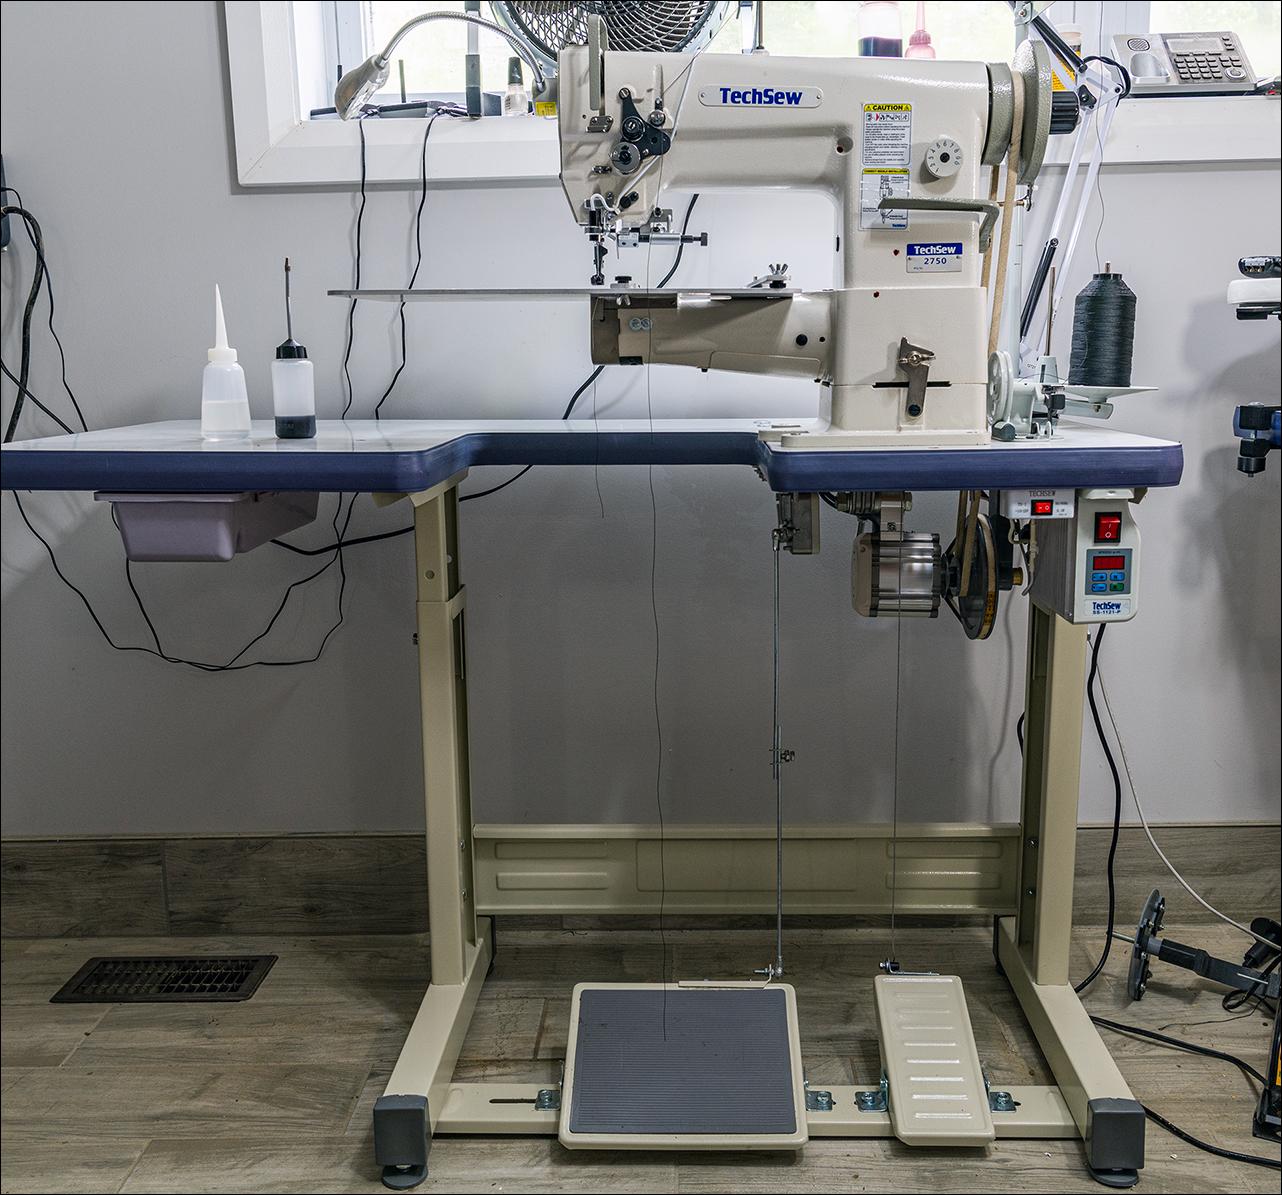
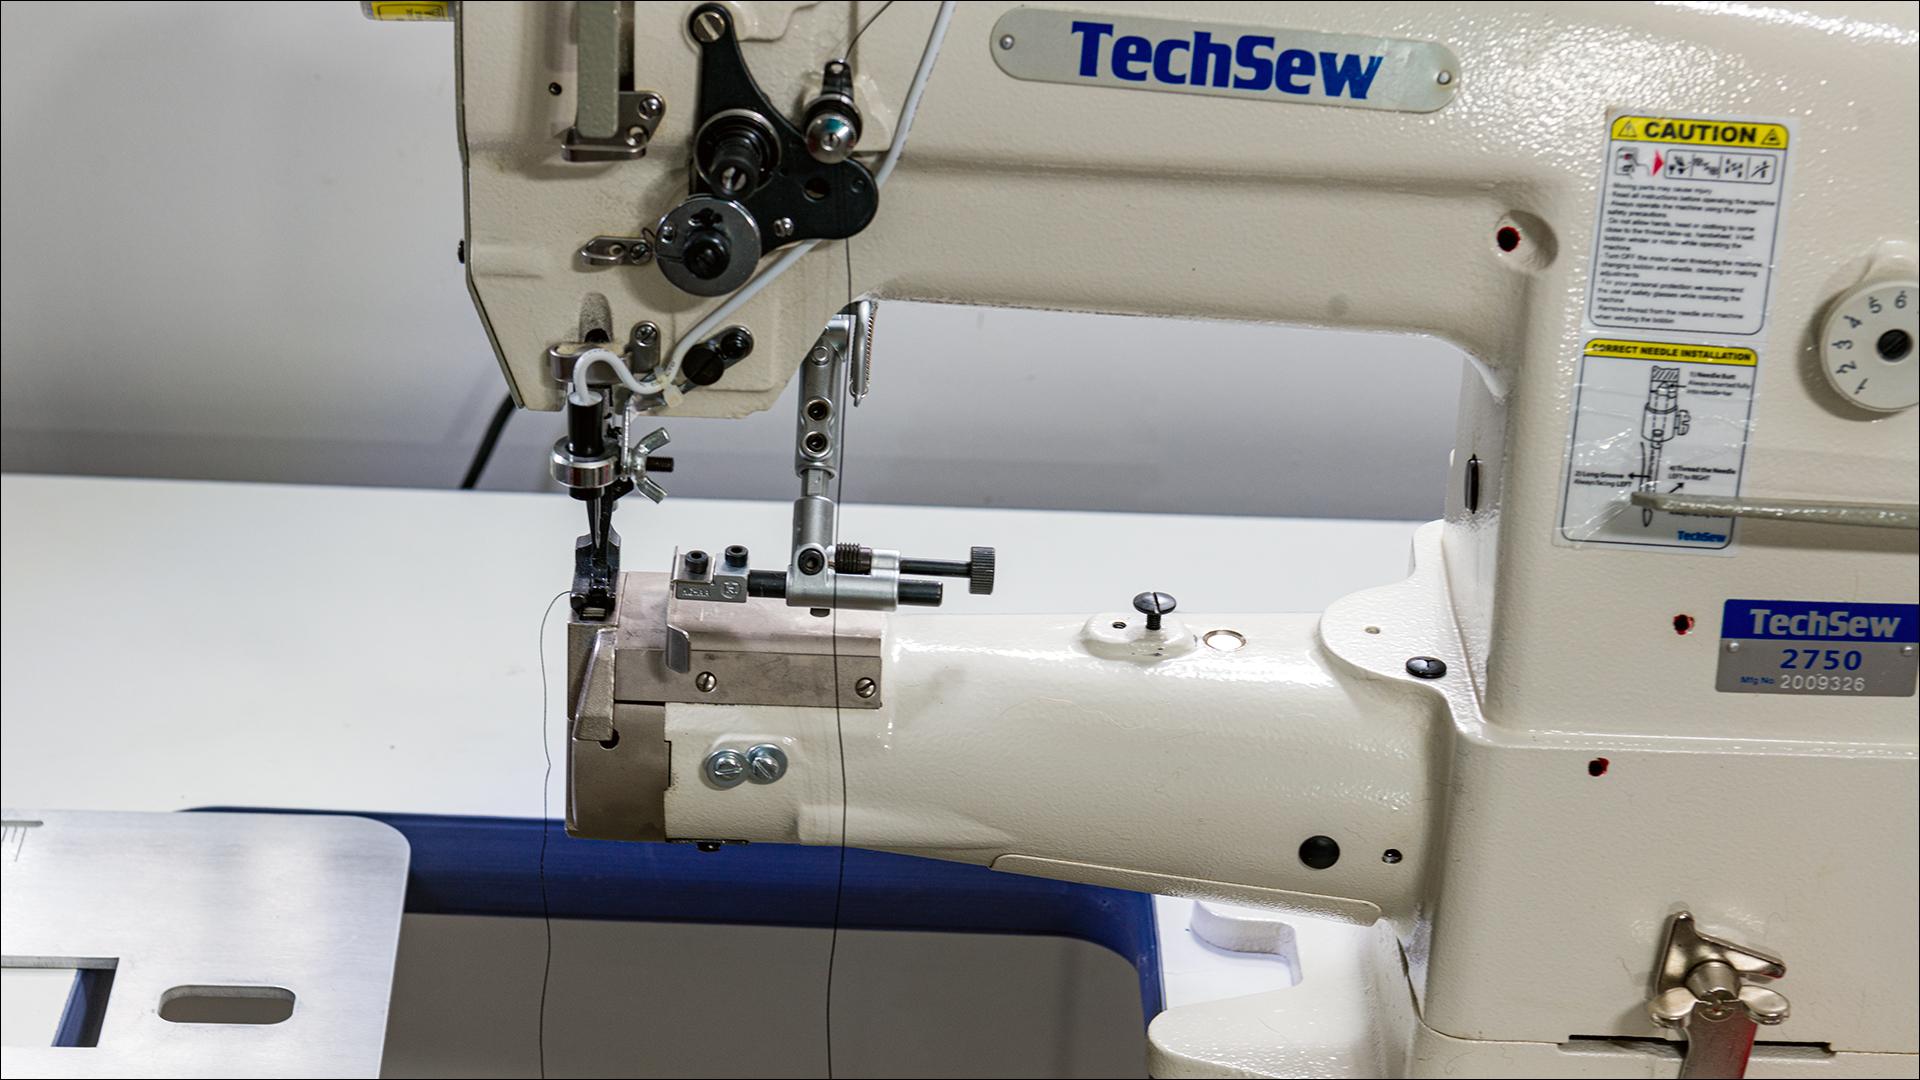
No. That is a clone of the Seiko 8B which tops out a 140 ( #22 ) so V138 in thinner stuff. I think more of a binding machine similar to the 335. Here is my clone of the Juki LS-341 a Techsew 2750 which is the same as the Cowboy CB341. kgg


-
Looking at the specs of a new PFAFF 335 at the official PFAFF site ( https://www.pfaff-industrial.com/en/portfolio/sewing-machines/cylinder-arm/pfaff335 ) the recommended needle system 134-35 with a metric size needles 80 to 100. The system 134-35 needles are not as common as the system 135-16 needles. According to the official PFAFF website the machine is made to accept 80 to 100 (metric) or #12 to #16 needles which in turn allows for thread from V33 to V69 max. However I did see on Sunny Sewing Machines ( https://sunny-sewing-machines.myshopify.com/products/pfaff-335-cylinder-arm-walking-foot-sewing-machine-w-binding ) and they are saying it can handle up to V207 so I would check with the main distributor for PFFAF to confirm it's capabilities. I think their thread capabilities is an error. Ah, you are no crazier then most of us. I do think you are looking at the wrong machine and I would suggest looking into a Juki LS-341 or Juki LS1341 or clone if you need something to sew a touch over 3/8" thick once you go over that thickness you really need a Class 441 machine like a Juki TSC-441 or clone. Keep in mind a clone is going to a LOT less expensive. As a note 9 oz leather is 9/64" inch thick so it depends then on how many layers to want / need to sew through and the toughness of the leather. kgg
-
Nicely done. I guess Molly is a little spoiled. kgg
-
Techsew 5100- New to Cylinder Arms, Need Help
kgg replied to parishleather15's topic in Leather Sewing Machines
I did a topic with some photo's and an explanation on the various methods of threading the top thread for the original Juki TSC-441, the Cowboy, the Cobra and the Techsew. I thread my TSC-441 clone as if was a true Juki TSC-441. kgg -
Techsew 5100- New to Cylinder Arms, Need Help
kgg replied to parishleather15's topic in Leather Sewing Machines
Hopefully it is just the top pin guide that got damaged while he was transporting the machine home. A top pin guide from a Cowboy 4500. Or he could thread the Techsew 5100 the OP gets a new one like you would thread a Cobra Class 4 machine as they don't use a top pin guide. This is a good example why any machine needs to tied / strapped securely during transport. I have added a link the Techsew 5100 Threading Guide and also for the Cobra Class 4. kgg Threading a Cobra Class 4 -
Just my two cents worth: i) The main disadvantages a) To much computer controls b) When the motor fails it probably going to be more expensive to replace the motor and controls as it ages. As far as I know you wouldn't be able to bolt up a generic motor and be limited to a setup for that model of machine from that manufacturer / supplier. c) Higher possibility of damage to internals like shafts etc. should something get jammed up. I have not seen any machines with a built in safety clutch and a lot are made mostly for the garment industry. A possible exception would be the Consew 2206RB-14-7-DD. From what I have see it has similar spec as the Consew 206RB-5 however no safety clutch and quite the price difference Consew 206RB-5 costs about $1500 USD verses about $2200 USD for the Consew 2206RB-14-7-DD. d) Inability to add a speed reducer. ii) The main advantage I think would be in a production environment where machines are replaced on probably a set replacement cycle like every 3 to 5 years. As I like a basic setup: sewing machine, servo motor (I perfer a Brush rather then a Brushless servo motor), belt/belts connecting the servo motor to sewing and maybe a speed reducer. Makes determining the problem, repairing and back running much simpler which generally means less expensive. kgg
-
Techsew 5100- New to Cylinder Arms, Need Help
kgg replied to parishleather15's topic in Leather Sewing Machines
Here is a couple of video's to help you get started: kgg -
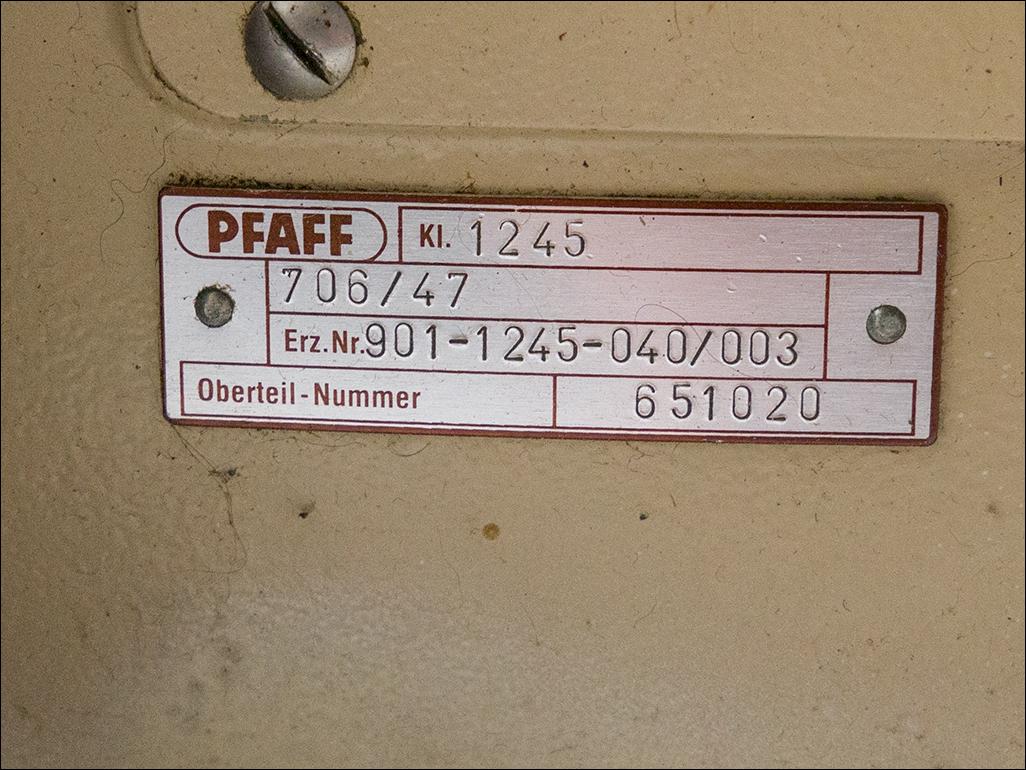
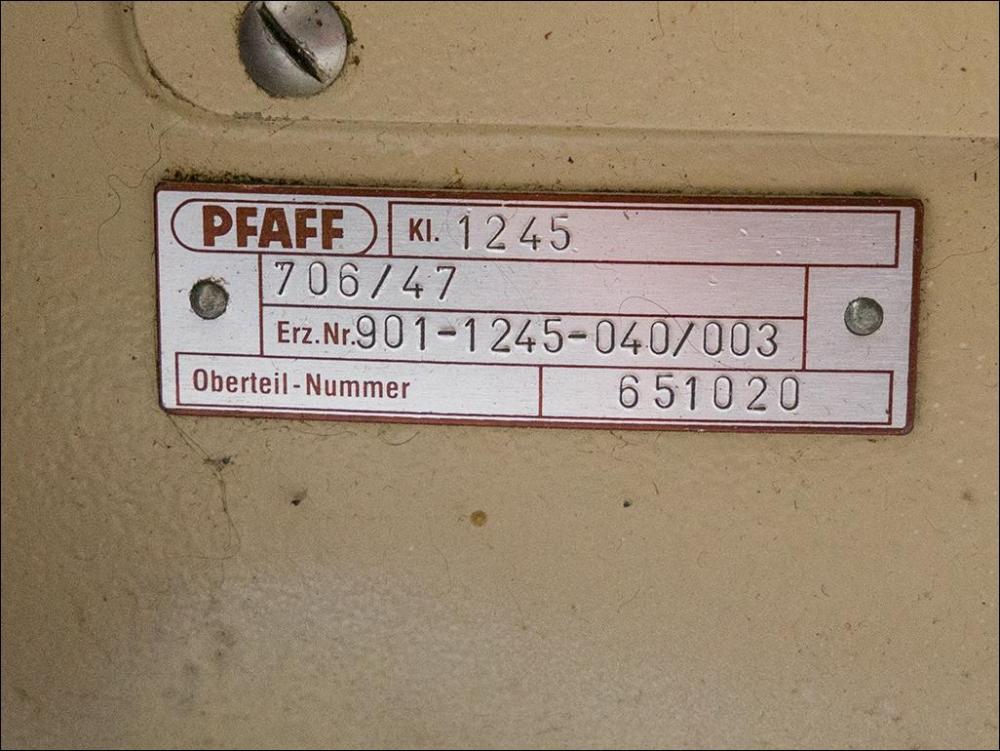
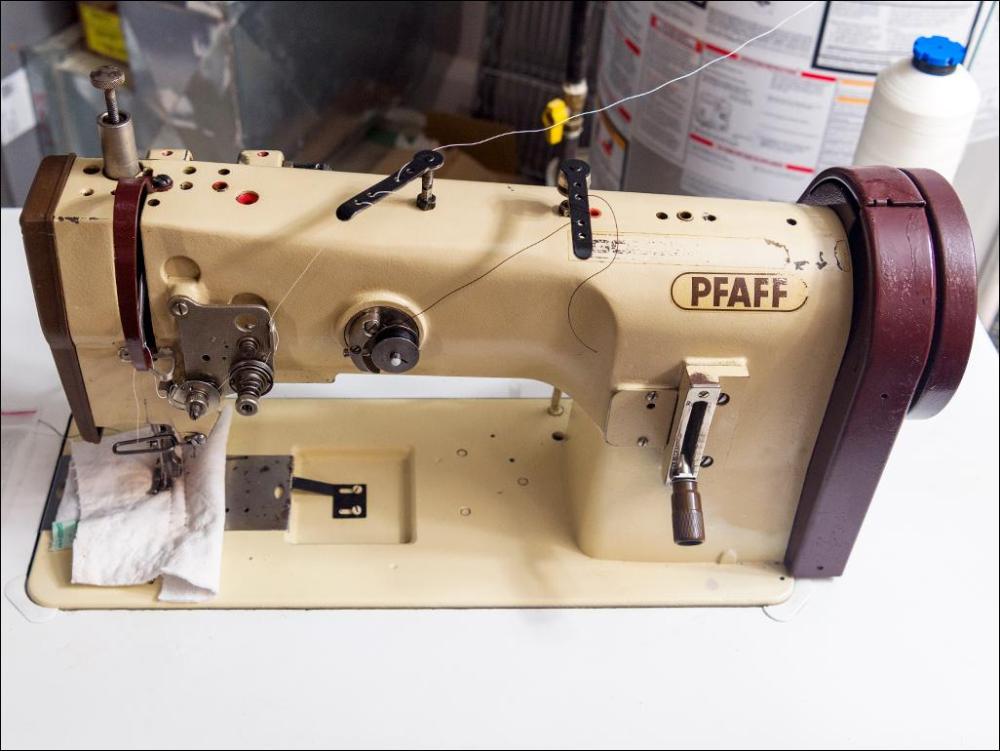
This appears to be the same PFAFF 1245 machine that I had for a very short period of time. The threading appears to be correct up to the last thread guide just before the needle. In your second video I noticed the thread guide just before the needle appears to be different then the one I had on my machine and seems to be further to the right side of the shaft rather then being more too the center. The manual I have in figure 1-01, figure 7-04 and figure 9-01 shows the guide being centered. According to the manual " Use only system 134-35 needles " and it could take size 110 to 140 ( #18 to 22 ) needles which means it could handle V69 to V92 in thicker stuff and V69 to V138 in thinner stuff. My machine would not work with V138 except in thinner fabric. The thread fraying at the needle maybe being cause by a burr at the needle plate/feed/ etc. or the hole in the needle plate andfeed dog may not be large enough for the needle system you are using. I have included the manual I used and a photo of my machine, nameplate and needle area. Note: In the machine photo I miss threaded the small round tension guide just before the main tensioner. kgg pfaff_1245_1246-manual-EN.PDF

-
I did like the video ( https://variani.com/videos/belt-punch-and-cutter-machine.mp4 ) you did post under another topic about the press. The quality of the setup seems to be quite nice. I think this style of guide could be adapted for use with a standard hand press or modified for the less expensive drill press guides. I did like the self centering feature but the distance between the holes could be better refined as some might like the holes closer together while others farther apart depending on the use of the belt / strap. A belt to hold up your pants verses a gun belt. I can see it being an asset but cost would be a major factor and it would be in competition with such items like pre made clicker press dies with the hole punches build in. I do have to agree that when I did read your post I did think of it as an advertisement as some others had I would suggest that you really need to write your post slightly different as not to give the impression of it being an advertisement. kgg
-
Since you have gotten good service out of the Cowboy I would just go with another Cowboy. kgg
-
My questions: Is the long arm necessary? Could you get away with a machine like a Juki DNU-1508 or clone. Would a cylinder bed machine like a Juki LS-341 / 1341 or Juki TSC-441 or clones of those machine work??How thick is the thickest part that you have to sew going to be? A couple of photo's of the style of bags you want to make may help to determine if this is the right style of machine for your application. kgg