
Silverd
-
Posts
489 -
Joined
-
Last visited
Content Type
Profiles
Forums
Events
Blogs
Gallery
Store
Everything posted by Silverd
-
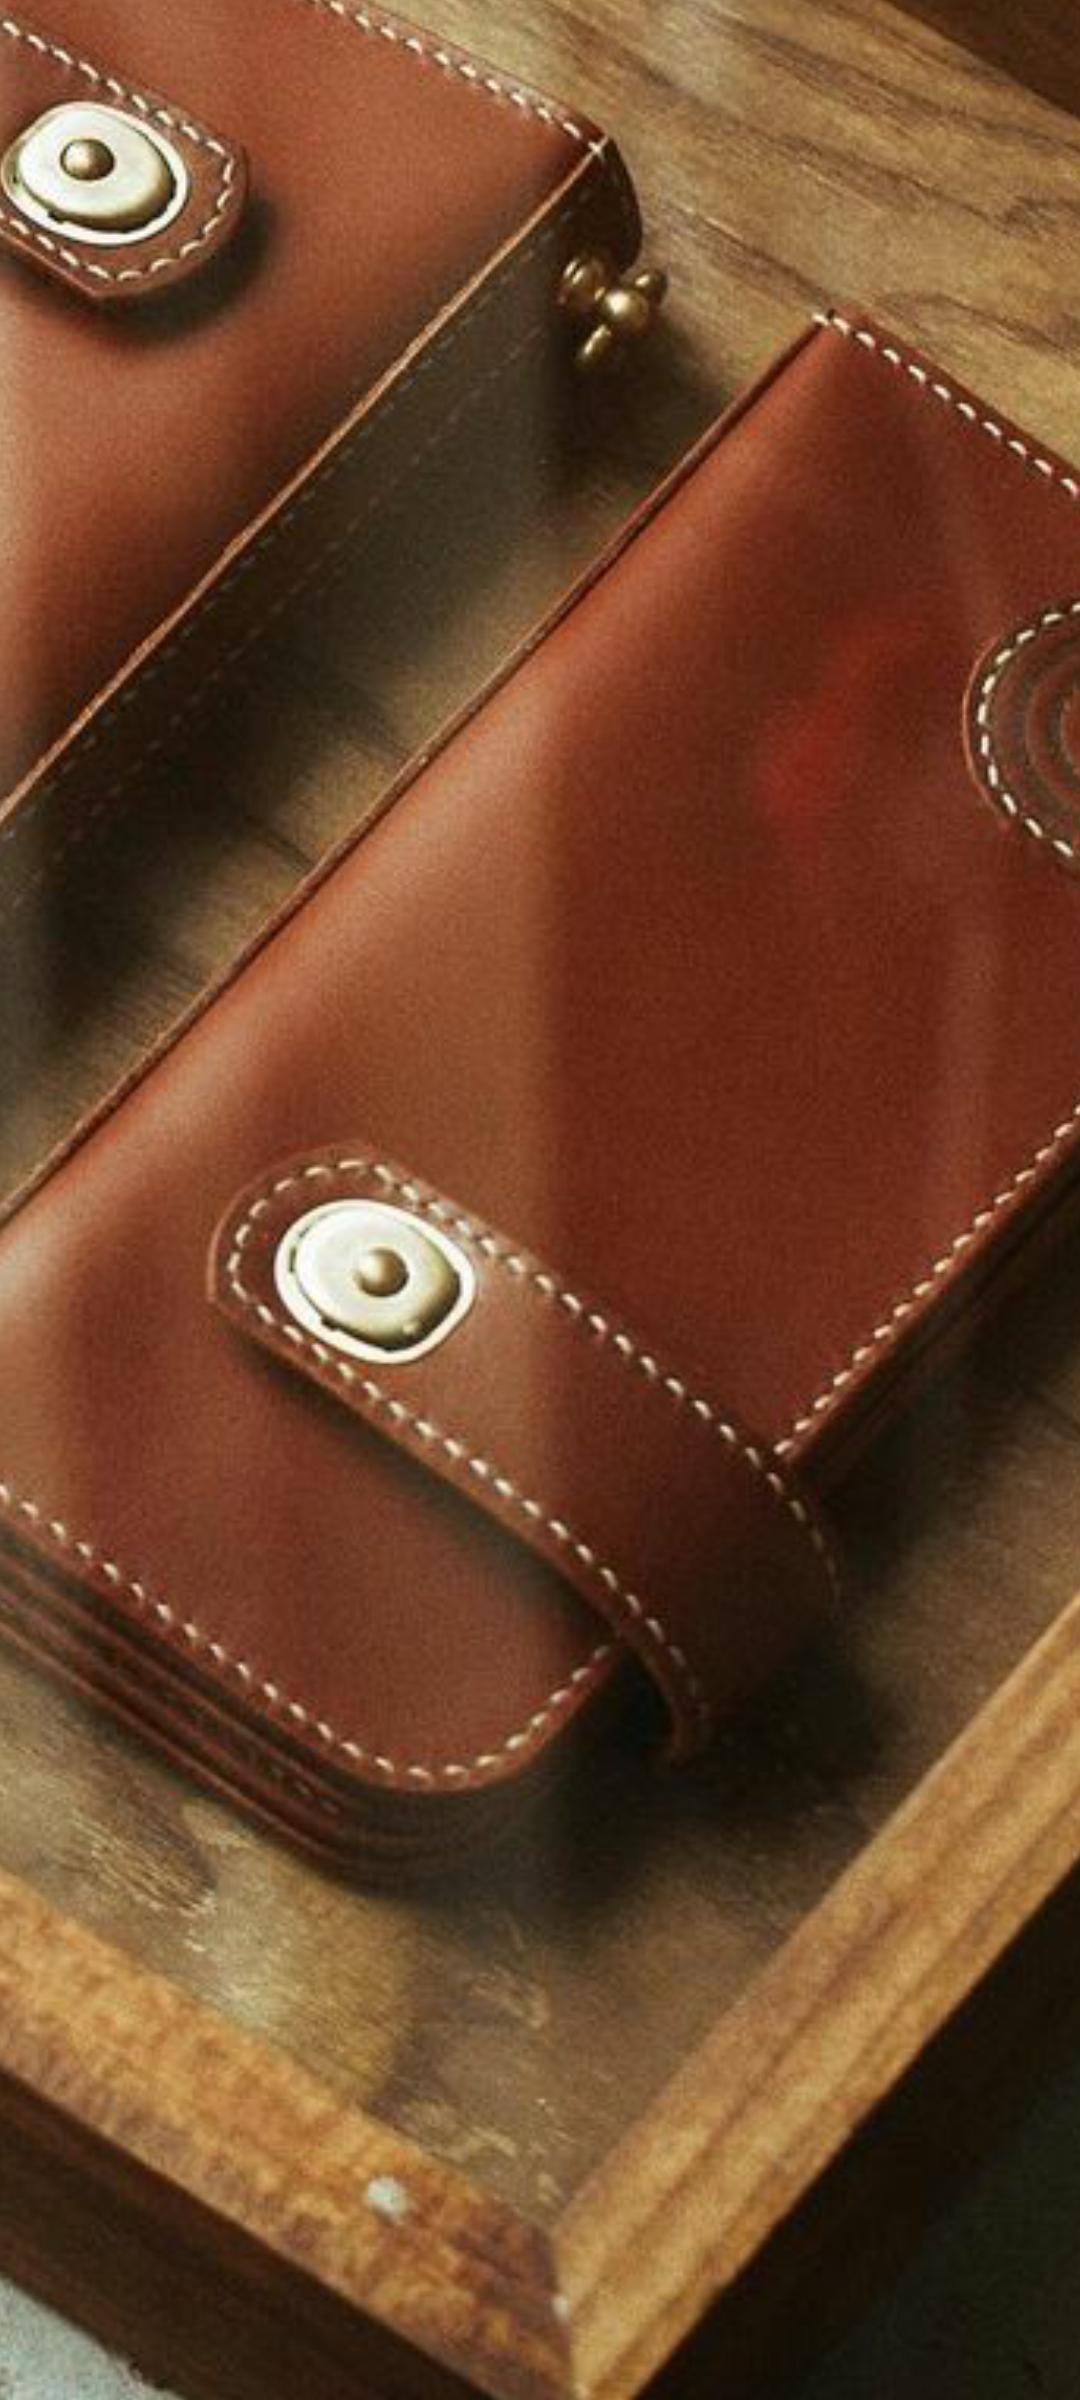
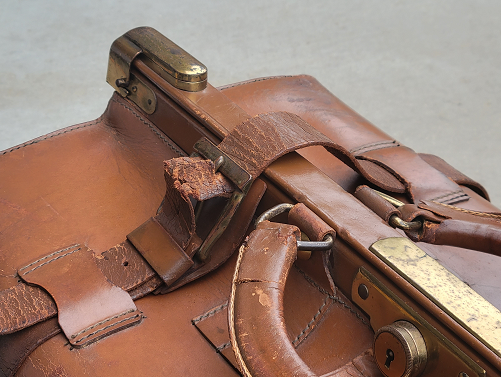
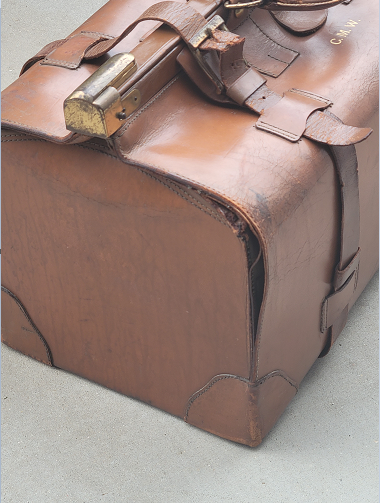
My latest concern is the handle anchor straps. IF they are not up to the task of holding the loaded trunk, then the project is limited to cosmetically restoring the trunk rather than cosmetic and functional restoration. To accomplish handle anchor strap replacement will require removing the lining to gain access to the back side. Of course, making new anchor straps will be required then hand sewing them back in. Notice how the previous leather worker sewed them with a stitch line across the highest stress area just below the Dee Rings. tsk tsk tsk...Not how I was taught to execute a load bearing connection. Silverd
-
It looks like a paint finish is original. Opaque colored finish I think.... Silverd Where do I get this? Makes sense to use. Silverd
-
Saddle Soap is a good idea. I'll for sure do that! I agree that the Dees should be replaced. It appears they are brass plated steel but I have not taken a magnet to them as of yet. This weekend I'm planning to slowly start in. The leather connecting the Dees to the main case look to be questionable as well. And the way the stitching was placed along the top edge creates a perforated tear line...Thats now how the equestrian folks do it for sure. Unfortunately the inside lining would need to be removed to replace them but I suppose thats the right way to do the restoration. Silverd
-
Yes, a very cool bag that could have aged more gracefully if only cared for along the way. I Agree with your concerns re the condition of the leather and stitching ripping through. I have not had time to take a close enough look to tell yet but I'm hoping the handles are in as poor of condition as they are because of hand sweat penetration that repeated use may have caused where as the bag leather might be a little better. Will see soon enough. Stay tuned for more images as the project progresses. Silverd


-
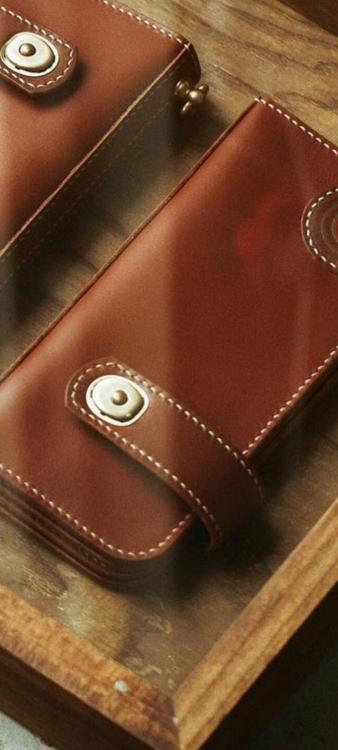
Hello Fellow Leather Workers, I picked-up a fun project from a client of mine yesterday. The images attached are of a vintage suite case of sorts, possibly a large Dr. Bag, which appears to have been originally made circa 1950-60s and is in obviously rather poor condition. Client would like to get it back into a functional state, which I can likely accomplish by replacing the main straps, recovering the carry handles and hand stitching back the failed seams. Internal condition of the cotton fabric lining is actually very nice aside from some discoloration. I didn't include internal photos as I will not be doing any work to it at this point. Cosmetically, \the client is also interested in having the hardware polished and if possible, the entire case repainted in the original color. The condition of the main bag leather is marginal. There is evidence of dry cracking at the corners, which I am hoping can be mitigated through application of leather conditioning products I have used in the past on very old halters and headstalls. Any suggestions? I'm thinking I will apply the conditioners first then sand and repaint if I decide to go down that path. This is similar to how Fiebings suggests leather be conditioned, colored then protected with Tan-Kote as a final step. Of all the work, repainting the leather may be the most challenging and the most risky. If there is someone in the forum who has any experience with this sort of work I would greatly appreciate hearing from you. All other advice as to the best way to proceed on this project would also be graciously accepted. Many Thanks in advance! Silverd


-
Those loops are hand stitched in as is most of the bridle since there are buckles or loops at each end of the cheek pieces that prevent use of a machine. Browbands and nosebands can be machine sewn but cheek and head pieces are only sewn by hand that I am aware. Big Sioux taught me this! ...And she knows. Silverd
-
Id like to see an example of an ink stain in leather (vegtan) removed successfully. I would be very impressed. Silverd
-
Sadly I will suggest there is nothing you can do to remove the ink without altering the surrounding area. Darkening the entire bag is likely the best solution to "hide" the ink marks or do nothing. Silverd
-
Help needed with tension issues on 441 clone.
Silverd replied to Watts's topic in Leather Sewing Machines
Certainly Silverd -
Did this sell Yet? Silverd
-
Did these sell? Silverd
-
Help needed with tension issues on 441 clone.
Silverd replied to Watts's topic in Leather Sewing Machines
if the material you are sewing is not evenly flat on the bottom it can prevent the knot from getting pulled up into the material. If you are not holding the material flat against the needle plate it can cause this issue. If there is a gap between top material and bottom material it can cause this issue. If the material you are sewing is very stiff (Temper is high), it can prevent the knot from pulling up into the needle hole...Hence the suggestion to use the next size needle up. Casing the leather slightly on the bottom side only can help if high temper is the root cause. I use a misting sprayer from Tandy for this purpose. Pressor foot pressure will effect if the knot is pulled into the needle hole as stated above. Material should not lift off of the needle plate while sewing. Installing the bobbin the wrong way can cause this issue. Consult owners manual Using a size down thread on the bottom will help Calibrate the bobbin tension by using a single coke can (full) as a known weight source. Bobbin tension should be set such that when the can is tied on it barely pulls thread out of the bobbin. Start there then change to suit your particular project needs The thread must wrap 2X around the last top thread tensioner disk although the first disk has the most influence. Hope this helps! Silverd -
Hello Fellow Leather People Looking to purchase a fur sewing machine. Anyone know anything about them? Looking at a Bonis never stop and a Success machine. Anyone have experience with either? Silverd
-
Fantastic!!! So now I recall these are used in the marine industry...for boat canvas covers etc. Very sturdy stuff. Many thanks! Silverd
-
Hello Helpful People! I'm in need of assistance. Can anyone tell me where these snaps can be gotten. Many thanks Silverd
-
Hello I'm looking to have my Brand Logo made into a medallion or concho like badge that I can attach to bags and other personal carry items I make and sell. Kinda like the Michael Corrs thing in sterling silver. Do any of our wonderful patrons have a source you might recommend? Thank you in advance Silverd
-
Hello Group! Anyone familiar with USA investment Casting supplier that can support making custom medallions and Conchos in Sterling Silver? Thank you in advance; Silverd
-
...My have times changed! I have many younger clients now asking for hand bags, journals and other personnel items to be made using non animal materials. I'm bringing in plastic leather like materials and canvas for testing to appease this growing population. The design and use approach and process is much different than with animal leather. Skiving my not be possible in some cases. Edge burnishing is not possible that I know of so switching to edge paint is almost mandatory. Joint gluing is done using an alternate adhesive and of course no dying or splitting. All in all the process requires much less skill and equipment if you look at it one way. I cant say I like the idea but if you take a look at some of the high end bag designer products you will find several models being offered along side full grain leather units. the tactile differences between leather and pleather are rapidly narrowing and if you are on your way out of this industry then you can avoid transitioning to the new materials but if you are just starting out I'd say I would recommend getting your feet wet. The times are a changing. Silverd
-
First Sandals, A Davy Copy
Silverd replied to Silverd's topic in Shoes, Boots, Sandals and Moccassins
Off to the retail race
-
First Sandals, A Davy Copy
Silverd replied to Silverd's topic in Shoes, Boots, Sandals and Moccassins
Latest Version Silverd


-
First Sandals, A Davy Copy
Silverd replied to Silverd's topic in Shoes, Boots, Sandals and Moccassins
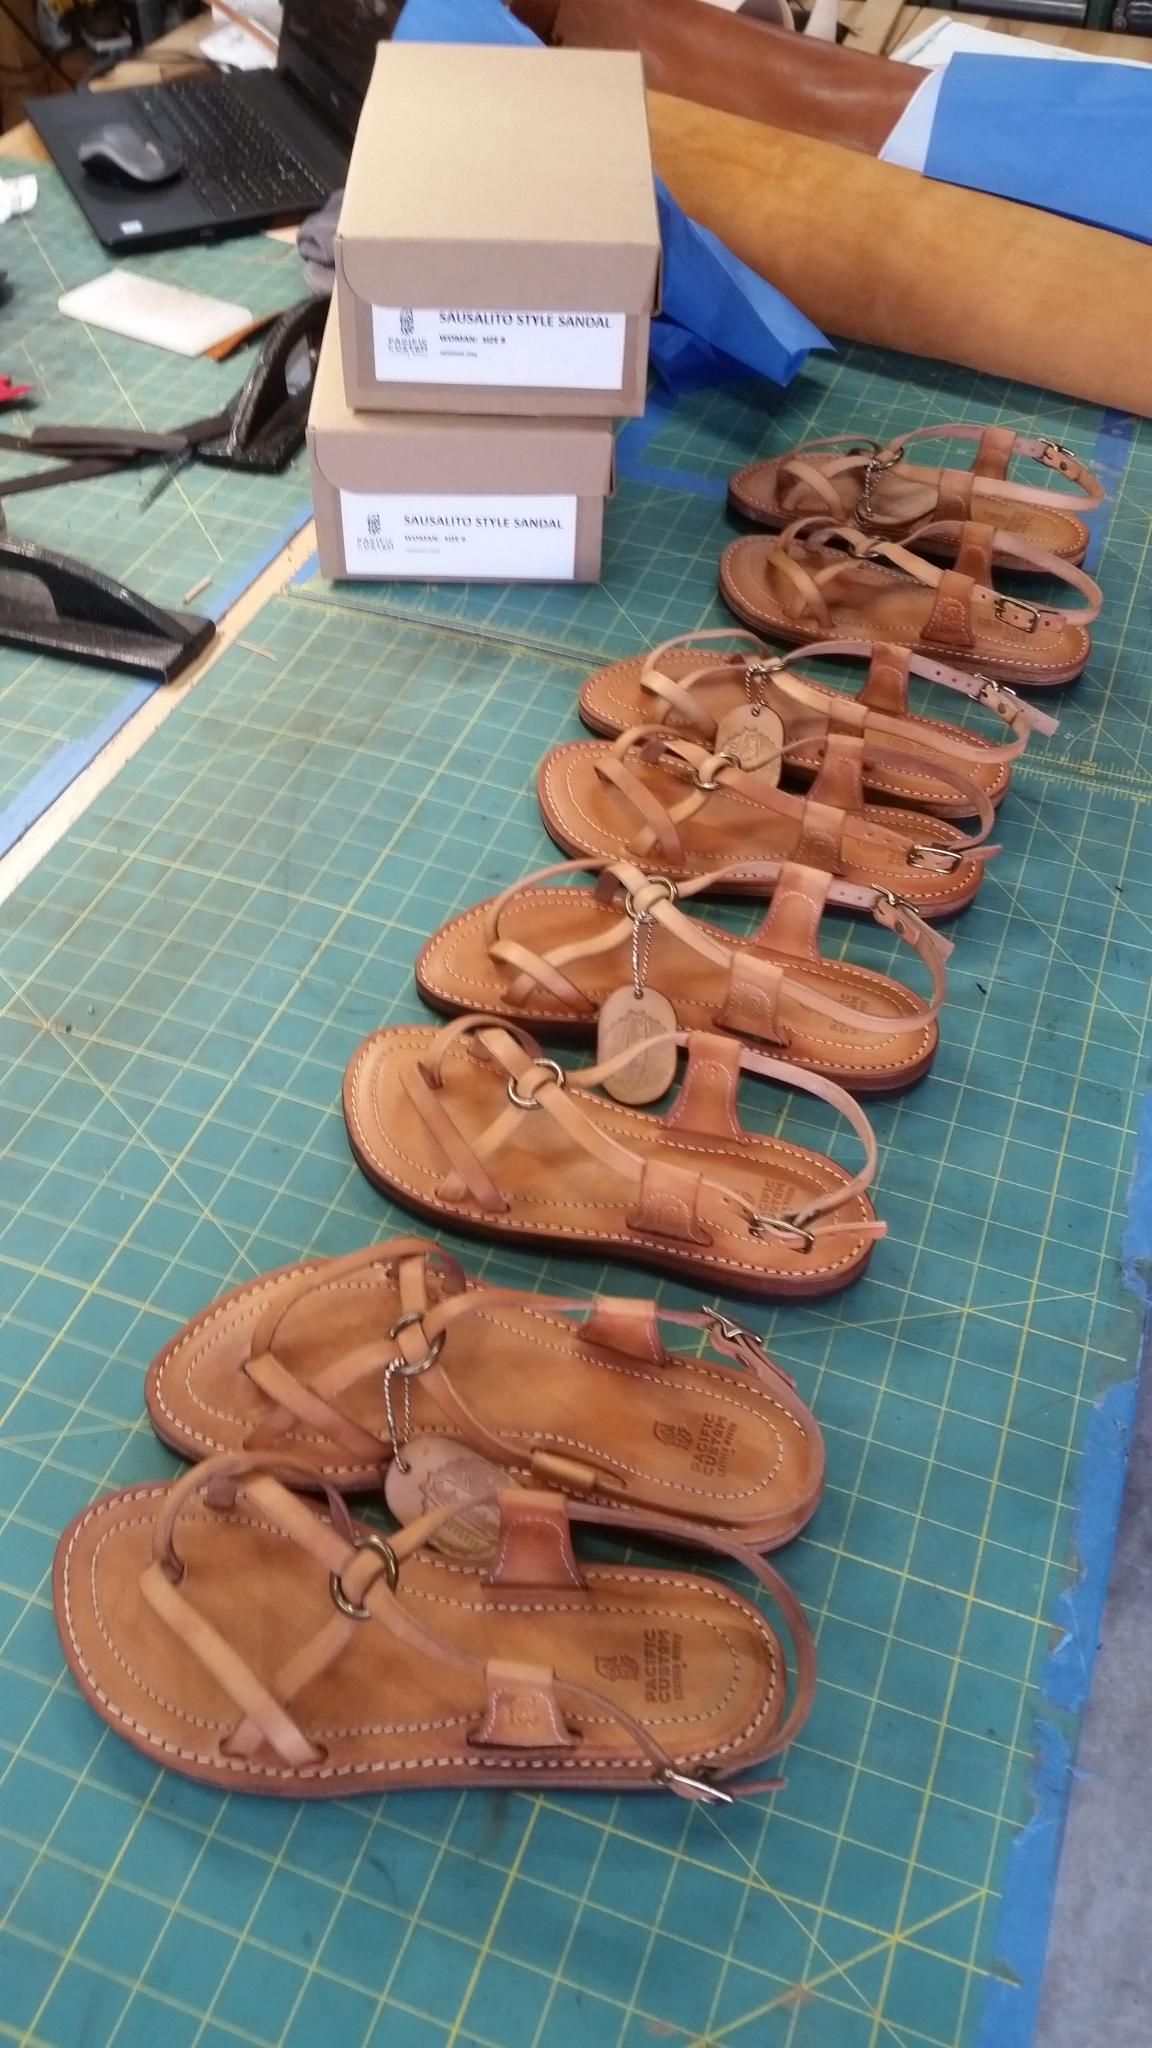
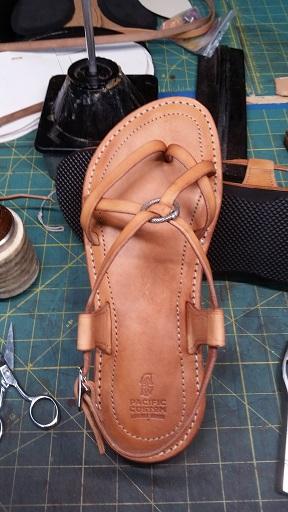
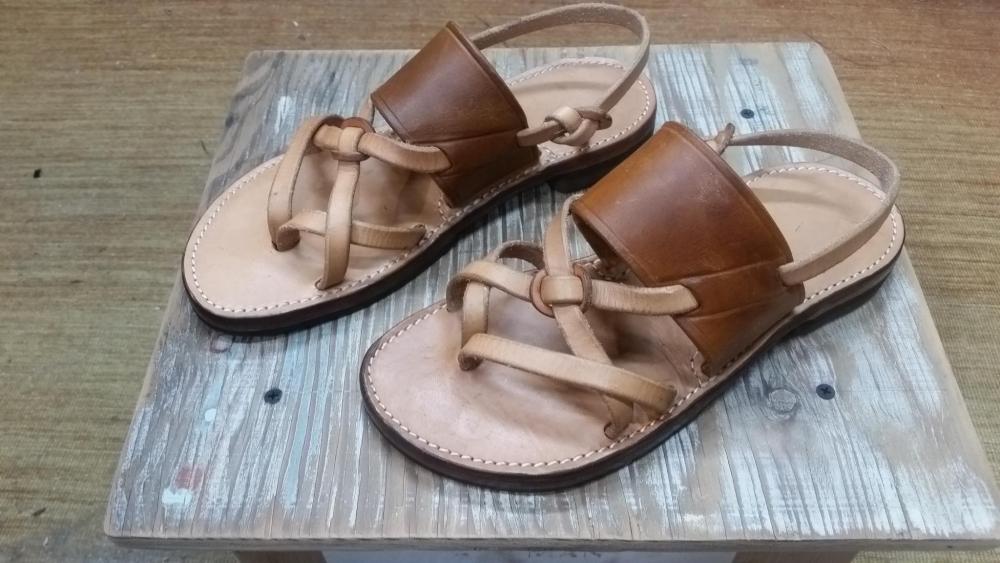
The soles are covered with Soletech materal. The material is available through Soletech distributors and Amazon. I purchased the smooth material in 1/4" and 3/8" thicknesses (they refer to it in units of Irons so 12 iron and 18 iron) in the 50-60 shore A hardness. Other like material is available. They offer the same material in a variety of thickness. They offer the same material with a diamond pattern one side which I have since received and think will benefit the safety aspects of the shoes however the smooth sole material is very grippy. ...and they offer a "Cloud" version which is softer (40 Shore A that is not recommended for the out sole but may serve as in insole cushion). The latest design adds 1/4" of sheet cork as an insole compliant member and a continuous 1/4" Soletech out sole layer with a 1/4" heel. It also has an adjustable Arch strap which makes the perimeter sewing easier. I need to reduce the image sizes so I can post more than one at a time. If interested I will do this so you can see close ups of the construction and more generational design styles. Silverd Yes indeed! The original version design are quite a challenge to break in. Davy recommends using saddle soap and water on the first week of initial wearings to keep your feet from forming to the sandals! Ive worn them for several weeks and they are getting better but slowly. Davy provides a 10 year warranty! Silverd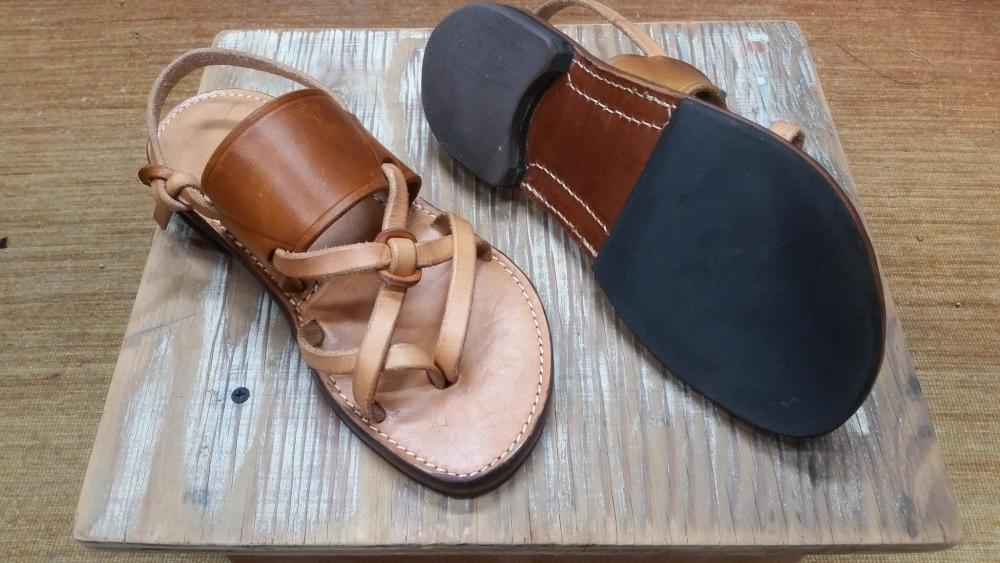
-
Thought I would share with the good group of Leather making, shoe loving folks my first made pair of custom leather sandals which I found instructions for on the Fine Leatherworking website. If you have not been on this site you might want to take a look around. They have some nice BLOGS going and resources not found anywhere else including lessons and high quality hand tools. Sean Aquino is a Master leather craftsman and instructor who has taught me a lot and holds both one-on-one and group lessons on the skills of fine leather work from beginner to advanced levels. Let me know how you like these custom sandals. I'm changing the design to eliminate the custom element by following the lead of Berkinstock. I'll be selling these out of an Artisian Shop I'm associated with in SB California and measuring and fitting for each customer would be impossible. Hence the buckles. The next generation that I made I added a layer of cork and some Polyurethane padding to give the shoe some initial comfort and long term foot molding attributes. Still, the break in period is significant and requires the wearer to participate in the process. Not like the Buy-and-Go production foot ware from Off shore! More photos to follow if anyone is interested. Silverd
-
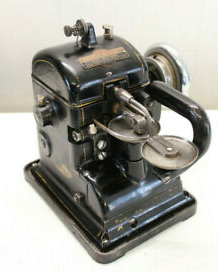
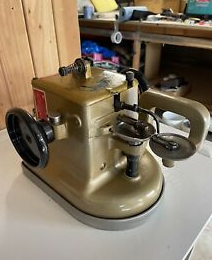
Good advise. According to the Cobra team in Ontario California, the NP-4 skiver can be set up to run two motors. one foot pedal variable speed for the drive wheel, one adjustable but constant rpm for the bell knife. There is an added cost of about $225.00 to install the 2nd motor and belt etc. which seems reasonable to me. The machine does not have a feature to accommodate a vacuum system but it would not be difficult to add a vacuum hose through the bottom of the table under the cutting zone since these machines are open on the bottom. I like your idea of the stone that can be used to remove burrs...and Dave at Cobra sent me (on request) a photo file of the various presser feet that Cobra sells for the NP-4. There are 13 in total different feet, none of them however are roller style like the Nippy examples in the above Nippy made video. Perhaps another skiver makers roller feet will fit it. I've since given up on buying a Nippy due to the difficulty in communicating with them. I would be interested in a used Fortuna Skiver, as you suggest as these machine have all of the features I believe to be desirable, but I have not found one for sale in the USA. The Cobra solution seems to be the best alternative and would be supported into the unforeseeable future. Cost of a new Cobra NP-4 is also a consideration as they are quite reasonable and the Cobra products in general appear to be of good workmanship compared with other Chinese clone machines. Silverd
-
I contacted Campbell this morning and talked with them about the FAV AV-2 skiver. They handle these products but don't stock them and wait time due to Italy on summer break will be into October or possibly November depending on how soon FAV could ship. They also recommend a rubber roller to deal with the wrap around issue in place of a vacuum system which drives cost up another $2k. And they recommend the dual drive control that turns the bell knife at a constant rpm and allows speed adjustment of the feed roller by the operator. I think that sounds like a practical Idea however cost on this machine was estimated at $4500 delivered to CA. That's a bit more than I would like to pay and a lot longer than I want to wait. I think there is likely a lot of successful skiving being done using the simple clones. No vacuum, no dual control, no top feed, not OEM for less than 1/2 the cost of a FAV or a Nippy or Fortuna etc and likely support of the Clone machines from a reputable source is far better than the OEM makers. A strange industry this sewing bunch. Silverd