-
Posts
814 -
Joined
-
Last visited
Content Type
Profiles
Forums
Events
Blogs
Gallery
Store
Everything posted by AndyL1
-
I use this stuff: http://www.homedepot.com/p/3M-17-6-oz-High-Strength-90-Spray-Adhesive-90-24/100151277?N=5yc1vZc5dk 3M 90 Spray adhesive works great when I glue lining to my wallets. I cut my wallet parts out first then cut a piece of pig slightly larger. Spray some glue on each, wait until not tacky anymore then stick together. I use a rolling pin to smooth and press them really good too. Cheers!
-

Hop Head Wallet
AndyL1 replied to AndyL1's topic in Purses, Wallets, Belts and Miscellaneous Pocket Items
Thanks all! I received another commission for this wallet after the guy's buddy saw his. Can't beat word of mouth advertising! -

Zippered Wallet
AndyL1 replied to LeatherLegion's topic in Purses, Wallets, Belts and Miscellaneous Pocket Items
These are very nice! I've never done anything with zippers before... I have a few on hand for a project that I was going to attempt to put them into. Now you've inspired me to give it a shot. I like the quick access card pocket on the outside too. Nice one! -
Perhaps a new link is needed? It is still requesting login information and signup.
-

Hop Head Wallet
AndyL1 replied to AndyL1's topic in Purses, Wallets, Belts and Miscellaneous Pocket Items
Thanks all! This was pretty fun to make, the "Sidecar" wallet was a great idea that was actually part of my customer's original wallet that he wanted recreated. I just modified it some to suit this piece. Special thanks to Forum Member ducjes for the pattern from this thread: http://leatherworker.net/forum/index.php?showtopic=54776&hl=+wallet%20+pattern A little departure from my normal bi-fold and worked out great! -
Been wanting to post this one for a while, here is the finished Hop Head wallet. The backside has a cool, very slim card wallet that slips into an outside pocket. I dubbed that The Sidecar. Made for a fellow beer lover and hop head at Sanctum Brewing in Pomona, CA. Cheers, Andy
-

Indian Head Nickle Wallet
AndyL1 replied to AndyL1's topic in Purses, Wallets, Belts and Miscellaneous Pocket Items
No problem! Yeah the antique is just Tandy's black. I dilute my Resolene 50/50 with water though as I like a more mellow gloss than full strength gives. I find it's better to do a couple of light coats with diluted rather than a heavy one at full strength. Good luck on your first project! I'll stay tuned for photos of yours. -

Indian Head Nickle Wallet
AndyL1 replied to AndyL1's topic in Purses, Wallets, Belts and Miscellaneous Pocket Items
Hi Bruce, It's just dyed with Fiebing's Light Brown Pro Oil dye. It came out kind of reddish though as that's just how this particular leather accepted the dye. A happy accident I suppose. I didn't dye the Indian's face, just sealed it up really well with multiple coats of Resolene. Then I just antiqued the whole thing. Another coat of Resolene to seal the antique and all done! I should add that I dilute my dyes with denatured alcohol as the Fiebings stuff always comes out a lot darker. Thanks! -

February Keep Making Stuff Challenge
AndyL1 replied to thefanninator's topic in Leatherwork Conversation
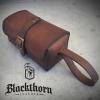
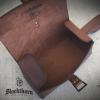
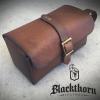
I'm a little late to the party on this one too! These dopp kits are great to make, had a lot of fun with this one. I made mine out of some really nice oil-tanned in about an 8oz weight. I made my handle a little bigger so I can carry it around my wrist in case hands are full of towels or whatever. Love it! -

Indian Head Nickle Wallet
AndyL1 replied to AndyL1's topic in Purses, Wallets, Belts and Miscellaneous Pocket Items
Thanks all! This was a fun one to make for sure. -
Nice work and welcome to the forum. Love your straps and that buckle is top notch! Cheers, Andy
-

Indian Head Nickle Wallet
AndyL1 replied to AndyL1's topic in Purses, Wallets, Belts and Miscellaneous Pocket Items
Thanks all! I'm in love with the way it turned out too. It's dyed with Fiebings Light brown (diluted), antiqued in my tried and true method, then sealed with a few coats of diluted Resolene. I give it some neatsfoot oil after dyeing though to recondition the leather as the alcohol tends to dry things out. -
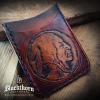
Hey all, Just showing off a little tooling I did. Done with just two tools: modeler and a checked backgrounder (well three if you count the swivel knife on the initial cuts). Dyed using diluted Fiebings light brown, sealed and antiqued. What do you think? Comments welcome! This one is shipping out to England in the morning. I had to make it a little larger than my normal wallets to fit British Pound notes. Cheers, Andy
-
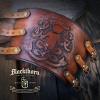
Thanks! I've only made a couple bracers. My normal items are briefcases and wallets so this was a nice departure. I made the slab a bit shorter than the actual circumference to allow room for the straps to adjust.
-

Be Kind, But Honest.
AndyL1 replied to rusticbob's topic in Gun Holsters, Rifle Slings and Knife Sheathes
Looks great! Nice stitching and all. I use a Dremel with the small sanding drum. Glue, sand, bevel edges, then burnish with saddle soapy water on my wooden burnisher. -
Welcome to the forum! I'm sure you'll find everyone here is really cool and this forum is a goldmine for information. Cheers.
- 10 replies
-
I made one of these up in the past for a customer in Luxemburg. Thanks to the reach of the internet a fellow in Norway saw that one and decided he needed one too! A Pictish mermaid tooled onto a slab of 6/7 oz veg tan. 5/8" buckle straps to keep it closed. I lined the backside with some nice black pigskin and stitched around the edge. Came out pretty cool if I may say so! Cheers, Andy
-
Just an idea I've had. I don't make shoes so I thought this kind of detail would be great on a bag or wallet. I'd use my press to push the die through. I wouldn't make this up on my account as I couldn't afford it at the moment, but if you're in business to sell a lot of them I would definitely keep an eye out for one.
-
Ah this would be amazing! I'm anxiously awaiting to see what you come up with. EDIT: I just did a quick count on how many holes that would be. At $1.45 per hole this will get very spendy. Gulp. Still, it would be a great tool!
-
http://fontspace.com/ is a good one too for gobs of FREE fonts. You can type in your own text to see what it will look like.
-
I can second using LW. I had a full set made of letters and numbers and they are great quality, machined brass. I like the included holder as it's very handy. The only thing I need now is a proper case to hold all the letters.
-
I was thinking along the lines of this or similar (attached). I suppose one could be made fairly easy, just a plate of steel with the proper cutting tubes pressed through or welded in the right pattern. Check out step two on this page: http://www.habbotstudios.com/_blog/HABBOT_BLOG/post/How_a_brogue_gets_that_way_/
-
That's pretty cool! Would you happen to know where to get a punch to create the flower pattern common on toe caps?


