

hawgrider
-
Posts
40 -
Joined
-
Last visited
Content Type
Profiles
Forums
Events
Blogs
Gallery
Store
Everything posted by hawgrider
-
 Good looking design. Nice work!
 -
Farting around with leather.
hawgrider replied to hawgrider's topic in Gun Holsters, Rifle Slings and Knife Sheathes
Keep in mind the leather is not cracking. Only the finish is giving the appearance of cracking. I still believe its a finish issue. Either from the dye or the leather balm. I've used the same dye with other projects but with Resolene for the top coat and had no issues what so ever. This is the first time I've used leather balm with atom wax and then this issue shows up... Draw your own conclusions. Looks like I need some more experimentation with this leather balm. -
Farting around with leather.
hawgrider replied to hawgrider's topic in Gun Holsters, Rifle Slings and Knife Sheathes
Gotta be the dye then. So I will fetch me some Fiebings oil dye for future use then. Thanks Dwight appreciate the critique and advise. -
Farting around with leather.
hawgrider replied to hawgrider's topic in Gun Holsters, Rifle Slings and Knife Sheathes
The leather was a discount piece of double shoulder veg tan from Tandy. I suppose it may be the the piece of leather. It was not very pretty it had lots of bug bites in it. -
Farting around with leather.
hawgrider replied to hawgrider's topic in Gun Holsters, Rifle Slings and Knife Sheathes
Hard nose all you want. As I said to you on another forum the rivets were used to stay close to the original sheath which is what I wanted. And every sheath I did has a welt on the edge side of the knife some thicker than others. The original bowie sheath did not have any welt . The sheath I made for the bowie does have a welt only on the edge side. I was very happy with how the bowie sheath turned out. Its look and function is exactly what "I wanted" to each his own you don't have to like it I made it for me. Thanks for your critique. Now why did the stain and leather balm on the gun belt show wrinkles and a cracking look when the belt is flexed? Is the the pro dye or is it the leather balm with atom wax? Would a oil stain have been better for this project? -
Farting around with leather.
hawgrider replied to hawgrider's topic in Gun Holsters, Rifle Slings and Knife Sheathes
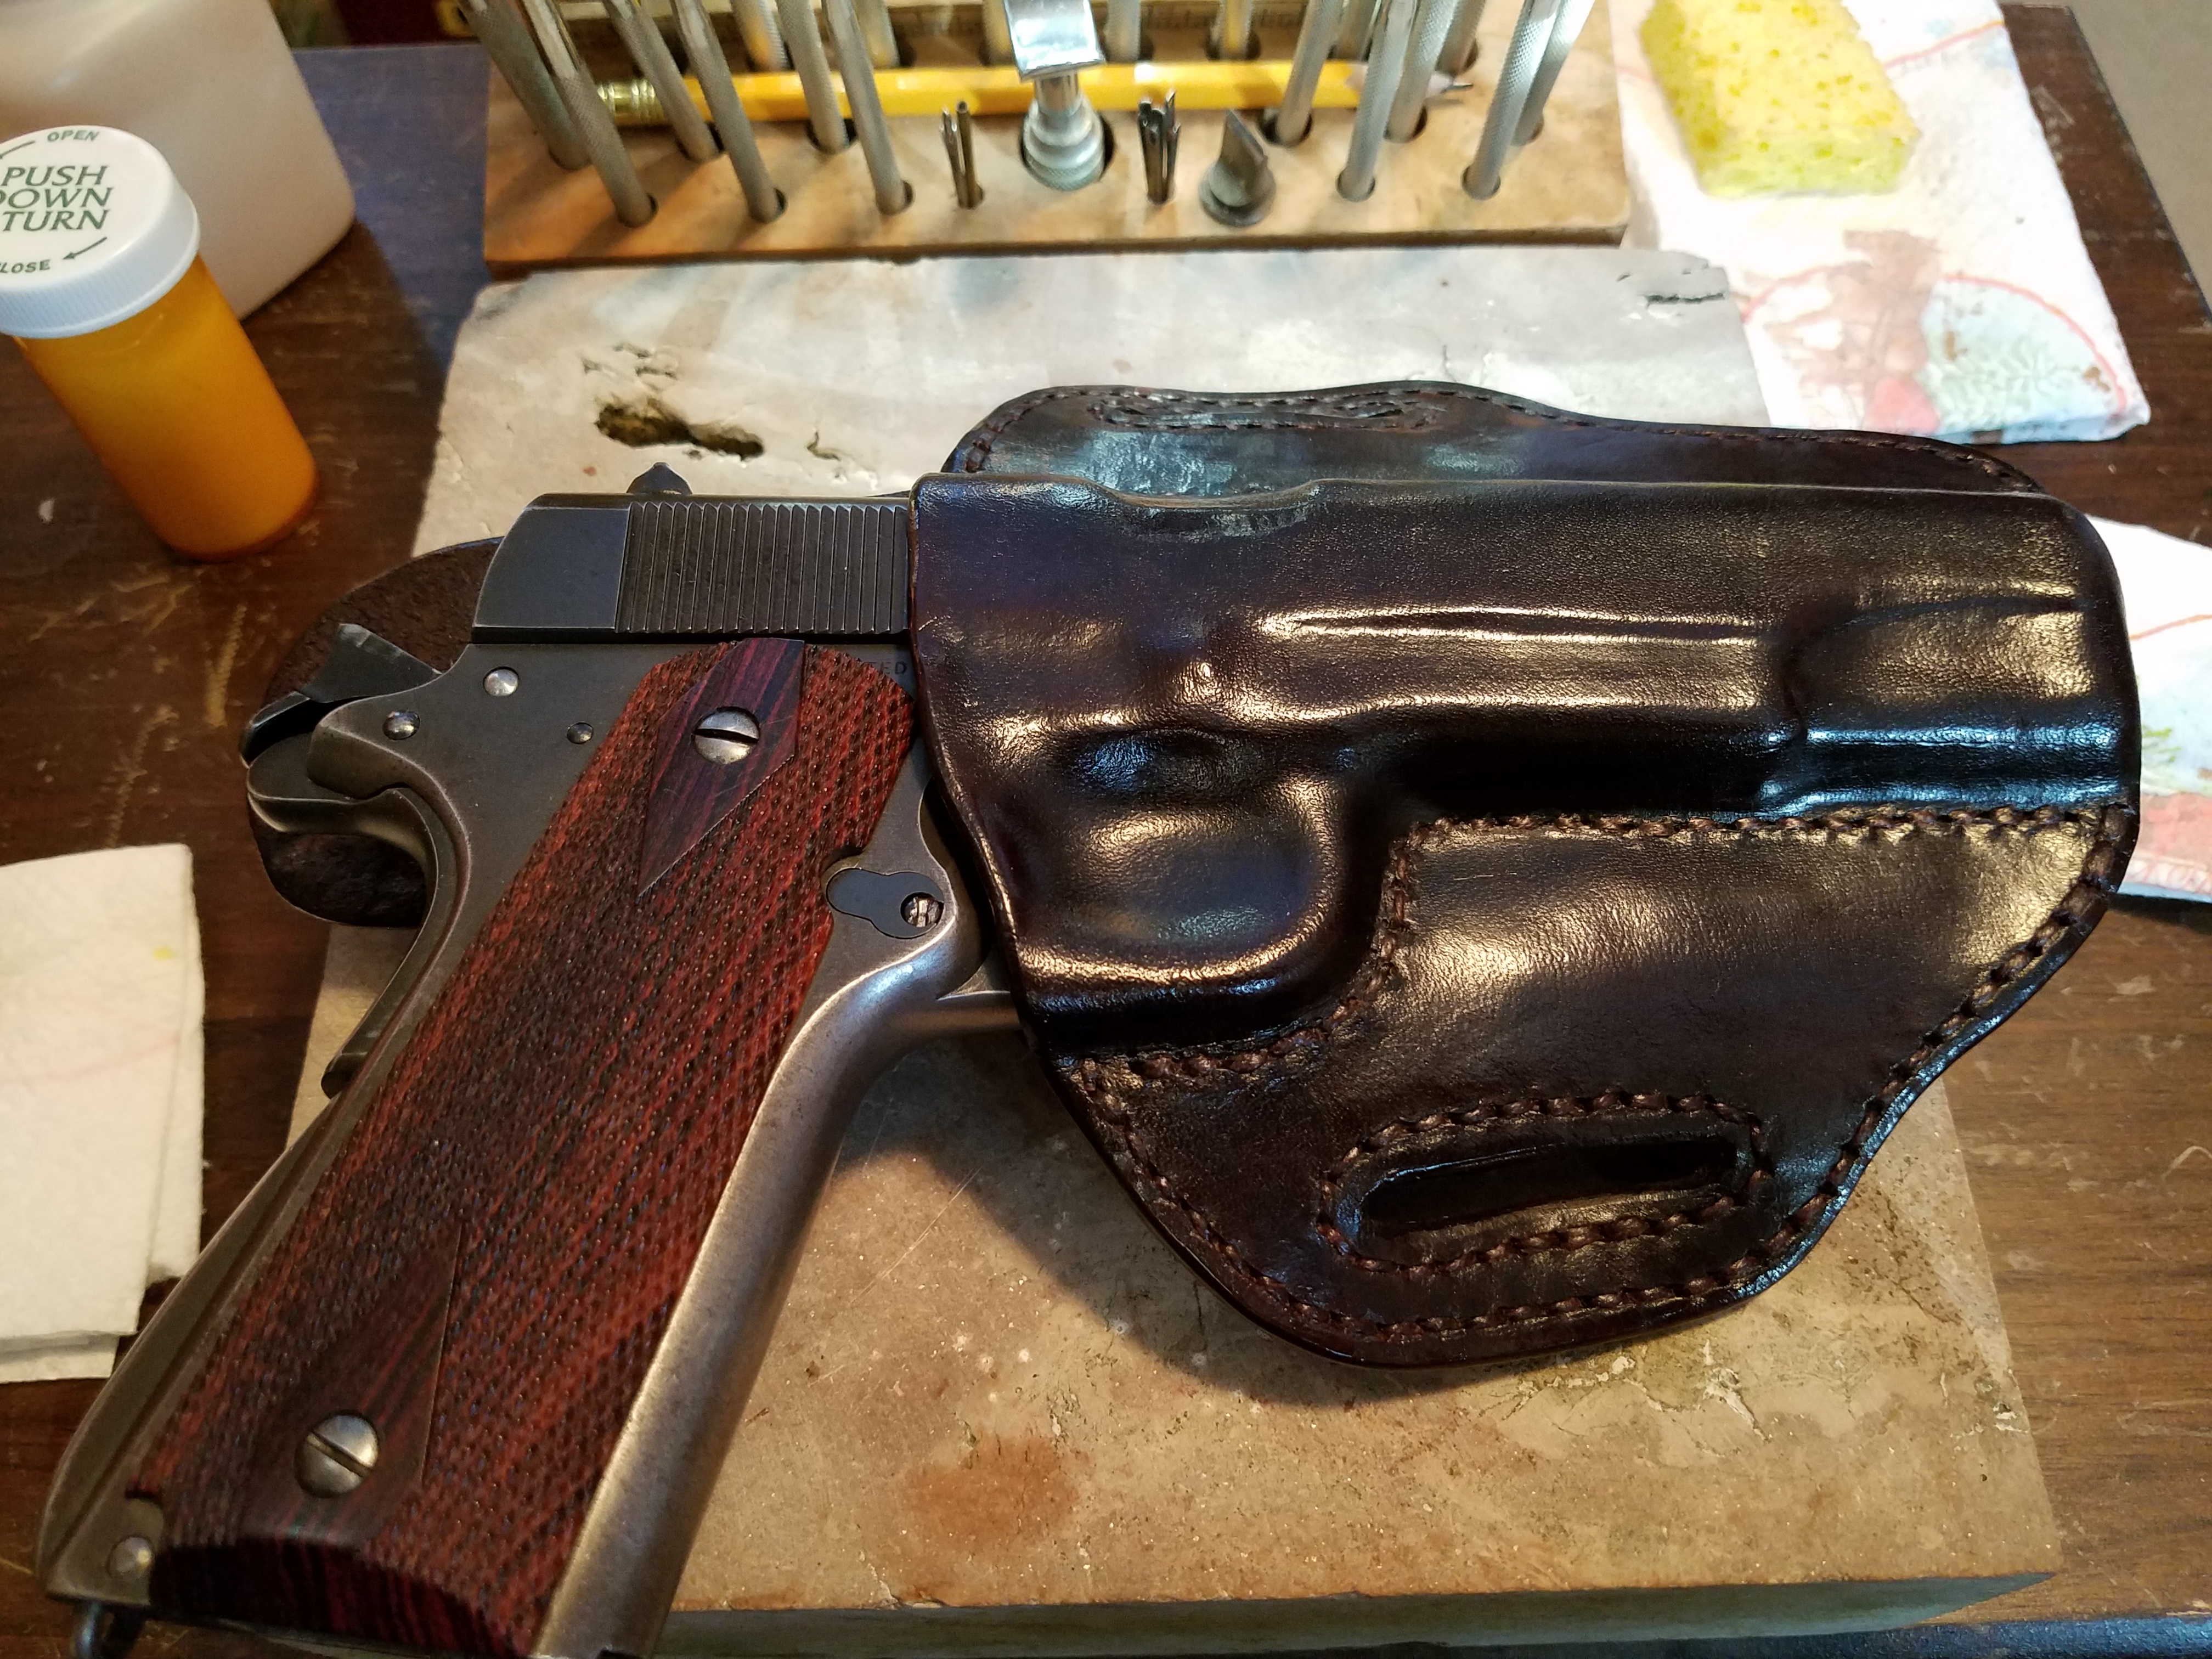
Have been making a gun belt rig with this sorta crappy 5 oz piece of double shoulder I picked up for cheap. Going to glue up 2 pieces to make a 10 oz thick belt. And... I think I'm going to cheat a bit and re-purpose some of an old to small belt. Making some ammo loops for .38/.357 I decided to go with 2 sections of 9 which will give me 3 reloads for my Blackhawk. I'll mount them something like this leaving the small of my back open with no ammo poking on my lower spine while sitting. Got the glue up done and made the parts I need for the ammo loops. Waiting on some Tiger thread to come in the mail. Finally got my Tiger thread in the snail mail today this stuff looks like exactly what I needed. Its braided and waxed polyester. The diameter is 0.80 which should be perfect to fill the holes from my diamond hole chisels. This stuff is hard to come by no local sales at all. Got my ammo loops built a few days ago. Glued up and rivets in. A little stain touch up and some another coat of leather balm with atom wax for the top coat finish and they are ready to mount to the belt. My woman scored me a new 1 1/4" thick work surface last night. Price was right as in you pick up... sweet! Obviously from somebody's kitchen counter top venture. Made some progress over the weekend. Got it stained and 2 coats of leather balm with atom wax topcoat. Still need to mount the ammo loops, burnish the edges of the belt and trim the belt at the strap end. Might try to darken the holster to see if I can get a better match. Close ? Trying to end up spaced evenly with the buckle centered. Once I figure out if they are in the right position I'll try to center them in the width of the belt. Pretty much done for now on the belt. Mounted the ammo loops and made a keeper for the belt strap and the overlap section. All in all I'm pretty happy with it for a first time venture. The goods- It fits my fat ass, its sturdy, the color is pretty good, the match of colors is not to bad, the ammo loops are snug and I landed them on the belt pretty darn close to where they needed to be. The bads- because the belt is 2 glued pieces thick my edges didn't stain and burnish as well as I'd liked. So at some point I'll order some edge paint from Tandy to fix that. Either the stain or the leather balm atom wax changes color and leaves a weathered cracked look when the belt is bent or flexed which I'm ok with but I didn't expect it to do the when the leather is bent or flexed. I'm betting it's the stain which is Pro dye. Maybe an oil stain would have been better? -
Farting around with leather.
hawgrider replied to hawgrider's topic in Gun Holsters, Rifle Slings and Knife Sheathes
One of my Bowie Knives has been needing a new sheath for a few decades the original has been dry rotted. It's going to be close in design to the original sorta. I have 2 Bowie's this one I've never used because of the rotted sheath Got it glued up sewn up, stained, snapped and riveted. Had an issue with the snap cap but its about 30 years old. My dads snap anvil may be crap too? Still have to sand the edges and burnish then finish top coat. -
Thats some pretty exotic leather right there!
-
Finished Sheath for Customer!
hawgrider replied to YinTx's topic in Gun Holsters, Rifle Slings and Knife Sheathes
Nice "Browning" deer head. Sheath looks good! -
Farting around with leather.
hawgrider replied to hawgrider's topic in Gun Holsters, Rifle Slings and Knife Sheathes
No but its a little skinny which contributed to some of my holes for stitching being a little to close to the edge on the back side. Thanks all for the comments! Not sure what I'm doing next maybe a sheath for an old Bowie Knife Ive had for a few decades? -
Farting around with leather.
hawgrider replied to hawgrider's topic in Gun Holsters, Rifle Slings and Knife Sheathes
Got it finished. Nice snug retention from the wet mold. 2 coats of Resolene. -
Sold here- https://www.tandyleather.com/en/product/fiebing-s-leather-balm-w-atom-wax
-
Farting around with leather.
hawgrider replied to hawgrider's topic in Gun Holsters, Rifle Slings and Knife Sheathes
Here GeneH you see how the holes closed back up. Here is the backside and you can see I'm haveing a problem getting thru in good alignment. Maybe I should doing the holes front and back without the welt glued in. Then just prick the welt from one side or the other. -
Farting around with leather.
hawgrider replied to hawgrider's topic in Gun Holsters, Rifle Slings and Knife Sheathes
The holes on the last pic were nice diamond holes from the chisel set I have. Just before the pic I opened up the holes with an awl as I me getting ready to sew it up. Those holes will shrink up and take the diamond hope shape again as soon as I wet mold the sheath to the knife. The problem Im having is not so much from the top side. Its the back side that is the issue from not being perfectly straight while hammering the chisel through. The thickness make its impossible to do it in one pass with my new set of diamond hole chisels from Tandy. So sometimes the holes on the back side are out of alignment. -
Farting around with leather.
hawgrider replied to hawgrider's topic in Gun Holsters, Rifle Slings and Knife Sheathes
Thanks I try to improve with each venture. My stitching and edge work did get a little better. Hole placement when the thickness of the leather is deeper than my hole chisels is a challenge. The welt for the knife sheaths make it difficult to get holes placement perfect. I keep trying to come up with a method that narrows the risk of trashing the piece if I land a the holes in the wrong spot. -
1st knife sheath
hawgrider replied to stormdevil's topic in Gun Holsters, Rifle Slings and Knife Sheathes
Looking good! -
Farting around with leather.
hawgrider replied to hawgrider's topic in Gun Holsters, Rifle Slings and Knife Sheathes
Southpaw sheath is finished- Worked on this one over the weekend. Took a Stab at a border with so so results. need more practice for sure- -
Sheridan tote bag
hawgrider replied to Rolandranch's topic in Purses, Wallets, Belts and Miscellaneous Pocket Items
Wow! The tooling is fantastic. -
Nice bag it looks great!
-
Farting around with leather.
hawgrider replied to hawgrider's topic in Gun Holsters, Rifle Slings and Knife Sheathes
Finally got the southpaw sheath wet molded now to let it dry. -
Wheel guns Rock! Nice holster for it. Last minute change to leave the bottom open?
-
Very detailed! Nice !
-
The bag looks great! Now before you go for a ride you may want to avoid the mistake I made. I had a FLSTC Heritage Softail and like an idiot I put a roll tool bag on just like you are doing and I went for a ride and the first big bump I hit the fender took a nice big dent from the roll bag full of tools. Moral of the story I replaced the fender with new and it wasn't cheap. Hope I saved you from making the same mistake.
-
Practicing Basketweave...
hawgrider replied to LederRudi's topic in Gun Holsters, Rifle Slings and Knife Sheathes
Nice work! Looks great to me. -
Farting around with leather.
hawgrider replied to hawgrider's topic in Gun Holsters, Rifle Slings and Knife Sheathes
Thanks folks. The comments are great so my work must not be too terrible. I can take criticism too so don't be to nice to me. And by the way that's only the first sheath of two. The next one coming soon will be just like it but left handed for my other daughter who is a southpaw. See y'all soon thanks for looking!