nylonRigging
-
Posts
479 -
Joined
-
Last visited
Content Type
Profiles
Forums
Events
Blogs
Gallery
Store
Everything posted by nylonRigging
-
SEIKO - What kind of sewing machine is this?
nylonRigging replied to Seom's topic in Leather Sewing Machines
Is it just a Drop Feed ? ( bottom feed-dog only ) ? . with just stitch length/reverse lever on the R-side . It does look like there was a model/plate missing there under the stitch length knob . looks like some discolor where it was till removed, or knocked off . It should have had another small plate riveted on saying where made ? . 'made japan' or 'made china' . but I think that Seiko is Jap. machine. But , If can't find any model plate or anything ??? it might have a factory 'cast stamp' or something more under bottom side of the head if you look . If just Drop feed . I would not choose it to sew Leather with as my 1st choice . ( bottom feed ) , it actually sewed really good for heavy Webbing/fabric . It sewed #277 thread great, and up to #346 only satisfactory . About 1/2" high material is the limit for Needle . It only takes 15 minutes to take down the bobbin assembly and look at the race, Hook, Bobbin ...etc . and put back together. If were me looking to buy .. I would Sew on it and bring a some webbing and throw under the foot and see how the Hook and assembly treating the stitching . -- Looks just like a old ( China made ) 'Mercury' branded Head I had years ago that was just a bottom feed . And they made that Machine Head copied/branded under a mountain Pile of different cover names . The "made in China" heads were just disposables . 'china made' , Run them till sloppy and get rid of . . -
I almost positive you not going to find a model specific flat-bed attachment made for your Consew model . You will have to adapt another table made for different model of similar size . or build new from scratch . I would look first for some compatible to length/size with your Consew cylinder bed . My 1st thought .. was maybe checking to see if ( UWE flat-bed ) for the Pfaff-335 will be close to working size . ? You might get Lucky . it easy to trim a wood top to fit . Also really easy to Drill and thread Tap a new hole here or there on a Machines head to make bolt mounting work . . edit Add: Adaptation of another model table will be hit or miss.. But As far as the UWE table, If you tried . He integrates throat-plate to pass threw the wood top . The holes on his tables will be drilled and mount in holes to that model .. You might get lucky ??? and maybe drill a couple new hole to mount to your throat plate , or with out having to trim for the Consew dogs to fit-up threw . https://uwe.store/products/ut335-flatbed-table-attachment-for-pfaff-335 .
-
I want to restore a Singer 111W153
nylonRigging replied to kevinkay's topic in Leather Sewing Machines
- NICE .. Man that 111 is Really SWeeeeet looking and clean . . -
That good . All you need is a few hours behind it to get a feel for machine and get comfortable . Gear reduction is great especially if you marry it to a servo . I have it both ways servo and clutch motor on machines . I have a big Clutch electric and It slowed down with good torque from a dead stop , but only way to change speeds is changing out a different combo of pulley sizes . Servo is most definitely give you a huge range of RPM choice to select and work with when sitting behind your machine . .
-
If Material is not to thick, for the Needle's length and plunge to make a proper stitch . Along with the material sewn is soft enough for your needle to pass threw . Then No Not going to damage your machine . And machine is not over stressed with you adding more Torque LB/ft energy behind the needle plunge . your ( Singer 111 ) , Having To much torque . . look at it from the side of thought that every once in a while everyone is going to have a BAD Needle strike from deflection . The Needle meeting the ' immovable object ' your Dogs or Throat Plate . You cant get much more sudden abuse than that with the machines stitch cycle . The damage to the Machine 99% of the time is only shattered/busted Needle . Also, with just shoving the Needles shaft rod Up, just knocked out of timing little bit . .
-
Help choosing a servo motor for a ferdco pro 2000
nylonRigging replied to aaronthearcher's topic in Leather Sewing Machines
just my opinion . maybe give some info to making your choices . I think that the servo that draw more Amp runs stronger and less heat under a load . I run 4 of the standard 550 watt servo motors and they all draw 4-Amp . I have one of the brushless 750 watt servo and it draws 6-Amp . It is like night and day when you hop off the 550 to the 750 watt, 6-amp motor . . -
Speed control by pedal force or movement?
nylonRigging replied to Gymnast's topic in Leather Sewing Machines
- Good luck on making a better machine speed control . ( There is not much in between ) . as far as control . You either use your physical 'Feel' with push/pull with hands-feet for spring-lever on clutch or servo motor . Or, it just swings to the total opposite end using little physical Feel of input by your using just a little 'Tap' of the foot or finger for activating a On/Off switch for pneumatic solenoid switch or inboard attached servo motor and electronic board, or your running CNC program, multi-directional free motion stitching . I still pretty far behind 21st century Tech. and my most complicated control is a Bartack with 'ancient technology' Pneumatic/solenoid press-foot lift and stitch cycle . All my other machines are Muscle pushing a spring-lever, with two of them still being old clutch motors . Small custom design like here on this board with leather will always hang on the end with the most invested in muscle memory with an eye on every stitch and pushing a spring-lever with a foot or hand for machine control and speed . You need to build a cheep-$ robot instead of a better switch . My Ass gets sore sitting on a stool behind machines for hours, Personally I want a A.I. Robot that podcasts my favorite listening, that will do all my sewing for me ....LOL . -
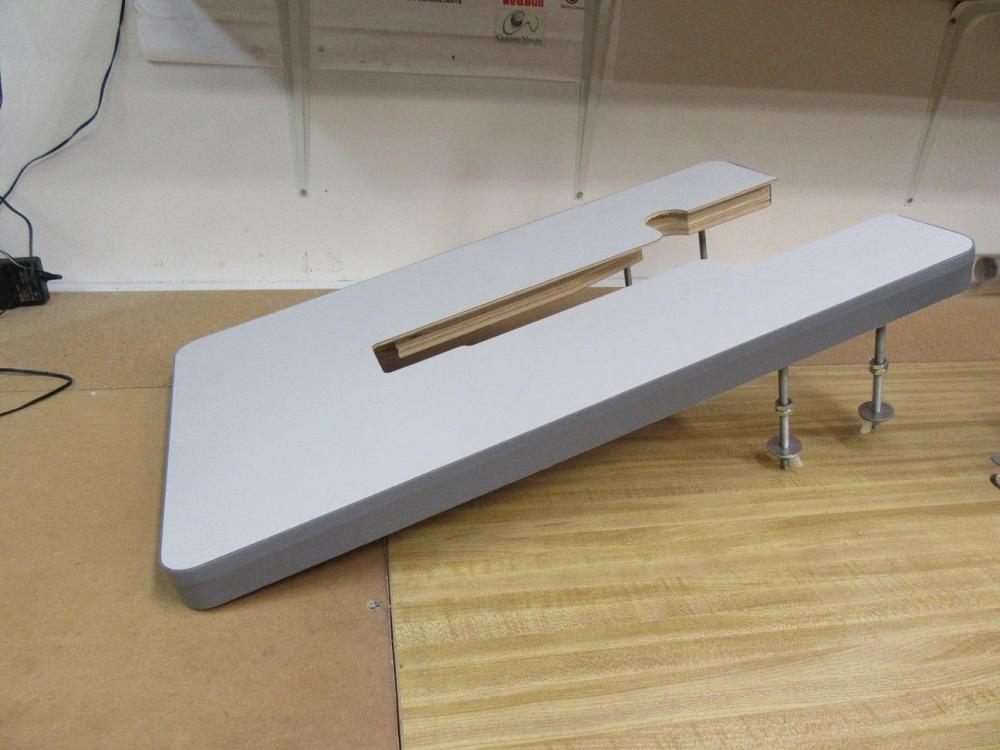
Flat-Bed attachment, off Artisan 3200 . It's spring cleaning and moving things out. Flat-bed was mounted on machine a couple of months . It in excellent shape, was taken off and just sitting on a shelf in the shop after that . ( 45-$ ) plus shipping . . I can take paypal also . Just give me a PM here for info . -
-
Is 20 3/8 machine base correct for 21 inch table?
nylonRigging replied to katit's topic in Leather Sewing Machines
hey.. PM sent . it is found . streamline off line and get back to me on my cell# asap . Text or call . . -
Is 20 3/8 machine base correct for 21 inch table?
nylonRigging replied to katit's topic in Leather Sewing Machines
yes you are right, (was not paying close attention) that link smaller on the width that what you need. But there are a crapload of 112's out there . It is going to be all about finding salvage for that age of hinges . And there are guys with a big collection of heads and parts but if there on a good working head, people not going to part with them . I only know one guy up here with a horde of old machines and heads, I will pop a text to him and see if will dig and look to see if he has a set of old 112 hinges . . -
Is 20 3/8 machine base correct for 21 inch table?
nylonRigging replied to katit's topic in Leather Sewing Machines
Using my GoogleFoo https://www.ebay.com/itm/USED-Industrial-Sewing-Machine-Table-Hinge-Pin-Hinges-/282957384799 - -
Is 20 3/8 machine base correct for 21 inch table?
nylonRigging replied to katit's topic in Leather Sewing Machines
Hey .. I going to change that one Hinge center to ( 3 1/4" ) . I just went and took more time to squared everything up . and that rear hinge really is closer to the ( 3 1/4") like your your 138 . in the Pic. camera angle looks little off, but it just the lens angle . I keep the old 112 set-up for just single-needle 'inside seam' binding tape . 112 is a double-needle machine. But it also works great as single-needle for jobs . It is real old and I have had it forever. I rebuilt the whole both bobbin assembly a few years back and it just keeps on rolling along strong . -
-
Is 20 3/8 machine base correct for 21 inch table?
nylonRigging replied to katit's topic in Leather Sewing Machines
Man that pretty close for you making it a fit . The 112 table is cutout right @ 20 1/2" x 7" And 'these' original Singer factory hinges of the 112 head are Oval-half moon shape and screwed down into the hinge cutouts . And that is what I looking at, and measuring for a center mark . The aftermarket table you looking at has the normal cutout for a longer ( standard rectangle-shape ) drop-in hinge . So you probably have very little trouble getting a good workable fit . . -
Is 20 3/8 machine base correct for 21 inch table?
nylonRigging replied to katit's topic in Leather Sewing Machines
( it say's ) . If it cut for the Signer112 with Hinge placement pre routed . the Placement of Hinges is what I would use for the ( reference/witness mark ) for fit, and it all falling into place . If you taking your Singer 138, and want hinges to fall into place on the cutout of that table . I just went back and measured the Singer 112 sitting in the back . If you take both Hinge center's for a reference point . standing in front of the 112 . with the tape measure placed on the back-side of machine . with the 0" inch end mark, placed on R-side (belt end) of machine . The Singer 112, ' center ' of Hinges fall at the ( 3" ) and ( 12" ) mark of measurement . . edit add: it no biggie after that if you need to do just a little trim or sanding fitting for the felt pads and corner bumpers, for getting the Head falling into a nice setting and height sit . Also same for your oil drip pan you going to need . It 'Easy ' straight forward to make a real nice one . Just get some Galvanized sheet metal and bend with some straight edges and fit in the table cutout . Then just the bare Pan and hit it with some primer and paint if you want before nailing it inside the cutout . . -
Need advice on sewing across transitions
nylonRigging replied to KennethM's topic in Leather Sewing Machines
Sounds about same thing I do also . Transitioning Up/Down/ gaps ...etc. This is what I do . I use different nylon webbing's as spacers/jigs . For stepping Up and Down and Across, to keep the dogs in contact for good continued thread tension and consistent stitch lengths . I always just have a handful of these assorted webbing pieces laying by machines . I will use different Widths and lengths webbing's of 3/4", 1" , 1 1/2" , 2" ...etc . Then, I will also stack (sew together) in different height choices . 1, 2 ,3 stacked together ...etc. . -
Can Anyone Recommend a Small Roller Foot Post-Bed Machine?
nylonRigging replied to pgb123's topic in Leather Sewing Machines
thanks .. for sharing that . i have never seen that small a ( bobbin thread cylinder post ) before in my life . would love to play with one of those for a spell. . -
HI! Greetings from Taiwan (asian craftsman)
nylonRigging replied to wuxuantw's topic in Member Gallery
Very nice and you are artistic to say the least . Your good taste, also takes a solid head for 3-D visualization and working proper order of completion of pattern for all your beautiful work . ....thanks for sharing . -
Can Anyone Recommend a Small Roller Foot Post-Bed Machine?
nylonRigging replied to pgb123's topic in Leather Sewing Machines
ya that Robinson's has some nice sweet machines. Here a Vid. of a cool Post Bed .https://www.youtube.com/watch?time_continue=30&v=tYsWBAO5bhk - -
Lash/Slop in Feed Dog assembly
nylonRigging replied to nylonRigging's topic in Leather Sewing Machines
I did that last evening loosen collar and then push and re-tight . But also I finally noticed that the slide keeper tab #20 was not actually going far enough sliding Right . I had to get out the one of smaller fine round File's and give several strokes to both screw holes on the L-side . and that allowed the holding tab to slide more Left, and take out more of the horizontal slop and that helped a bunch . ....thanks . -
Cylinder bed tables, adapters, handcranks, and more!
nylonRigging replied to luxuryluke's topic in Leather Sewing Machines
Oh Crap It just dawned on me ....LOL . I might be able to take your ( Urethane Belt bonding ) idea and use for making a New rubber tire ( big fat O-ring ) on the inboard bobbin thread winder, On my old Bernina 217N . You cant get those bobbin big o-rings anymore, and I been looking and X-referencing other O-Rings for a long time and it been a NoGo for finding a match . All I need to do is find the right round Diam. and start giving it a try . .....thanks MUCH . -
Lash/Slop in Feed Dog assembly
nylonRigging replied to nylonRigging's topic in Leather Sewing Machines
a couple days back I did loosen those two keeper hex heads on that #26 holding collar, and I took a little play out . ' But ' I did not push direct pressure from the #18 where that C-clip holds . I will do that latter tonight and see if I can get a little more slop removed . ...thanks -
Lash/Slop in Feed Dog assembly
nylonRigging replied to nylonRigging's topic in Leather Sewing Machines
So the loose play is just nature of the beast ? . I knew the steel slide-clip is adjustable and slides back and pulls it to the right and hold inward . But I was just concerned that it was excessive amount of movement ? .....thanks -
What can anyone say on the amount of Lash/slop in the 441 Feed Dog assembly ? Is there a proper way to remove with adjustment ? ....thanks https://i.imgur.com/lebZyfG.mp4 -
-
that is Weird .. not suppose to do that, your lengths stitch should not change unless you manually change them . Probably something real simple that is hard to see right off the bat. may not be the problem ? . But 'Only' thing that pops into my head is maybe raise press foot and hold it just above feed dog . Then carefully look and see if they are 'both moving exactly together' . when you manually slowly roll the hand wheel threw a few revolutions . I don't have 206 RB, but I do got a 146RB, and one time I had linkage arm work loose that connects strait to he outside press feet . It went out of unison/timing with dogs just a little . Thread tension looked great top and bottom with sewing, but it was doing some real funky feeding with stitches that day and took me a couple hours of scratching my head before I figured it out . .
-
Looking for binder attachment for yamata fy335
nylonRigging replied to SIRENco's topic in Leather Sewing Machines
I have had a lot of binders and finding one's that are keeper is a struggle sometimes . & Leather is not my forte, . also, ( I am a needle feed guy ) and that my favorite way to bind seam . I really love old double-needle flat-beds like old 112 /212and the newer juki LH3528 line . but I excel in many years Binding heavy denier cordura's and fabric, with Type-lll and Bias tapes, and I always still learning little fine details . I only have two machines setup right now at stations for both outside and inside seam bind . I have customs binders and some I soldered myself . I solder better than a blind chimpanzee, but I am FAR from soldering like a skilled jeweler . Tenn. attach. Co. makes good systems and there solder work is great 'rugged' for the long run . But You pay-$ for them also . There binding systems tend to run on a 'raised feed dog' because there Binders (sit a tiny taller) are big and soldered beefy on the head/throat for years and miles of tape . but they have the Dogs prefabbed. and ready if you want. Binding seams, both sewing with, and the set-up and adjusting for the tracking and stitch QC are an art in it's own right . Also.. Anytime you buy a custom binder, that does not mean it is just screw it down and start sewing . there are a lot of little thing that you will be learning about setting it up and also you going to get good at trimming and shaping your presser foot for different jobs with different binders. Binding is a whole system . Binder, Presser feet, Dogs/feeding and then there is the binding materials your choosing to run threw your Binder and machine , and they all have to flow together for your QC . . edit to add: LOL.... I just read that you are also dealing with getting binder and binding using heavy foam padding ...LOL . You are really putting yourself thew the learning curve, and binding around different foams are a whole pile of knowledge that you never quit learning how to do. .