


chuck123wapati
-
Posts
7,433 -
Joined
-
Last visited
Content Type
Profiles
Forums
Events
Blogs
Gallery
Store
Everything posted by chuck123wapati
-

spring flowers and good food
chuck123wapati replied to chuck123wapati's topic in All About Us and Off Topic
Stay warm, my friend, and safe. Ice skating isn't what it's cracked up to be. lol -
spring flowers and good food
chuck123wapati replied to chuck123wapati's topic in All About Us and Off Topic
i carry a complete survival bag in both my rigs, with food and stove plus blankets, plus extra gloves, coats and hats lol. With the wind and lack of trees, the winds could kill you in minutes here with no possible way to build a fire in these conditions. When I was about 18 i was stranded overnight in a huge blizzard out in the oil field with two other guys in a pickup truck. We survived by staying awake all night and wrapping our feet together in a xtra pair of coveralls. Here's a tip: if that ever happens to you, drink as much water as you can before it freezes, and you get too cold to. Also all your food will freeze too. We had crackers that night lol dry with no water. they finally found us and got us out about noon the next day to a small town where we were still snowed in at for another day. After about six hours, the coolest ice circles form from your breath that you have ever seen on the inside of a vehicle but not so cool in the morning, the sun comes out and melts them for your first survival shower. -
yup thats nice work.
-
Make a ranger belt; no hardware will touch her body.
-
spring flowers and good food
chuck123wapati replied to chuck123wapati's topic in All About Us and Off Topic
Will Chedder brauts and tater tots work? I don't want to dishonor my clan, Montgomery. -
yeah i know farm Geese arent any friendlier, I sure wasn't waiting around to see which way they were going lol.
-
Has anyone seen this thread on the forum? Every time I see it i get this mental picture of Family Guy ( cartoon character) lying on a beach in Florida in a speedo with the butt of a tiny derringer sticking out from under his massive man boob. "Springbreak shoulder holster building "
-
I had a seagull get caught between the mirror and me with the window open in my truck one day at the city dump. damn thing about beat me to death before he/we got loose lol. My son was with me and laughed his ass off, Yellin, get him dad yer winning. Last year, while fly fishing, a pair of geese with younguns sprang out of the brush about ten feet from me. They honk and flap their wings to startle the threat so they can evade, and damn i thought I was a dead man for a minute i turned and they went by me about 40 mph it seemed lol geese look really big when they flair thier wings. Again, my son was watching from afar and rolling on the ground, Whats wrong dad they scare ya?
-
That's amazing. He shouldn't even have to come down off a ladder for lunch lol. Beautiful craftsmanship!!!
-
the links on this one work.
-
spring flowers and good food
chuck123wapati replied to chuck123wapati's topic in All About Us and Off Topic
Some folks believe Wyoming is just a myth. Have you ever watched the x files? The truth is out there lol. https://bigthink.com/strange-maps/wyoming-doesnt-exist/ -
Nice 73,😍 I love lever guns. They are just cool all over. I am green with envy, all I got is an old trapdoor Springfield lol. Thank you, I have braided about five times, mostly round hat bands. But I figured out it's in the prep work, like most things, edging, and beveling a piece of 4 oz is a pain lol, but worth it. 1/4" strap of 4 oz, bevel and burnish the skin side first, then skive the flesh side edges. Thank you.
-
Thanks Thanks, man, I try.
-
first pancake holster
chuck123wapati replied to Thadrick's topic in Gun Holsters, Rifle Slings and Knife Sheathes
You did it right, excellent work!! I'm not good enough to use white thread yet; it really shines when the stitches are as good as those. -
spring flowers and good food
chuck123wapati replied to chuck123wapati's topic in All About Us and Off Topic
This is exactly where I live. When we travel, most locals rate their drive on I80 by how many accidents they pass along the way. Today it's only supposed to be"breezy." 13mph with 35 mph gusts lol, sometimes there isn't much time between gusts, but it gives you time to catch your breath. The truth is out there!!!! -
I would love to try it sometime, it would definitely be a good old day lol.
-
At least it's a bit different. It's a sweet gun for sure, his is 45 70, it'll launch a water bottle lol. Thank you.
-
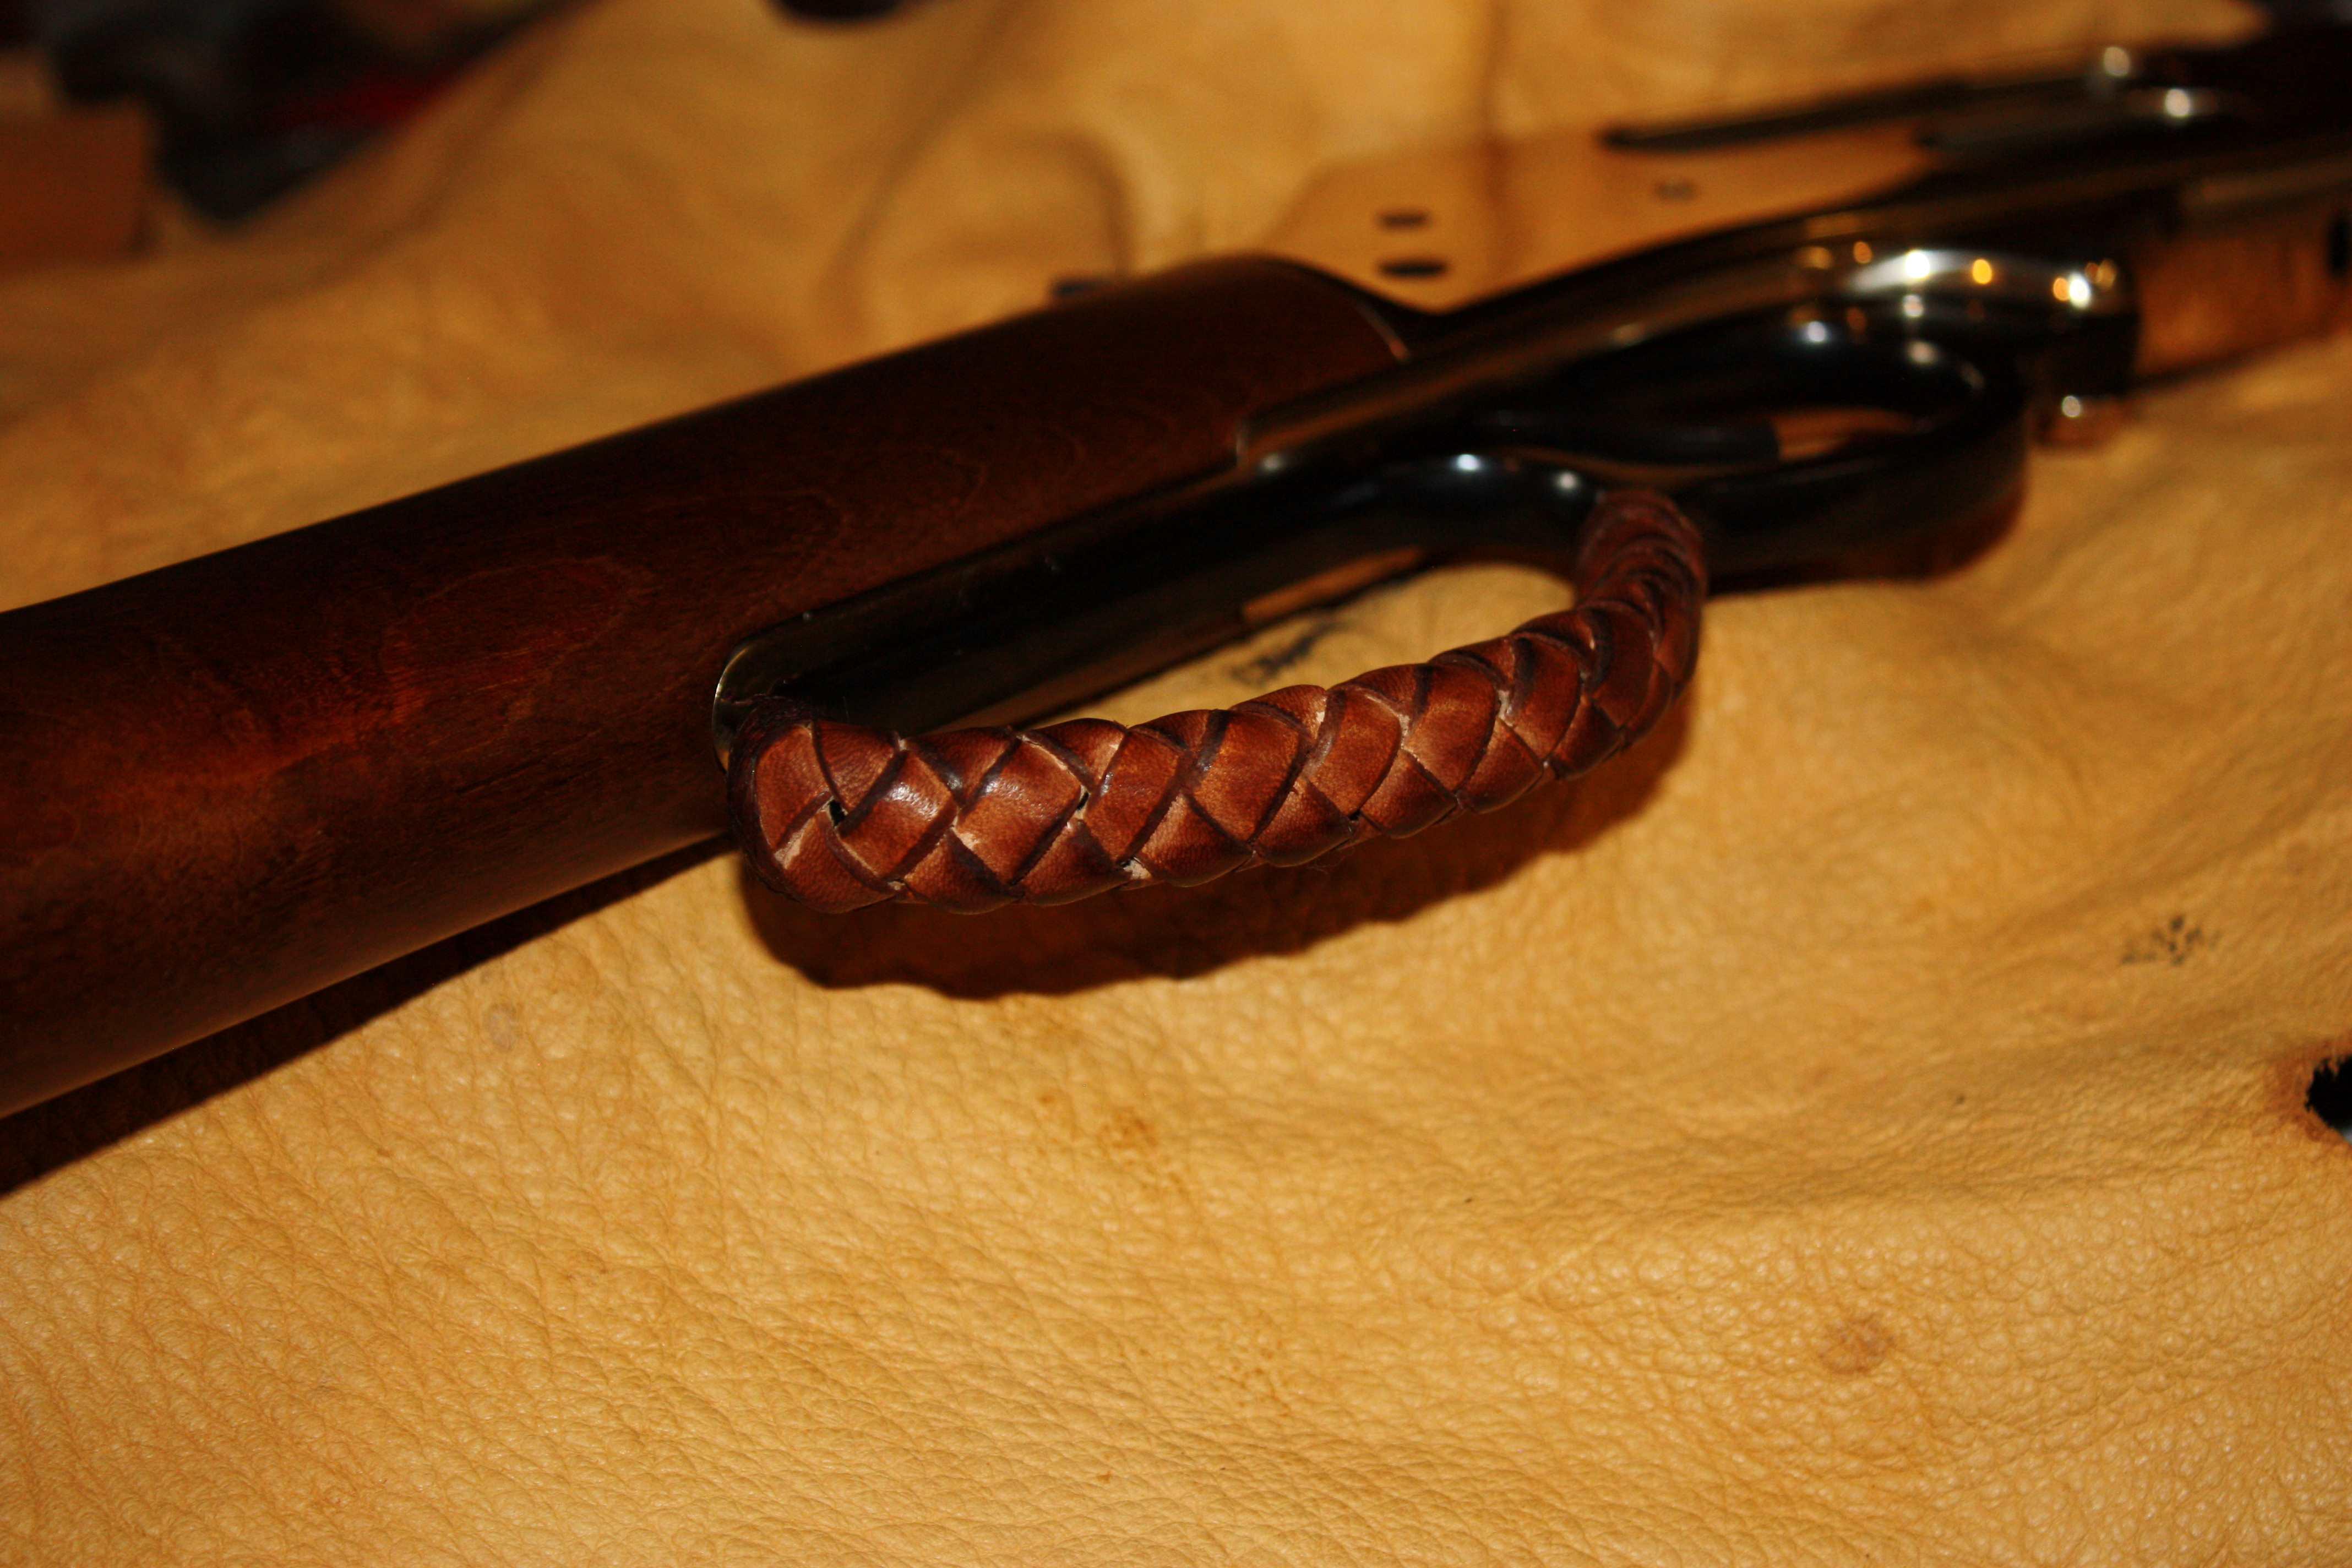
My son bought a new rifle and showed me this clicker-stamped sew-on thing on the net, actually said it was handcrafted. I didn't know running a clicker press was considered a craft. Well, anyway, it can be done differently, especially for a Henry lol. The 1/4" veg tan lace, skived and burnished, took about an hour of prep. Finished with real sinew, stained Bison brown.

-
Those Vikings had some pretty nice stuff.
-
Really nice work!!! You could thin down the leather a bit for human use if you're going to build them to sell, lol. But it will last a lifetime or two.
-
spring flowers and good food
chuck123wapati replied to chuck123wapati's topic in All About Us and Off Topic
Beautiful animals!! -
-
Permanent ink pen for cartography project?
chuck123wapati replied to hansgruber's topic in How Do I Do That?
Sheep skin Parchment has been used as paper for centuries and still exists; you can buy it, and it would be more period correct than chamois. You can use almost anything you can put on regular paper, just do some testing for bleed out. -
spring flowers and good food
chuck123wapati replied to chuck123wapati's topic in All About Us and Off Topic
It was considered the most sanitary method for sheep at the time and has been used successfully for far longer than modern methods. We used to help with calving and docking just to get a bucket of fresh oysters lol Young and fresh from calves are the best, but sheep are good too. Man, branding is a chore every young kid should help with at least once in their life. Plenty of dirt, crap, and bruises to go around lol, it's hard work but teaches a lot about community and family. -
spring flowers and good food
chuck123wapati replied to chuck123wapati's topic in All About Us and Off Topic
LOL, now you have a new years goal, good luck!!🙂