Scootch
-
Posts
143 -
Joined
-
Last visited
Content Type
Profiles
Forums
Events
Blogs
Gallery
Everything posted by Scootch
-
Do you have a photo of what you want to build? There are old threads on here from Melton and Jason of jb cases is you search. You can buy interiors from JB if you dont want to fool with tubes. Scootch
-
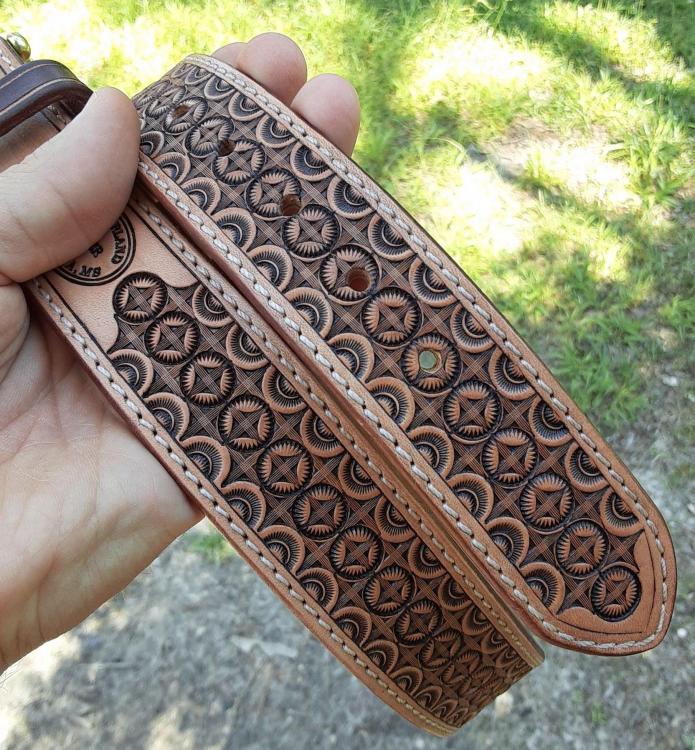
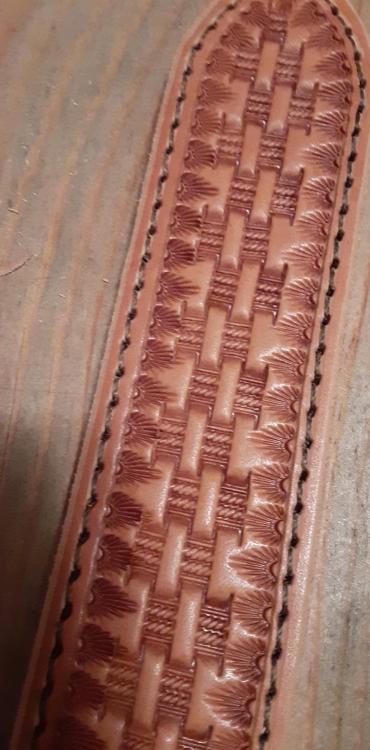
This is a belt I made for my son. The pattern takes up 32 inches. There are a total of 378 a impressions. The total stamping time time was 90 minutes not including layout and cutting the boarder. Since I'm pretty new at this I'd like to know how long it would take you all to do the same amount of work. To date I've made 4 basket stamp, this one geo and one carved/tooled belt. I've turned folks down because I want to get my skills up and determine appropriate pricing as well as being able to set reasonalbe goals for the amount of time it takes me to completely make a belt. I was thinking about determining how many stamps per inch would be on a belt with my stock of stamps and laying out a "time to stamp" to help determine pricing. Thanks, Scootch
-
Getting good straight cuts and issues with stitching.
Scootch replied to rckt1rcn's topic in How Do I Do That?
Are you trying to cut belts or short straight lines of a pattern. If the lines are short you should be able to cut them freehand. Practice on scrap leather cutting 6inch lines or so. Take your time. There is no deadline. If the edge bevels are not even your knife will try to veer off the line. If your knife isn't perpendicular it will try to veer. If your knife is not sharp as it can be you'll have to pull or push harder causing you to veer. Take your time and focus.. if the leather is damp or cased it will cut more easily. Also you dont have to cut completely through on the first pass. Make sure your substrate isn't soft where your blade digs in. If your lighting is poor and you're dealing with shadows it will be harder to stay on your mark. Just some thoughts. Scootch -
shooter saddlebag
Scootch replied to WyattEarp's topic in Gun Holsters, Rifle Slings and Knife Sheathes
Thank you Sir! -
shooter saddlebag
Scootch replied to WyattEarp's topic in Gun Holsters, Rifle Slings and Knife Sheathes
Beautiful work! What geometric was used on the border? Thanks, Scootch -
Bruce, The first I heard of Wayne was in your interview with DGS on "Lost Trades" podcast. I didn't realize it at the time but after Terry got back with me on the flower center I saw on his saddle I went back to the pod cast to see if y'all were talking about the same tool maker. It was pretty cool how it turned out that way. I'm currently reading Bob Brenners' "How to Establish Prices for the Saddlemaker or Leatherworker" that you referenced. This book will easily pay for itself with in a few small projects. Thanks for you contribution. Scootch
-
I just wanted to share a tool maker I found out about three or four weeks ago. While looking at tooling on various saddles online there was a flower center I hadn't seen before. After contacting the saddle maker to find out where to get the stamp he told me it was made by Wayne Jueschke. I ended up getting a couple of flower centers, box geo and triangle geo of the same size and a serpentine from Wayne. I have not seen any tools with such sharp crisp machining and impressions. His tools are made of steel and very well detailed. Most of my tools are from BK, a few from Jeramiah Watt and a few from Robert Beard but Waynes' surpass these makers in sharpness of machining and impressions based on my small sample of inventory. The tools are not cheap but he has many unique tools you won't find elsewhere. This transaction with him is the only time I've interacted with him. Just thought I'd pass it along because I'm satisfied with his product. Scootch
-
This isn't really a tool list but a list of essentials for me. Good lighting and a solid work table. Some sort of thin cutting mat between your work and the table surface so you don't damage your tools. Clear packaging tape to line your paper patters with so they paper pattern doesn't get wet. Ball point pens to use for a stylus (transferring your pattern to the leather). Find patterns that someone has tooled so you can see what the finished product is suppose to look like. Tankote and Fiebings antique paste. Make sure your tools are checkered and not smooth. This helps the antiquing process. Scootch
-
First pancake style holster. Need help for next one!
Scootch replied to Akers's topic in How Do I Do That?
You should be able to get good detail with 5/6. I've never tried molding a holster without a vacume bag. I use the set up that Adams leather works advocates. A harbor freight vacuum pump and a vacuum bag from a wood working shop (don't remember the name. I've also only made one 50/50 pancake holster. I like to make the flat back pancakes. I cannot tell for sure which yours is. You're not going to hurt the leather if you get it too wet. I usually submerge the holster in regular temp tap water for 20 seconds. Pull it out and let it soak up what it's going to soak up them dry the rest off with a towel and throw it in a gallon ziplock over night or for a couple of hours before I form the pistol. I also dye before I soak, soaking and wet forming seem to even out the dye job. There's a bunch of errors on this one... but it's a lined holster of 3/4 oz, so thats two layers and the reinforcement adds a third layer. Lined holsters are harder to detail. Scootch
-
First pancake style holster. Need help for next one!
Scootch replied to Akers's topic in How Do I Do That?
What weight leather are you using?Thinner leather will give you finer detail. Scootch -
I carry a pancake trapper sheeth, that I dyed black, for about the last year. It still transfers black to any belt I put it on after about 4 wearings. I've started playing with air brushing some. You can get good deep dyeing with much less dye by spraying. Maybe less dye would help if you try it again. Scootch
-
As long as the barrel rotates freely and you have a good quality blade that will keep an edge, I'm not sure you'll see much difference. You might try a knife with a different size barrel, saddle or one with more adjustment. I have 2 Bks and a Clay Miller. I keep different type blade in each one. Scootch
-
I think the best way to have a good edge is to have nice clean cuts with minimal trimming. I don't have good luck sanding before glueing due to the flesh side getting soft and leaving a pithy look to the seam after finishing. Use a good leather, not one that gives a lot of fuzzy edges when sanding. For example, choose welt material from the butt instead of the neck or belly area. With good leather and good cutting a nice edge can be achieved by burnishing with only water. If you're dyeing your edges make sure whatever edge enhancing stuff your using will accept dye. Sometimes after I glue and trim I'll wet the edge and let it get dry and hard before sanding. For thick edges use a sharp beveler in the size 3 or 4 range. That will give a good round edge and cut down on the amount of sanding needed. If choosing to use any advice make sure to practice on scrap first!
-
This is what I do as well. I usually make my first and last hole with a round awl. I also believe a stitch groover weakens the leather a bit but a knife sheath isn't going to see hard enough use to know the difference and I find it easier to keep the pricking irons in line with a groove than with a crease. Also when I pull my stitches tight I pull them at the angle I want them to go. It seems to help. Scootch
-
Andrew custom leather uses garment leather for his shoulder harnesses and veg for the holsters. His shoulder harness is suppose to be a good one. His design doesn't require belt loops either. You can look it up on hank strange videos. He has a how its made video of the monarch shoulder holster.
-
Looks to me like you were using a two prong pricking iron and got two strikes a little off. Are you creasing you're stitch line or grooving? I find it easier to keep things straight with a groove. Scootch
-
The only single ply belts I've made have been with 13oz hermon oak skirting. I've really been wanting to buy one of these double butts... https://buyleatheronline.com/en/home/73-veg-tanned-double-butts.html#/8-color-beige_natural/38-average_size_of_the_whole_piece-18_m_20_sq_ft_22_yd/56-thickness-4_mm/74-grade_quality-best_1_grade/161-size-whole_piece Scootch
-
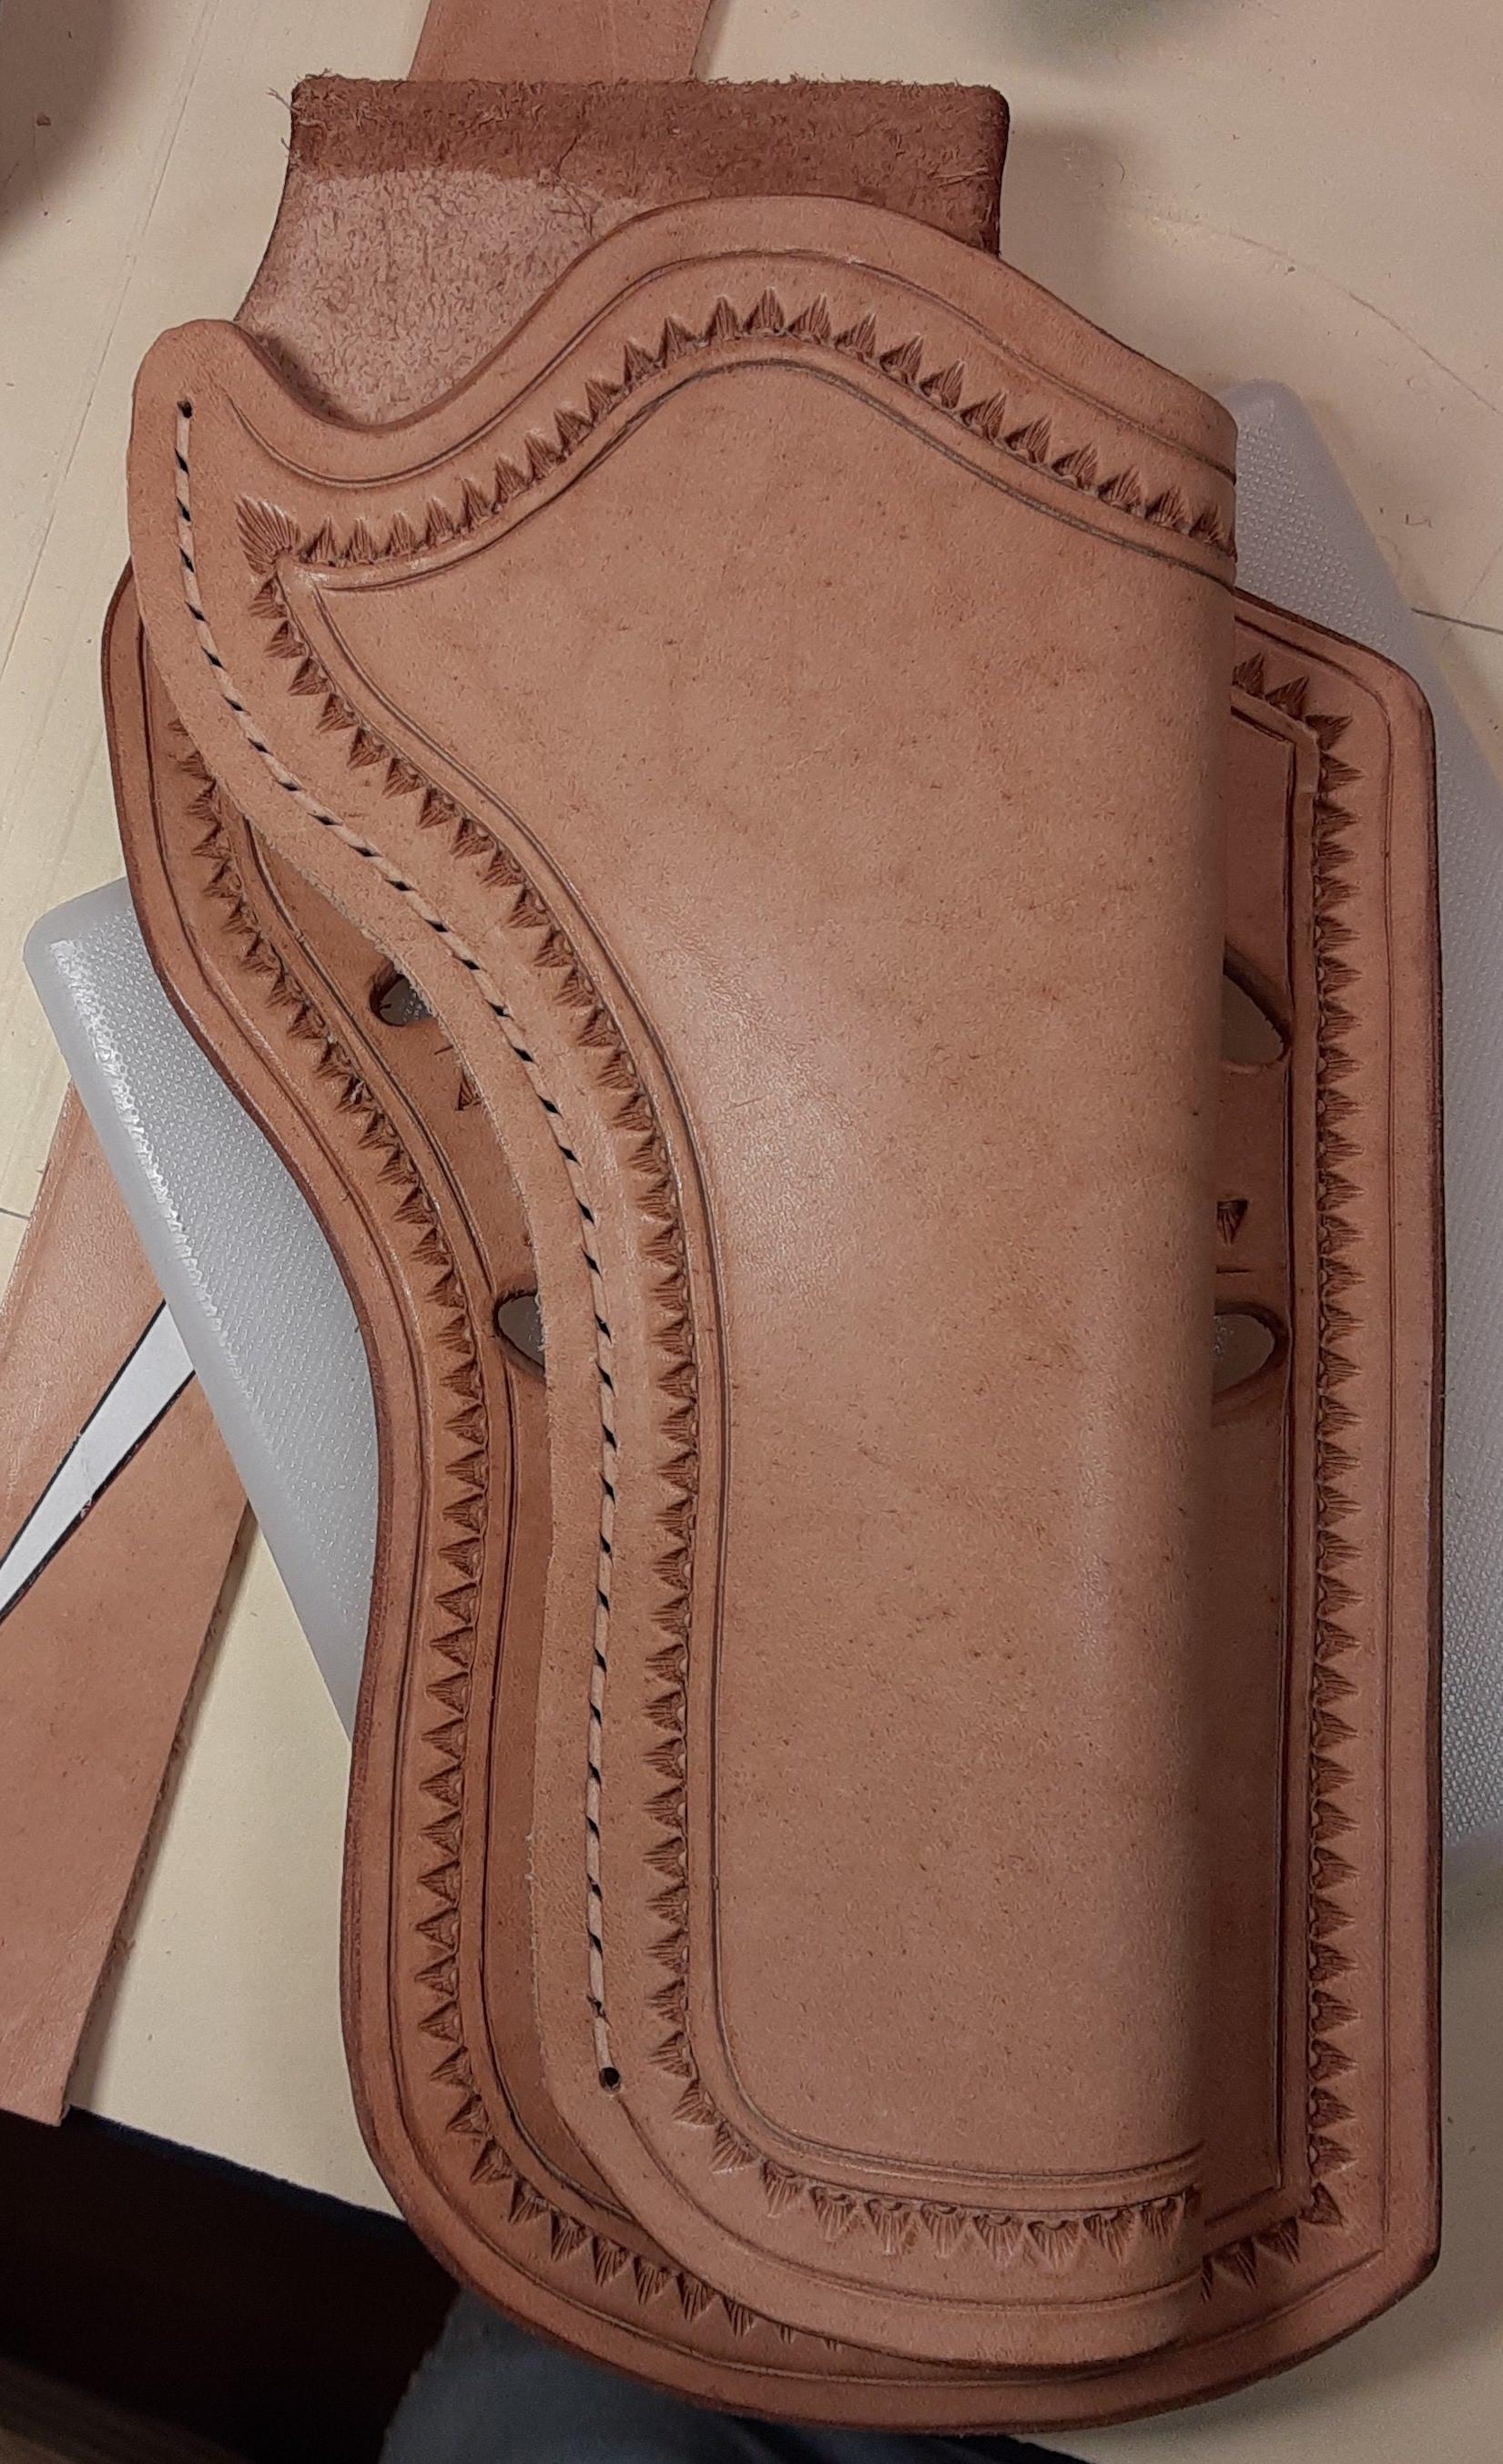
Thanks for the replies. I finally finished up. The first is of the photo type. It's embarrassing how bad I missed the stitch line. I made it as a flat back thinking it might wear better but changed my mind on the second one. The buyers primary interest was to be comfortable while seated in a vehicle and to not poke him in the gut too bad so I tried to keep the size minimal and used a single loop. The holster is canted somewhere around 63 degrees. The proto type was made from the shoulder neck area and the final holster was made from the butt. It was awful tight. I probably spent two hours stretching the holster enough to get the gun and belt loop to be useable. I made the welt minimal width to keep the holster size down but it broke a needle on my boss so I ended up hand sewing the welt. The reinforcement also wrinkled due to having to bend the holster for sewing. All and all I'm pretty satisfied with how it turned out. The holster shrunk causing the pistol to ride about 1/8" shallower in the holster than I intended. I took the stitch line from tracing the moulding shape from the photo type. I learned a lot on this one!
-
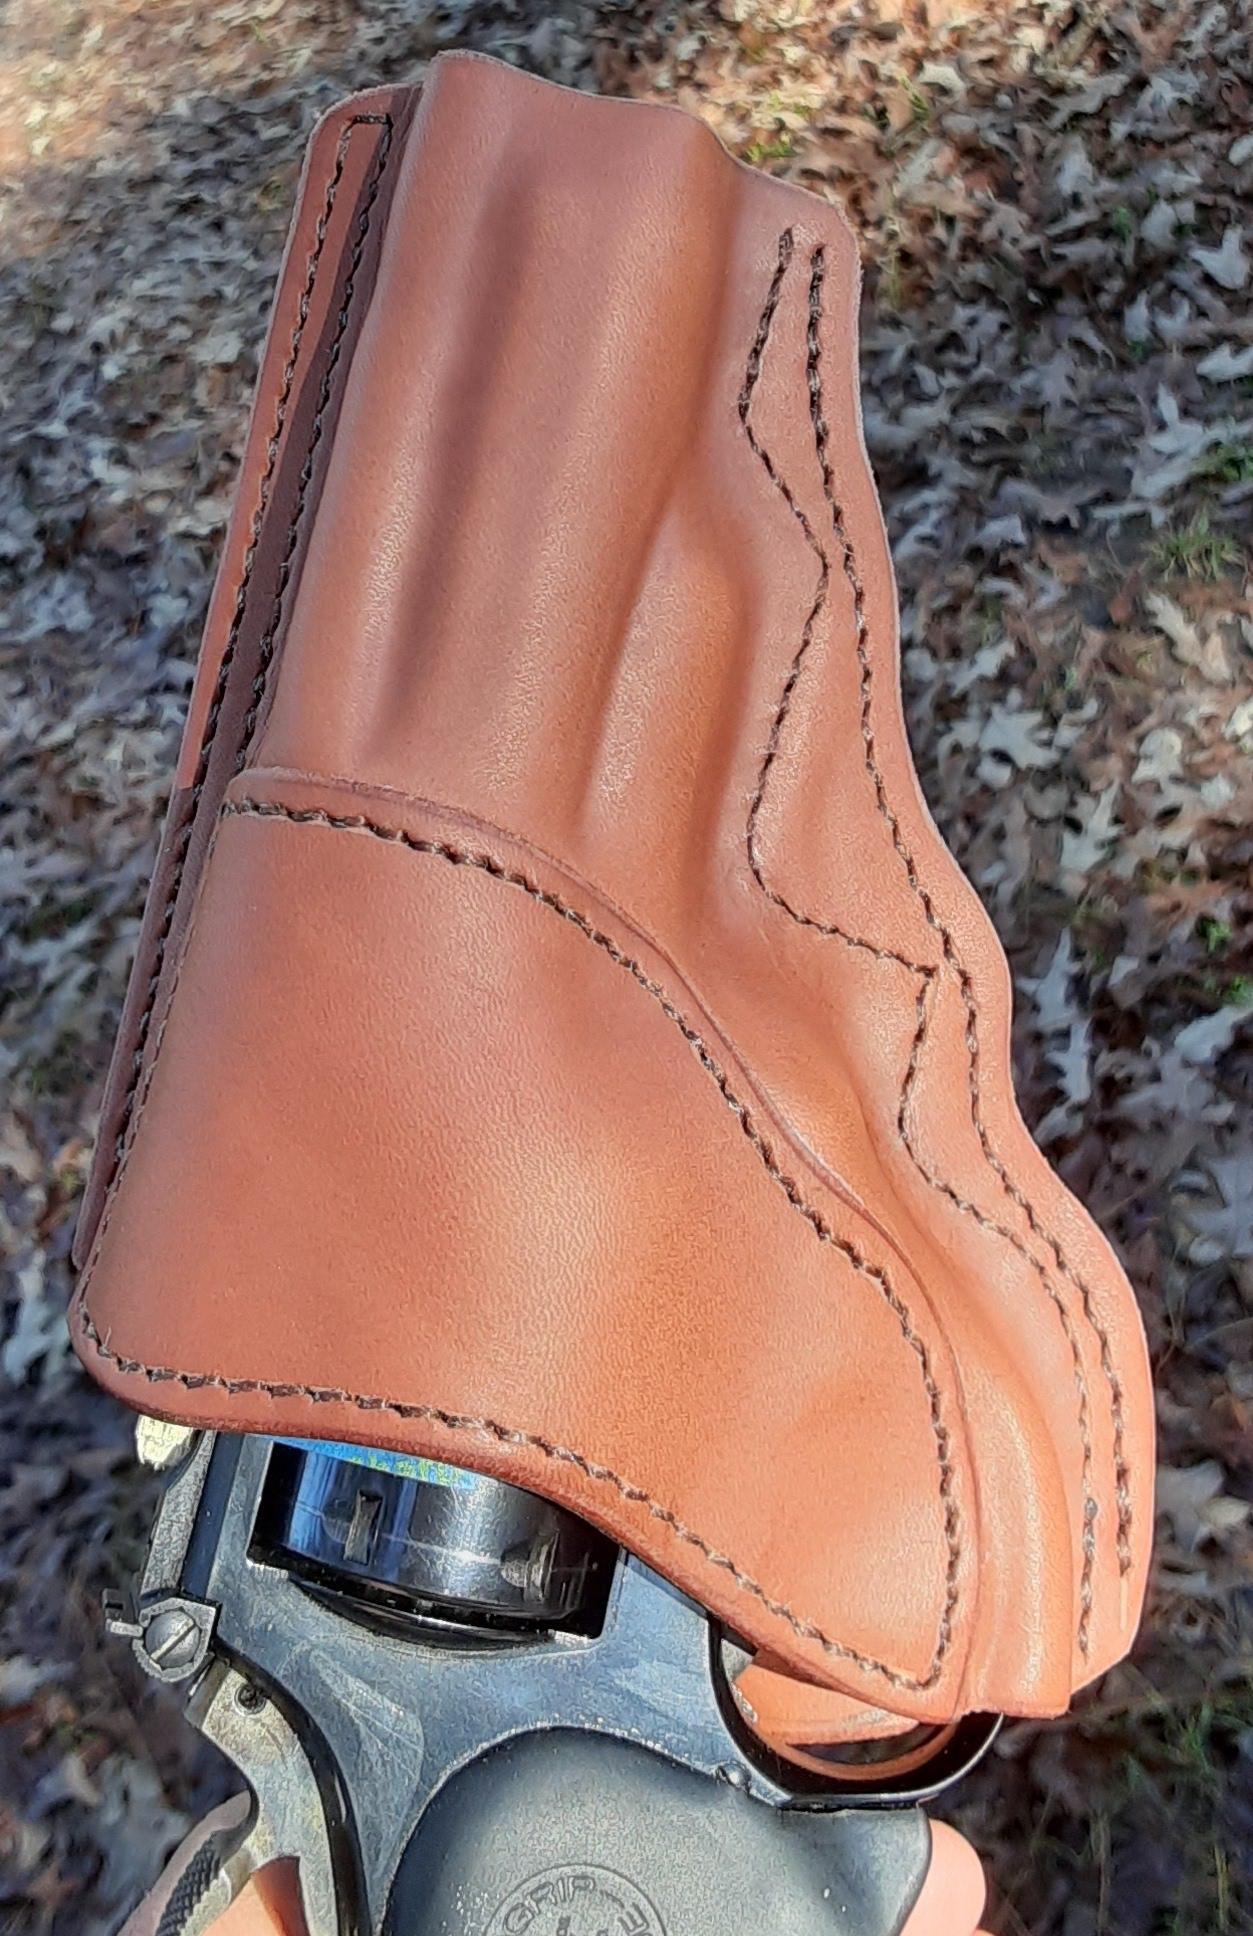
I've been working on a cross draw holster for a SW 19. This is the first double action revolver holster I've made. The pocket turned out a little too big and the stitch line was embarrassingly off but the overall intent of the holster was good, cross draw to be used from a seated position. My second pattern is tweaked and will be much better. I've given the holster to my customer to we are around for a while to make sure the fit is good and the belt angle is going to work out. So far so good. What I'm looking for are some photos of Double action molded revolver holsters to see how other folks are running the stitch line. On my second go around I'm going to add a welt. I'm also a little concerned about the sight channel coming out as well on the second one since the over all pocket will be smaller. Thanks, Scott
-
This is a Herman Oak belt blank and was cased with a damp paper towel. This would show burnish if your finger nail drug across it on accident.
-
This is an old pice of Tandy double shoulder. It was cased with a damp paper towel. This amount of burnish is par for the course with this shoulder.
-
That looks nice. Someone mentioned the DG youtube video. His method is what I use. Maybe its the exposure of your camera but your leather looks to be really light in overall color, I think the antique would look better if the leather was darkened by oiling before antiquing. On the other hand, I basket stamped a belt with intentions of antiquing but the Herman oak burnished so nicely the color contrast was great so I just died the edges and applied tan kote and left it at that. I've never air brushed tan kote but a few weeks ago I airbrushed a holster with 5050 Resoline and water, for the first time, and was very pleased with how it turned out. I was using a painters airbrush at 35 psi with the large needle and cone. It applied very thin and even. Scootch
-
Also make sure your resist isn't put on too thick as to fill up the fine lines. I haven't tried it but you can also thing your antique with tan kote. That might thin it enough to settle in the finer details. Top coating with tan kote will always remove some antiquing. I've always used tan kotw as my resist but plan on trying resoline soon. Scootch
-
I talked with him on the phone yesterday for a little while about his DVD's. He's an extremely nice fellow and you can tell he enjoys sharing his ideas on floral carving and tolling. Scootch