


Brokenolmarine
-
Posts
599 -
Joined
-
Last visited
Content Type
Profiles
Forums
Events
Blogs
Gallery
Store
Everything posted by Brokenolmarine
-
All around great work. Clean crisp design, excellent background, stitching is beautifully executed. Sheath compliments the knife.
-

Chiappa Rhino 60DS drop holster (stange situation)
Brokenolmarine replied to DoubleKCustomLeathercraft's topic in Show Off!!
I agree with the others, nicely done. Well designed, quality work. Look forward to the pictures. -
Very nice. Something she will be proud to carry, and even prouder to announce as "one of a kind."
-
Fender repair...
Brokenolmarine replied to Brokenolmarine's topic in Saddle Identification, Restoration & Repair
I told them they needed replaced, they told me to use them. I was going to make new leathers. They told me to use the old ones. If they decide to replace them when they come up. I'll order new leathers and blevins, and drill out the rivets. I don't ride, so I go by what they told me. -
Fender repair...
Brokenolmarine replied to Brokenolmarine's topic in Saddle Identification, Restoration & Repair
I wasn't able to before but may have figured out a way to do it now. I was thinking it would be a good idea because she doesn't take the time to clean, so even glued, that screw might come loose. -
Fender repair...
Brokenolmarine replied to Brokenolmarine's topic in Saddle Identification, Restoration & Repair
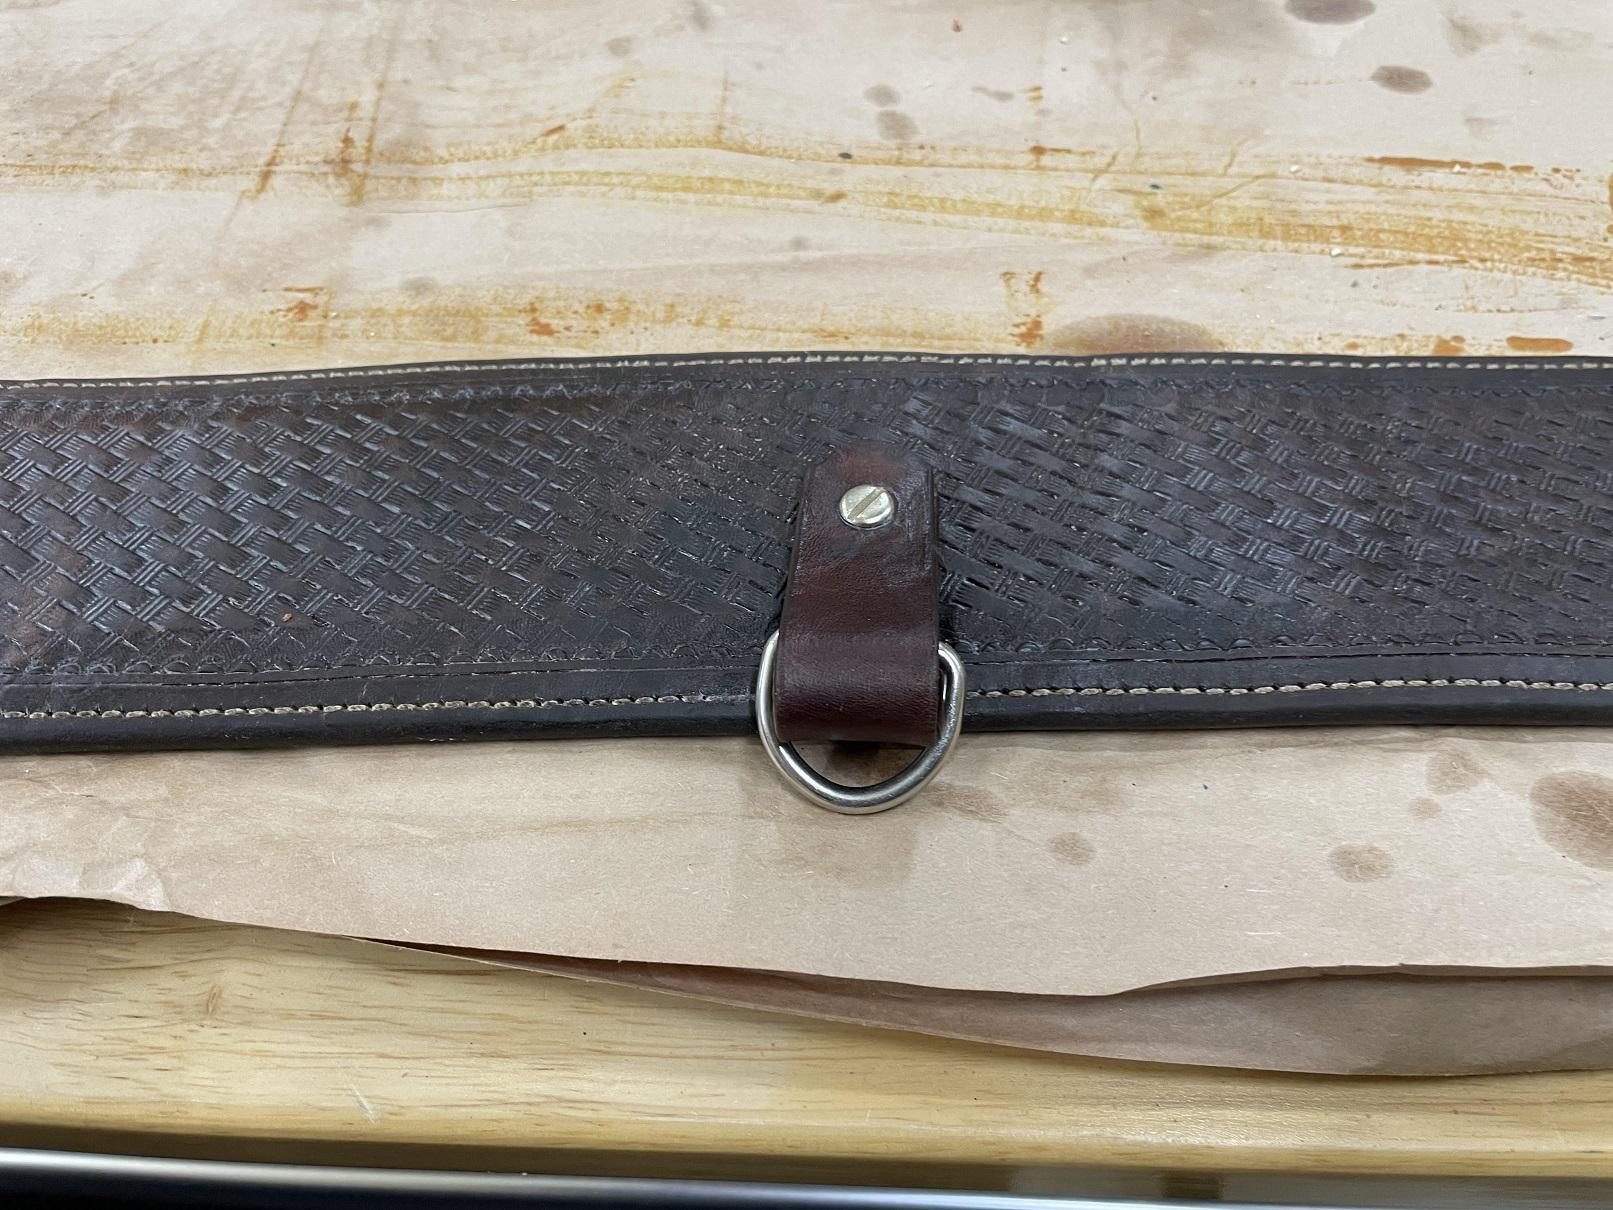
I also needed to repair the Belly Band, (or whatever it's actually called.) The owner didn't keep the leather clean, it was covered in sweat, dirt, and oils. I cleaned it with saddle soap and a toothbrush. My repair was to replace the broken loop that held a D-ring. Miss T was going to cut back the stitching so I could remove the rivet and the old loop, then replace them. Then I would saddle stitch the removed stitching. She took the band into her shop, pulled about 1-1/2" of stitches and discovered they had glued the two panels together. So I cut a square into the back of the band, and drilled out the rivet. The loop was glued into place as well. I cut out as much of the old loop as possible and made a new loop, and put it on with a chicago screw. Worked well. A closeup of the new loop. Unlike the pics of the fenders, this piece hasn't been treated with Mink Oil yet. I also made new laces so she could wrap the fenders near the blevins like she prefers. I wasn't going to try and recreate that. The project is pretty much done at this point. I'll be back to sheaths and holsters, a belt now and then.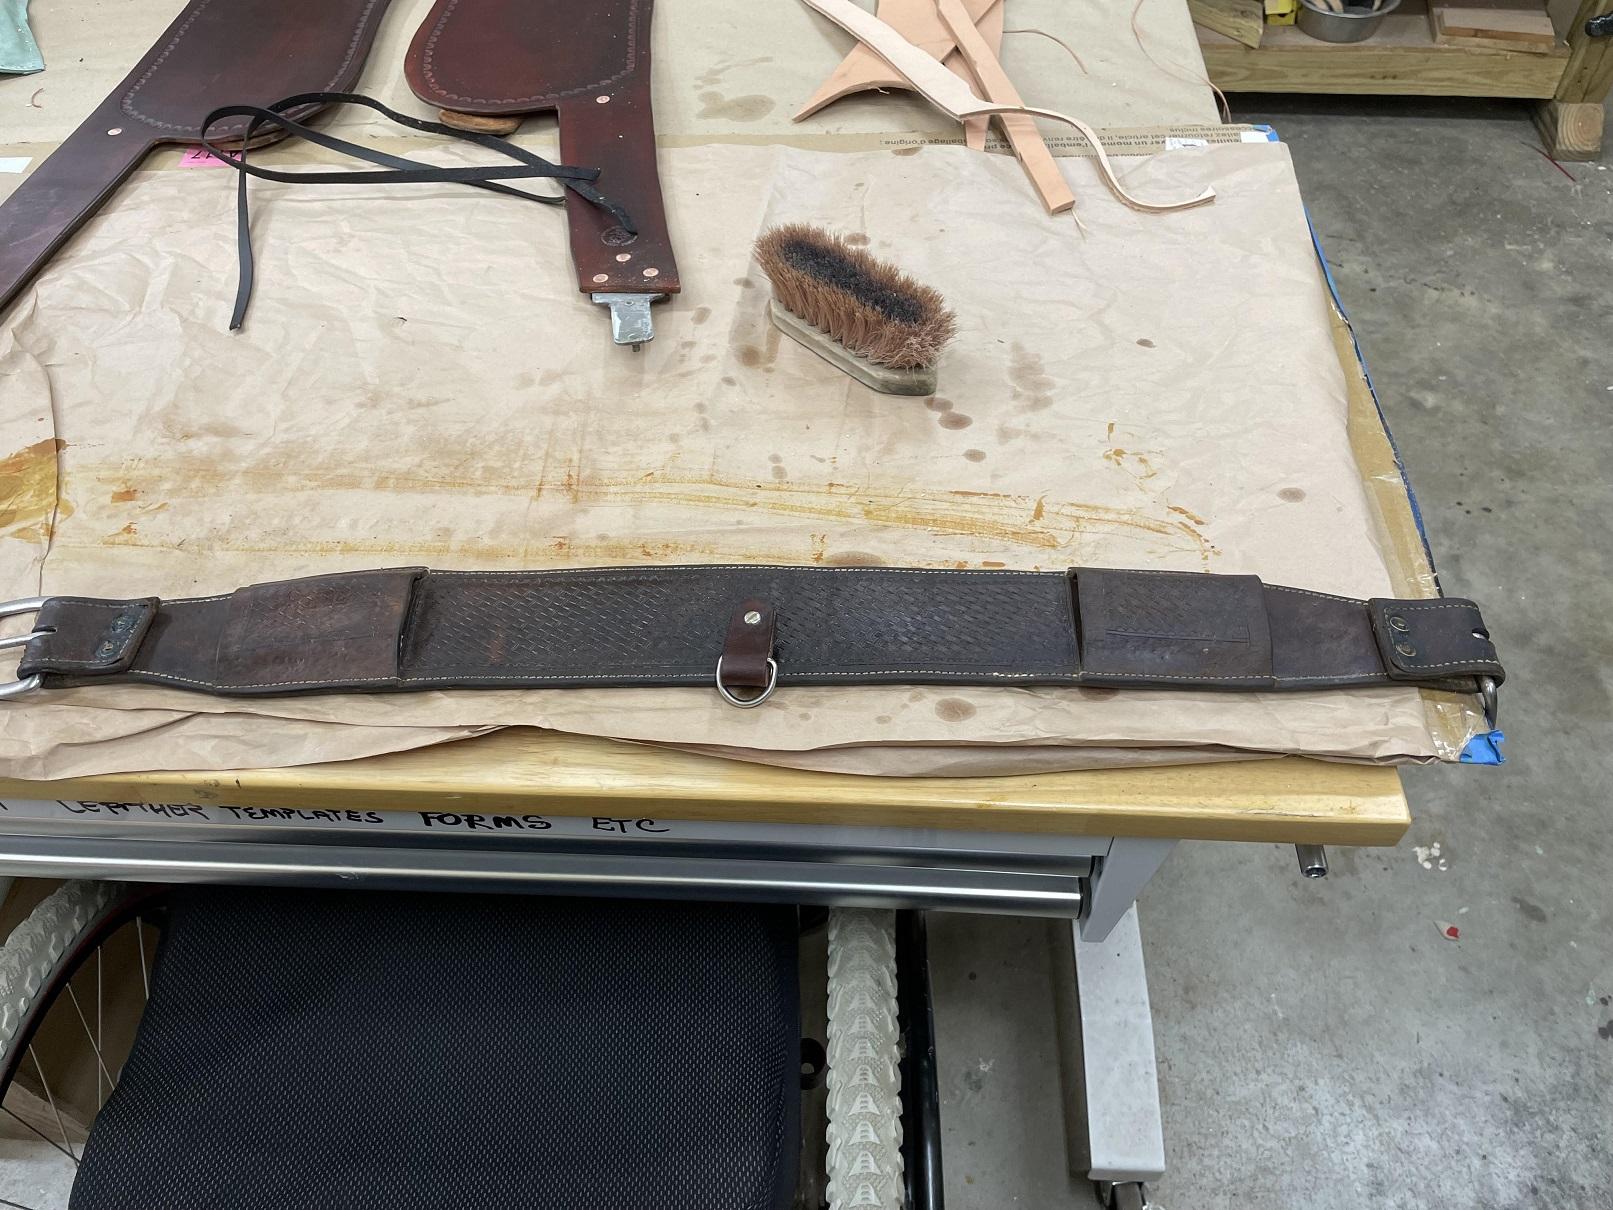
-
Fender repair...
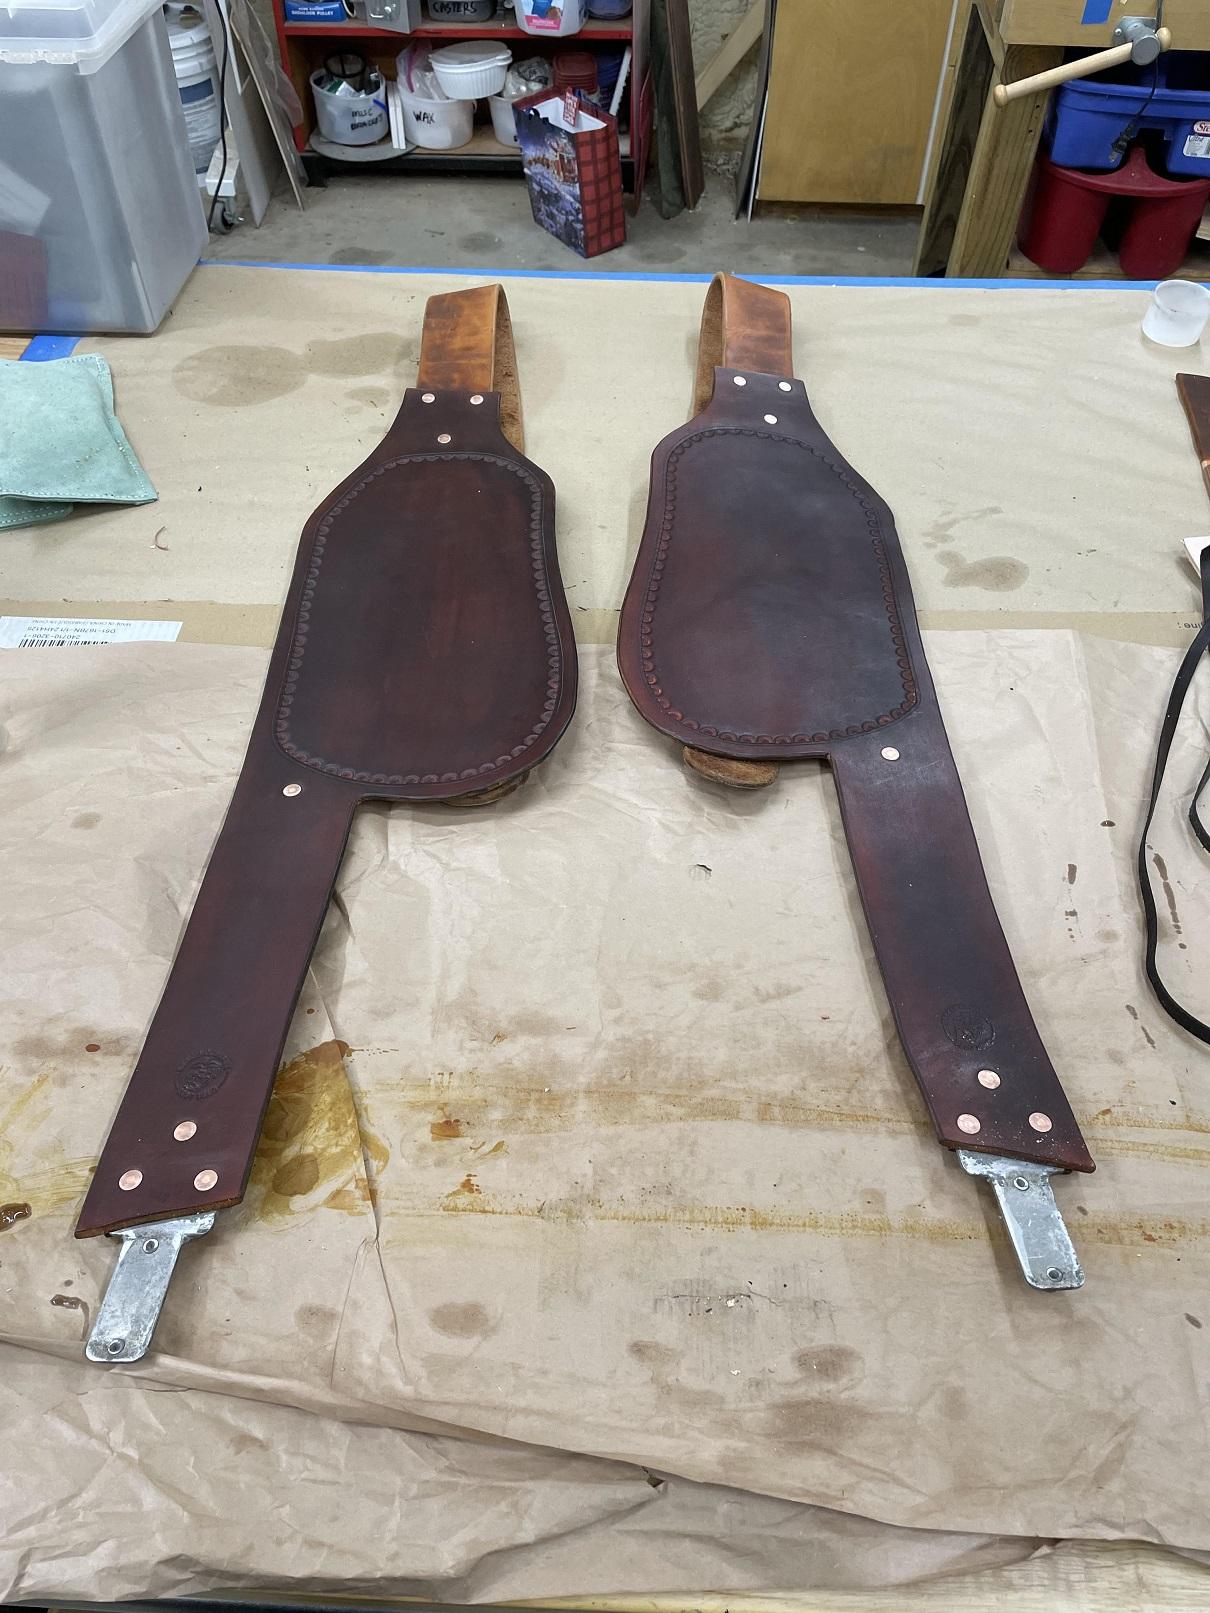
Brokenolmarine replied to Brokenolmarine's topic in Saddle Identification, Restoration & Repair
Wow, been away from the topic for a while. Weather. We had ten days of snow and ice and because of my physical challenges the wife won't let me out to go to the shop when the footing is challenging. Thirty surgeries so far and don't need thirty one. LOL. The weather finally turned decent and I was able to get back out and finish the work. I was also waiting for hardware. I had ordered rivets and burrs, but the first set that came in were too short at 1/2", I reordered 1" rivets, and Springfield is a great company, but slow. It took a week. I also ordered more Mink Oil, it was a lot faster coming from Amazon, two days. No matter, stuck in the house ten days. The view of the Fender Assembly from the rear: I didn't remake the stirrup straps, the owner didn't ask for them. I reused the blevins for the same reason. But, everything went together well. The shape of the back pieces is by design, she will curl them and lace them to keep them curled. The view from the front.... For a first attempt, I was happy with the result. My daughter sent her friend pictures and got back a one word reply. "Wow!" I guess she was happy, that's all that matters.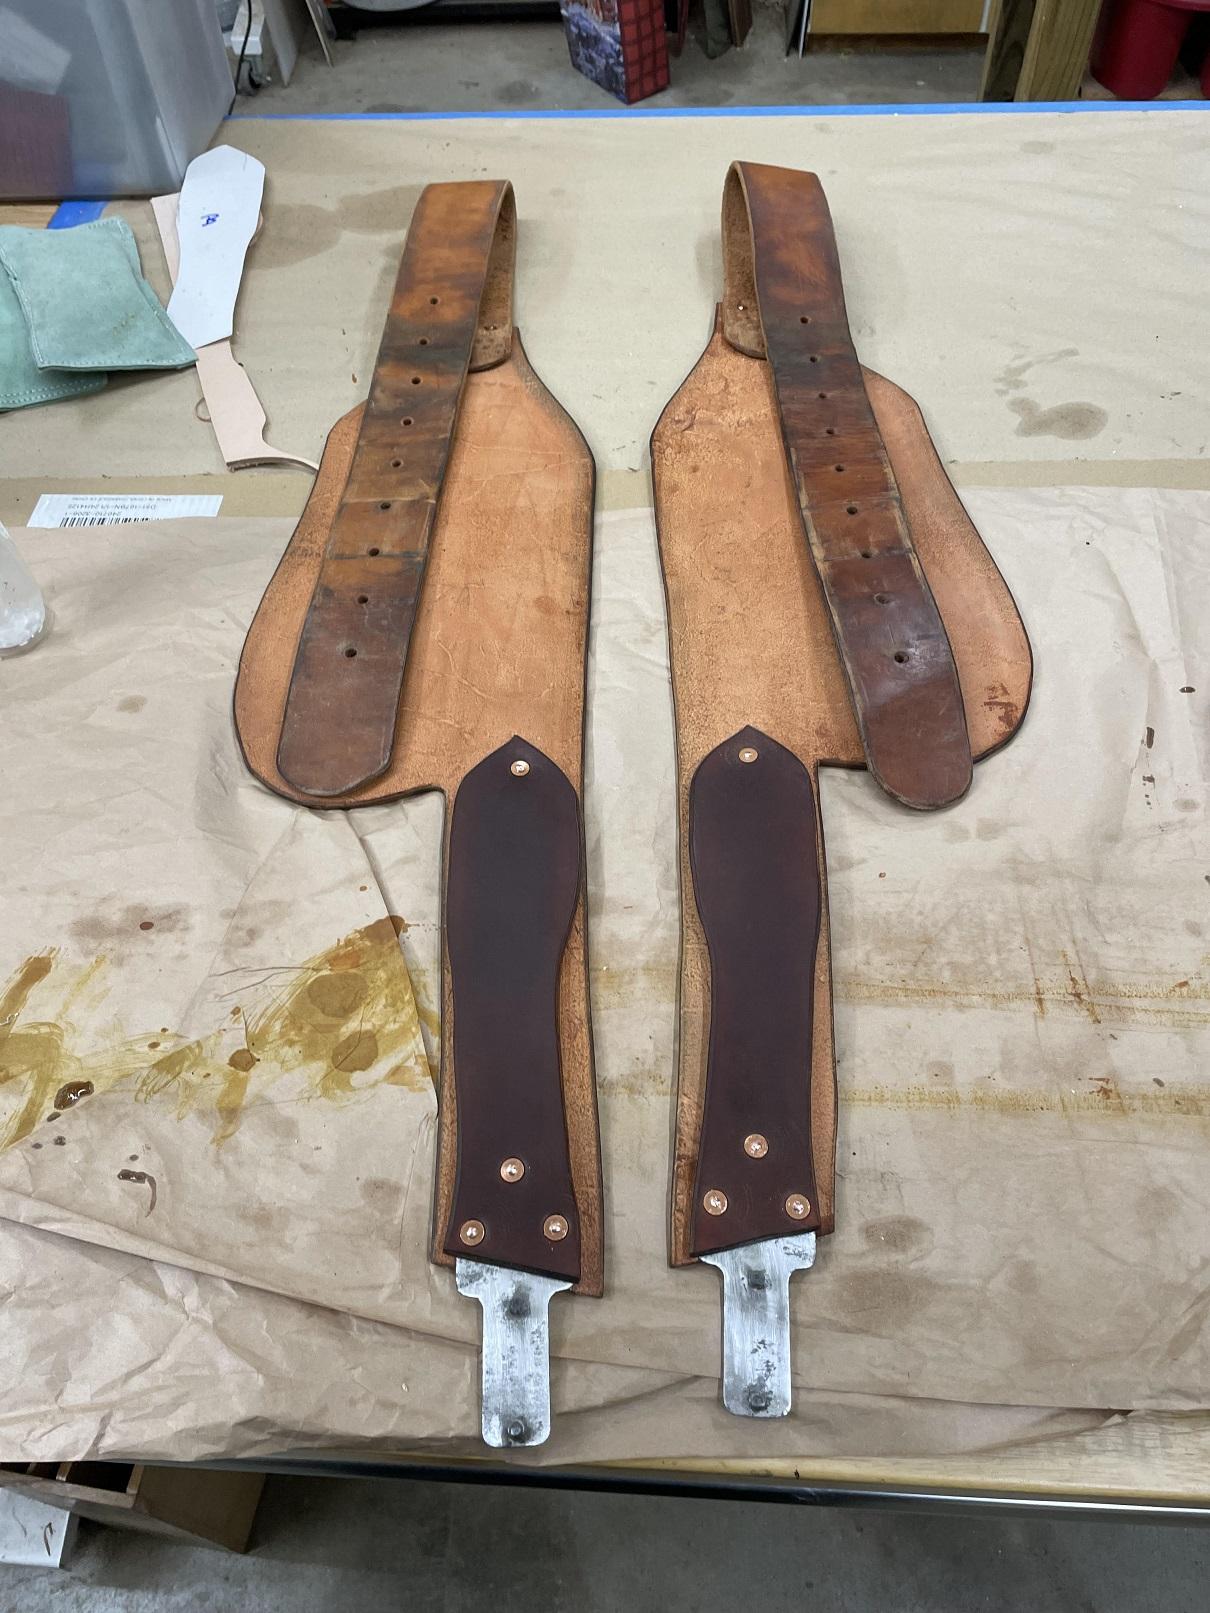
-
Fender repair...
Brokenolmarine replied to Brokenolmarine's topic in Saddle Identification, Restoration & Repair
Made a mistake, won't use Watco, that's my woodworking finish. I'll pretreat with neatsfoot oil, then stain. -
Fender repair...
Brokenolmarine replied to Brokenolmarine's topic in Saddle Identification, Restoration & Repair
Not my choice. I'm making the new fenders as a favor for my daughter for her friend. The original fenders are in pretty bad shape however. Dry and brittle in some areas, and tearing easily in others. Had not been well cared for it seems. I'll return the original pieces and the new constructs to the owner when complete. I don't usually do saddle work, and my holster, sheath, and belt work are all done for personal use or as gifts... Or for pleasure. I admire the work of the pros here, who know more than I, and try to learn from it... It's interesting. -
Fender repair...
Brokenolmarine replied to Brokenolmarine's topic in Saddle Identification, Restoration & Repair
They looked pretty bad originally.... but I was told they aren't all the same, and finding matches might be hard. Wouldn't want to have to buy a new set of stirrup straps just because the blevins are ugly, when they aren't seen while riding. (I guess) They can clean them the rest of the way... if they like. -
Fender repair...
Brokenolmarine replied to Brokenolmarine's topic in Saddle Identification, Restoration & Repair
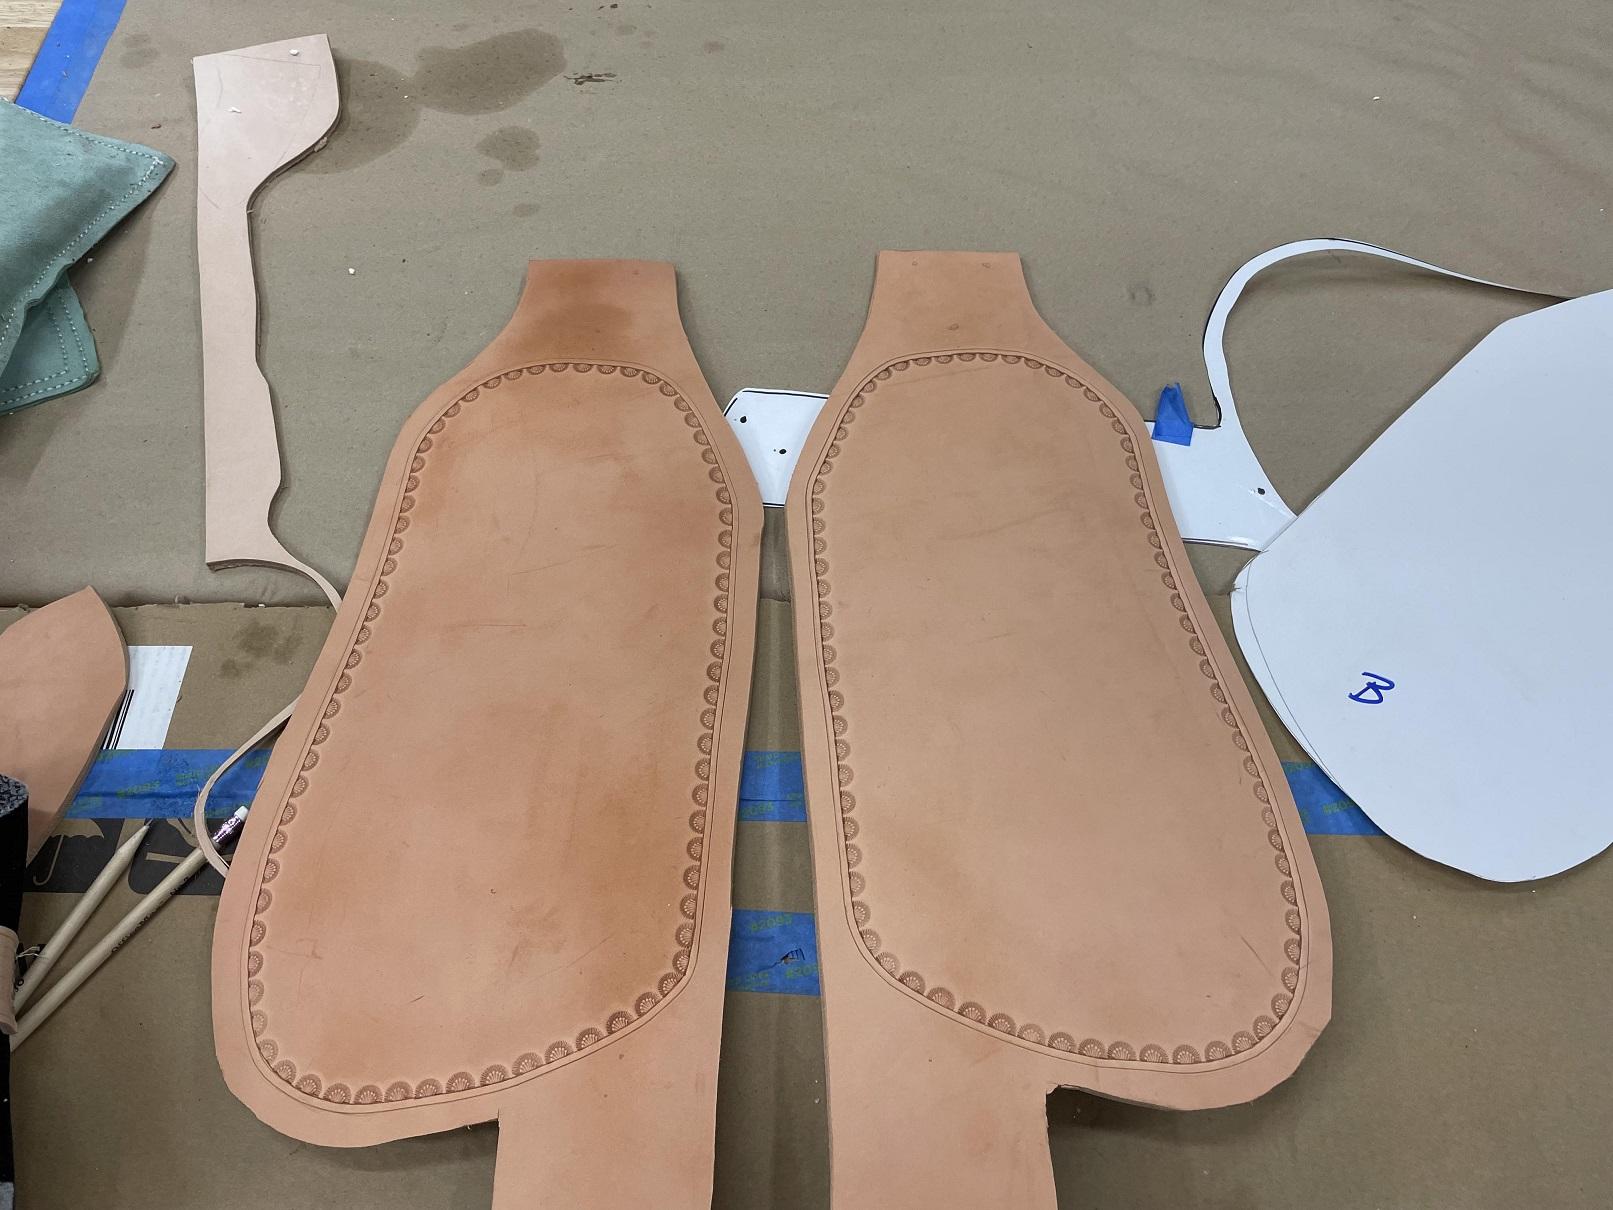
Back at it again, I carefully stamped the tooling pattern around the inside of the border, AFTER I cut the inside line deeper with a swivel knife the blade of which I had re-sharpened and polished. I now had a clearly defined sharp reference to work from. Each stamp was checked before I struck it and EACH strike was firm and careful. I wanted to avoid a glancing blow or a bounce, both of which could ruin the entire line. In the picture below you can see the border, as well as my Maker's Mark at the bottom of the leg on both Fenders. Again, Careful Placement, and then even more careful in the strike. Too much work to blow it now. A closer look at the border pattern. This is what she wanted. I would have gone with a Serpentine Pattern myself, but then... not my saddle. LOL. Next session, I'll work on dressing up the edges in preparation for applying Watco Oil or stain. There are some spots I'll want to smooth out the "Line/Flow" of the edges so that we can burnish the edges. I'll take a couple scrap pieces and make test panels for stains for color comparison. The owner of the saddle finally sent pics to assist with color match, though she isn't too concerned. I like to try. I did get to do some Clean Up work on the blevins, removing old glue, rust, staining... We'll be reusing the old beat up ones. They tell me they can't be seen, So why not.

-
Fender repair...
Brokenolmarine replied to Brokenolmarine's topic in Saddle Identification, Restoration & Repair
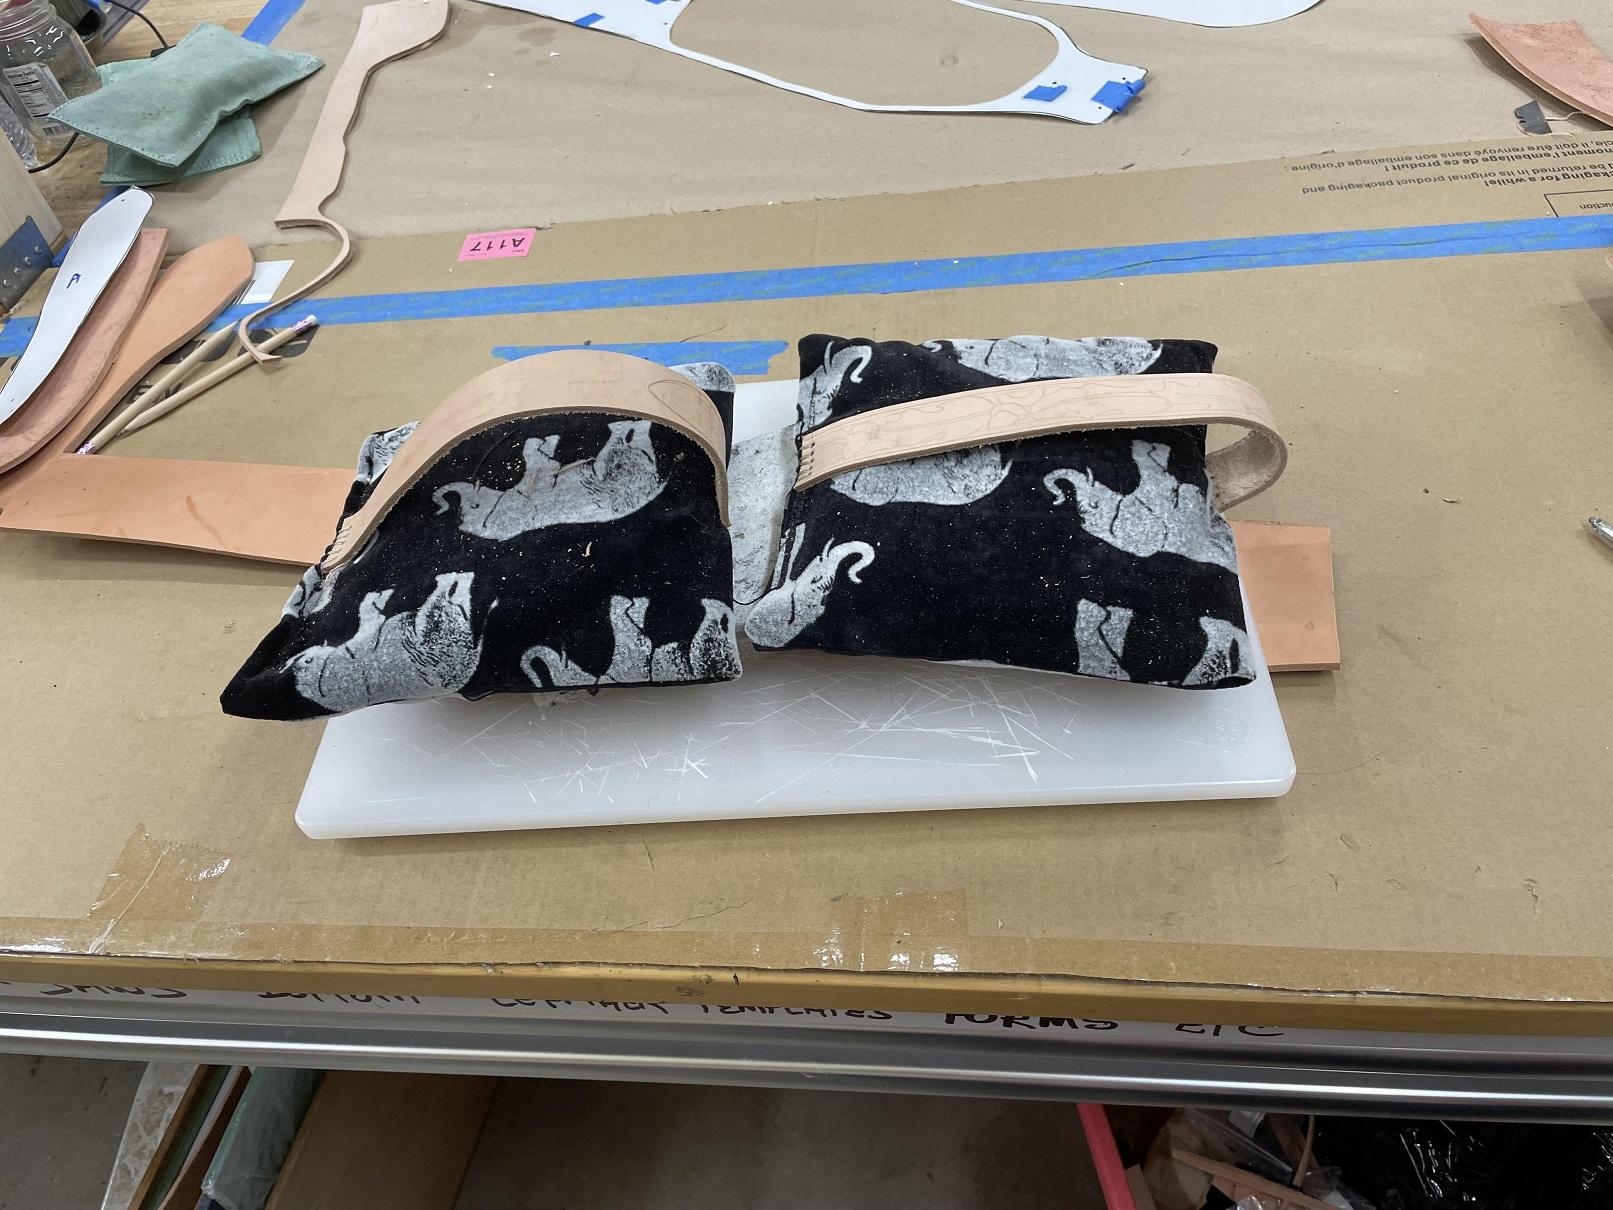
I came out after breakfast the next morning and checked. Success. The Fenders were flat and ready to tool. I used the template to carefully, and LIGHTLY pencil in the pattern. Using a double border swivel knife, I cut in the border. This is detail work, the pucker factor was HIGH. This type makes my arthritis scream, so I was done for the day. BUT, I didn't blow it. Not bad for a Broken Old Marine. I left this to rest while I rested the hands overnight.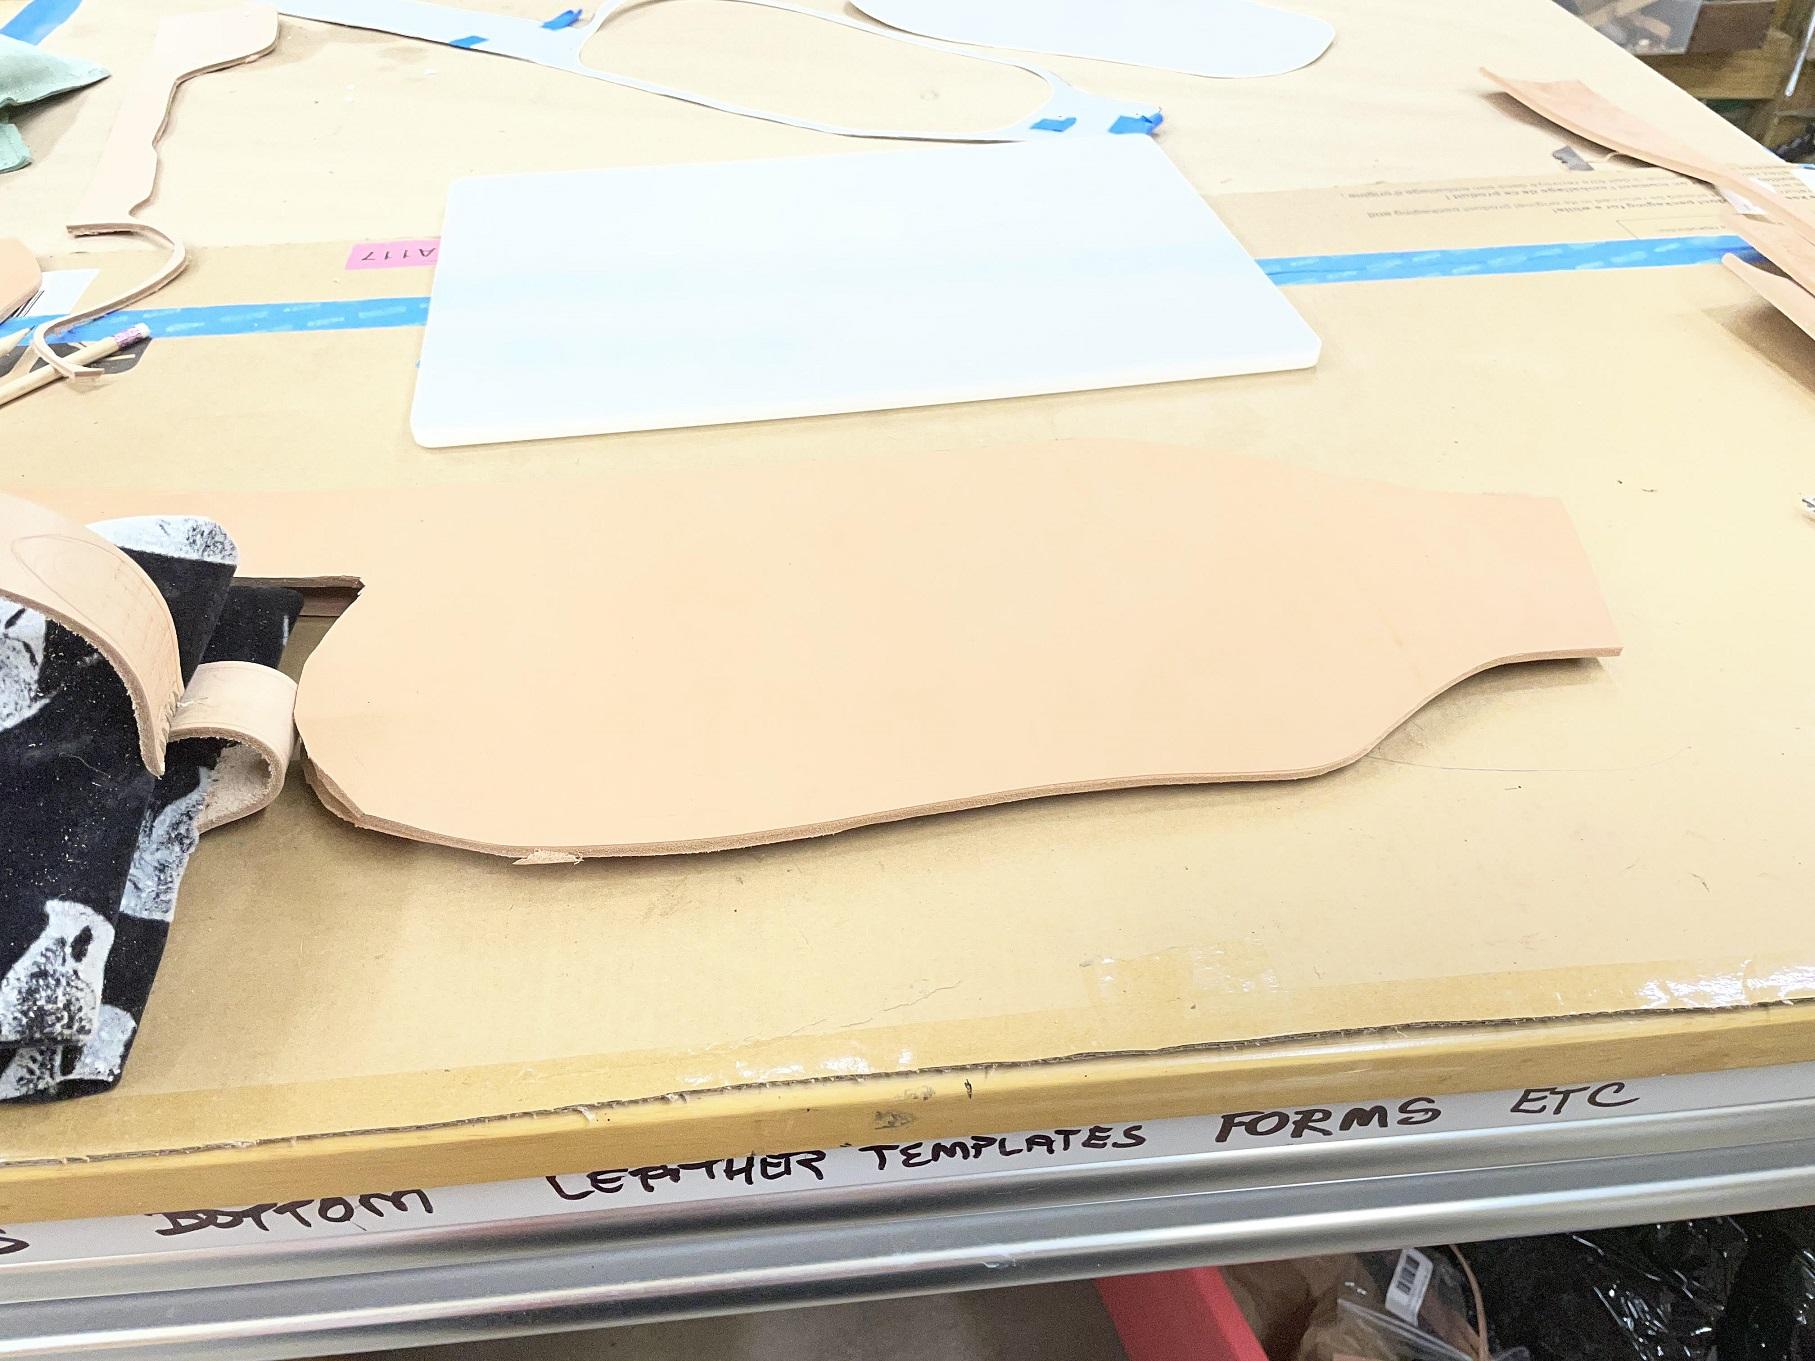
-
Fender repair...
Brokenolmarine replied to Brokenolmarine's topic in Saddle Identification, Restoration & Repair
I have made some progress in the past few days. I used the original template for the fender, and cut out a border template. It would allow me to insure the border I cut into the one side, matched the border I cut into the other. Why? Since you can't see both fenders at the same time when they are mounted on the saddle? Hey, just the way I do things. I try and do things the right way... or as best I can. However... before I can actually transfer this pattern to the fenders... there is an issue. They still retain a curl from the shipping. As I did with the original fenders, I sprayed them down with a generous mist, and weighted them down on the bench and left them for about six hours, then checked them. They had flattened considerably, but would benefit greatly from a second treatment. I repeated the process and left them overnight.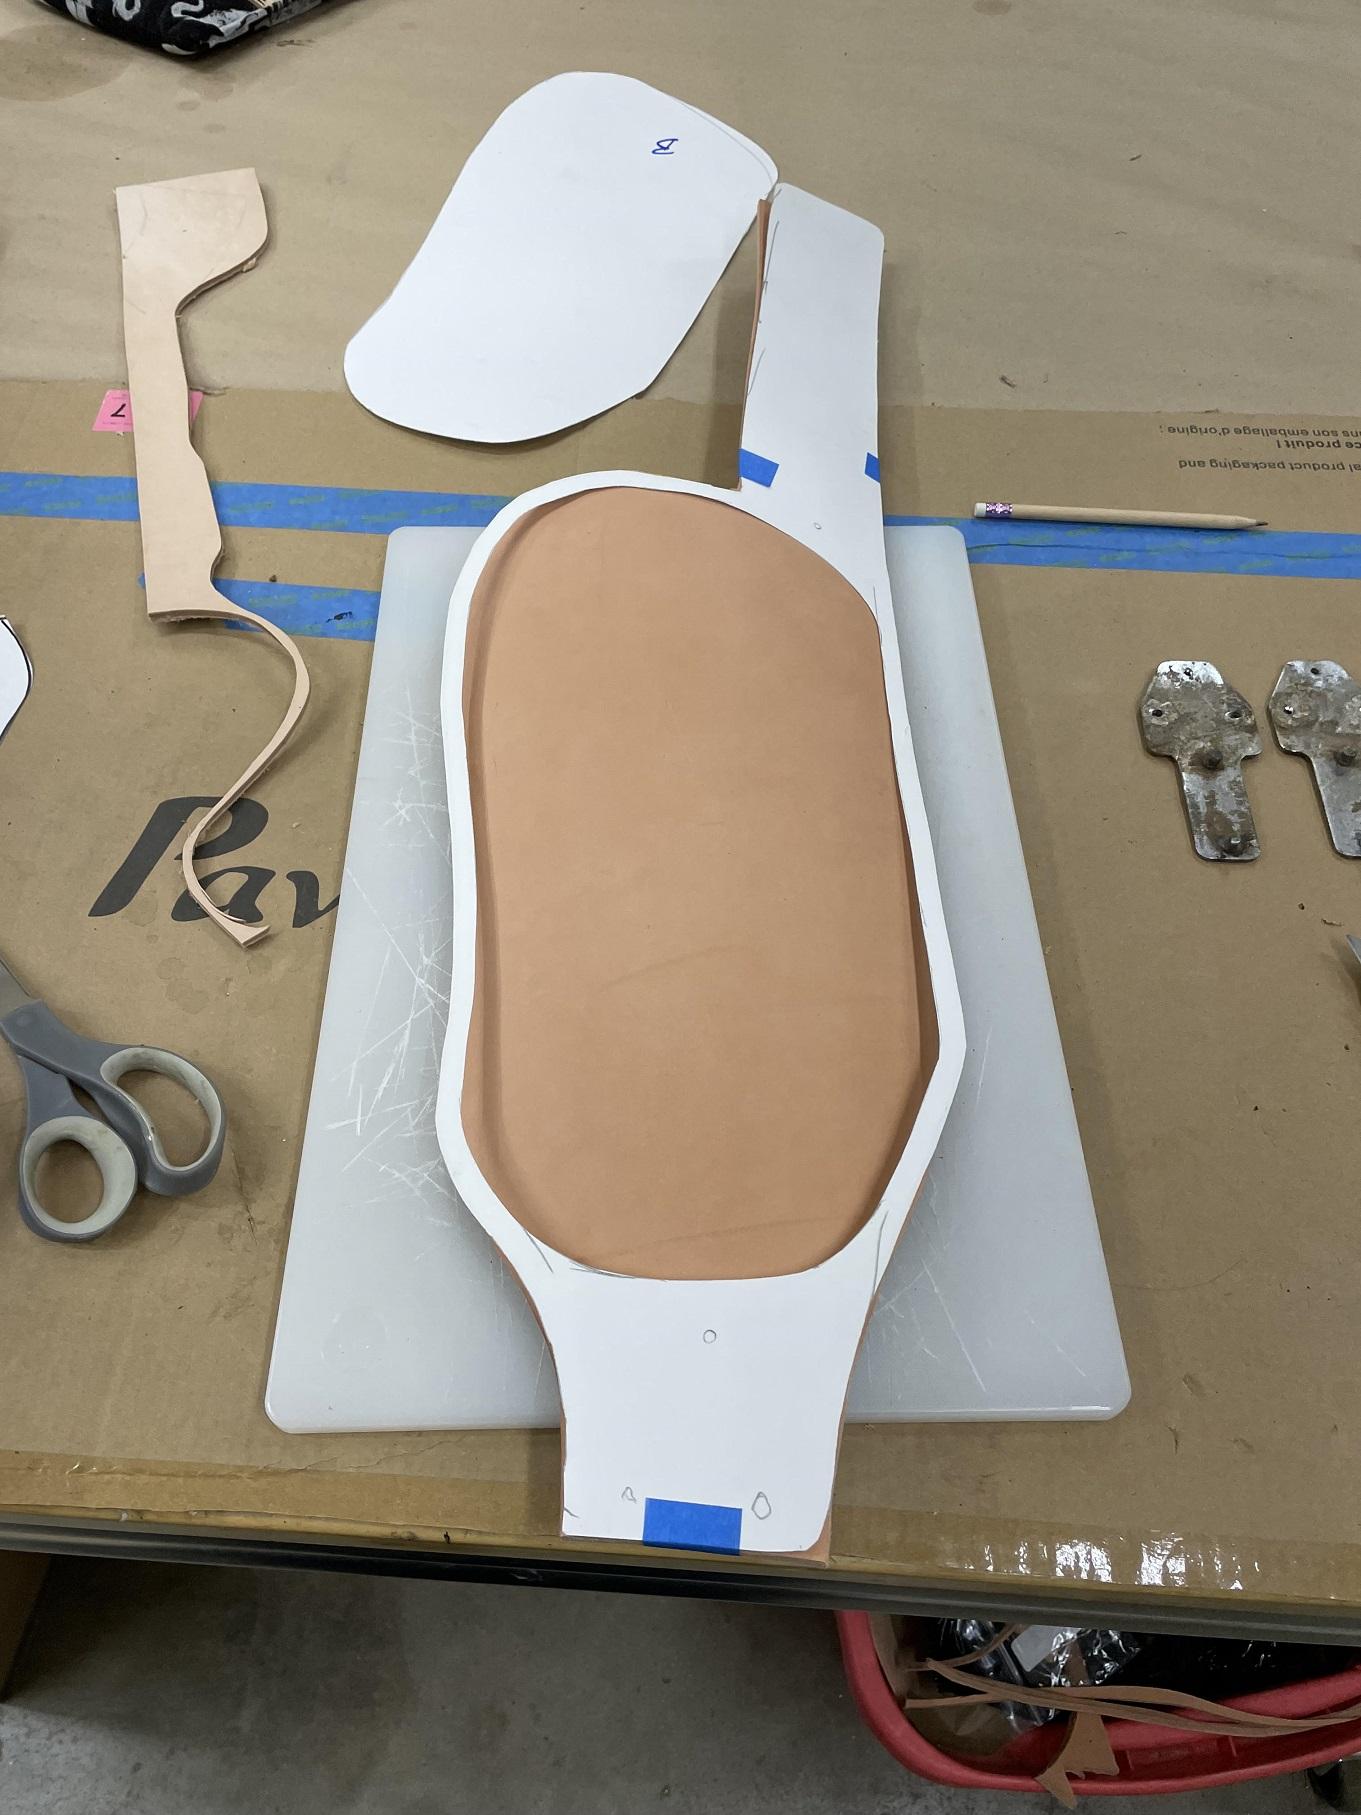
-
Fender repair...
Brokenolmarine replied to Brokenolmarine's topic in Saddle Identification, Restoration & Repair
Went out yesterday evening and did some touch up to the cutting, reducing the size of the small pieces, cutting them down to match the original pieces. They were both oversize by about 1/8" all the way around. Got that done, then took a piece of the same 15 ounce leather, and started tooling some border tests, rough test borders. Now these are rough, I didn't take my time and perfectly space or match the tooling as I would when I actually did the pattern on the fenders, but it would give the girls the idea of what the border would look like. Then I took a pic and sent it to my daughter to share with her friend, and took the sample in to the wife. #7 is a rope border and didn't turn out that well. The spacing of the lines was off, and I didn't work hard enough to get the placement of the tool correct. I have done much better in the past. That's on me... Might have looked a lot better if I had taken more time. "I" personally have always liked the two serpentine patterns, although they are a lot of work. (#3 and #4) Miss T voted for the double line and shell (#2) Jess liked the Barbed Wire (#1) knowing I would open up the lines a bit to center the string of wire. But her friend agreed with Miss T, voting for the simpler / thinner pattern represented by #2. Fine by me.... a lot less work. I'll go out this morning and dress up the edges of the fenders, then decide on the layout for the borders and cut a cardboard template to insure the lines are consistent. Pencil in the line, then CAREFULLY cut in the border line with the swivel knife, and tool the pattern on both fenders. Might take two or three sessions.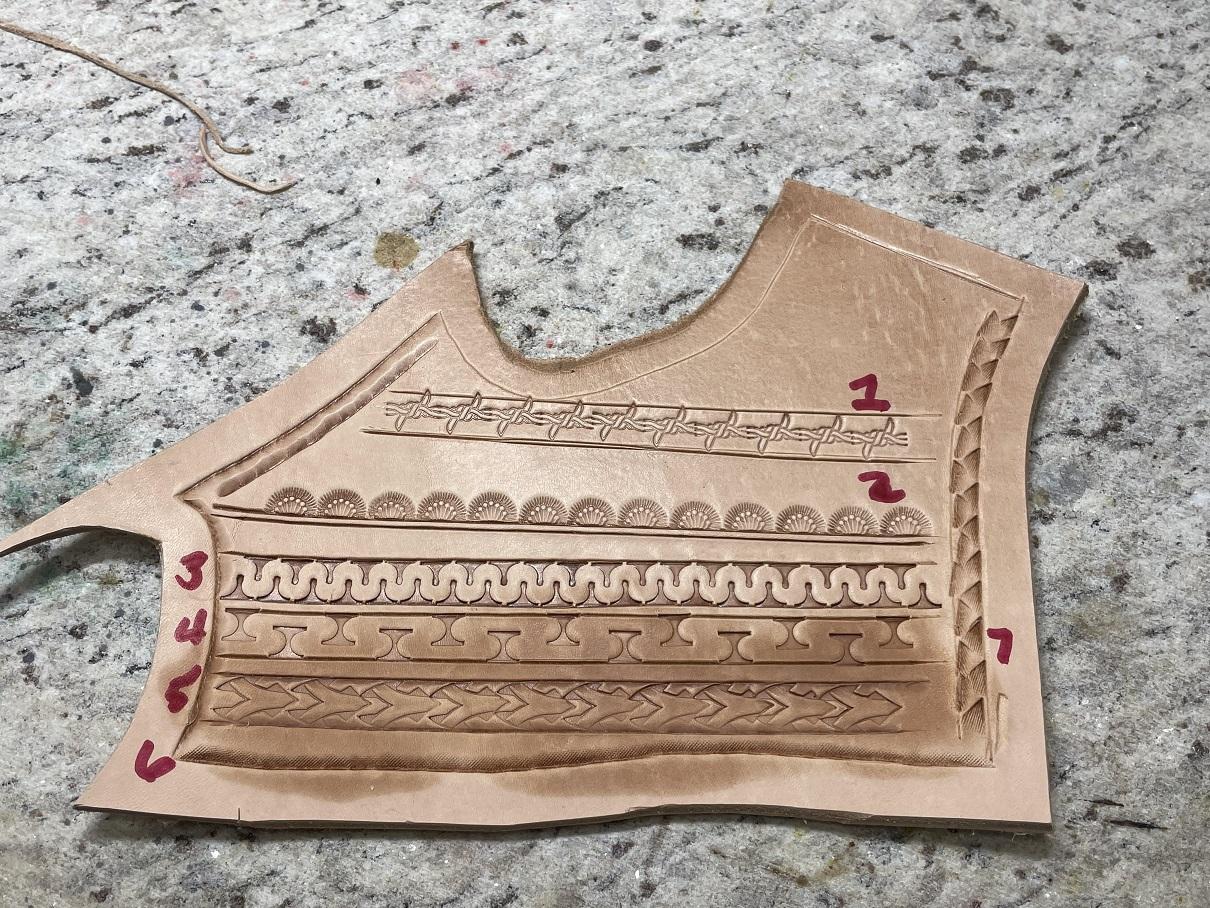
-
Fender repair...
Brokenolmarine replied to Brokenolmarine's topic in Saddle Identification, Restoration & Repair
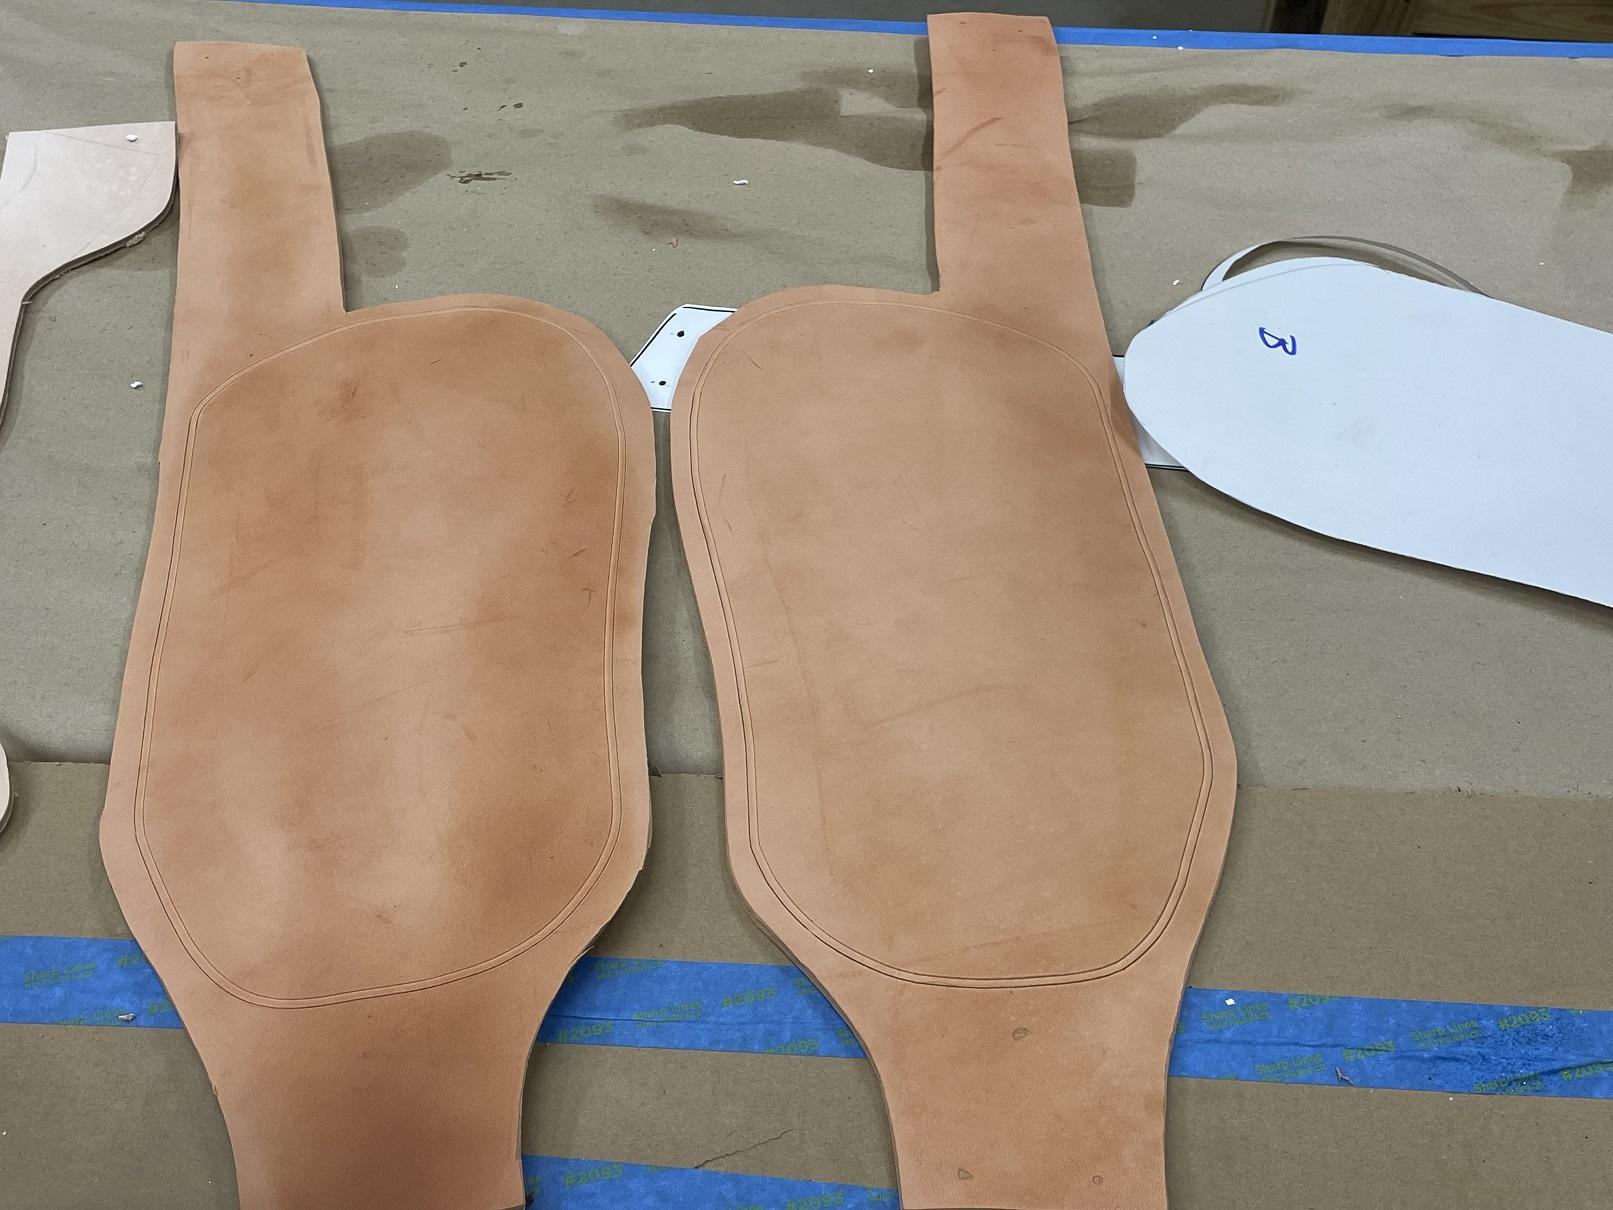
I put in one last session before quitting for the day. Changed the blade in the knife and got to it. I managed to get them cut out and they look pretty good. They are pictured here with the original fender. Here we are standing by waiting for the next move. I have to decide what I am going to do about details. A linear border? That border plus some accent tooling? A touch of floral for accent as well? We shall see in the morning. I won't punch the holes yet, but I will certainly mark the locations so that the border won't be suddenly interrupted by holes. BTDT.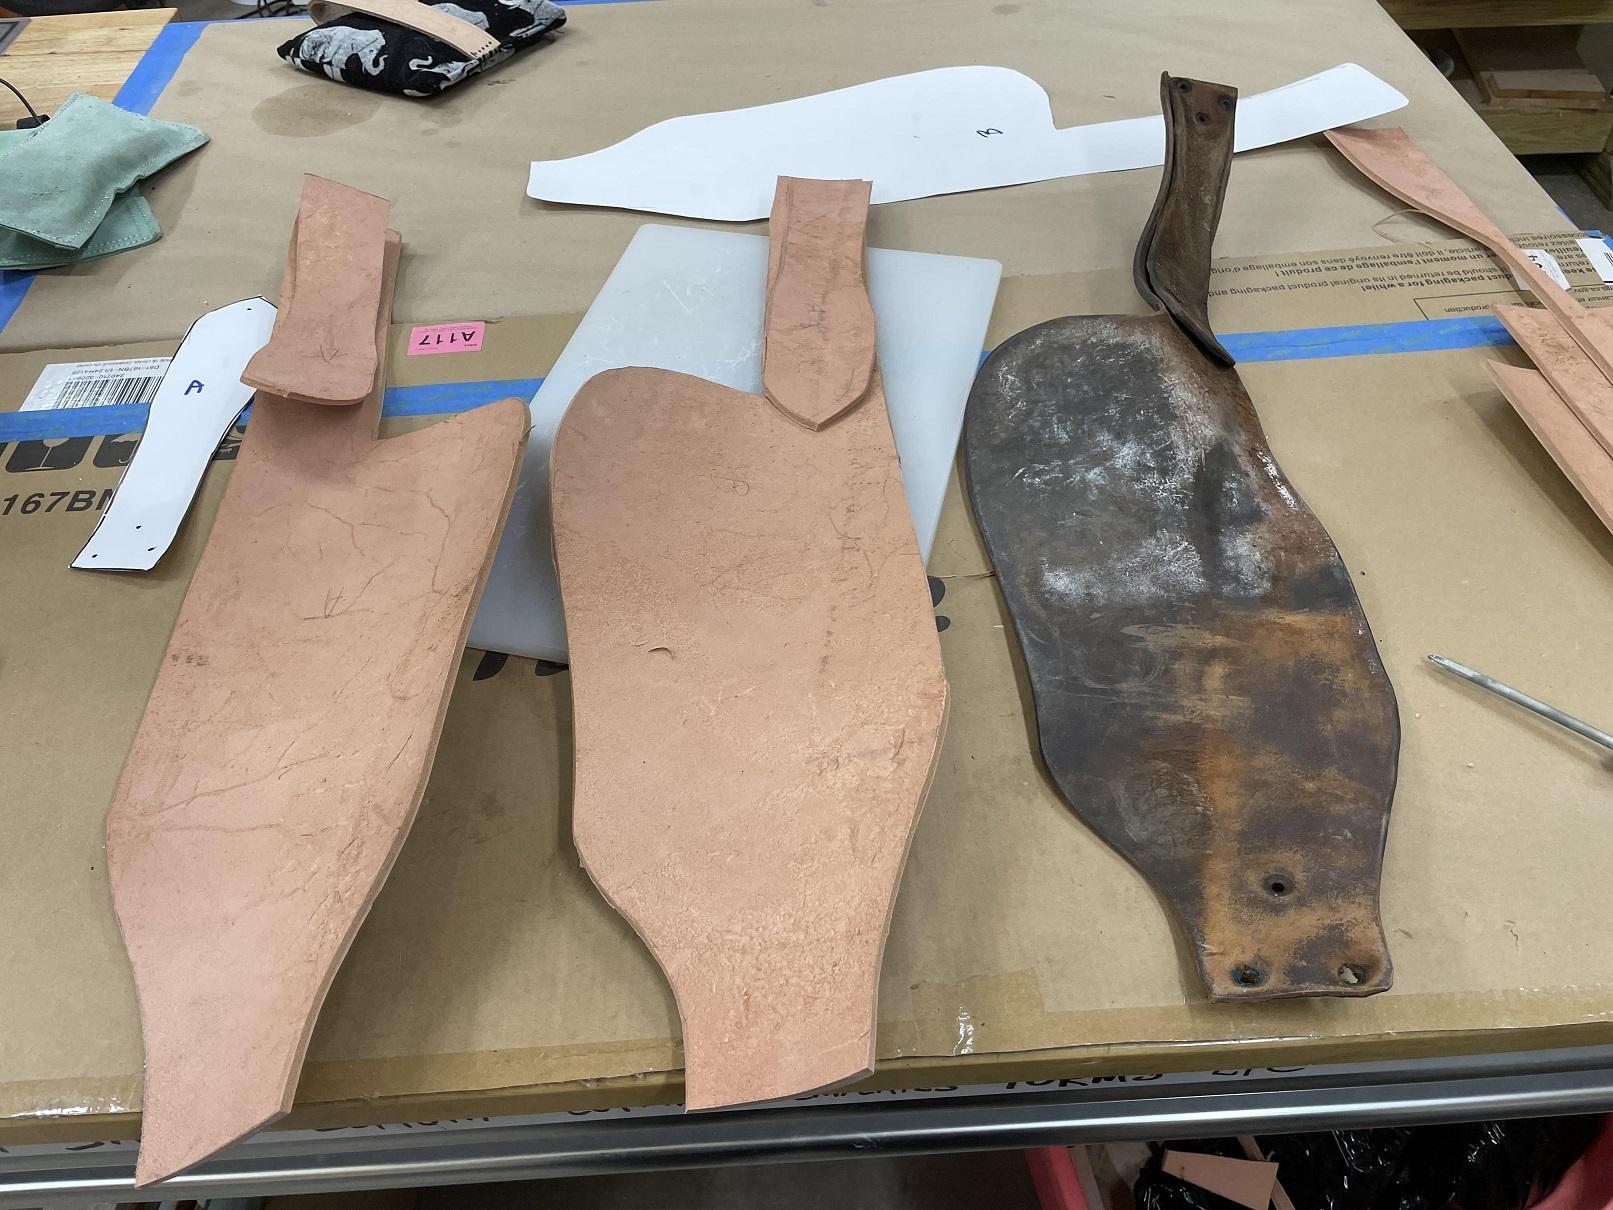
-
Fender repair...
Brokenolmarine replied to Brokenolmarine's topic in Saddle Identification, Restoration & Repair
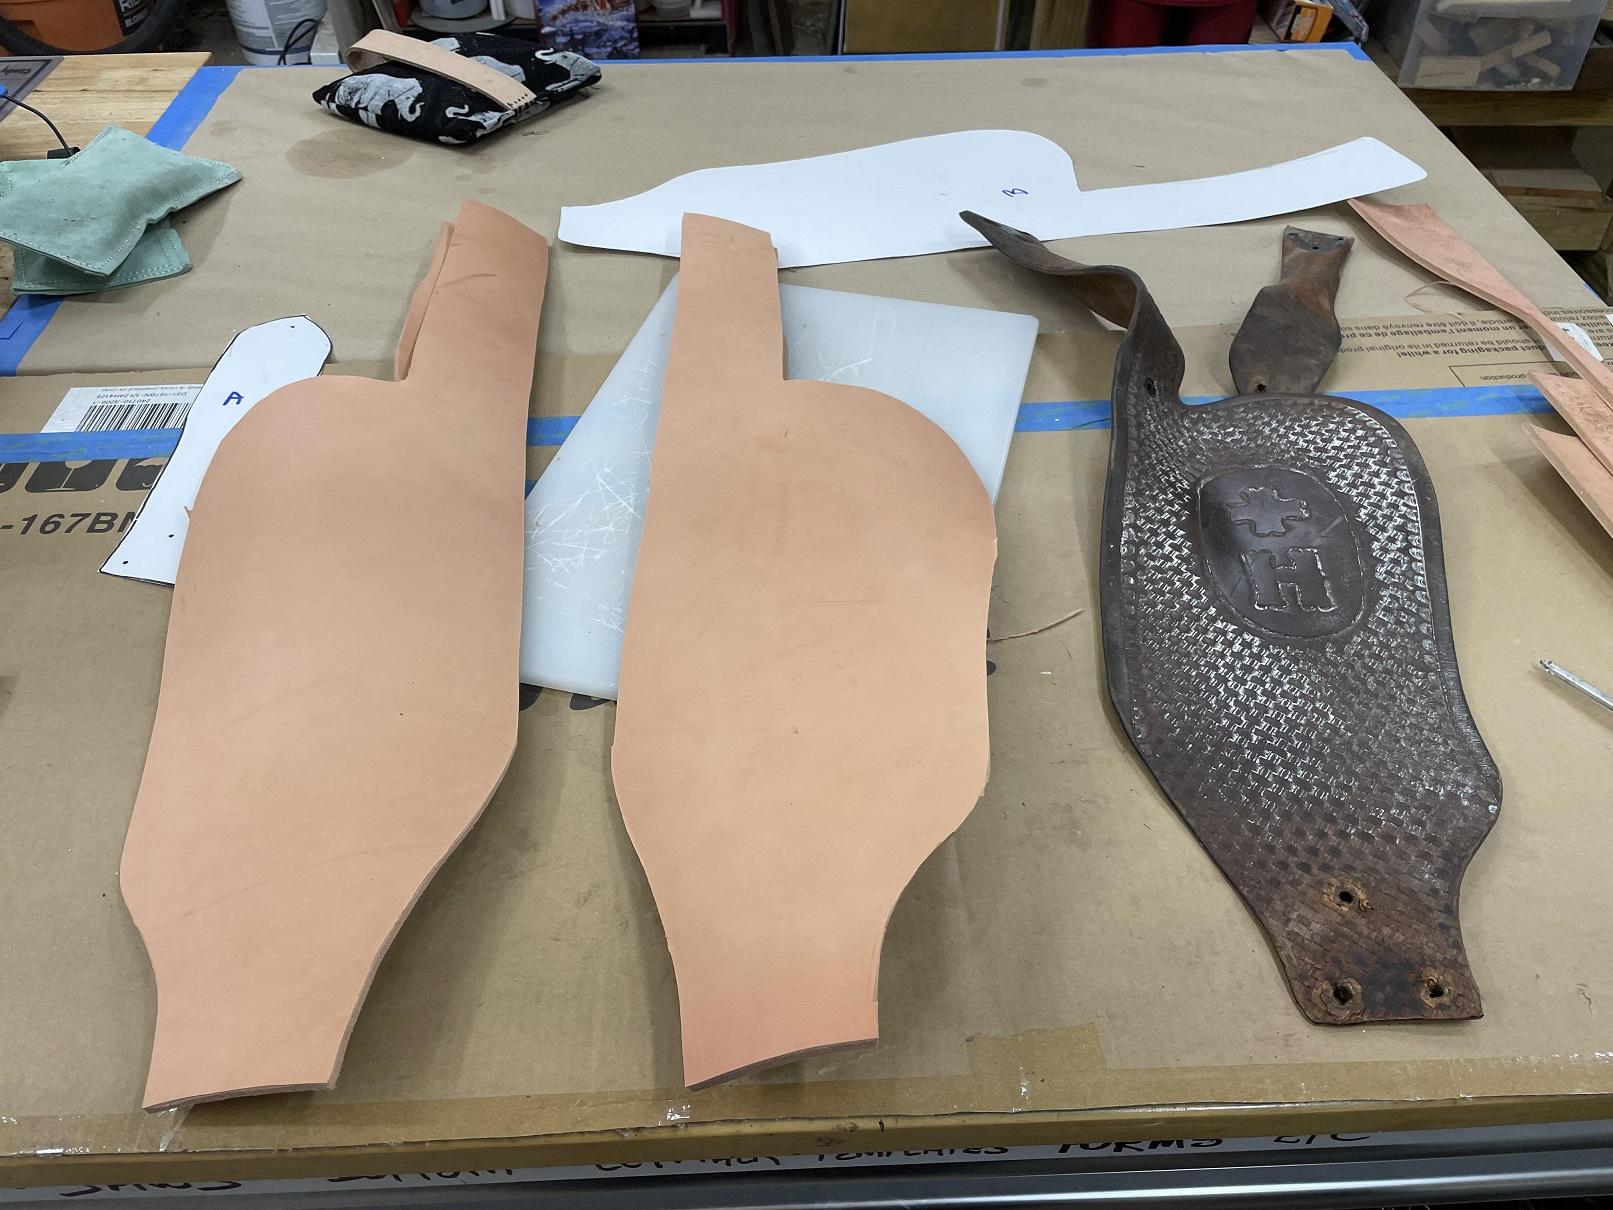
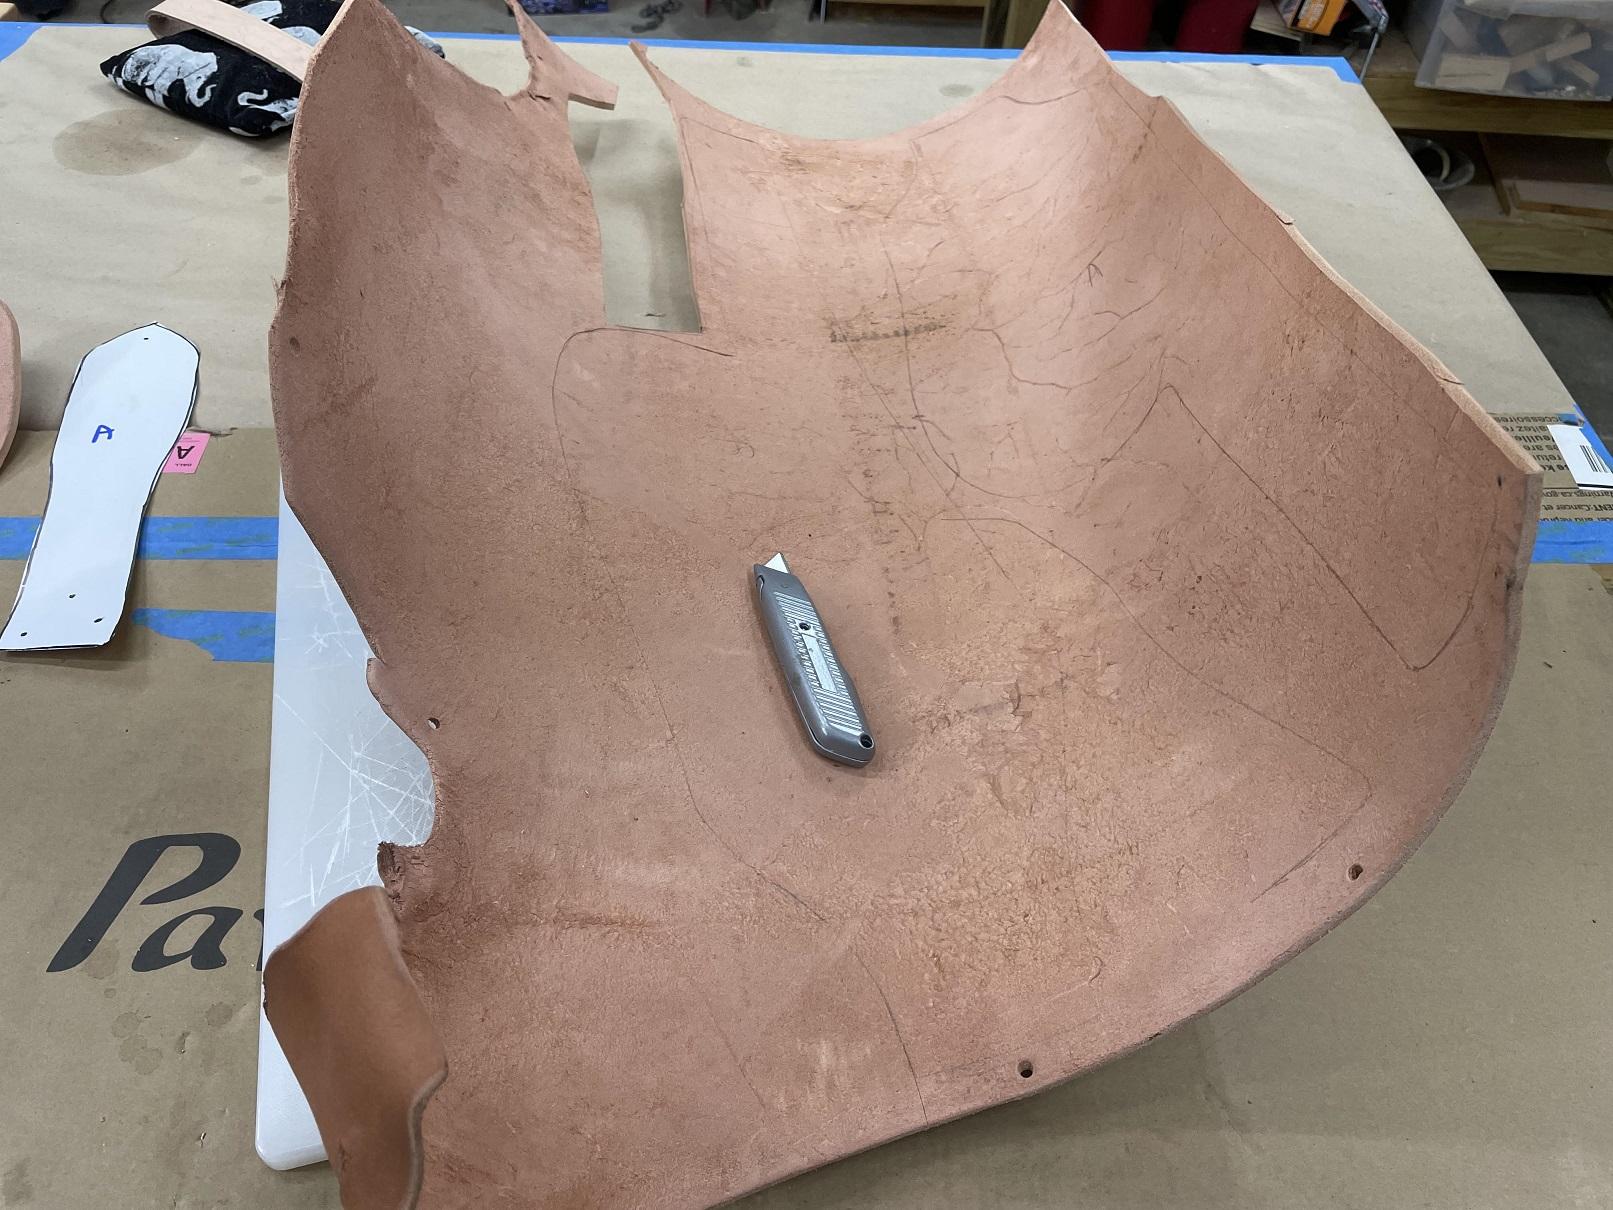
I laid out the four needed pieces on the 15 ounce saddle leather. The side I ordered from Weaver Leather was very nice. That much leather is very heavy, and came shipped in a box, so it was curled up and wanted to stay curled. What a pain in the ... um... Butt. Weighted it down, and got the layouts done. I cut off the section I needed and rolled up the rest, put it in a black trash bag to store, keep the mice out and the light off the leather. No need to ruin it. Cut out the small pieces first. They came out nice, but cutting the heavy leather is hard on old Marine arthritic hands. Time for a break before cutting the larger pieces. I'll go rest a bit, watch some tv with the boss, and have some soup, then come back out and get back at it.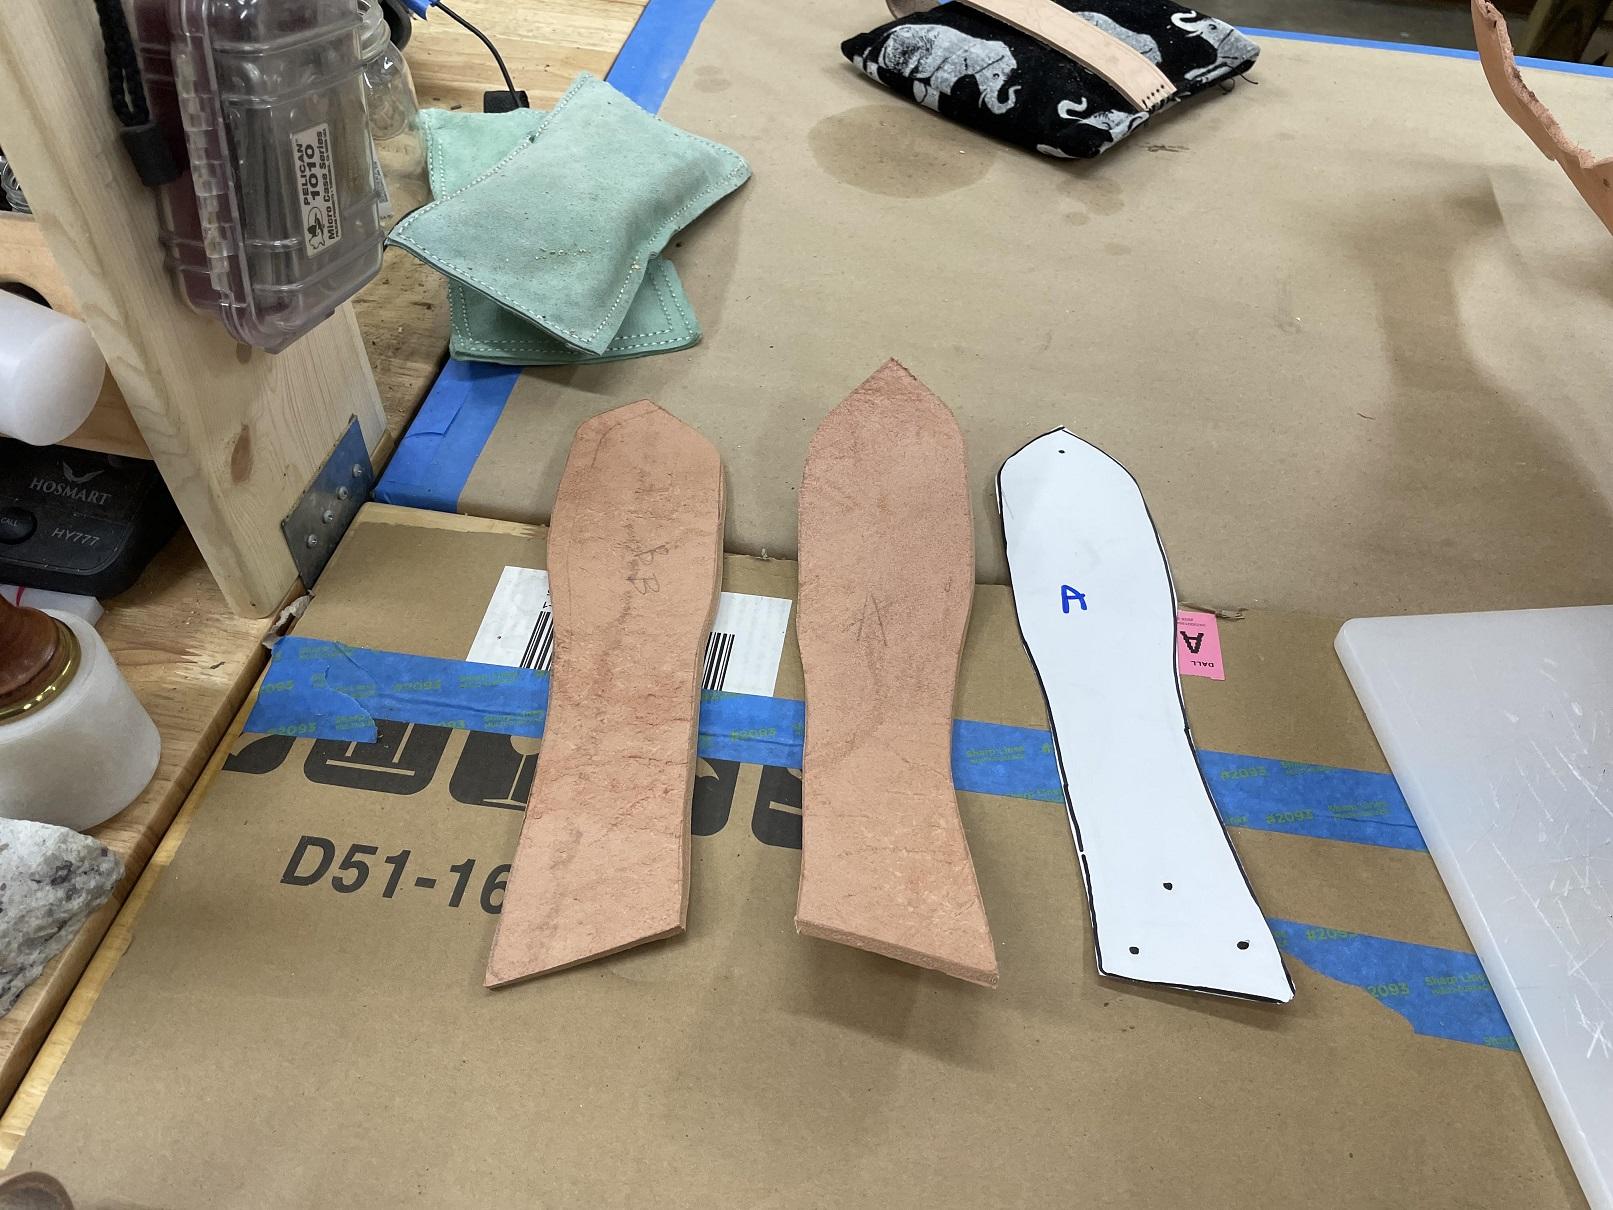
-
Fender repair...
Brokenolmarine replied to Brokenolmarine's topic in Saddle Identification, Restoration & Repair
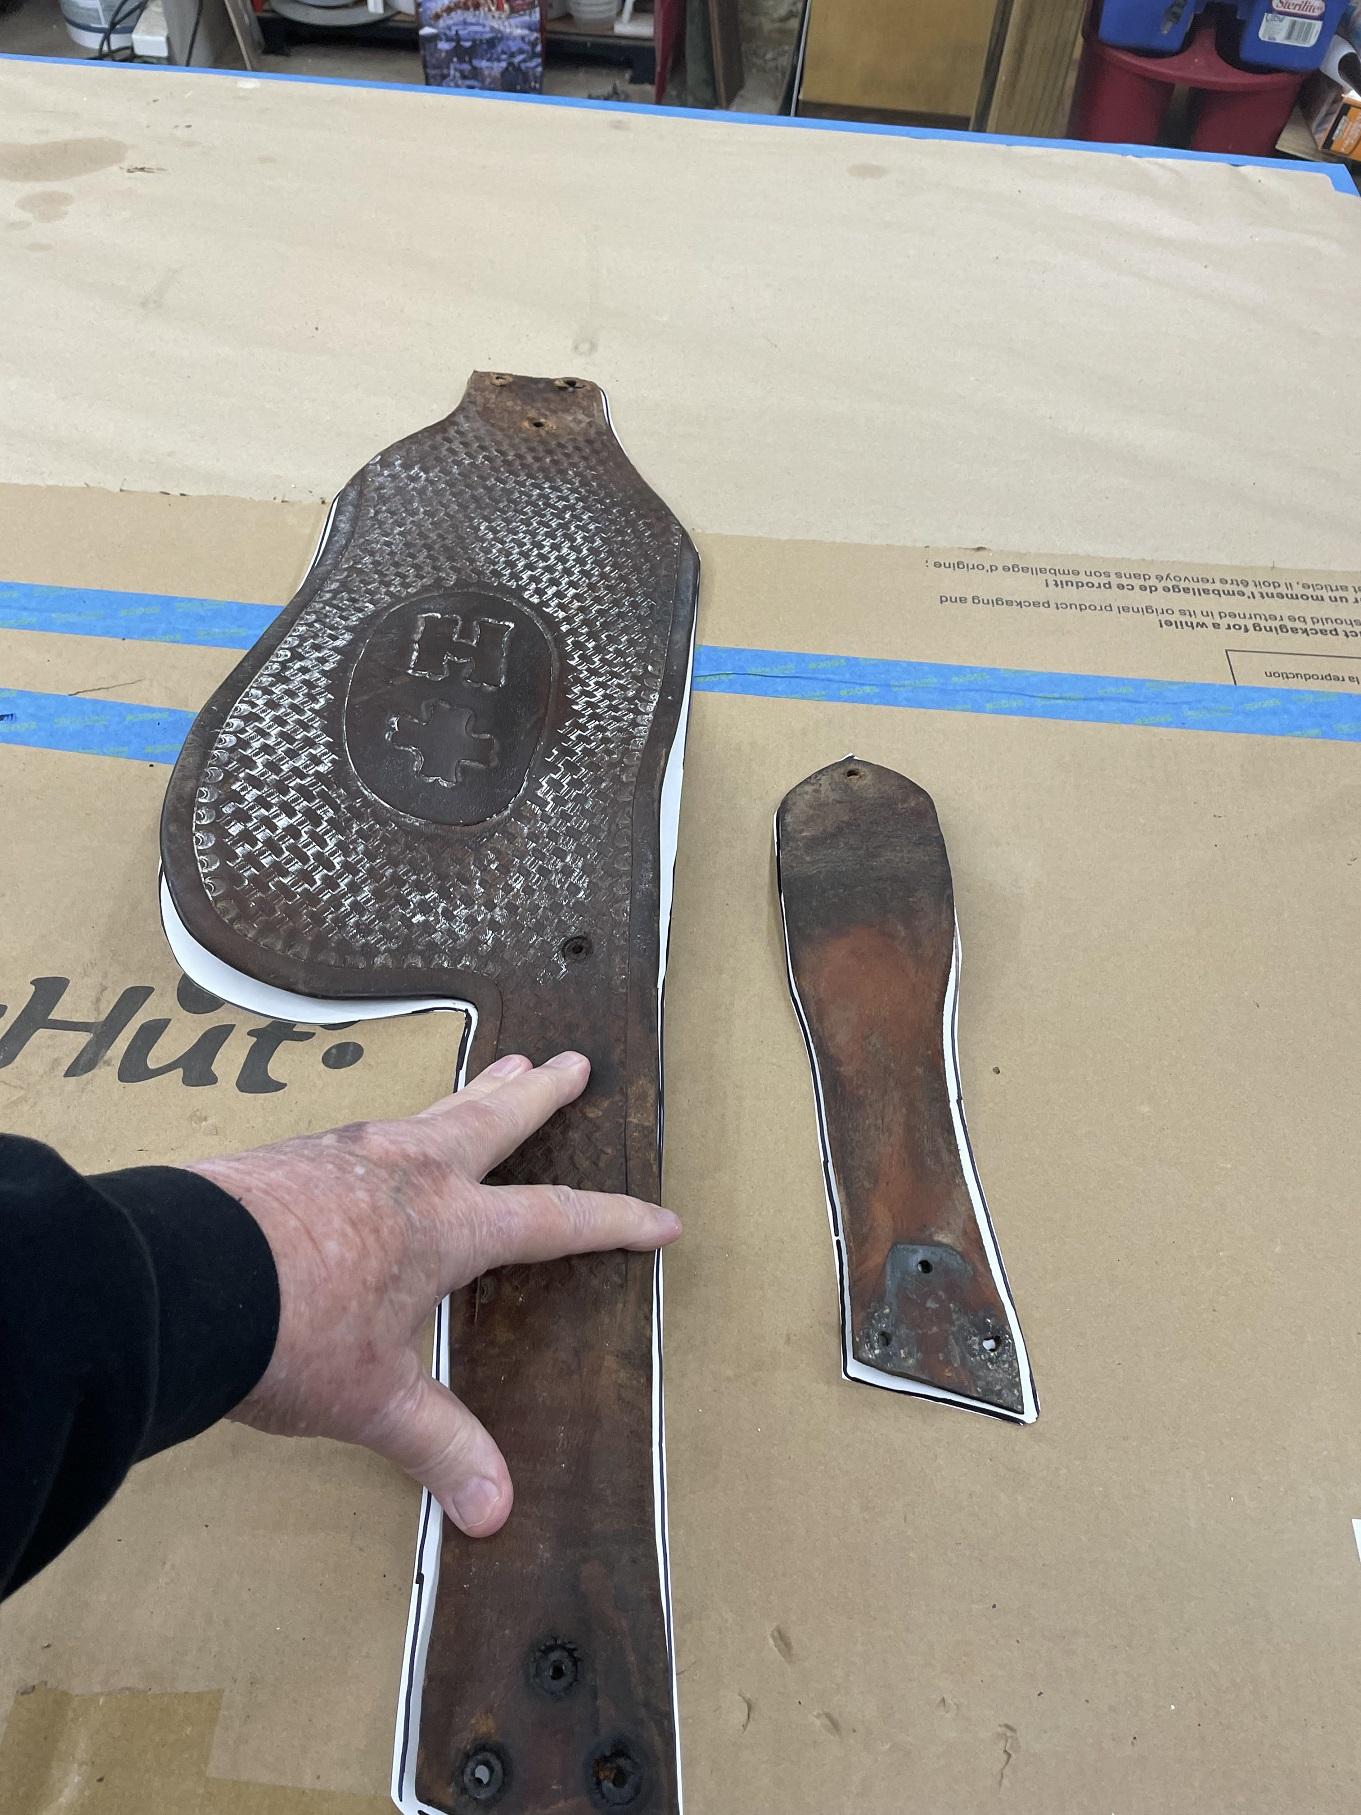
I have had a couple more sessions out in the shop. First and foremost... the compression worked. The original fender now got flattened enough to work as a template. I carefully drew it out on the cardboard, then marked the holes. I cut it out, then overlaid the originals to verify the templates were correct. I will be able to flip the cardboard over to cut out the mirror image for the other side.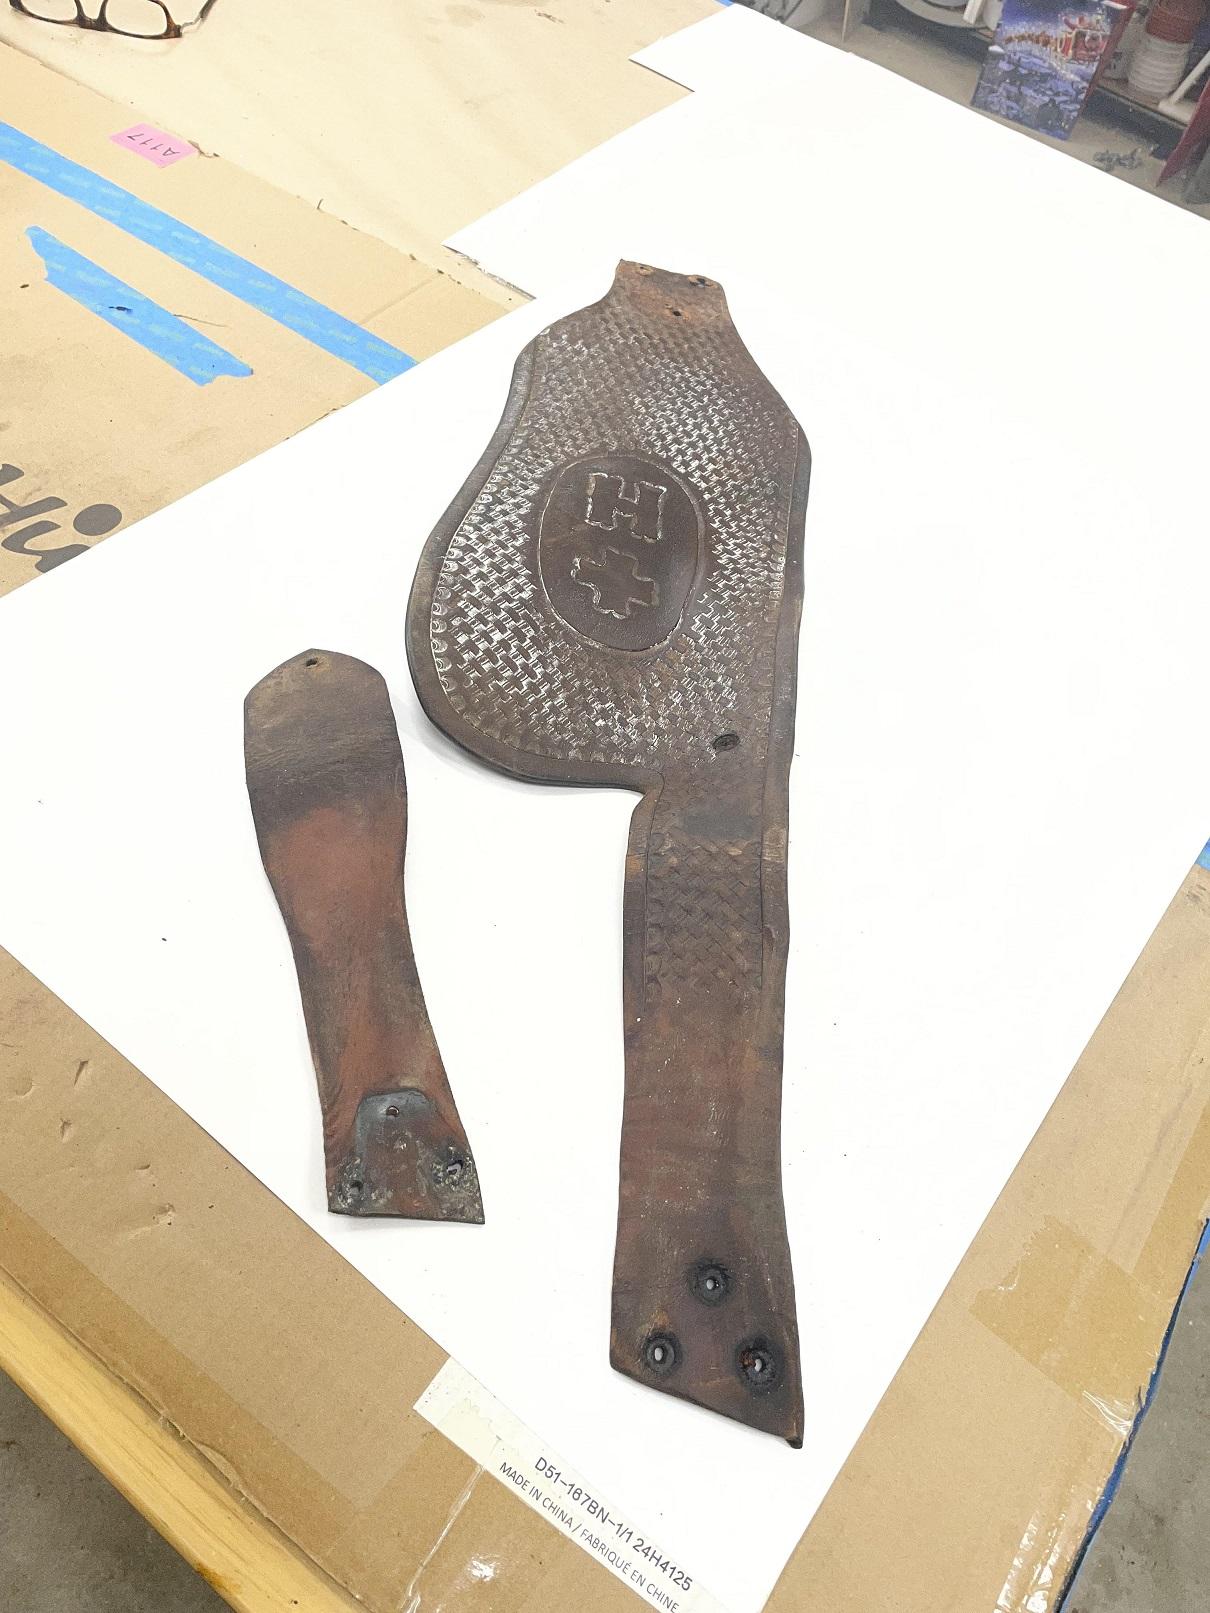
-
Fender repair...
Brokenolmarine replied to Brokenolmarine's topic in Saddle Identification, Restoration & Repair
I was planning to use a ruler to make the edges straight, but you are right, razor straight edges do give a nice appeal. The rectangle idea is a good one. Once everything comes out of the clamps I had planned on making measurements on everything to insure true layout in spite of the twisting. The wife and I had been discussing this earlier. Great suggestion though. As far as the wraps for the twist? Nope, I have a great plan for that. I'm going to cheat... I'm going to remake the fenders, do whatever tooling and borders, burnishing, and finishing, etc. Then I'll rivet everything together. I am going to make NEW wraps from new leather using the old wraps as guides and send them along with the new fender assemblies. I'll let HER wrap the fenders to her liking since they need to be wrapped to fit her position in the saddle. I'm doing this project as a favor to my daughter and her friend. I'm not claiming to be a saddle maker. My daughter has been trying to get me to make fancy nose bands (?) to sell at shows and rodeos for a good while. Her friend does the wraps on all her saddle fenders because she likes them that way... I'll let HER do it. LOL. -
Fender repair...
Brokenolmarine replied to Brokenolmarine's topic in Saddle Identification, Restoration & Repair
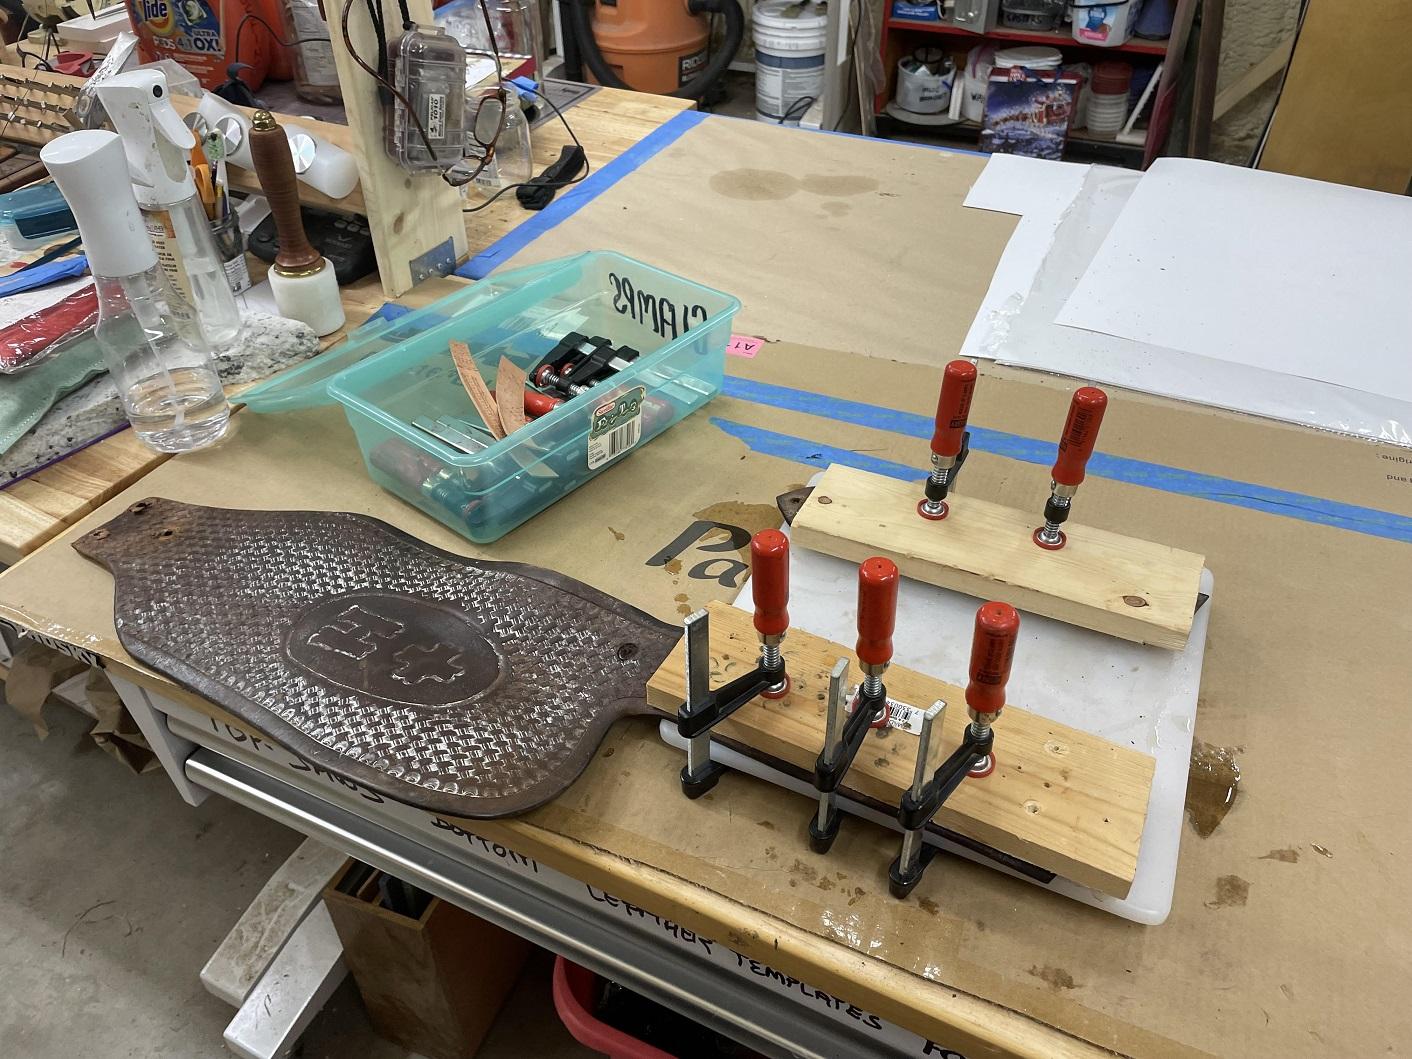
Thanks BD. I was back out this morning, and was about to start the layout, when I realized that with the way the original owner had laced up the fender above the Blevin to make the riding easier, it was all twisted. My wife and daughter were/are horse folk. Me? All I ever did was pay for things, clean a stall here and there, or go to shows and admire the horses (or the riders - female riders - in their tight riding wear.) ADULT riders... get your minds out of the gutters. LOL. The wife told my daughter to tell the original owner that when I remade the fender, I could flip the Blevin and have the same result and she wouldn't have to lace up the fender to clear her legs, it would automatically twist the leather. Nope, she liked it like that. Hey, it's her leather. BUT, it's so twisted it won't work like this as my template. I had to disassemble the good one as well to make it usable. First step, (hadn't read this post yet) Center punch. Went through the whole process and got it all done. Next up was to flatten the twisted sections so they would lay flat. I went them down good, then using a cutting board and some short wood pieces, clamped them flat. Not as easy as it sounds with two hands. The fender wanted to fight me, and I had to coordinate the fender leather, the boards and the clamps, and tighten them... but I got 'er done. I will let it sit for several hours, and check it. If it needs more time, I'll re-wet 'er and leave it overnight. Not worried, in this case, about damaging the leather, as it will all get tossed. I just need it flat to act as my template. Here is a long view of the clamped Fender. I am looking forward to actually getting started on the process. It's an older saddle, I think she bought used. My daughter told my wife that the saddle isn't as dark as the fenders, so she is supposed to take pics of the saddle to help me try and match them when I dye the fenders... but we know how that might work. A picture on the phone depends on the color settings on the phone. I may tell her to bring the saddle when she comes up the next time. The girl isn't riding in it with it broken down.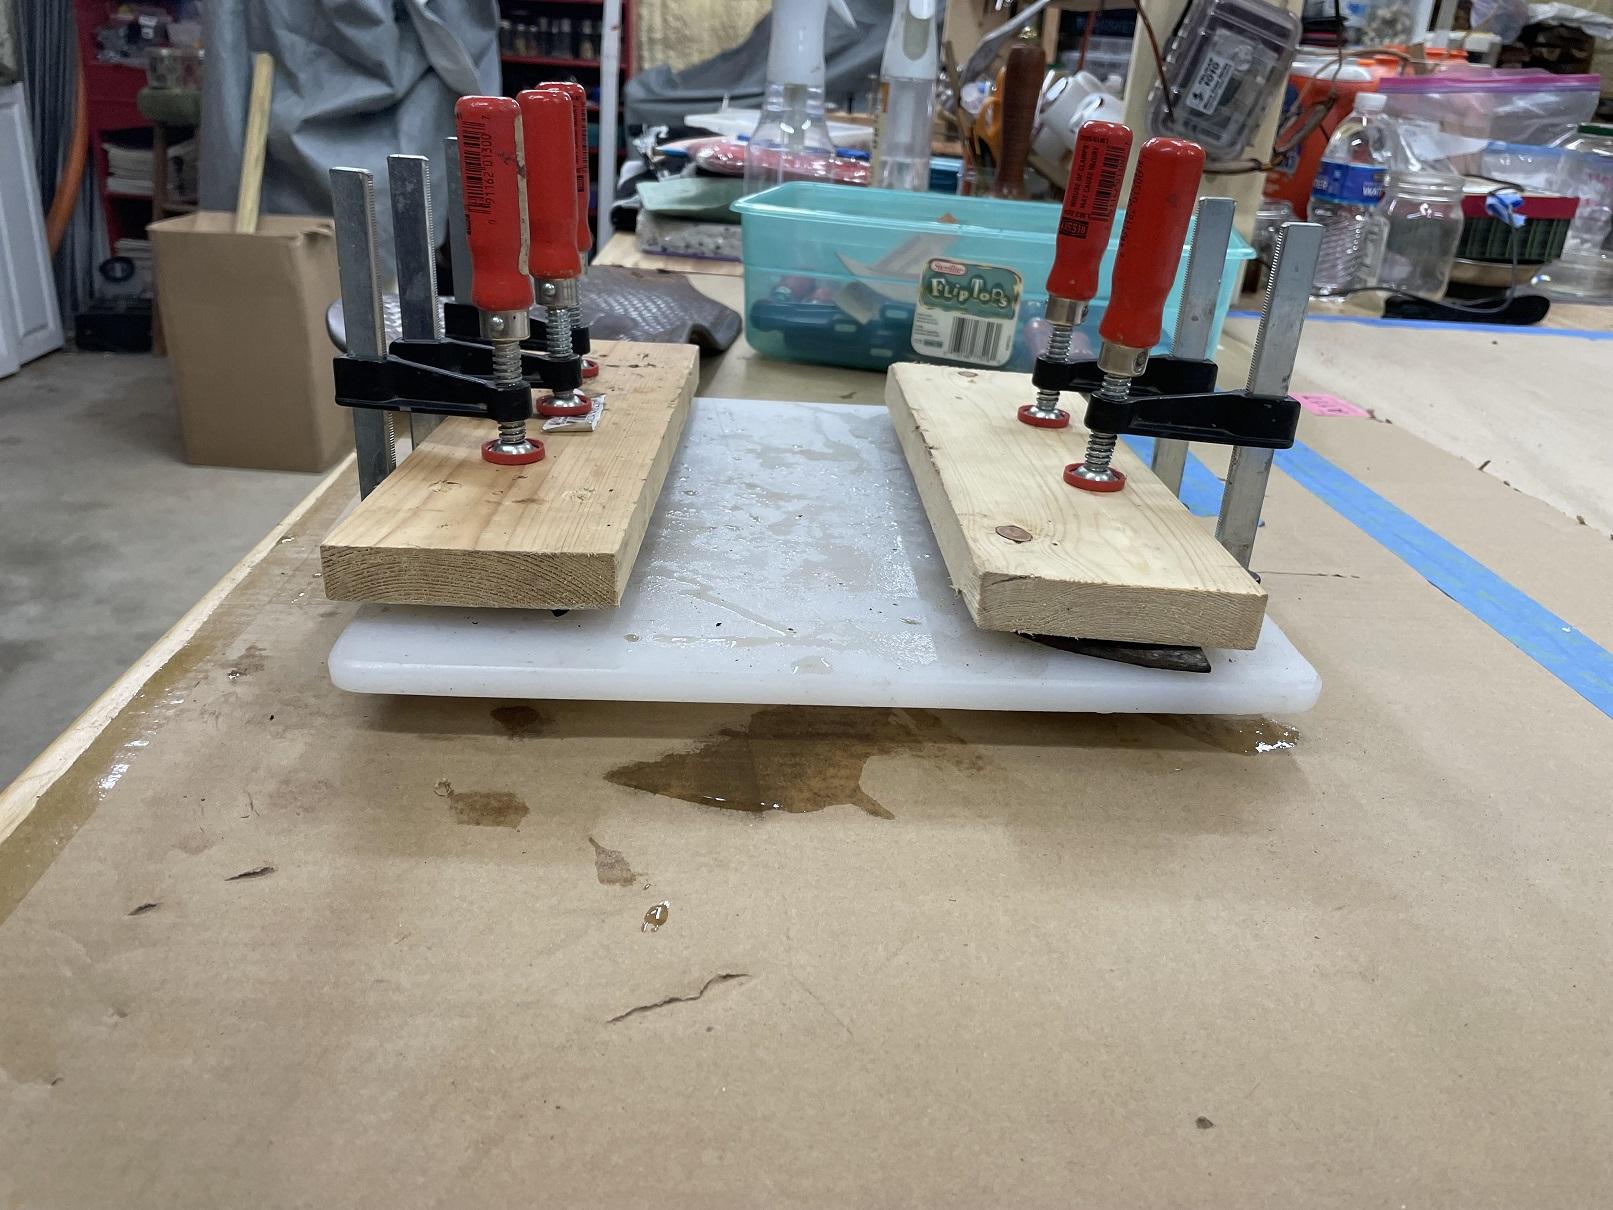
-
Fender repair...
Brokenolmarine replied to Brokenolmarine's topic in Saddle Identification, Restoration & Repair
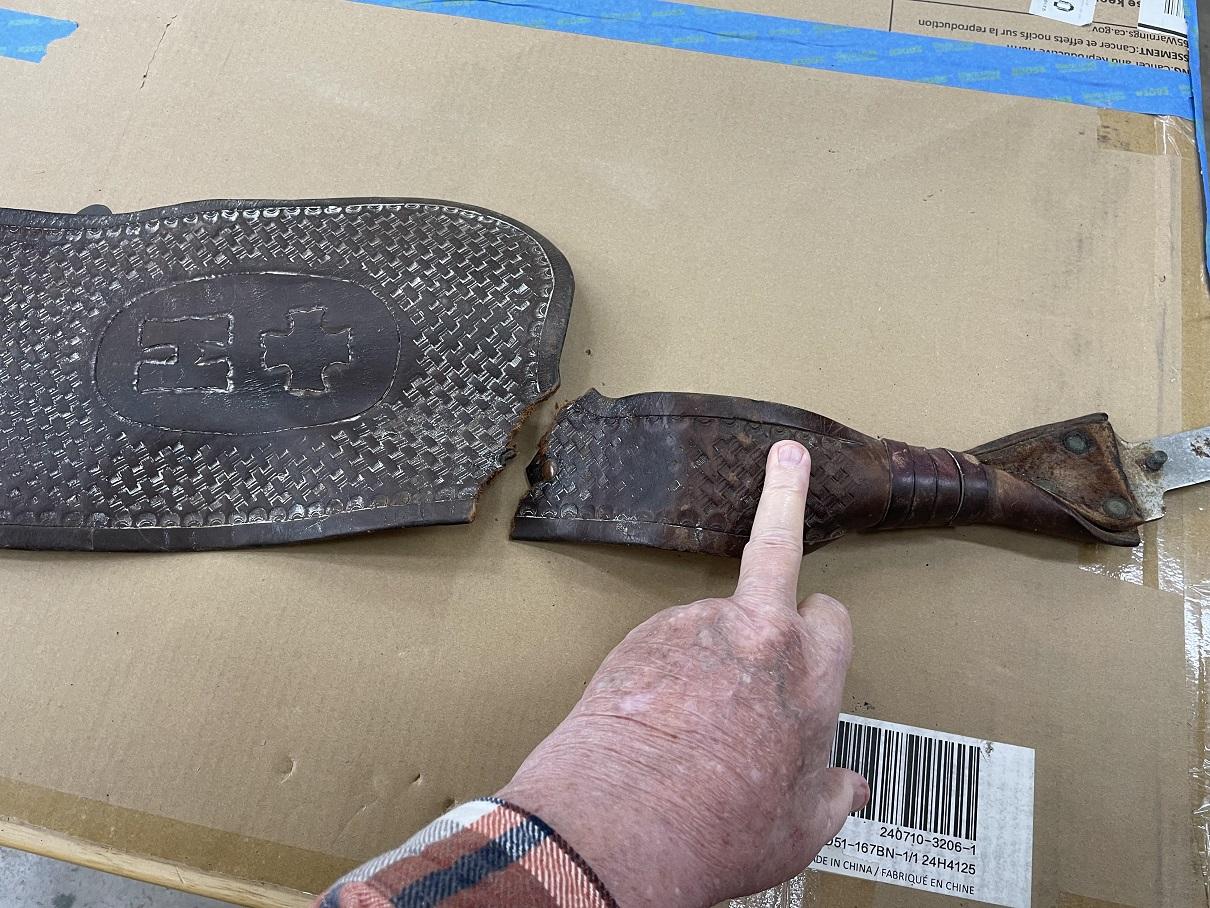
So, I began the Johnny Five Process. "Awww Disassemble." Using everything from a hammer and centering punch, to a drill and a pair of dental extraction pliers (Great for grabbing rivet heads) I took my time and pulled the failed fender setup apart into individual components. ONLY the Stirrup straps and hardware will be reused. After about two hours, the one setup was pieces and parts. I'll leave the other Fender setup all together to use as a reference for assembly and a pattern for tracing the cutouts for both sides... up until the time I need to remove the metal hardware and the stirrup strap. Stick around, this could get interesting. Stick around for the ride... (Pun Intended.) LOL.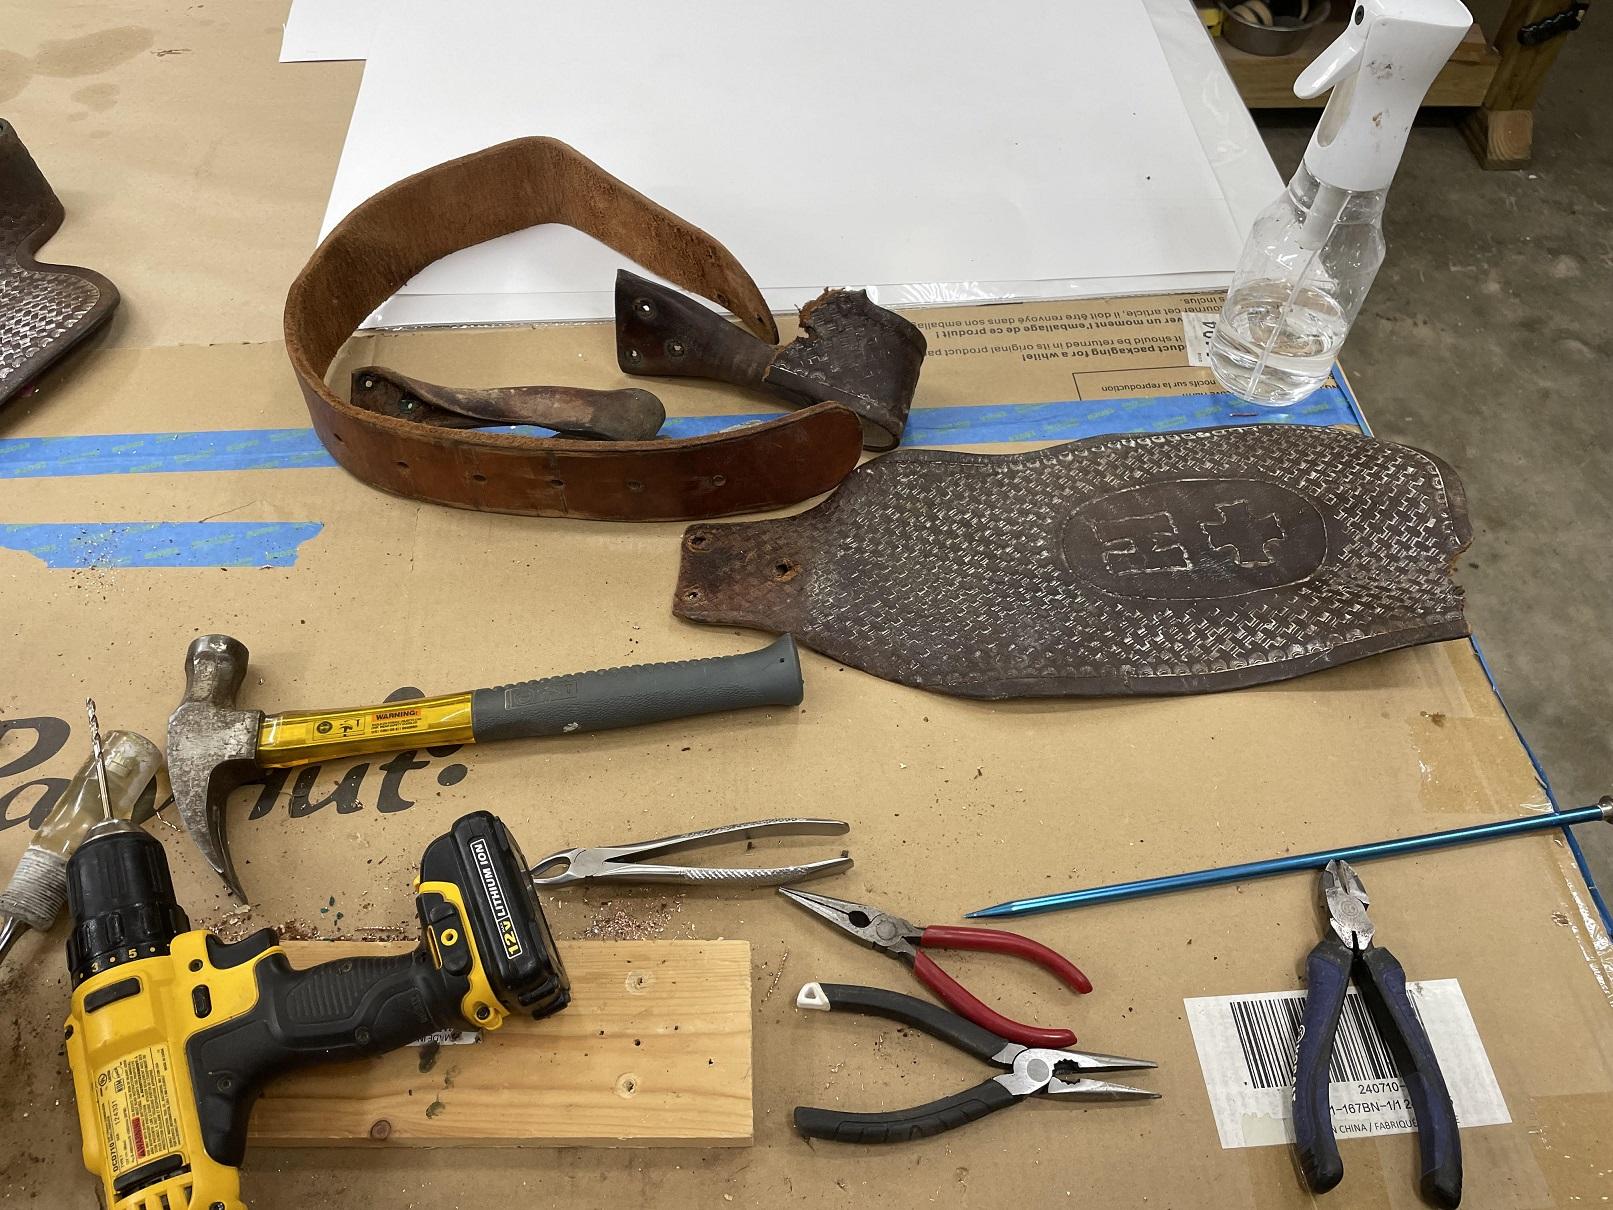
-
Fender repair...
Brokenolmarine replied to Brokenolmarine's topic in Saddle Identification, Restoration & Repair
The two fenders had been clearly well (loved) worn. One so much that it actually failed.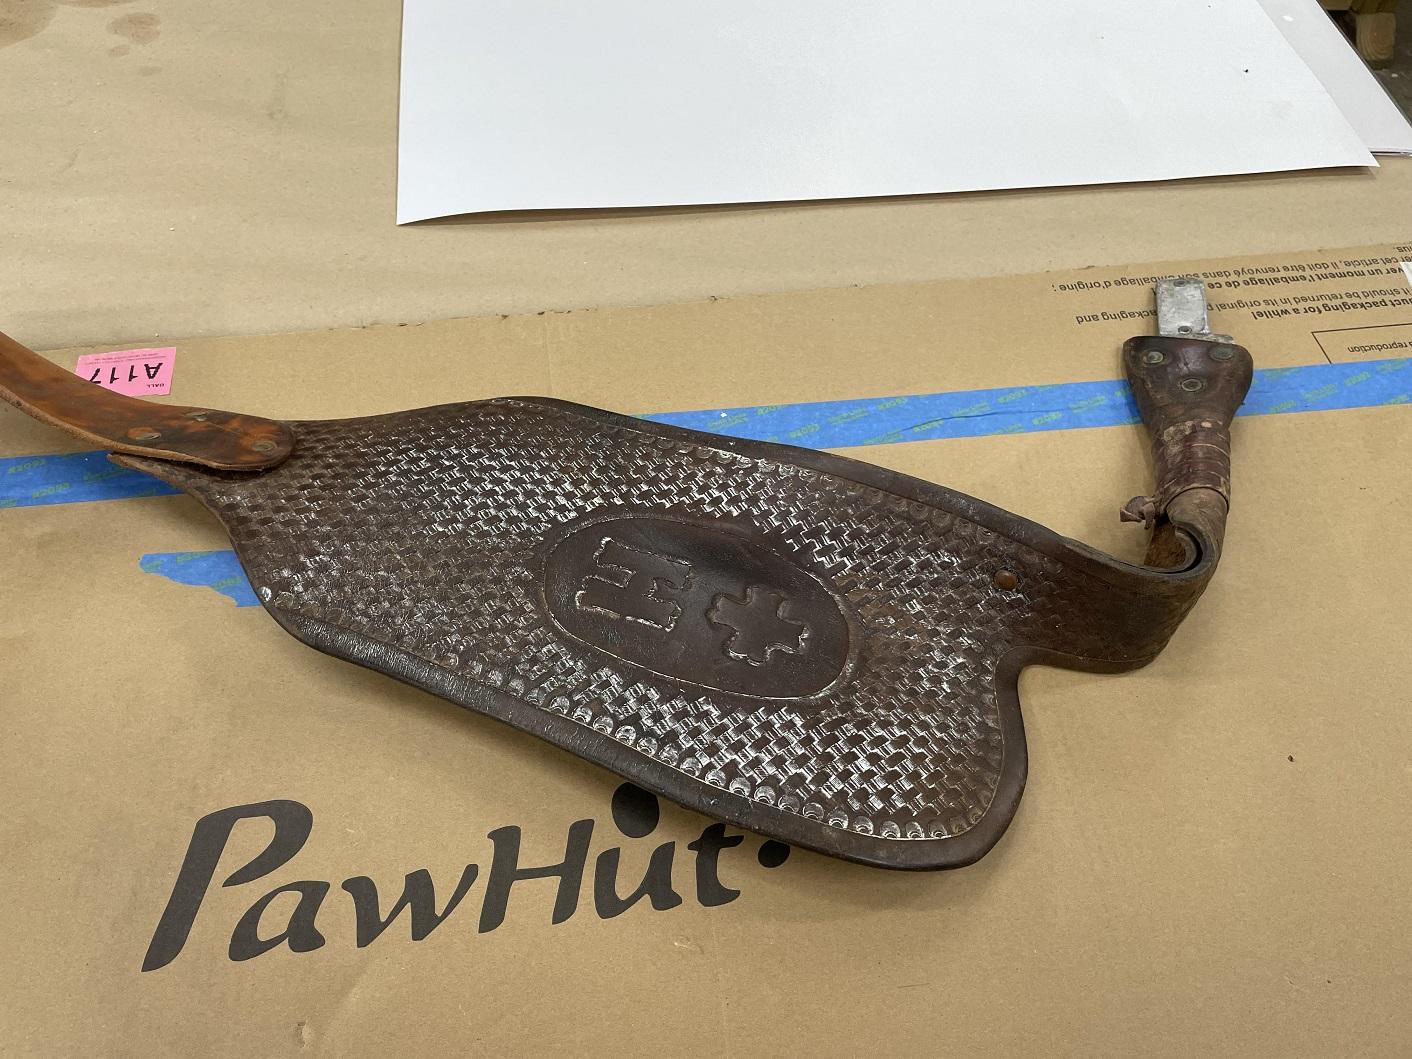
-
Fender repair...
Brokenolmarine replied to Brokenolmarine's topic in Saddle Identification, Restoration & Repair
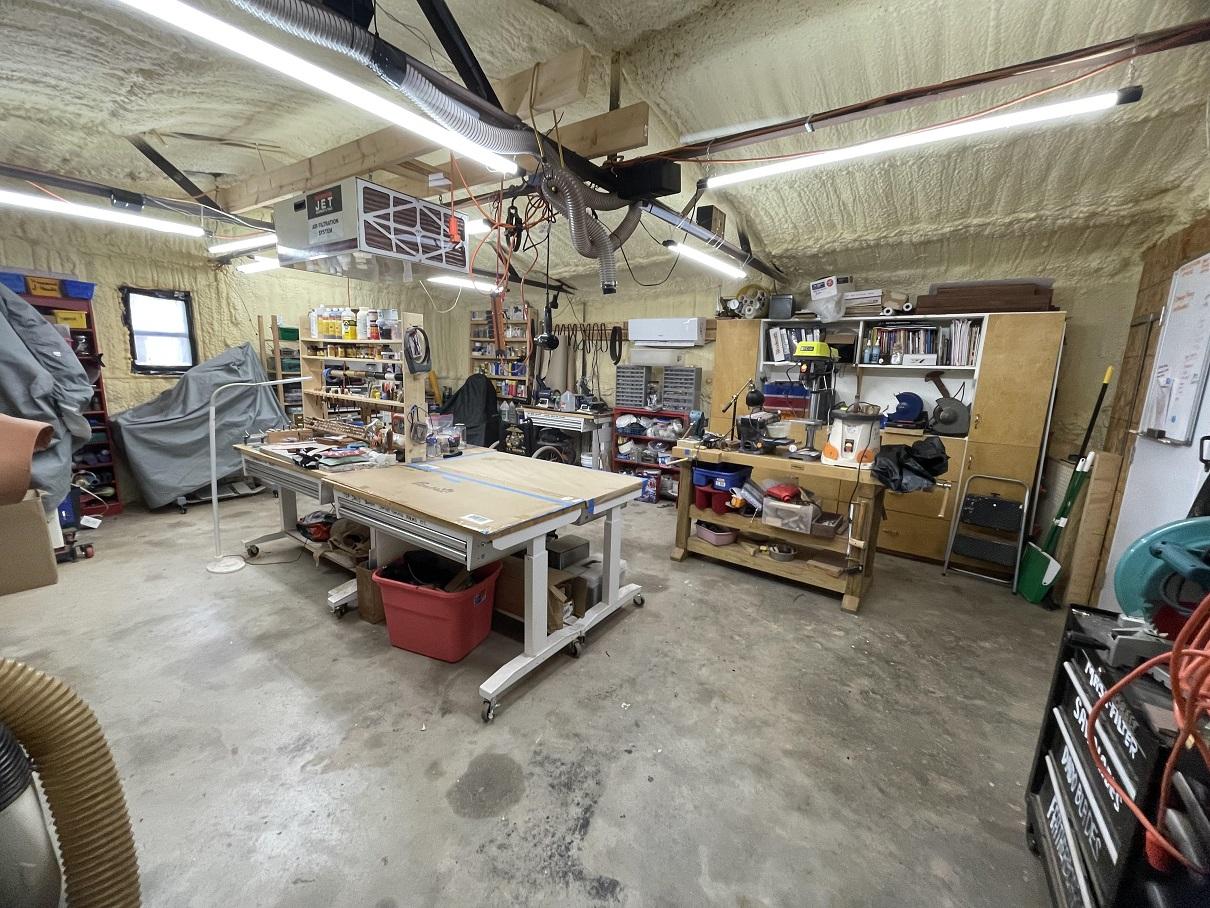
I got the order in late yesterday. Got out this morning and rearranged the shop for the larger workspace needed for this project. The shop usually looks like this, with a cutting table on the near side, and the table behind it holding the table top drill press for knife scales, the oscillating sander and the belt sander for shaping and finishing the knives. After moving the equipment to the woodworking bench behind the table and cleaning them both off, I had the needed space to get started.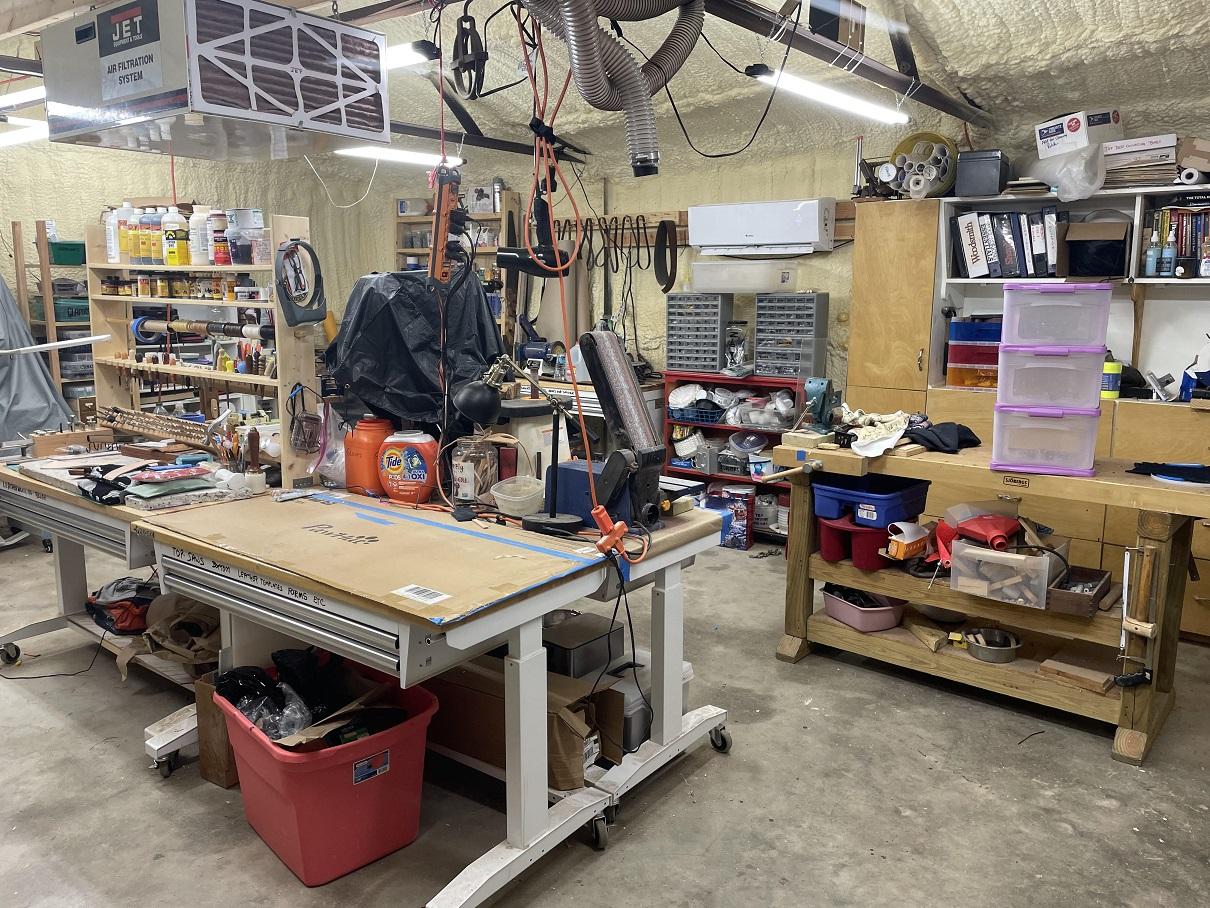
-
Fender repair...
Brokenolmarine replied to Brokenolmarine's topic in Saddle Identification, Restoration & Repair
Getting close, the order is due Wednesday, via Fedex. -
Fender repair...
Brokenolmarine replied to Brokenolmarine's topic in Saddle Identification, Restoration & Repair
Yup, they do that a lot here as the temps get into triple digits. I've watched a lot of his stuff over the years. Excellent instructor, even via you tube where you can't ask questions. -
Fender repair...
Brokenolmarine replied to Brokenolmarine's topic in Saddle Identification, Restoration & Repair
Still waiting for materials. I'm chomping at the bit to get started.