Brokenolmarine
-
Posts
592 -
Joined
-
Last visited
Content Type
Profiles
Forums
Events
Blogs
Gallery
Store
Everything posted by Brokenolmarine
-
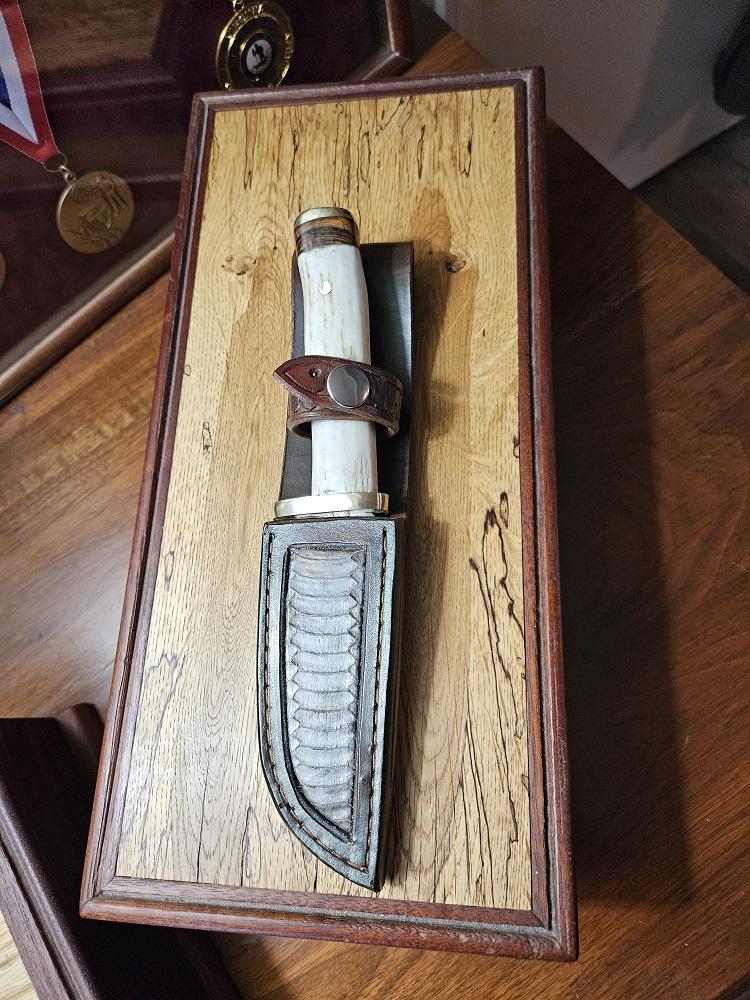
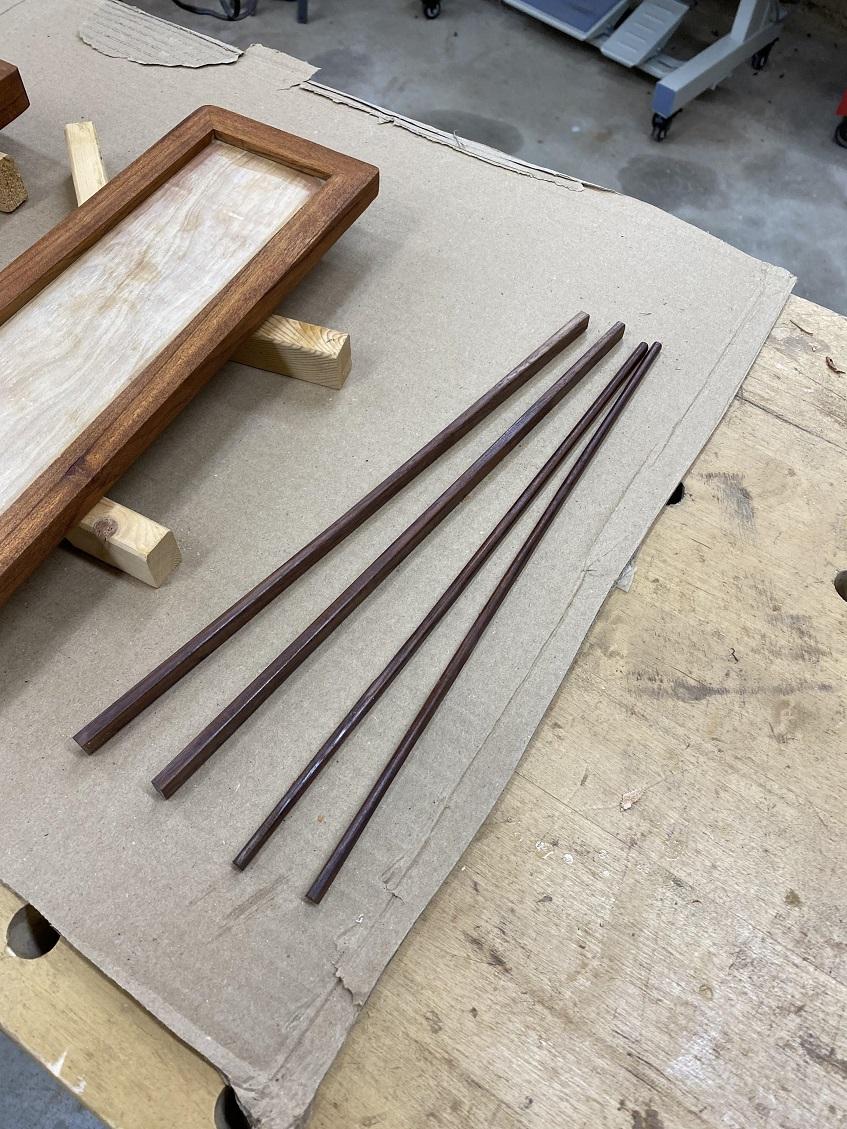
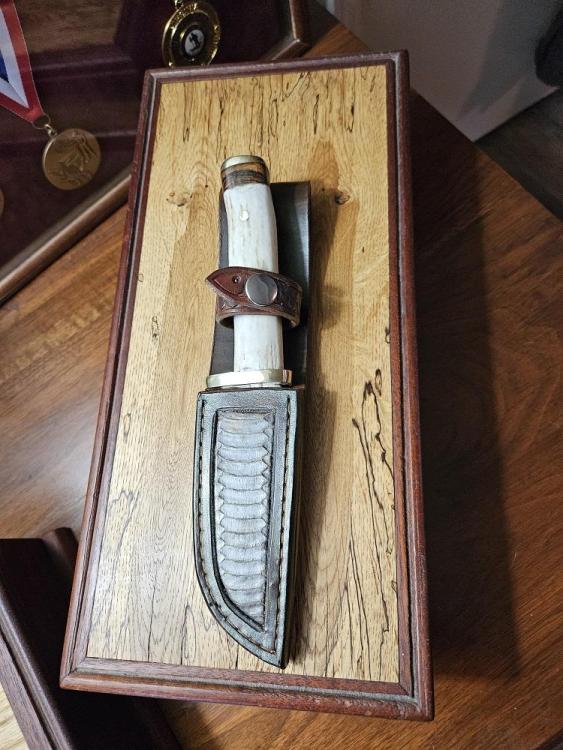
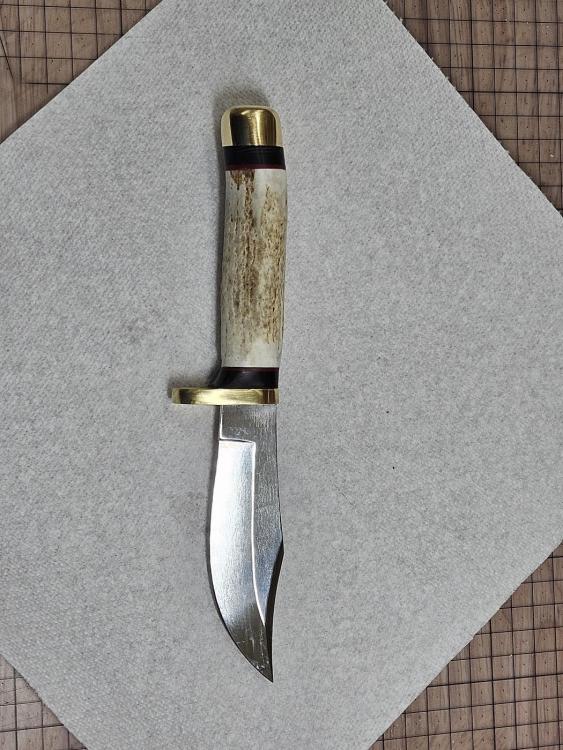
To pass the time I have been making a few knives lately. I buy the blanks because my arthritis wouldn't allow me to forge them, but I do all the rest. In most cases I form the guards and pommels from bars of brass or nickel silver. The scales come from collected woods or other items I have gathered over the years and I even have begun inlaying accents. So here are a few I've finished over the last few months. This stag skinner below was my first attempt at a stag handled knife and it turned out "okay." I wasn't thrilled as the blank wasn't a hidden tang blank and I had ground it down on the grinder to form the tang, which was off center. The accent below the pommel is nicely figured walnut, a scrap from another project. The pommel and the guard were formed from a brass bar and polished. The sheath was also a first attempt, at inlaying snake skin. I used the belly as I liked the look. Next up is this stag hunter, my second attempt. The pommel and guard came as a kit, but were way oversized and were shaped down to what you see by careful sanding to match the profile of the antler, which was shaped to match the handle. Between the brass you see accent buffalo horn spacers carefully shaped to match the stag as well. There are also thin red carbon fiber accents. No sheath with this one.
-
Hiding firearms around the house? A gun in every room? It's like some people think the world isn't safe anymore. I spent nearly thirty years in law enforcement after my Marine Corps career, and those folks are... Right. Good Job.
-
You are all welcome to comment, helpful critiques are appreciated. Thanks to those who have.... jim
-
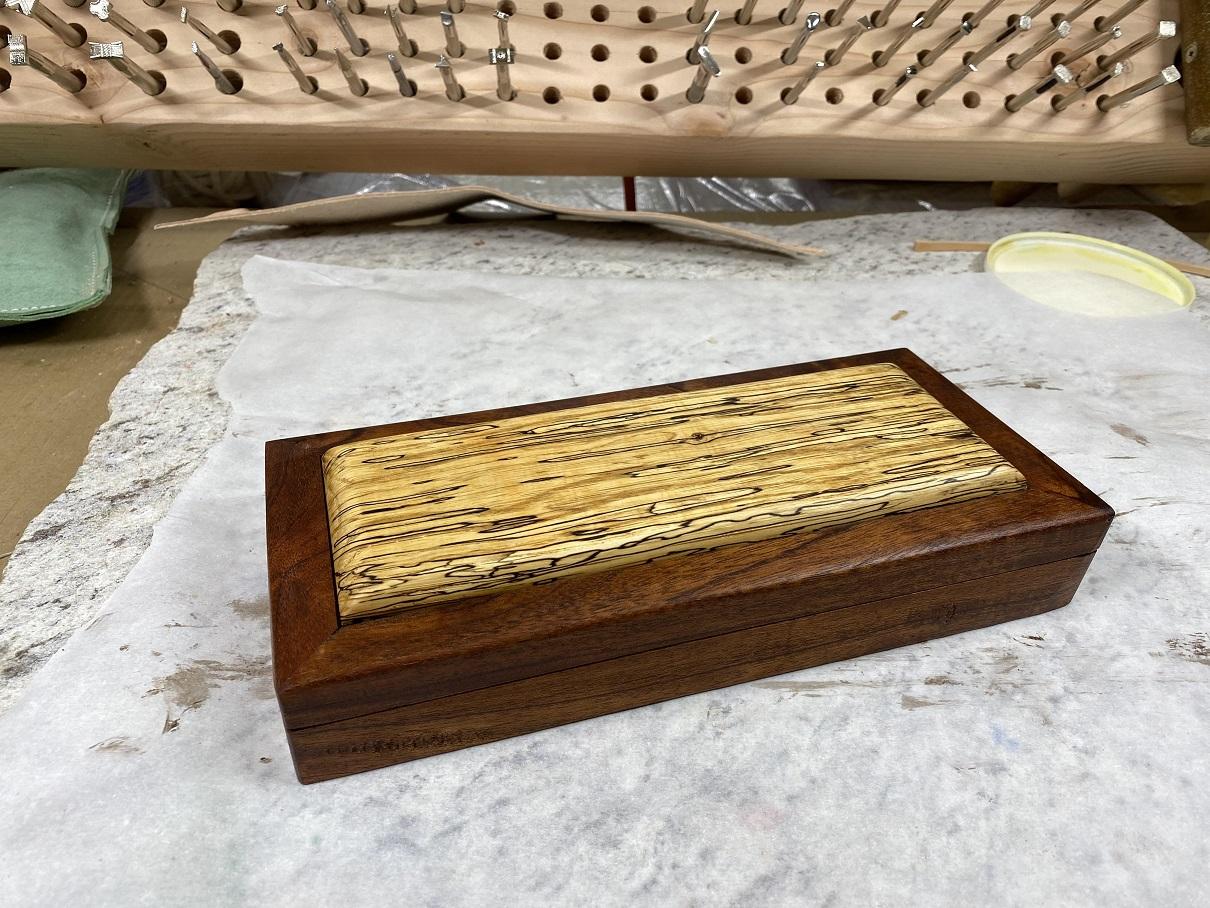
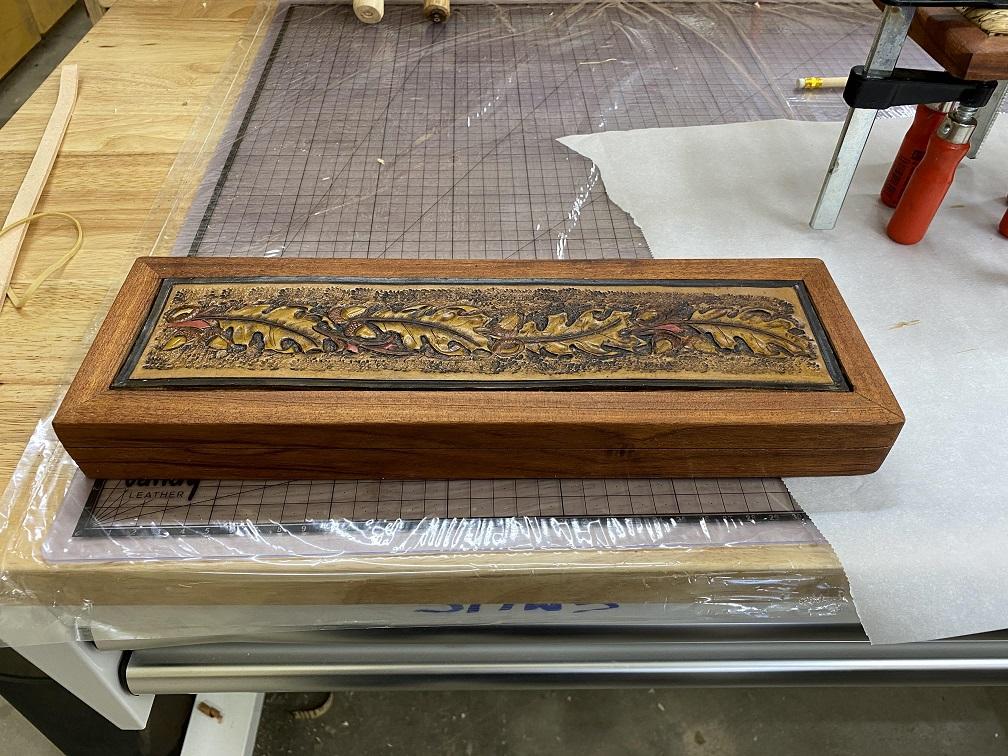
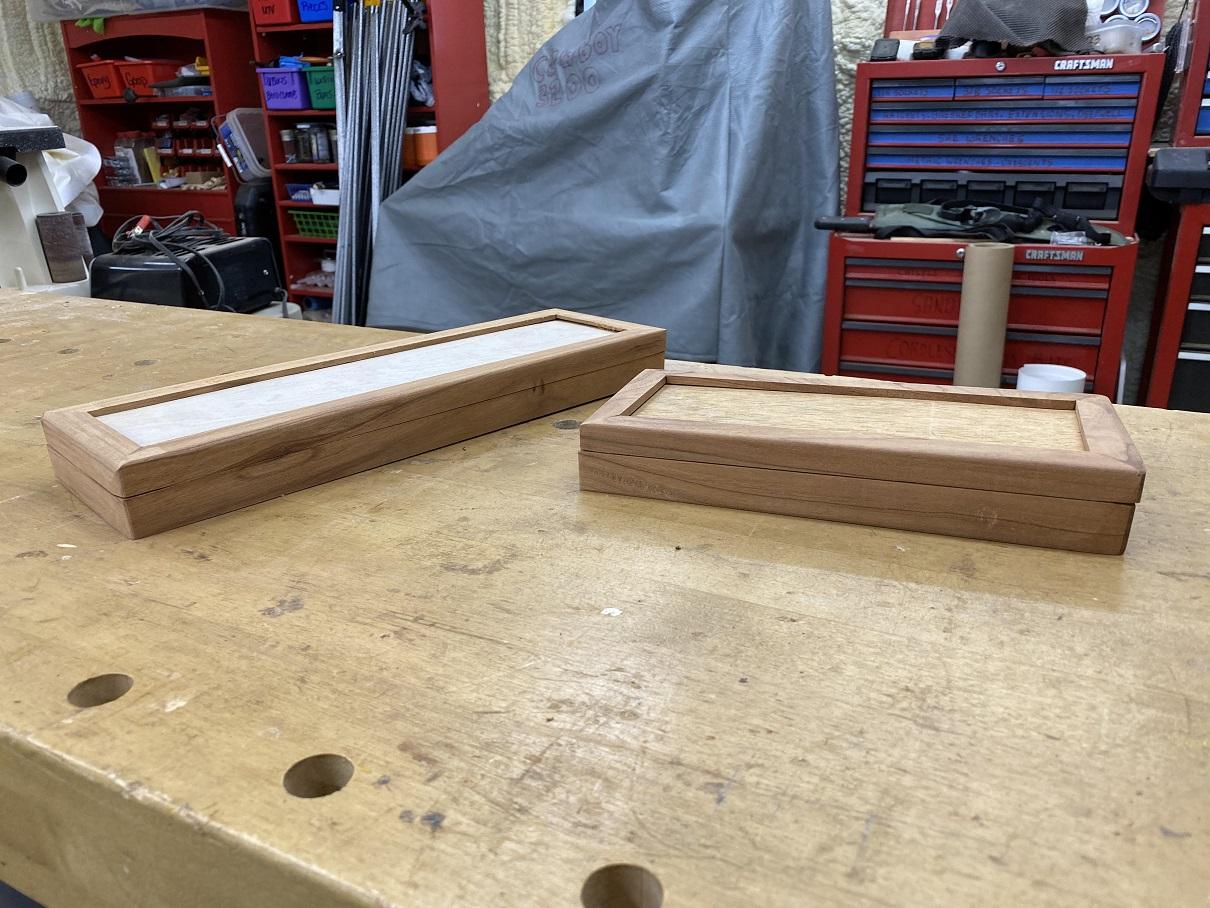
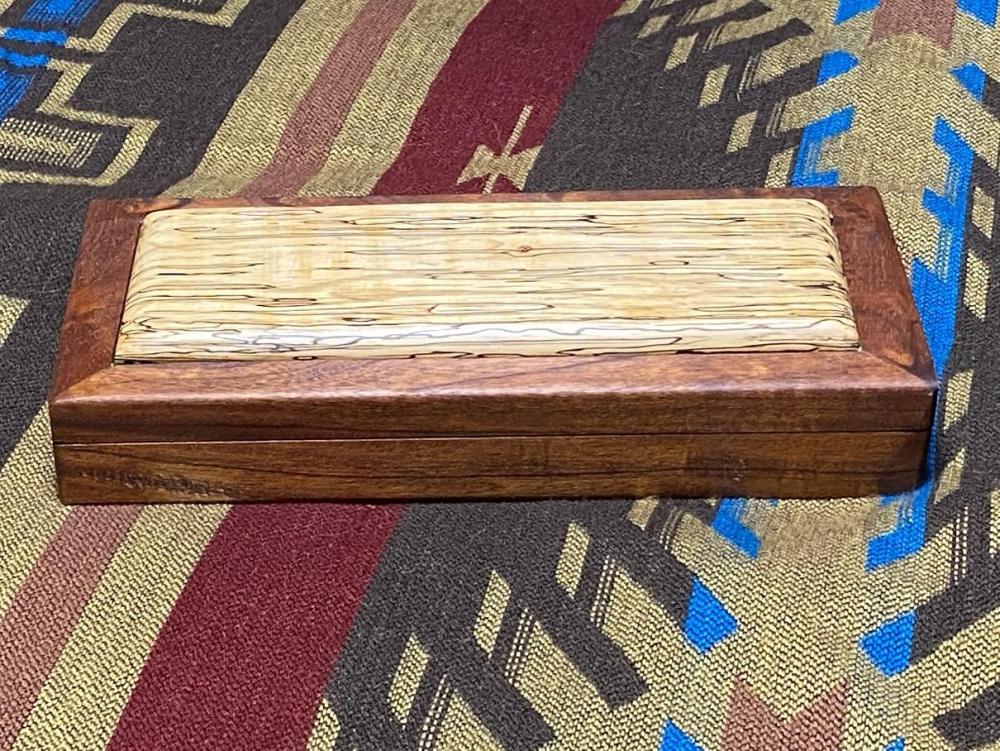
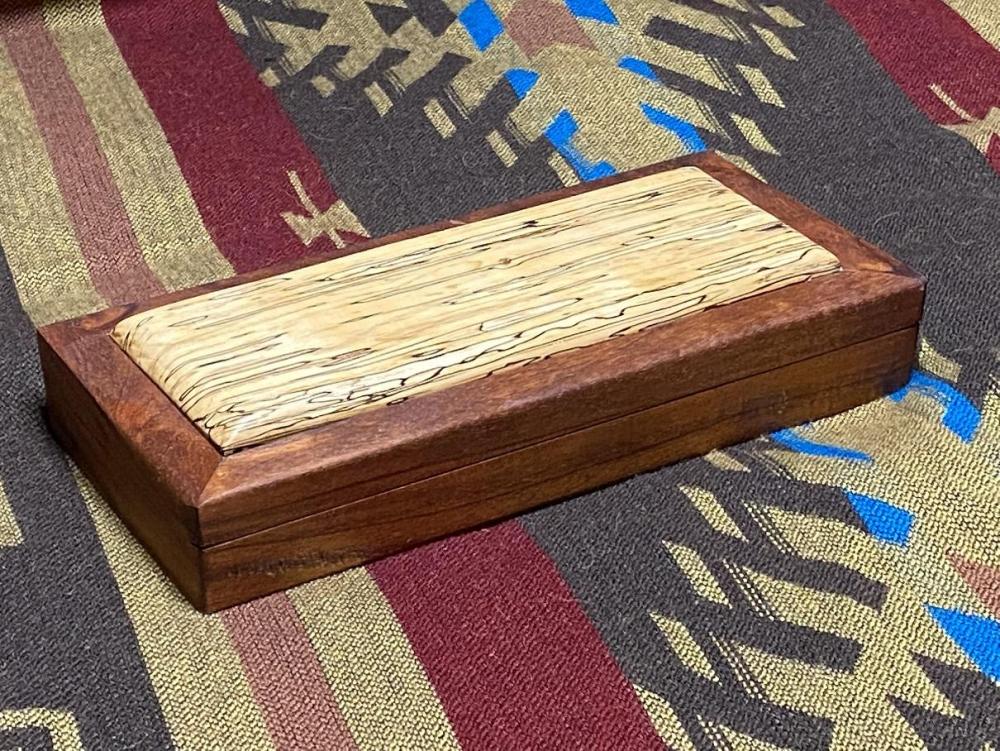
Last work on the project. Went out this morning and applied a good coat of wax to the wife's sewing room box. It glows softly and looks good. I'm done. I like the grain and contrast on her box even better than the letter box. I'm jealous. But then, shouldn't the boss get the nicer things.
-
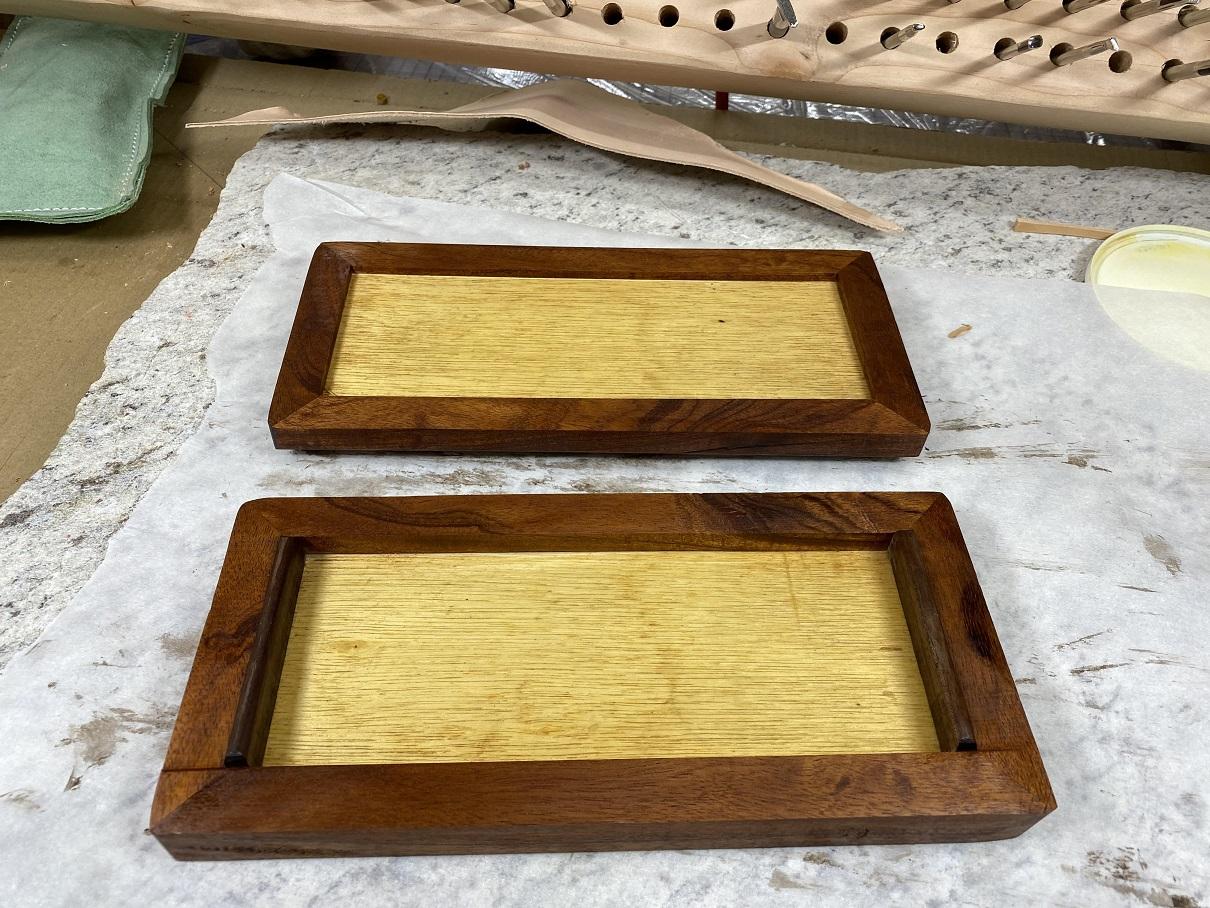
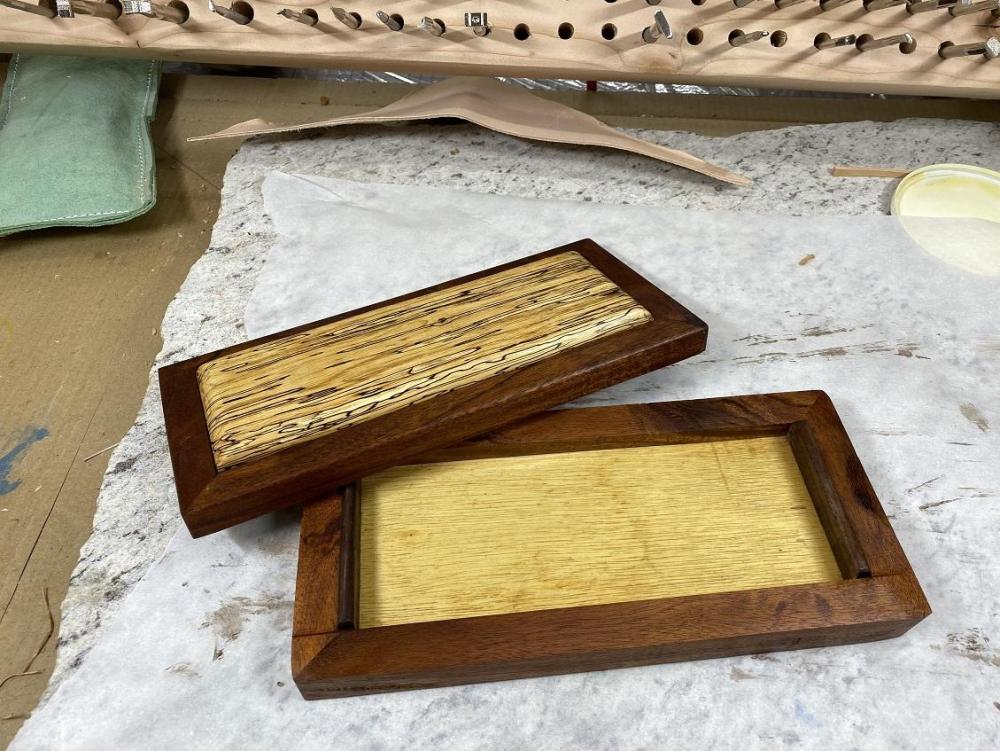
Back out to finish Miss Tina's sewing room box. The glue had said, and a coating of oil was applied to the whole box. Can you say, Ooooh... I love it when a plan comes together. In the picture below, you can see the walnut guides attached to the inside edges of the bottom tray. The ensure the top will be in proper position when Tina puts it back on. It will only go one way, all she has to do is match the grain pattern on the front if she mixes up the top and bottom alignment. She really loved the box, and said the beautiful grain in the spalted maple really compliments the grain in the mahogany. Now both boxes are complete other than a couple buffed out coats of wax. Most of my projects are started with a basic idea, and done on the fly, with the planning done as I go. I love the flexible work and the freedom it gives. I can work from the templates or rigid plans, but had to for my first career, and enjoy this so much more. Color this one done. On to the next....


-
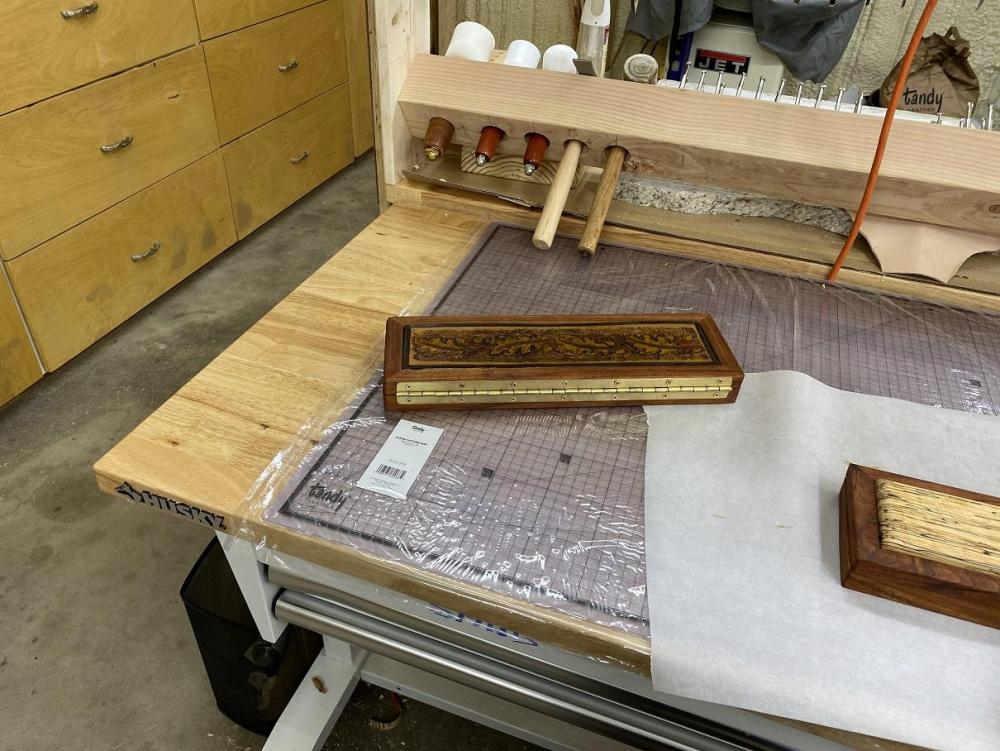
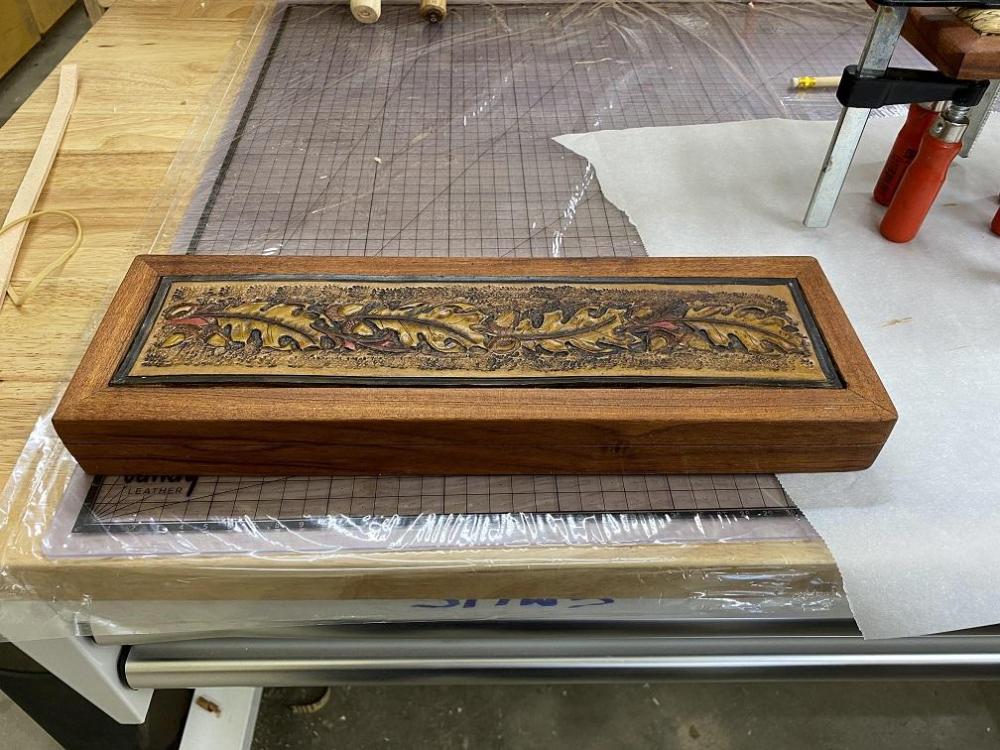
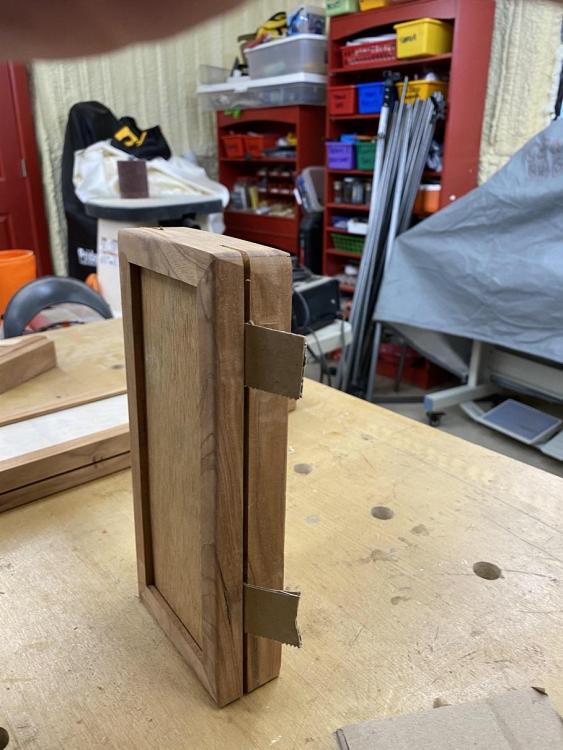
Went out this morning and looked thru the available hinges I had, and nothing that fit, looked like it would handle the weight of the mahogany lid. So, I took a three foot section of brass piano hinge on hand, trimmed it to length, rounded the end corners and Boom. Hinge. It works well and should last a long time. The box is done and other than a coat of wax now and then will be a working addition to the leather bench. I moved on to Miss Tina's sewing box, and formed the guides that will center the top when she removes and replaces it each time. I have them glued in place and am waiting for the glue to set. Then I'll oil the walnut and take some pics. Her box will be done, other than a couple coats of beeswax as well, then on to the next project. Scabbard? Gunbelt? Knife? Who knows, something to keep busy.
-
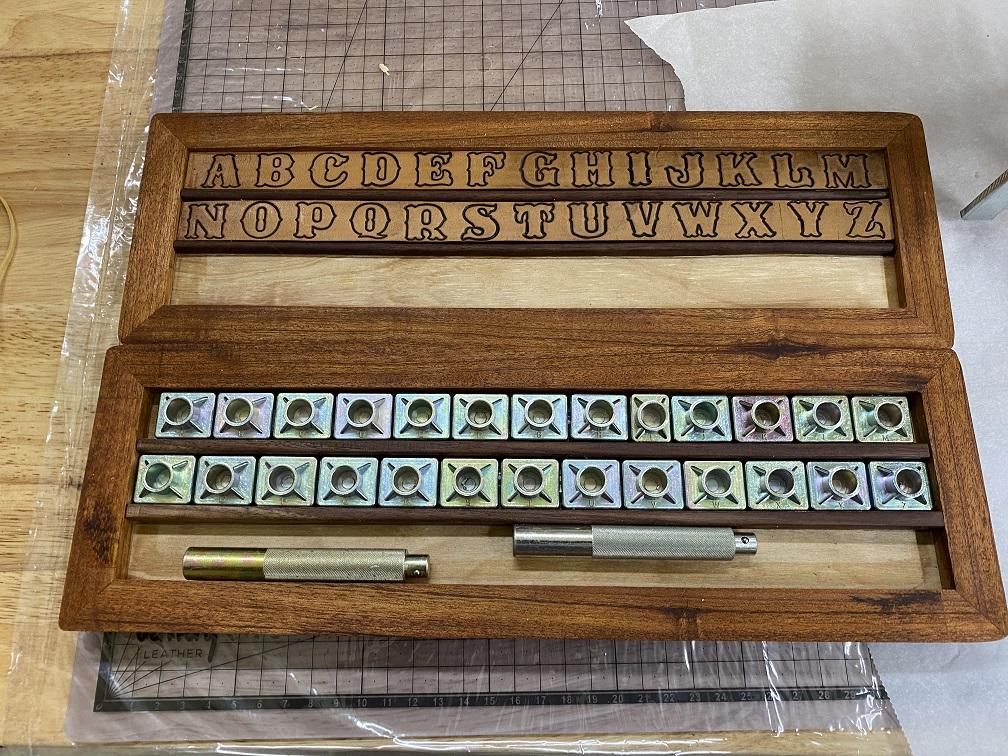
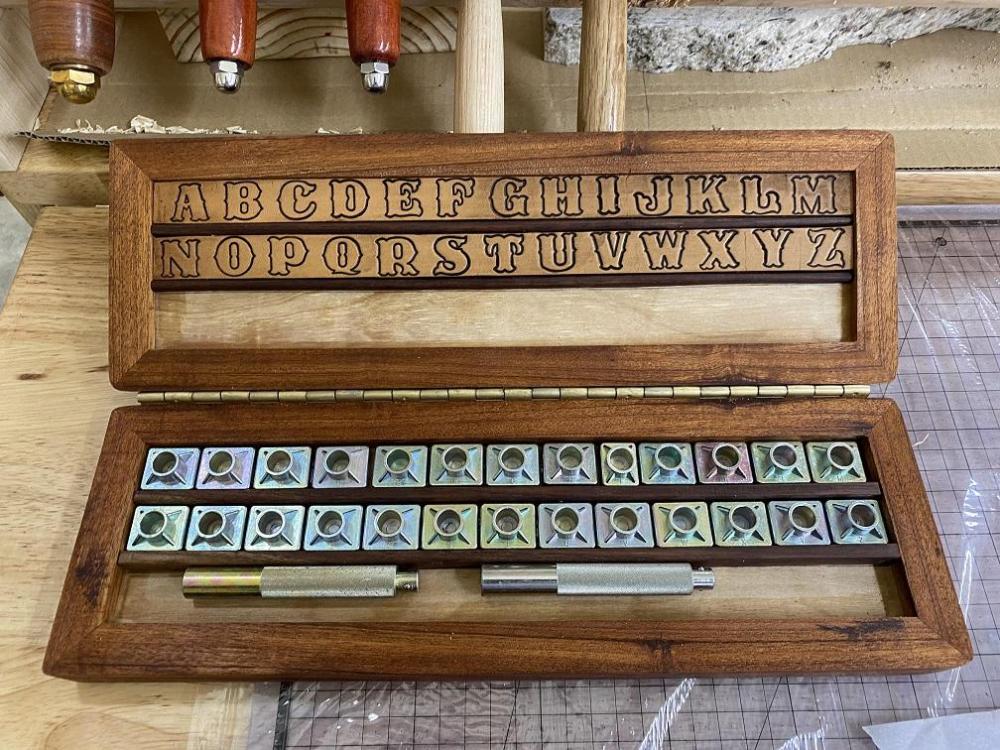
Next up, I glued in the inlay for the top of the letter box. It's coming together. So this is what you would see when you open the box, once I actually get hinges and a latch for the thing installed. You have the letters and such in the bottom, and the "Box of Chocolates" reference in the lid. I am pretty happy. The closed box is pretty attractive with the grain matching up and looking pretty good. I may have to use my syringe and needle combo and inject a touch of glue under that top inlay. There may be a touch of an edge rolling up just a tad. OR, it could just be a shadow. I put pressure all around the edges to set the glue. I got Miss T's sewing box top inlay in the clamps before I finished that session, and her box is almost done as well. That one will have some awesome grain.


-
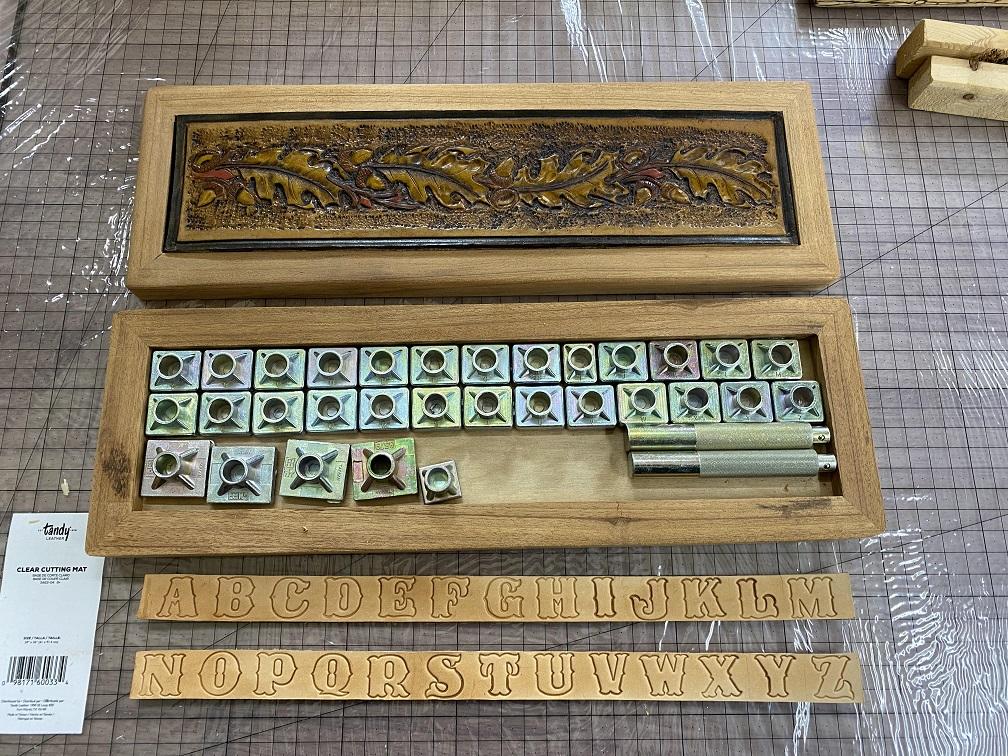
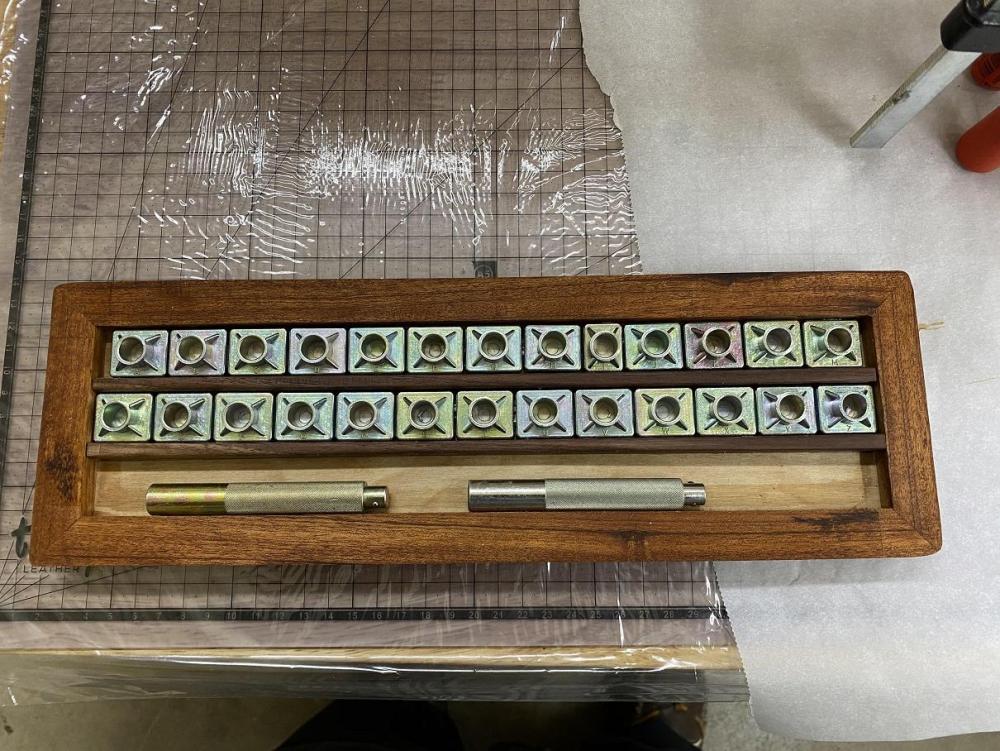
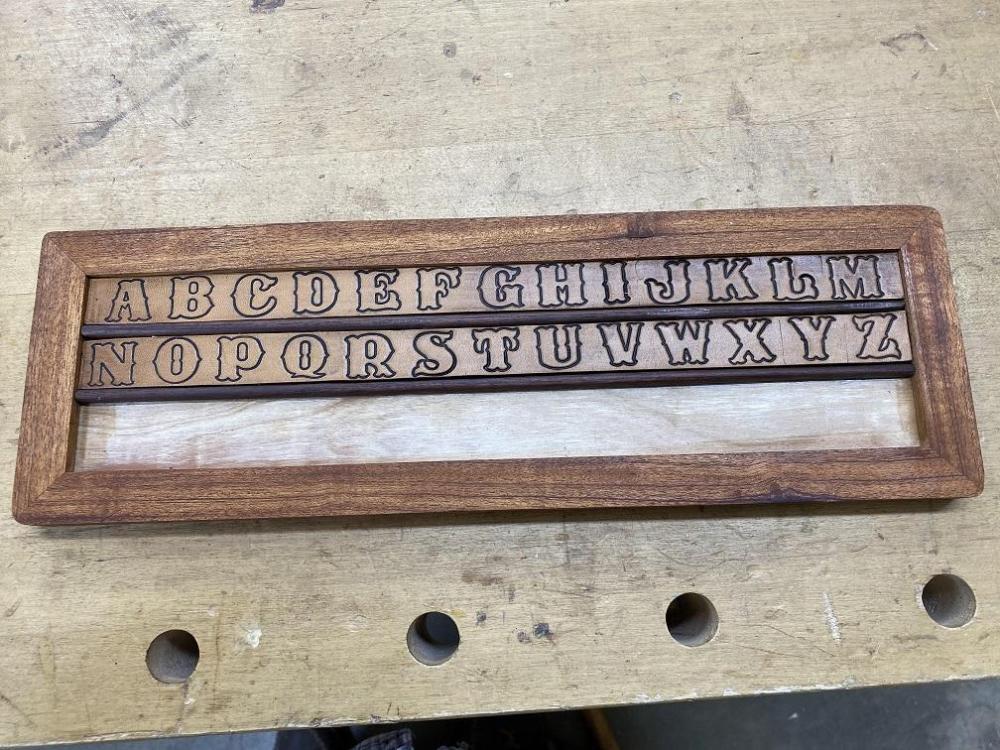
Another session, assembly in progress. Started with the letterbox bottom rails. They will keep the letters in the proper place and order and leave a space below the letters to store the handles. It worked out well, though I didn't like the larger stamps in here so they will live in a tray in the leatherwork bench drawer. I don't have that many at this time, so no biggie. Next up was making sure I oriented the under side of the top correctly then assembled the reference strips and spacers for that... They turned out very nice, and the walnut strips accent the antiqued letters on the strips perfectly.
-
Session this morning, now that the barn electrical project is done for the wife. The first portion concerned the reference strips now that the oil has dried and we have a resistance coating. I put a nice coat of antique on the strips, ensuring that every letter was fully filled and let it sit for about five minutes. Then, wiped off the excess, careful NOT to wipe the antique out of the letters. This darkened the natural leather and filled / highlighted the letters. I think it turned out great. I let it dry while I worked on the dividing strips, then put on a coat of finish. I made two pairs of dividing strips from scrap walnut, measured to be the appropriate height. One set for the letter tray, and a set to fit between these reference strips. I rolled the top edges for aesthetics, and then coated them with natural watco and set them aside to dry. We are very near the final assembly point.


-
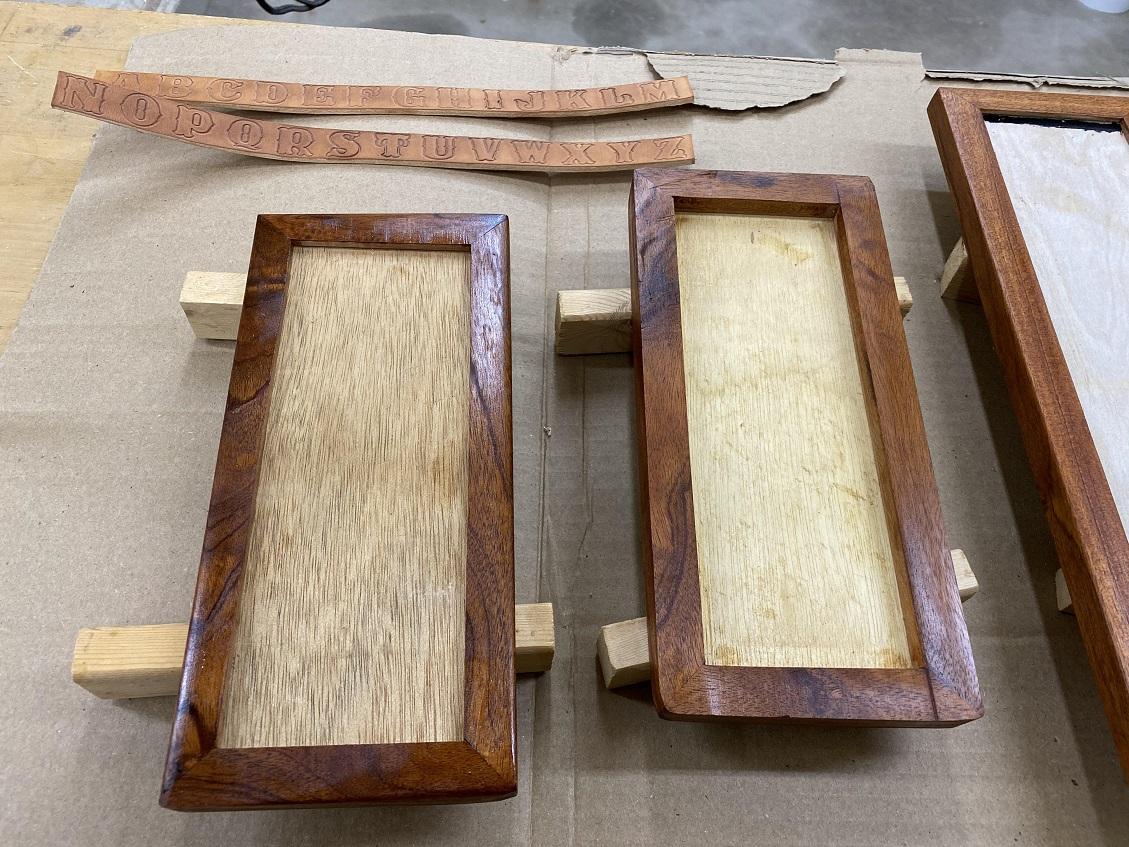
Since I had to run to the doc about a possible ear infection that made the whole left side of my face and jaw hurt, I didn't get much done today, but I wanted to knock out the oiling of the pieces. All four box components and the two reference strips got their first couple coats of oil. They will dry overnight and I'll likely put a second coat on them tomorrow; AFTER I put the dividing rails in the letter box bottom between the letters, and the top between the reference strips. The sewing box oiled, (The strips are in the pic as well.) The grain on this box is really nice. The letter box doesn't have as nice a grain, but the mahogany is still nice looking, and both will look good once put together. More work tomorrow.

-
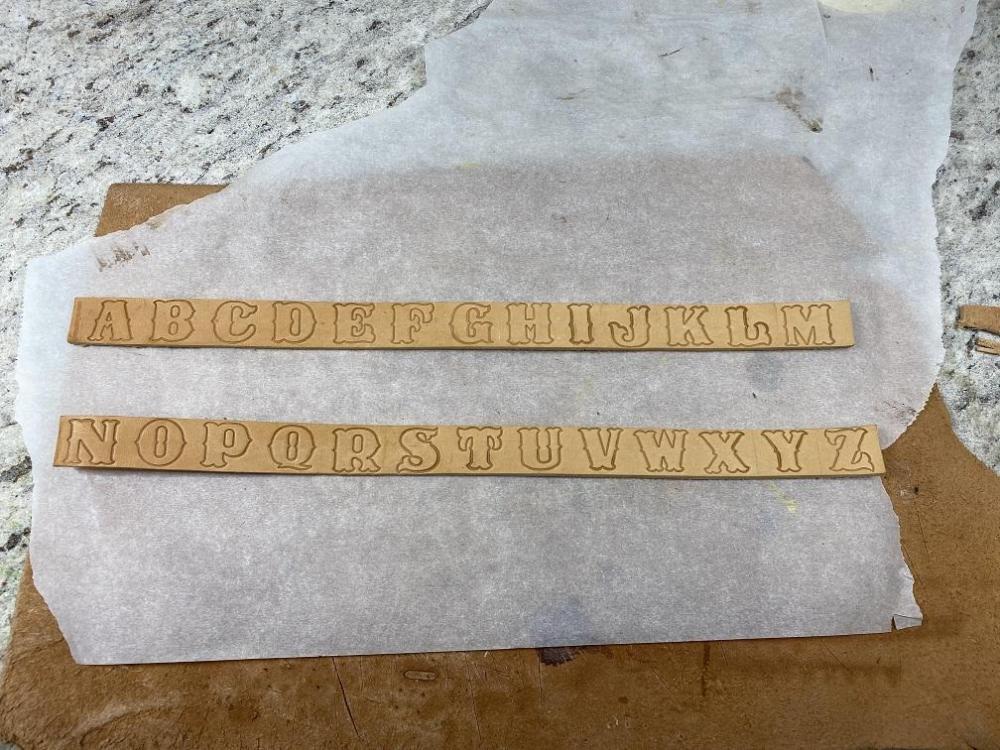
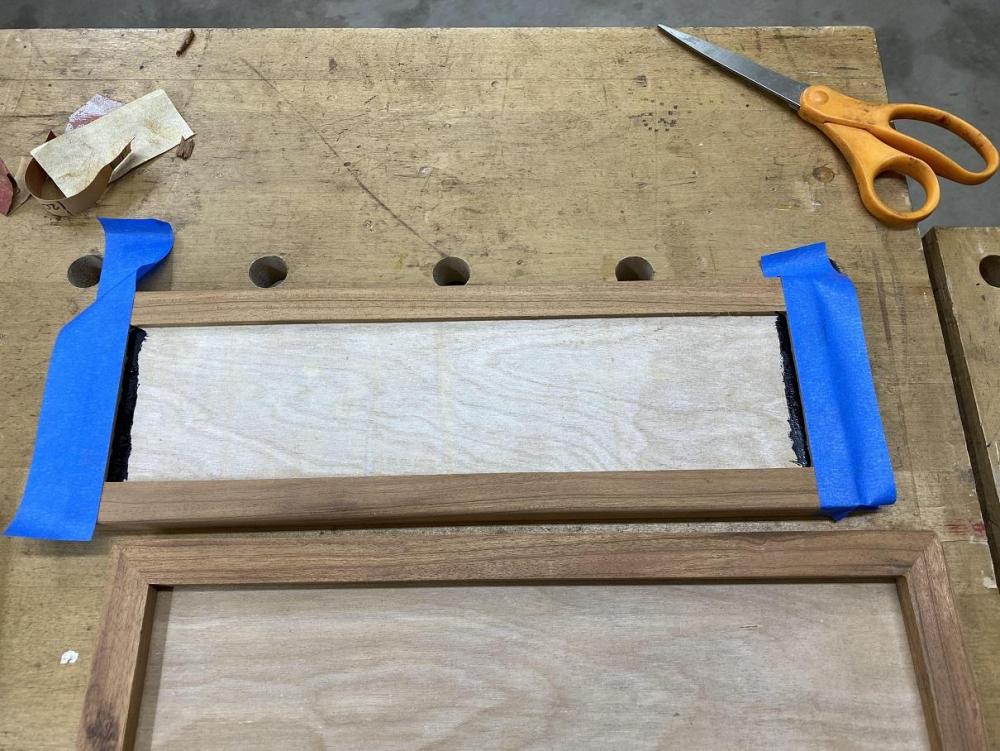
Got out over the last couple days, a short session here and short session there. We have had contractors out to run power to the new small run in barn and feed room. Took a long while to get them out. We have been busy with that, and I had other issues, but knocked out a few things. Drawing close to the end, so one thing I had to remember to so, was a neat little trick.... I took some black paint and painted a line down both ends of the area where the leather insert will go. With all the tooling, it's just a fraction short. This will prevent that bright white background from showing through. Can't paint the WHOLE thing black or the contact cement won't hold as well. Then I spent about two hours with small squares of sandpaper doing the finish sanding on all four sections of the two boxes. Any blemishes were sanded away. Not furniture, but I wanted them to look as nice as possible. Next I cut the strips of leather that will become the index strips inside the lid to the letter box and VERY carefully stamped the letters on the strips. They represent their positions in the box.

-
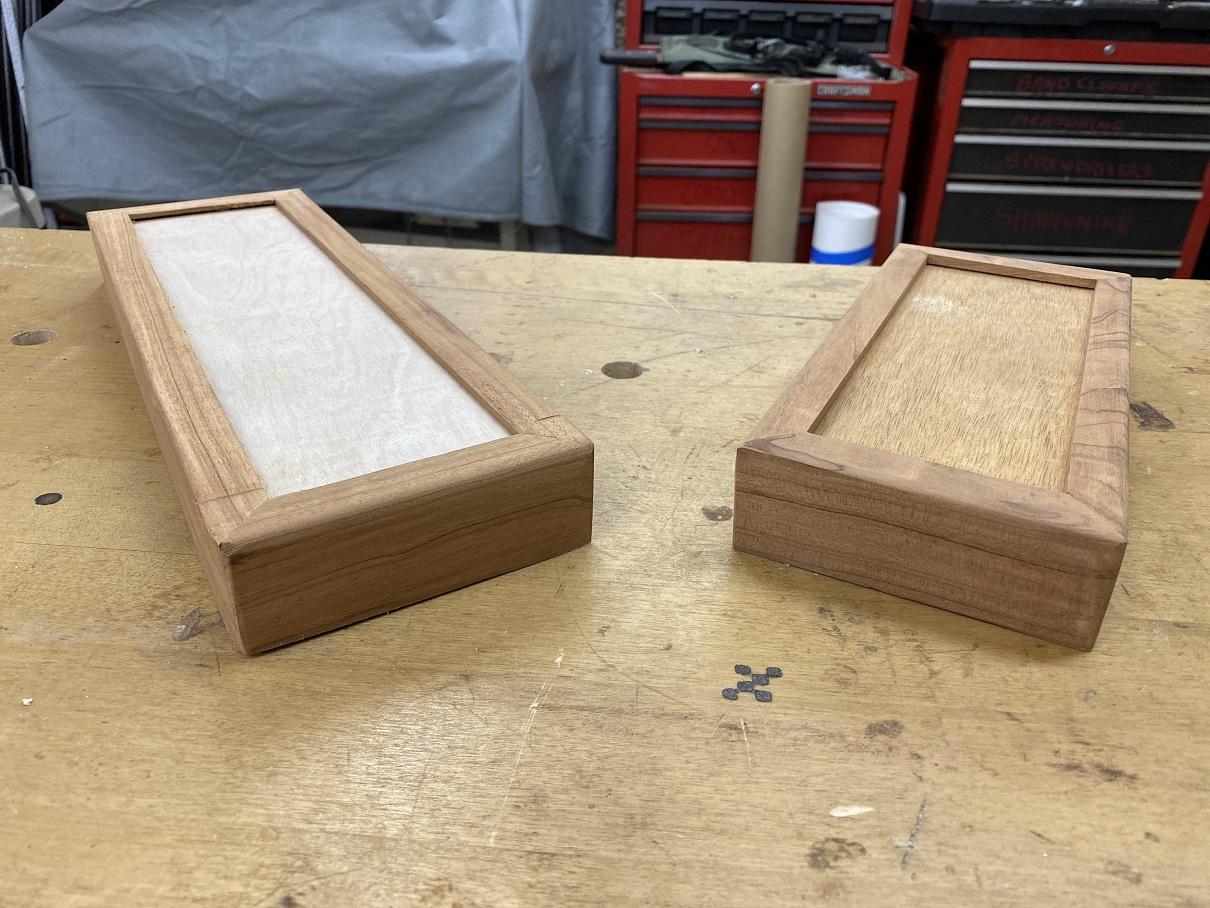
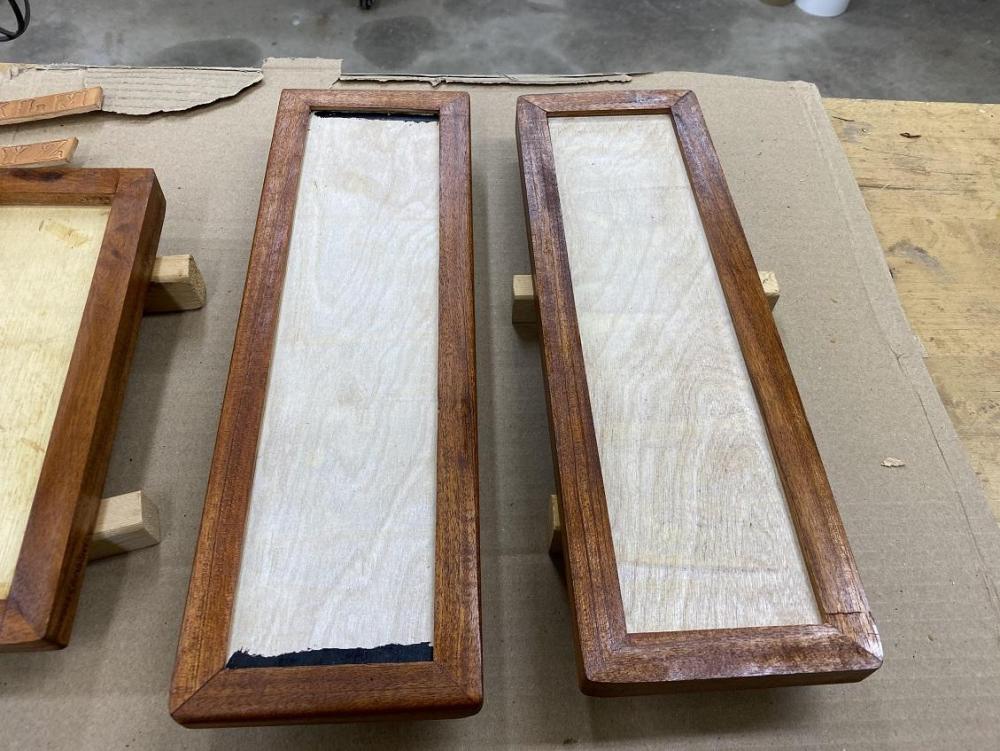
Once the four sides are cut, you have boxes with actual tops and bottoms. Unless you are perfect or you have some type of jig, you'll have some minor issues to contend with. Some work with the sander and planes took care of that. Now ready for some finish sanding and then the application of the natural oil. First I'll need to add the last items to each box. The guides to hold the lid center on the sewing room box, and the insert for the top for the letter box and the dividers on the bottom to keep the letters in place. Those will wait for the next session.


-
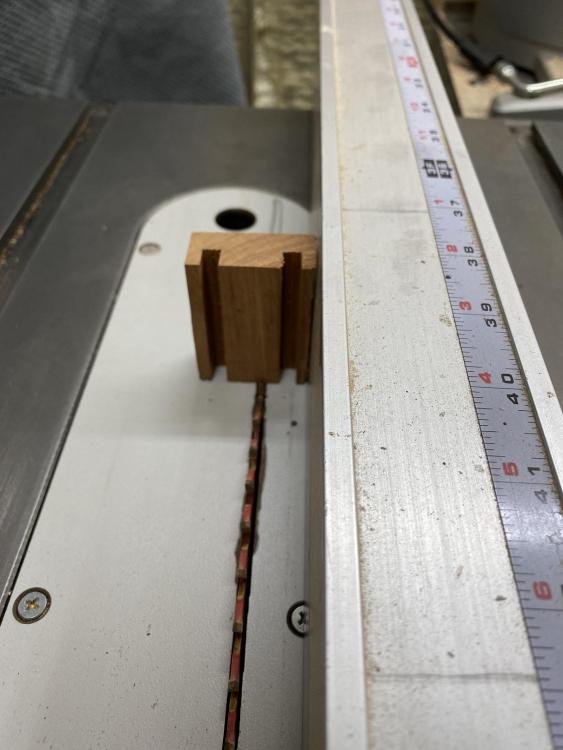
Back out today, ready to pucker up. The first step was to set up the distance from the fence to the blade. Again, saved the cutoffs and used a piece with the dados to set up. I made the first passes on the LONG side, on both boxes, then cut spacers from the right thickness of cardboard, and wrapped the boxes in tape, high enough that the tape wouldn't interfere with contact of the fence. Then prepared to cut the short sides. One hand and the featherboard would insure constant contact and position, the other would use a push stick to guide the box across the blade for safety.

-
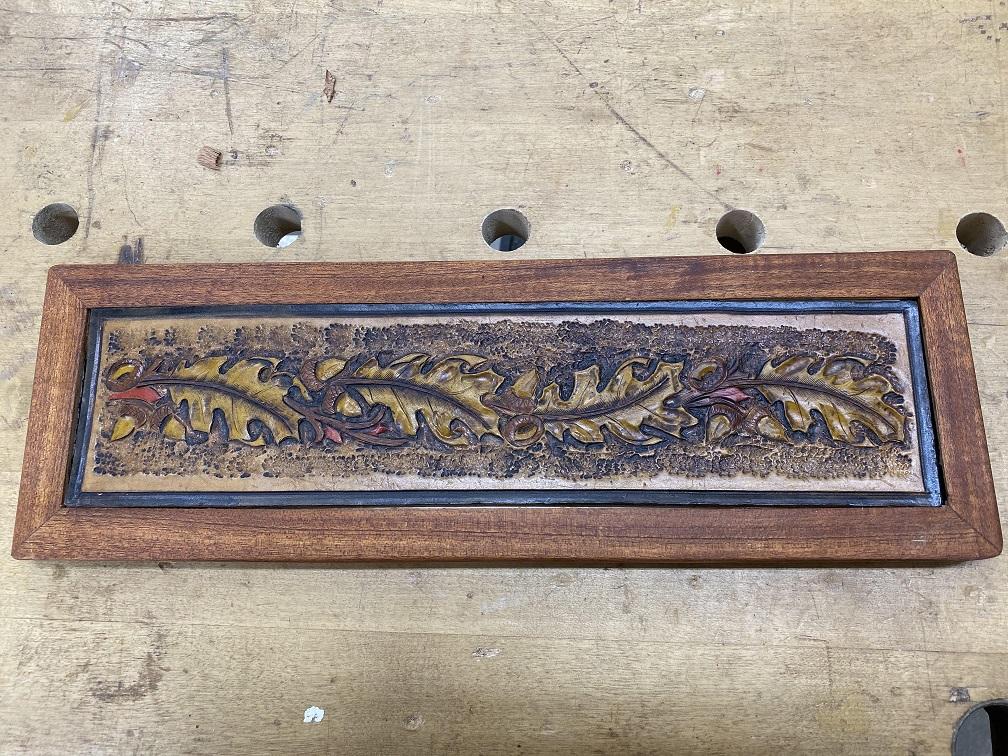
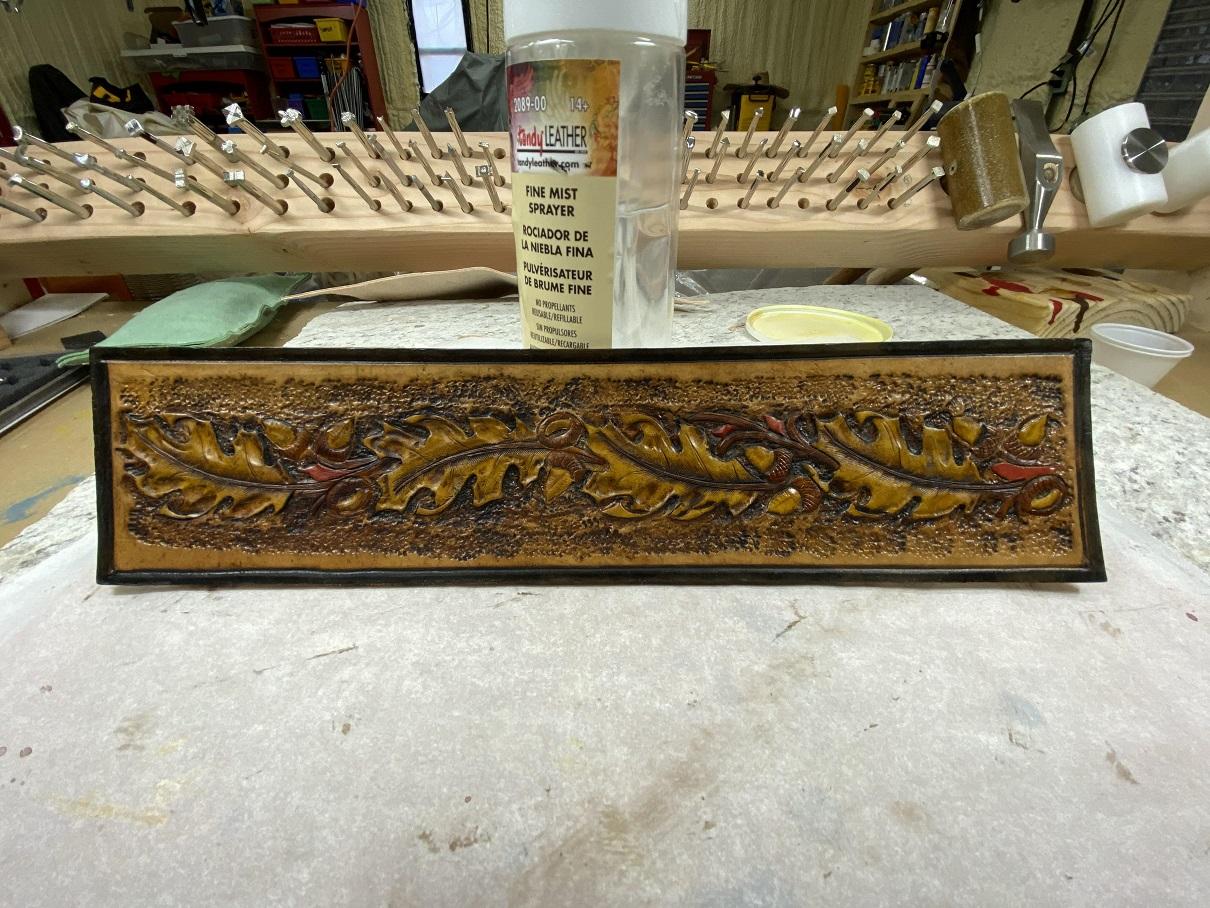
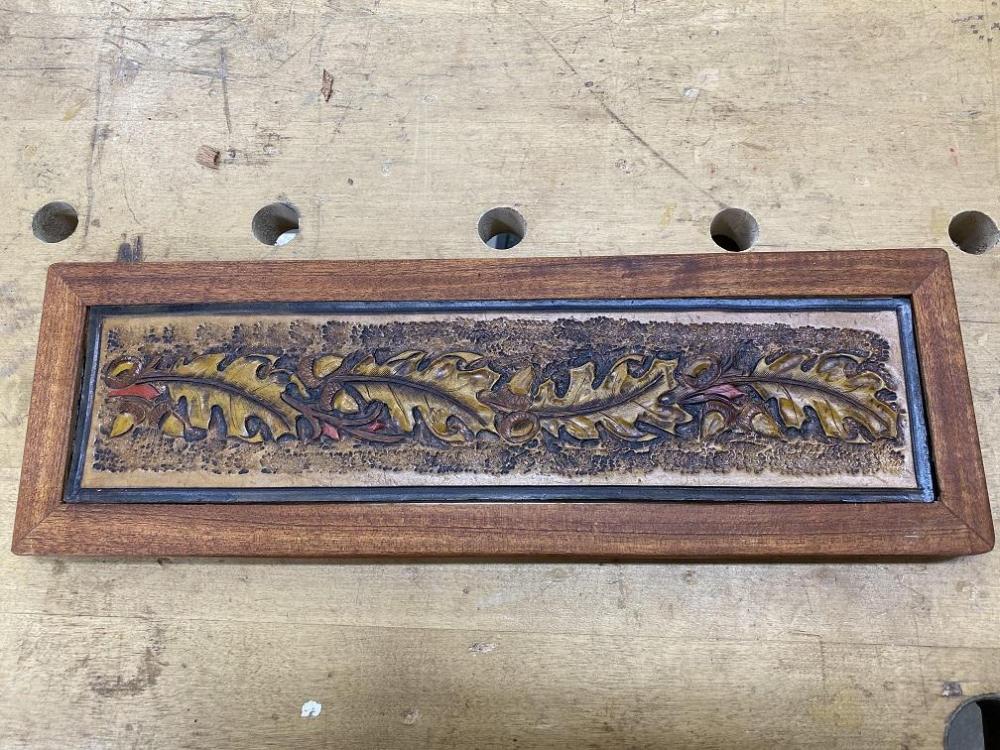
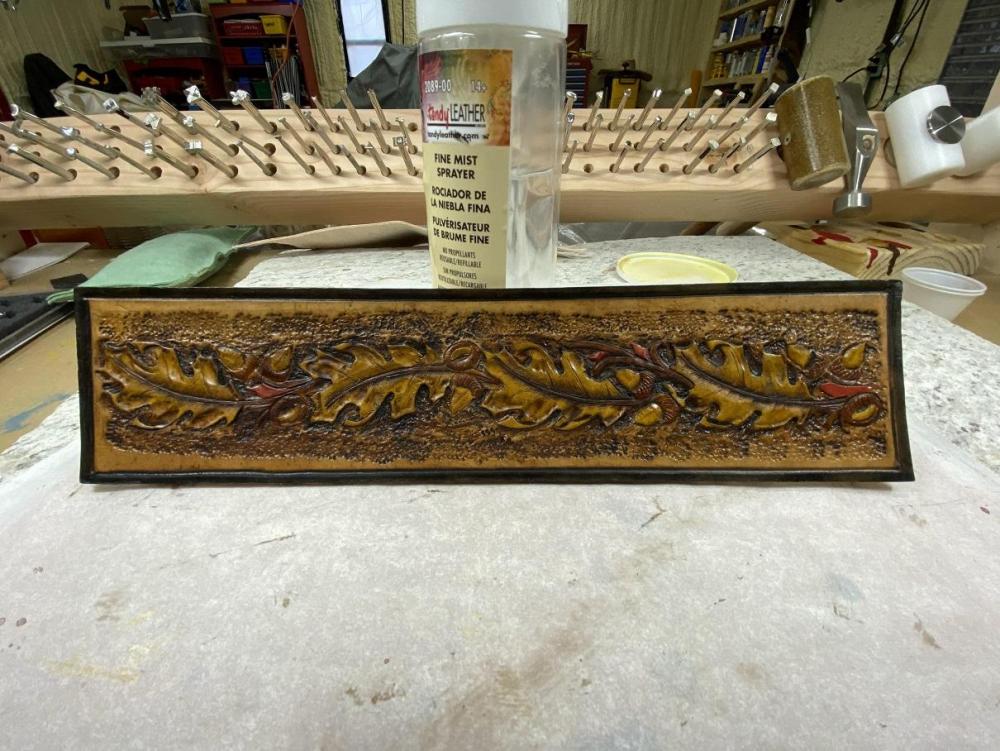
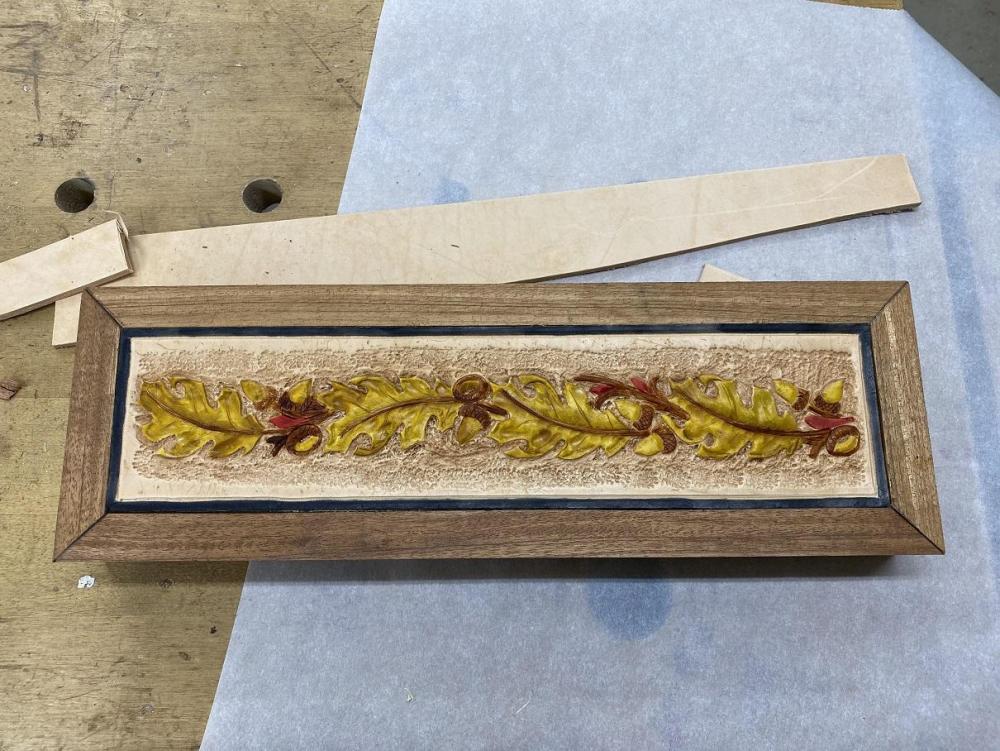
A peek at the leather insert... I spent an hour on IT yesterday as well. Antiquing and putting on two coats of sheen finish. Looking pretty good. Toned down the colors. I put the antique on heavy and then slowly worked it off using q-tips, taking much more off on the high areas then concentrating on some of the lower areas to insure it didn't stay too dark. I'm fairly happy.
-
Nice Work. Did you use a pattern or work it out yourself?
-
Then, I turned to the boxes. First they were clamped to the bench and the high areas were planed to match the profiles of the other edges. Then I used a molding tool to roll the edges and corners. Finally everything was sanded to blend the edges and corners. I left the edges for the inside corners sharp as they will receive the inlays. I will do some final hand sanding tomorrow, and then we'll be ready to make those (Pucker Factor) Separation Passes over the table saw. Once that is done, I'll touch up the freshly cut edges and then move to the final phases. The "Sewing Room" box will get inserts to align the top and it will simply sit on the top of the box. The Letter Box will get hinges and a latch of some sort. The letter box will also get interior treatments. A bit more still to come.

-
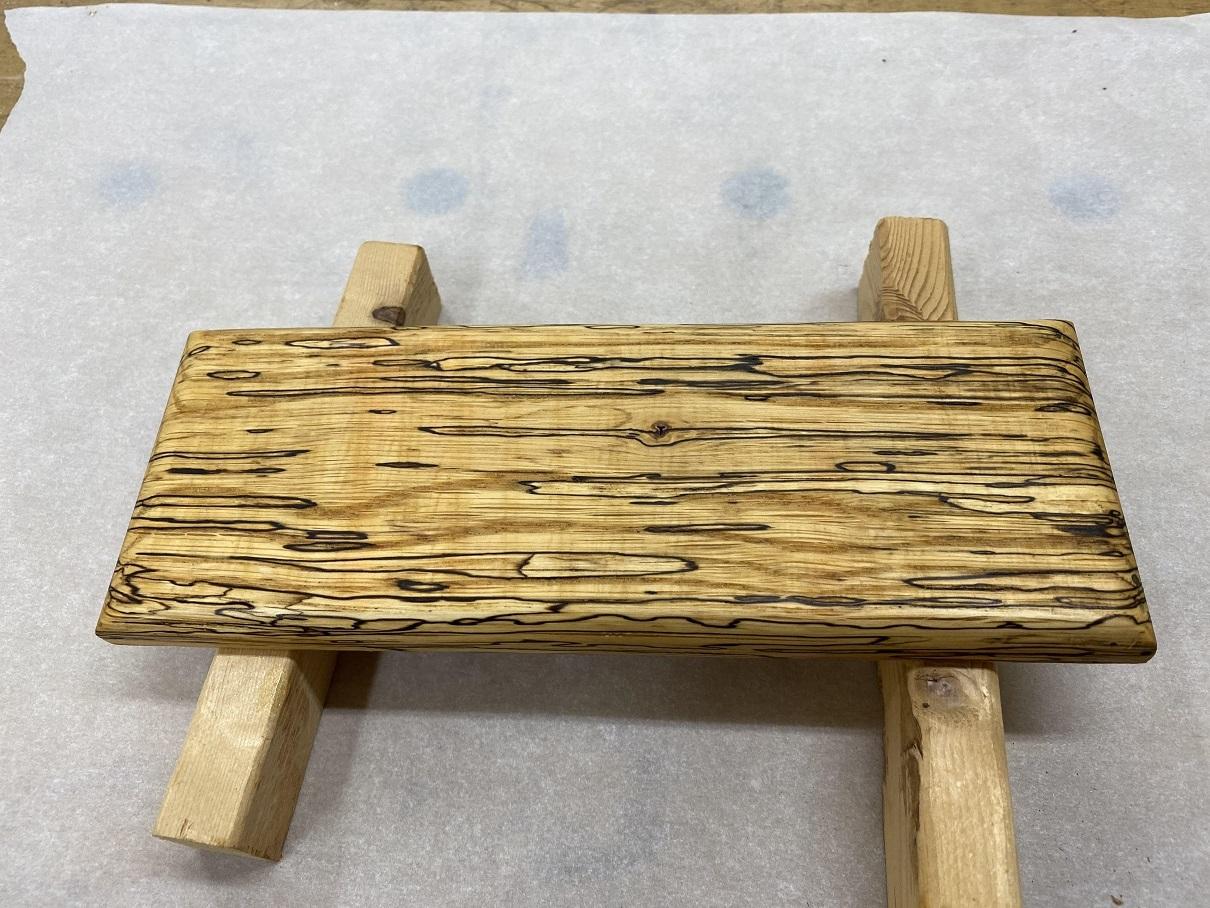
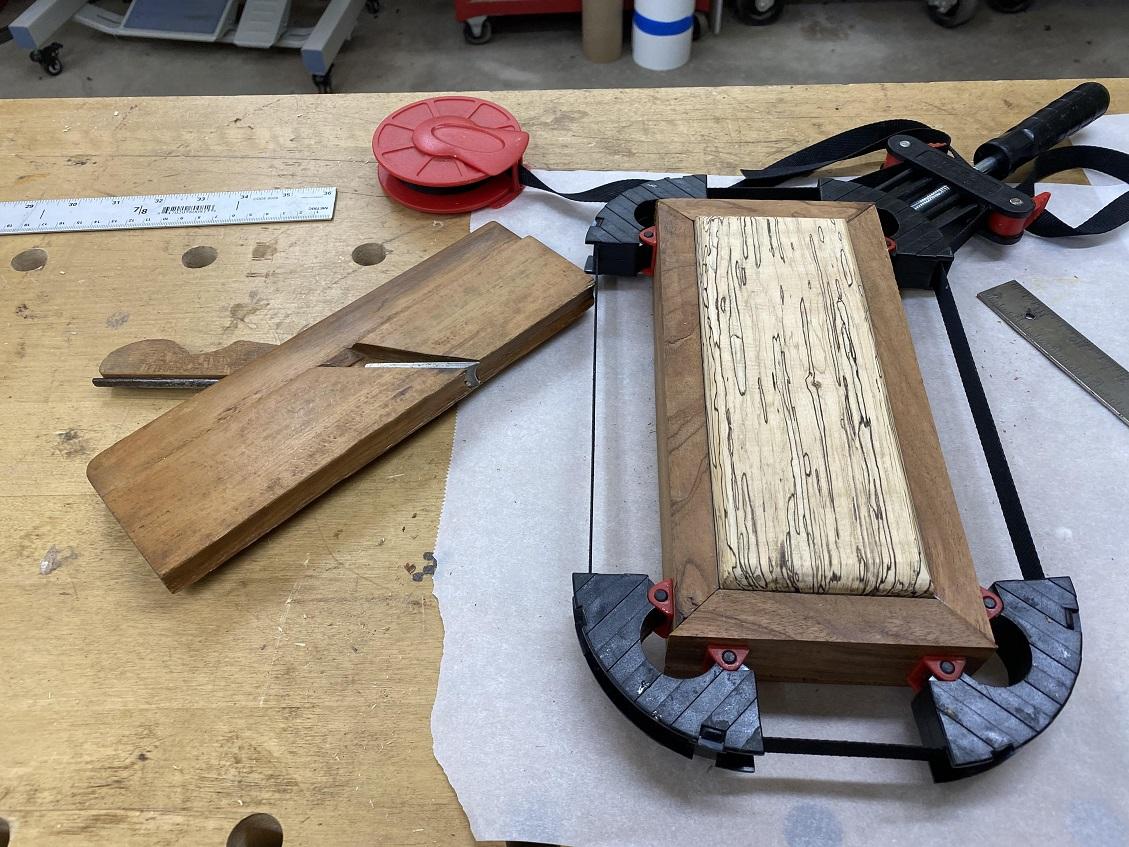
Worked in the shop for a while today, Sanding the maple insert by hand. Started at 120, then 220, and then to 325 grit. This was 120, but by the time I was all the way thru the progression it was looking pretty good. I always save the offcuts from the builds until the project is completely finished, and there is a reason. I use them to test various aspects of the finishes, or in case I need to use the plug cutter to make plugs or cut wedges. Always nice to match the wood. In this case, I wanted to decide if the Golden Oak base would improve the look of the maple, or to go with JUST the natural. A test piece would answer that question. Finished on side of the offcut in the combo and one straight. Both Miss T and I preferred the fuller, more rich color of the Golden Oak combo. So, I finished sanding out the inlay, including filling a pinhole in one end prior to sanding... then wiped it down to remove the sanding dust. A base of Golden Oak Watco Oil followed by two coats of Natural Oil... and left to dry.

-
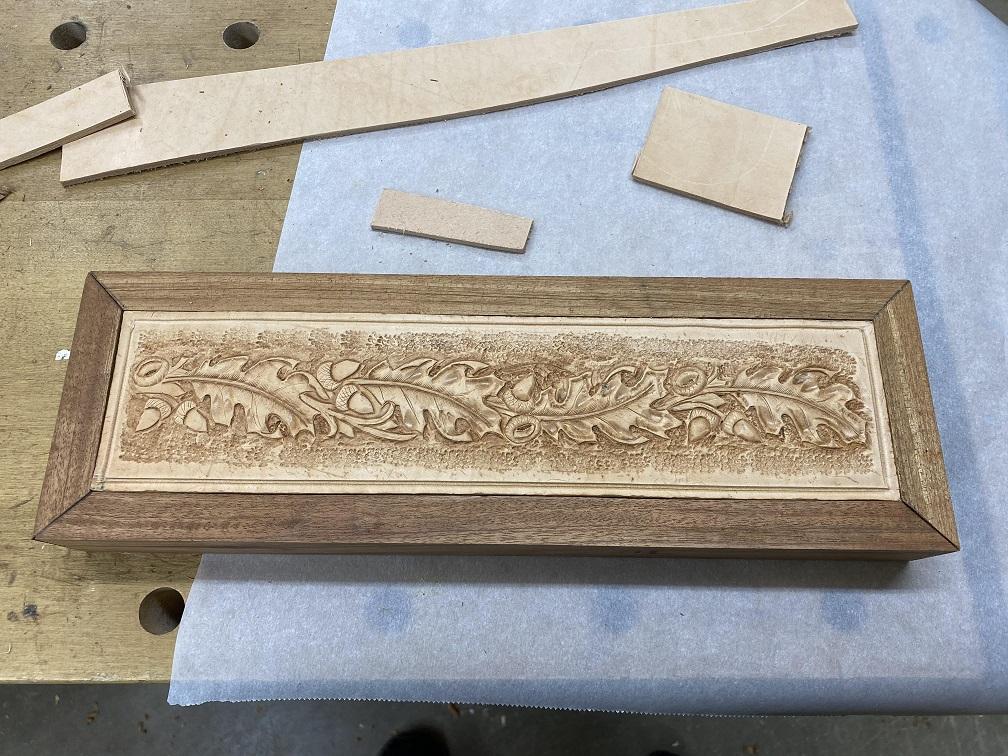
I spent a couple hours in the shop today, working to bring the two dimensional design to life. The first hour or so, tooling on the design. Still not where I want to be, but happy that my skills have improved a lot. I didn't spend a lot of time with the lifters like I would have on something that would see a lot of light. This will sit on the shelf in my private workshop. But I still tried to create that 3D effect as much as possible. The next hour or so was spent with a small detail brush, working on dying the pattern. Of course, I didn't work on the panel IN the box. I had it on the workbench. I will let the dyes dry, then put on a resistance coat, and antique. That will tone down the colors, and highlight the detail. A coat of Watco oil will provide finish and a richness to the leather as well. Once I have applied a couple coats of finish, I'll wax it. It should compliment the mahogany box once IT's done.

-
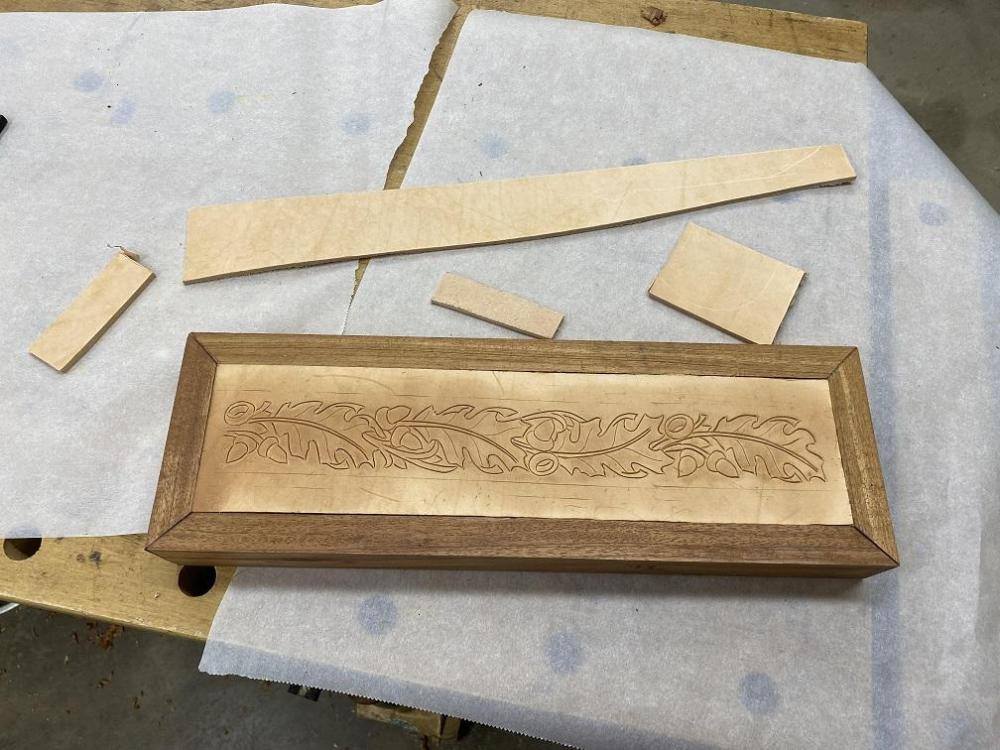
Slow and easy is the name of my game. I am not GOOD at this yet, so I have to go Slooooow. but, after about an hour, my arthritic hands and I got the pattern cut in. That will be all for us today. Tomorrow we will start with the tooling. I am hoping all the practice will make these leaves and acorns come alive.
-
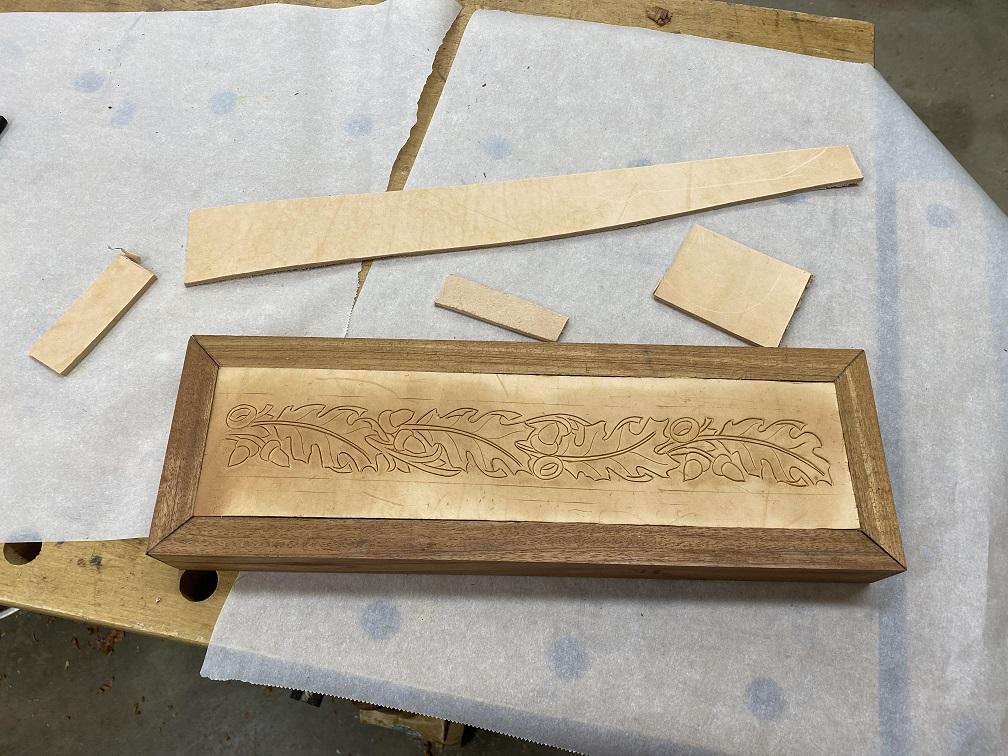
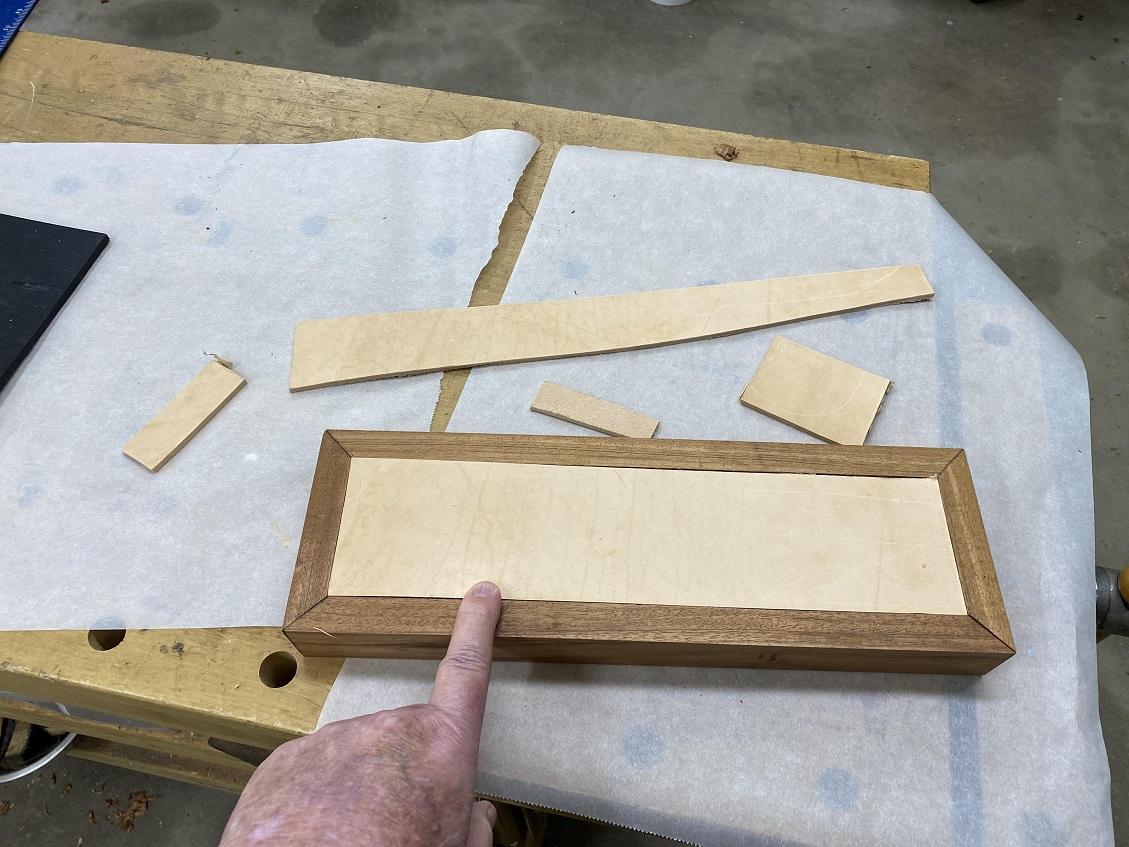
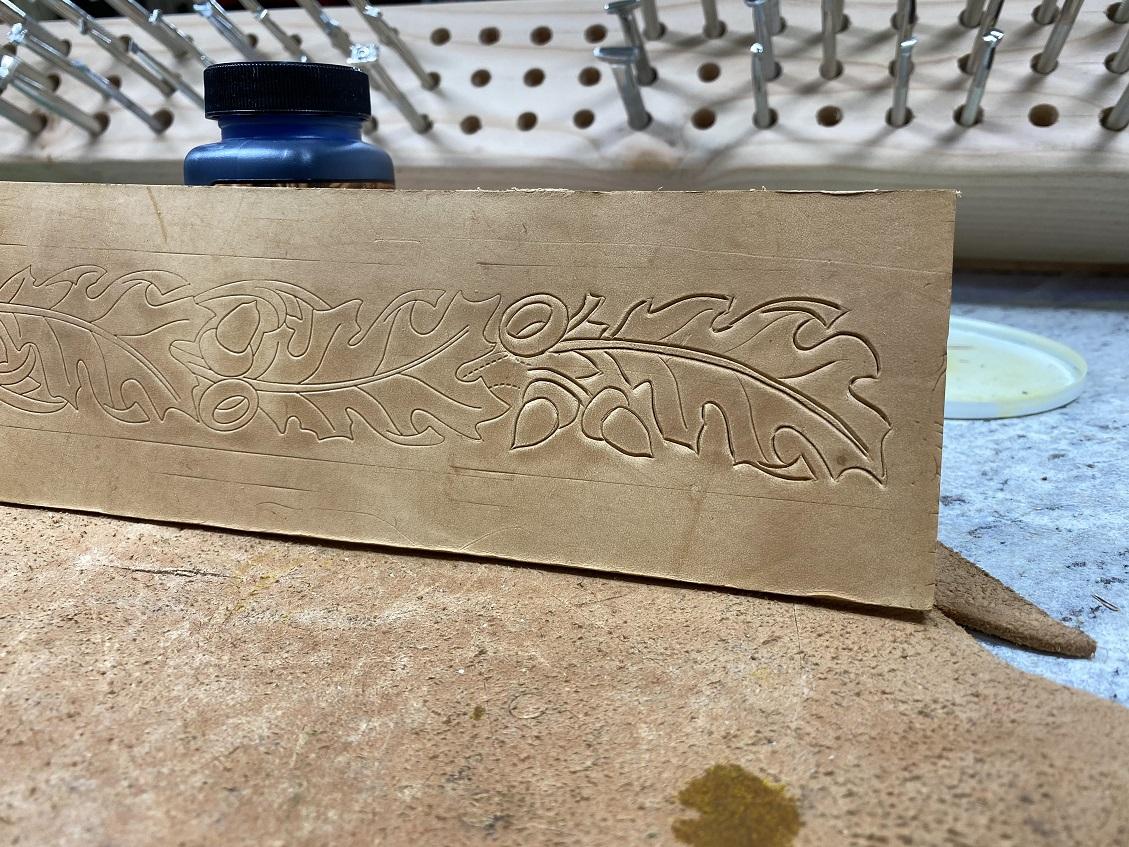
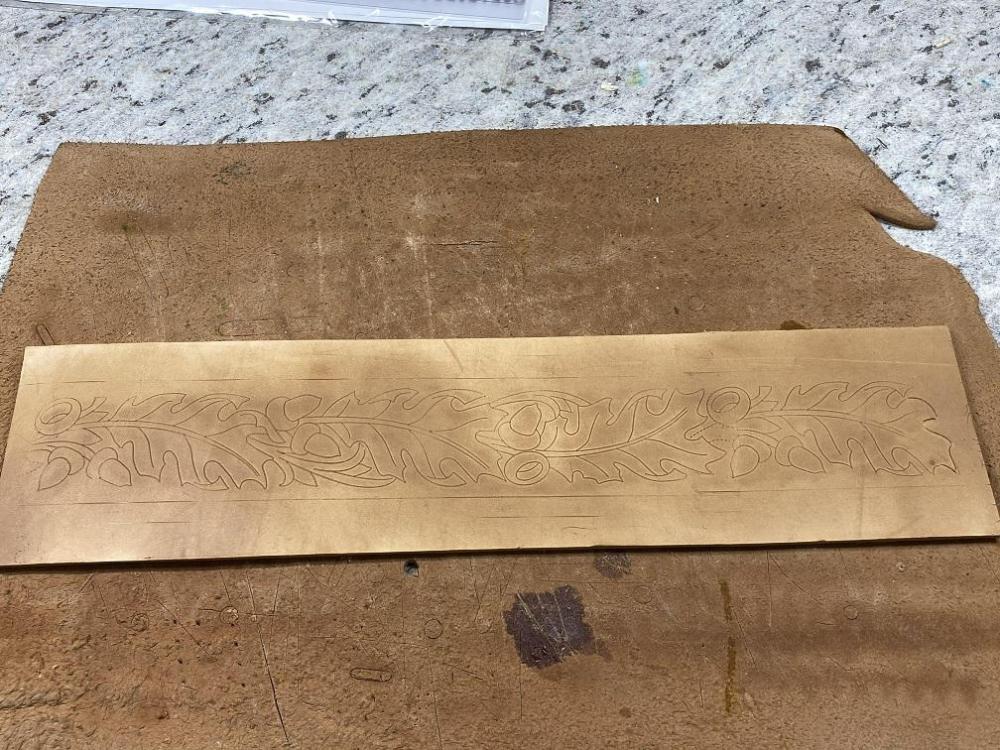
Out in the shop again this afternoon, this time to work on the letterbox insert. First step was to measure the inlay area on the top of the box. I got 12-5/8 x 3" found a nice piece of leather in the bin and squared an edge then cut it to width. Squared an end and cut it to length. Made sure NOT to undercut. It fit nicely. After casing, I transferred the design to the leather using a Belt Template from Tandy's collection... I like this one as it will let me work the 3D magic as best I can. Oak Leaves and Acorns. The leather was longer than the template, but it allows for a seamless interlocking of the design and careful transfer means you can use as much or as little as you like from the pattern template. The next step was to cut in the transferred design. You can see how much difference that makes comparing the two. With the tight curves on this pattern I used a 1/8" blade, with a sharp angle to it. The leather was so well cased that the reference lines from the template can be lightly seen at the edge of the design. In some cases, this might be an issue, but they will be covered when I do the background so they are not a concern.


-

Two tone holster...
Brokenolmarine replied to bladegrinder's topic in Gun Holsters, Rifle Slings and Knife Sheathes
looks good! -
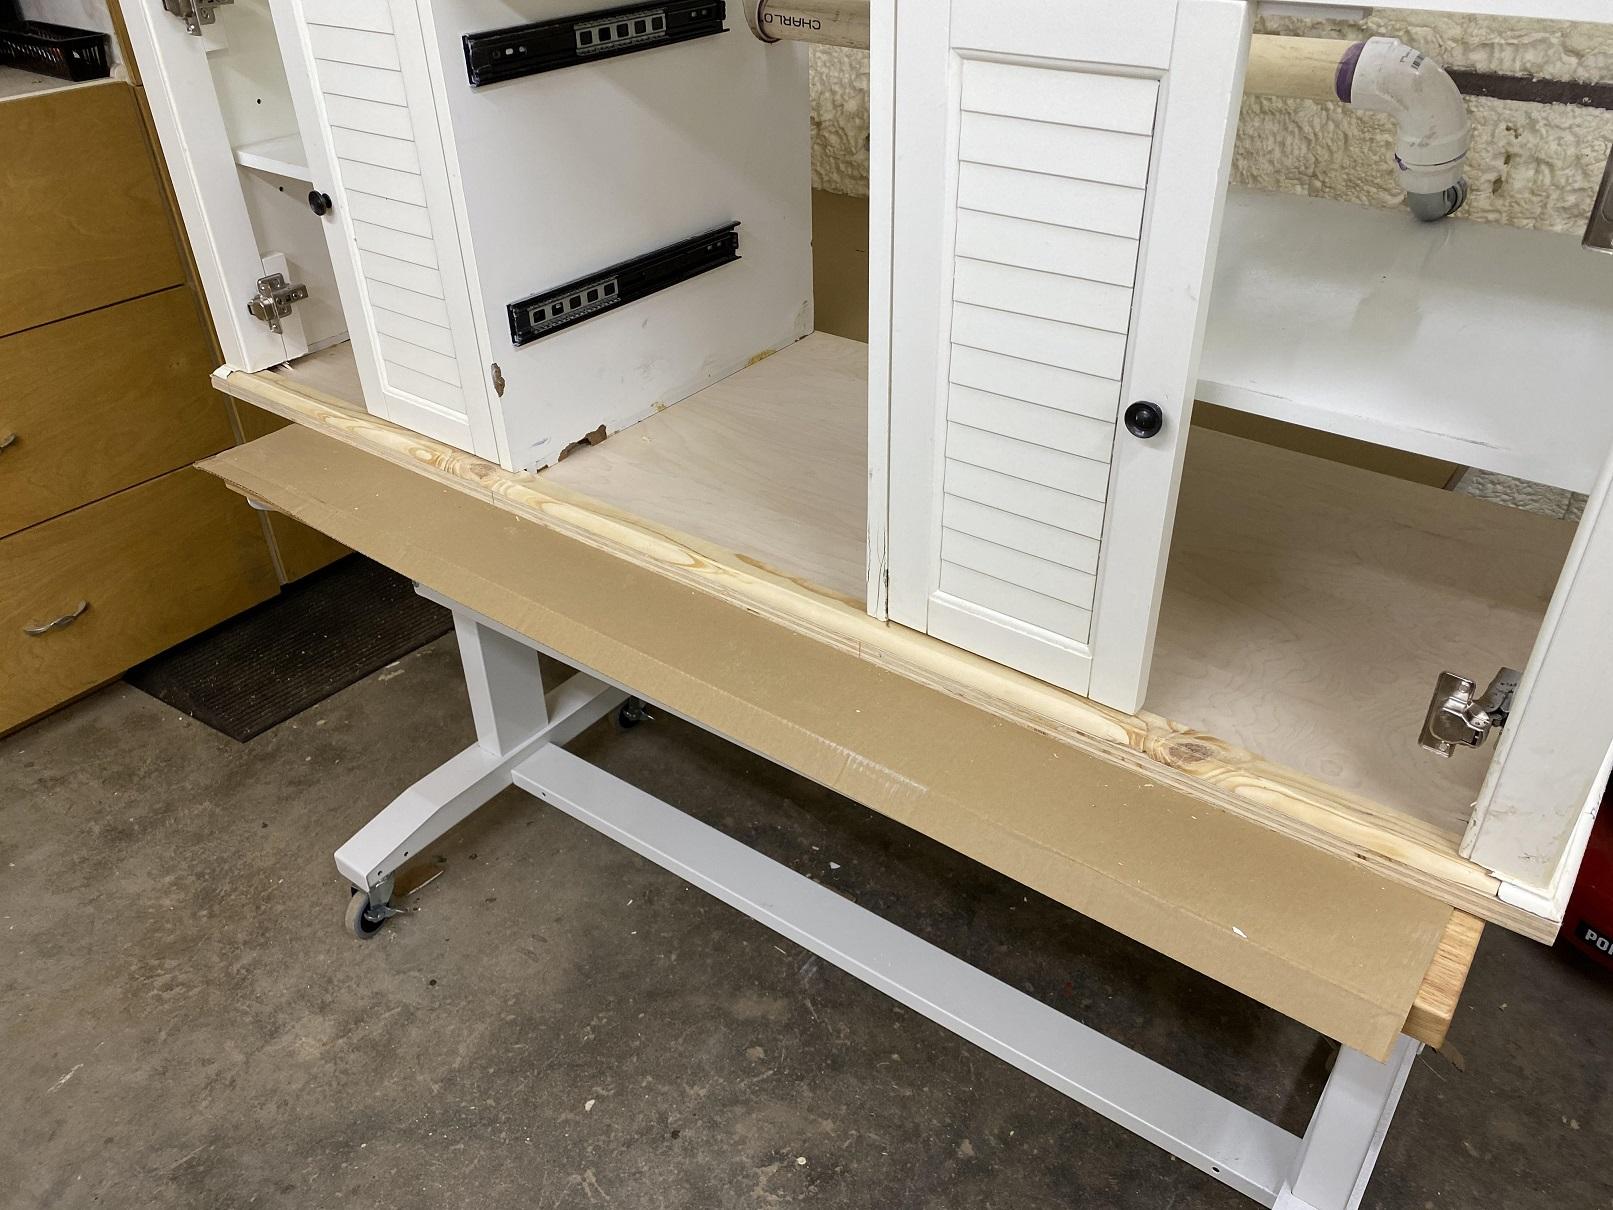
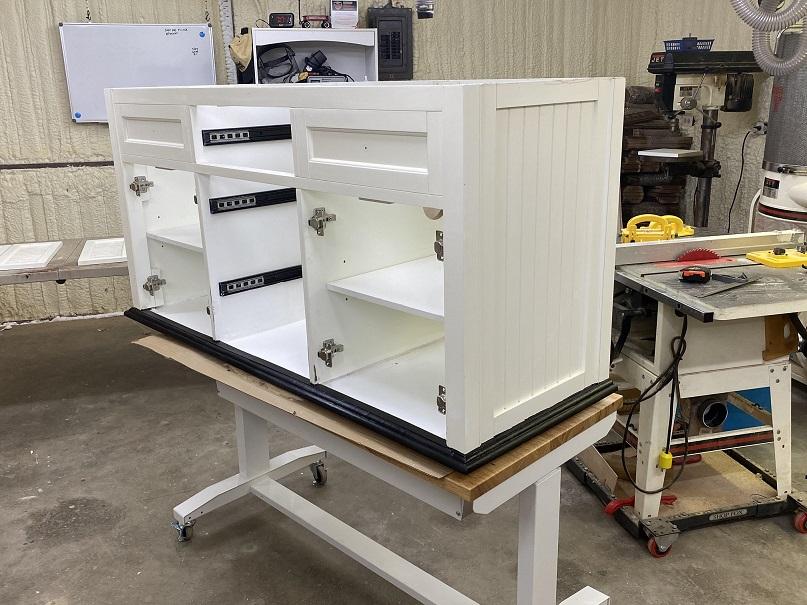
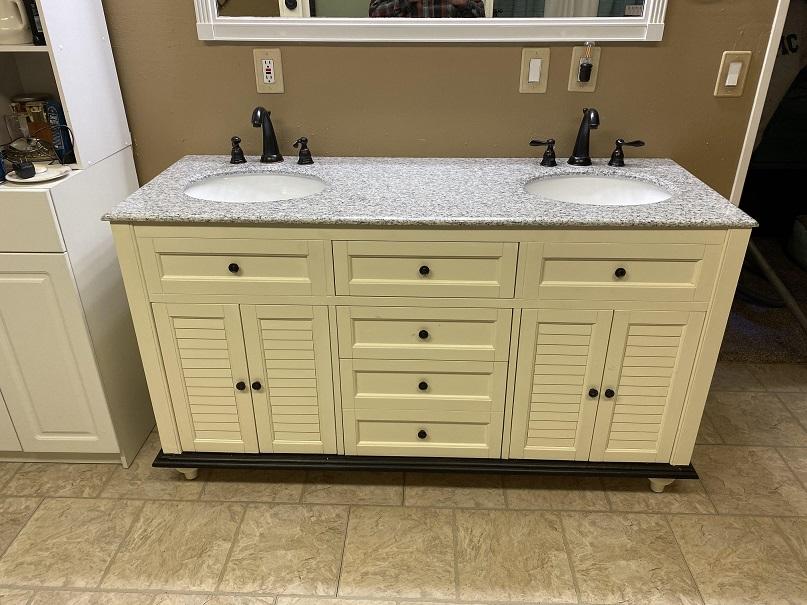
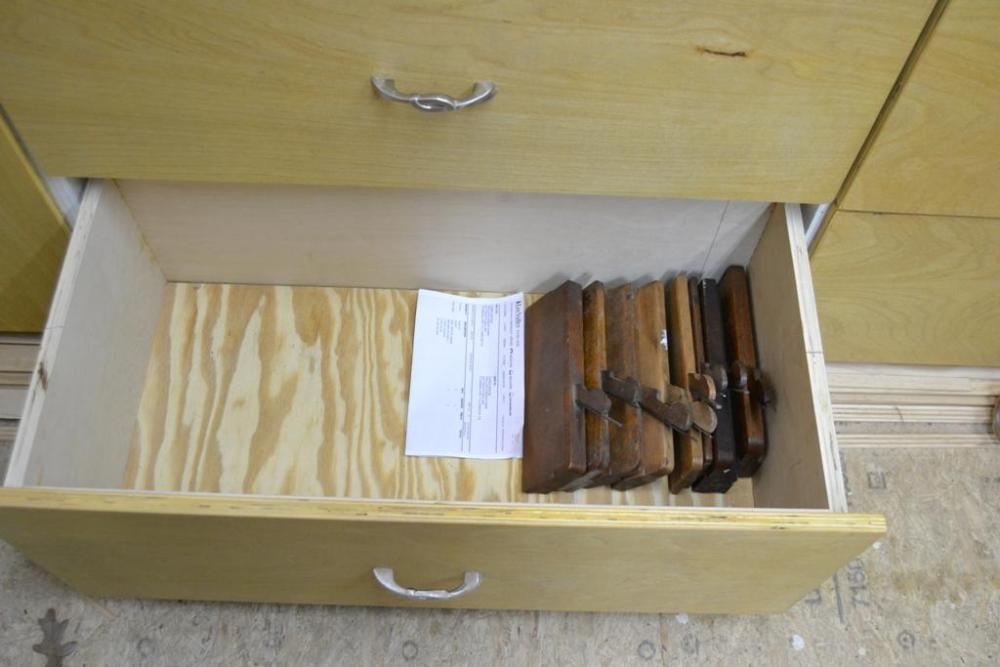
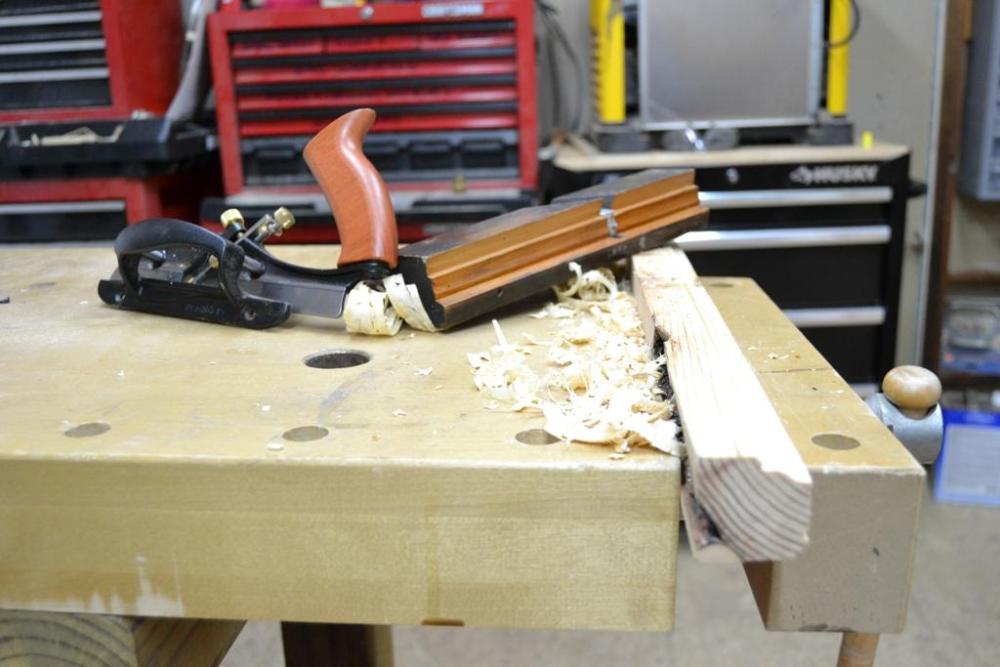
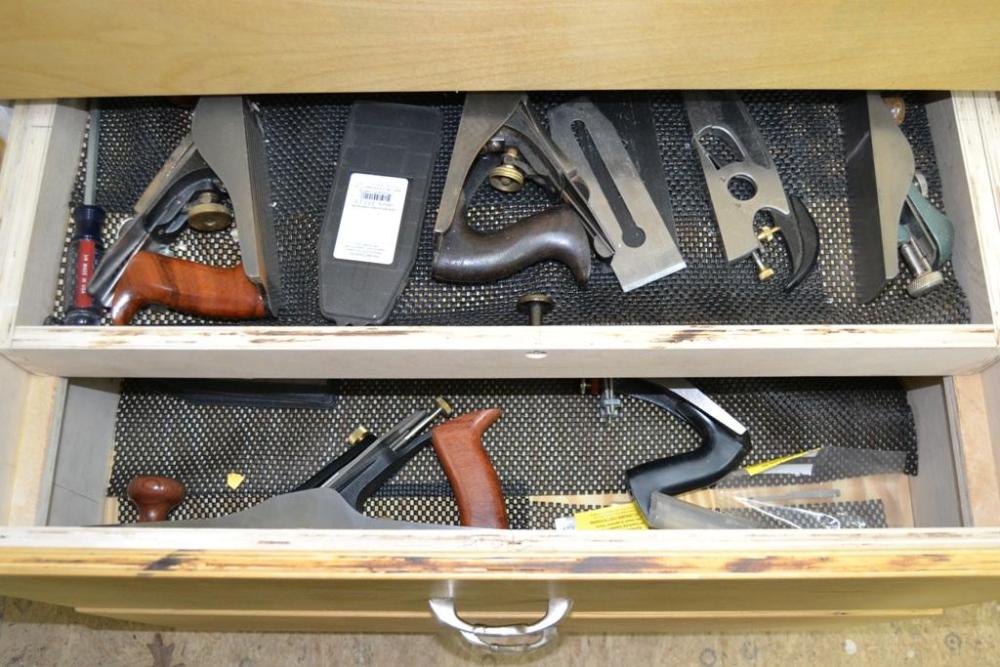
Over a week, using a LOT of the tools available in the shop, I rebuilt the vanity. In the pic below, you can see the molding has been painted, and the areas in need of repair inside have been patched and painted. ONE area on the face still needs painted white. The doors in the background on the far table have their first coat. It was a lot of work, but it saved a LOT of money, and the molding planes made it possible. Miss Tina said to go ahead and try, she wasn't sure it was salvageable. I told her I could do it, and a LOT cheaper than the cost of the replacement base. In the final picture the bathroom lighting makes the completed vanity look ivory/yellow, but it's white. Crappy lighting, which we later replaced, but it turned out great. You'd never know it was damaged. I love the molding planes. Here are the bulk of them. Another profile: The plane storage for my other planes.... Some of the planes I used a LOT, and some I rarely touch, but when you need one, you need it. Often, it's just the thing.
-
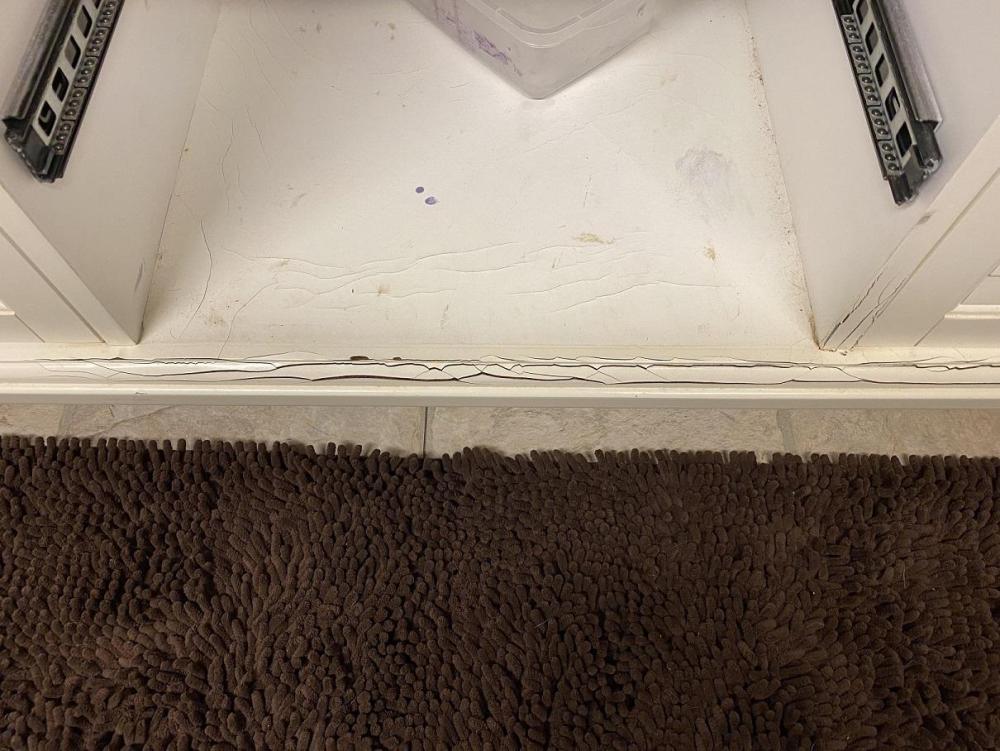
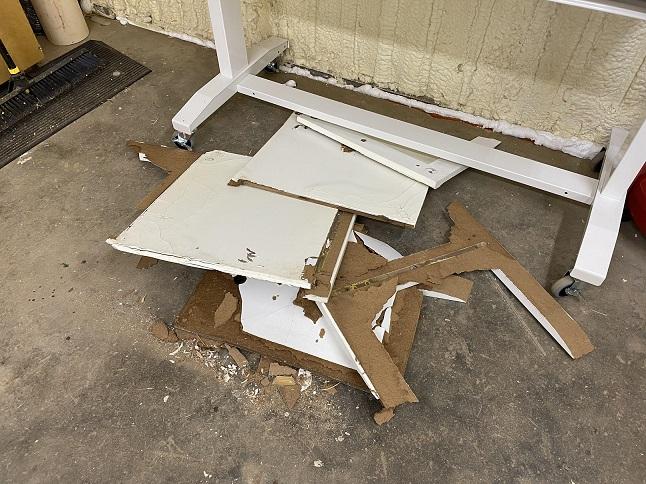
I bought a dozen of the molding planes with a variety of iron profiles, from Lee Valley Tools in Canada. They are antiques. They were used to make...ah... moldings for baseboards, crown moldings for ceilings, trim... whatever. If you watch some of the woodworking shows, some of the guys will have shelves filled with them. I actually was VERY lucky to have them. About six or eight months after we bought the farmhouse here in Oklahoma, the "new" bathroom addition the previous owner had added developed serious leaks. He thought he was a carpenter and a plumber. He was neither. He tended to use "Used" components whenever possible and had used old water line NOT rated for hot water. It would swell when it carried hot water and leak, then shrink back. Swell and leak, then shrink back. It was specifically banned for use, but he found a lot of it somewhere and all the hot water lines in the place had to be redone. Unfortunately, the water damage ruined the surround around the jacuzzi garden tub, and severely damaged the base to the bathroom vanity. A granite topped double sink. We had planned to just replace it. But... it would have cost $1300 for the base alone, about twice that for the complete vanity. Water damaged base: Note the cracked paint and the damage UP the dividers and the swelling in the "floor" of the vanity. When we attempted to remove the base of the vanity, it just fell apart. The bulk of the vanity was partical board and had acted like a sponge soaking up the water. We used cabinet grade plywood to make a new base, but new trim was not available, so I had to buy the wood, cut it to the proper width, and using two molding planes in combination, create matching molding. The process took a while as the bases for the pedestal feet had to be countersunk into the new base, and the molding precisely fitted. Note the areas where I cut out damage to the interior walls and damage to the face.

-
With a nice square edge, I measured the width and set the table saw fence and ripped the piece to width. (Close) Then test fitted the width. Just a bit wide. I tapped the fence just a hair, and ripped it again. Still just a hair. A tiny tap and one more pass. Perfect width. Same game with the length. Two passes got it. Now they were mated. I ran a SHARP pencil around the inlay, marking the fit. Time to roll the edges. Clamped 'er back in the vise and got out the molding plane, and using the pencil mark as my guide, rolled the edges to meet that line. Rotate, roll an edge, rotate, roll an edge til you are done. I could have done it a lot faster with a router, but ... NOISEY, and a router at that high speed can grab and tear spalted wood. Plus I like the whisp sound that sharp plane makes. There is a bunch of sanding left to do, and shaping on the mahogany... but next session I'll cut the leather for the inlay on the other box, and carve/tool that piece. Looking forward to that one.

-
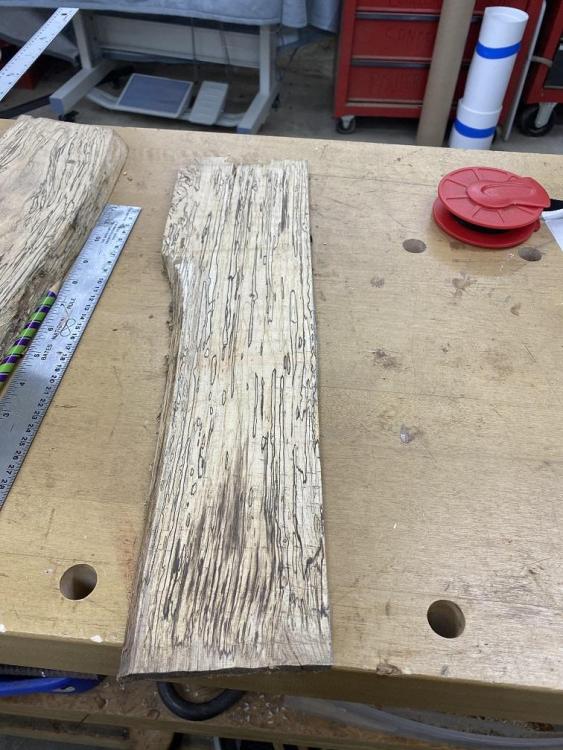
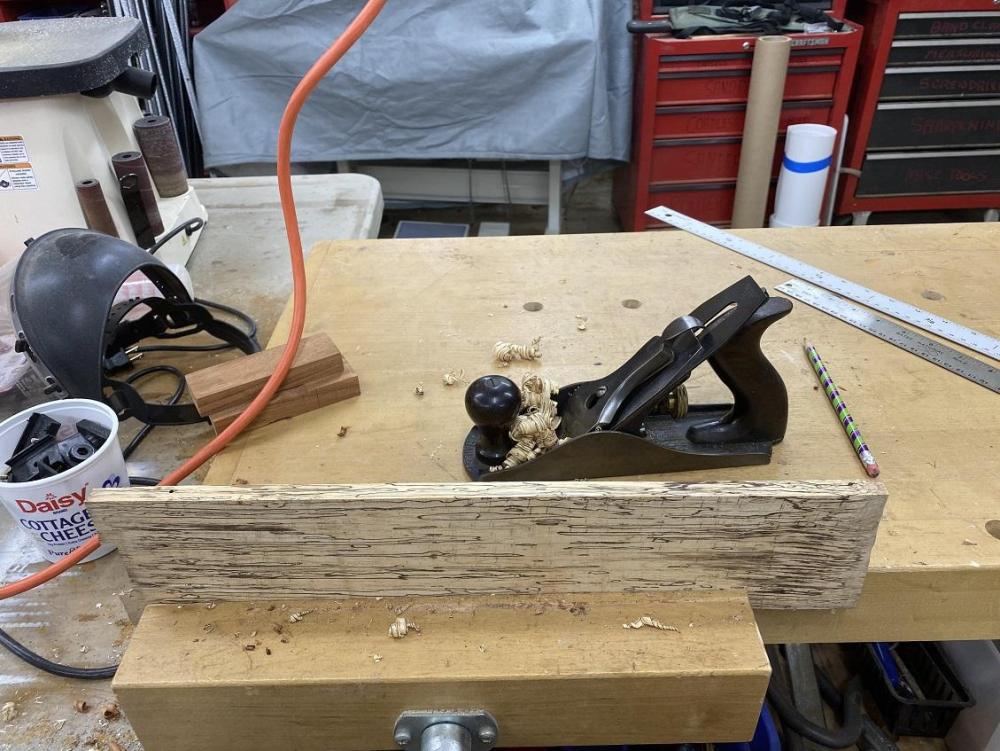
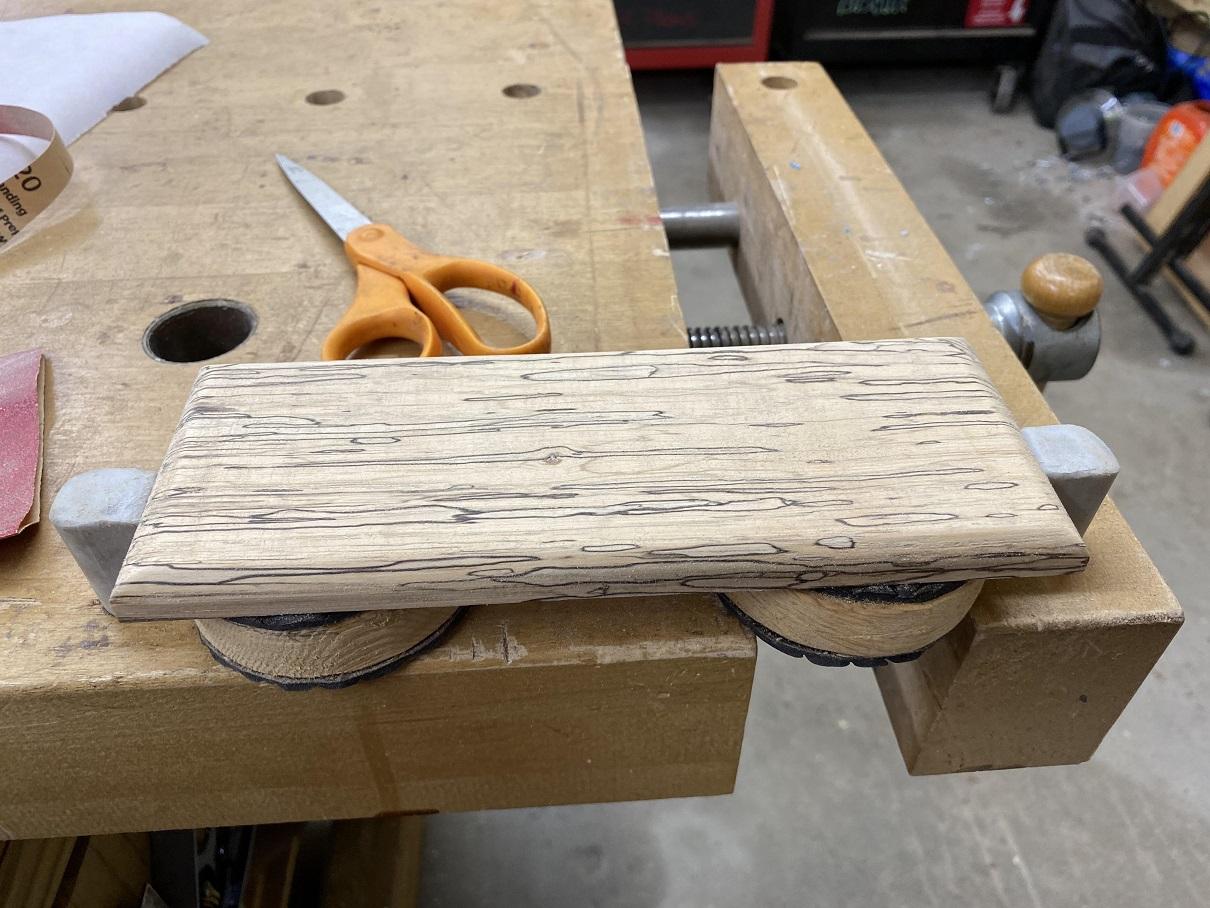
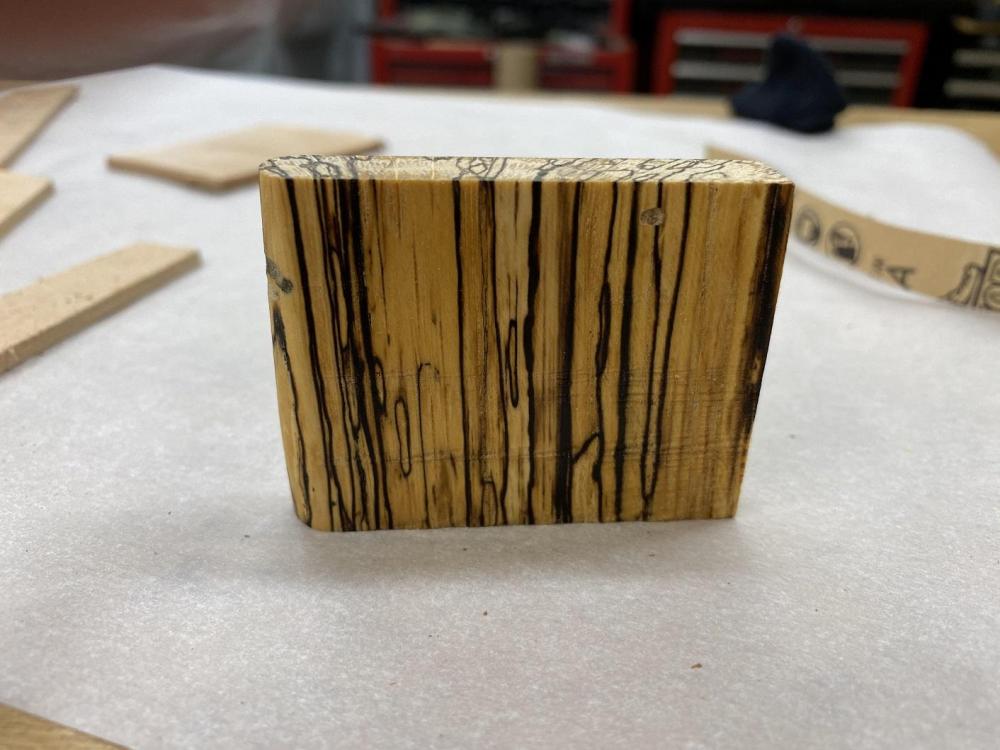
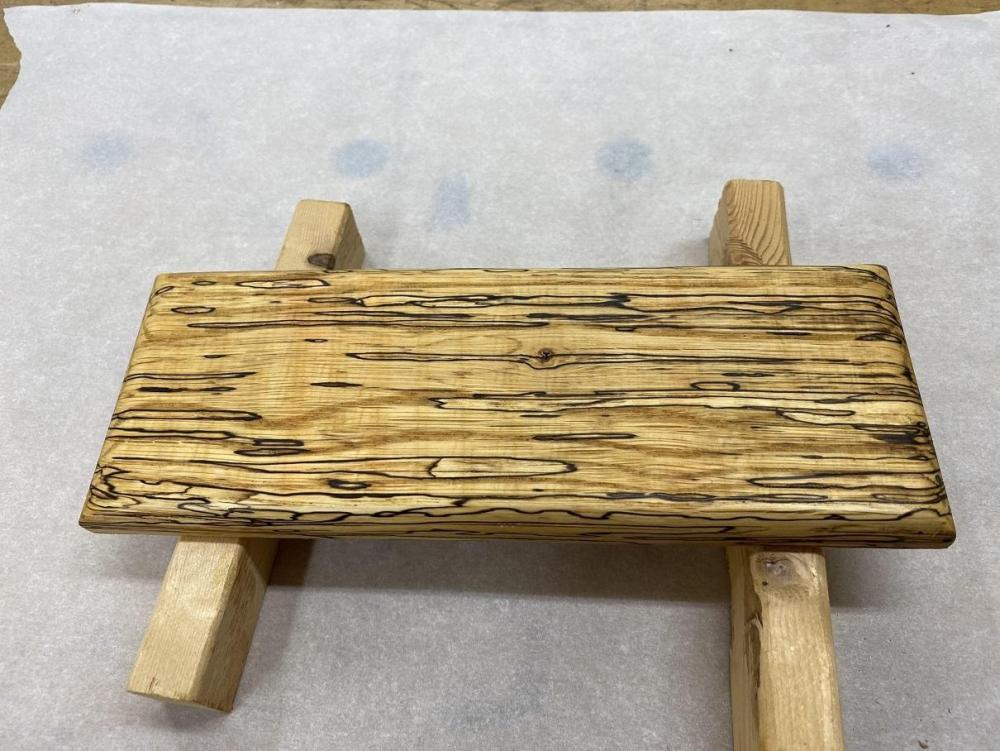
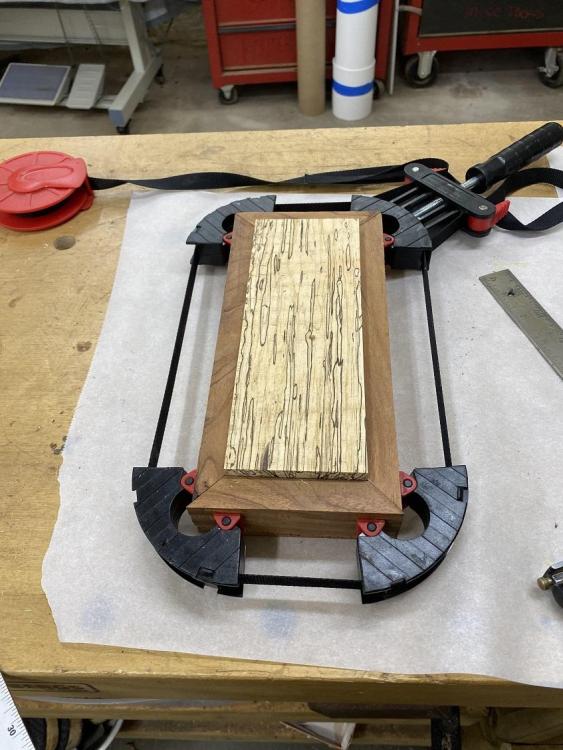
Today's session was all about the insert for the wife's box. I started by looking for the right piece of wood. I found a nice burled piece, but kept looking and BOOM... a VERY nice spalted piece jumped out and cried, "Use Me, Use Me." It was perfect. As you can see by the pencil line down the right side, the first step was going to be getting a fairly straight edge to work from. I started by running it across the table saw freehand, moving very slowly and trying to stay right with the line. I then checked it by clamping it in the vise and checking the edge with a known straight edge on a good rule. (They aren't ALL straight. ) It was a tad off. To the plane boss, the plane.... You plane a bit, then recheck, plane a bit, then recheck. All this is to insure you have a flat, square edge to run along the fence on the table saw. We are wanting to fit this in the top of the box and don't want gaps.