Mablung
-
Posts
576 -
Joined
-
Last visited
Content Type
Profiles
Forums
Events
Blogs
Gallery
Store
Everything posted by Mablung
-
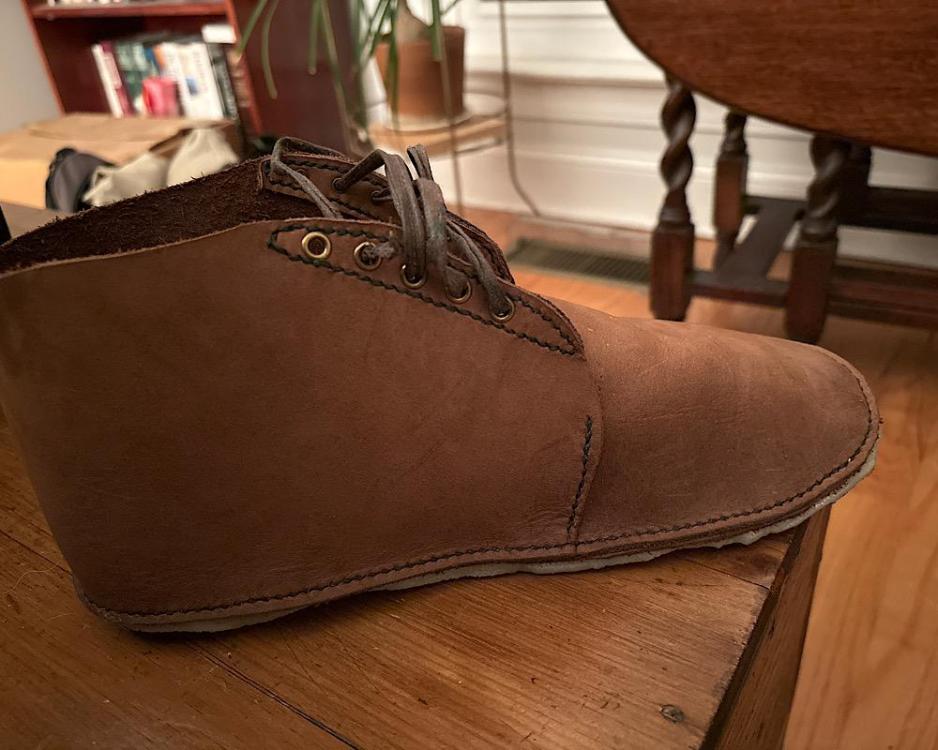
Well, a lot of things are right about these things, but the soles are a little too small (really not sure how I managed that, when I traced right from the completed shoe) and the veg tan toe counter in each is (a) too hard and (b) lacks sufficient toe volume. Wetting won’t do it, unfortunately. The leather is also thicker and firmer in temper than the previous stuff I used, so I need to adjust for that. Will need to adjust the pattern and then rebuild. Here’s a pic of one completed shoe. I think I’m going to either make a taller boot or lower the upper height just a bit as well; this height tended to cut into my ankle just a bit.
-
Hoping to get the soles glued tonight before I head out of town and can wear them in a bit. I'll get some pics, too.
-
Thanks! And yeah, I was thinking of doing the wet-walk-dry treatment to them. I think part of the reason the one felt tight is because I put a veg tan toe counter in the front, but I may need to add a little more "toe puff" to future iterations of the vamp and toe counter. We'll see how they come out after I move around in them a bit. I keep my toenails pretty short, so they shouldn't cause an issue.
-
These things have taken longer to complete than I anticipated. Got the eyelets set late last night, as well as stitching the midsole to the second upper. Now just need to cut and glue the rubber outsoles, stitch the eyelet reinforcement pieces on the second shoe, and run the laces. I think these will end up being just a little short of toe room, so I'll add that into the midsole pattern modification. I'll wear these for a bit to see if they stretch sufficiently and to figure out what other modifications I need to make, then go from there. Looking forward to finally having these done.
-
Never actually posted the pictures.
-
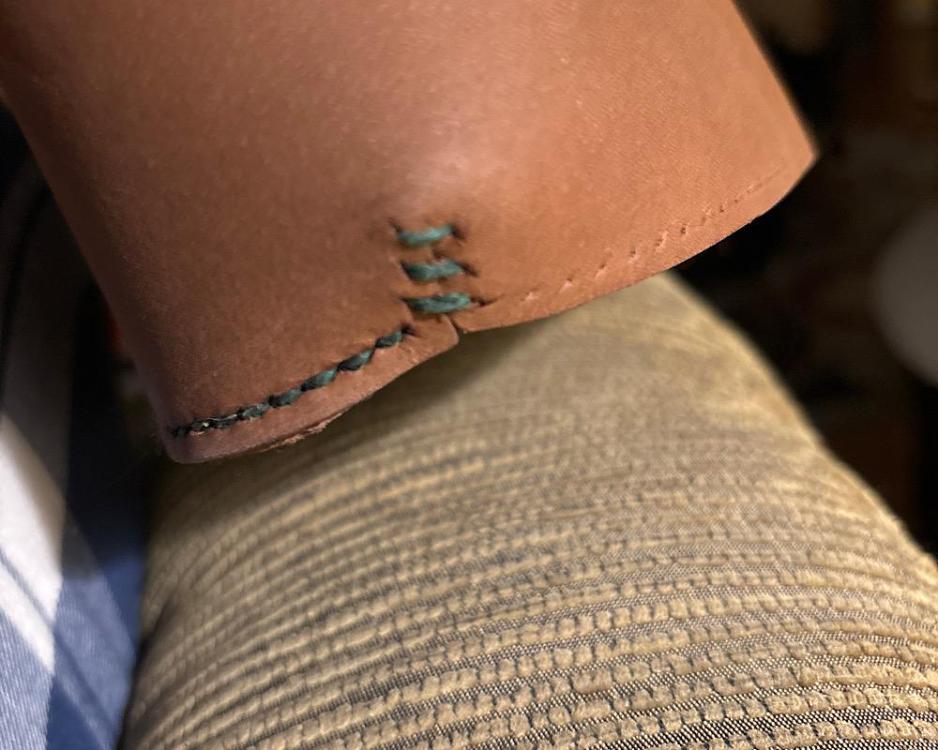
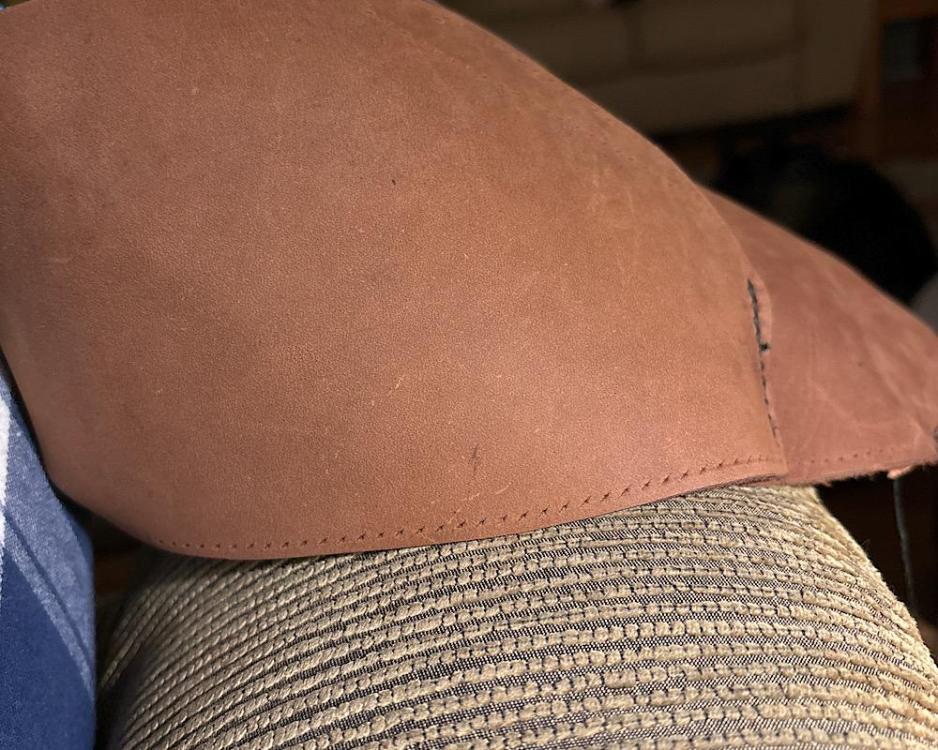
Couple other shots of one in progress. Haven’t stitched the midsole fully or the eyelet reinforcement pieces. The dart and mild curve in the top of the heel piece appear to be doing their job. We’ll know for sure once I finish stitching the midsole and glue on the rubber soles. I realized, in stitching the other one’s midsole the other night, that I erred by failing to adjust the width of the rear of the midsole heel for the material I removed from the upper heel piece. So, it’s a bit puckered at the back. In my test fit, though, it didn’t seem to make a difference and will become even less of an issue after I hammer it down a bit, hammer the stitches, and glue on the rubber.
-
Agreed with the others that those look pretty darn good. Yeah, clean up your stitch lines (I can’t cast too many stones, considering the state of the stitching on a pair of chukka boots I’m making currently), but overall those look good and substantial. See if you can sell some, as it sounds like you’ve sunk some money into the tools and materials and could use supplementing your income anyway, but also just enjoy those. I like it.
-
6 inch hollow ground Splitter blades need sharpening
Mablung replied to Doc Reaper's topic in Sharpen it!
Sounds like a 1000-grit waterstone, or the equivalent in another kind of abrasive, would be a good place to start. 220-grit waterproof sandpaper might work, too, then work up through 320 and 400, followed by a good stropping. -
I’ll post some pictures some time soon, although “soon” might mean the end of the week. Hopefully earlier than that.
-
Thanks for the suggestions. I modified this heel pattern to curve a little bit more, at least at the top. I’m a believer in changing this incrementally, so I’ll probably go ahead and try just with the dart, then make another pair. I could use some low-top shoes as well, so I might as well continue to fiddle. Plus, I have a whole side of SB Foote to work with, so I can make a large number of brown shoes. Good thought on the Kamsnap setter. I’ll take a look. The weird thing is, my 1/4” eyelets set just fine, no problems. I’m going to look at the anvil again and at Tandy to see if part of my setup is defective—I can feel a little burr around the outside of the setting eye in the middle, so I may just need to polish it with a small, fine file.
-
Look at the tutorials on sharpening head knives in the Leather Tools and Sharpen It! subforums’ sticky threads. The chap who owns Leather Wranglers (can’t think of his name) does a video on which he demonstrates sharpening one of his knives. Probably the best video I’ve seen. Used his advice to get my vintage CS Osborne knife into scary sharp skiving shape. Learn to cut and skive with that single head knife, and you’ll be just fine. Not much you can’t do with a good head or round knife.
-
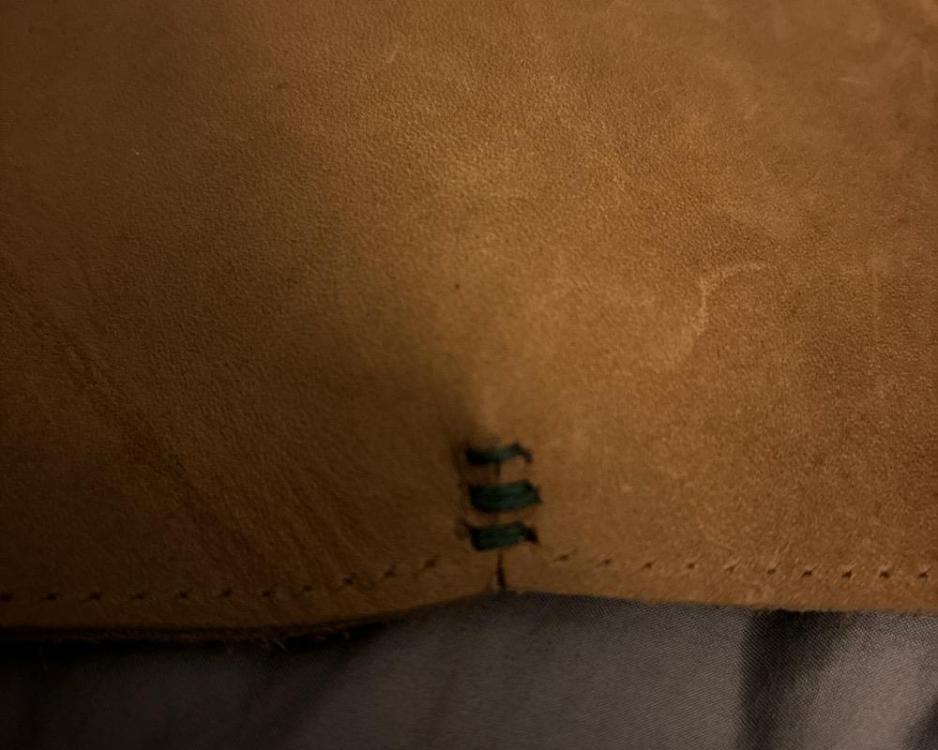
Didn’t get everything done, but I at least got the dart right and did the butt joint to make the seam at the back. If I can ever get the 3/16” eyelets to set properly, I’ll be in business. For some reason, they keep coming out crooked and partially smashed. I think my setting anvil may be the wrong size, although the setter itself looks right.
-
Hoping to get them done today and posted. How to do the dart @Aven described finally clicked in my head, so I tried it last night. I WAY overdid the dart, so I need to redo one upper, but I know now I got the idea basically right. I just need to tinker with the height and width of the dart to get it right. The leather I’m using is 5.5 oz., so I need to make it less dramatic than I thought I would.
-
I had no idea such a thing existed until I went into the store a few months ago, saw the alum tan, and thought, “What the heck is that?”
-
To that point, my local Tandy has some straight white alum tan for sale. I’ve seen chrome tan that’s already struck white.
-
what type of glue to finish linen thread saddle stitch?
Mablung replied to thekid77's topic in Sewing Leather
I burn the end of poly thread to keep it from unraveling. That and that helps shrink it back if I can’t trim it close to the surface for some reason. It’s not to keep the stitching from working loose; it still can, even if the end of the thread is melted. Feel free to put glue, if you like. Just about any glue would likely work. The only point anyone pointing out you don’t have to do that, is that you don’t have to do that if you have matched the thread size and hole size. -
That’s good advice. I need to do a few holsters soon, so I’ll make liberal use of that advice. Yeah, didn’t realize just how soft it is until I was wrangling it to line a glasses case this evening. Not terrible to work with, but it was more difficult than I thought it would be. I’ll post a few pics of that case soon, if for no other reason to get everyone to share some collective disgust with my pattern and how messy the edges are going to be. It’ll be the world’s ugliest but bombproof glasses case.
-
What kind of leather is this?
Mablung replied to panchoskywalker's topic in Leatherwork Conversation
Could be a lot of things. Can’t really tell just from those two pictures. -
Question on dyeing.
Mablung replied to Tophee's topic in Dyes, Antiques, Stains, Glues, Waxes, Finishes and Conditioners.
Resolene should work as a resist. Test it on a scrap piece to be sure. With any resist, it’s important to not leave the antique paste on too long. Most of those coatings aren’t absolutely “antique proof,” if you will, so it is important to wipe the antique off quickly if you only want it to stay in the stamp grooves. Otherwise, it dries in place and becomes more difficult to remove. -
what type of glue to finish linen thread saddle stitch?
Mablung replied to thekid77's topic in Sewing Leather
I’ve got a holster with thread and stitch holes that are grossly mismatched, and even then the thread hasn’t worked loose. Linen specifically might be a little more likely to, but properly matched thread and stitching hole sizes seem to eliminate that issue. -
Question on dyeing.
Mablung replied to Tophee's topic in Dyes, Antiques, Stains, Glues, Waxes, Finishes and Conditioners.
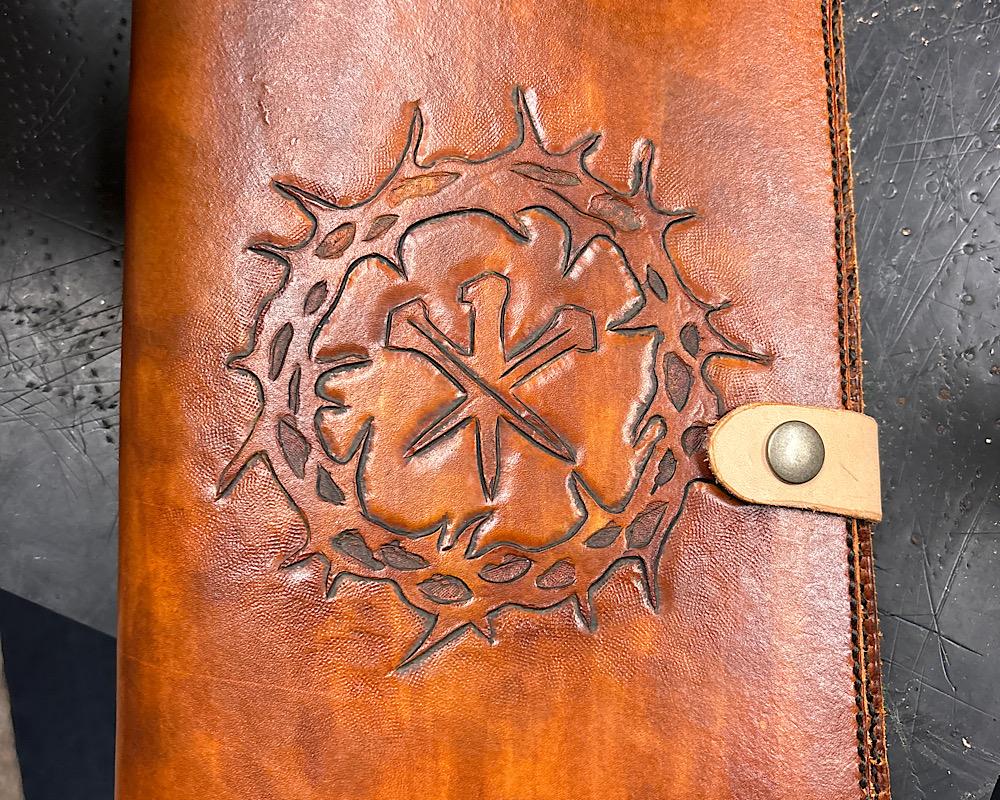
Happy to contribute what little I can. If I’m honest, I’ll tell you that the posts on this site are where I have learned most of what I know. There is sooo much to learn, and that’s part of the fun. You have the right attitude about it. You can also thin the dye to make it a lighter brown. This notebook cover was done with a Fiebing’s Light Brown dye, but I thinned it with denatured alcohol, about 50/50 (editing to say: might have thinned it more like 40% dye, 60% alcohol). I’ve done a couple knife sheaths with the same dye without thinning it—those turned out about the same color as the piece you showed. Yet another knife sheath was done closer to 50/50 or maybe 60/40 and got it darker than the notebook cover but lighter than the other sheaths. Thinning it made all the difference. Just another aspect to experiment with.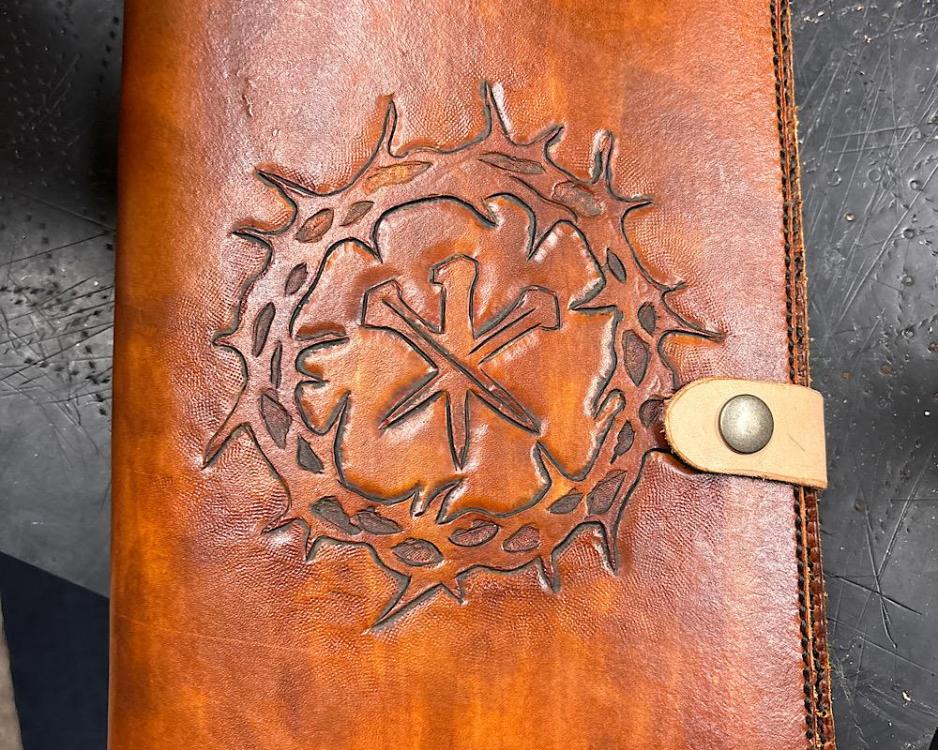
-
Question on dyeing.
Mablung replied to Tophee's topic in Dyes, Antiques, Stains, Glues, Waxes, Finishes and Conditioners.
If you want the stamp impressions to be more obviously visible due to contrast, a lighter dye will certainly help. Darker dyes are more forgiving of the application of multiple layers to cover streaks, blots, and other mistakes, but a great part of that depends on your application method, too. Leatherwork offers innumerable rabbit holes, of which this is only one. Welcome to the hobby! -
Question on dyeing.
Mablung replied to Tophee's topic in Dyes, Antiques, Stains, Glues, Waxes, Finishes and Conditioners.
Antiquing is done after dyeing. There are a bunch of really helpful threads on here about everything dyeing and antiquing. Some people will do an overall background dye, then dye just the stamped/tooled area with another dye. Others use antique paste or even Sharpie markers. It depends on the look you want. Antique paste can be a bit messy and involves some extra steps, but it does give a nice look to certain things. Have fun learning and experimenting with all this. Look up The Leather Element videos Weaver Leathercraft puts on YouTube. The guy who presents them, Chuck Dorsett, has a couple on antiquing that I’ve found very helpful. -
Kinda where I’m leaning. I think the sheepskin will make a great glasses case lining, but the cow shoulder feels like it’ll withstand the abrasion and heavier use more easily.
-
Title says most of the question. I’ve got a sheepskin and a cow single shoulder, both veg tan and both around 3 oz., I plan to use as lining. Sheepskin was purchased originally to line a glasses case. Then I got the single shoulder because it was a good price and useful for lots of things. Then I wondered which would be better for lining a holster I plan to make soon. All of my pistols have forward slide serrations, so I’m concerned about longevity of the lining. Veg tan the lining will be regardless, because I don’t want to use suede (due to the effects of chrome tannage and of grit getting caught up in the fibers—both are bad for a pistol’s finish). Thoughts?