Search the Community
Showing results for tags 'figure carving'.
-
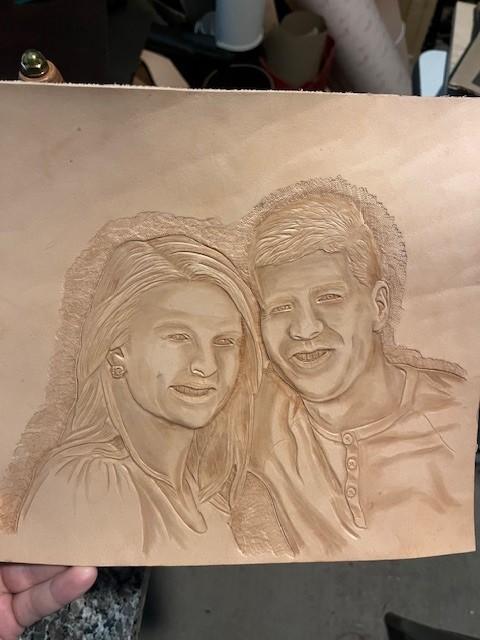
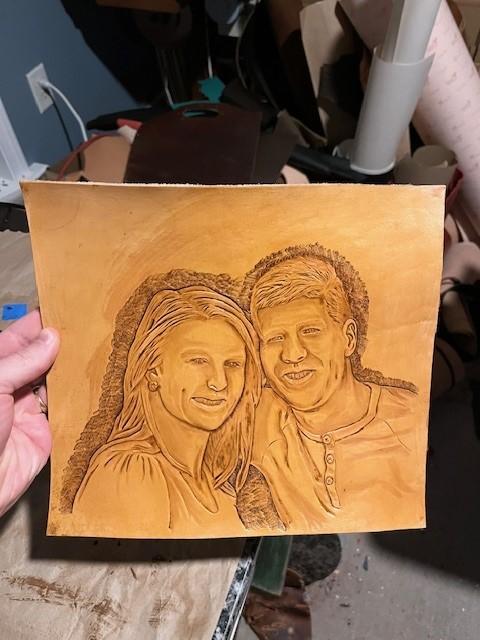
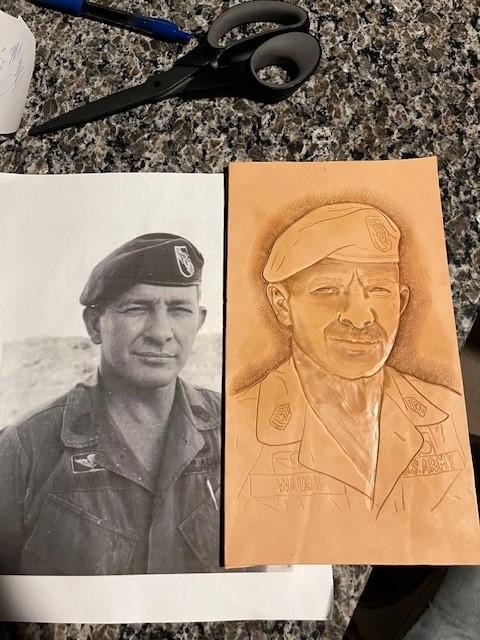
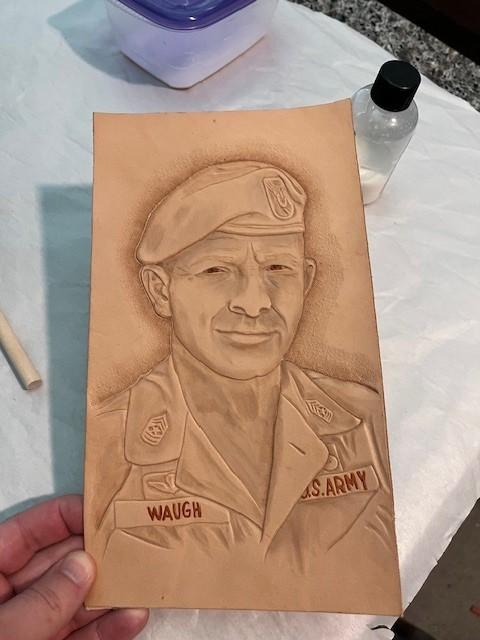
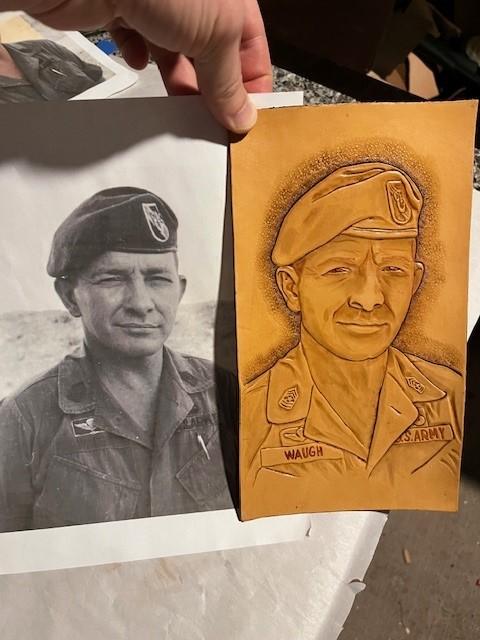
Rather than post a new thread for each project (posted 2 in the show-off thread), figured I'd just start a thread I and others could add to. I'm learning to do portraits. I started down the rabbit hole doing comic book art carvings. I struggled with the faces, so started researching how to do it better and that effort expanded into pursuing realistic portraits. I've really enjoyed the learning process. I'm hoping this thread can turn into lessons learned, progress photos, and a place for others that may be pursuing the same goal to ask questions. My number one tool I've found besides practice is the videos from Elk Track Studios by Annie Libertini. I've downloaded and used those, but was also fortunate to be able to take one of her live classes in 2024 at Sheridan. The first photos here are a self-portrait of me and my wife and a portrait of CSM Billy Waugh. Annie recommends not doing portraits with teeth, as they look weird. After doing the self-portrait, I can confirm. Would definitely recommend not doing toothy smiles. CSM Billy Waugh is an amazing figure in military history. If you don't know who it is and you want to kill > 1 hour of time check out the video. (The video contains a lot of military humor / crass humor, so be forewarned).
- 11 replies
-
- portrait carving
- figure carving
-
(and 1 more)
Tagged with:
-
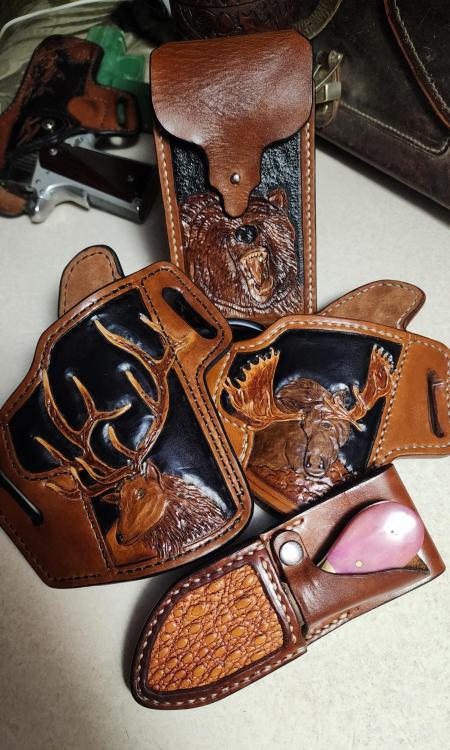
I finished my customer's order with the moose carved holsterthat I posted about a week ago. I ended up having to make the elk holster a second time because I forgot to adjust my pattern for the suede lining. I figured it out right away, and the entire time I was making it i thought something was off. The phone case was my first that I've been commissioned to make. My customer was absolutely ecstatic about it. Mainly I think he was more excited about the grizzly. The knife sheath is for a little damascus pattern skinner. We decided to go with the snapping turtle leather inlay because it's such a small window to carve on. I still have some of the leg leather left from a couple of tail inputs inlaid orders. Elk holster- Ruger P85 Moose holster- SCCY CPX2 Grizzly- Galaxy S+ series/size phone Snapping turtle inlay- unknown knife maker, small skinner
- 4 replies
-
- snapping turtle
- figure carving
-
(and 2 more)
Tagged with:
-
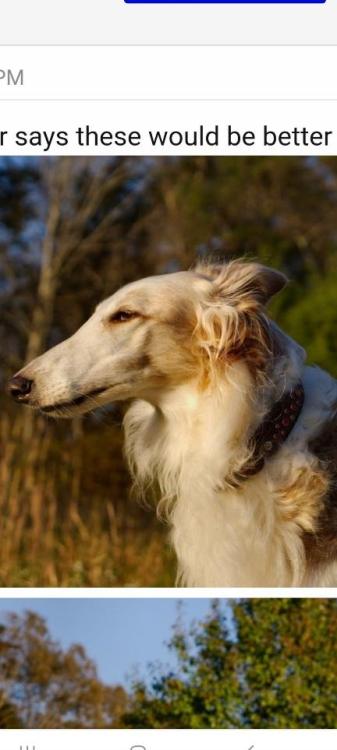
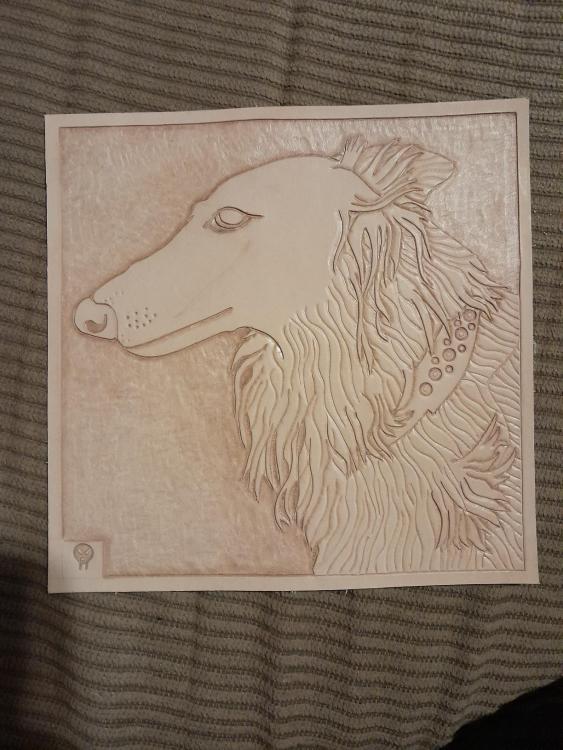
I've done several animals including birds and reptiles and fish. But haven't done a dog until now. I was asked if I could do a memorial piece for a guys Russian wolfhound. He sent me a few pics and I chose one I thought would translate good on leather. I told the guy I hadn't done a dog yet but was up for the challenge. I would also like some feedback from this group on your thoughts.
-
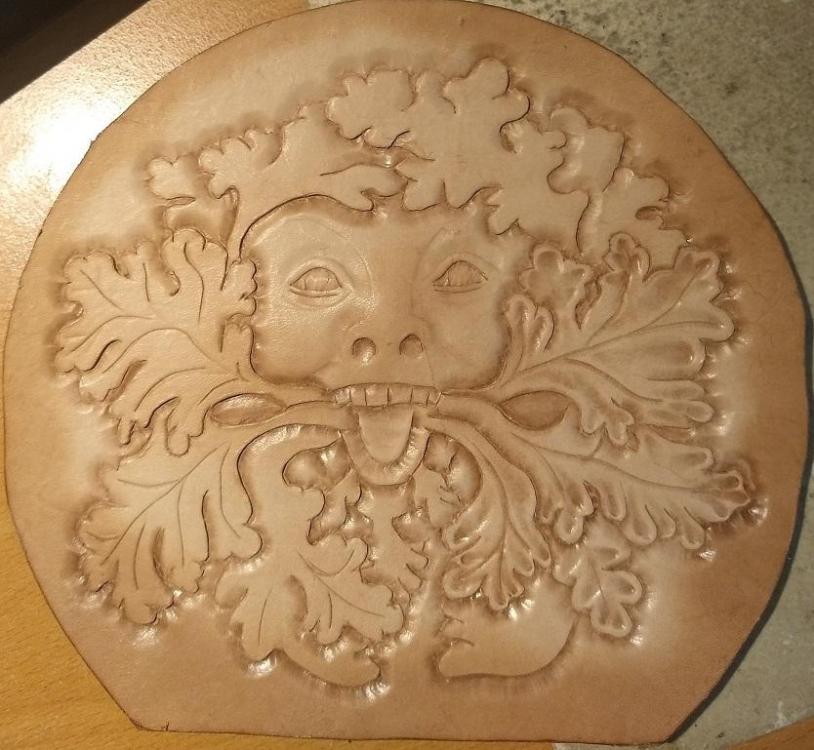
I'm working on this Green Man face for a bag. I've got a handle on the floral tooling (oak leaves), but I'm not sure how to best do the face, especially the nose (and by extension, the eyes). I'm not sure what tools I should use, or what sequence of techniques, to get it right. Any of you figure modeling experts got some advice?
-
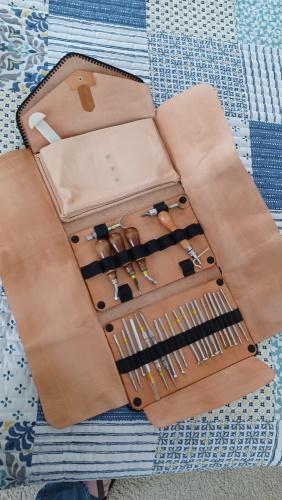
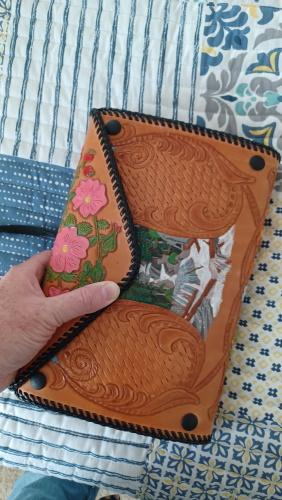
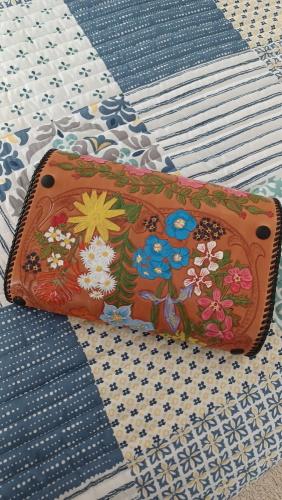
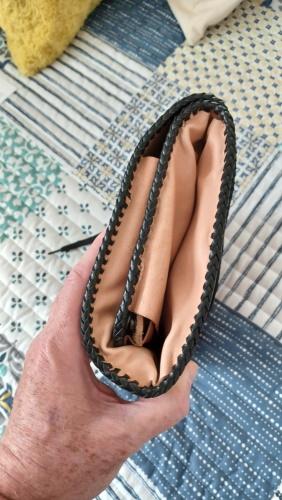
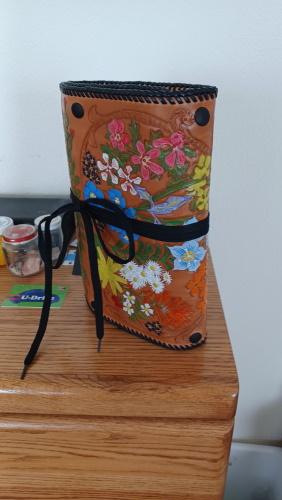
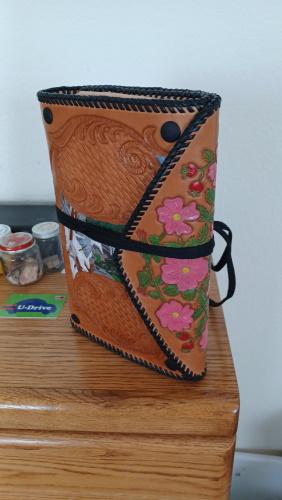
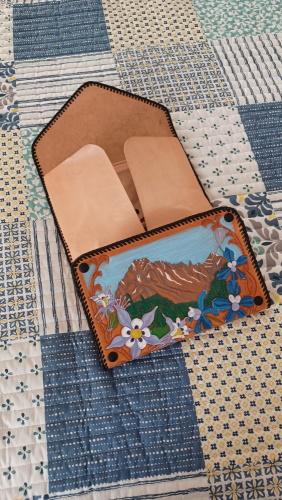
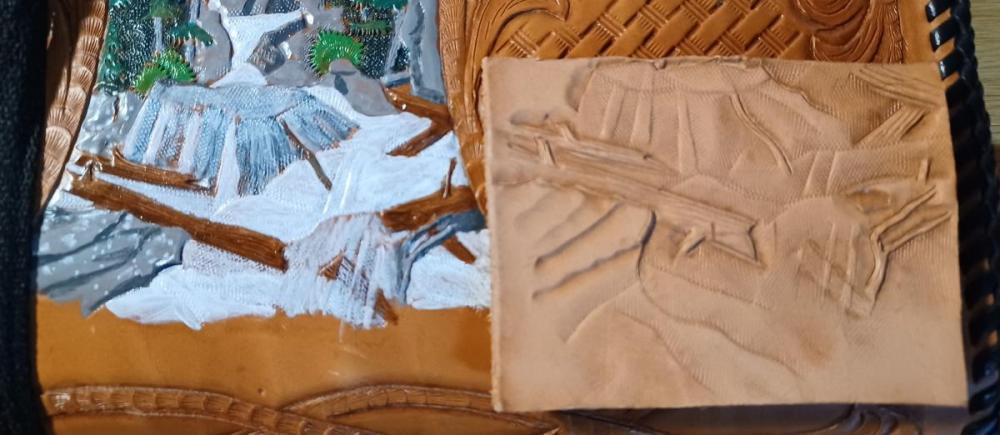
It's done! Next on the list: a set of coasters for my sweet wife, and a replacement camera case for my son's antique Minolta SRT201. This was a fun project. It took so long because it's a hobby, not a job. I envy those of you who can turn around projects faster than this. I did find two serious design flaws. The three folds? gussets? (the places where it bends) are all the same 2-inch width. I should have made the inner one 1.5, the middle one 2.5, and the outer one 3.5 inches. I thought the 2 inches would be more than adequate for the tools inside. Related to that, I need to rethink the closure. I had been planning on using a simple Prusik knot to attach a 12-inch thong to the flap, and then wrapping the thong around a concho in the foreground of the waterfall. Now I don't know if I really want to do that. So for now, I've tied it shut with a bootlace. Got any advice for me? Some things I like about the design: The inner panels are removable and interchangeable. I'm going to make a second panel for stamping tools, to replace either the handled tools panel or the inner pouch. And if I decide to trade leatherwork for another hobby, I can design brand-new panels. The lacing looks so retro! I love it! My next project will be sewn, but I love the old-style look of this double-loop lacing. The carving and coloring is *chef's kiss*. After a hiatus of more than 30 years, I've still got it. But now I need to get serious about brushing up on Western Floral. Outside and inside One-third closed. This panel is hidden when it's fully closed. Front, back, and side when closed Tied shut with a bootlace I carved this little piece to match the base of the waterfall. I was going to color it to match, and cut out a circle in the right place, so I could use it as a concho . . .
- 10 replies
-
- coloring
- floral carving
- (and 4 more)
-
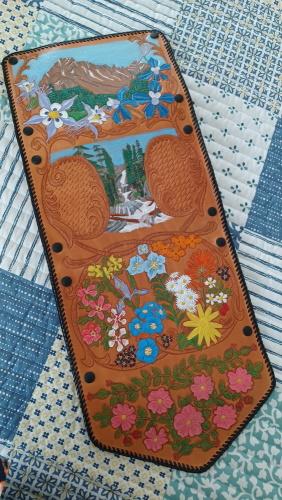
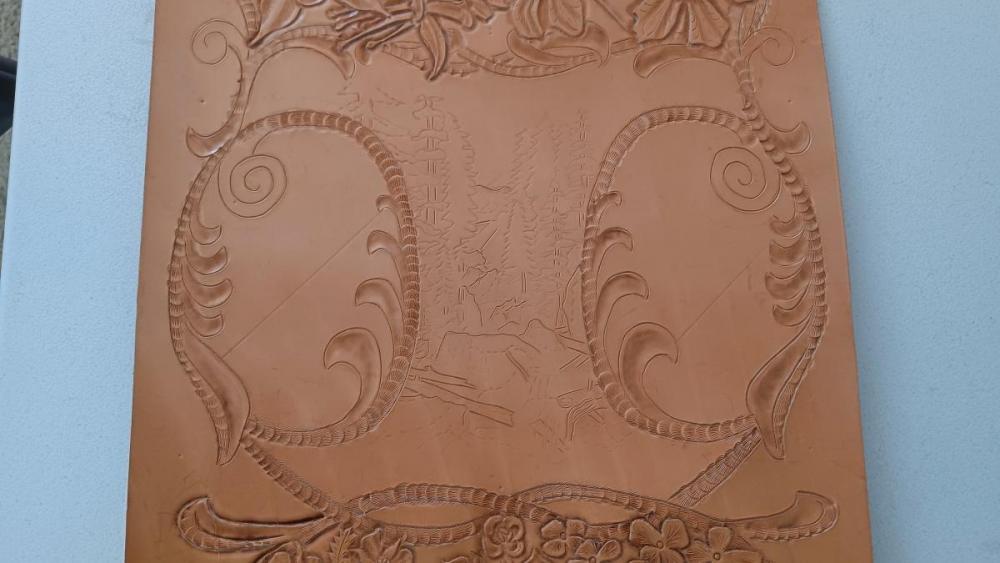
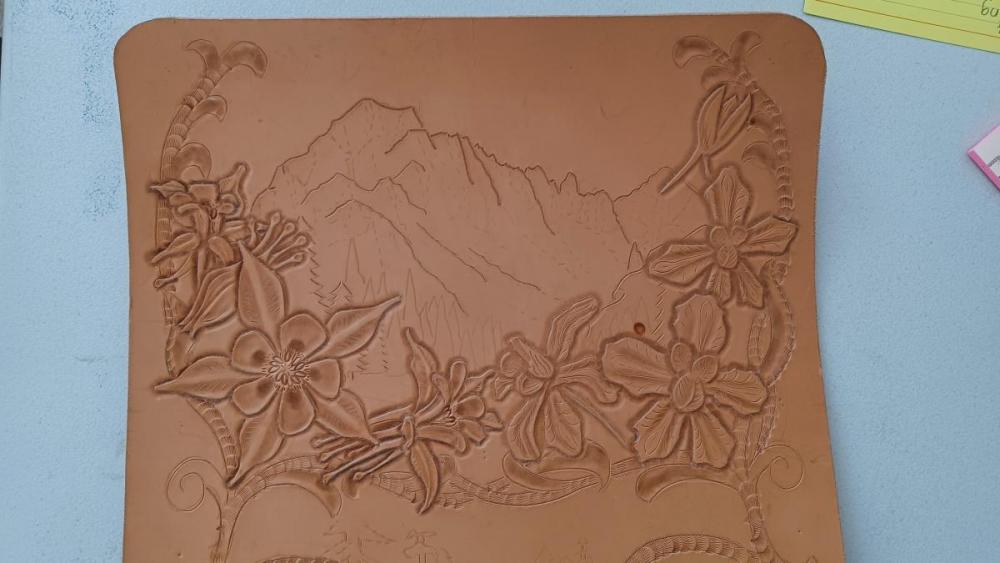
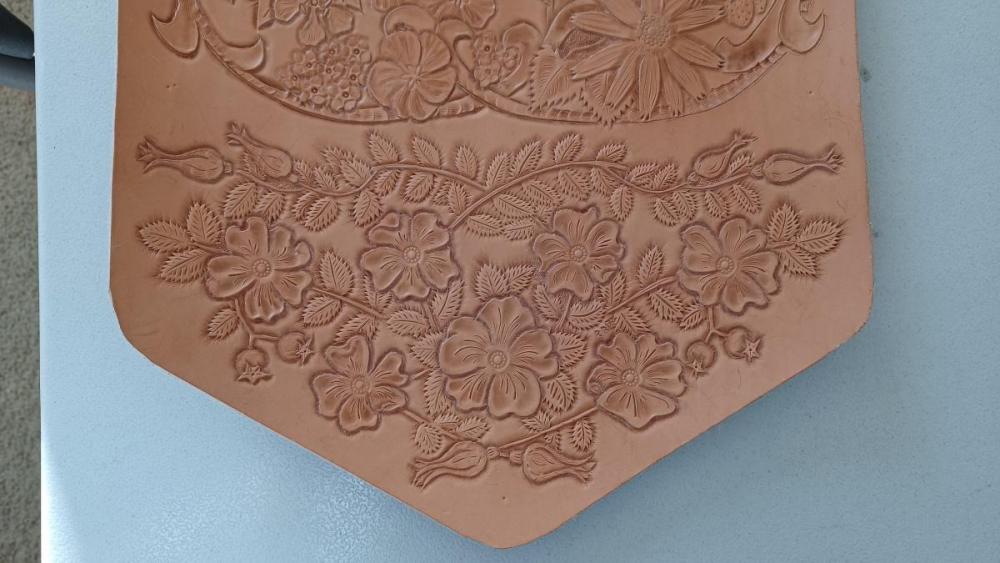
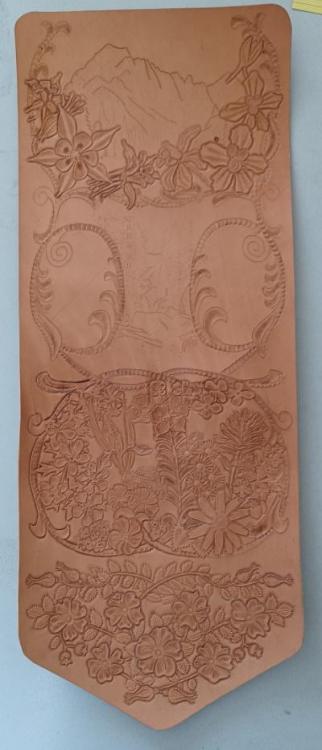
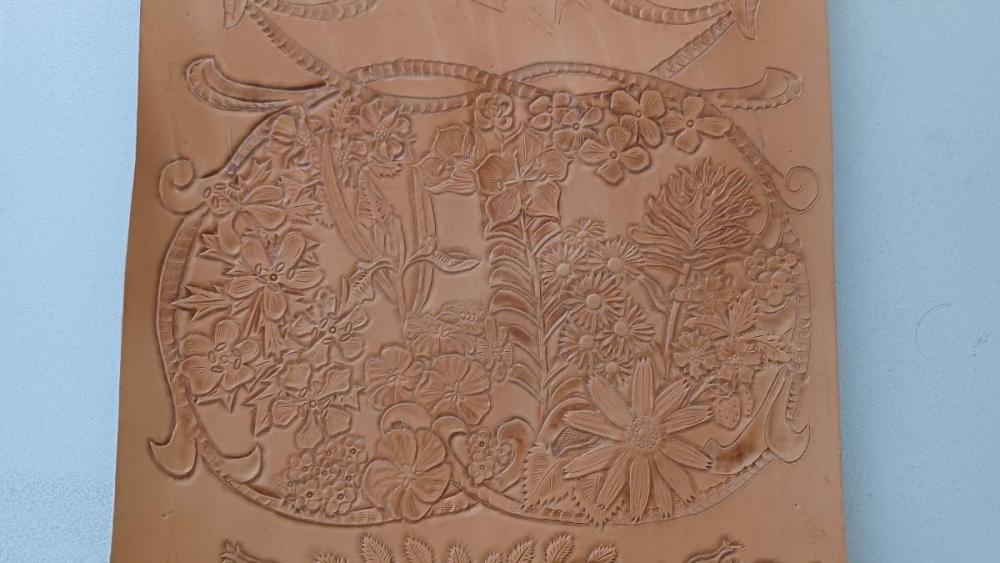
I started on this project before Christmas. I knew it would take me a while to finish it, and it's not finished yet. Consider this a progress report. I figured that if I tell you all about it, you will hold my feet to the fire and make sure it gets done someday. It's the outside of a triple-fold tool pouch. The design is two scenes from Rocky Mountain National Park, a lot of Colorado wildflowers, and some basketweave, all held together by some vinework which I wouldn't exactly call Western Floral, but it leans in that direction. You've seen a photo of the wild roses on the flap before. Every blossom is from a photograph, either one I took or one I swiped from the Web. The first panel (sorry, the photos are out of order and I can't fix it) is a collection of some of my favorite Rocky Mountain wildflowers. Starting at one o'clock, and going clockwise, I have: Common western wallflower Indian paintbrush Forget-me-nots (they are tucked into several little corners) Wild strawberry Heartleaf arnica Blue flax White geranium Wild geranium Potentilla or cinquefoil Aspen daisies above the heartleaf arnica Jacob's Ladder to the left of the aspen daisies Wild iris to the left of Jacob's Ladder The second panel is a tryptich, with basketweave on the left and right, and Ouzel Falls in the center. The third panel will be finished last. It's Longs Peak and the Keyboard of the Winds, framed by columbine on the left and larkspur on the right. You may recognize the mountains from the Colorado state quarter. It's difficult to keep the moisture content consistent on this huge piece of leather, especially in the dry Colorado winter. You will notice differences in the burnishing from spot to spot. Feedback is welcome. I can't go back and change anything, but I can make improvements going forward, and I can use your advice in future projects. EDITED TO ADD: I hate doing scrolls. I always messed them up when I was a kid. I don't know what possessed me to include six (SIX?!) scrolls in the vines, but there they are. I would appreciate pointers to resources on doing scrolls.
- 22 replies
-
- western floral
- basketweave
-
(and 2 more)
Tagged with:
-
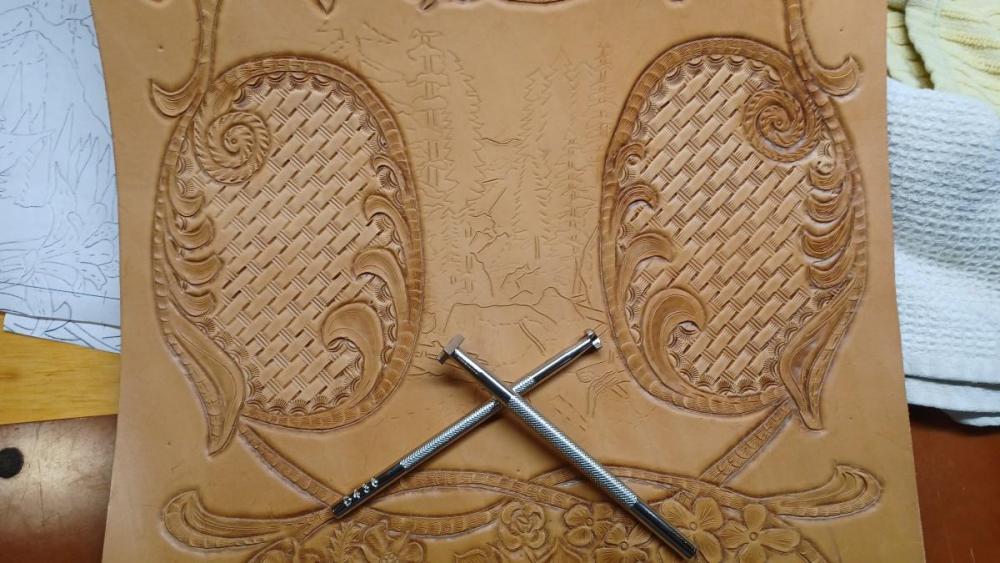
I was gonna wait until this panel of the pouch was all finished but I'm so tickled, pleased, and gruntled with how well the basketweave turned out, that I had to post this picture tonight. It ain't perfect, but I like the way it looks. What do you think? Should the border stamp go all the way around the frame? Even around the scrolls and the tips of the small leaves? You can see that I'm still having trouble with my scrolls. I did the one on the right first, and everything was okay until I went a little Edward Scissorhands with the, um, "decorative" cuts. I pretty well mangled it. Too bad you can't erase boo-boos on leather. But I learned my lesson, and used a much lighter touch with the one on the left.
-
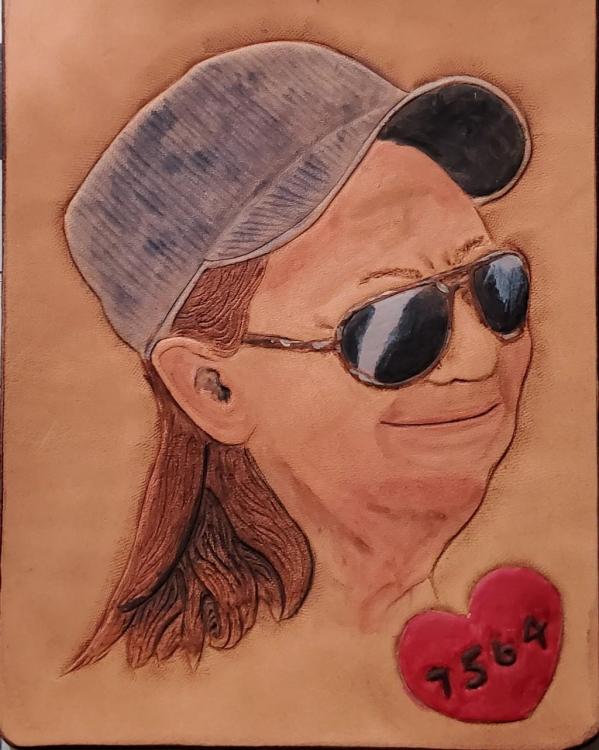
Here's a portrait of my best friends mom. She passed from cancer a few years ago and I thought he might like this for his birthday this week.
- 4 replies
-
- figure carving
- portrait
-
(and 1 more)
Tagged with:
-
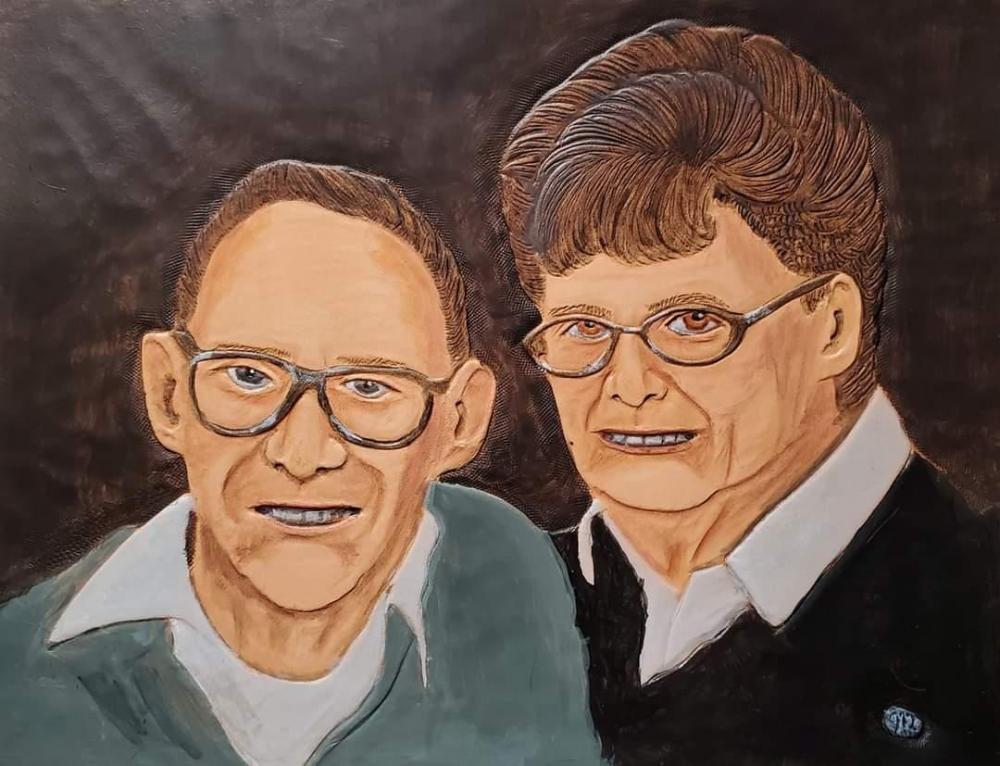
Hey everyone, I've posted the carving in the figure carving area. This is the completed colored portrait. It is of my grandparents and will be sent to my dad for Christmas. Anywho, im always open to critique and I hope you enjoy it.
- 9 replies
-
- figure carving
- portrait
-
(and 1 more)
Tagged with:
-
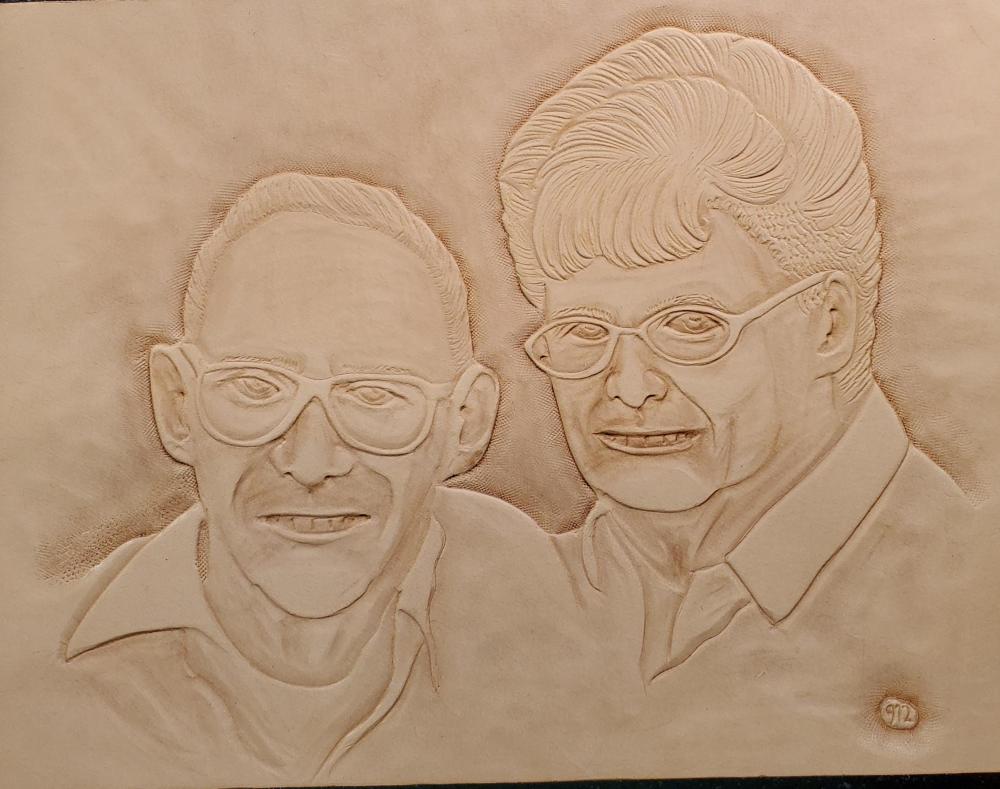
This is a leather rendition of the only portrait of my grandparents that I have. I hope I've done them justice with my first leather portrait. I used a swivel knife and some modeling spoons for this and some bevelers and things for the background.once it dries ill try some color, maybe a sepia type look. Still unsure about color. Always open to critique. Thanks
-
Myself and a friend were booked for the making realistic figure carving pieces. We were to make a lifelike portrait of sitting bull. He is horribly ill and cannot make it. If you are going to the southwest leatherworkers show and was interested in an 8 hour class tomorrow please call the Brian at leathercrafters and saddlers journal. 715-362-5393
-
- figure carving
- tooling
- (and 3 more)
-
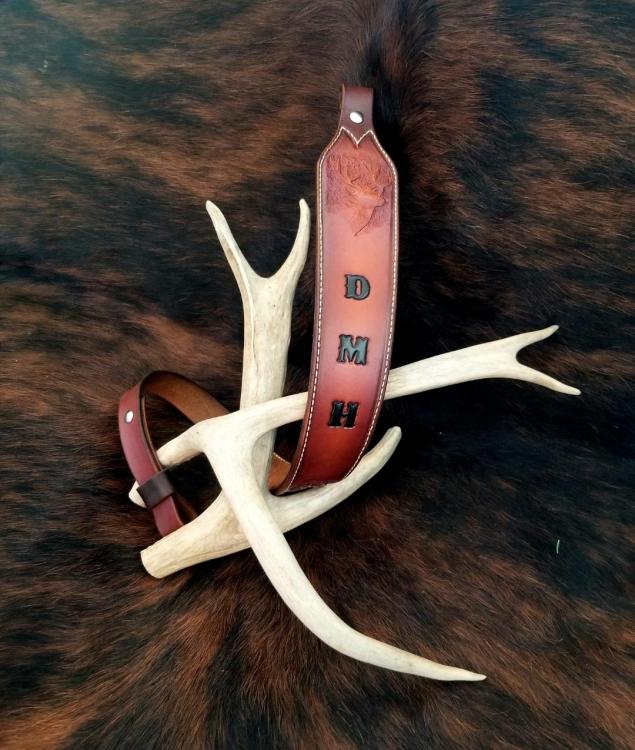
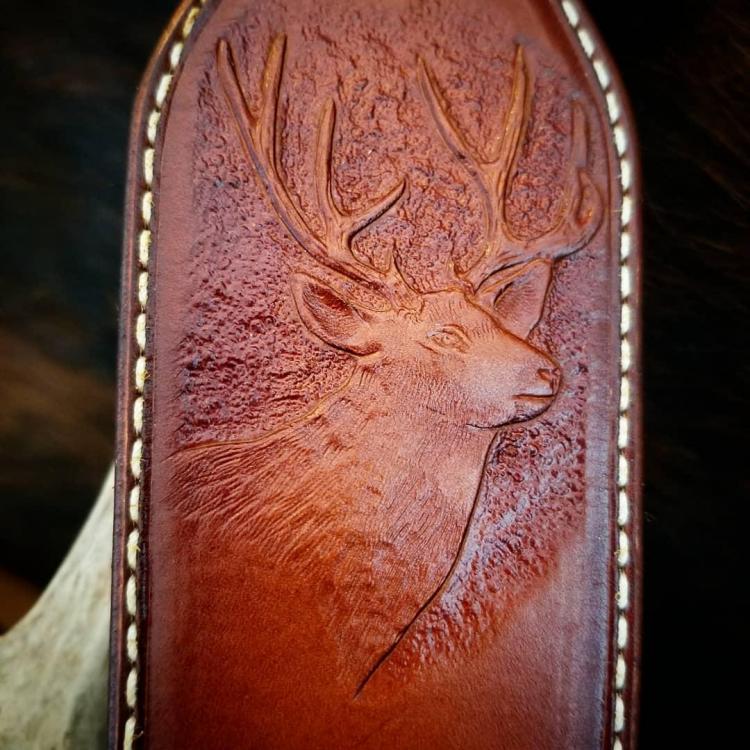
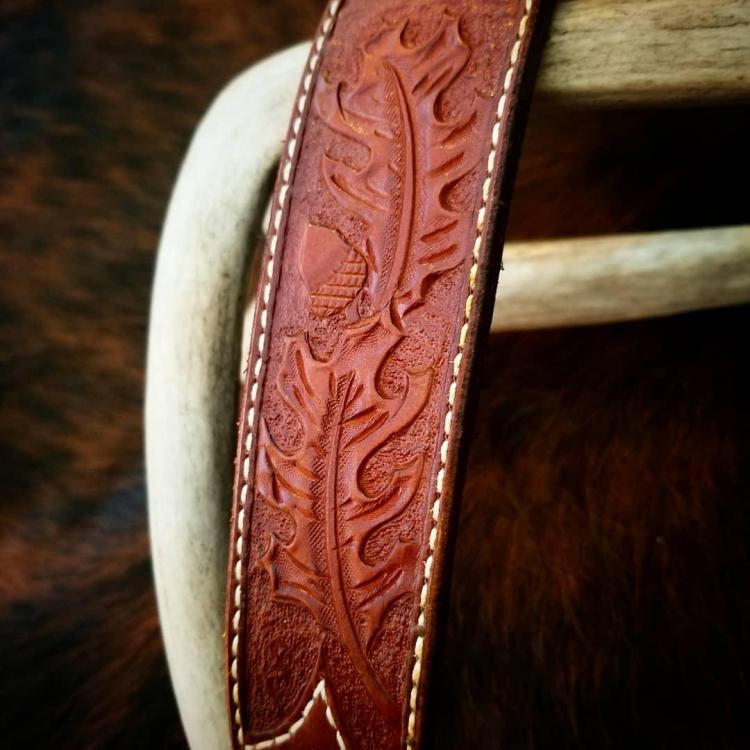
Here's a custom rifle sling I did a few weeks ago. I lined the shoulder part with 4-5 oz bison with the flesh side out so it won't slip off the shoulder as easily. Also, I noticed that the bison edges burnish pretty well with the veg tan. Ryan
- 3 replies
-
- rifle sling
- figure carving
-
(and 1 more)
Tagged with:
-
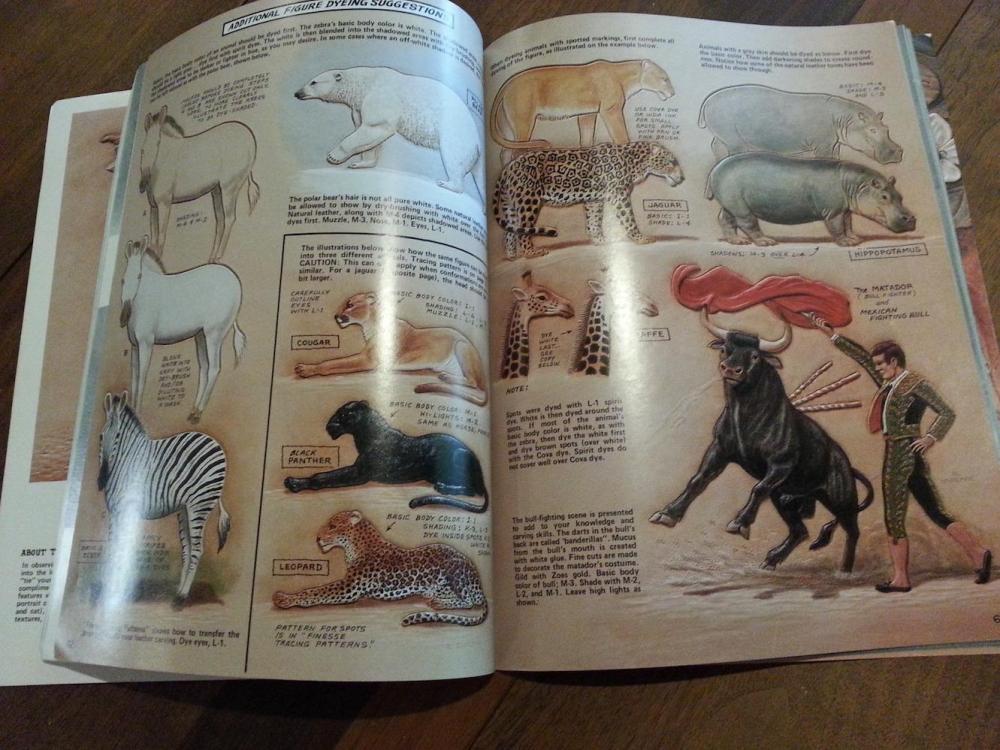
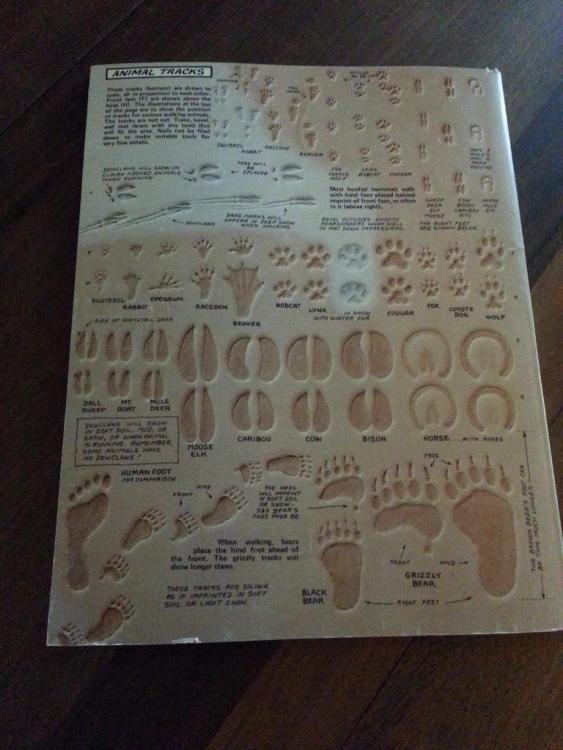
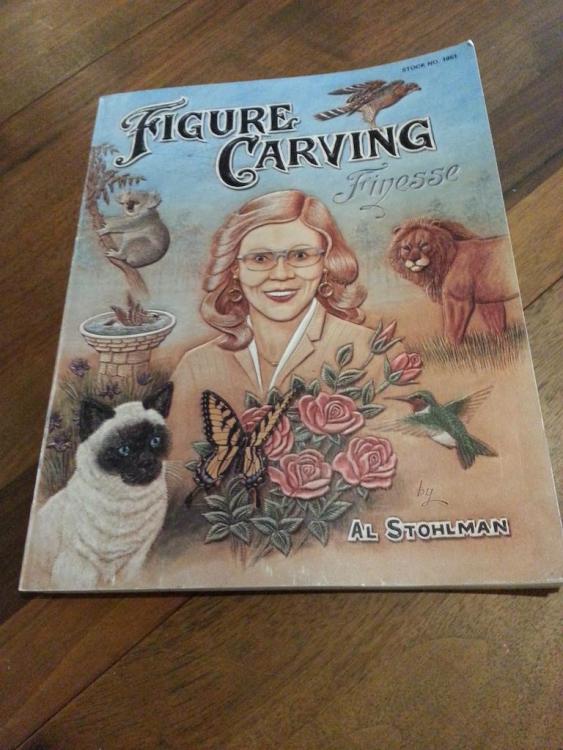
This is Figure Carving Finesse, packed with info on how to perfect your figure carving skills. I think it normally retails for around $30, I'll sell this one for $20 plus shipping. YinTx
-
Hello, again! Here is the gun belt to the holster I posted earlier. A friend commissioned me to make it for his 45 Colt Ruger Blackhawk. He's a big fan of tie-down roping and asked me to incorporate some roping scenes. Let me know what you think and please ask if you have any questions. -Ryan
- 41 replies
-
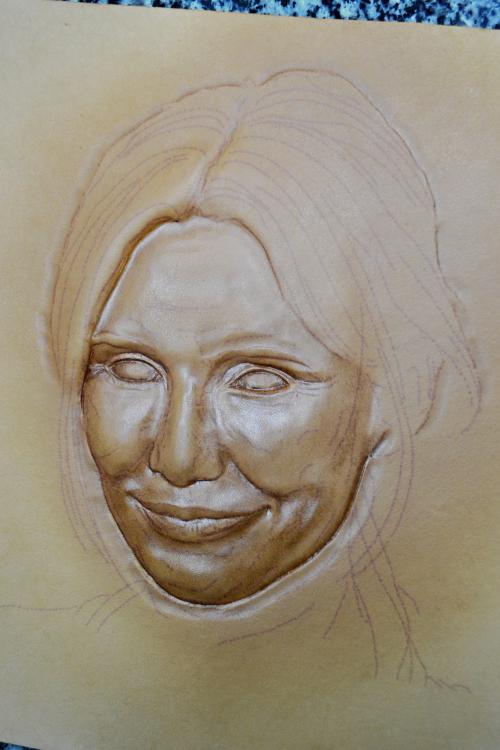
After training on animals and flowers, I decided to try to perform a carving of a person's face. This work still in the process, but I would like to hear critical remarks (For which I will be very grateful) - there is still an opportunity to make adjustments.
-
From the album: Portrait. Leather carving & embossing.
-
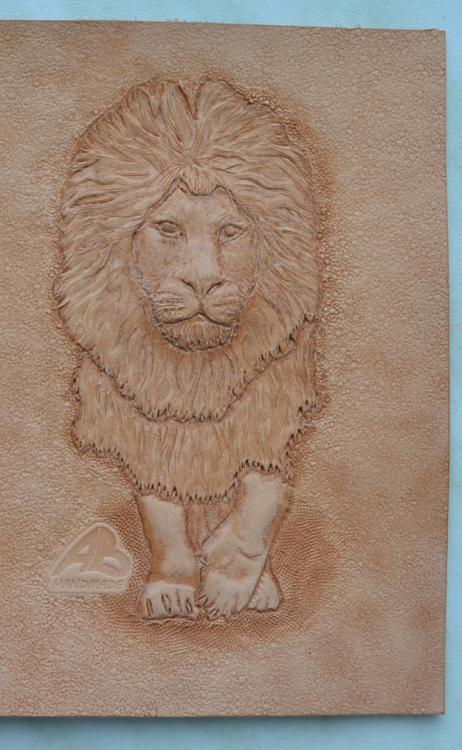
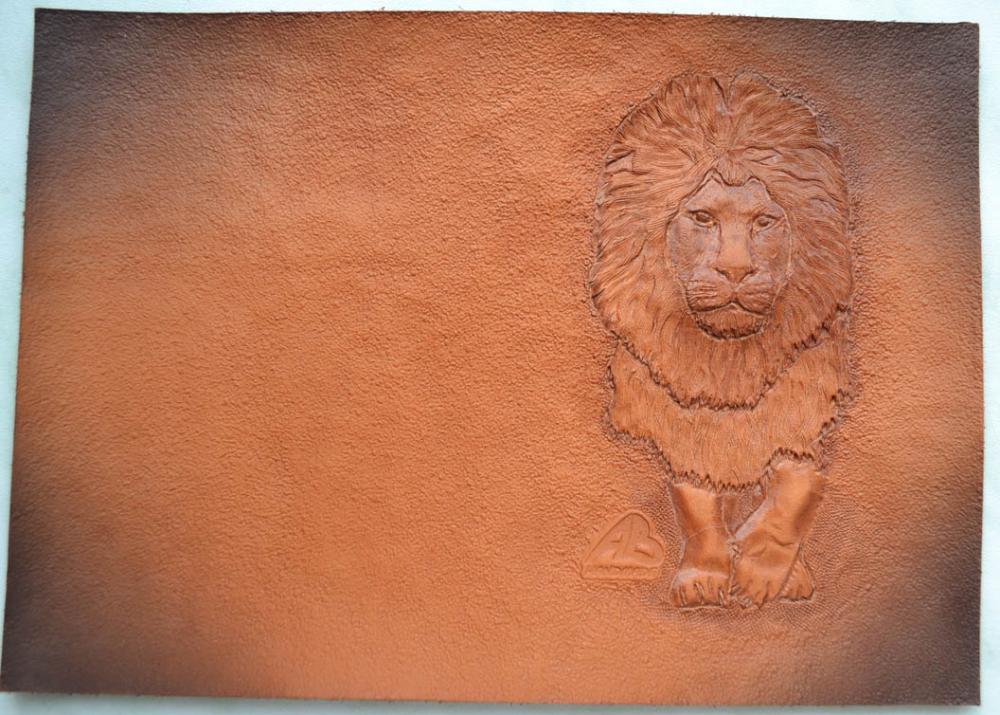
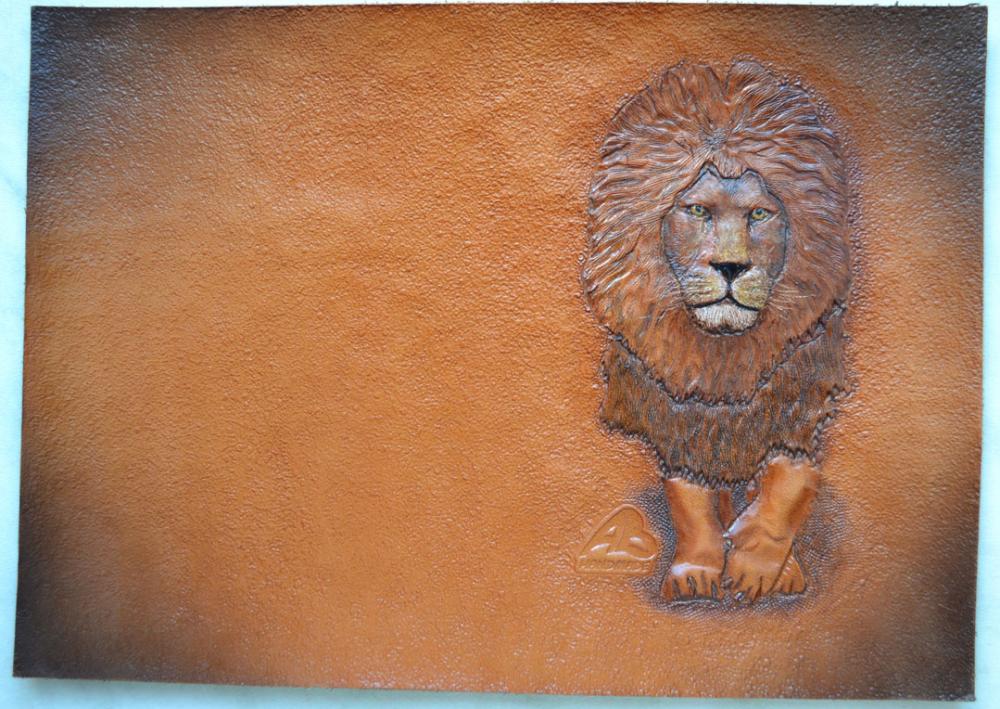
Mountain lion, version 2. Based on previous errors. I decided to describe the process - maybe someone will be useful. First I do the preparation of the leather insert. 4 layers of veg tan leather 7 oz = 11 mm. I form the insert with a scalpel and knives for wood carving. After that I process it with the finish (I'm use Appretto Mild). Next I Transfer the drawing to the leather. Stretch the leather on the insert. Using bevelers, I create a bas-relief. Now I'm making wool. To be continued...
-
Mountain lion. Figure carving & embossing.
ABHandmade posted a gallery image in Our Leatherwork Galleries
From the album: Mountain lion (puma). Carving & embossing.
My puma got a boyfriend. -
From the album: RolandRanch
Holster and gun belt I made for a friend. -
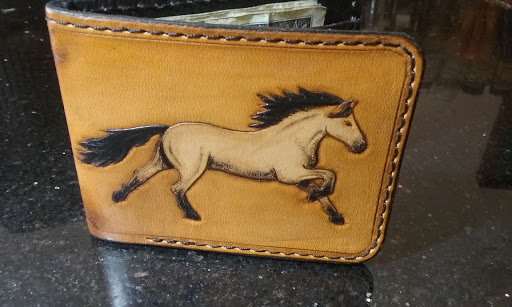
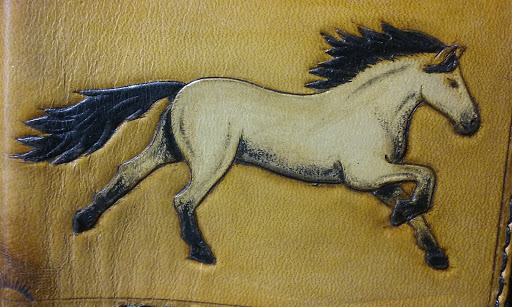
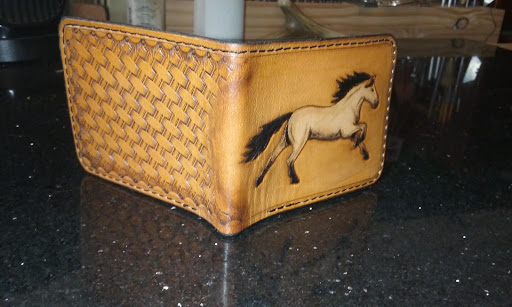
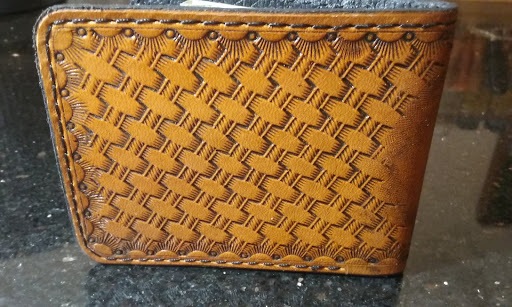
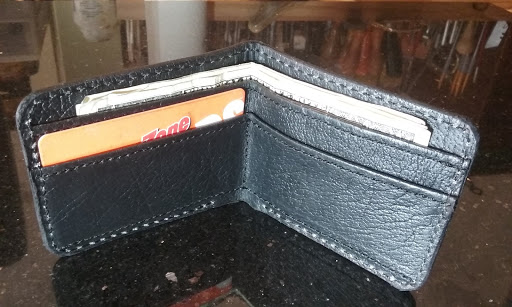
Here is a recent creation of mine for a friend. She is moving away and asked if I could make her a billfold. She said if I could possibly carve a silhouette of a horse, that would be great... and of course when someone is easy to please and doesn't want you to go through a lot of trouble, it just makes you want to go all out on it. And I happen to know she really likes duns and buckskins. The veg tan is 4 oz belly and the lining is pigskin. It is machine stitched. I tried something new in my stamping by spacing my camouflage a little more and then adding a seeder dot in between them. I actually think it looks pretty good that way. Any questions? Comments/critique are always welcome. Thanks for looking! -Ryan
- 22 replies
-
- rolandranch
- figure carving
-
(and 2 more)
Tagged with:
-
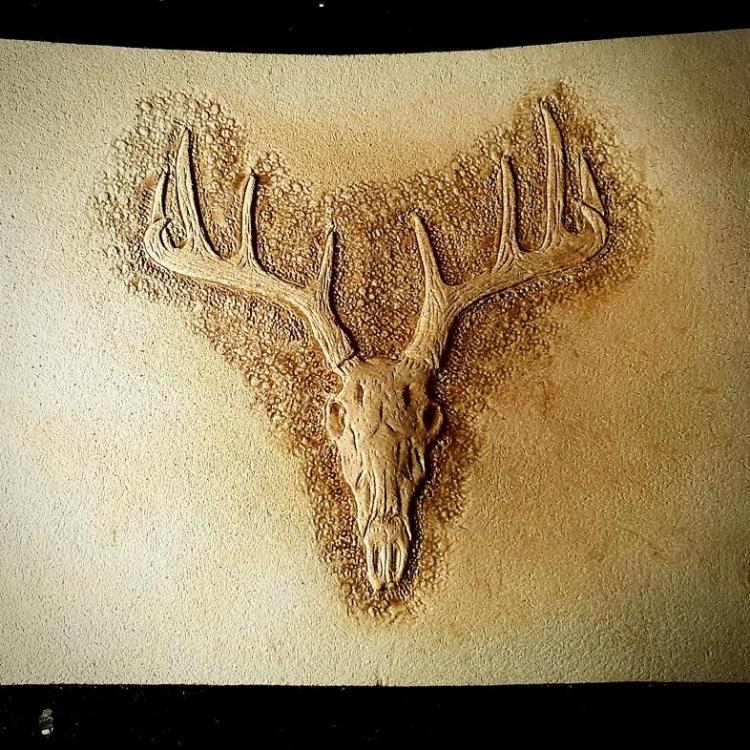
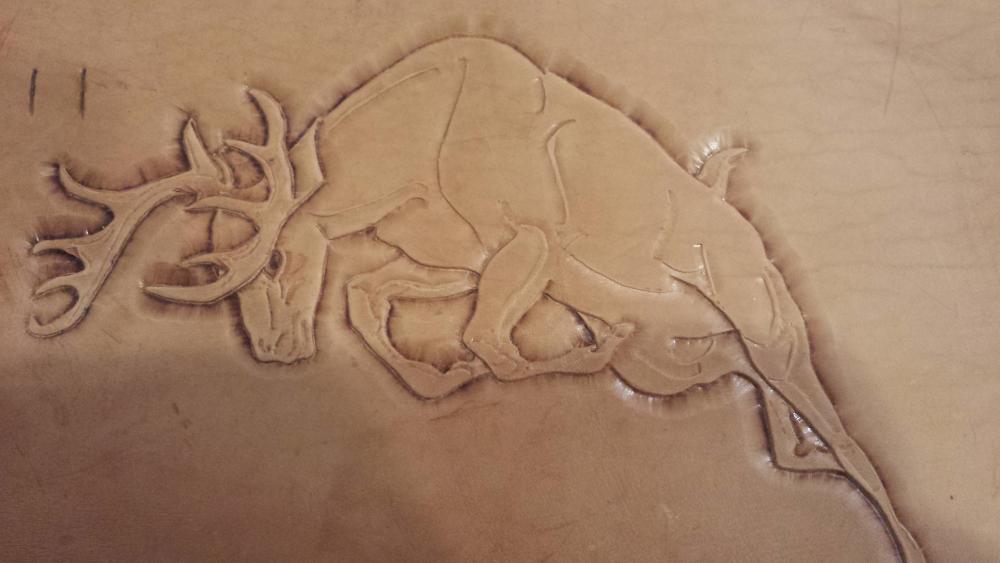
It's a design from one of those Al Stohlman stencils, I'm not designing my own yet. It's 9oz leather. It just doesn't look right. I feel like I'm doing something wrong. I used to have an issue where I was tooling with the leather way too wet, so I stopped doing that and all my work looks improved, but I still feel like something is not "clicking"? Like I'm missing something about this. I have most of the Al Stohlman books including Figure Carving Finesse. Sometimes it's a bit overwhelming and confusing though, and most of all I wish I could see his work in real life, because I stare at the flat photos in the books and I wonder how deep the cuts are and such...and sometimes it's hard to make out what effect he's trying to teach? I feel like I need to see and touch to really understand, but that's not possible...I don't know any leatherworkers in my area either. I feel like maybe I'm striking too hard or cutting too deep? Beveling too deep? Using the wrong bevelers? Stohlman recommends certain specific bevelers for figure carving, but I don't have those exact ones (yet). I have these straight bevelers, B935 and the bigger/wider version of that one. Will it really look THAT much better if I use the triangle-shaped "figure bevelers" Stohlman says to use? Also I don't know what Stohlman means when he talks about using the modeling tool to "smooth and round off edges" of the beveling. Like, I see this ledge that occurs when you bevel, but I don't really understand how to make it round, when I try to use the modeling tool on it it just feels like I'm making the image less dynamic and pressing the edges down so they don't stand out as much. idk if that makes sense. Obviously the lines inside the animal (supposed to be muscle definition) is a hot mess. Also I suppose I should add some fur texture? So idk. Any and all advice and critique is welcomed. I kinda like how this turned out because I really like working with thick leather, it allows a lot of depth which is fun, but I still feel like I'm not understanding something about it.
- 19 replies
-
- figure carving
- deer
-
(and 4 more)
Tagged with:
-
From the album: J Coleman
-
Way back in July I posted a figure carving I was frustrated with and I needed help/critique. A lot of people came through for me, but especially user immiketoo, with a video from his site learnleather.com. I encourage everybody to go here if you need videos about figure carving and using a modeling spoon. The modeling spoon video he gave me was invaluable in the improvements I made. So here are two figure carvings: both are the same deer pattern. The first one is the one I uploaded back in July asking for help. I did not have the figure carving bevelers, or a good modeling spoon. The second one is after watching immiketoo's video, buying figure carving bevelers, and also buying Peter Main's modeling spoon just this month. I got busy with school and couldn't afford the modeling spoon for awhile, so this is why it took so long for me to make another attempt. However I believe this carving is already much better. Anyway here they are, and if anybody has any further critiques or suggestions for improvements, feel free to share. Edit: the uploader isn't working. My files are under the size limit but the website disagrees for some reason. I'm going to see if I can post them underneath in the comments.


.thumb.jpg.327685d8c1787fa894323fed9a6b2dac.jpg)
