All Activity
- Past hour
-
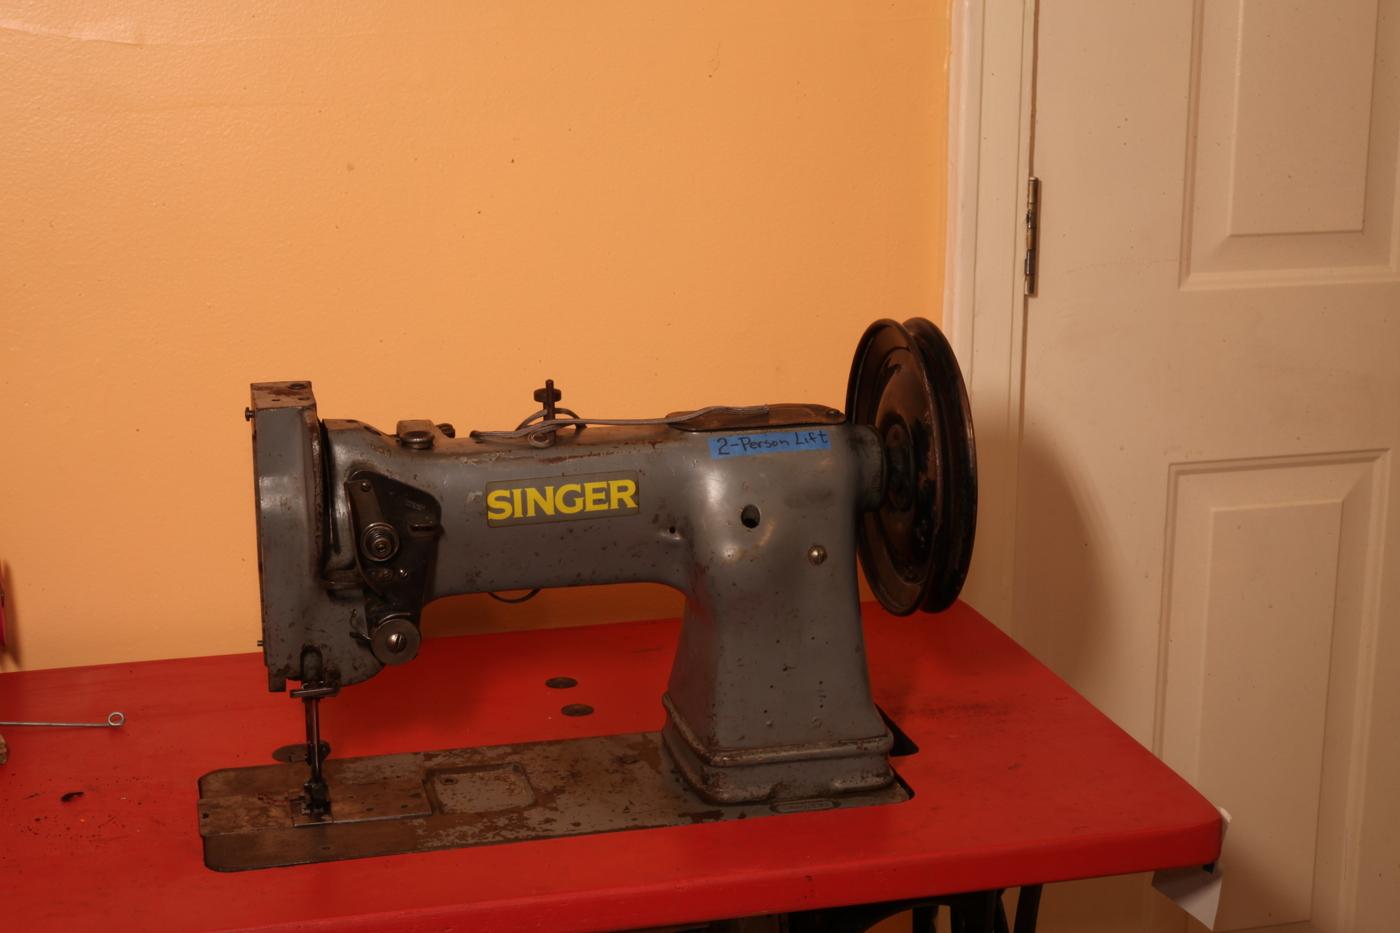
The hook washer as it’s called in the parts book, is the large flat washer that sits under the hook, it has like a finn that extend at 90 degrees upward just below the point of the hook. i can’t figure out what it’s function is, but the needle is rubbing on it, and I don’t think it supposed to be this way. I’m an automotive mechanic by trade, I have no previous experience in sewing machine. when sewing multiple layers of upholstery leather, it all goes well for about 12 inches, then my string frays and breaks. (135 thread, 160 needle, 5 stitches per inch, pressure is ok)
-
If this is your rookie effort, I can't wait to see what's next!
-
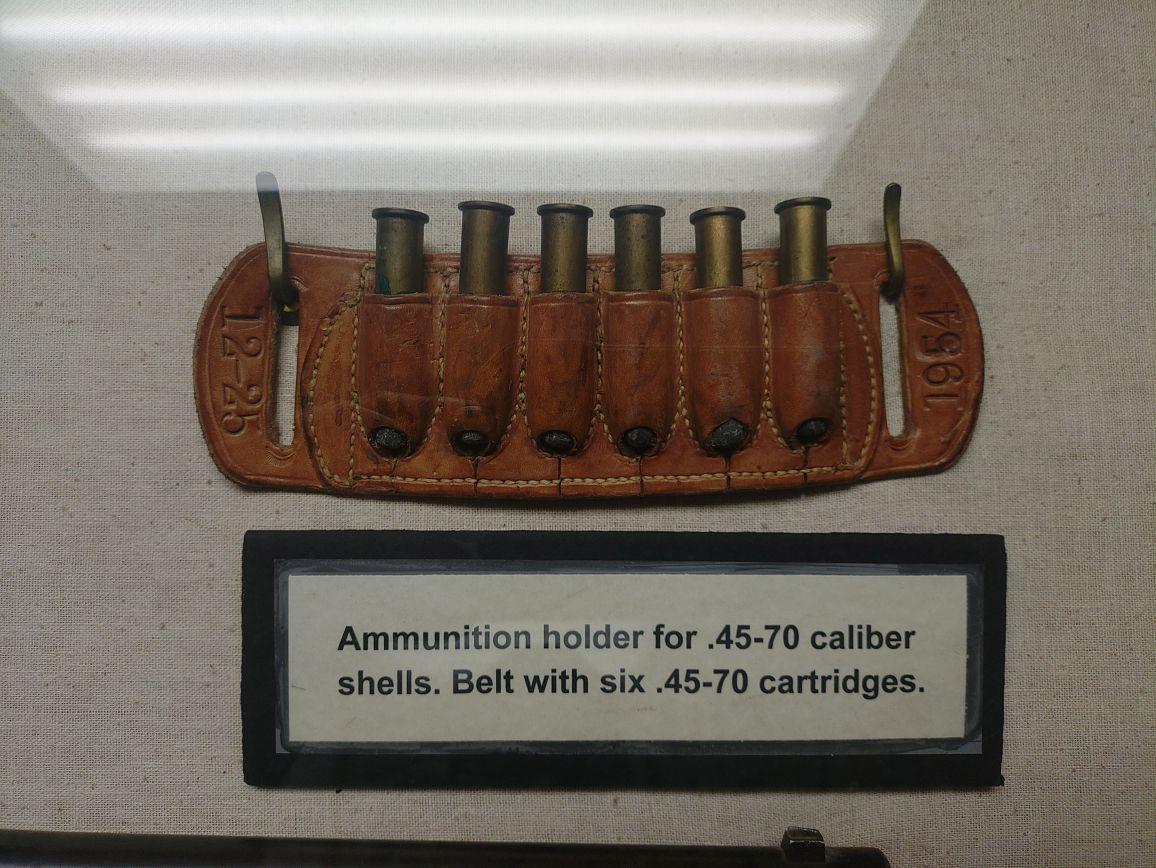
Ive seen many ammo holders on here in the past but this one stumps me. I found this in a museum and couldnt help think that this design would work perfectly for bottle neck rimless ammo. My question is how the heck did they cut the outher loops like that to get things to fit ammo and yet look so clean? How can a person reproduce this to fit bottle neck ammo? Just use a bunch of leather and try till its right? Where are the measurements taken from? Anyhow? anyone know of any writeups on this design?
-
Exactly, just tweak the stopping point until it stops with the tension arm all the way up. I'd have to go sit down in front of a machine, but it should be pretty close to the moment the needle is all the way up.
- Today
-
Trust the machine. (not the motor haha) To understand when is an appropriate time in the stitch cycle to pull your material free, you can stitch slowly (handwheel!) with the bobbin cover removed. I both start and end my seams with the takeup lever at the top of the stroke. Depending on which model of digital servo motor you have, there may be adjustment within the menu to configure how much rotation happens between what the servo considers Needle UP vs Needle Down. I suppose in my wildest dreams a needle positioner might default stop for needle down a little after the hook point grabs the thread. Then when I heel tap it would first rotate to where the takeup lever is at its highest point (to lock the last stitch), then reverse ten or twenty degrees and come to a stop when the needle is at its highest position so it's easy to pull the material out. ☺️
-
@kiltedkrafts As they don't have serial numbers i don't think you will ever know . All i can say is that it is pre world war 2 because the factory was bombed. Vihl perderson took over production after that and made them under their name . Both machines are identical and parts are interchangeable . Needles are still available from the link below but to get parts means to buy an old machine and cannibalise it. https://www.leffler.com.au/pederson-needle-ltr-for-309-machine/
-
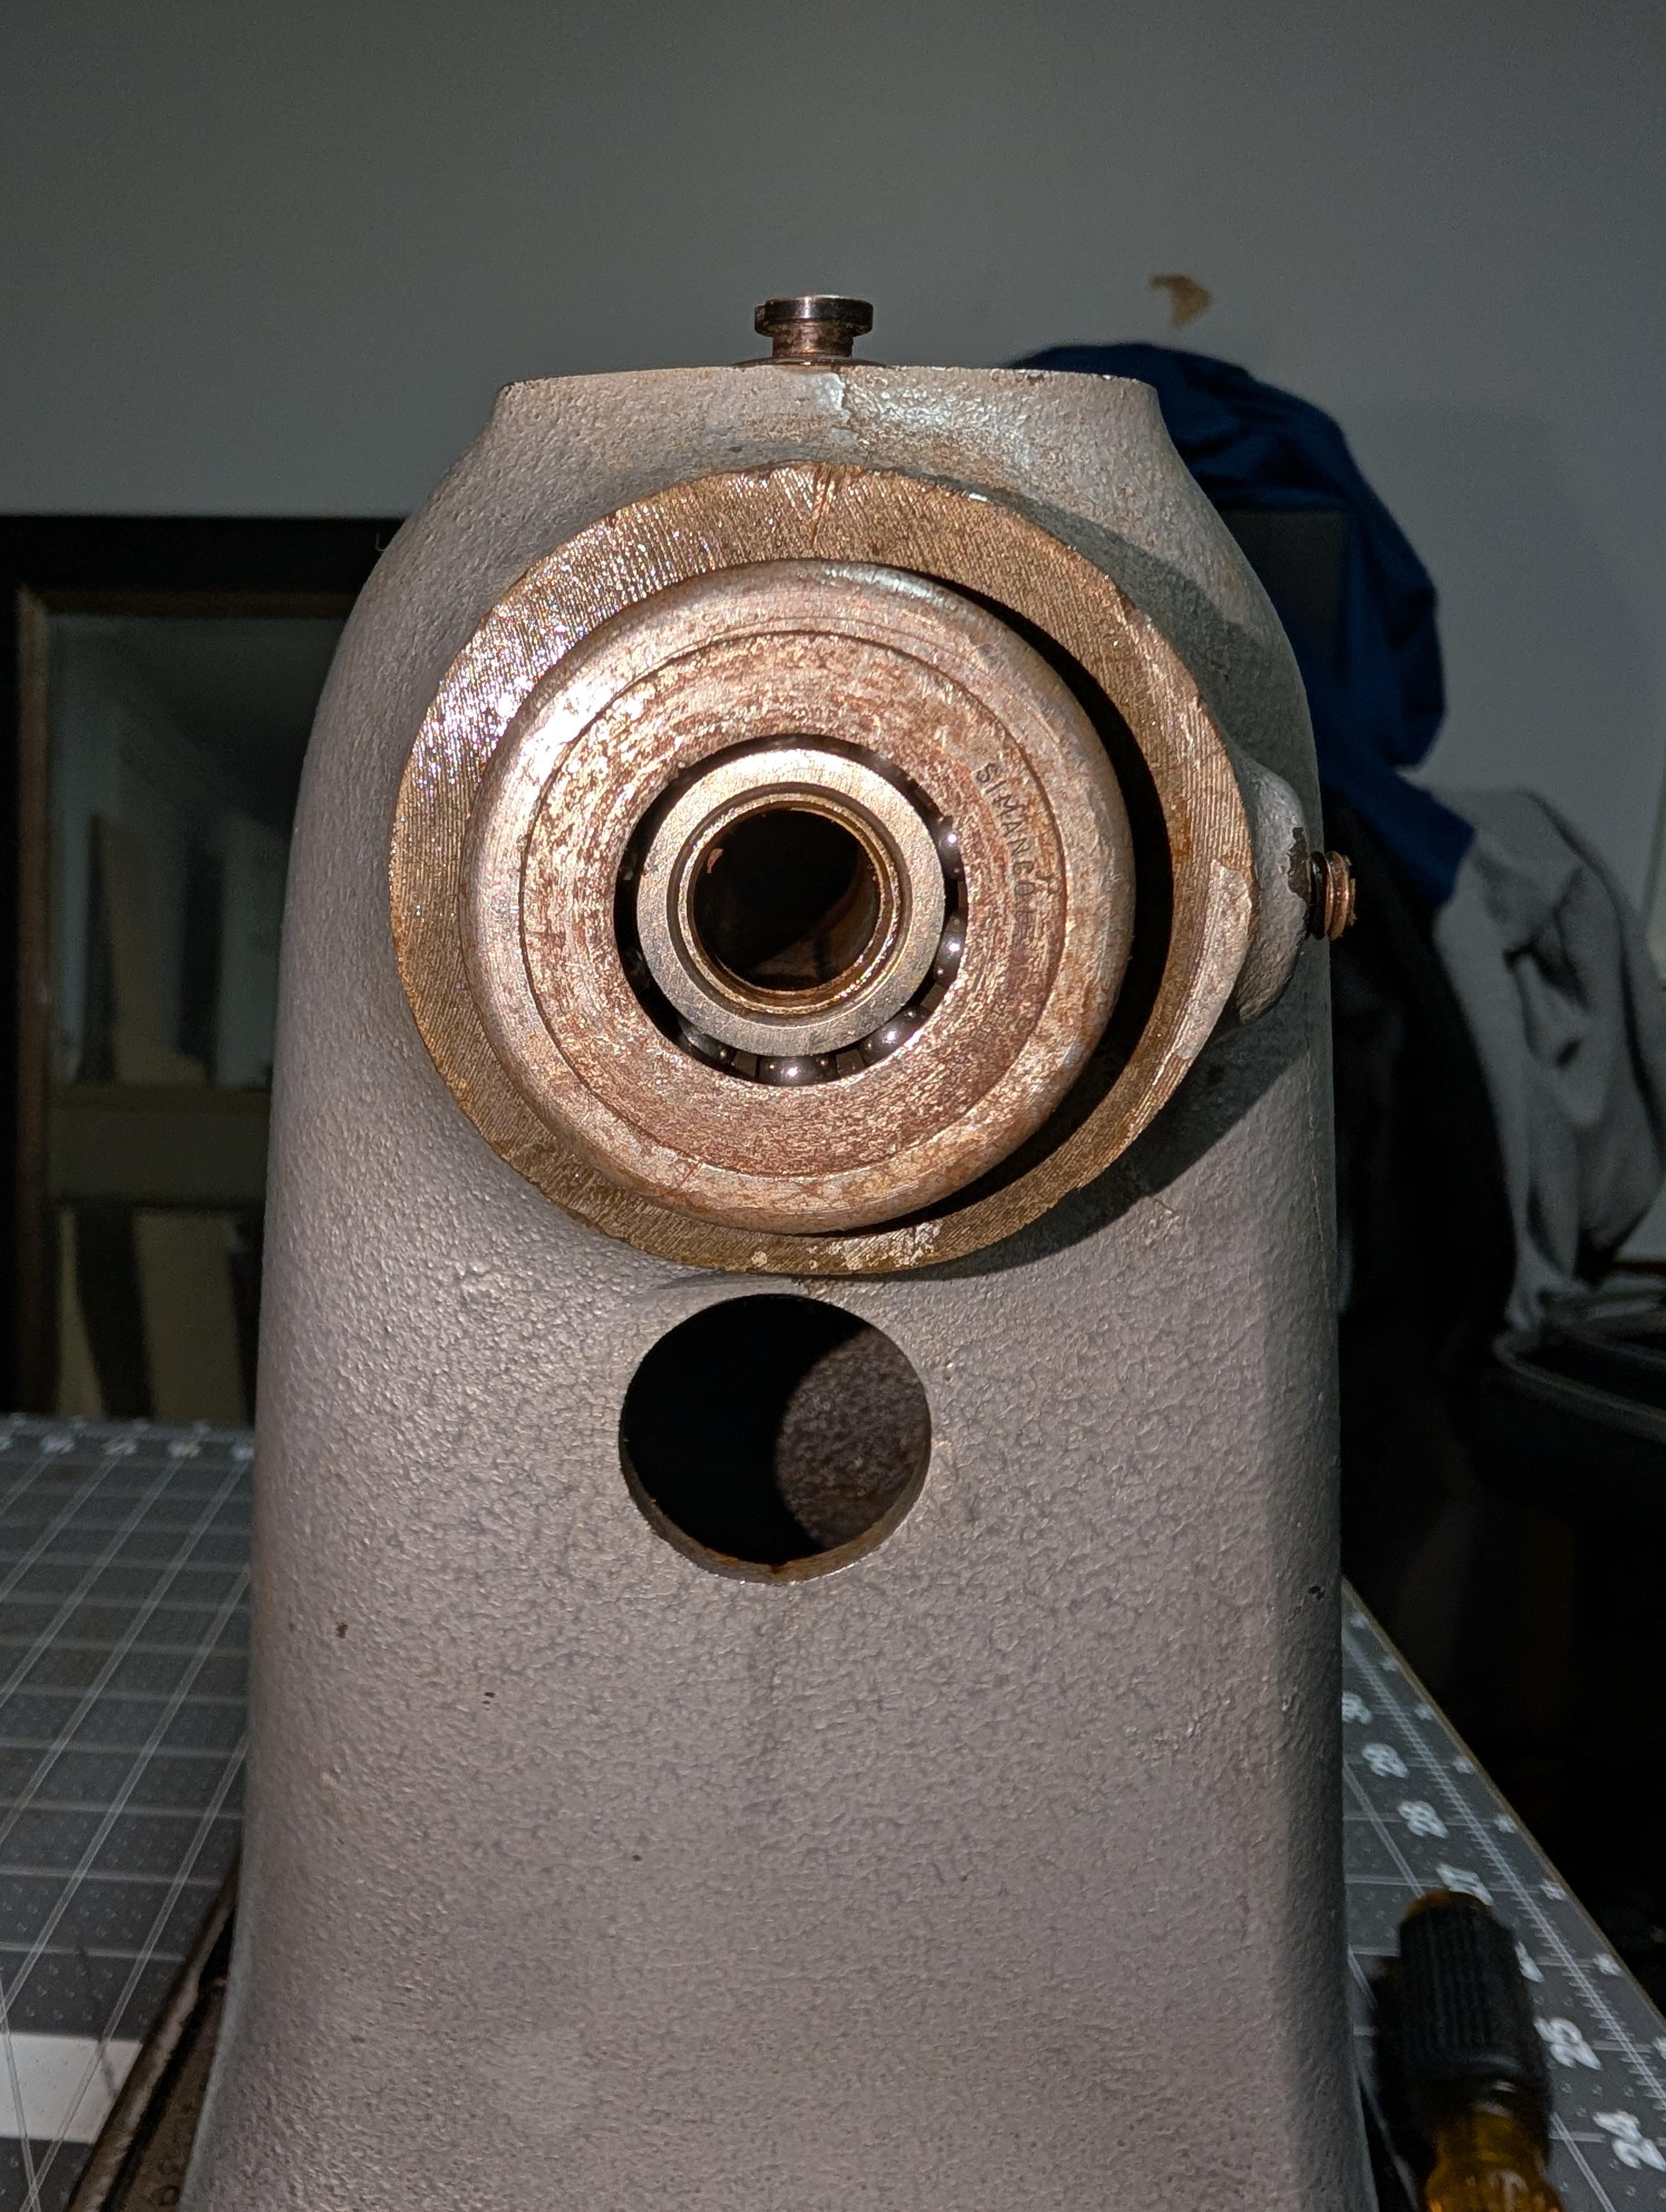
On the subject of lubrication: should this bearing get packed with grease, or does it just get sewing machine oil?
-
Hello all, this forum helped greatly in helping me identify the machine that I wanted and most anything I needed to know. however, I have one issue that I can’t seem to find the answer to. my machine sews pretty well, and I have outfitted it with a consew servo motor and eps. Works awesome. the question I have is that when my needle comes to the peak of the up stroke, my bobbin thread is still hooked. I have to advance the hand wheel 20-25 degrees before the thread releases to pull out so I can cut it. I have checked the timing from the hand wheel to the bobbin shaft as shown in the manual and it’s dead on. its a minor inconvenience but the needle has already started dropping by the time the thread releases and seems wrong. Maybe that is just how these machines are, but if it’s not I want to fix it. thanks for any guidance.
- Yesterday
-
Thanks for the video, unlike him I have 4 corners and I’m not joining the gusset like he did. I have the outside piece overlapping the gusset. Wish I had the names for how gussets are joined up. Anyway, the wax string following the hole pattern for stitching worked pretty dang good. I cut gusset long for safety but marked with pen the dimension of the string inside. As I stitched my way around meeting in the middle the marks were true so I cut gusset and punched a few holes. I’ll try to post a pic tomorrow.
-
Very cool!
-
Great job, love the colour
-
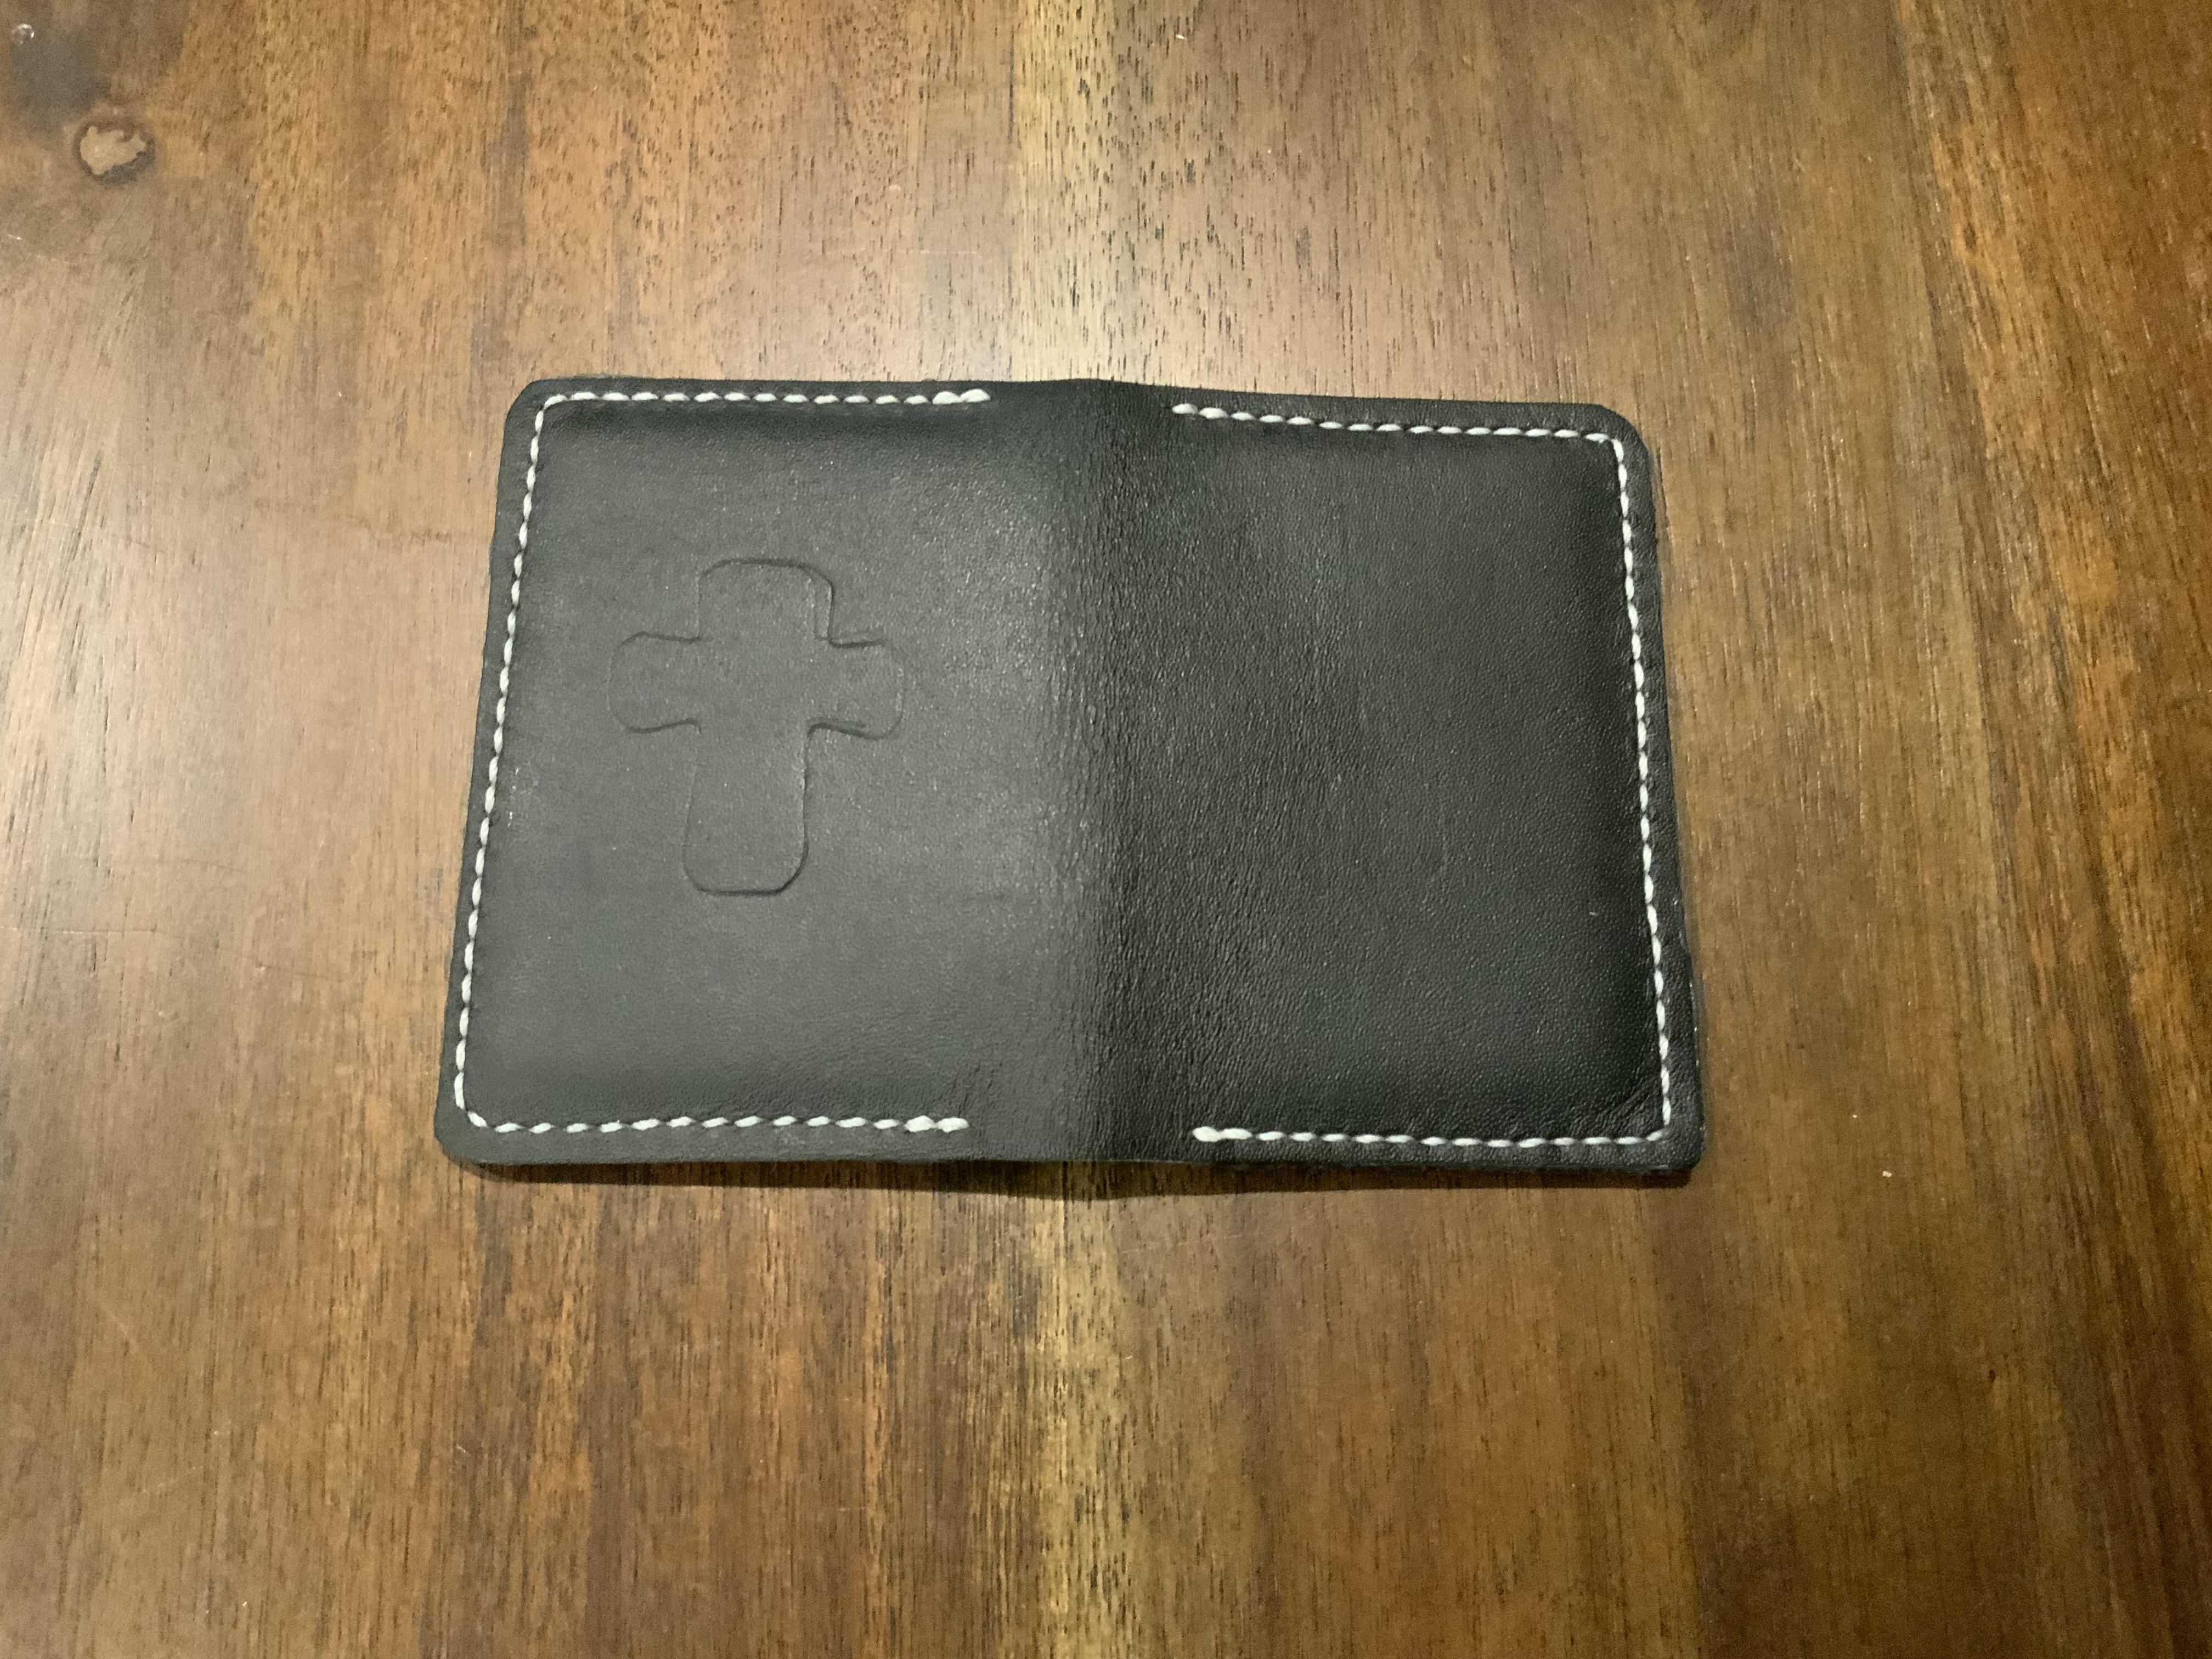
This is my first wallet and attempt at stitching. 4-5 chrome tan leather. Never mind the cross, I had a brain fart and thought I try stamping that after it was put together. Been carrying it for about a month.

-
You might be struggling but that came out great! Very nice work.
-
I have just bought one from eBay. How would i go about finding out the approx manufacture date? is there any way to guess at it?
-
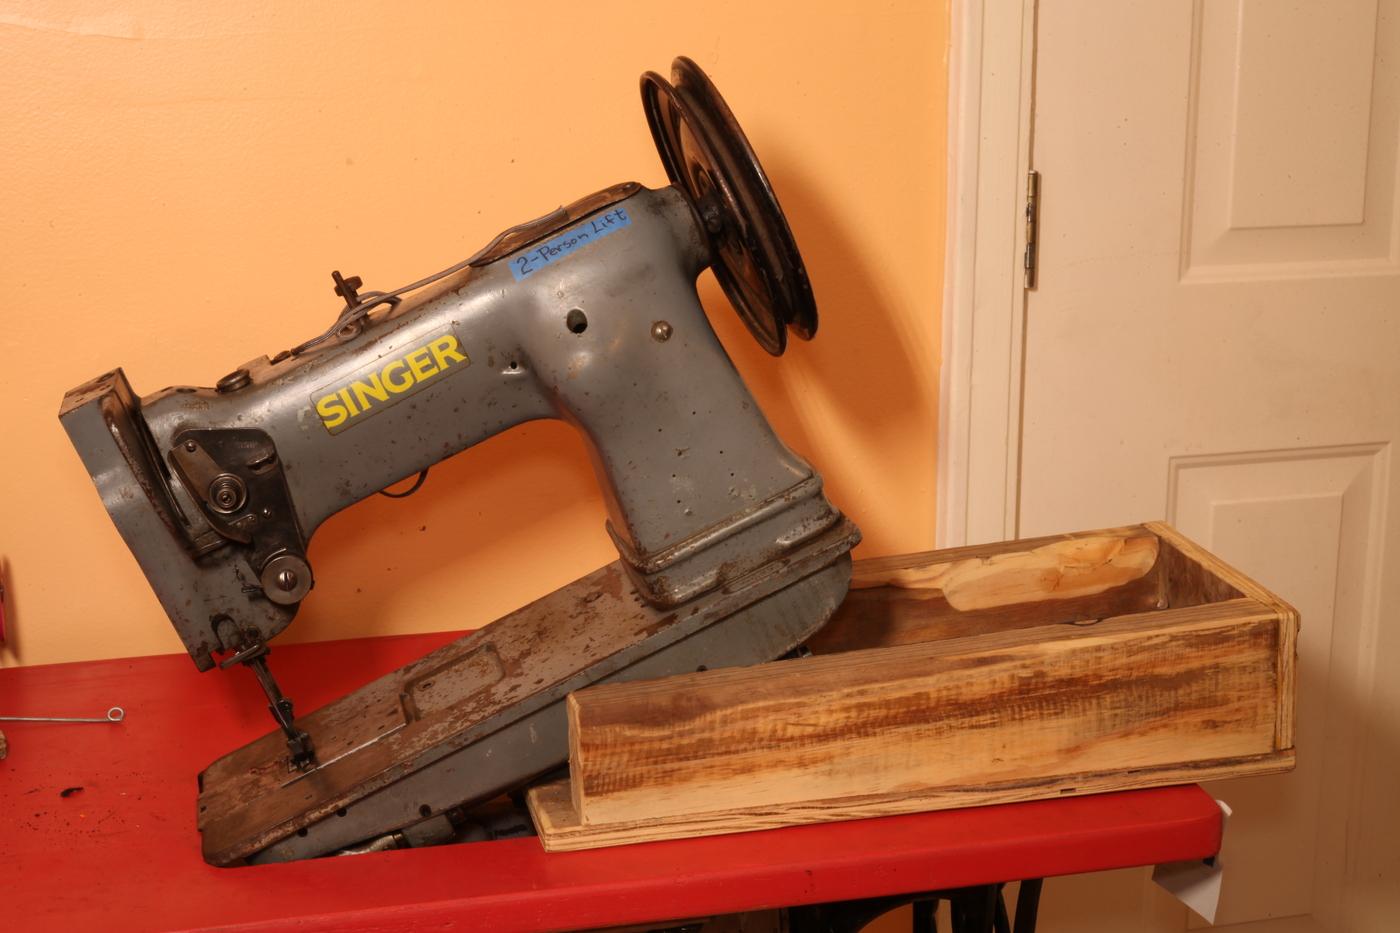
This cradle that I built to support the machine while working on it works fairly well as an assist for dropping the machine into the hole. That means your table is too pretty. Make it work! And I've been dragging things across the table, enough that I got a remark, "We're going to have to repaint that top" 😁🫢

-
Looks like two good machines to me! I'm also considering selling a head unit, as I don't have enough tables. To really outfit someone well, I would sell them a head unit + table + digital servo motor.
-
Thanks for the tip @fredk. I will remember to do that.
-
I bought a hundred red spool pin felts pretty cheap from Amazon. I've used pieces cut from them whenever I need a piece of felt for an oil wick. And all my machines have beautiful spool pin felts. They really tame that thread spool on little domestics.
-
Good job Invert the top plate every 6 presses or so. You'll find the press dishes the plate and inverting it before it gets too bad sends it dishing in the opposite direction I buy steel and aluminium off cuts which are sold on ebay. I get them relatively cheaply
-
I ended up just trimming it. No side sitching, using more vlue to adhere the sued to the top leather and this is the final result.
-
You can use a utility knife and make multiple cuts to make straight cut appear curved. Instead of doing 3 or 4 cuts, which makes it look boxy, use 10.
-

Noseband With a Bad Reputation?
BlackDragon replied to TomE's topic in Saddle and Tack Accessory Items
The curb strap attaches to each side of the bit and sits under the mouth to apply leverage when the reins are pulled, amplifying the rider's signal. Yes, thank you. Many years ago I rode Hunt seat over fences and was getting into saddle seat but left the sport because life got in the way. -
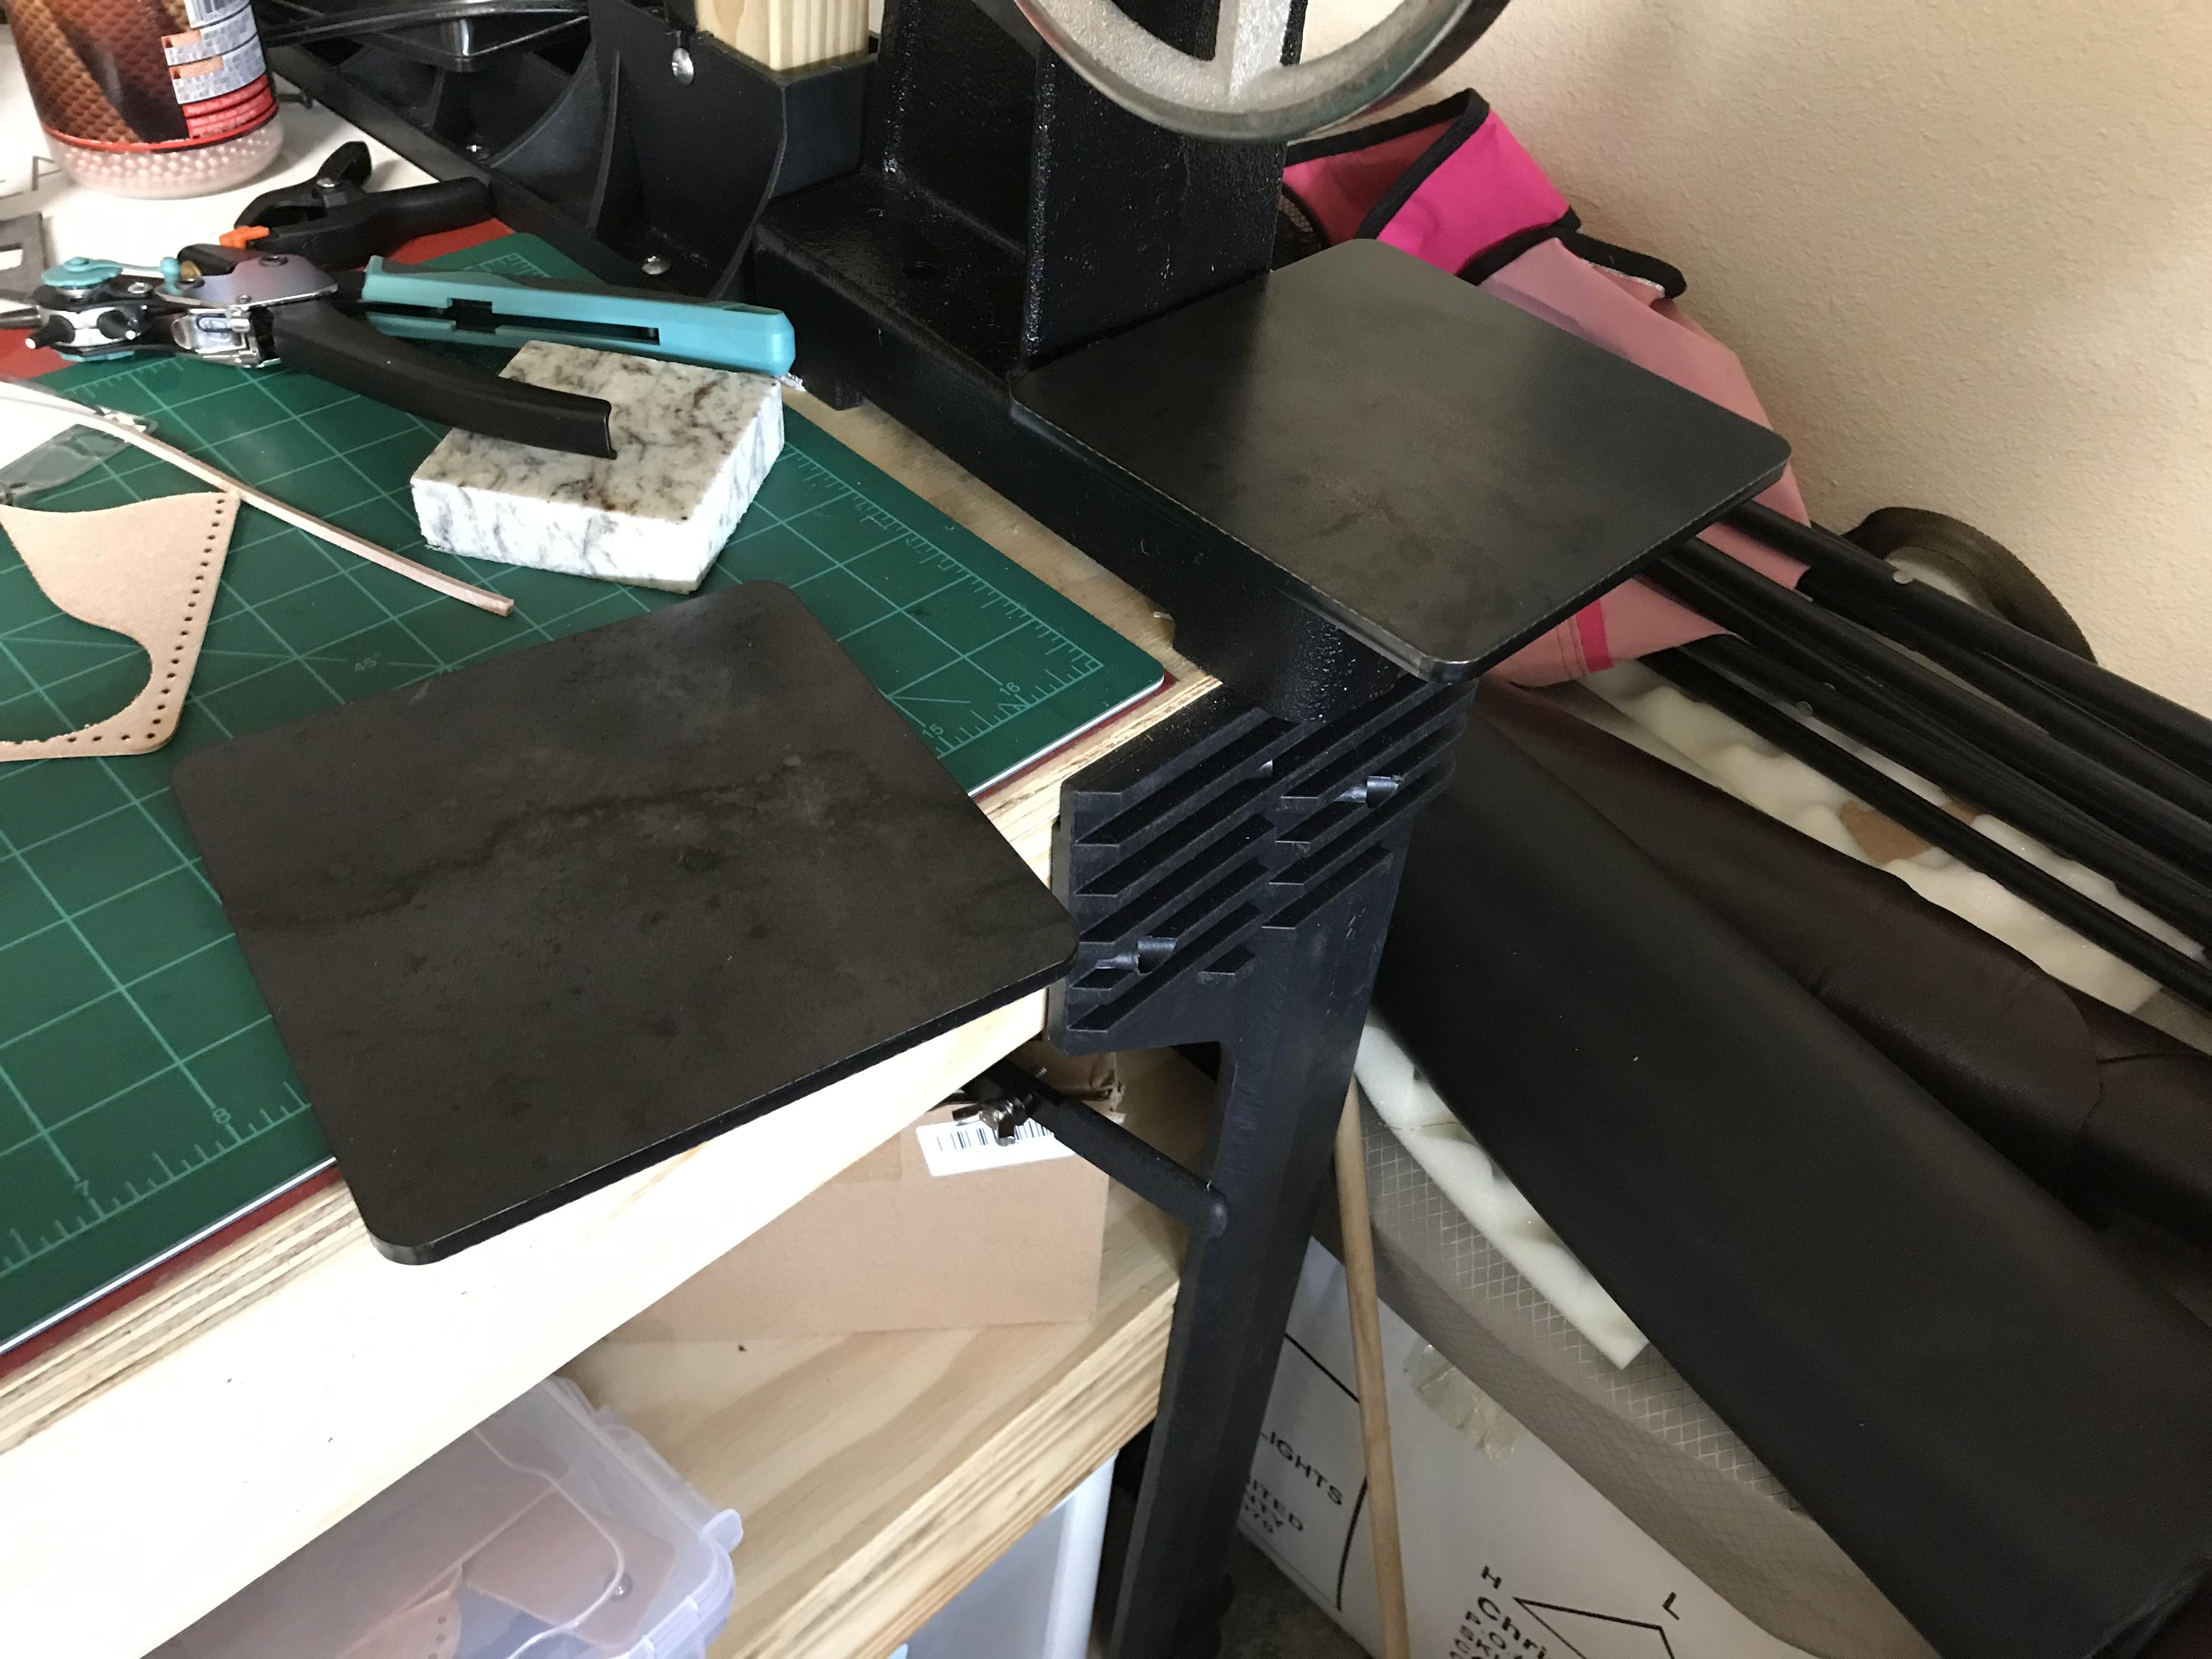
I had gotten a 1 ton arbor press and searched high and low locally for some steel plates to use it as a clicker press. The one I found on Etsy were just to expensive in my book. So I searched Amazon and found a set of 2 6 X 6 X 1/4 plates for $22. I got them today and really like them. Rounded corners and the whole 9 yards.
-
I would; use a coin or something, draw round it for the curve, in ink. Then cut using scissors or shears on the drawn line. I find cutting out-side curves easier with scissors
-
I have a set of nail files for sanding snd i got a coin for the edges