All Activity
- Today
-
Wasn't sure where to put this... Just wanted to see if this could be done. It can. I seriously doubt Knuckle Sammich will work for its intended purpose, but I wouldn't want to be on the receiving end to find out. It's a wall hanger in my shop and a conversation piece.


-
 Why This Matters If you've ever tried hot foil stamping on leather, you know the pain all too well. It's that moment when the foil just won't stick, the edges look sloppy, or your perfect piece of leather is ruined by a burn mark. If you've felt this heartbreak, you're in the right place. Here’s the thing: while good foil is a must, the true game-changer is your mastery of temperature, pressure, and dwell time. You can have the best foil on the market, but without this trifecta, your results will fall flat. Master these three elements, however, and you can transform your craft. We've gathered data from countless tests, community discussions, and expert advice to show you exactly how. 1. Temperature: The Foundation Your first challenge is Temperature. Too little heat? Your foil won't stick, leaving you with a patchy, lifeless finish. Too much heat? You'll watch your clean lines "bleed" and lose all sharpness. On delicate leather, you risk a permanent burn. Real-world experience proves this point. On Leatherworker.net, one leatherworker ran a series of tests on vegetable-tanned leather. The results were clear: 110°C gave a crisp transfer but lacked vibrancy. At 120°C, the shine was perfect, though the edges were a bit softer. Push it to 130°C, and the lines completely blurred. We also saw a beginner on Reddit share their struggle with PU leather—120°C wasn't enough to get the foil to stick, but 170°C was so hot it began to melt the material. The lesson here is simple: ditch the idea of a universal number. Your perfect temperature is a unique combination of your specific leather and foil. 2. Pressure and Dwell Time: The Balancing Act Now for the final two variables: Pressure and Dwell Time. This is the balancing act that separates good work from great work. Too little pressure? Your foil won't stick, leaving you with a weak, patchy design. Too much pressure? You'll get a deep, warped emboss and edges that look fuzzy instead of sharp. The goal is a firm, even press—without it, your design will look inconsistent, with some areas perfect and others completely blank. Then there's dwell time. A stamp that's too fast won't give the foil time to bond, leading to a flimsy transfer. Leave it on too long, though, and you’ll find the edges of your design starting to bleed, your leather getting scorched, or the foil losing its vibrancy. Tips from the field: One Redditor shared success with 150–170°C for 2–5 seconds, adjusting per leather type (Reddit, 2023). For large stamps, pros recommend keeping dwell time as short as possible while making sure pressure is even, to avoid half-clean, half-muddy logos. Think of it like cooking steak—too little heat and it’s raw, too much and you’re chewing charcoal. The magic lies in that middle ground. 3. The Overlooked Factor: Color Here’s a factor most people overlook: color. You might assume all foils are created equal, but you'd be wrong. The pigment and metallic composition of each foil color demands its own unique handling of heat, pressure, and dwell time. In other words, don’t assume one “perfect” setting works across all colors. Multi-color sets are great because you can experiment side-by-side and dial in quickly. Step-By-Step Troubleshooting Workflow Start with clean leather – wipe off oil, dust, residue. Baseline test – pick a mid-temperature (say 110–120°C), medium pressure, 2-second press. Climb the ladder – adjust in small steps: +10°C, +0.5 seconds, or a touch more pressure. Record everything – keep notes per foil color and leather type. Future you will thank present you. Scrap first, product later – always test on offcuts before risking your main piece. FAQ: The Common Headaches Q: Why isn’t my foil sticking at all? A: Check temp and pressure first. If still failing, your leather surface might be oily or too smooth. Clean it, rough it slightly, and test again. Q: My edges are fuzzy—too much pressure or too much heat? A: Usually heat/time. If it’s spreading outward with metallic dust around, back off the temp or shorten dwell. Q: Do I need different settings for veg-tan vs PU? A: Absolutely. Veg-tan can handle higher temps. PU is heat-sensitive—shorter and cooler is safer. Why is the right foil so important? The real magic of mastering temperature, pressure, and time only happens when you have a foil you can trust. A professional-grade foil offers: Consistent Results: You can rely on the same settings and get the same great results every time. No more guessing. Predictable Performance: It eliminates the frustration of a "lottery ticket" batch where each roll behaves differently. Creative Freedom: A good foil set gives you the variety you need to experiment with different colors and finishes, knowing they will all perform reliably. Final Thoughts Mastering hot foil stamping is less about luck and more about a methodical approach. It's the art of finding the perfect balance between temperature, pressure, and dwell time. When you finally get these three in sync, you’ll see the difference firsthand: your work will transform from "okay" to "outstanding." With the right tools and a little practice, you can turn every project into a masterpiece. About Jinglin Jinglin was born out of a passion for embossing craftsmanship and a pursuit of personalized customization. In exploring traditional techniques, we discovered that embossing is not just a decorative process, but a form of artistic expression that gives each creation a unique shine and texture. As a result, we are dedicated to creating high-quality embossing machines and custom brass dies to help creators bring their design dreams to life. We are committed to providing craft enthusiasts with high-quality, affordable tools and materials, enabling them to enjoy the creative process and achieve remarkable results. References Leatherworker.net. (2023). Best temperature for leather foil stamping: 110°C vs 120°C vs 130°C. Available at: https://leatherworker.net/forum/[Accessed 18 Sept. 2025]. Reddit. (2022). Beginner question: best temp for foil stamping PU leather. Available at: https://www.reddit.com/r/Leatherworking/[Accessed 18 Sept. 2025]. Reddit. (2023). Advice for hot foil stamping: tips on pressure and dwell time. Available at: https://www.reddit.com/r/Leathercraft/[Accessed 18 Sept. 2025]. More Guides & Tutorials Which Maxita Hot-Foil Machine Actually Fits Your Bench?,2025, Jinglin. The Ultimate Guide to Maxita Hot Foil Stamping: Master Your EC-27 & EC-17, 2025, Jinglin. Maxita EC-17 vs. EC-27: Which Leathercraft Machine Is Right for You?, 2025, Jinglin. Maxita Hot Foil Stamping Machines Comparison: EC-17 vs. EC-27 and Holder Types, 2025, Jinglin. 3-Line Foil Stamping Guide: Maxita EC-27 & EC-17 Tutorial, 2025, Jinglin. Detailed Causes & Solutions for Gold Stamping Failure: Guide for Leather Hot Stamping Users, 2025, Jinglin. Hot Foil Stamping Machine FAQ: Common Issues and Practical Solutions, 2025, Jinglin. Maxita Hot Stamping Machine: Leather Craft Embossing Guide, 2024, Jinglin.
 -

Help! Singer 111w155 stripped / stuck screw
matthew123 replied to matthew123's topic in Leather Sewing Machines
Thank you dikman! That is the type of torch I have, so I will keep at it. Thanks Doogmiester! Do you think it's a standard thread pitch and size? I've heard Singer screws are all different types of thread arrangements. Any suggestions where to buy a new screw? Thanks Friquant! I will fine tune it that way and get them equal. Alzilla, I agree it may come down to drilling.... Will keep y'all posted when I have some time to tackle it this weekend. Thanks again!!! -

spring flowers and good food
Handstitched replied to chuck123wapati's topic in All About Us and Off Topic
Well chuck, it's that time of the year where it's starts to warm up on the approach to summer here in Oz, i'm guessing it will start to cool down for you. The canola crops around the district are maturing, they smell like rotten cabbage for about 3-4 weeks then dry out for harvesting. I've been busy weed spraying, then slashing,soon followed by fire breaks, they're compulsory for land holders . Are they compulsory in the US ? The width varies from one local shire to the next, but average 1.8 mtr wide, but I make mine 3-4 times wider to be sure . HS -
Where to get swivel for a holster
Steve75 replied to Randy Cornelius's topic in Gun Holsters, Rifle Slings and Knife Sheathes
There is a thread on this very topic in this forum. I have a holster like that I bought many moons ago for my K frame. It was made by Tex Shoemaker, which unfortunately has gone out of business. Steve -
Looks good. If you can find a Singer patcher treadle stand I bet it would fit perfectly. kgg
-
I bought 2 of em . . . asked the lady if it was a Singer . . . she said yes . . . loaded it up . . . got it home . . . then saw that it didn't have the "Singer" across the middle like the one in the picture. Had to go buy another one . . . checked it this time. Yep . . . they are one solid platform for sure. May God bless, Dwight
-

Help! Singer 111w155 stripped / stuck screw
friquant replied to matthew123's topic in Leather Sewing Machines
If you want equal lift, here's how to do it.
-
Help! Singer 111w155 stripped / stuck screw
matthew123 replied to matthew123's topic in Leather Sewing Machines
Yes, the inner is definitely still lifting higher than the outer, but they're closer to equal than before, and both are lifting higher overall than they were before. The outer used to do almost nothing. -
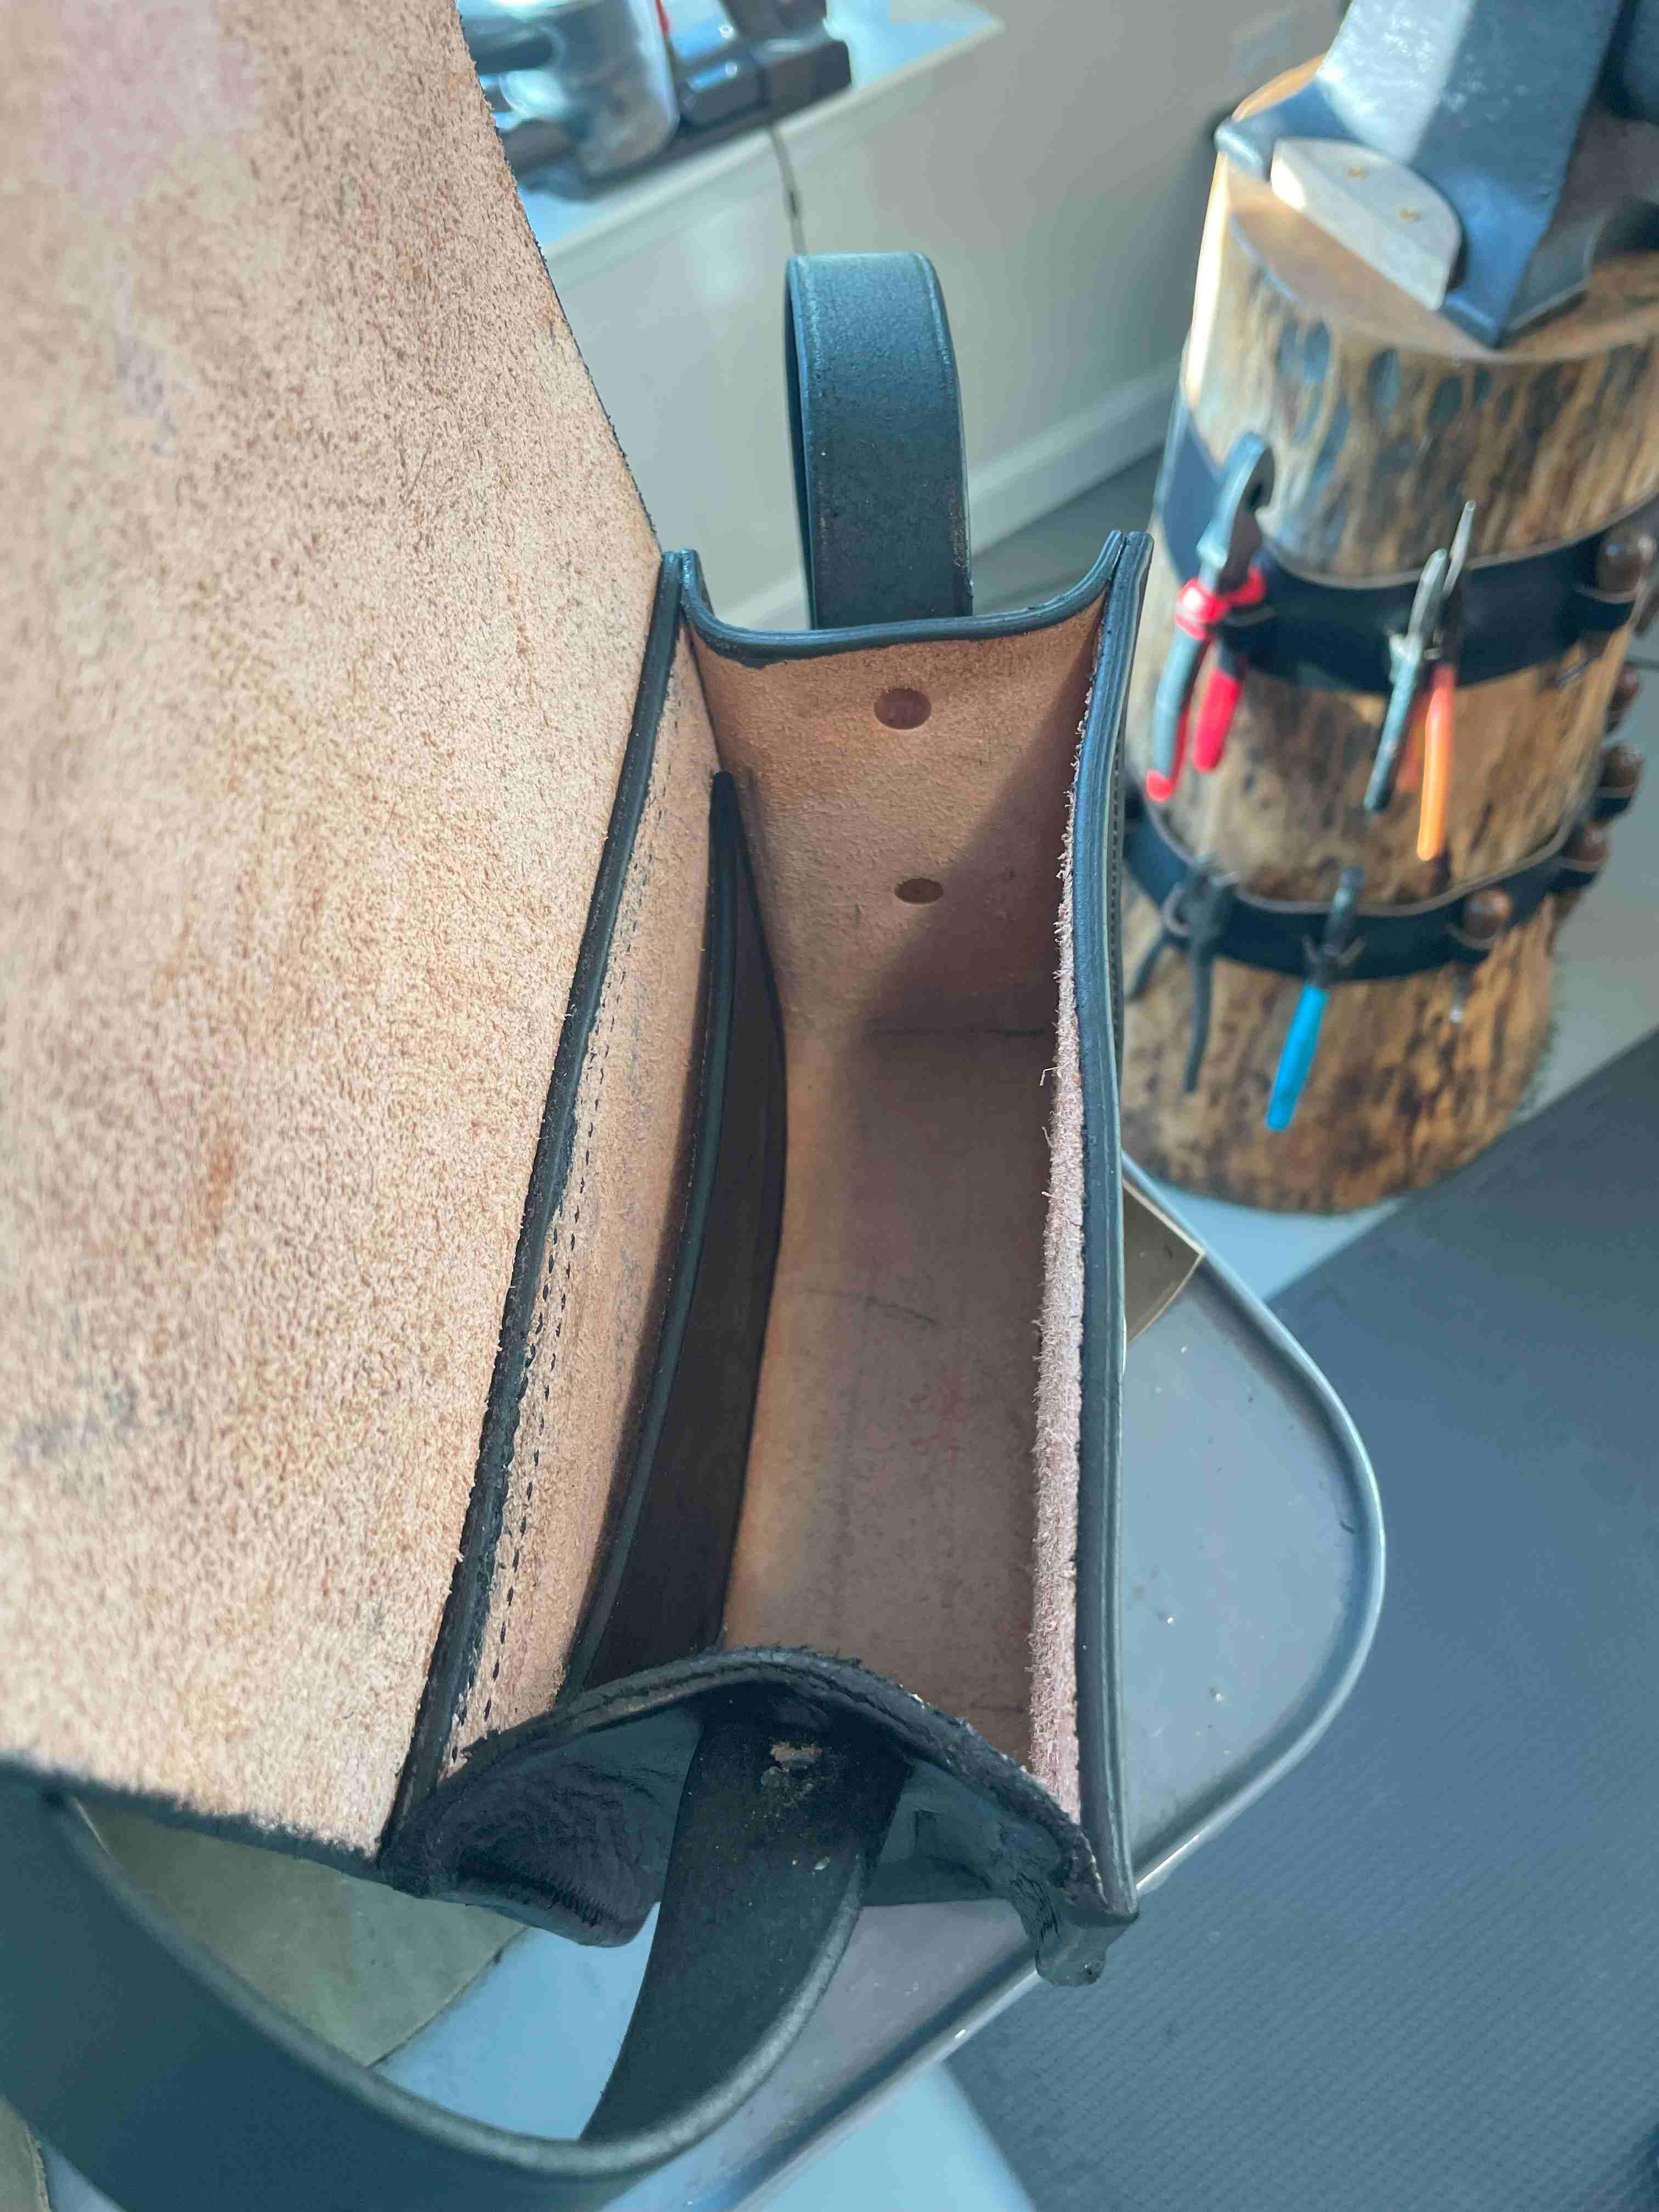
That's some serious stitching! Well done.
-
Nice effin' job, that item should be around for decades, given the proper care
-
Frankly, anyone with a modicum of common sense knows that this is not the way to repair a worn out billet. I would not repair a worn out strap on a leather bag in this way. Not even on a cloth bag, come to think of it. And a plain running stitch! I wonder how her shoes turn out.
- Yesterday
-
You could put a crescent wrench on the block to gently rotate it
-
I wax my dies sometimes but with paraffin. Much as I like beeswax for some things, I like paraffin better as a lubricant and also as a rust preventative - especially after clicking a bunch of chrome tan. I do the same with punches that don't see much use. The nice thing about beeswax is that it melts with a little friction but then solidifies and gets sticky and hard again as it cools. That's what makes it great for screws and handled tool treatments. Also why it was and is traditionally used in mixes for handsewing thread wax.
-
Looks good. I often think isn't it a good thing Singer made those frames to last forever! They can be very useful indeed - and they look cool! My Pfaff 335 is on one.
-
Yep, I don't need another one but over the years I've realised I'm happiest when I'm making something. I forgot to mention that another improvement is the knob on the left, it's so I can clamp the lefthand tool to stop it moving around.
-
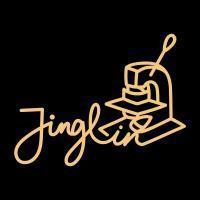
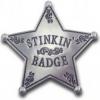
I just got a hide and 3 12oz bellies from Wickett & Craig. The bellies were on sale $5 so I got 3 of them. I like making these hard bags for Harleys and the ladies purses. The old Landis 16 really sews a very nice tight stitch. I have a booth in Down Town Georgetown SC where I sell ladies purses and tote bags. These came out ok..

-
 Here's the part that should move, if I'm understanding the video correctly...
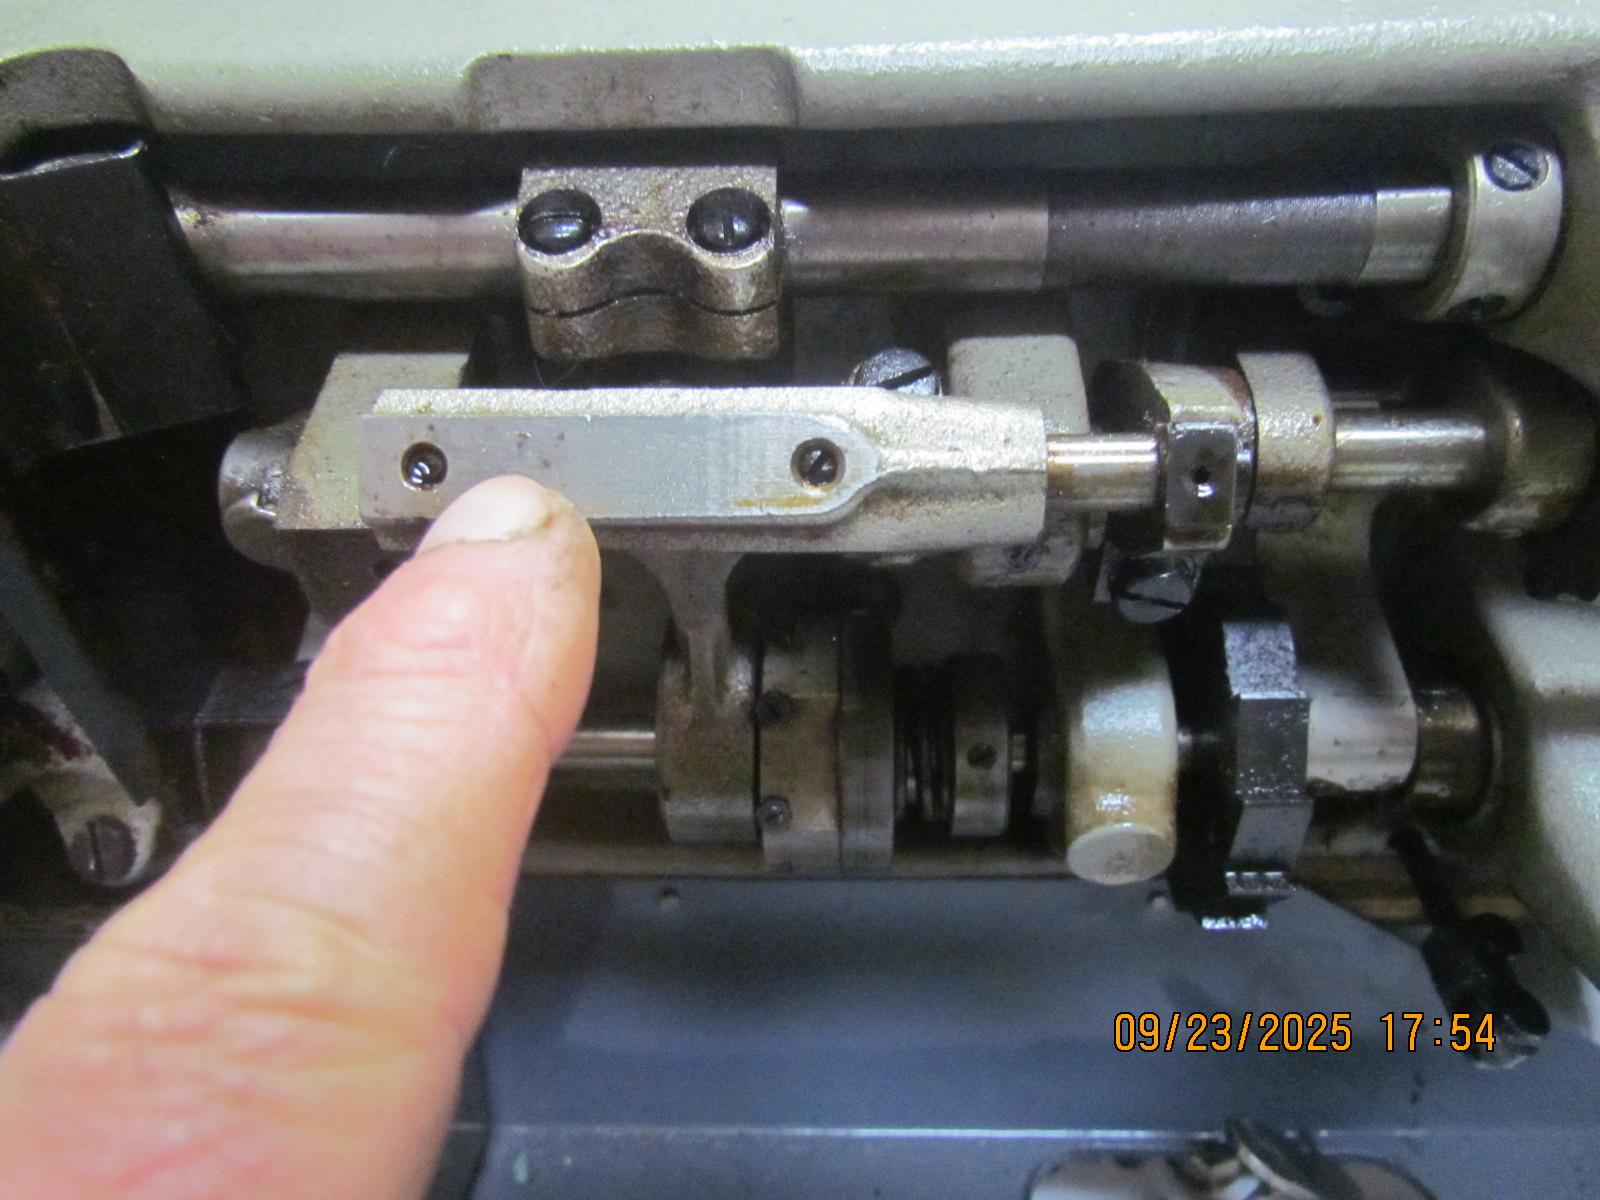
-
Help! Singer 111w155 stripped / stuck screw
friquant replied to matthew123's topic in Leather Sewing Machines
That's in the ballpark.. Is the inner toe still lifting higher than the outer toe? -
Here's the link to the video. Procedure starts at about 10:00. I'll post a pic in a bit...
-
Hello everyone I found solution for this problem by adjusting clutch my motor fixed I post my experience maybe it can be useful for someone😇
-
Help! Singer 111w155 stripped / stuck screw
matthew123 replied to matthew123's topic in Leather Sewing Machines
Thank you again everyone! I will respond in more depth soon. Just wanted to share an exciting update. I haven't worked on the stripped screw at all. However, I noticed that now the worm screw "D" turns with some resistance and actually changes the height that the presser feet lift. So I guess all the PB blaster freed something up in the eccentric mechanism? Even though I can't loosen the set screw "C", the worm screw "D" is moving the eccentric. So I was able to use the wisdom in another post combined with turning the worm screw "D" to get it walking high and looking good to me. I've attached a video of it walking now. Does it look right to you all? So I still need to address the stripped screw, but at least I know the machine is usable and adjustable and works right. Will report back when I have time to work on the screw again. Walking111.mov -
What's with the SMS? At least they have some rules on how you are allowed to operate your saddlery business. And then there is also the Guild examines and Chapel Manor. In Germany, Saddler is a protected profession, that requires you to do 3 years of apprenticeship, several tests and examen. Comparable to the Millennium scheme in Britain. That also means, no self-thaught saddlers in our country, only here and there some saddle fitters (not protected) with some questionable education aka non at all in some cases. I guess the max. you are allowed to make and sell, without being a saddler, is bridles, halters, dog collars etc, but certainly you are not allowed to make a saddle and sell and also no repairs, as you have no insurance for doing such things. We Germans seem to love insurances! XD
-
afaik its the same in the UK and Ireland