

All Activity
- Past hour
-
If you are ever if Florida look us up. We owe you dinner. 😄
-
Thank you so much. What should we use to lubricate it?
-
Country Bob my friend. It took 4 hands and a lot of force but it went IN!
- Today
-
Yes,when it kicks out it will hit there until it gets re-engaged.It's not going in the groove because your not pushing the handwheel backwards with enough force WHILE holding the button down.Since you don't want to do what I'm telling you you can get a wide screwdriver put on the lower part of the left pin & top of the right pin give it a twist (clockwise)& it'll pop back in the groove.
-
Thank you KGG I will try that.
-
Personally I would remove the cotter pin on the catch arm pivot point, the catch arm that catches the side of shaft and see what going on. Maybe the hole in the larger piece at that point has worn the pin or the hole in the larger piece has been enlarged. What do you have to lose? kgg
-
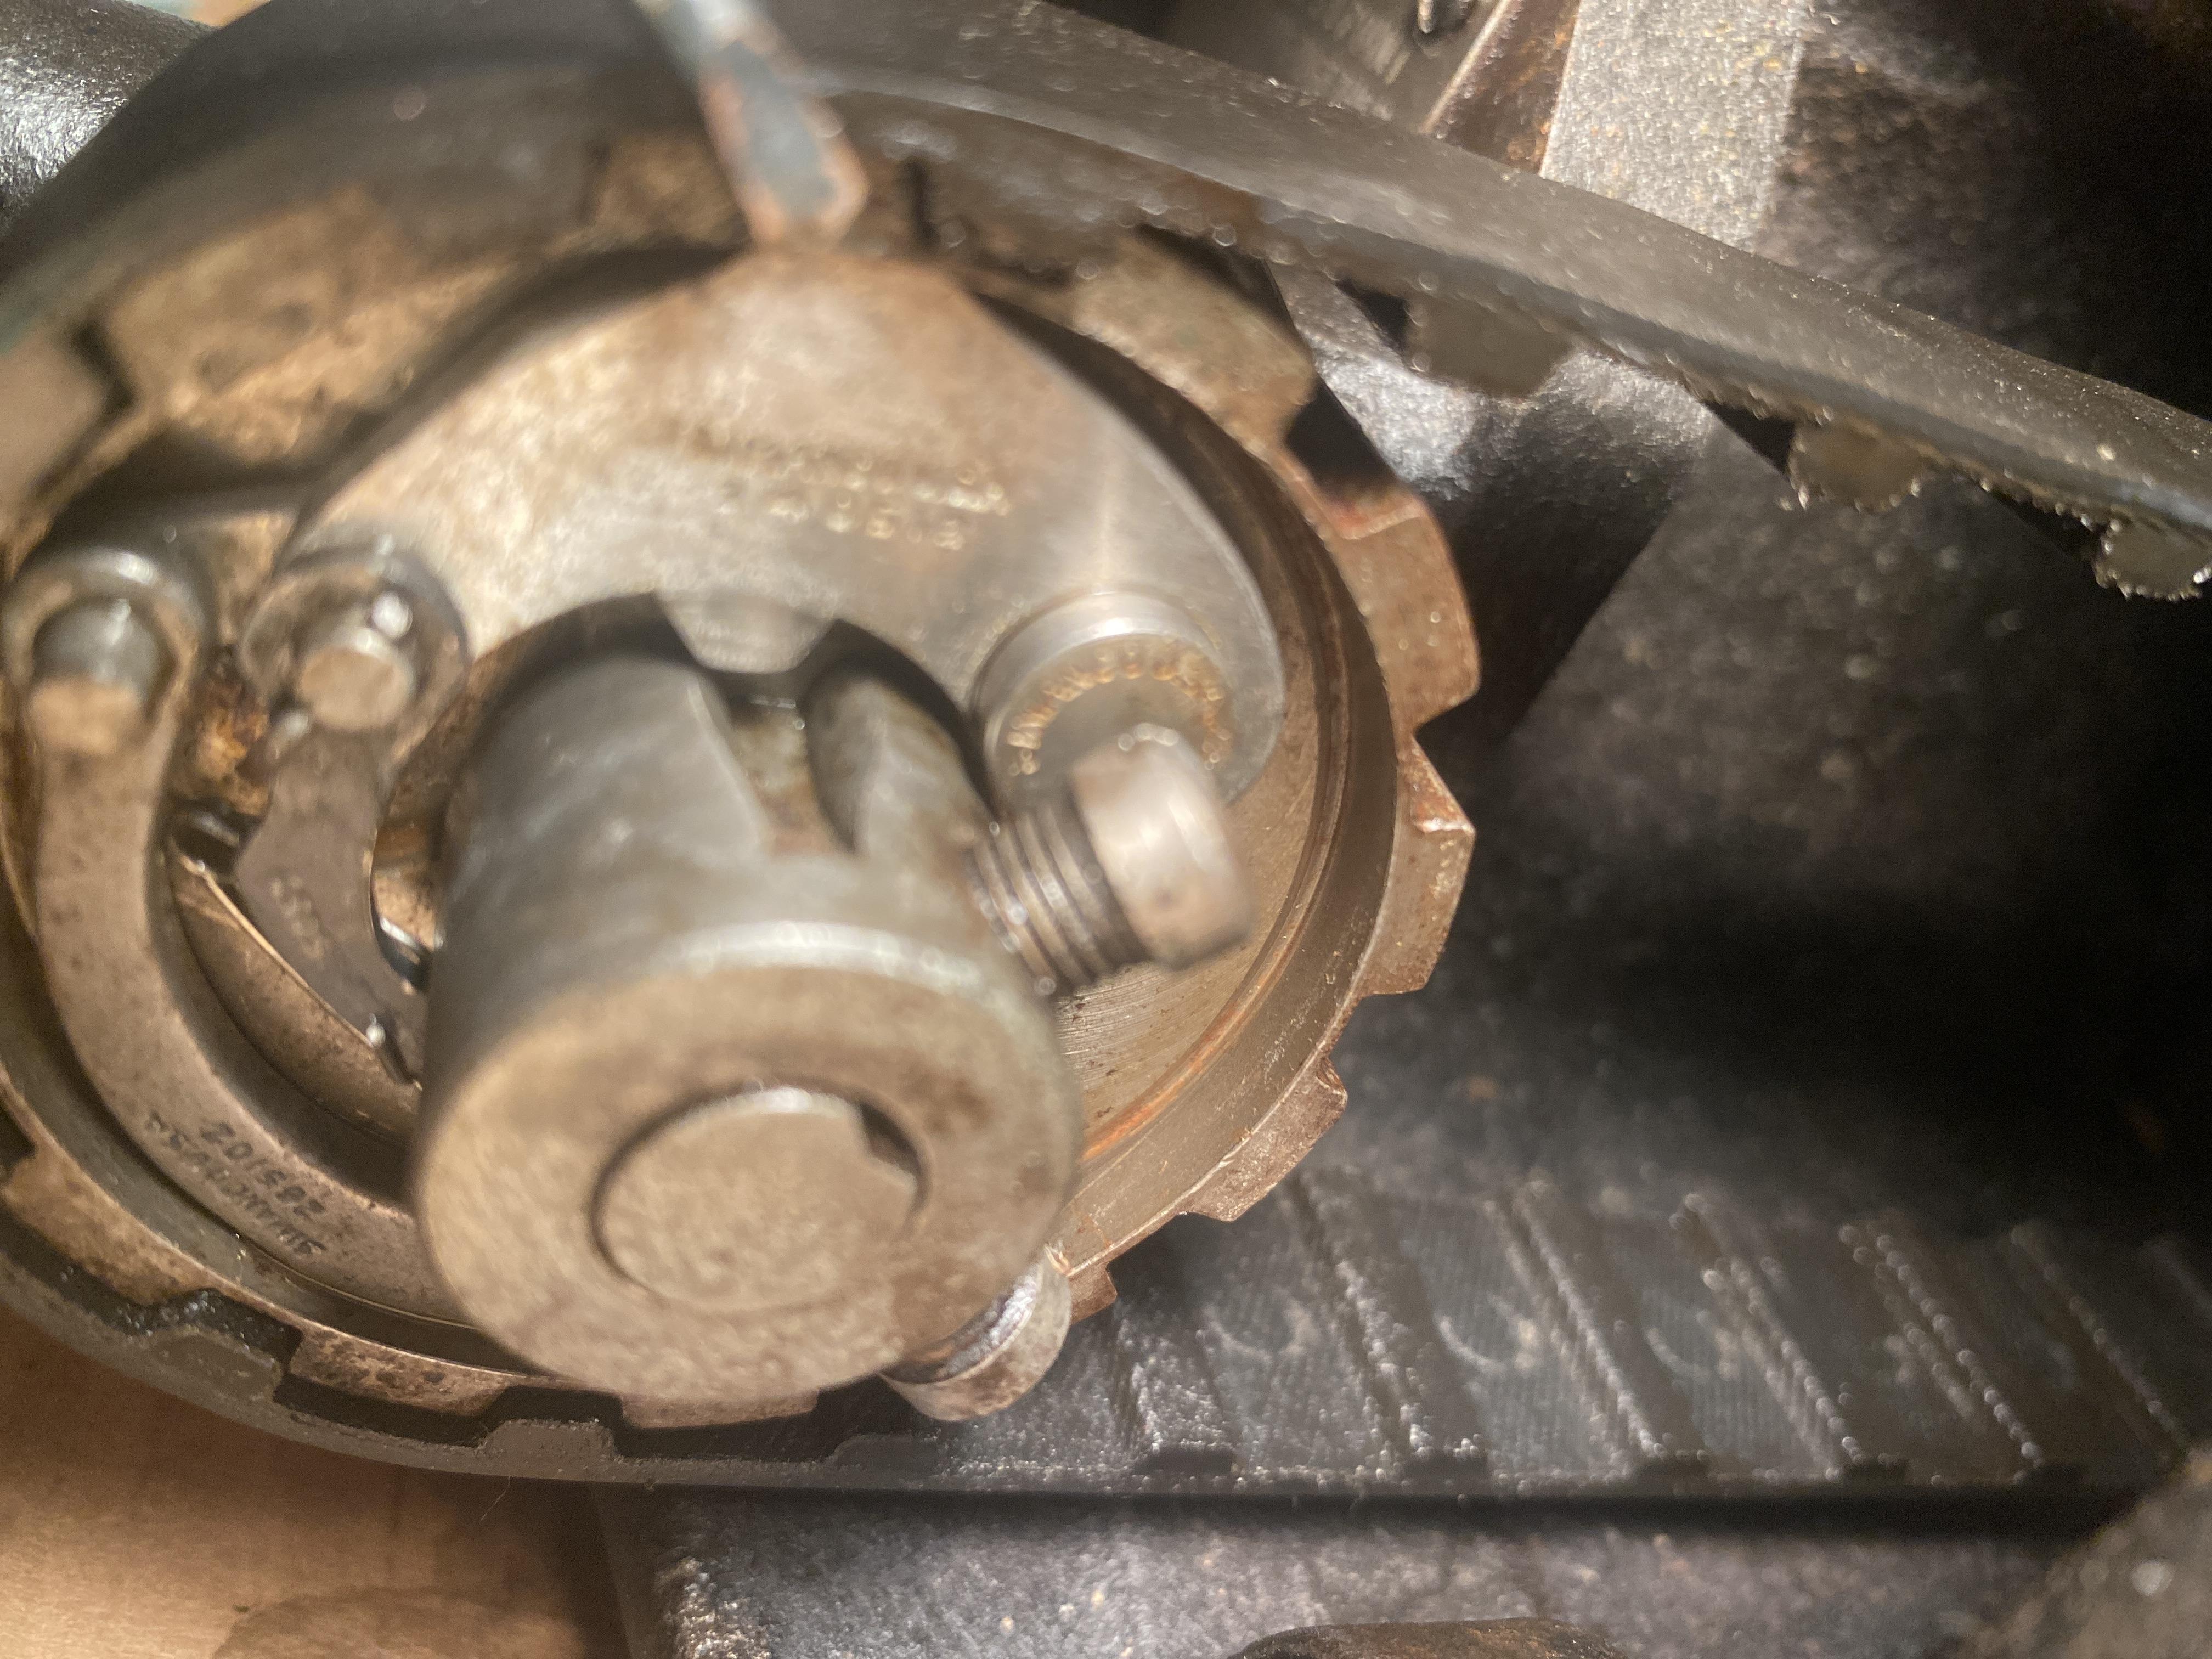
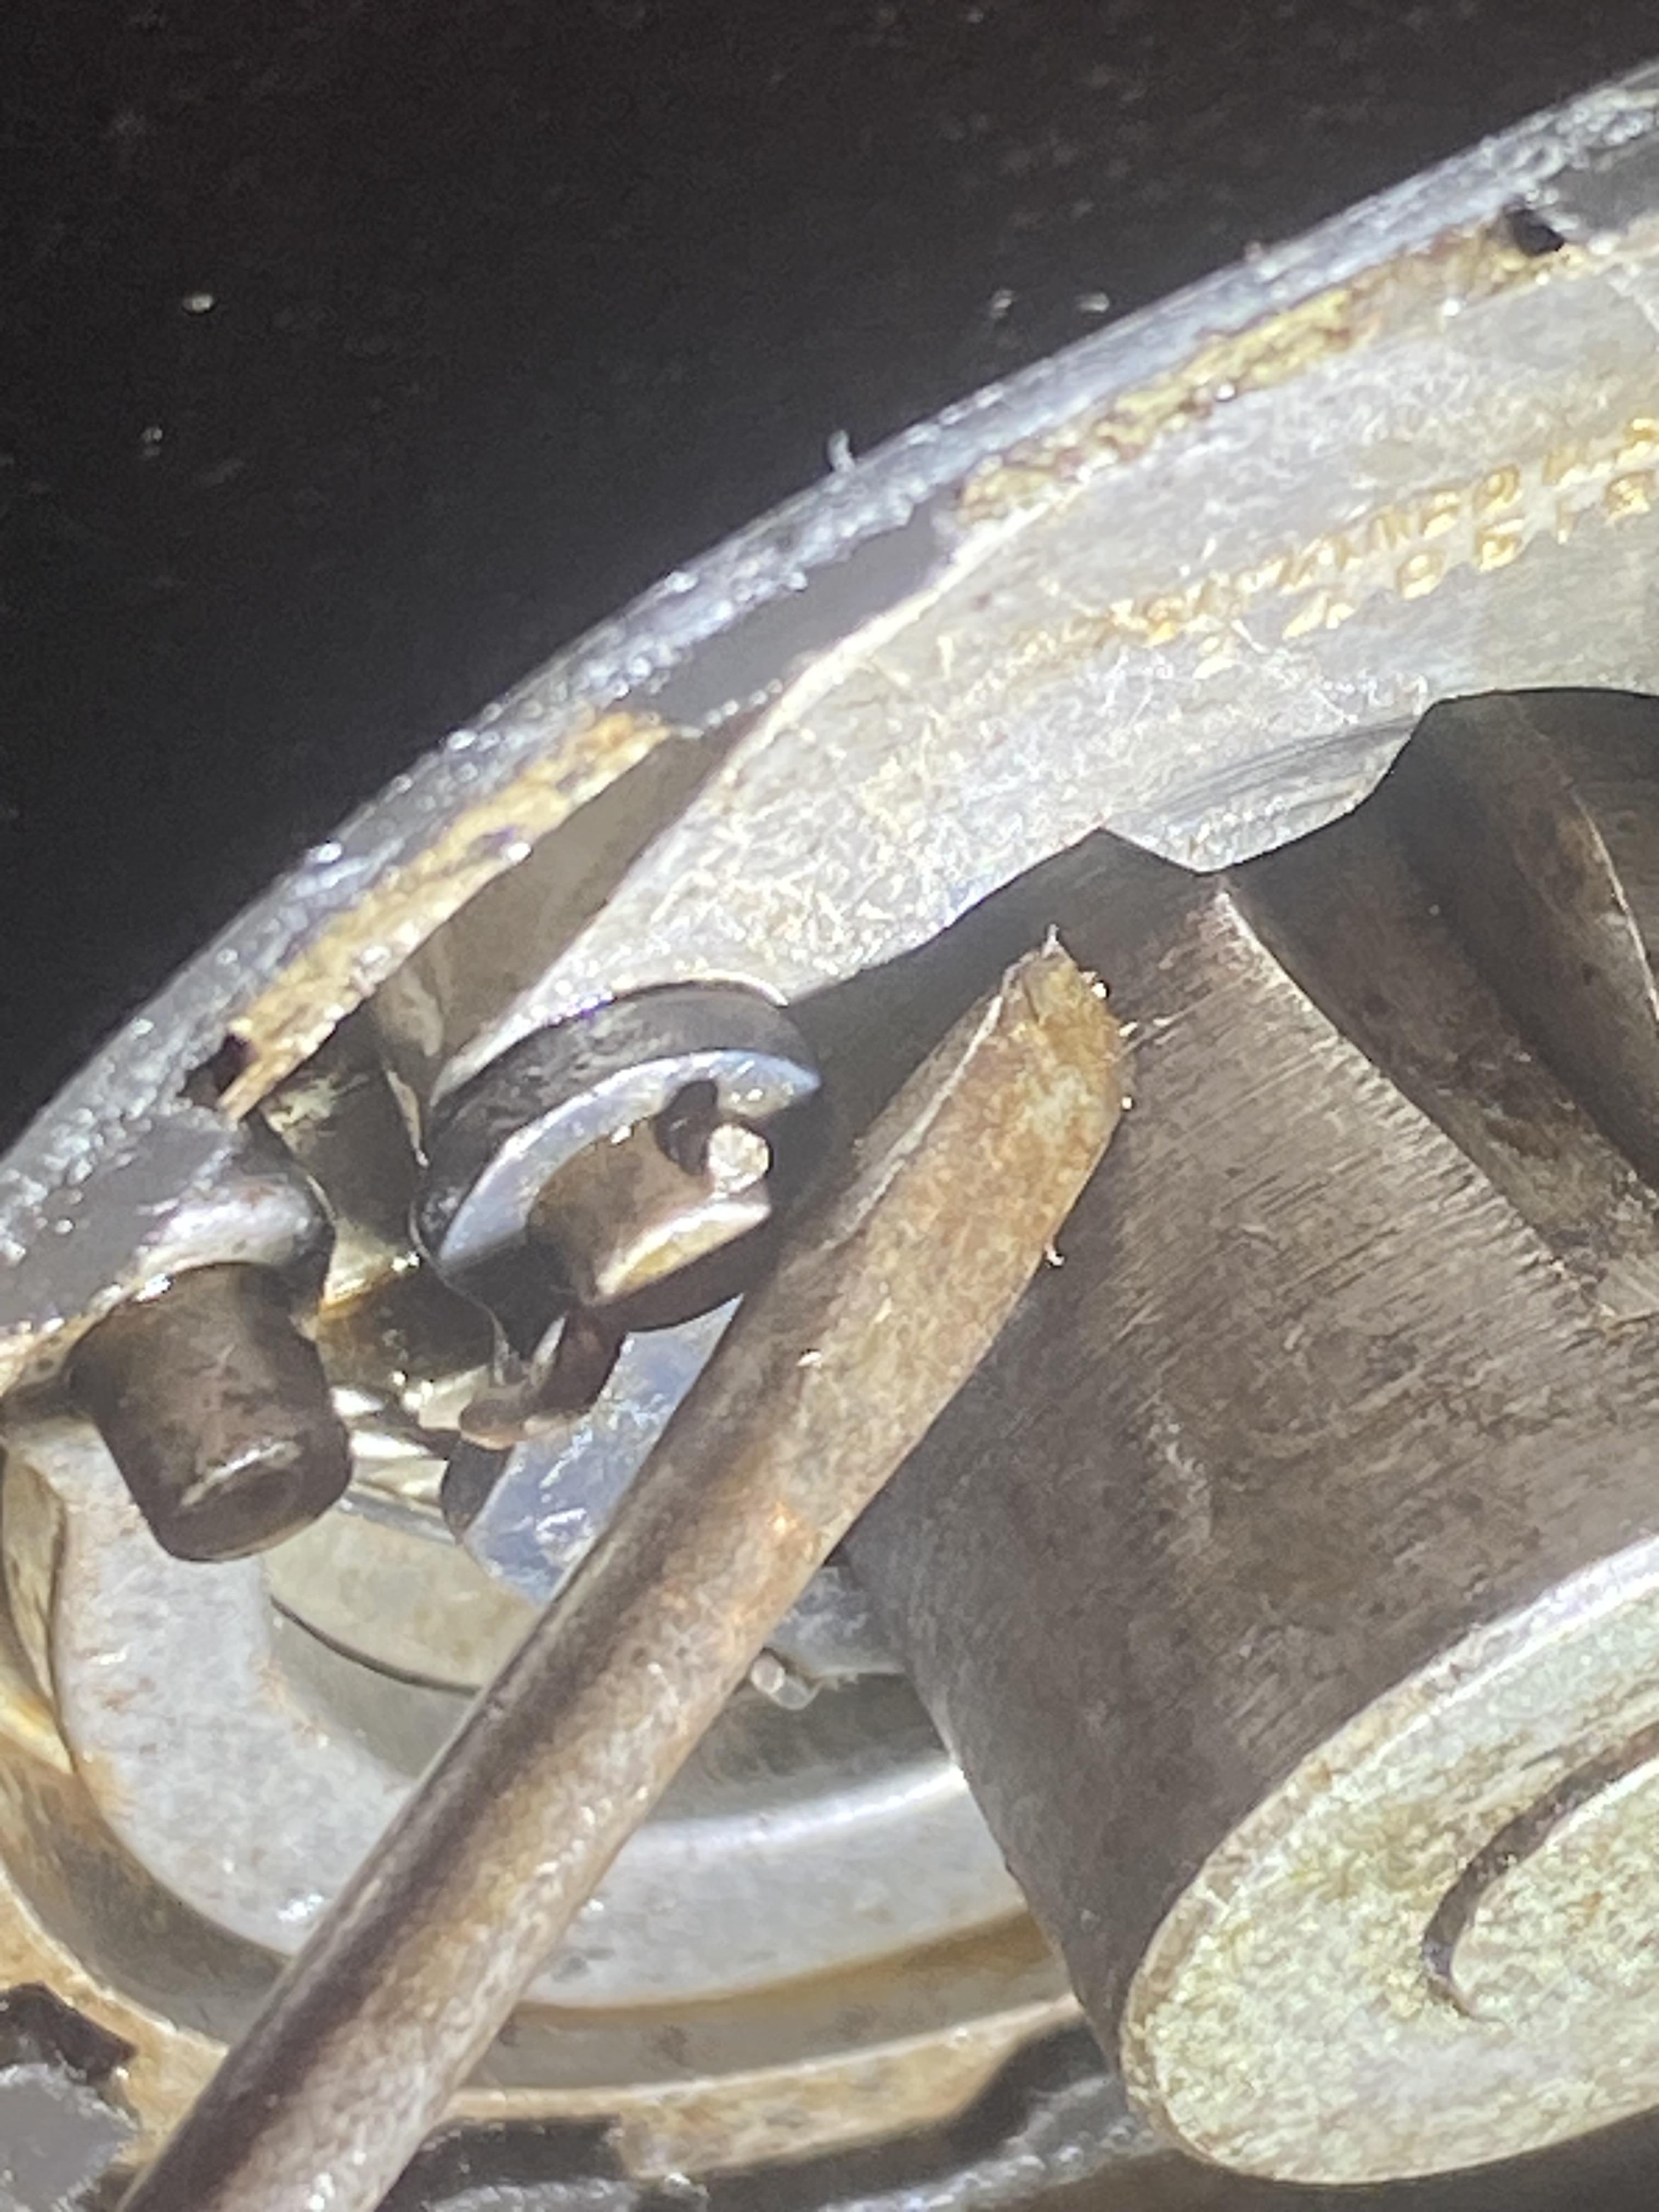
Thanks, Bob for all your help I did engage the shaft, but unfortunately, it did not move or change the position of the piece of metal that’s supposed to go into the slot see picture above even after moving the wheel towards me and or away from me
-
Like I said b4,push the button & while holding it down push the handwheel backwards & it'll snap back in.
-
Photo 2 I believe that there should be a space between the outer wall and the plate but correct me if I am wrong. It seems stuck up there.
-
Photo 1 …..pointing to slot….its not lining up.
-
We pushed button. It is in gear. Shaft is moving perfectly but we still have the problem in the video. The little piece ( don’t know what it is called) is not going into the slot the way it is suppose to. It is just on the edge of it.
-
-
Thank you cowboy Bob and kgg. We did engage the button. That was the first thing the repair guy did. Fixed the button and engaged it. Then he went to clutch area and that is when everything stopped. He fixed and tweaked everything else but did not feel comfortable taking apart clutch. We have been oiling for two days. Here is where we are at. Thank you for any help.
-
Good inspiration. LOL, all putty knives should look so good. Good suggestion to experiment with pieces for heat treating. I've found that in a lot of cases old saw blades are made of better steel than new ones. Good inspiration. LOL, all putty knives should look so good. Good suggestion to experiment with pieces for heat treating. I've found that in a lot of cases old saw blades are made of better steel than new ones. Good inspiration. LOL, all putty knives should look so good. Good suggestion to experiment with pieces for heat treating. I've found that in a lot of cases old saw blades are made of better steel than new ones. Good inspiration. LOL, all putty knives should look so good. Good suggestion to experiment with pieces for heat treating. I've found that in a lot of cases old saw blades are made of better steel than new ones. Oops. Sorry about the multiple taps. But then, it does hammer the message home.
-
Hi Bob This is Ron Nancy’s husband. Thank you for replying. I did watch the same video Singer Safety Clutch above several times. Here is the problem I’m still having. Any help will keep me out of the dog house 😂
-

Finally a good purchase...I think!
Handstitched replied to stitchgearhead's topic in Leather Sewing Machines
800 euros is around $1500 au. That's a pretty good haul of goodies 👌 I'd be like a kid at Christmas, I just want to play HS -
.thumb.jpg.6e903dd66163ad5672f00f144058c571.jpg) Moved your post to Dyes, Antiques, Stains, Glues, Waxes, Finishes and Conditioners Check through this forum. Mainly, you will find that you need to buff the purse with a clean white soft cloth until it stops transferring dye (rub off) to the white cloth. Then it needs to be sealed with a finish product that could be a lacquer and water based sealer. You find various names as you peruse this forum.
Moved your post to Dyes, Antiques, Stains, Glues, Waxes, Finishes and Conditioners Check through this forum. Mainly, you will find that you need to buff the purse with a clean white soft cloth until it stops transferring dye (rub off) to the white cloth. Then it needs to be sealed with a finish product that could be a lacquer and water based sealer. You find various names as you peruse this forum. -
Make sure you hold back the starting threads, or at least the top thread, for about three stitches. Ensure that the needle isn't too small. Move up a size or two to see if that helps bring the top thread up into the leather. Choose the correct size needle for the thread combination. Do standard troubleshooting stuff. Start by checking the hook to needle timing. Adjust the hook or needle bar height if it has been thrown out by the impact of sewing rubber. Remove the throat plate and clean off any residue on the bottom of it. Also, check the feed dog and clean it if necessary. Re-time the machine. Change the needle to a leather point needle. Make sure you've threaded it correctly and that the top thread stays inside the tension disks and doesn't lift up as you sew. Center the check spring if it was turned to one end or the other end. Finally, make sure that there is a modicum of tension on the bobbin thread; not too much or too little.
-
It's not rusted,don't take it apart! Just re-engage the safety clutch & you'll be sewing again.
-
Walking around the supermarket yesterday I noticed that they use a thick dense cardboard between the layers of bottled water (and other stuff). There was loads of it and I thought it would be ideal for pattern making and laser practice. If it's rolls you're after they're around 3ft square so would make around a 12inch roll with a bit of tape or string.
-
 Unfortunately I don't get much at that thickness, I wish I did but since we don't normally use it, the lots that come through are rare.
 -
You can buy a couple of harness needles and some tiger thread, or you can use a speedy stitcher. If the sheath is machine sewn, the speedy stitch will work fine. personally, if you're doing these repairs a lot then go with some john James harness needles an awl, both diamond and round, some tiger thread in various colors and sizes. also some contact cement to reglue, then of course the cleaning,conditioning and buffing supplies to make it shine.
-
I moved this over to "Sewing Leather", where it should get some attention.
-
I was just showing the tubes as a way to help organize. I wouldn't put tubes on the door, but maybe some small basket type shelves like this:
-
I work for a food packaging company. The packaging film comes on the cardboard cores. The best place to find it would be checking with vinyl shops that do banners, or car wraps. They will be happy to let you have the cores.


