All Activity
- Past hour
-
The bell icon interprets a click with "Whew, I told the member everything that was going on!" It continues to list each notification so you can refer to them at any time. You can still click each item individually, or set up an activity stream to your interests. I get emails for my notifications, so sometimes my bell has a red number for a day or two until I go back and click it just to make sure I didn't miss or forget anything.
-

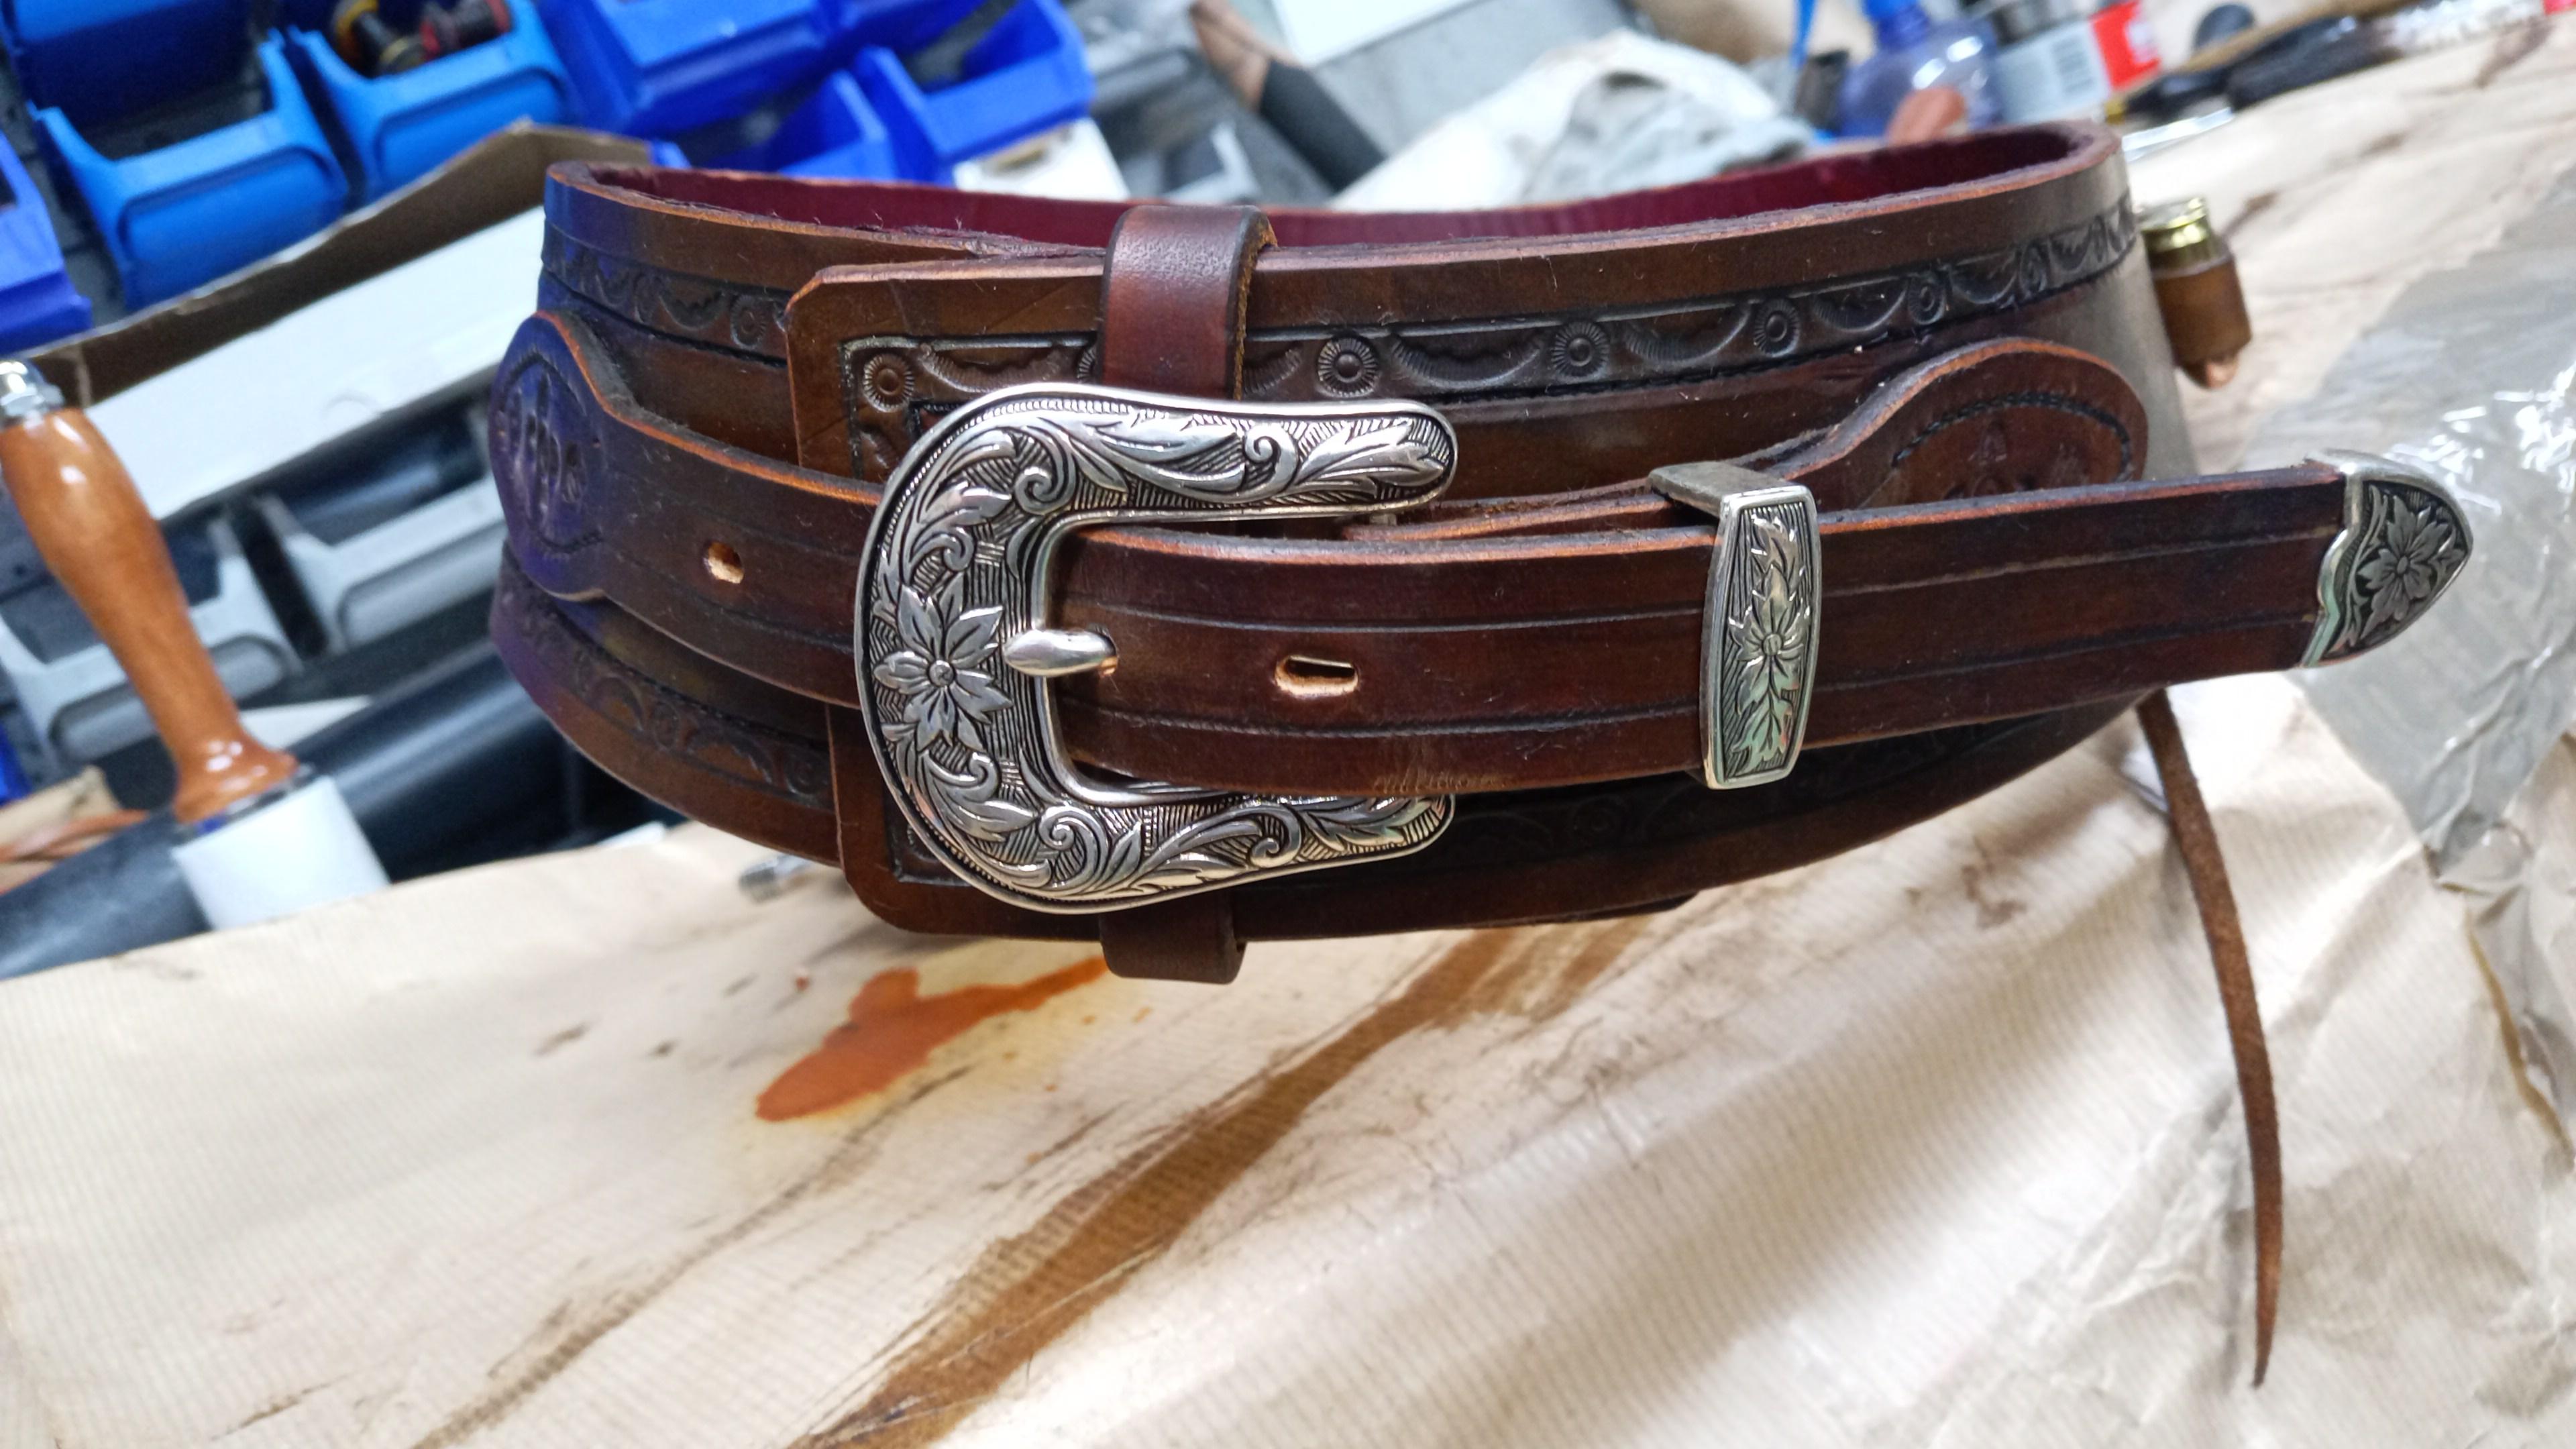
Removing stains on vinyl caused by leachhing from leather handles
Johanna replied to santabgirl's topic in How Do I Do That?
A picture would really help. We can't tell if the hardware or leather is bleeding, and we probably won't be able to help if the stains are on vinyl, but we'll try. -
 😊 thanks
 -

Holster between the belt and pants
AlZilla replied to AlZilla's topic in Gun Holsters, Rifle Slings and Knife Sheathes
I like that sewn on setup more than the snap. I haven't sat down with this project yet. - Today
-
 NICE work !!!!!!!!!
 -
 A BTB (or BTP) holster is my next project. I have never used one, nor made one before. It is an experiment. I am making it for a friend who said that his "muffin-top" causes too much tilting outward with his Avenger style holster. I have always wanted to try this style, so this is the perfect opportunity. I saw that jefferycustomleather style quite some time ago and appreciated its' simplicity and elegance. Love the look. However, I worry that a muffin-top may play the devil with a snap closure, so I will be going with a sewn-on loop, such as that offered by Mitch Rosen. https://mitchrosen.com/products/straightman?_pos=3&_sid=afaeaeaf8&_ss=r This will be a straight-drop style for a Sig P365.
 - Yesterday
-
Already have several holsters for my pistols but had an itch to build another one while it was raining outside.
-
DIY'ing it might be a good way to go. I found this thread *here* that has some detailed process. Doesn't seem difficult or high skill requirement. Just takes time. One thing I might do differently is those guys used nails to help hold the layers together, and in time as it wears down they'll eventually be sticking out the side. I've got a hand crank book press the should compress it together good enough that the nails aren't necessary.
-
I use a set of calipers to find that 4th hole, leave machine in forward but stitch back to the start point, stop the needle just after it starts back up and the turn the work around and stitch forward through the stitches I just made. I don't have to worry about forward and reverse stitches being exactly equal in length. I keep scrap around so I make sure how long 3 stitches is currently on the machine. Todd
-
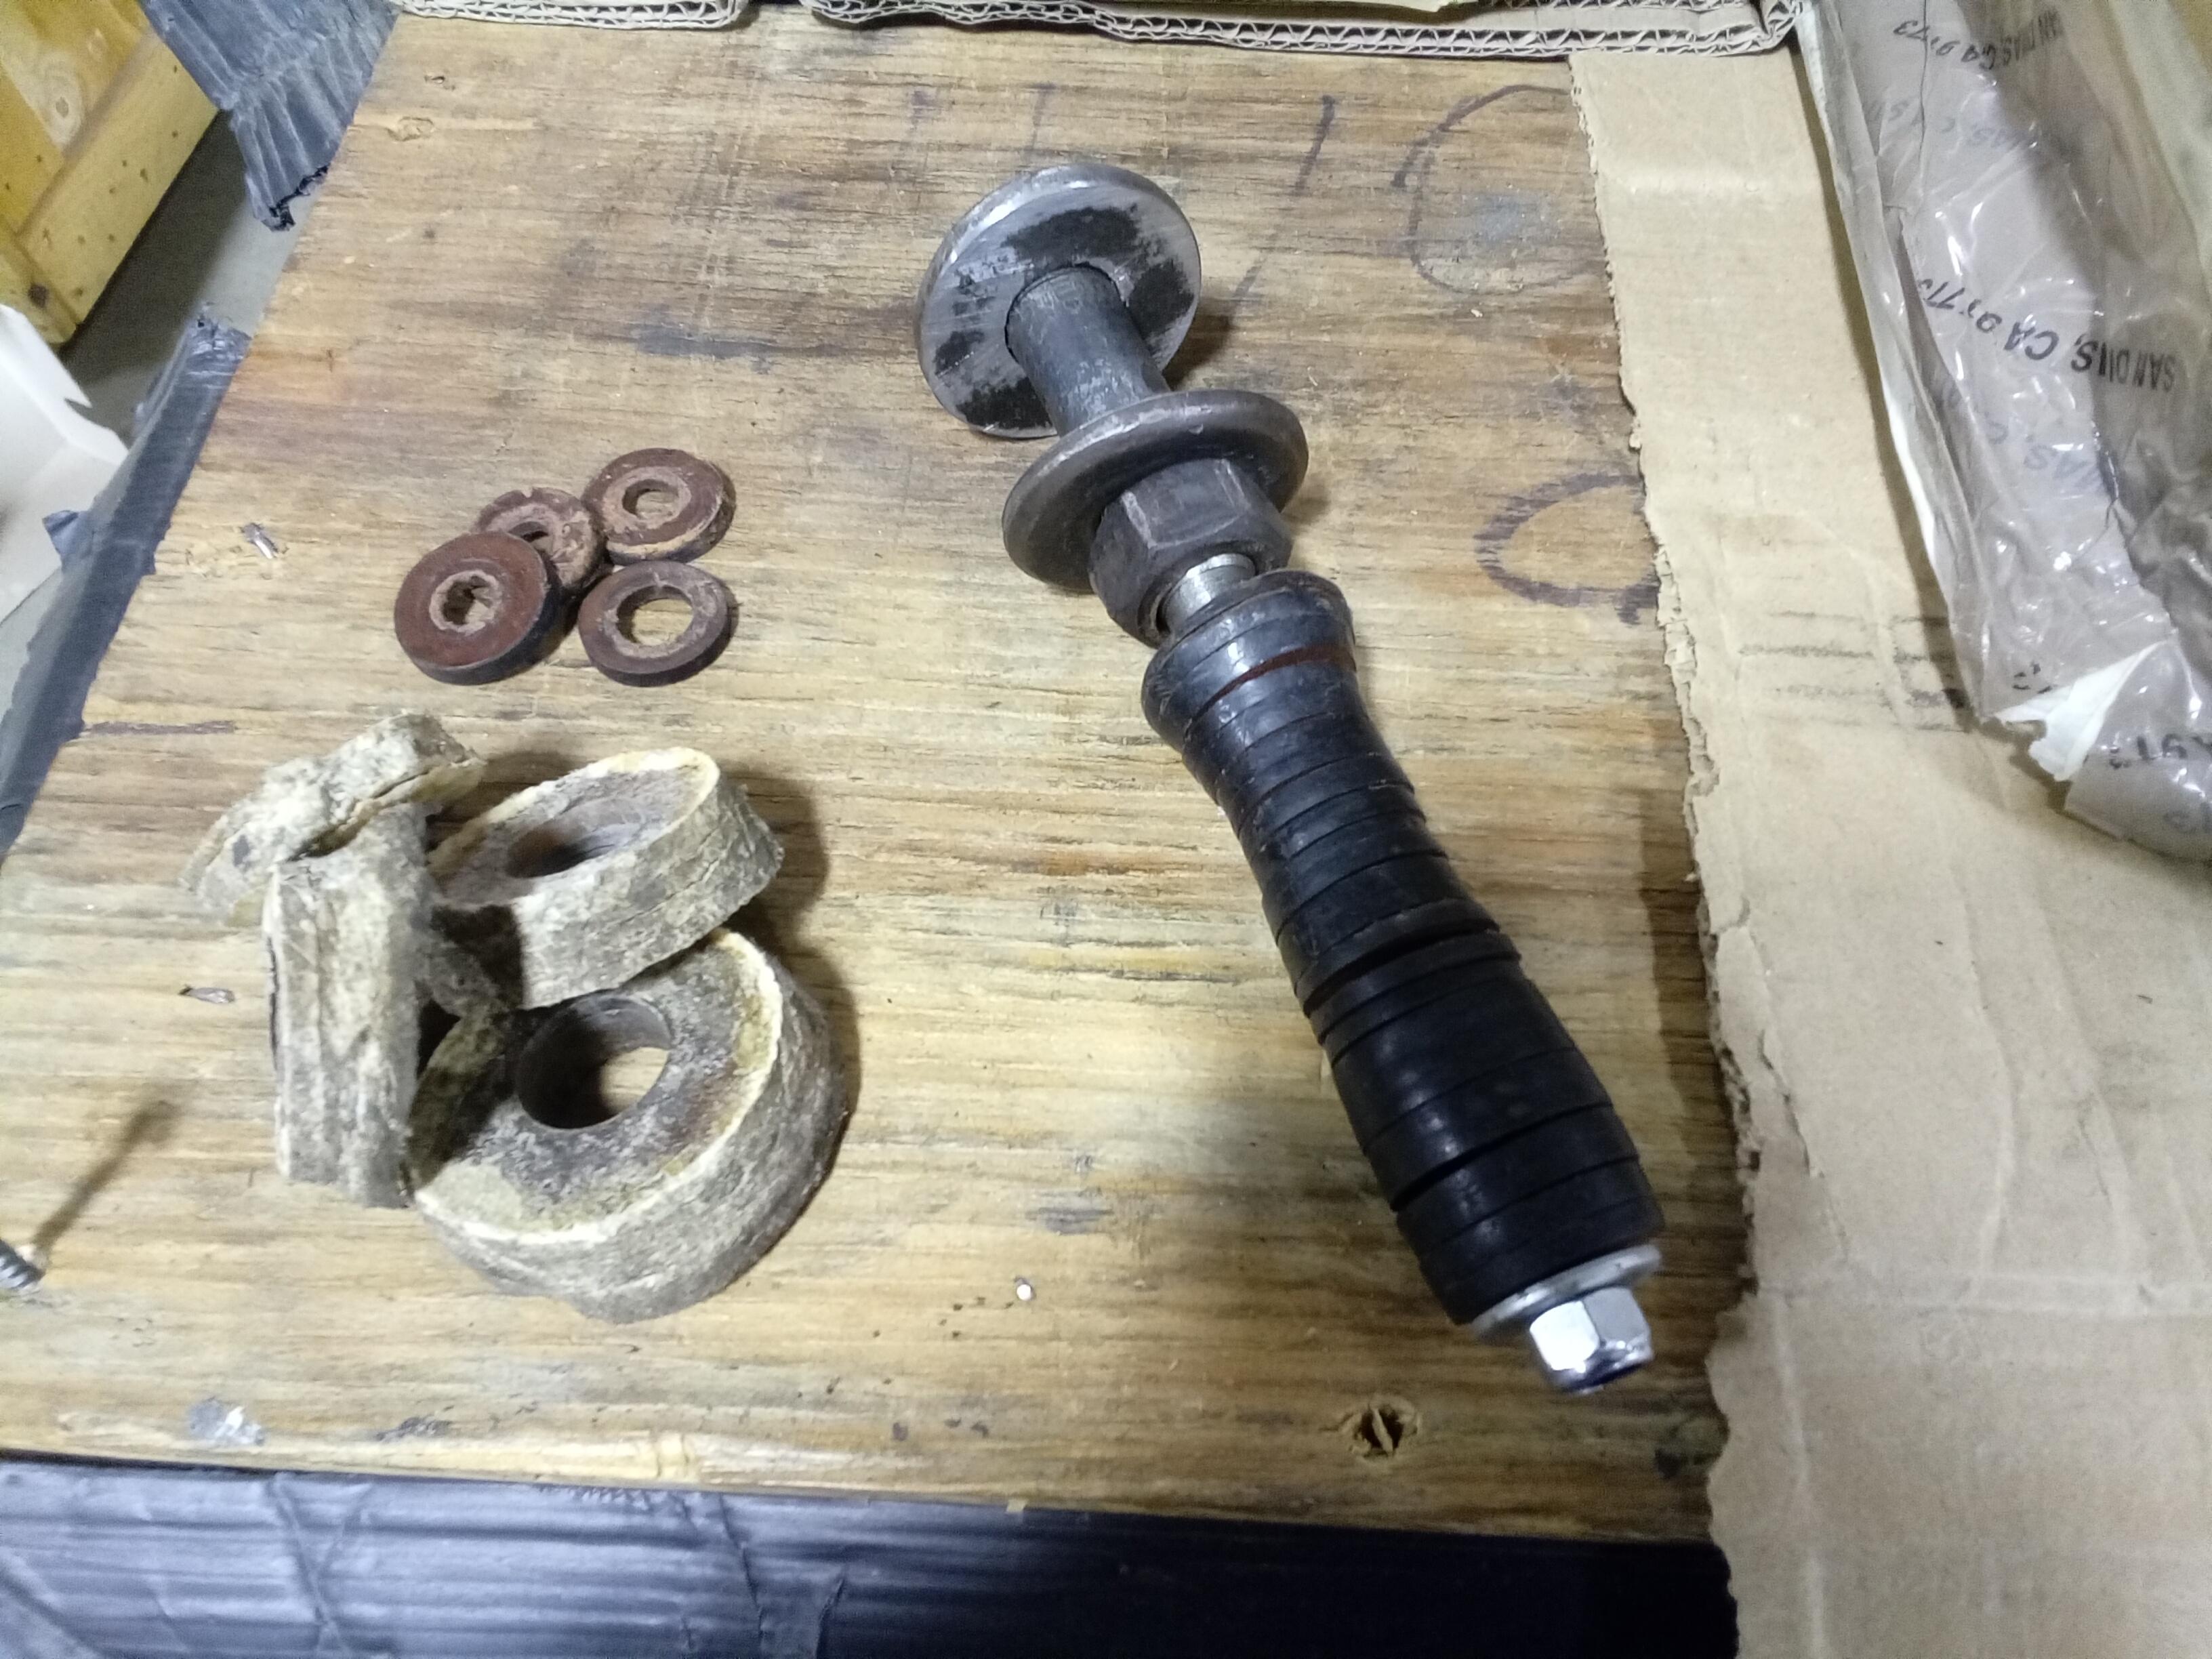
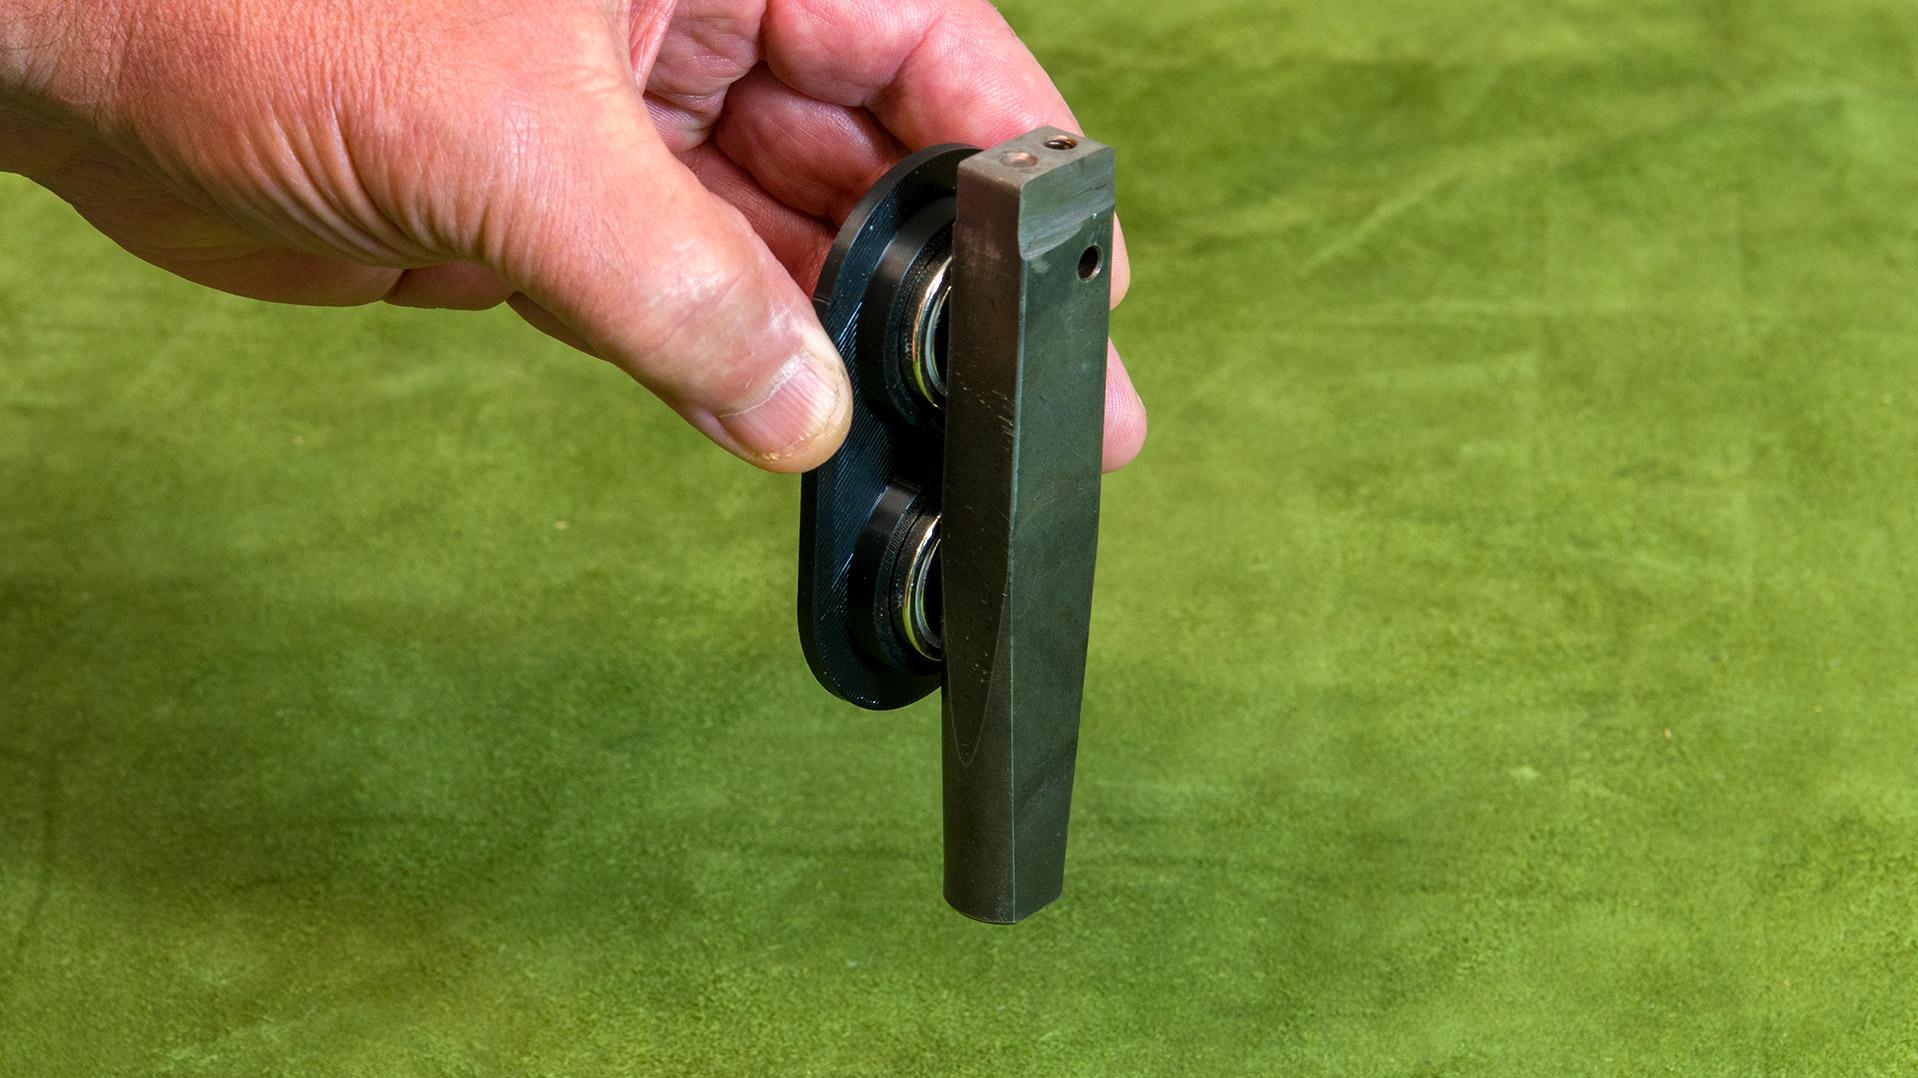
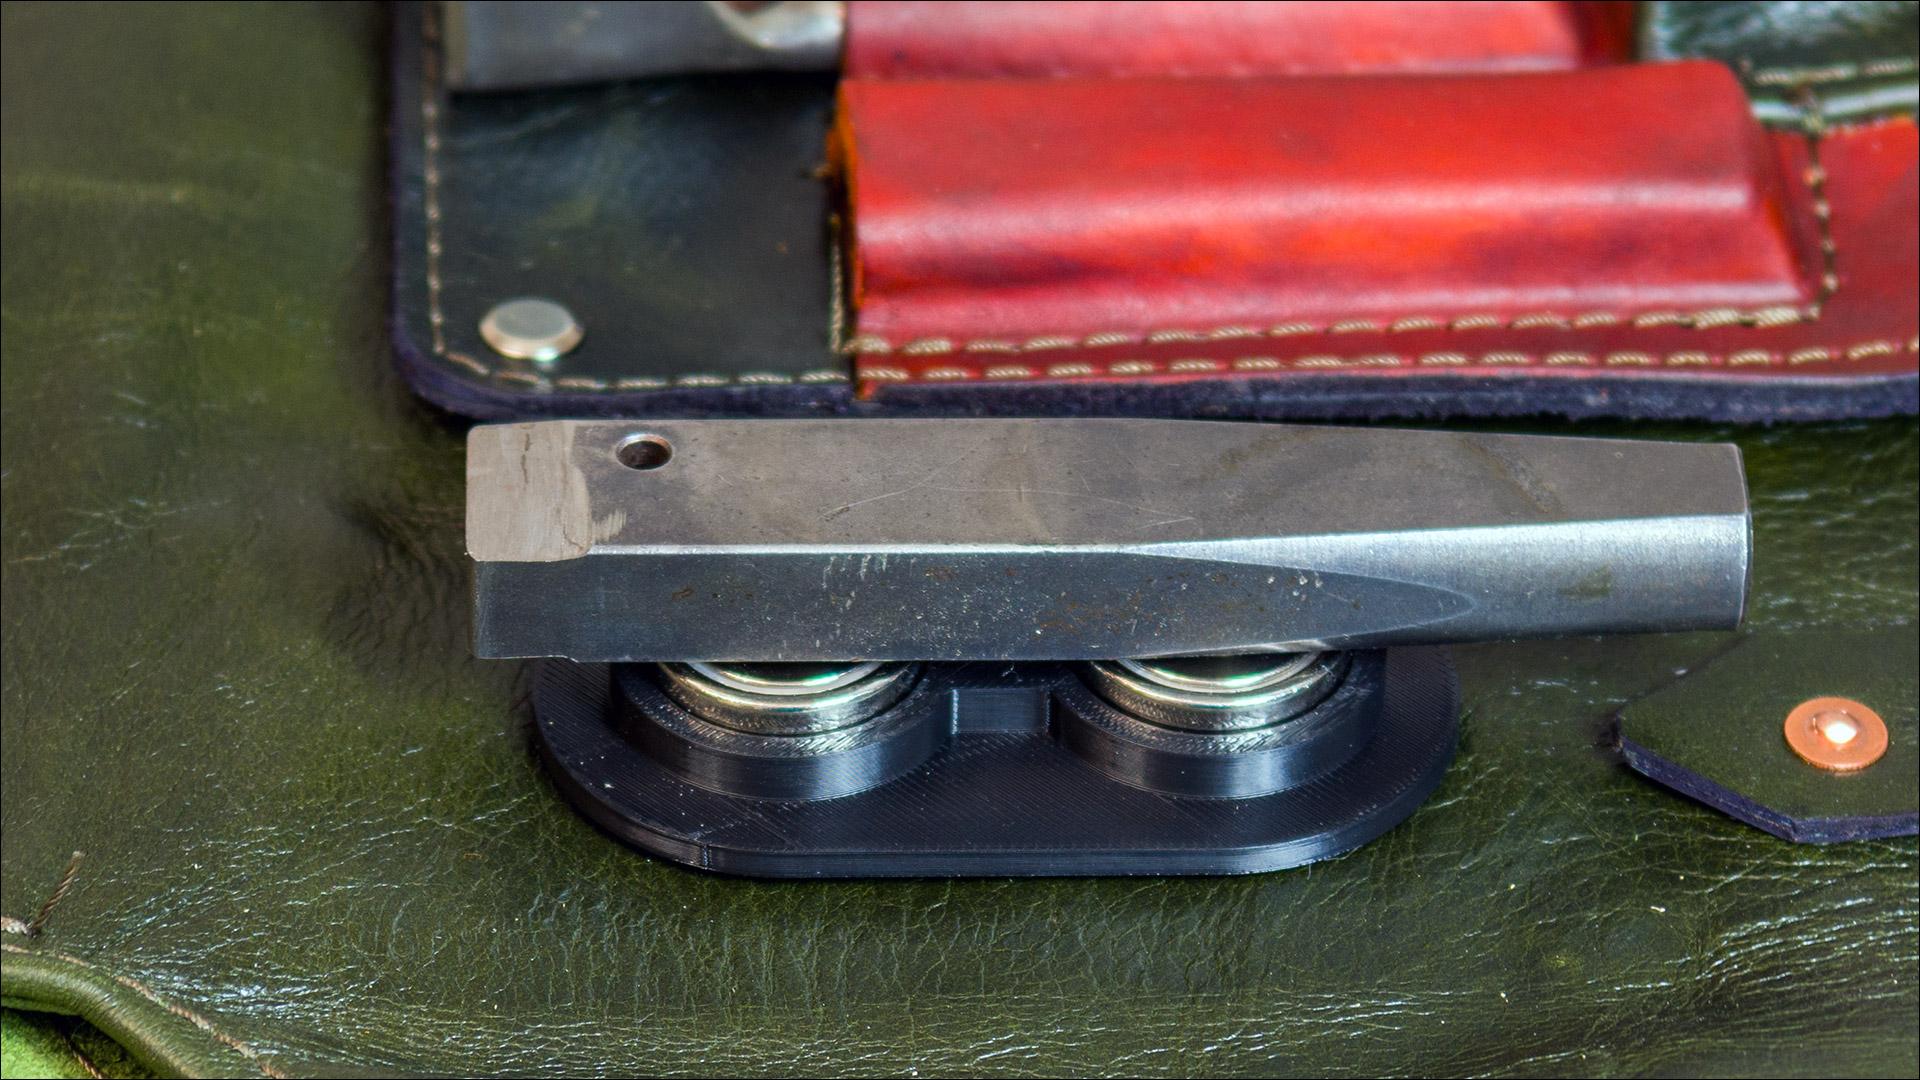
Not much to it. The bolt looks forged, maybe the washers too.

-
The domes are nice and pretty, I used to use a rivet set, then a custom driver in a riveter. I use allot of #12x3/8" copper belting rivets, but set them flush across the surface in a steel piece in a 5 ton press. 5 tons is enough to swage the rivet tip into a hole .110" in one whack. Looks pretty sharp in it's own way and bites allot better than you'd think. I don't think it would work with a copper burr though, just too thin and soft.
-
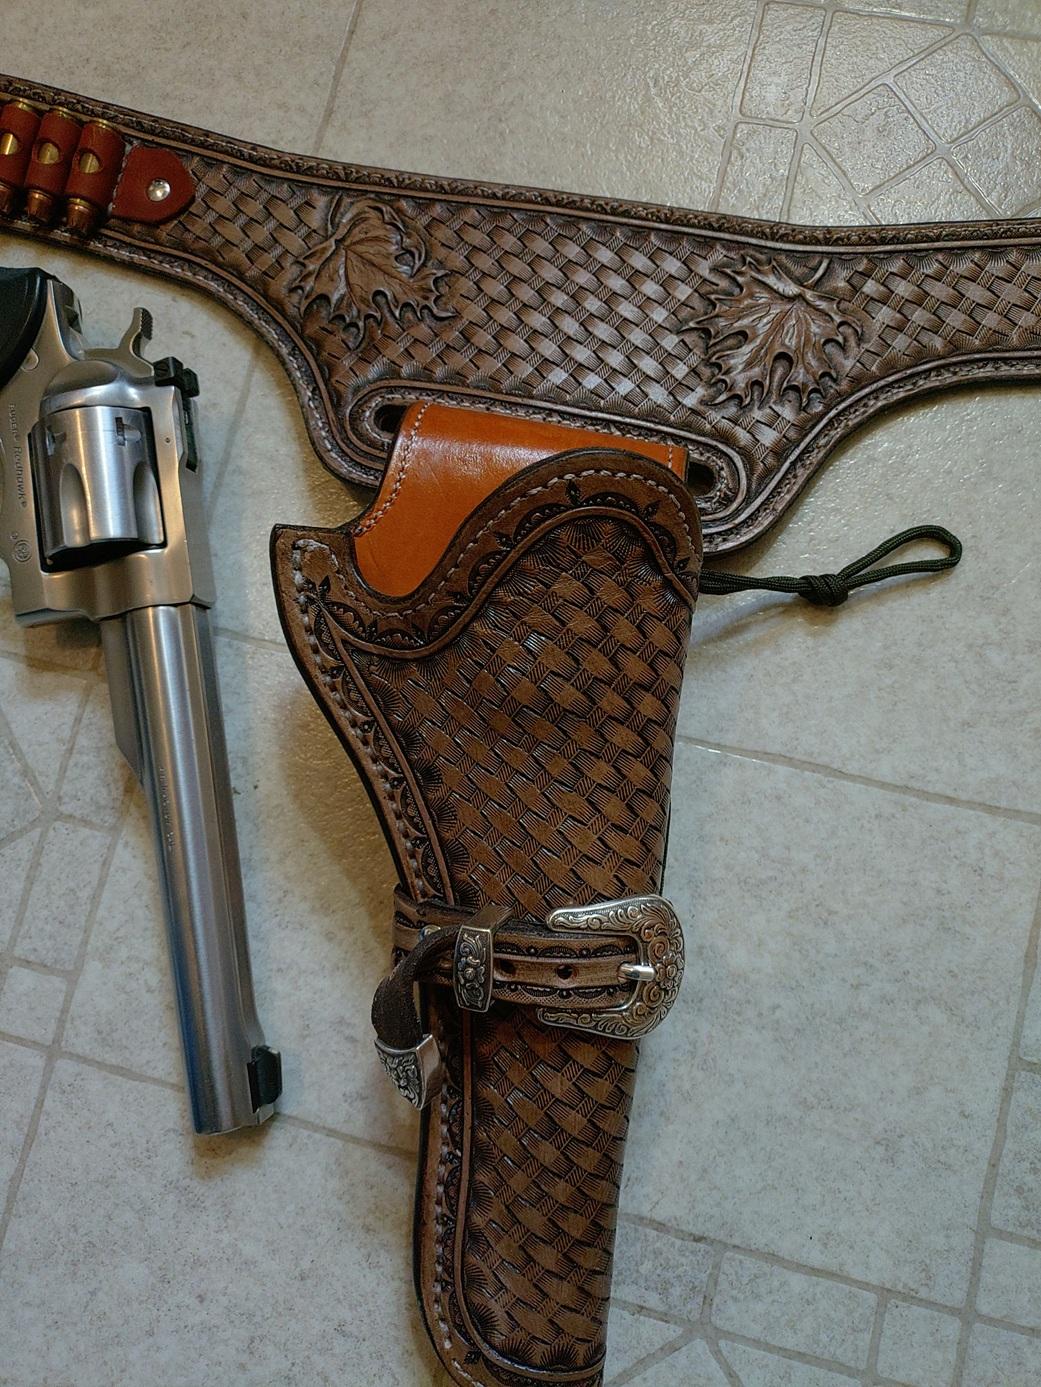
I like it! Criticism would be things that can still be finished. Maybe use a larger beveler? Die or paint the edges after that then slick? Stitch your liner closer to the edge? Looks a far sight better than my first.
-
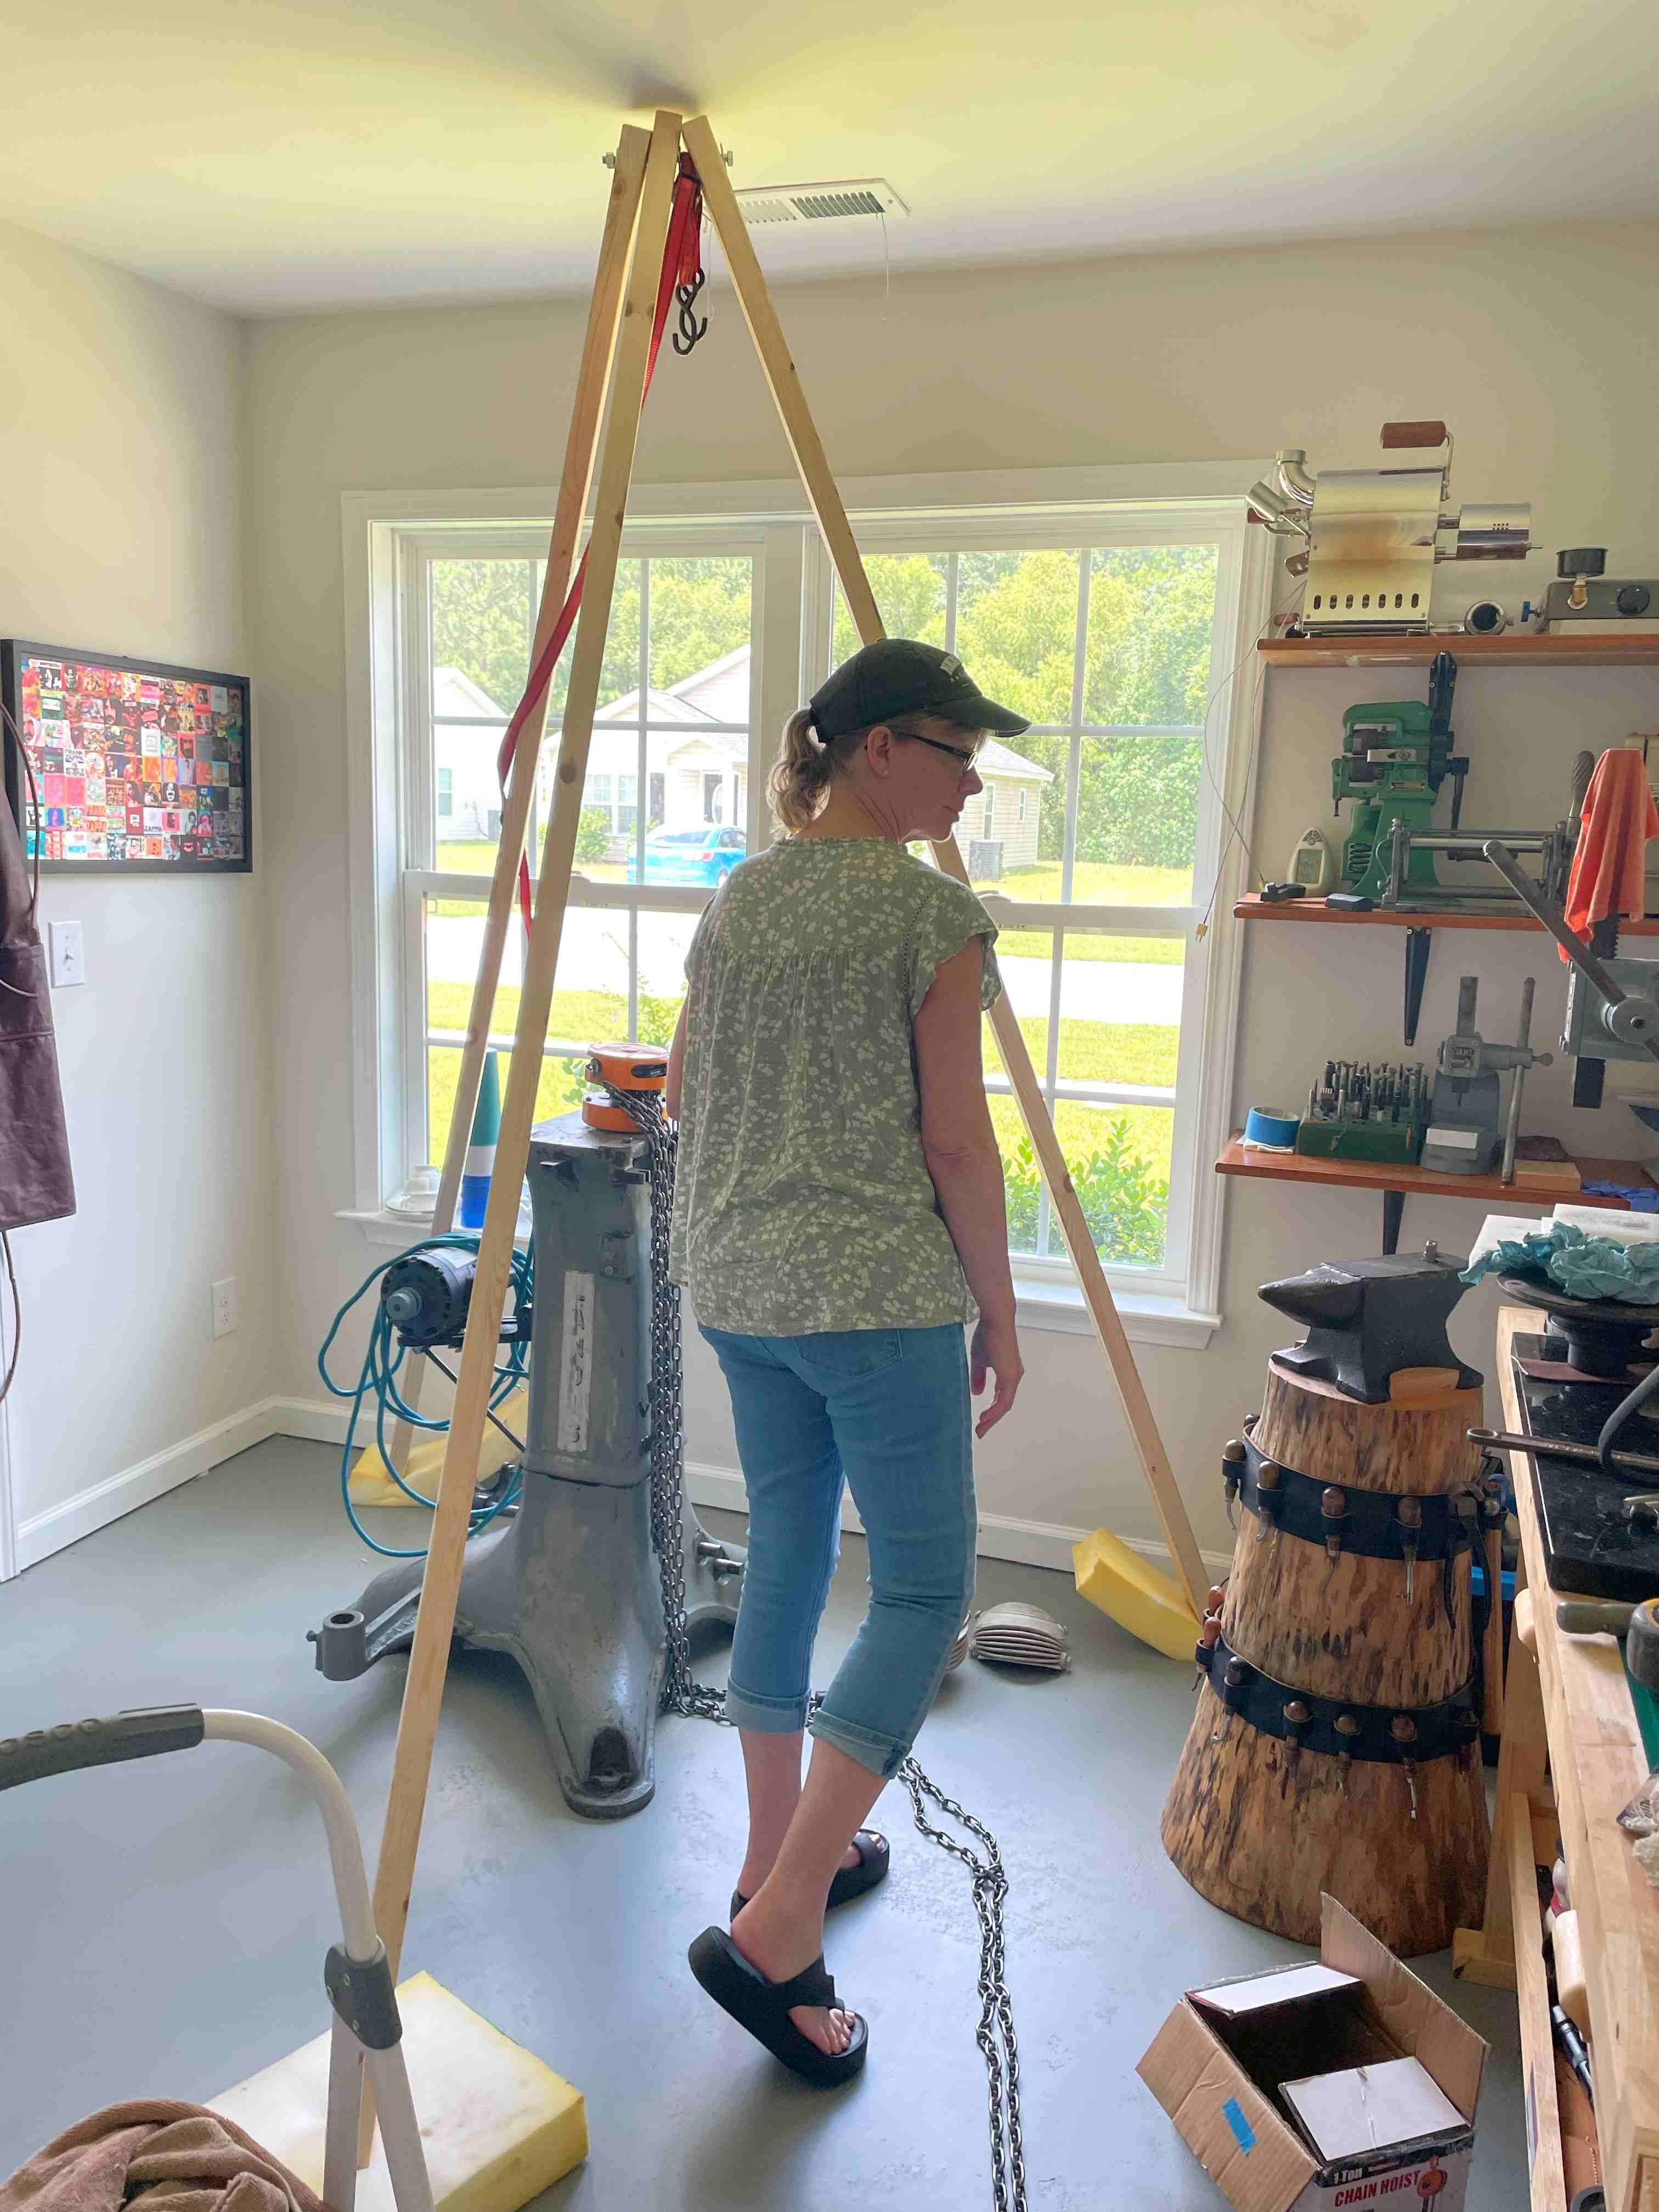
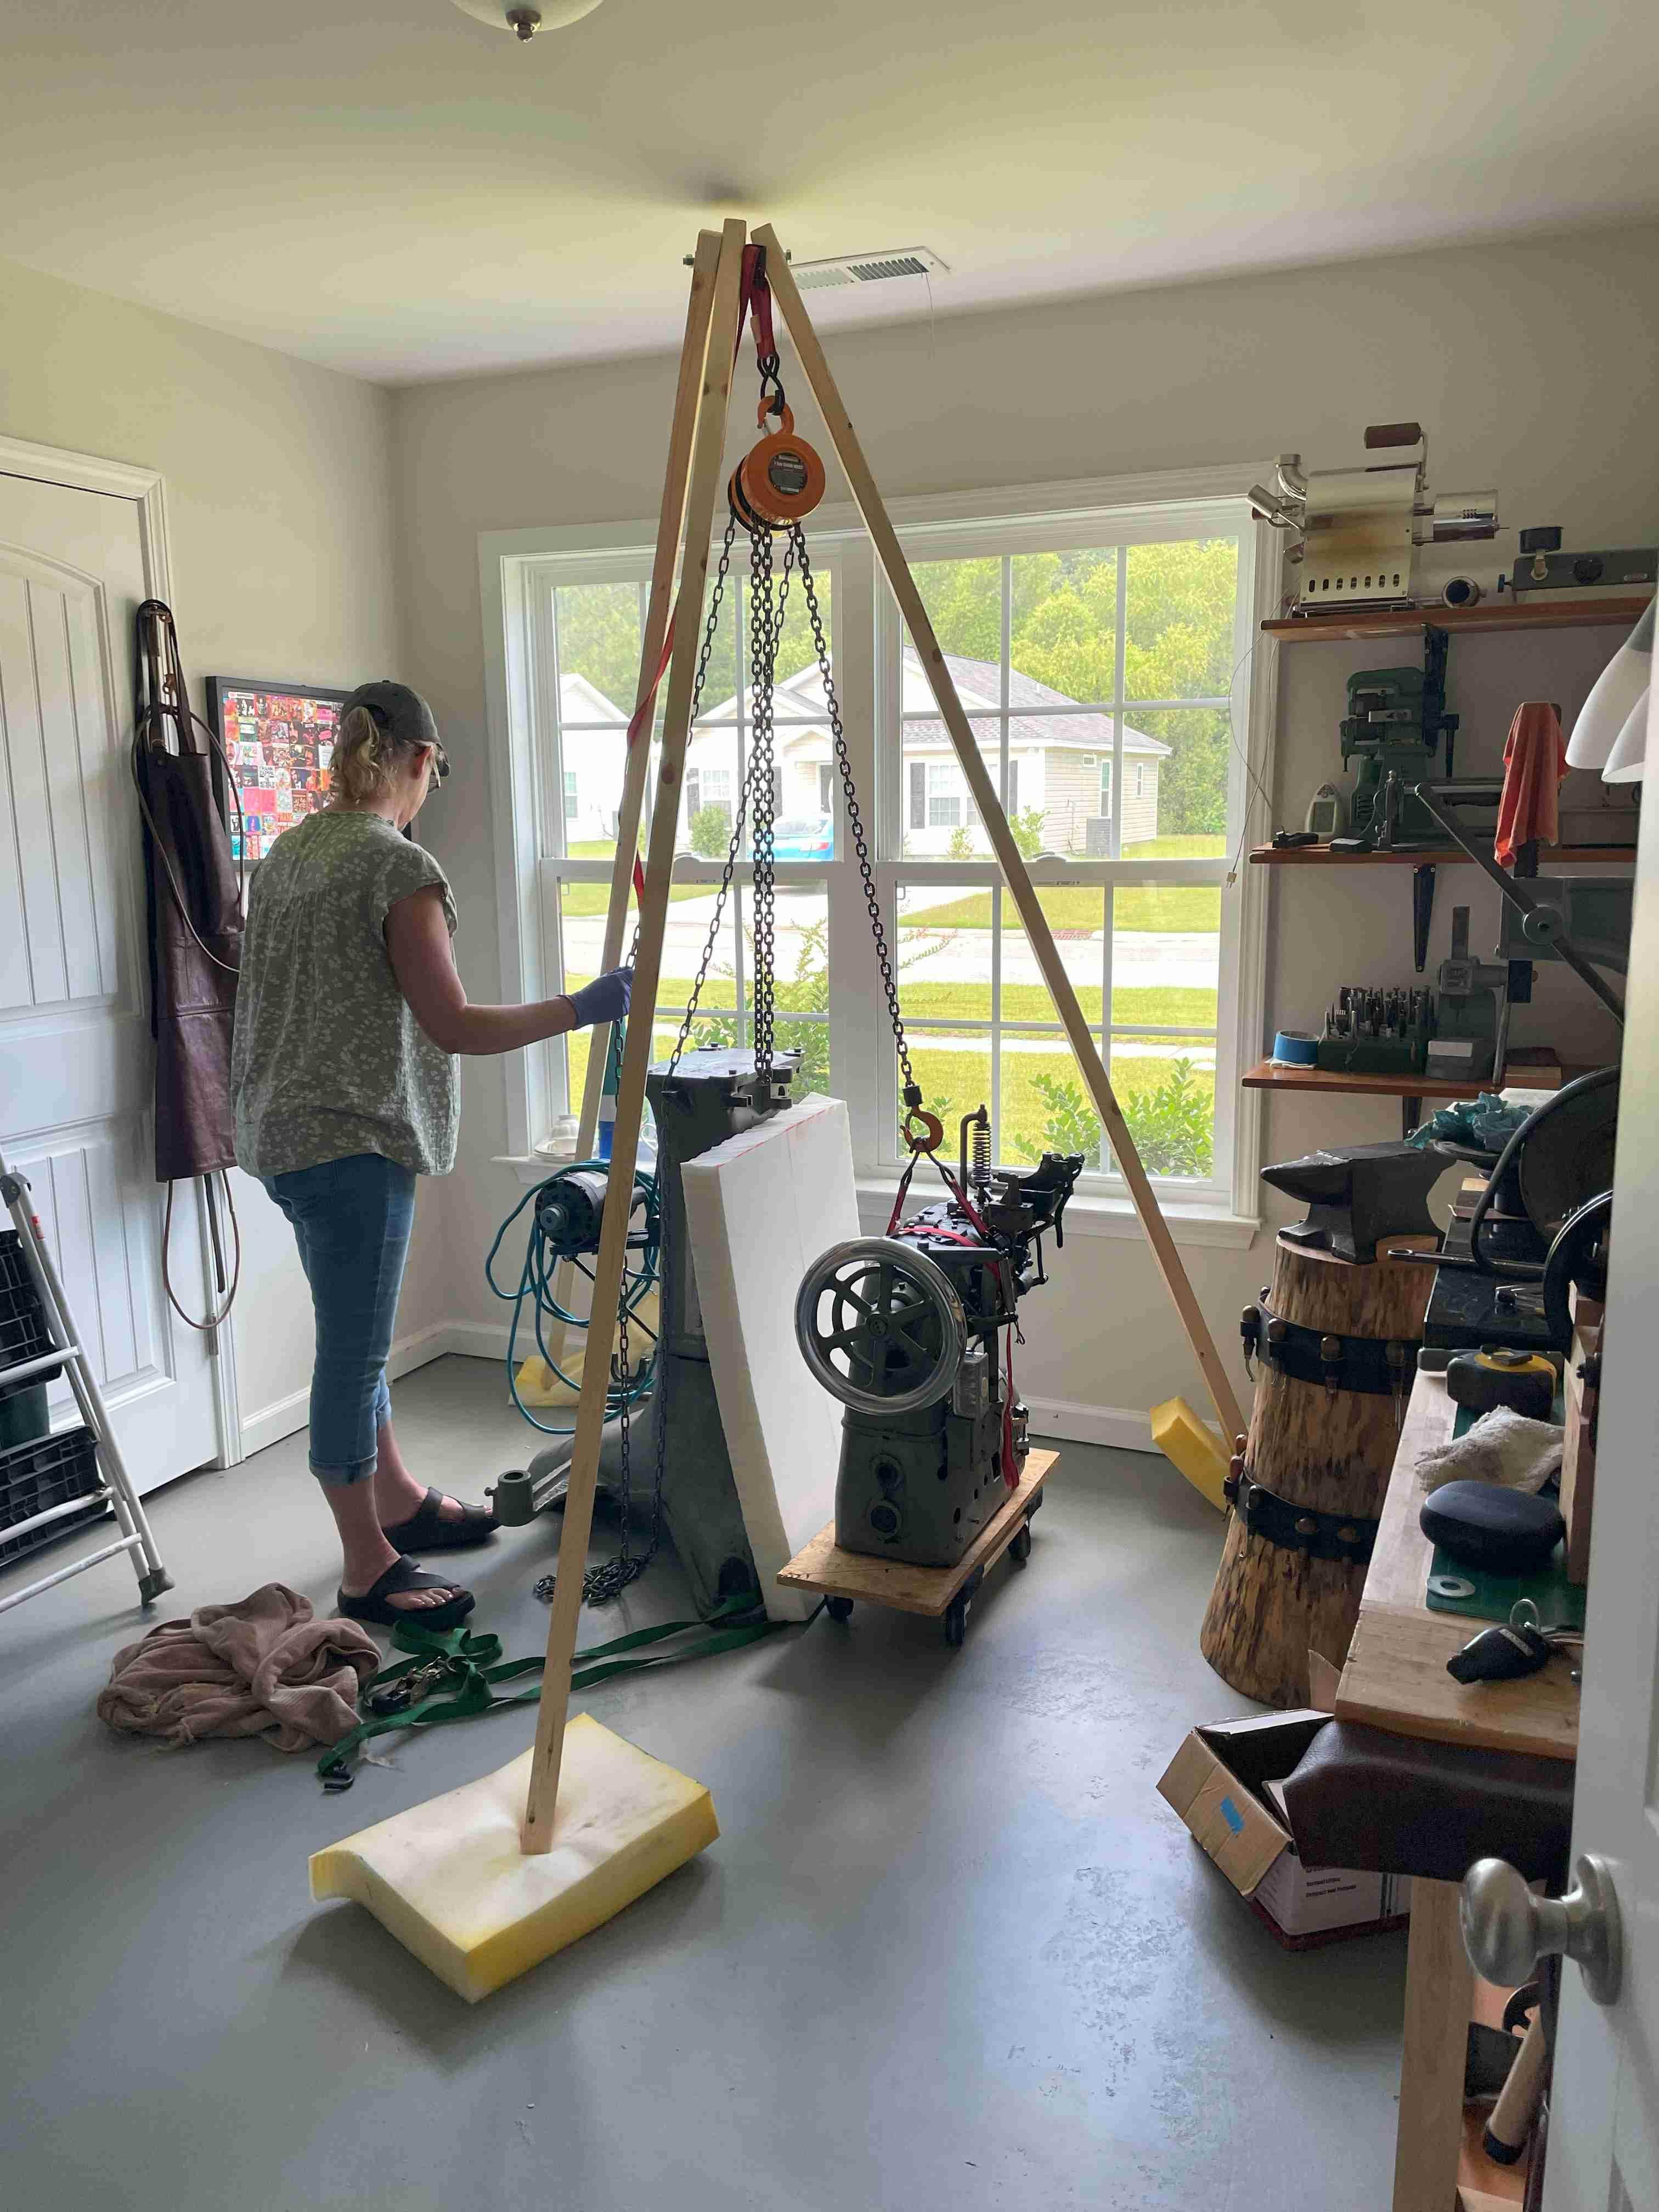
Now that is COOL! Pretty clever, you taking the pics while your "willing" helper does the work. Incidentally, I like the anvil stand, that's also .
-
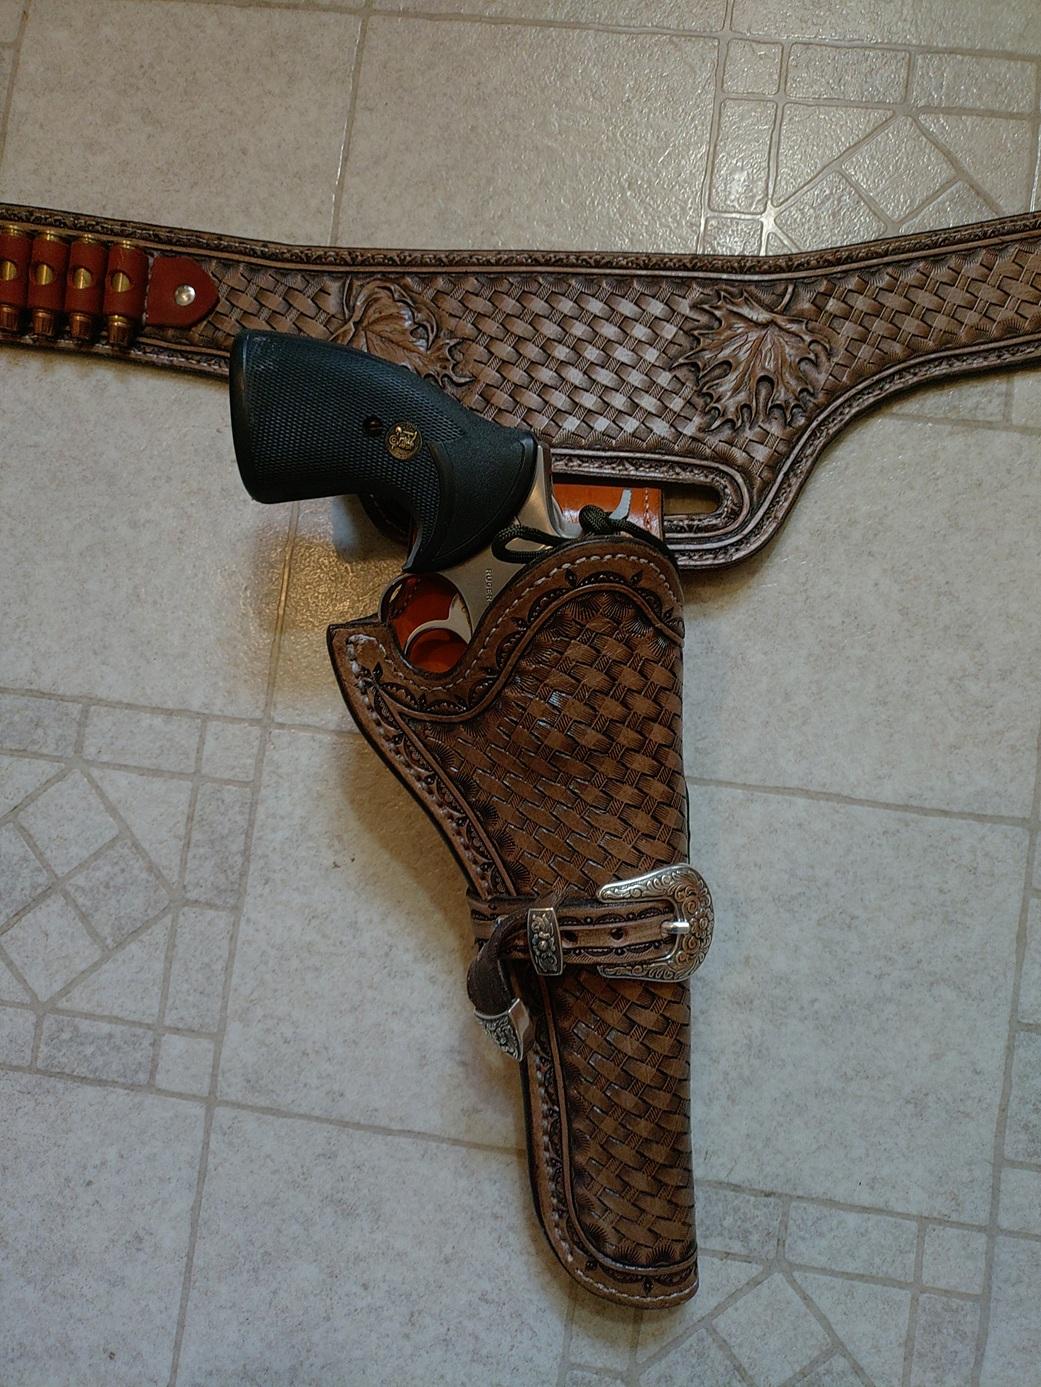
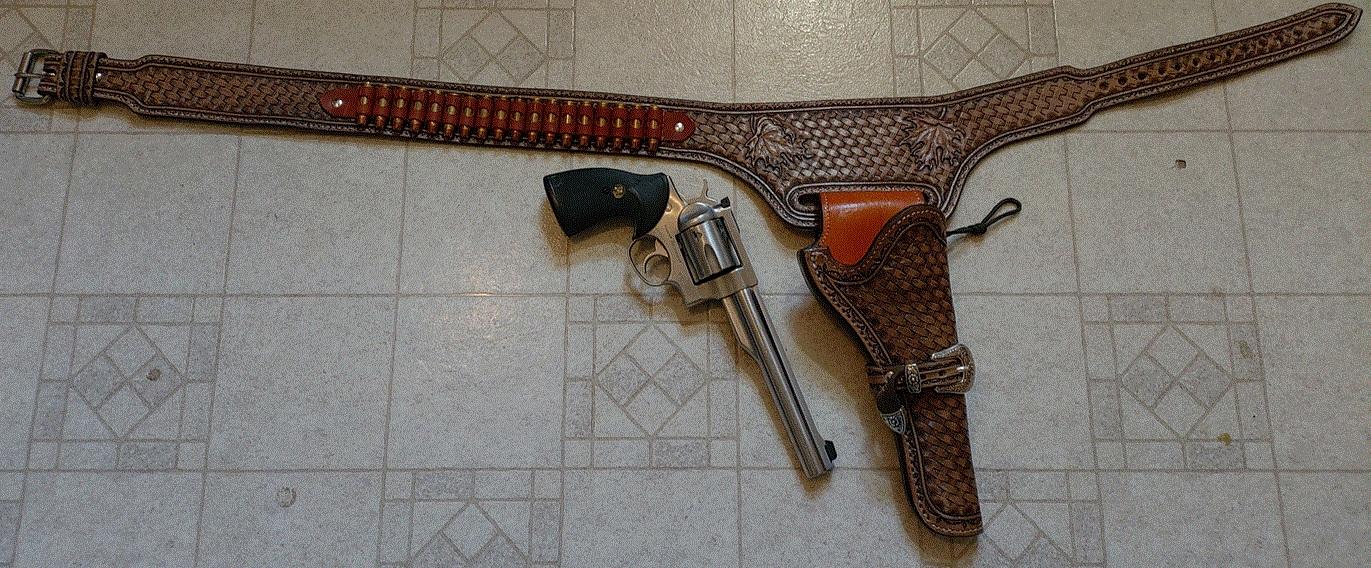
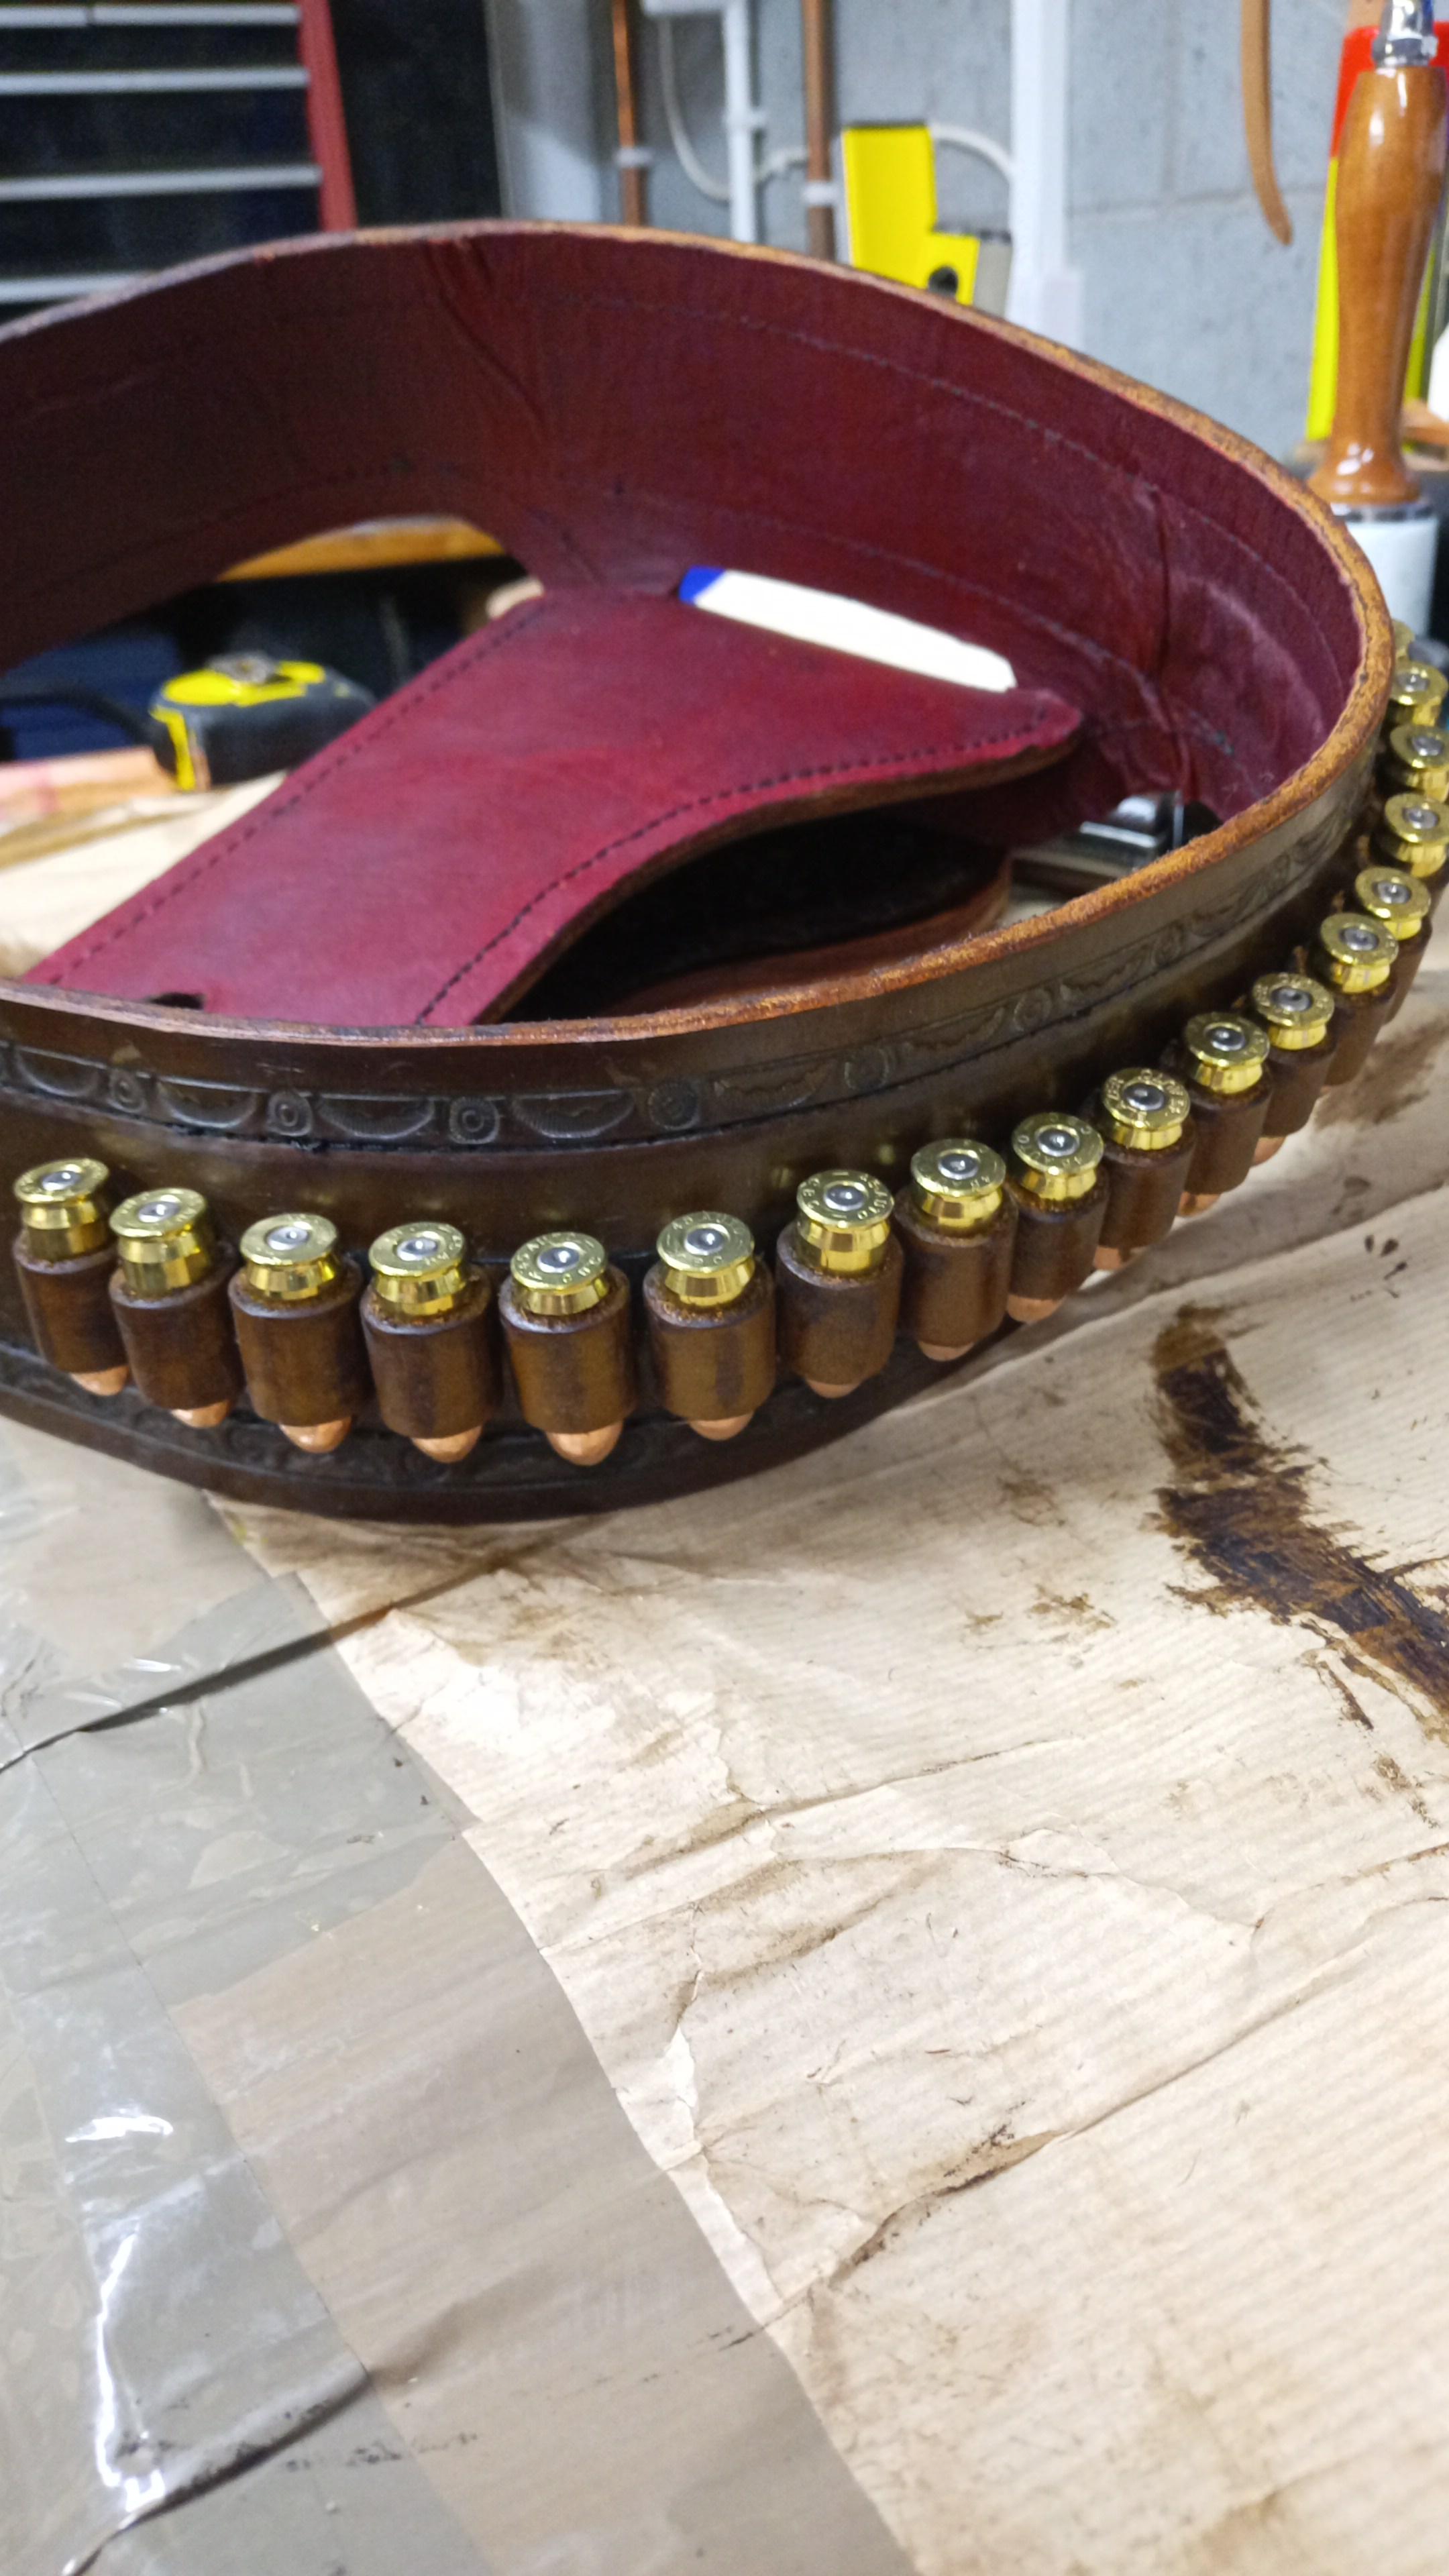
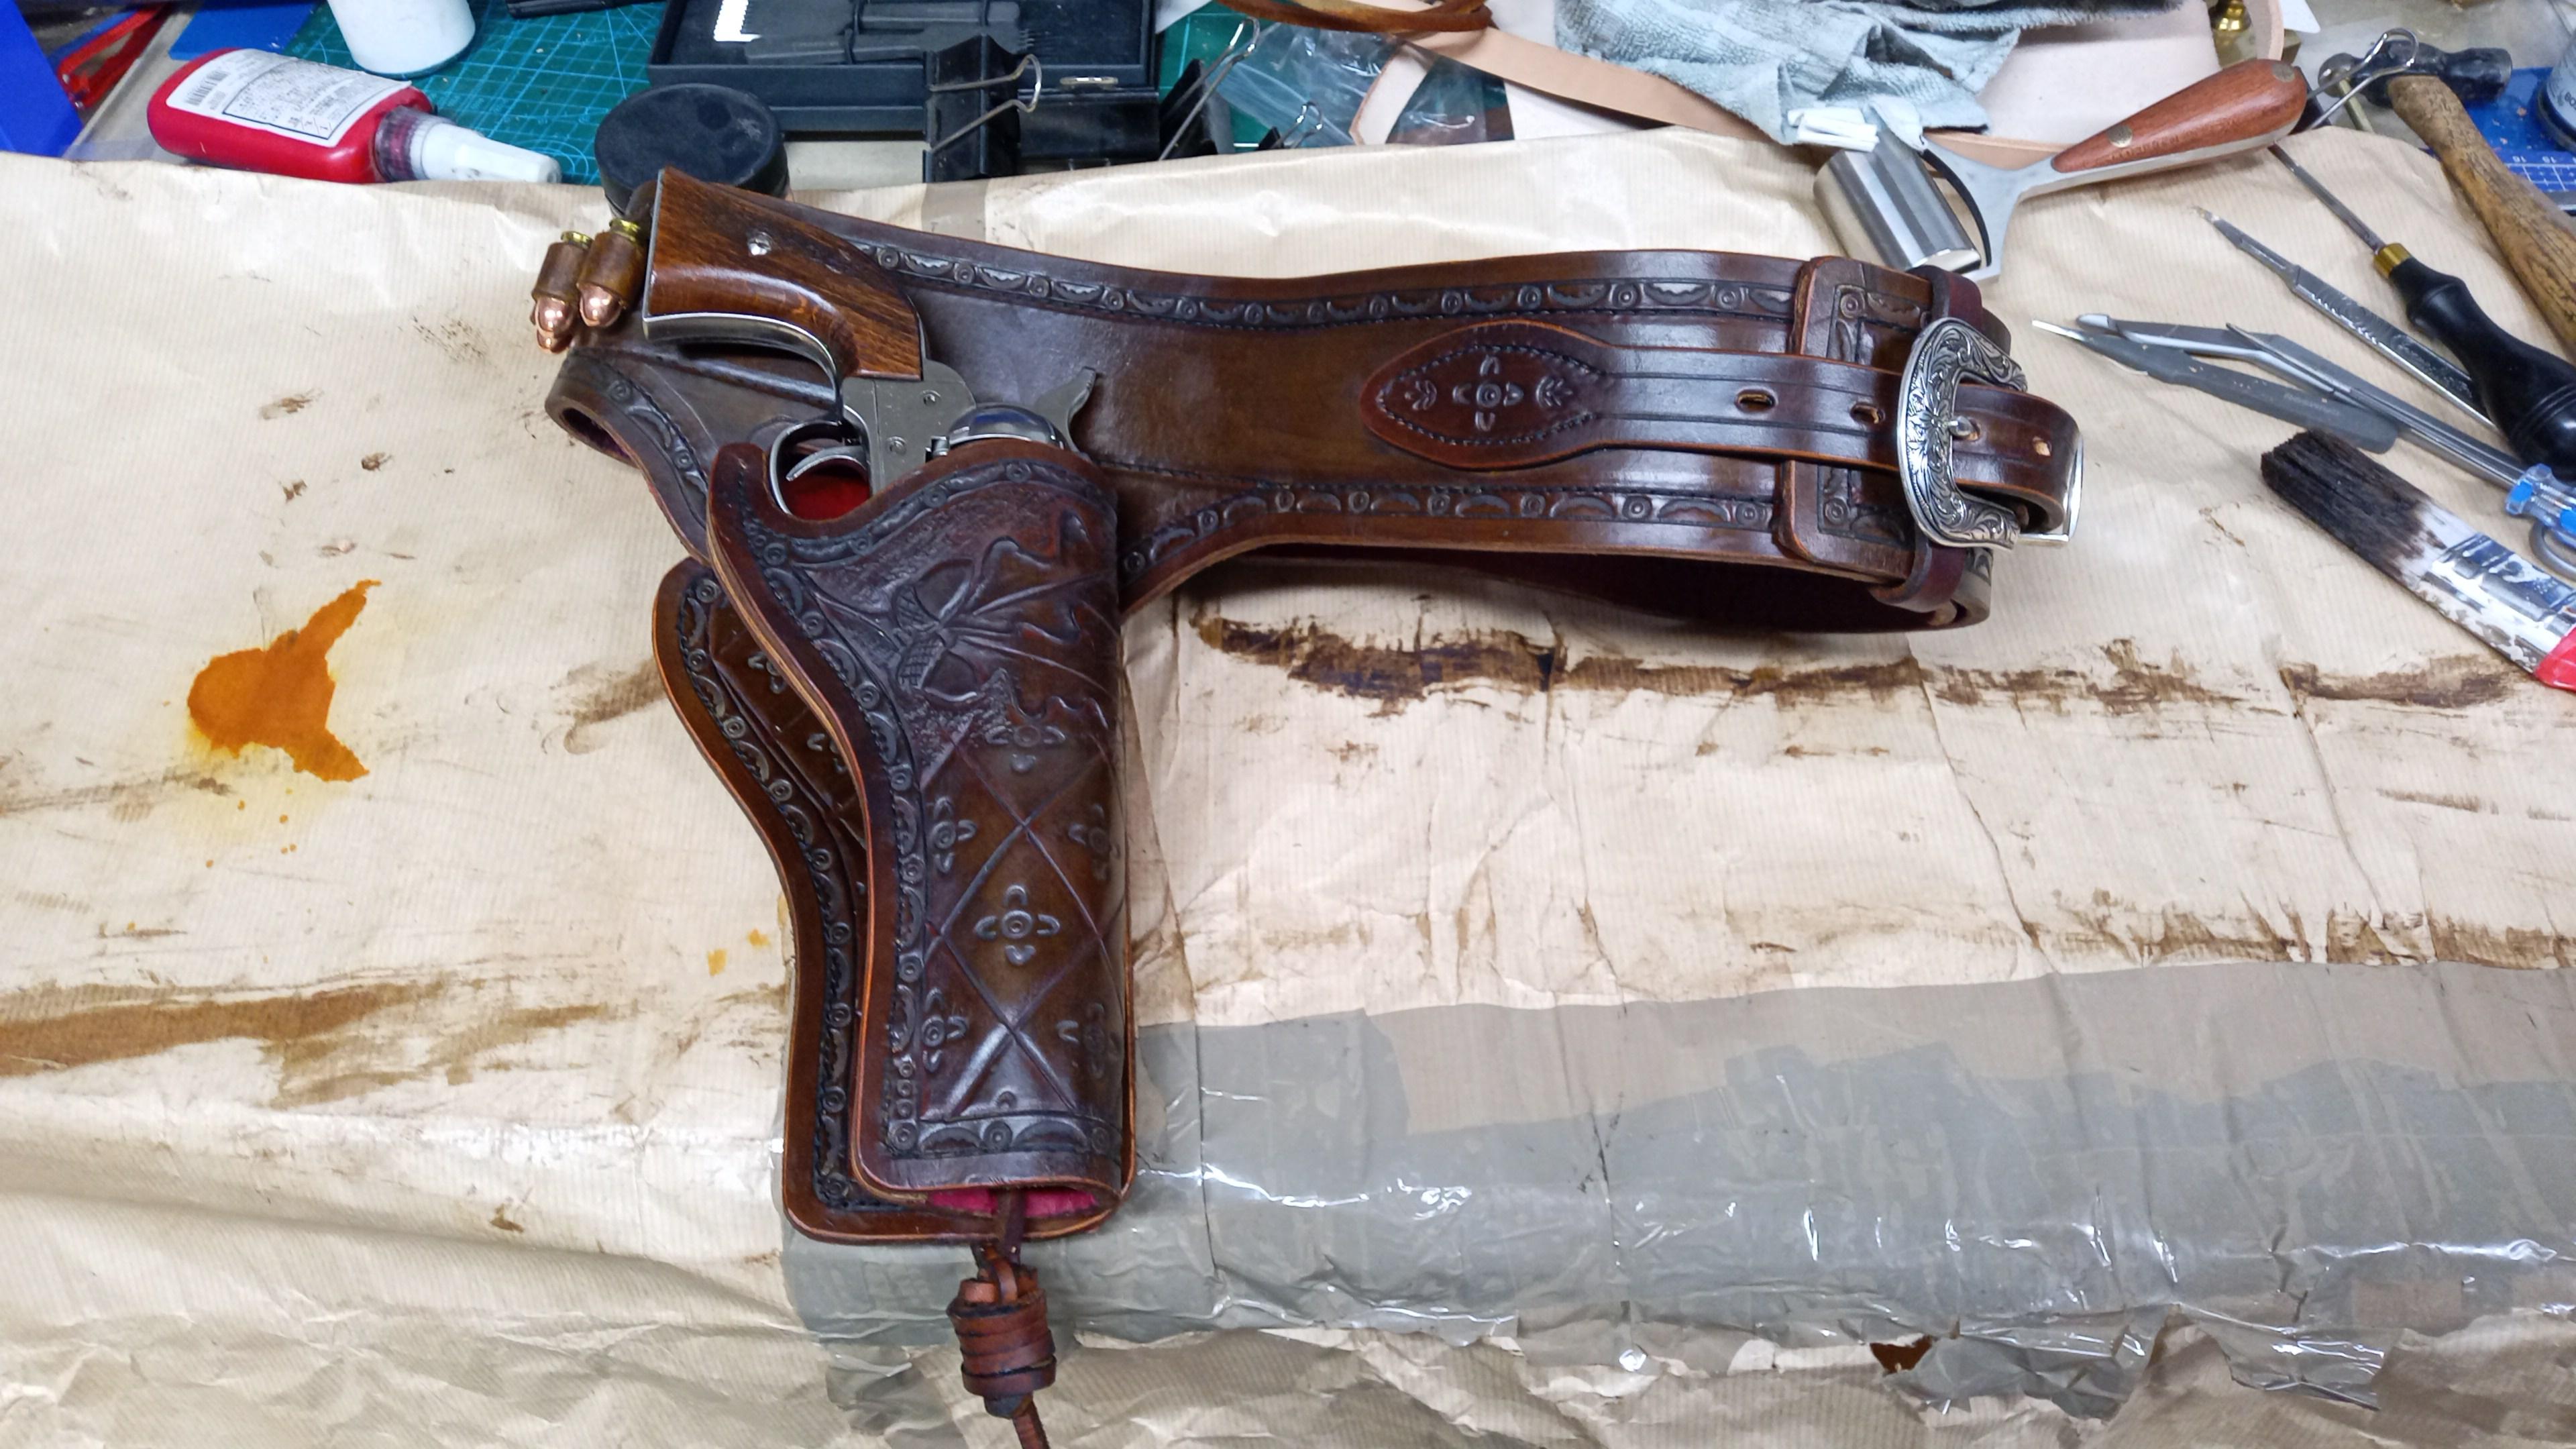
For a first holster effort that's pretty bloody good. Your ammo, however, isn't .45 Colt, it looks like it's 9mm.
-
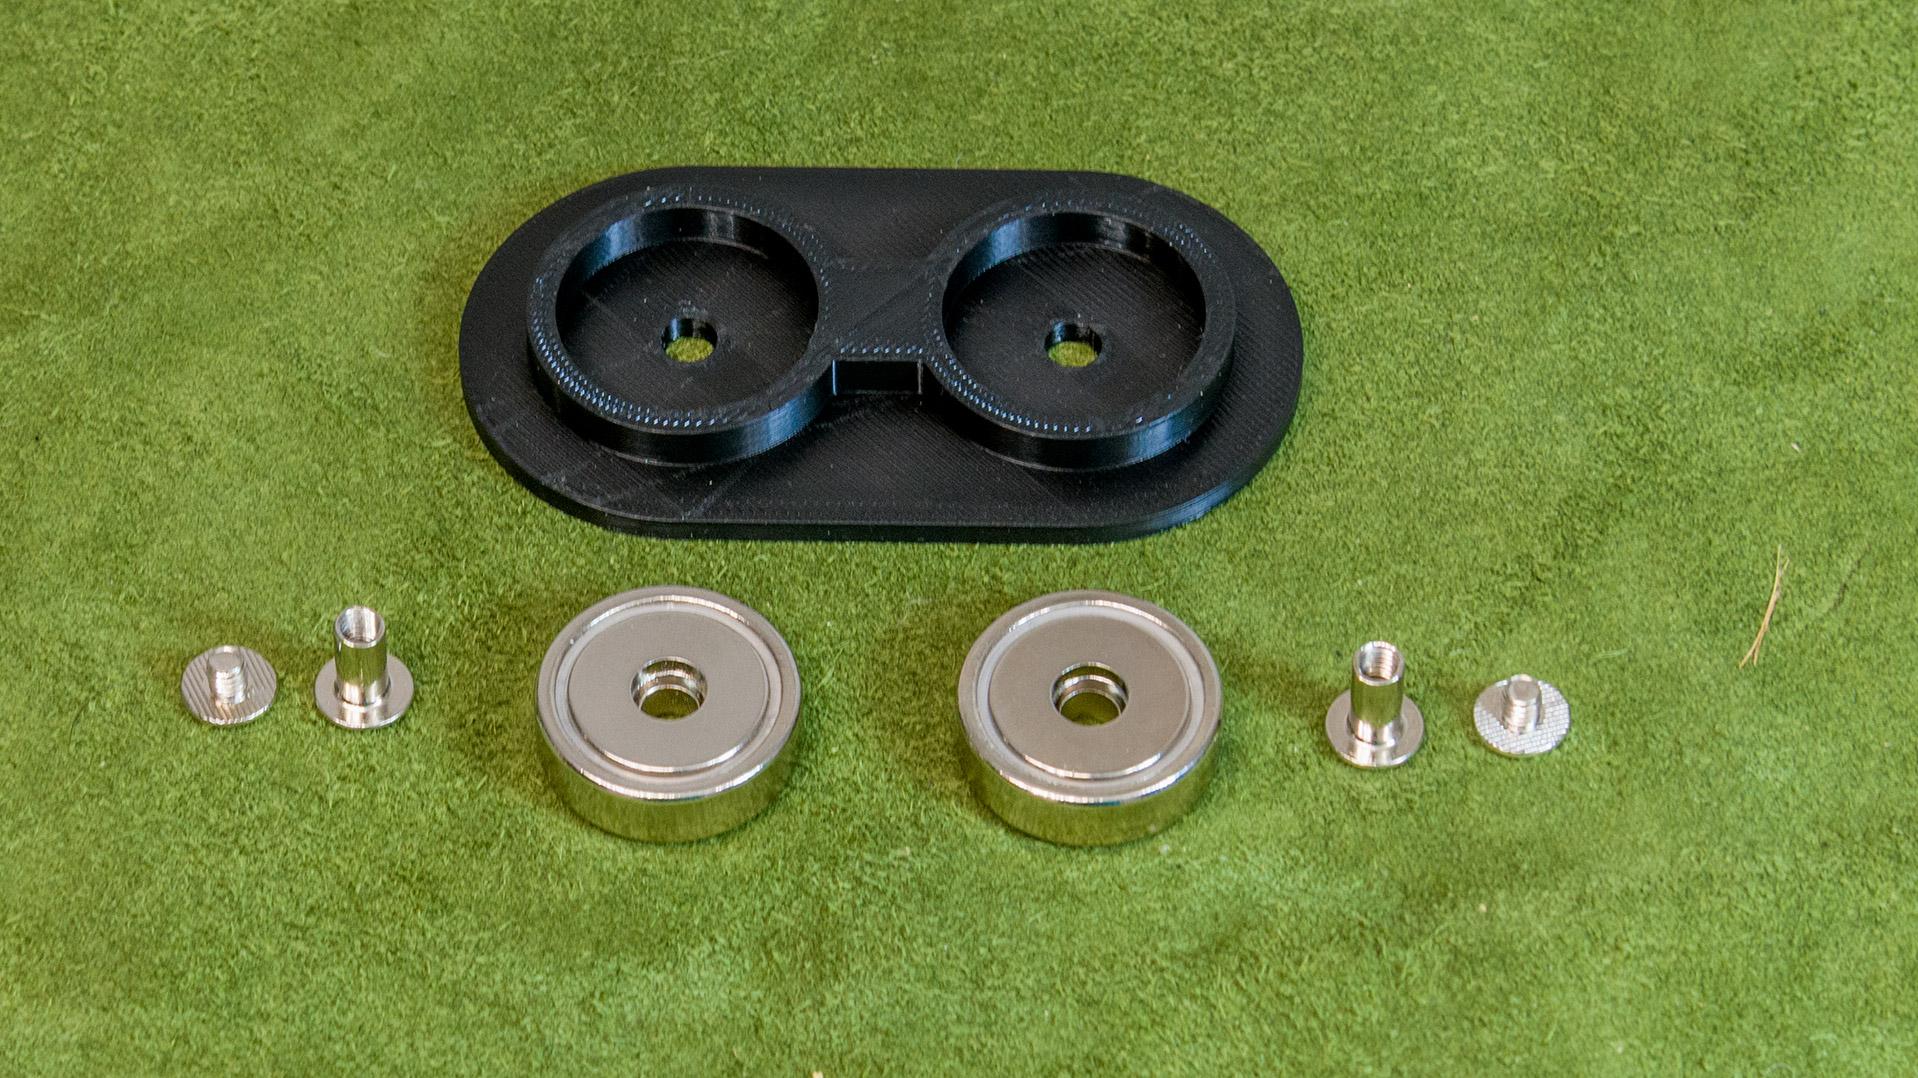
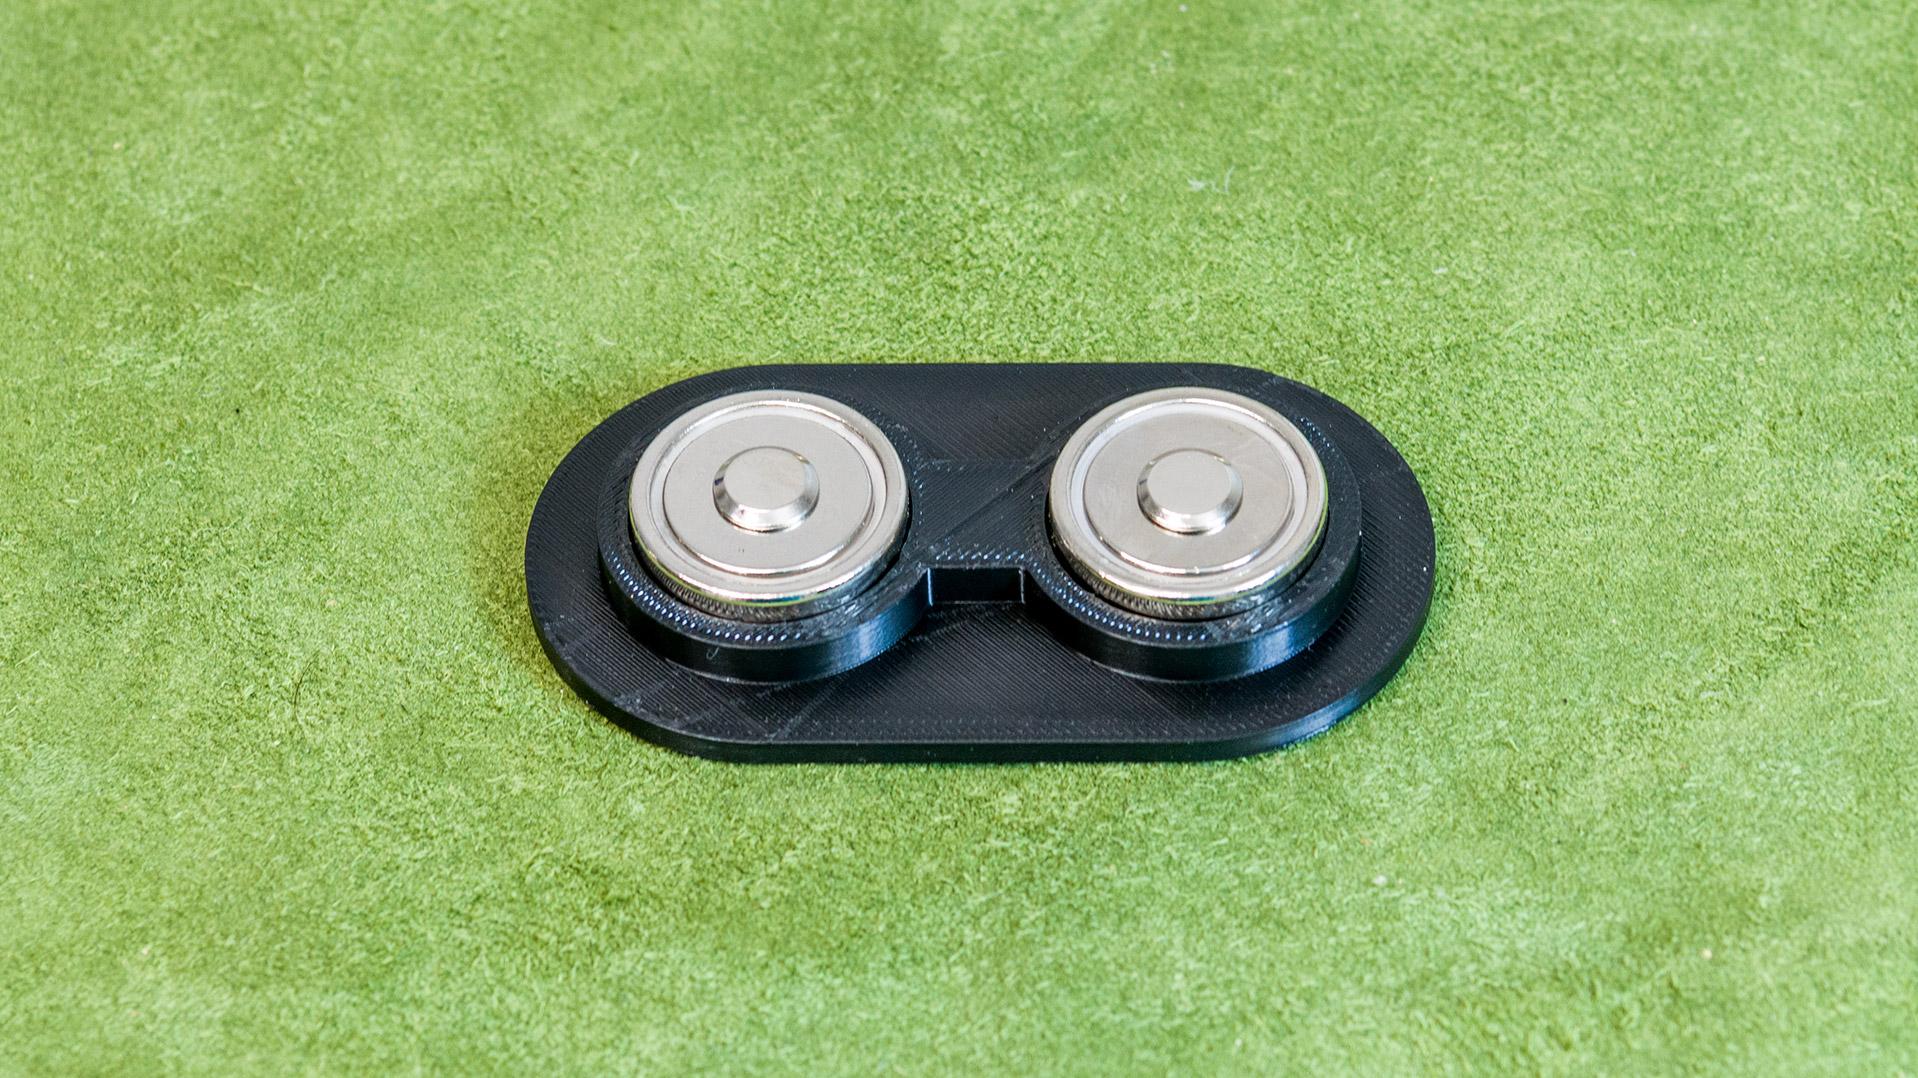
The chinese one is perhaps stainless steel. Magnets aren't any use on s/s
-
I'd like to see more photos, Close-ups too ? Well done for stepping out of your comfort zone. It looks very nice Where did you get the inert ammo?
-
A while ago I asked what I now know to be a daft question, since then I've been playing and building a project between regular orders... 7months and it's finished. The first project I've stamped, the first I've carved, the first I've dyed, the first I've antiqued and the first time lining anything. (I've played with each but never on a project) I was asked to step out of my lead and folio cover comfort zone and build a show holster and gun belt to go in a fantasy cowboy outfit. I've never done anything like this so of course I agreed. This project is made with 10oz natural veg-tan body, a 3oz heavily milled natural veg-tan goat (a super ropey piece). All dyed with feibings in the respective colour ("chocolate brown" and "ox blood"). The buckle, keeper and end tip thingy are 925plated copies of a late 80's steel set. Antiqued with feibings dark brown paste. The holster and ammo are fitted to a "single action army .45". Being in the UK this is a non-functional replica scaled down 2% so that it cannot be easily converted to functional. Unfortunately due to the size difference the genuine inert ammo doesn't fit but becomes pretty bling. Feel free to offer constructive criticism but please bare in mind this is a whole world of firsts for me and I have a list of things to improve on my next project already.
-
I typically use one of two rivet setters a brand name ( Weaver ) and unknown brand ( Chinese ). What sparked this topic was when adding a magnetic holder to my new leather apron to hold small items I noticed the Weaver would hold while the Chinese one wouldn't and would have to be placed back into the tool holder. Here is my comparison: 1) Weaver #12 Heritage Rivet and Burr Setter ( https://www.weaverleathersupply.com/products/heritage-rivet-burr-setters?srsltid=AfmBOorZa03-7yJXd4NK0J7ms-NhaPObUqG9y6-cYWW633ChiNRKtNjq ): i) colour: gun barrel black, ii) length: 112 mm ( 4.4" ) iii) weight: 198 grams (6.9 oz) iv) Construction: Ferromagnetic metal (holds to a magnet) v) Country of Manufacture: Unknown. On a brief search I was unable to determine if it was made in the USA. Cost: $36 CAD ($26 USD) per size plus shipping 2) Chinese Not Branded #12 Rivet and Burr Setter ( https://www.temu.com/goods.html?_bg_fs=1&goods_id=601101822896581&_oak_stage=6&_oak_page_source=703&_x_vst_scene=adg&_x_ads_sub_channel=shopping&_x_ns_prz_type=-1&_x_ns_sku_id=17592387188379&_x_ns_gid=601099558219698&_x_ads_channel=google&_x_gmc_account=695390730&_x_login_type=Google&_x_ads_account=6910707695&_x_ads_set=21445371984&_x_ads_id=163985514426&_x_ads_creative_id=705187068636&_x_ns_source=g&_x_ns_gclid=EAIaIQobChMIh8-XxtqJiAMVckp_AB0yLi9TEAQYBiABEgKM5PD_BwE&_x_ns_placement=&_x_ns_match_type=&_x_ns_ad_position=&_x_ns_product_id=17592387188379&_x_ns_target=&_x_ns_devicemodel=&_x_ns_wbraid=Cj8KCQjwoJa2BhC-ARIuAK-YPyAPBRiMisytKWY4gCe42YwLmzWGnnz3z3Cv-X8BXZO0JO9OMpk78c8fmBoC3BY&_x_ns_gbraid=0AAAAAo4mICGOP3XszhHdJ9mfoJkEYI7ia&_x_ns_targetid=pla-2322529874778&_x_sessn_id=m1vl5lgo1t&refer_page_name=goods&refer_page_id=10032_1752786185211_my3616b3n9&refer_page_sn=10032 ): i) colour: Shinny Chrome ii) length: 112 mm ( 4.65" ) iii) weight: 193 grams ( 6.8 oz) iv) Construction: Non Ferromagnetic metal (will not hold to a magnet at room temperature) v) Country of Manufacture: Unknown, probably China Cost: Budget friendly from Temu at $12.24 CAD ($8.90 USD) for two setters a #9 & a #12 free shipping Conclusion: Both rivet setters: i) Do the job very well and have installed many a copper rivet and burr. ii) Hold up very well to being stuck with regular metal hammers. I'm not particular on what I use to strike them using a 10 oz, 16 oz or a 22 oz regular hammer whatever is the closest at hand. iii) The doming of the copper rivet over the burr is consistently good. What do you use???????? kgg
-
Run some stitches without thread in scrap or cardboard, too. It's an exact template of your current stitch length setup.
-
I think a call to Osborne to see what the hole size is will be your best bet. I decided several years ago to put new rawhide heads on several wore out mauls. What I found was that every maker had their own better (and different idea) of what the round stock should be even among the same general sizes. I gave up at that point and used them for ballast in the trash can. Dan Preston from then ShopTalk magazine did some refurbishing on mauls and made up rawhide heads. I think he had an article or two about it. I bought out his stuff twice and those mauls were not the shiniest. They ended up ballast as well.
-

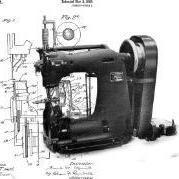
Sailrite worker bee kit and Tandy big handwheel
Jdicenhour replied to Jdicenhour's topic in Sewing Machine Accessories
Price includes shipping within the continental United States. I'd prefer not to ship outside the US. -
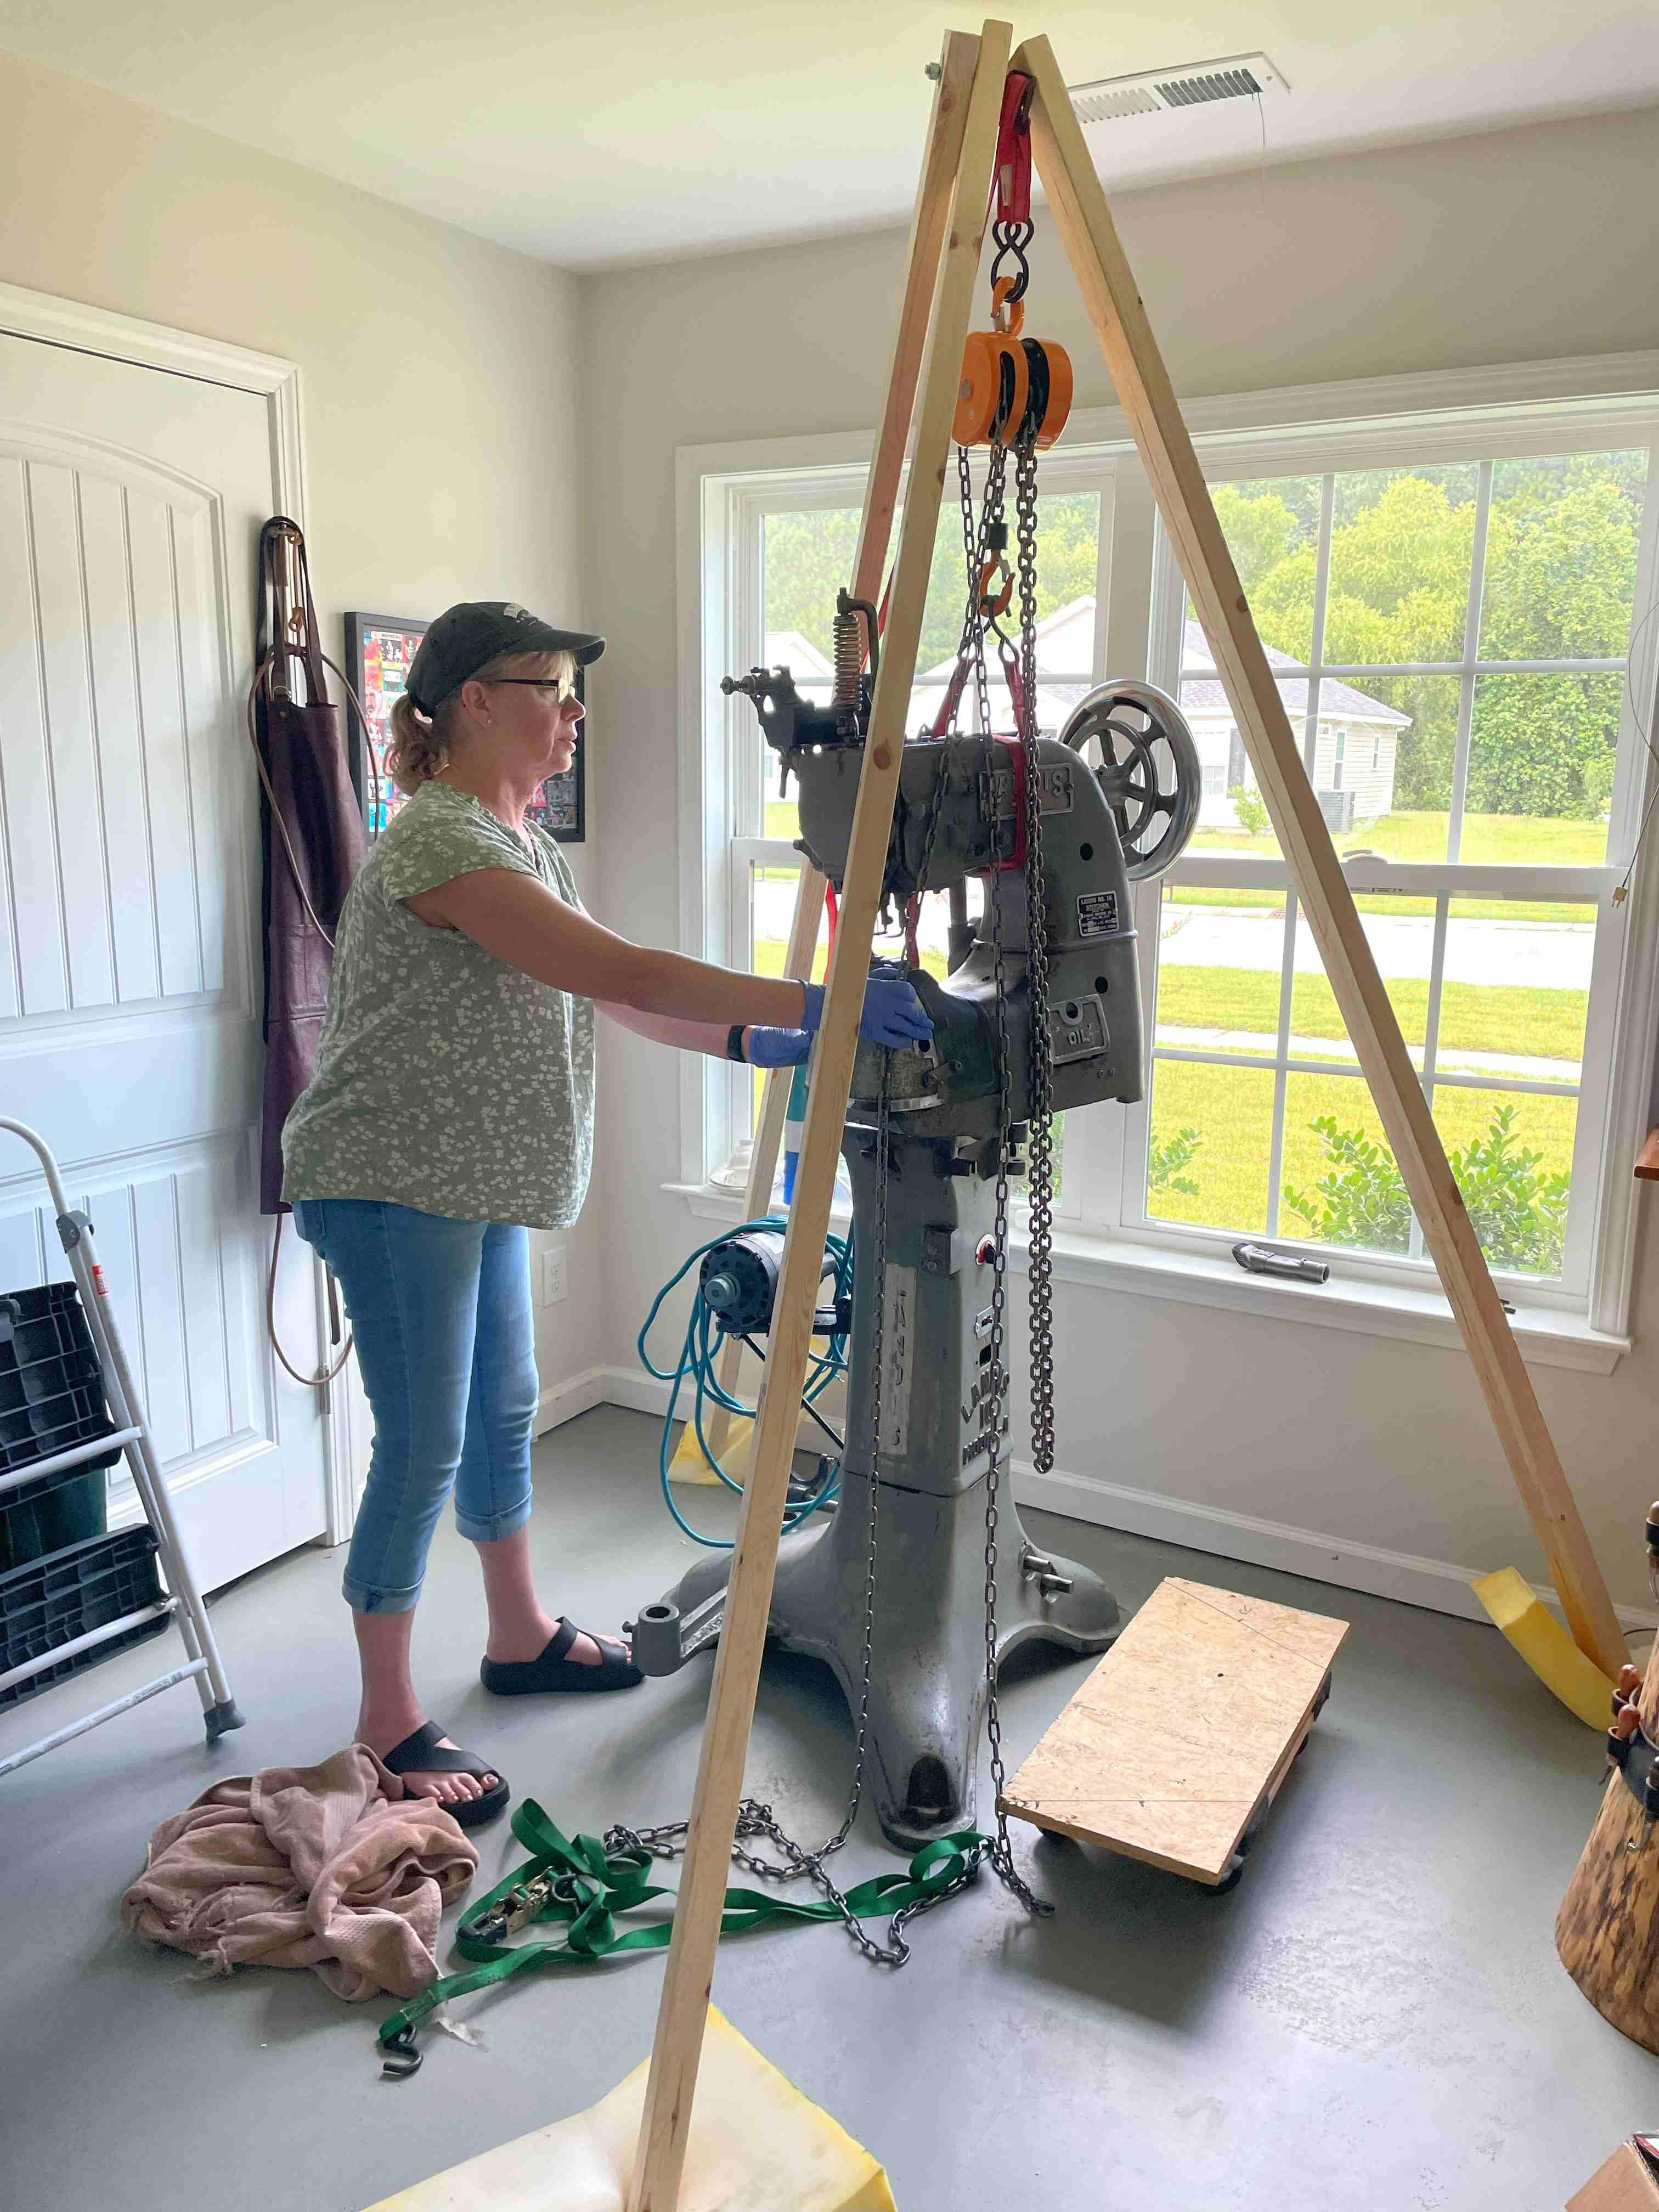
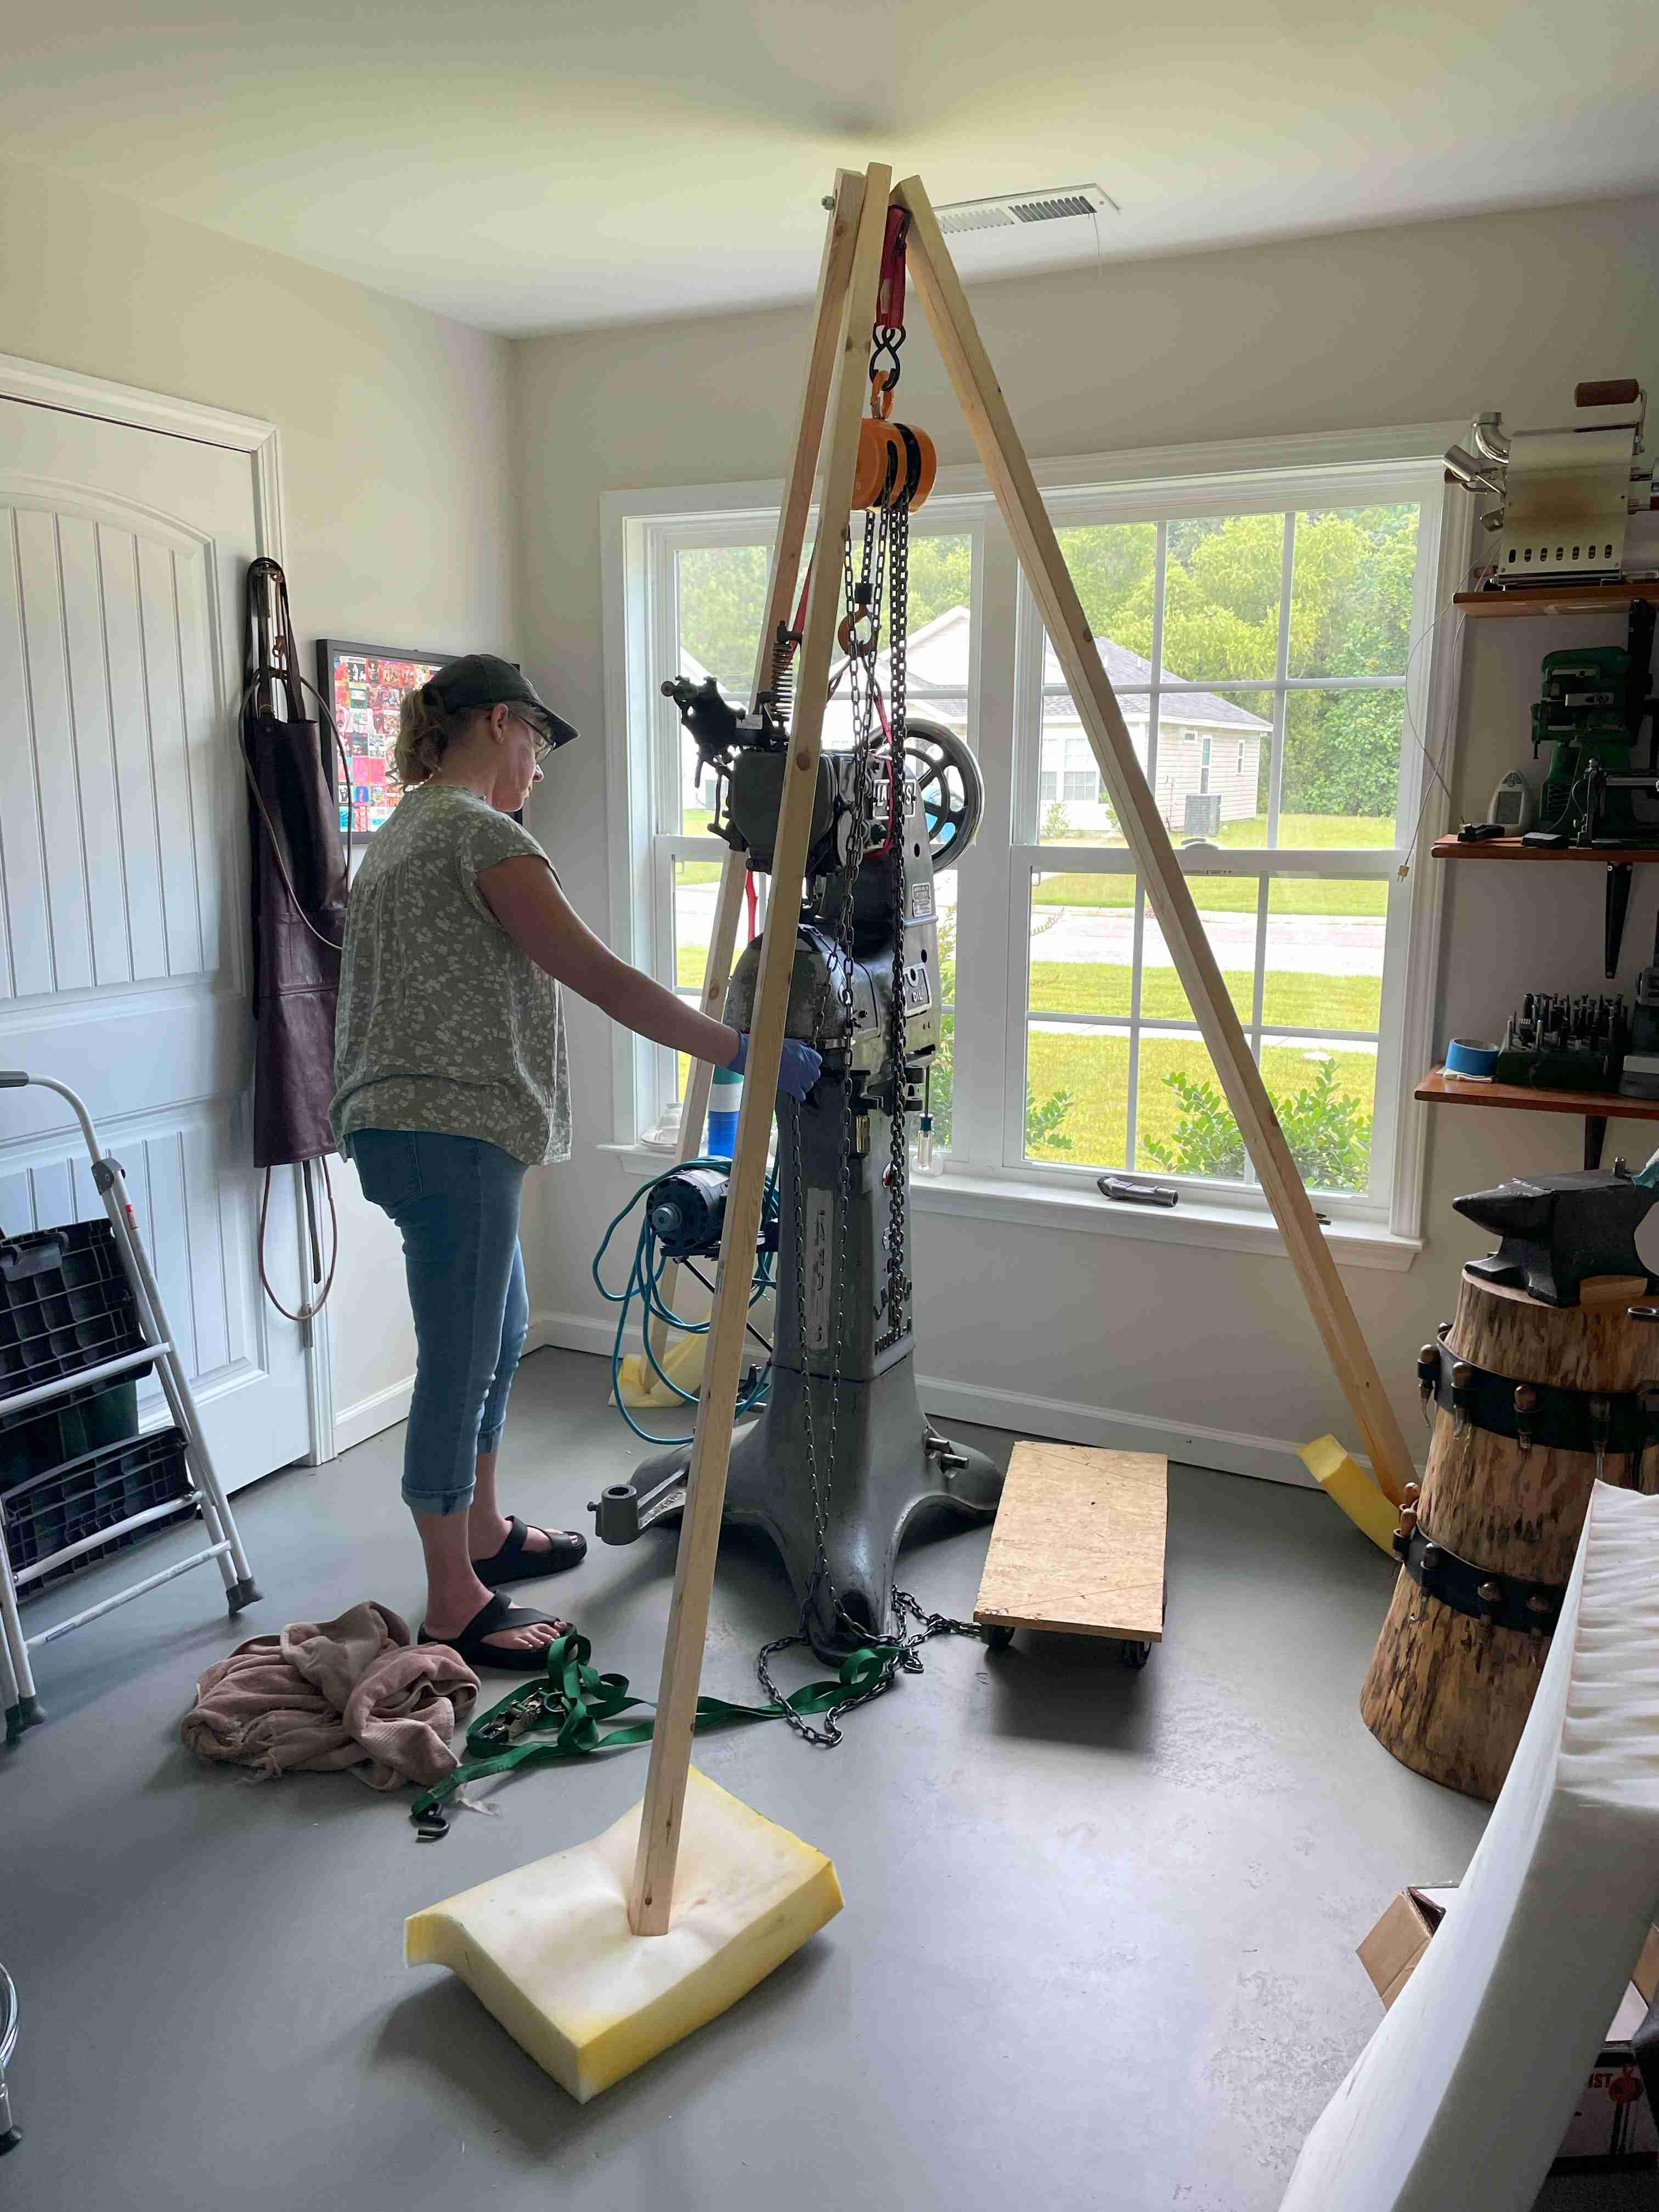
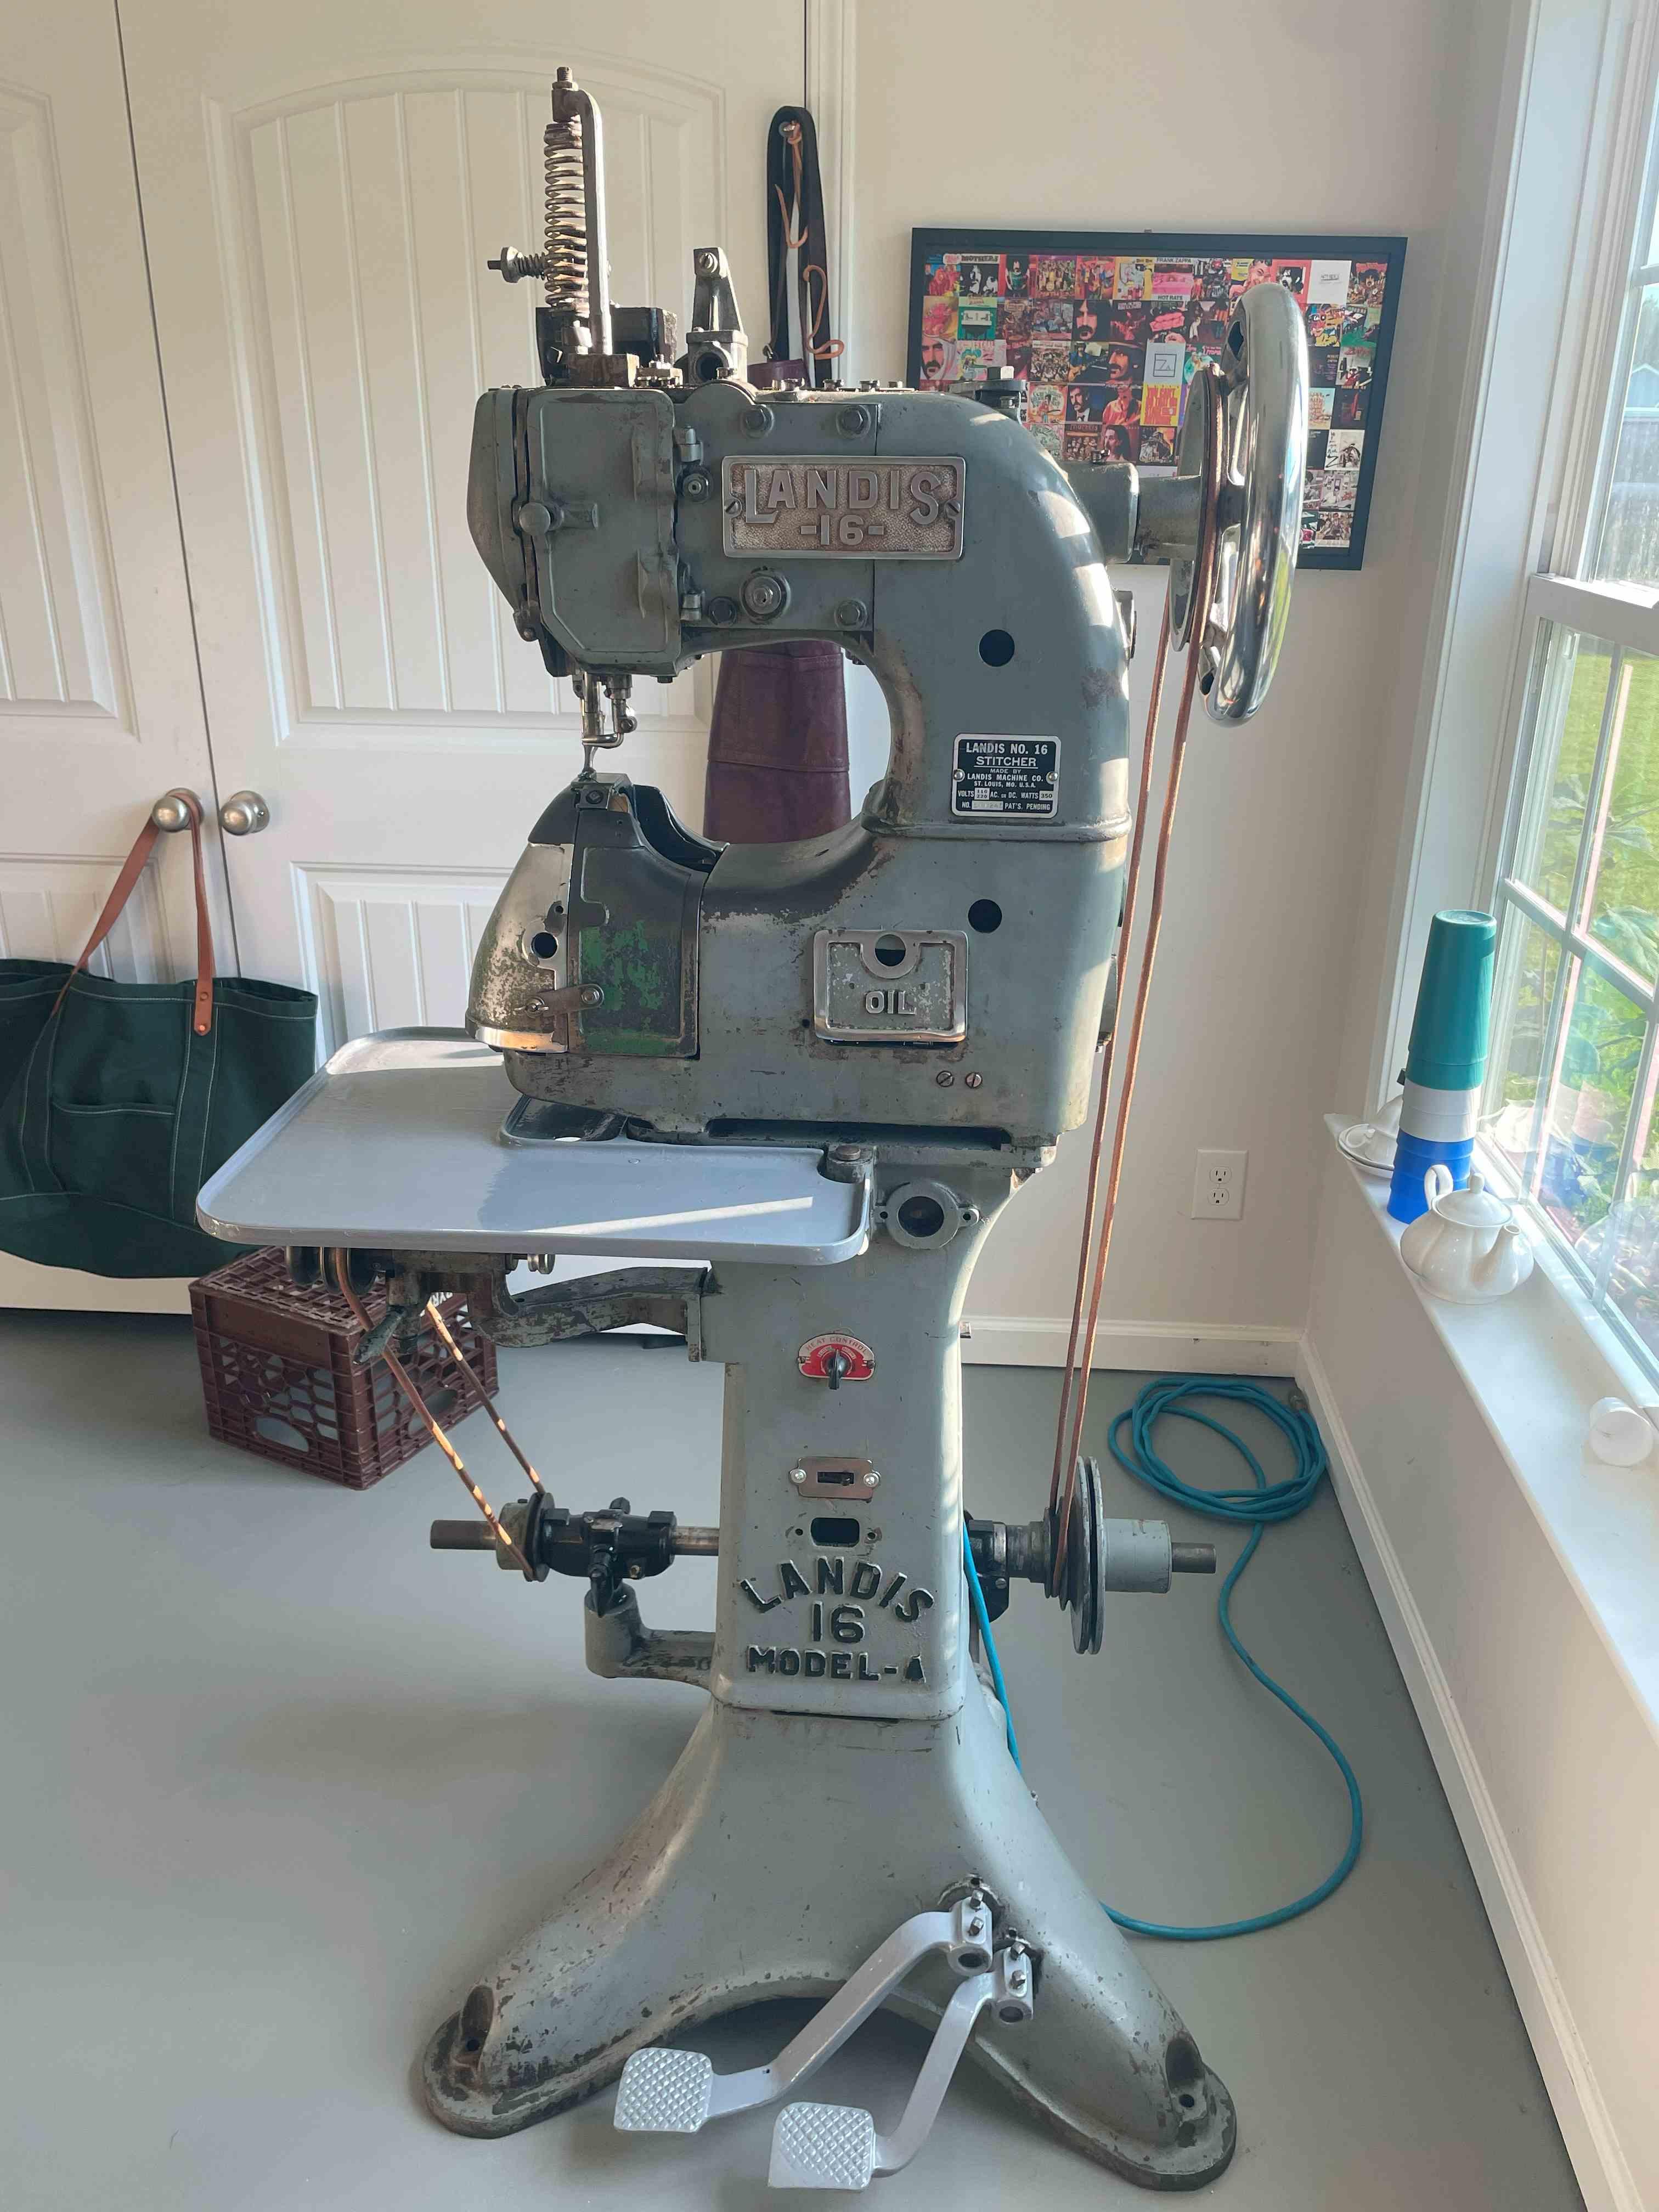
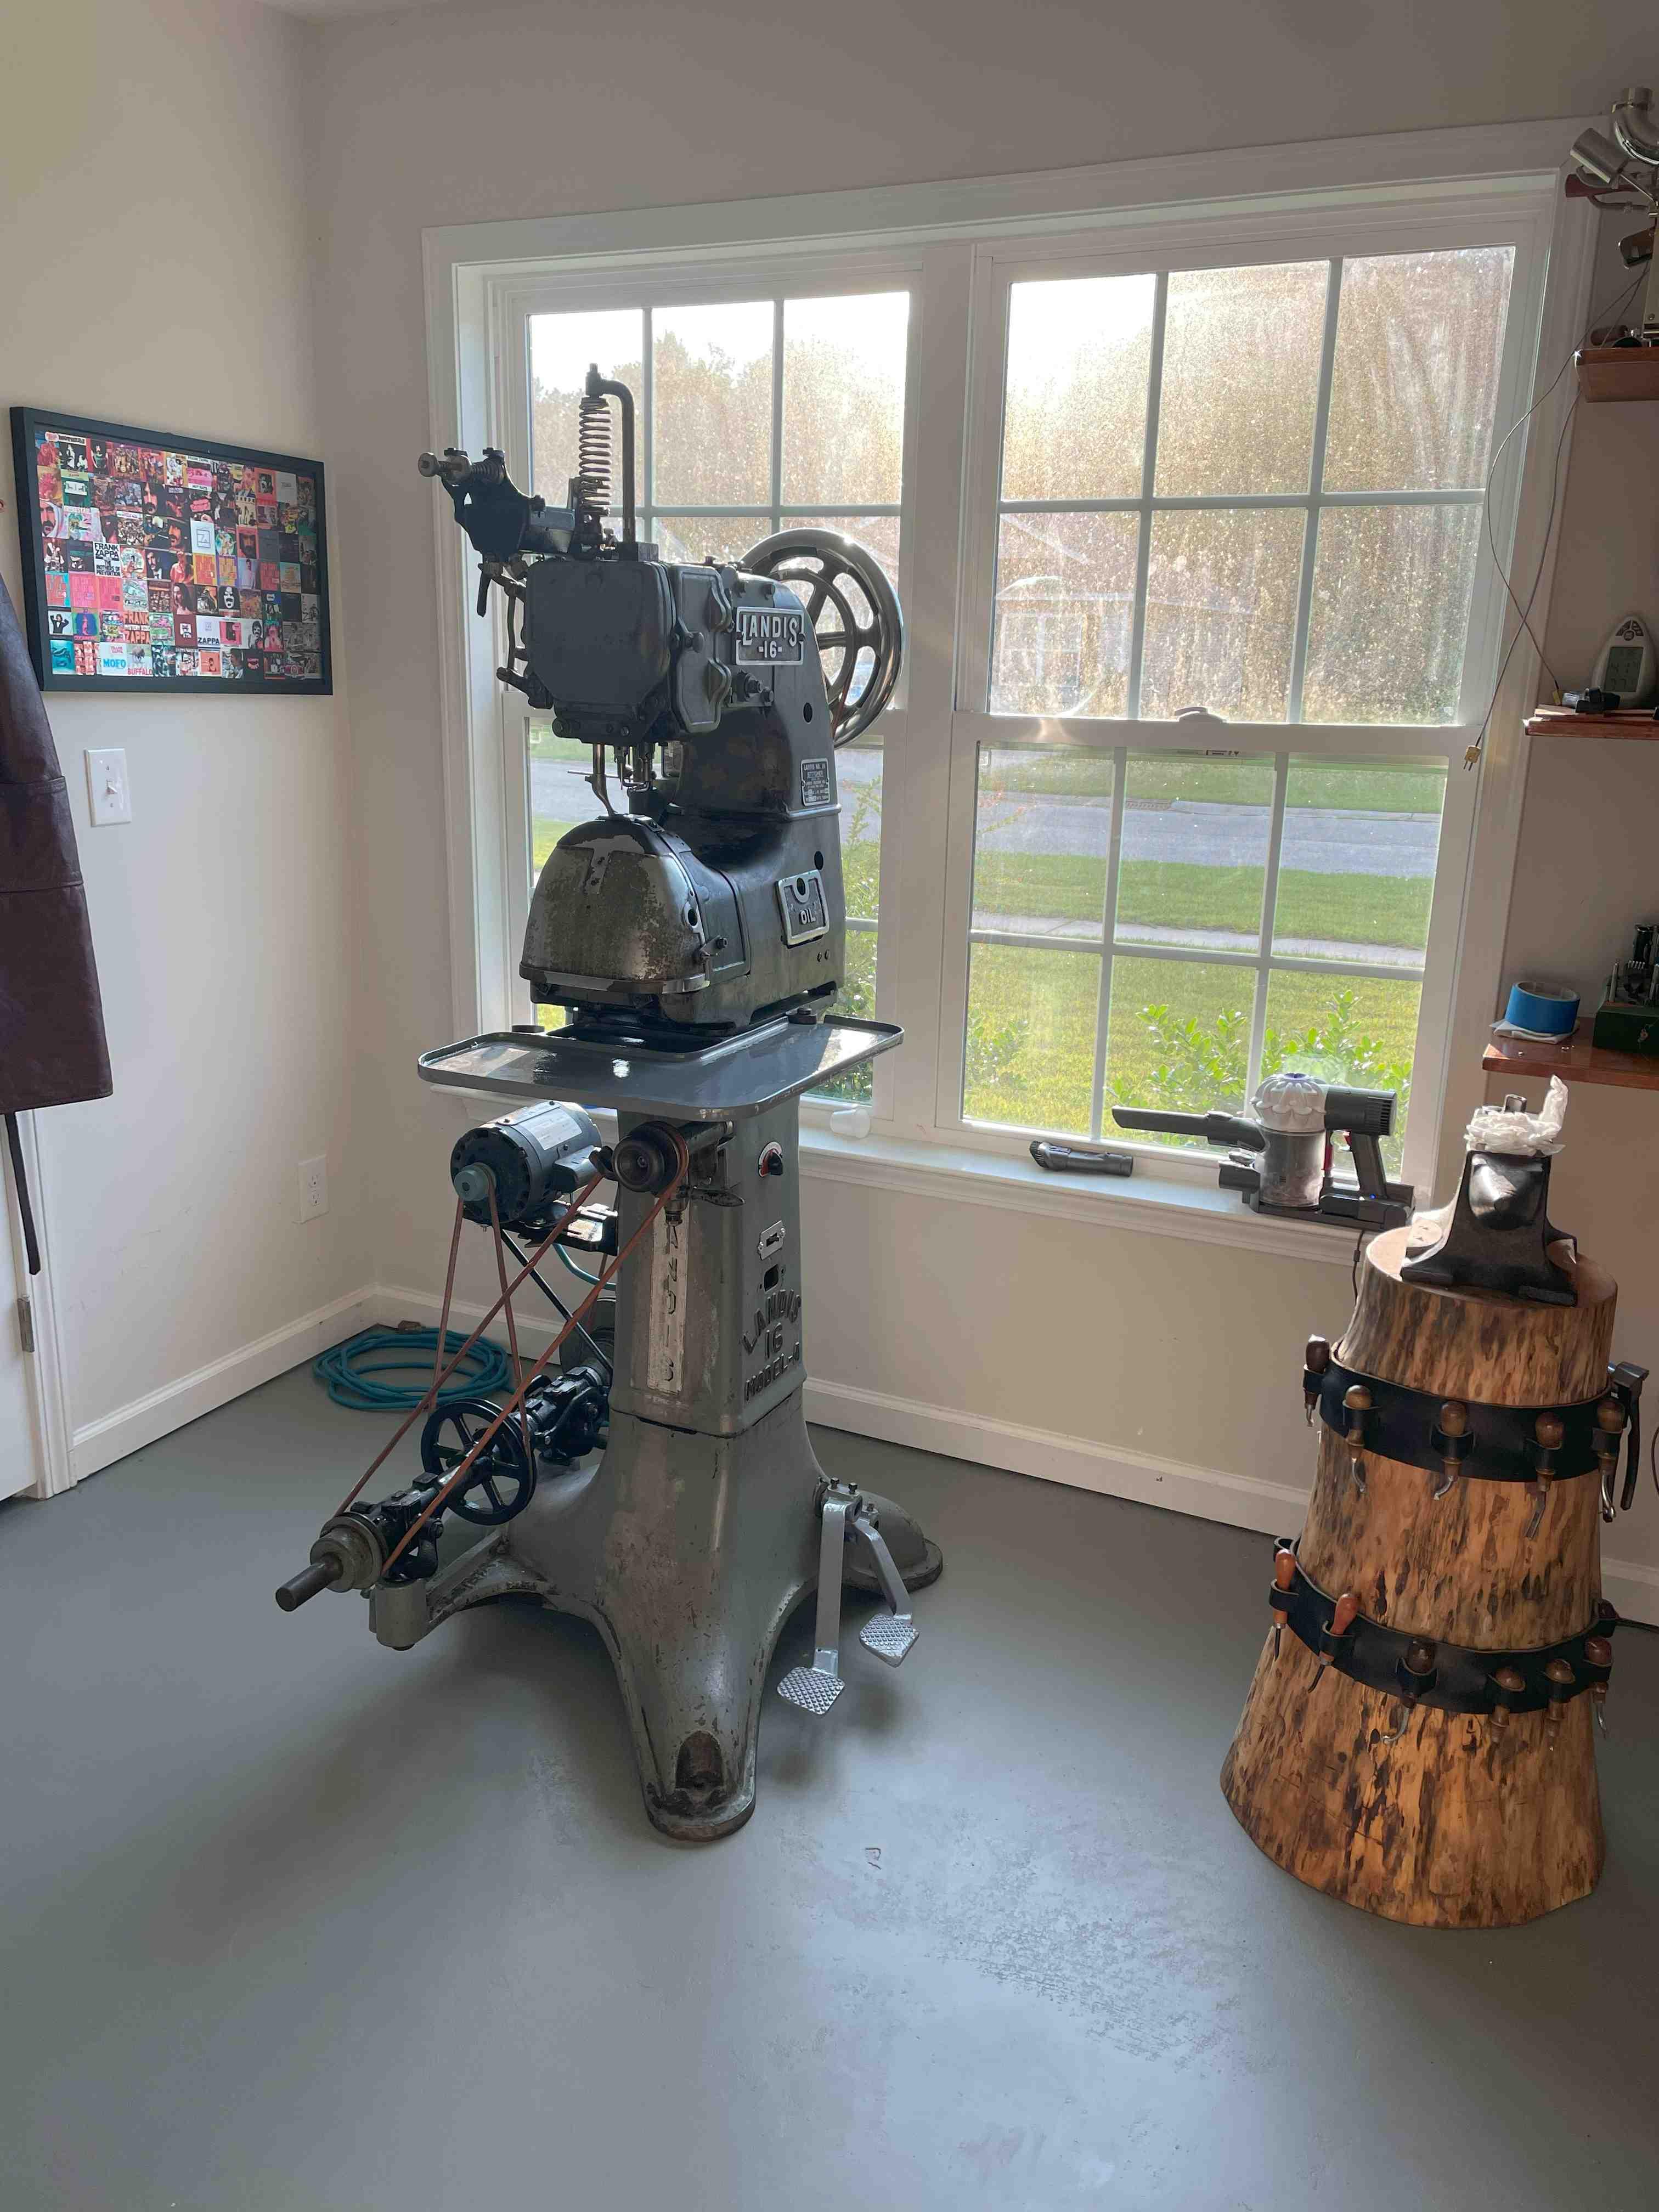
I picked up this machine in Dillsburg PA from Joey Sewing Machine needed to be cleaned up but was a really good deal. I contacted Eli over at Landis Machine Co for a few parts a brass shuttle I sent him the old one and he sent a working one. Had it sewing but there was an issue of it breaking the thread. I sent the machine to Eli and he had to replace a few parts inside the machine it sews like a champ very tight stitch I love this old machine. I picked up the machine last Friday and over the weekend had the wife help me install the head. Eli has a whole shop full of old Landis 16 and other very cool old industrial sewing machines. Eli is a very cool old man 82 and still working on these big machines. It was so cool to meet him and see his shop. I have photos of the old machines I will post later. I live in Georgetown SC..
-
As Cledus said to the Bandit; 'That'll work too'
-

Sewing machine for true moccasin footwear
Cumberland Highpower replied to X24's topic in Leather Sewing Machines
Unfortunately running a UL is a bit of a trade in itself. Unless a guy was sewing 200 units a day that would definitely be the wrong machine and attachment to recommend. If he had 200 to sew, daily I'd say that's right up his alley! I used to have an Adler 205-25 that was built for moccasins. What was the advantage? Hard to say really, because I never saw the good in it. At least on that machine you could set the upper foot to feed more or less relative to the feed dog with easy adjustments. Apparently quite allot of moccasin makers used the 205-25, I've seen a fair number out there. -
Post a couple photos