All Activity
- Past hour
-
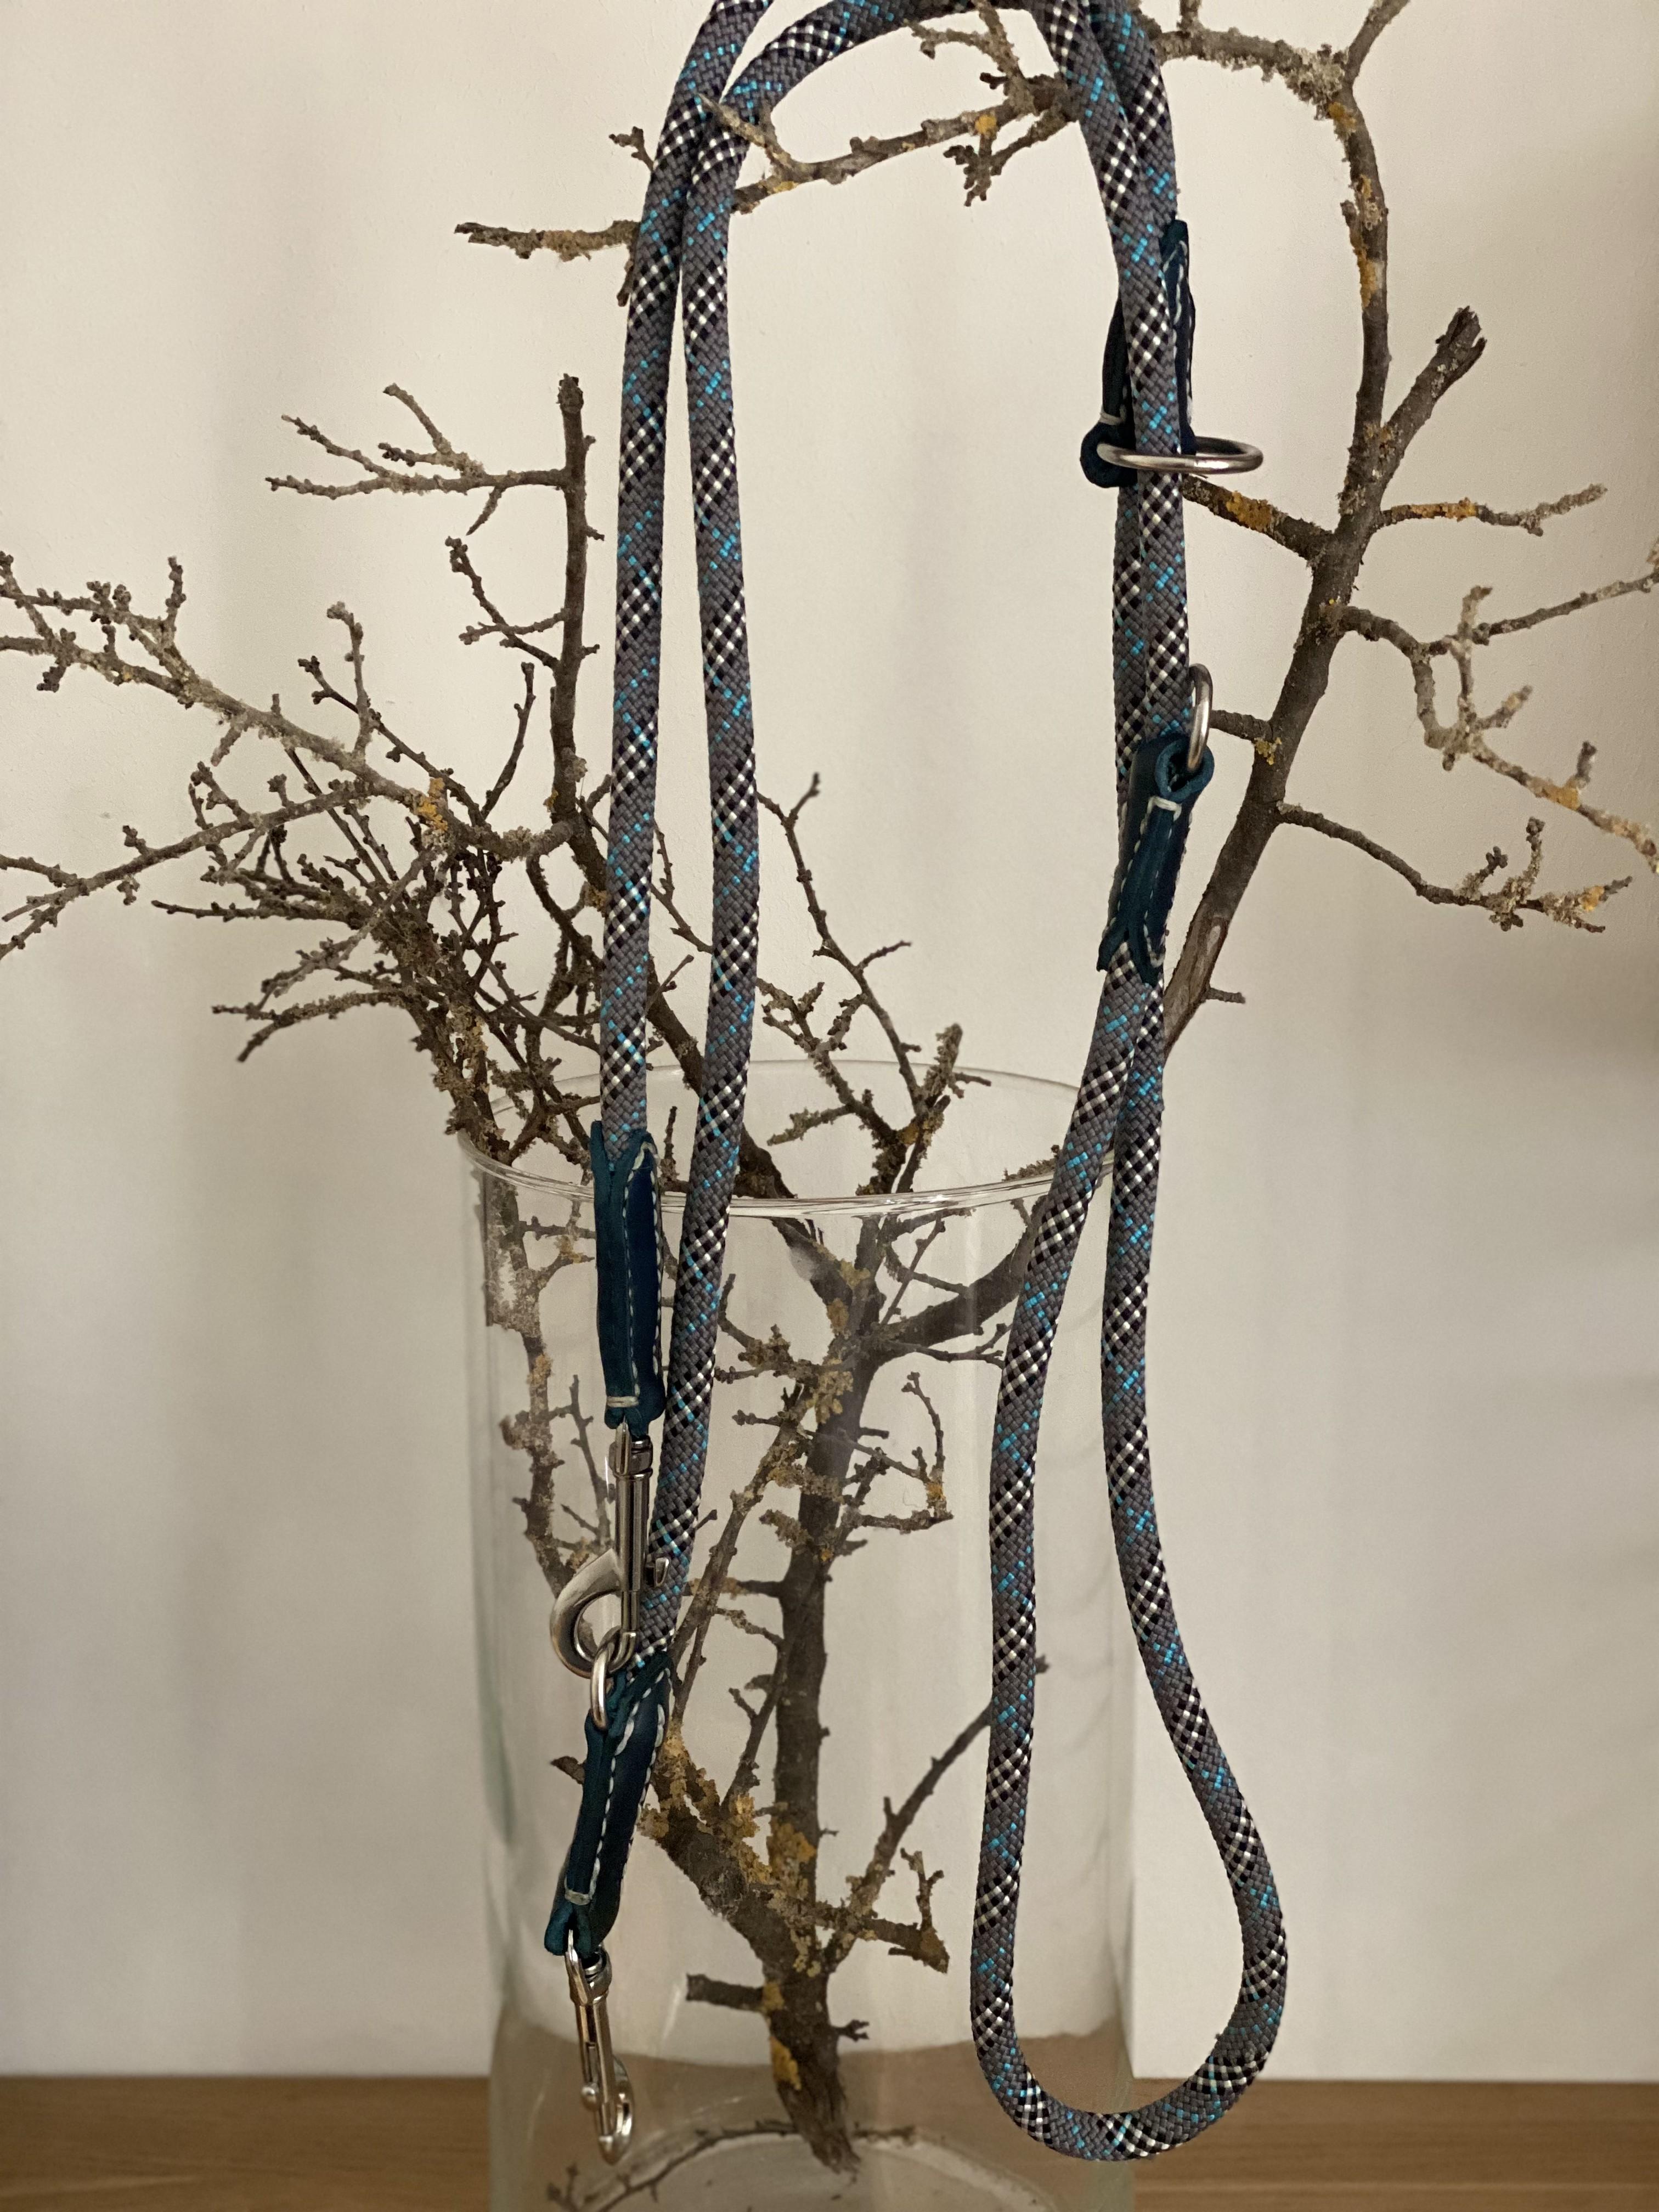
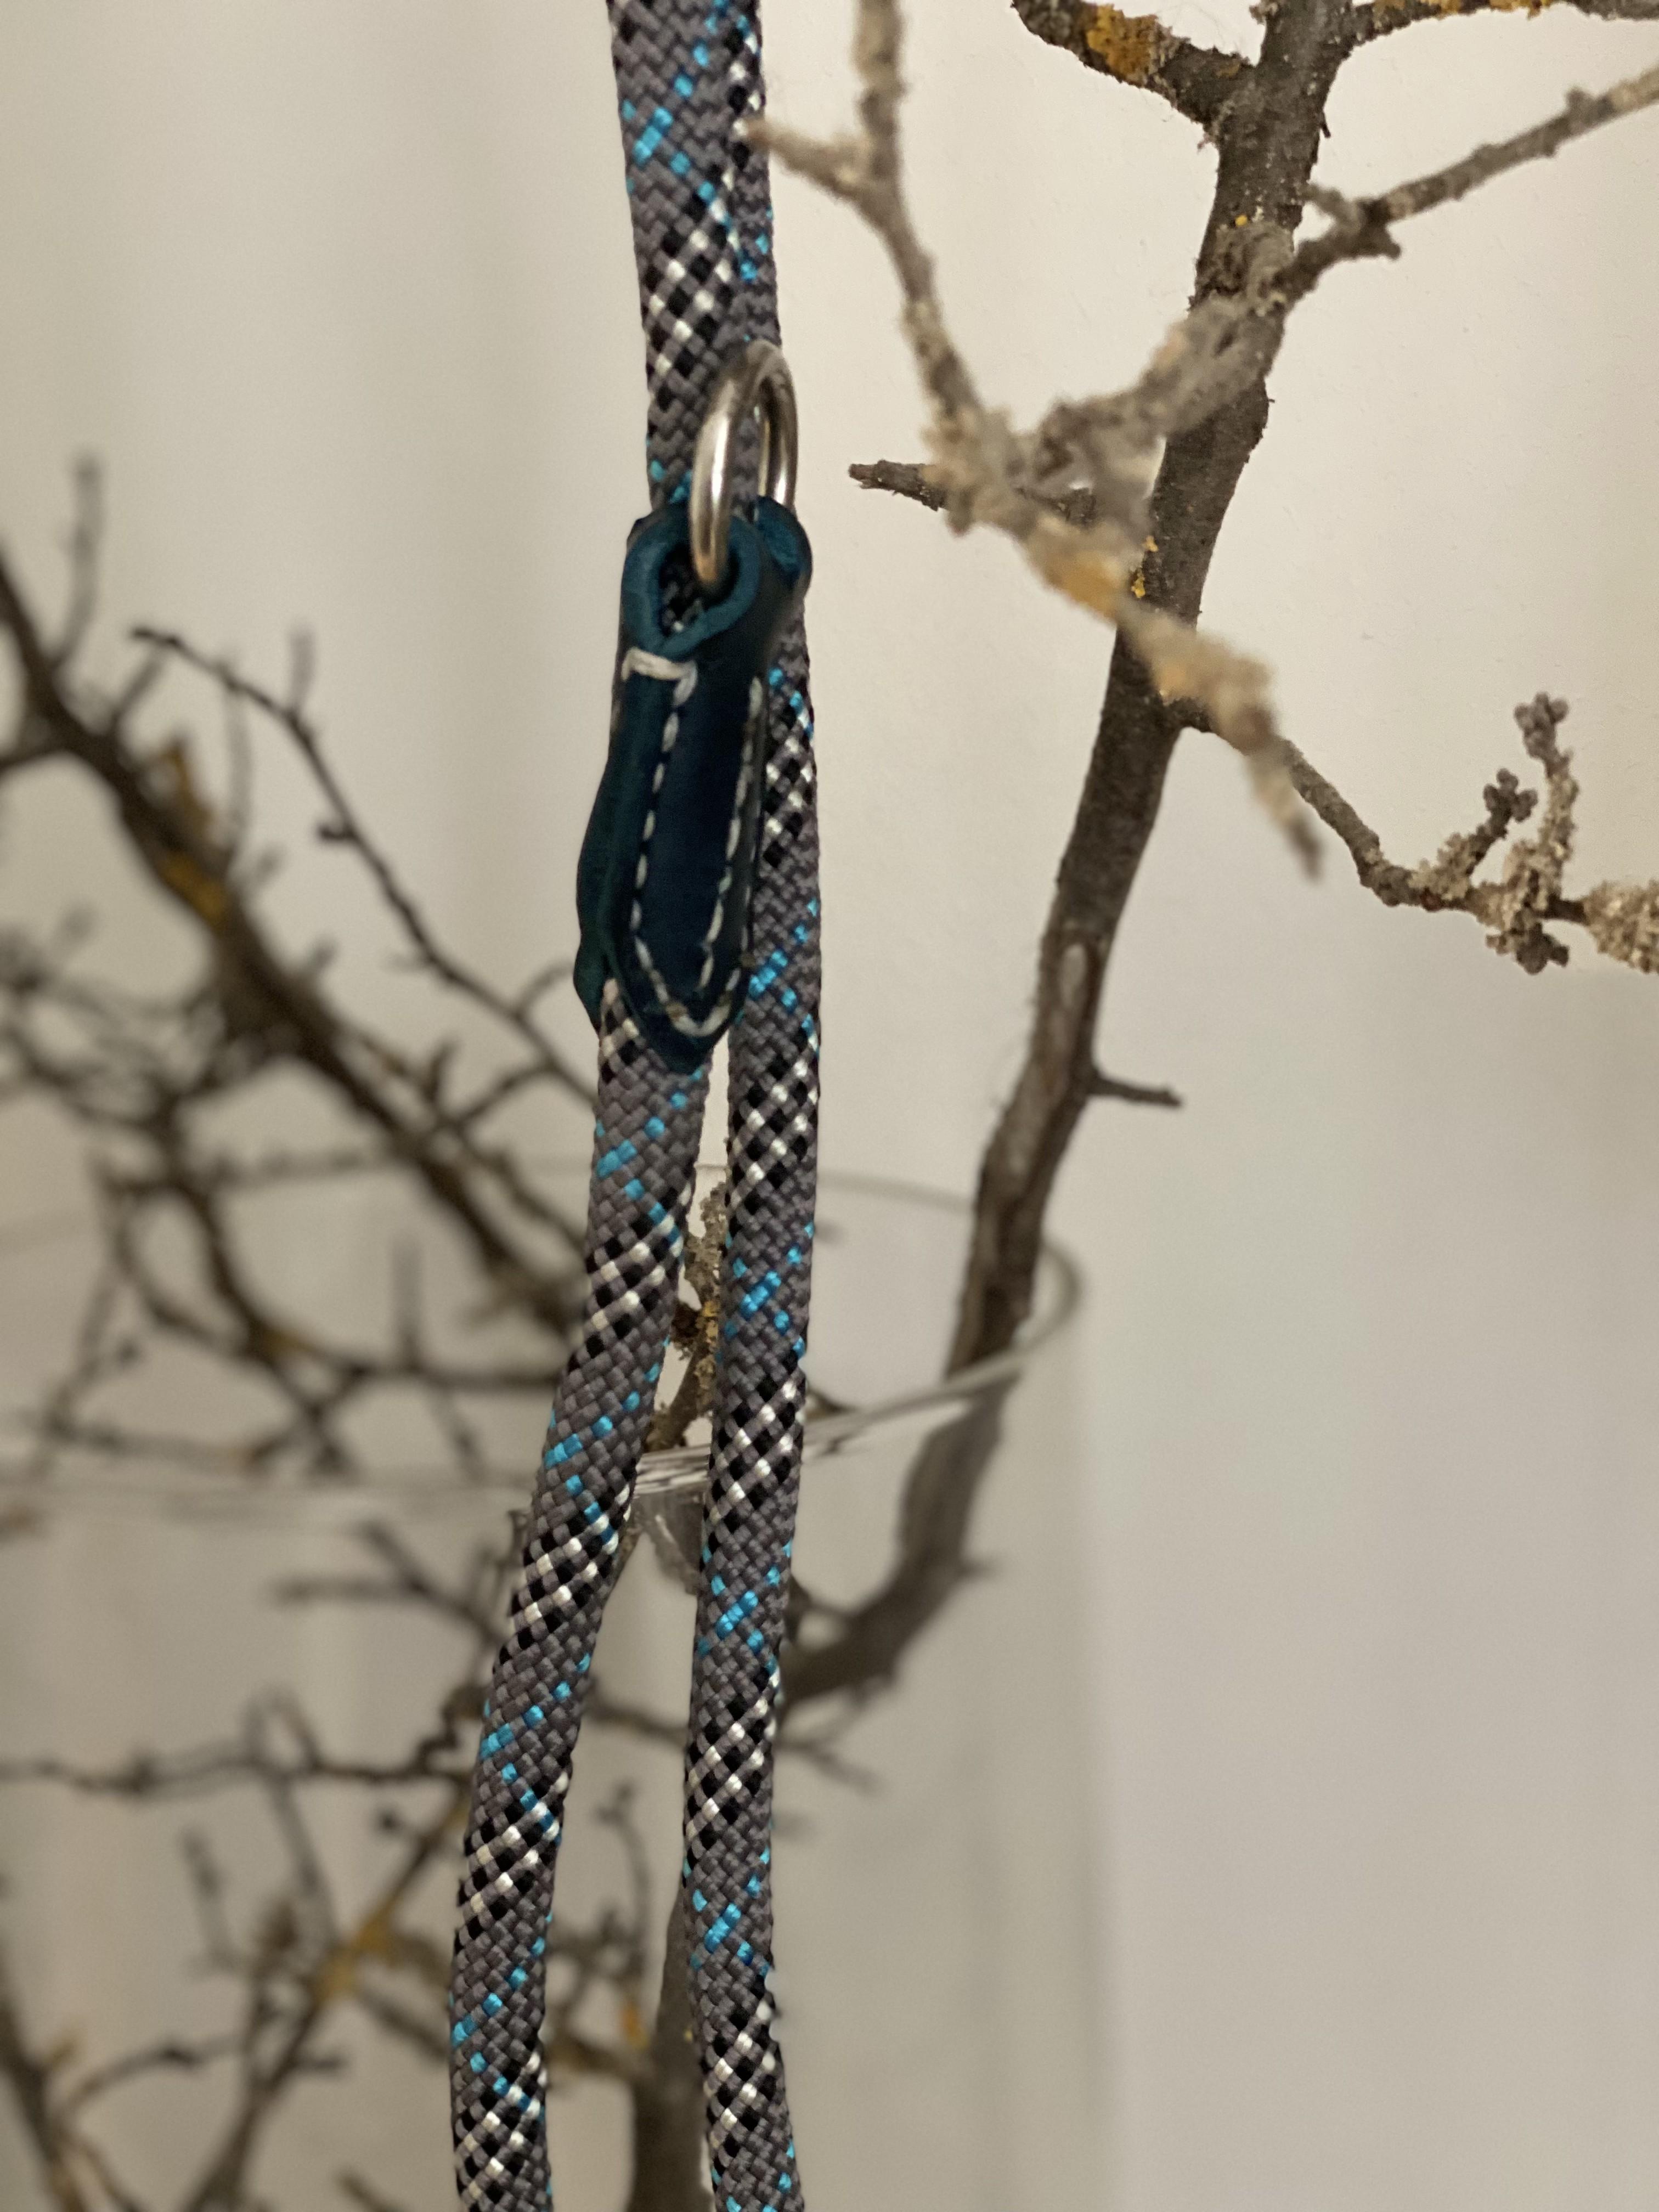
Nicely done I like the collars a real labour of love. The only word of caution is for the more powerful dogs that the dead ending of the rope lead at the clip where the leather folds through the ring of the clip and being secured to the lead by thread is a real weak point. I have seen a lot of that style fail due the leather weakness, wear of the leather, leather rot and thread failure particularly the inexpensive leads. Nothing worst then pulling back on the lead and the dog is gone leaving the owner holding a pretty lead. Since I deal with a wide range of customer breeds I have to be sure that no matter the breed the lead will not fail. To that end for nylon / polyester leads I pull back a couple internal core strands of the rope for about 4-6" (100-150mm), thread the end through the "O" ring, heat compress and melt two #9 copper rivets through. Then I install burrs and cover the end using shrink tubing to cover the end. The shrink tubing helps protect the rope from the dogs that like to chew at the clip. I do the same thing for kennel quick leads ranging in length from 4' to 8' (1.2m to 2.4m). The funny thing is I have a husband and wife who I made a 6' (1.8m) rope lead for the husband and a 4' (1.2m) leather lead for the lady. The dog loves to chew on the point where the clip attaches to the rope and never touches the leather lead. I had to install a extra layer of shrink wrap to protect the rope lead. kgg
-
That's a fact! I like playing with some of the old formulas. When I was handsewing a bunch, I made up coad (handsewing thread wax) with pine pitch and beeswax. Cook it all together and knead it underwater when hot and shape into balls. Fun stuff to use. The old timers had summer and winter formulas that varied the ingredients to make a softer wax for winter and harder wax for summer, since those old shop temperatures varied with the season. My leather edge wax for years was 50:50 beeswax/paraffin. Melt it together and pour into muffin wrappers. I cooked down dark brown spirit dye to make a thick concentrated dye-pigment additive for some cakes to color it. My handle treatment for hammers and tool handles is an old time boiled linseed oil/beeswax/mineral spirits mix to make a paste. It is also good for a rust preventative on knife blades that aren't used much or before storage for the season (filet and hunting knives). In the last couple years I have made a turpentine mix that substitutes for the mineral spirits also. That smells amazing while it cooks and good for handles. The big shop smells great for days. I also make a "finishing wax" with BLO/carnauba wax/turpentine for the final treatment on tight grain exotic wood handles. I pour those pastes into 4 oz balm tins to set up and store. The old guy that taught me a bunch about tools had the saying "Beeswax to stick/paraffin to slide". Old men are generally wise and I follow that advice.
-
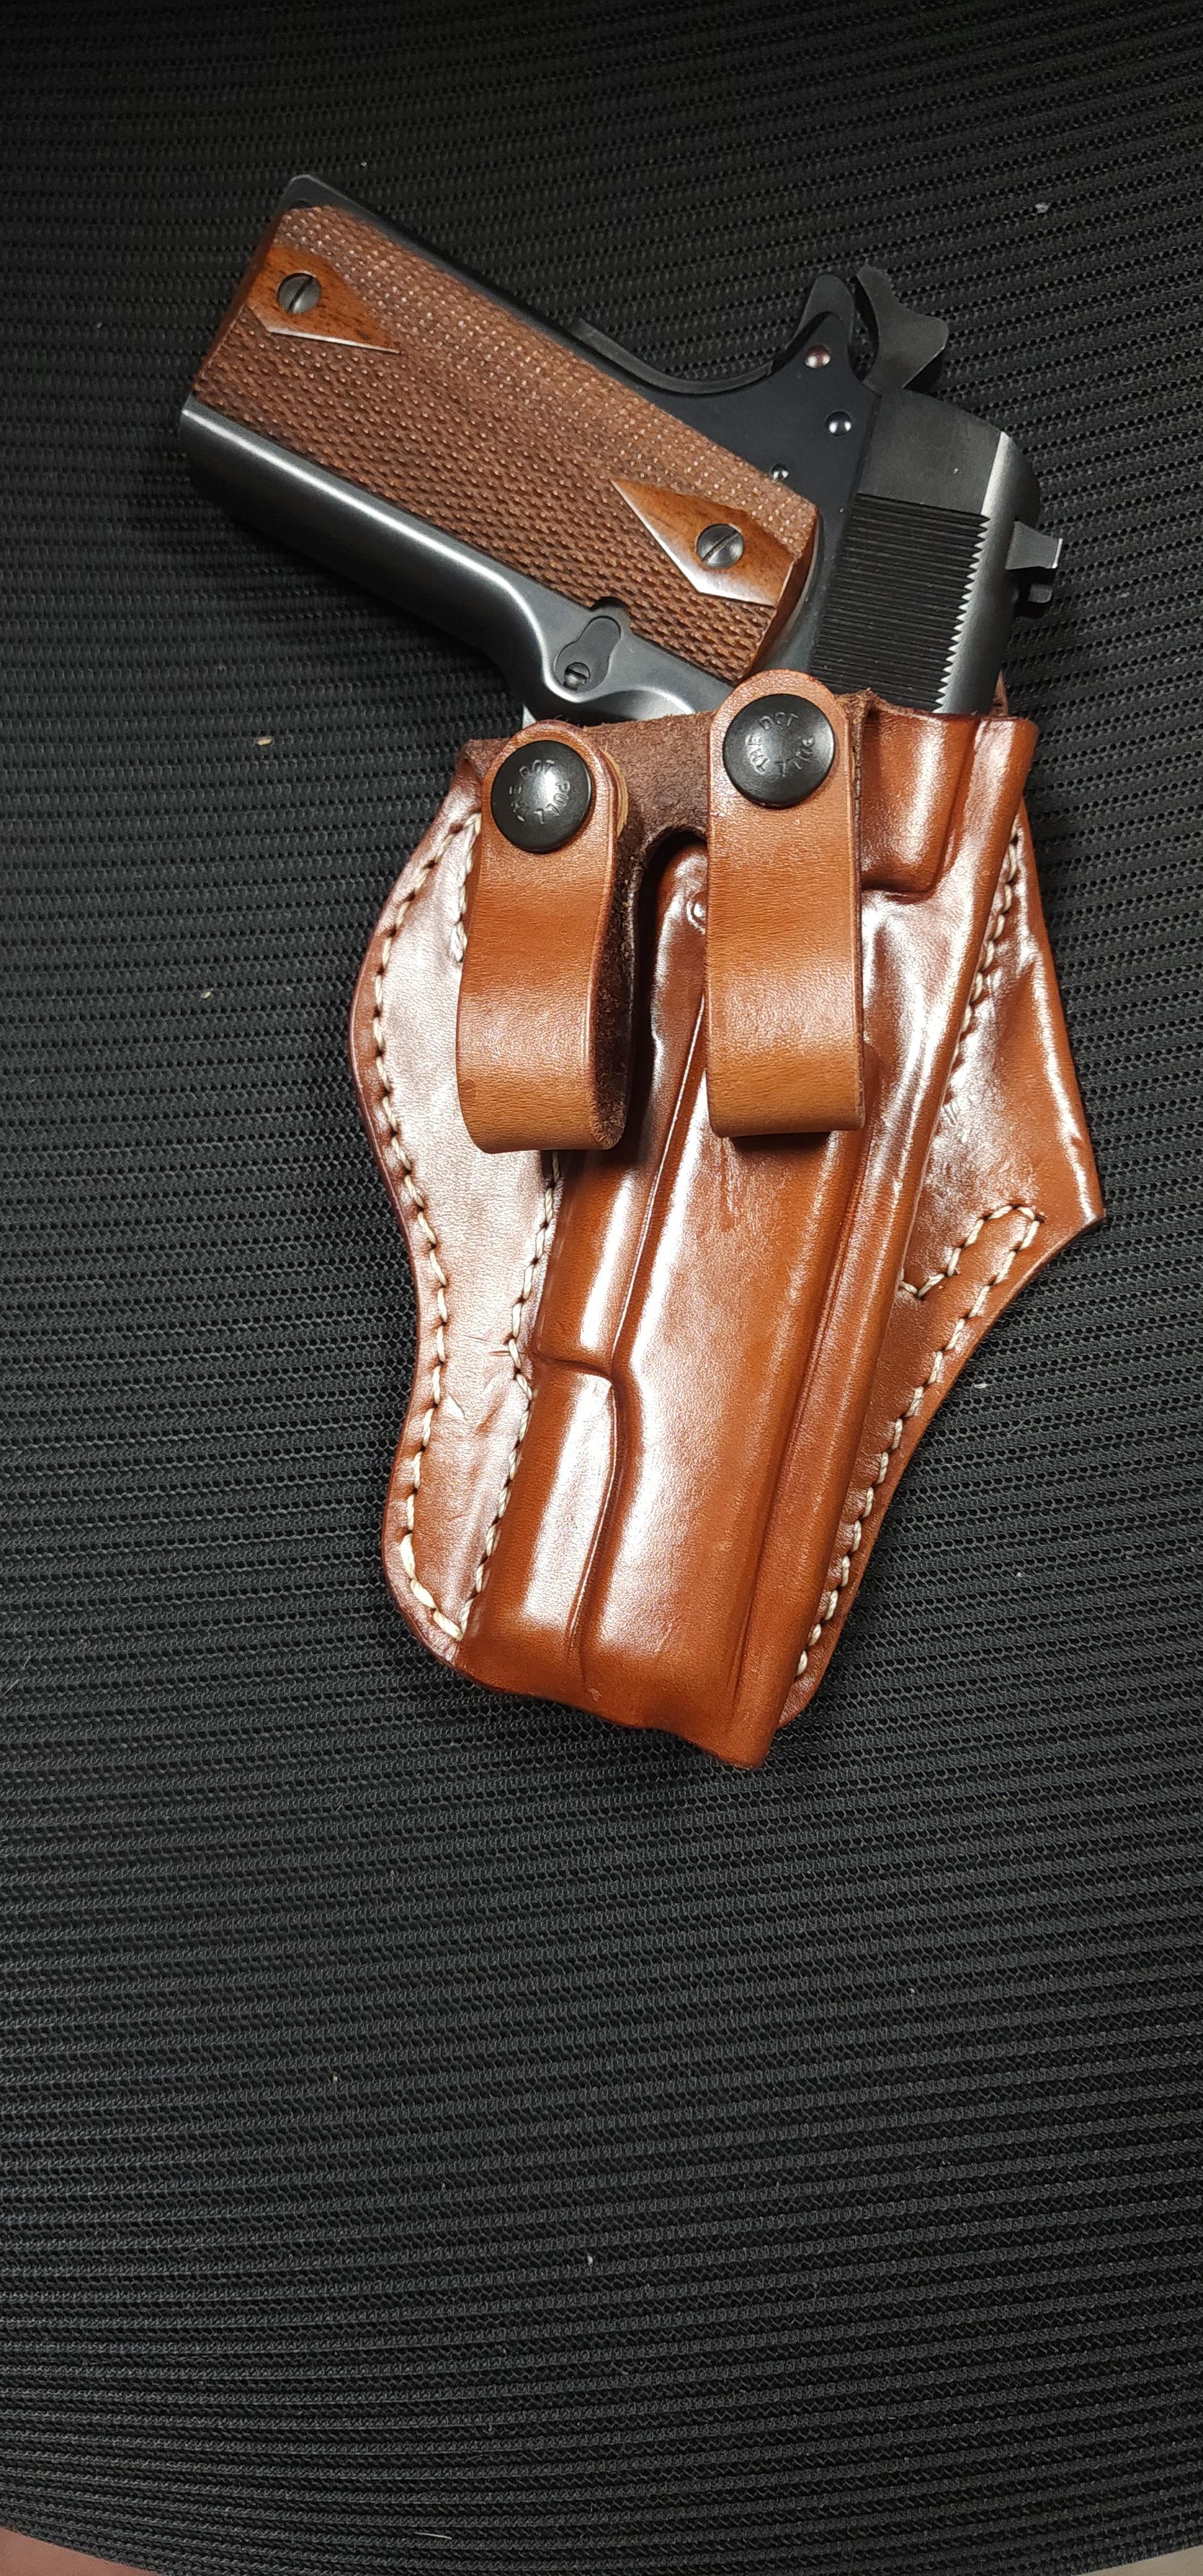
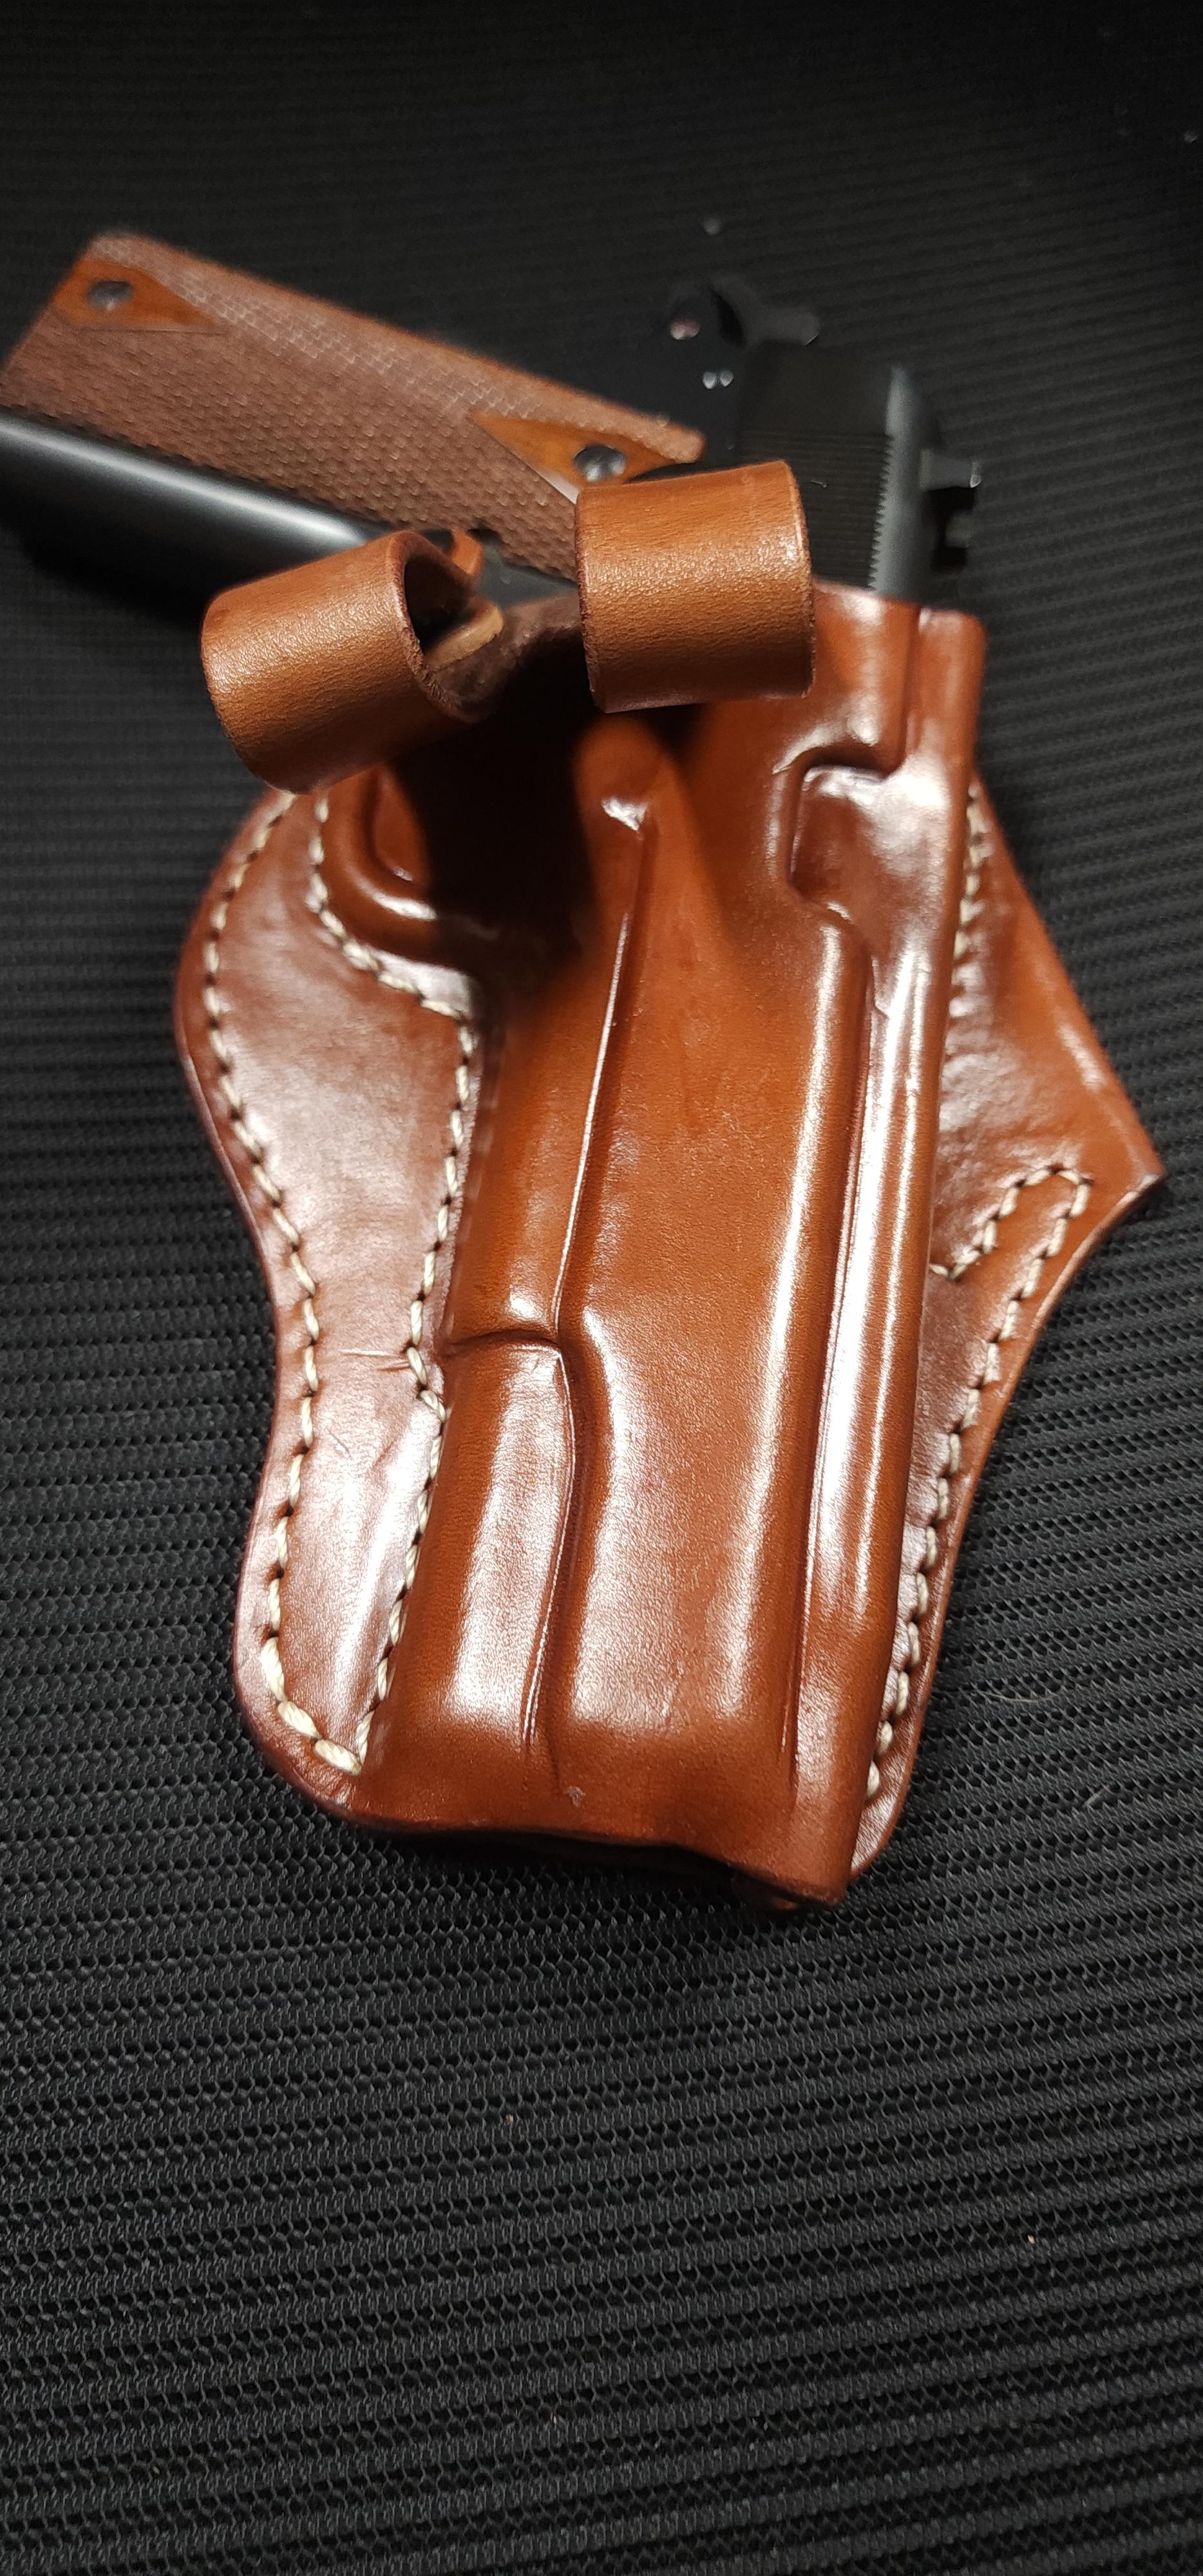
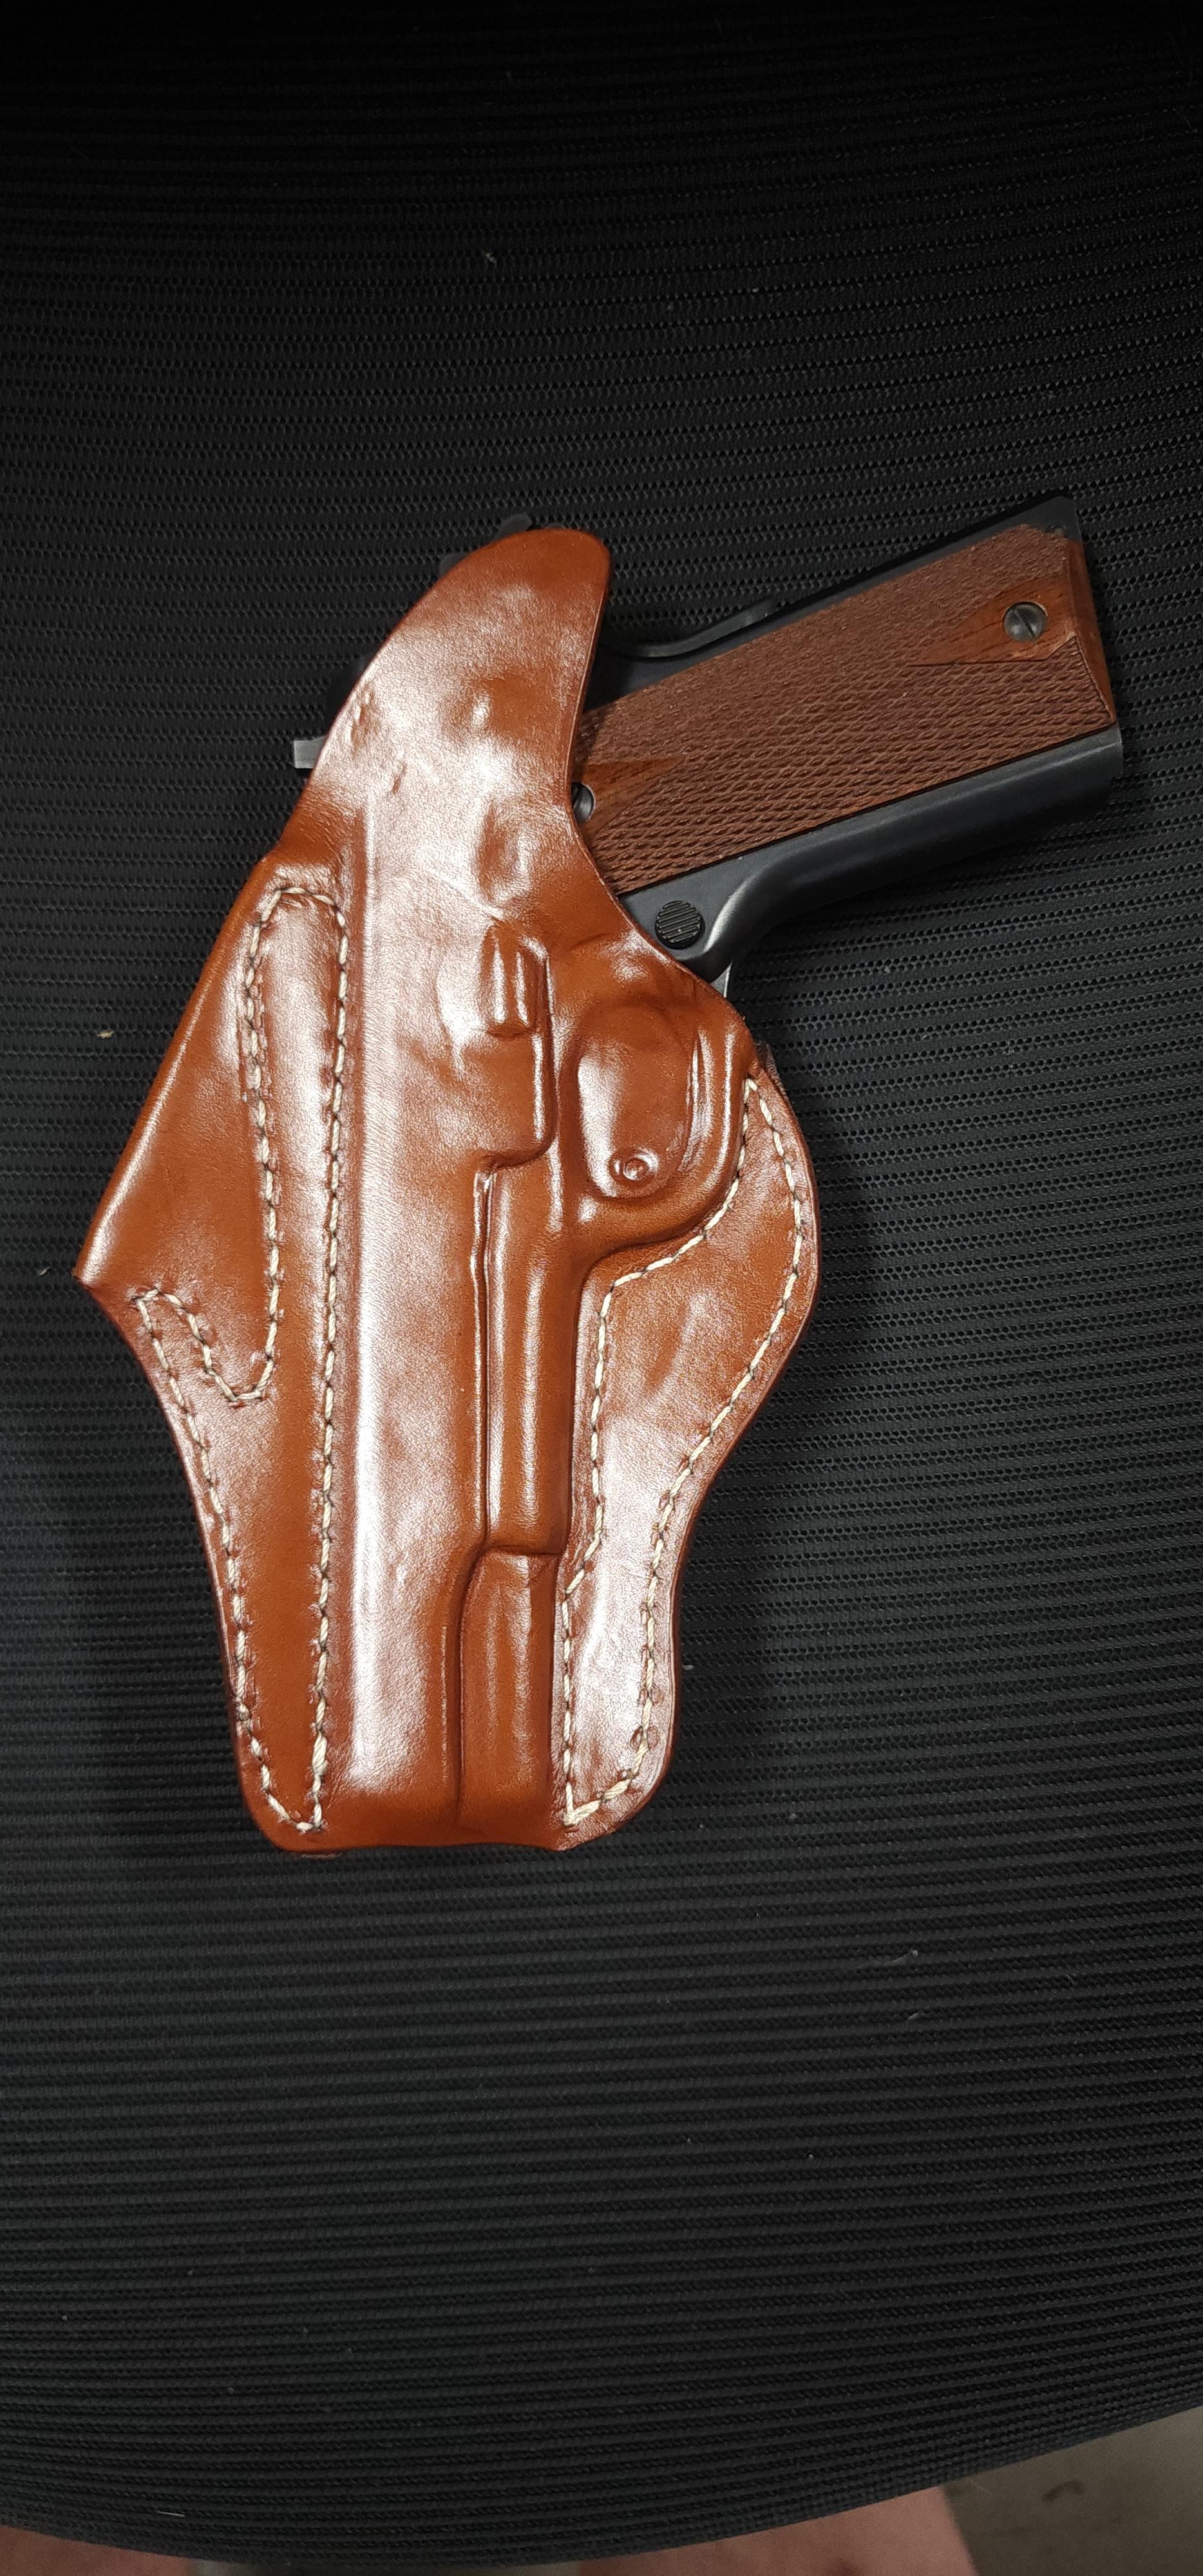
I revised my pattern and came up with this. It is based on Lou Alessi's design but i created the pattern based on photos. It is made from a single piece of leather.
-
Yes, I just googled it, and draw reins are what I am talking about. I just gambled with a direct translation from Danish :-) Here they are called: glidetøjler. glide = slip or slide, tøjler = reins. Brgds Jonas
-
Good looking leads and collars! I like the way you sewed the chapes on the ends of the rope leads. You are motivating me to make a leather collar for our new border collie rescue. He arrived a week ago and we've been his foster home until today when the mandatory hold on adoption is over and we can officially claim him as our own. We have another border collie who is teaching him how to (mis)behave around the farm.
- Today
-
 Nice work! Welcome to the forum!
 -
Google image search says it's a Singer 7-33. https://www.google.com/search?vsrid=CMGasciNpZWkahACGAEiJDA3ZDlkMGM2LTVlMDMtNGRiYS04NThjLTA3NDMzYjljNzZhYTIGIgJnaCgKOIz6m8nV9o8D&vsint=CAIqDAoCCAcSAggKGAEgATojChYNAAAAPxUAAAA_HQAAgD8lAACAPzABEIAIGIAGJQAAgD8&udm=26&lns_mode=un&source=lns.web.gisbubb&vsdim=1024,768&gsessionid=24dj2mh4nfiLTSphHqJfHudhqACKQKBxlDVm2yspEKbM25XhmrRn0A&lsessionid=U9iFFpQDbhz8KncIZ7XjX8c_1DDP_O5CbKsLDwO4GzJa1yPHkLRbRA&lns_surface=26&authuser=0&lns_vfs=e&qsubts=1758897977399&biw=1920&bih=903&hl=en#vhid=v6WRbHUhptf8PM&vssid=mosaic Here's the pdf for it. The 7-31 is similar to the 7-33 and uses the same manual. http://hensewfiles.com/PDFs/SINGER 7-31.pdf
-
 Thanks for posting! Your original artwork is superb. I especially like the belt. OK, it's a tossup between the belt and the satchel with the planets. Beautiful work.
 -
The Chicago screws are a good idea - for the next one. This older client's saddle was in good shape, and I am guessing that she had taken a break from riding and was returning to it.
-
I've been asked to come look at this machine. They say they think it is "out of time". I can time almost anything, if that is the problem. Can anyone tell me the model? Any suggestions or resources? Thanks!

-
 Really nice work! And welcome to this forum. The belt is stunning! Is it machine or hand-sewn? Best, Tove
 -
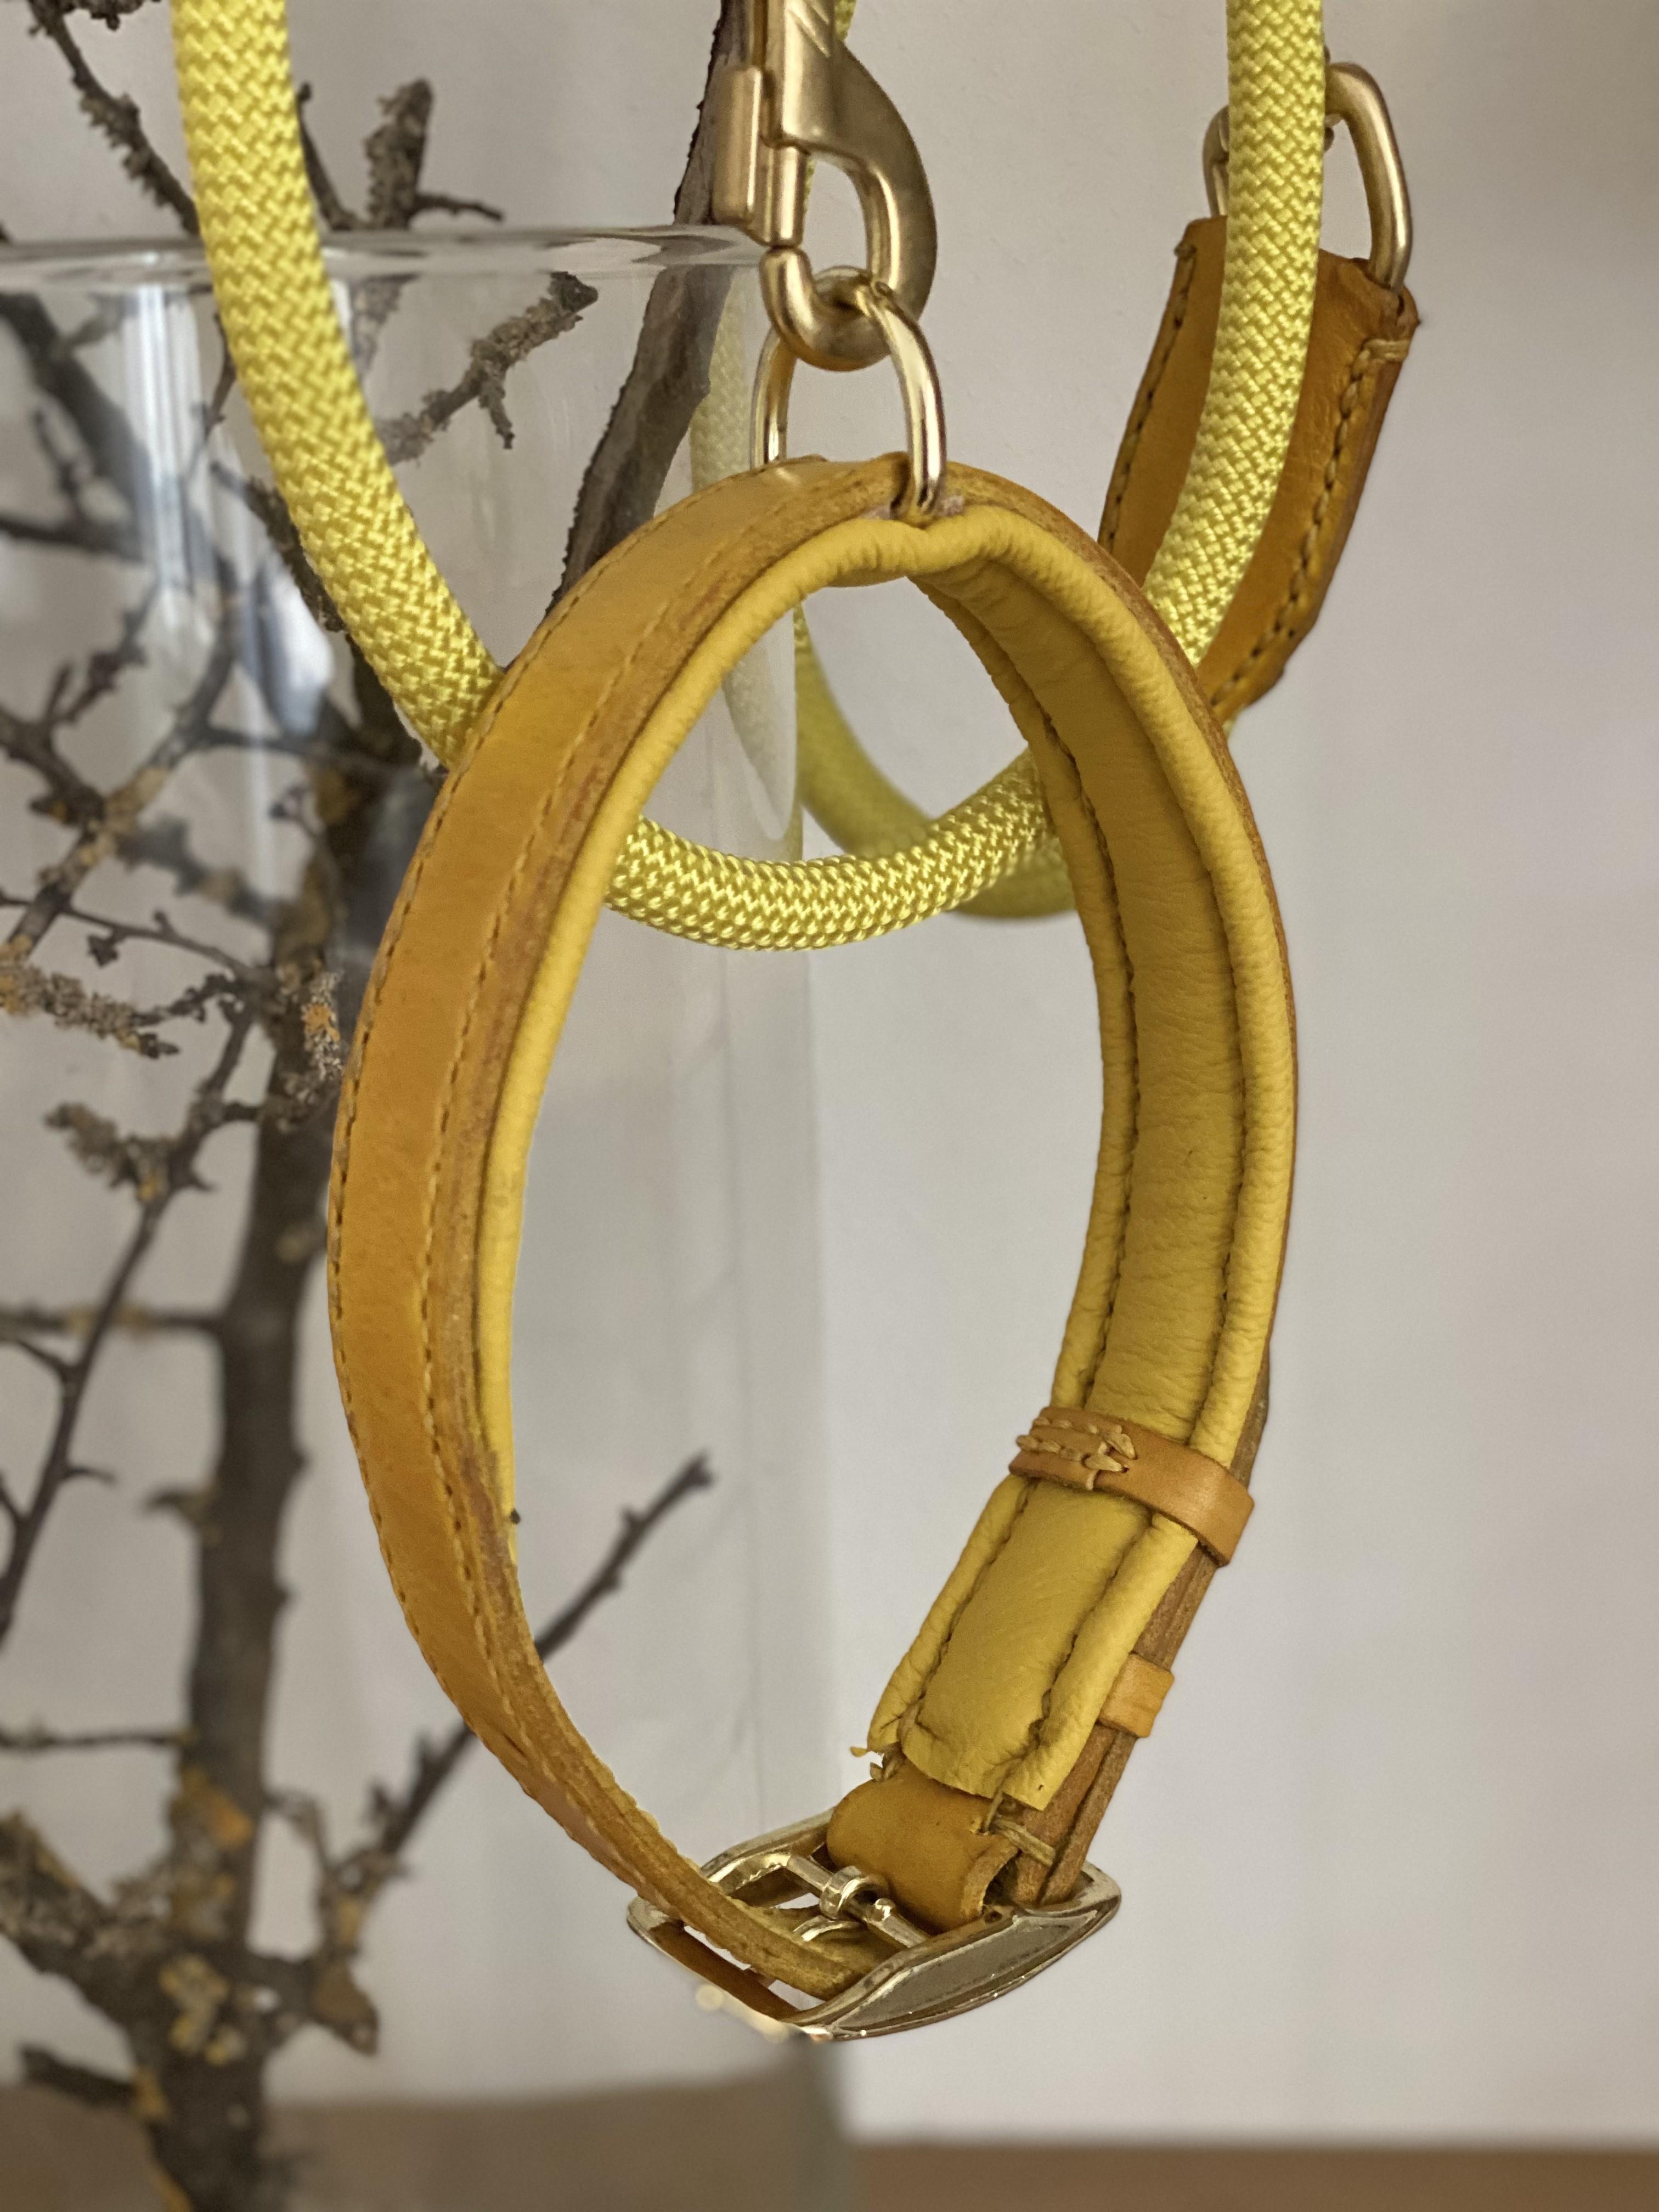
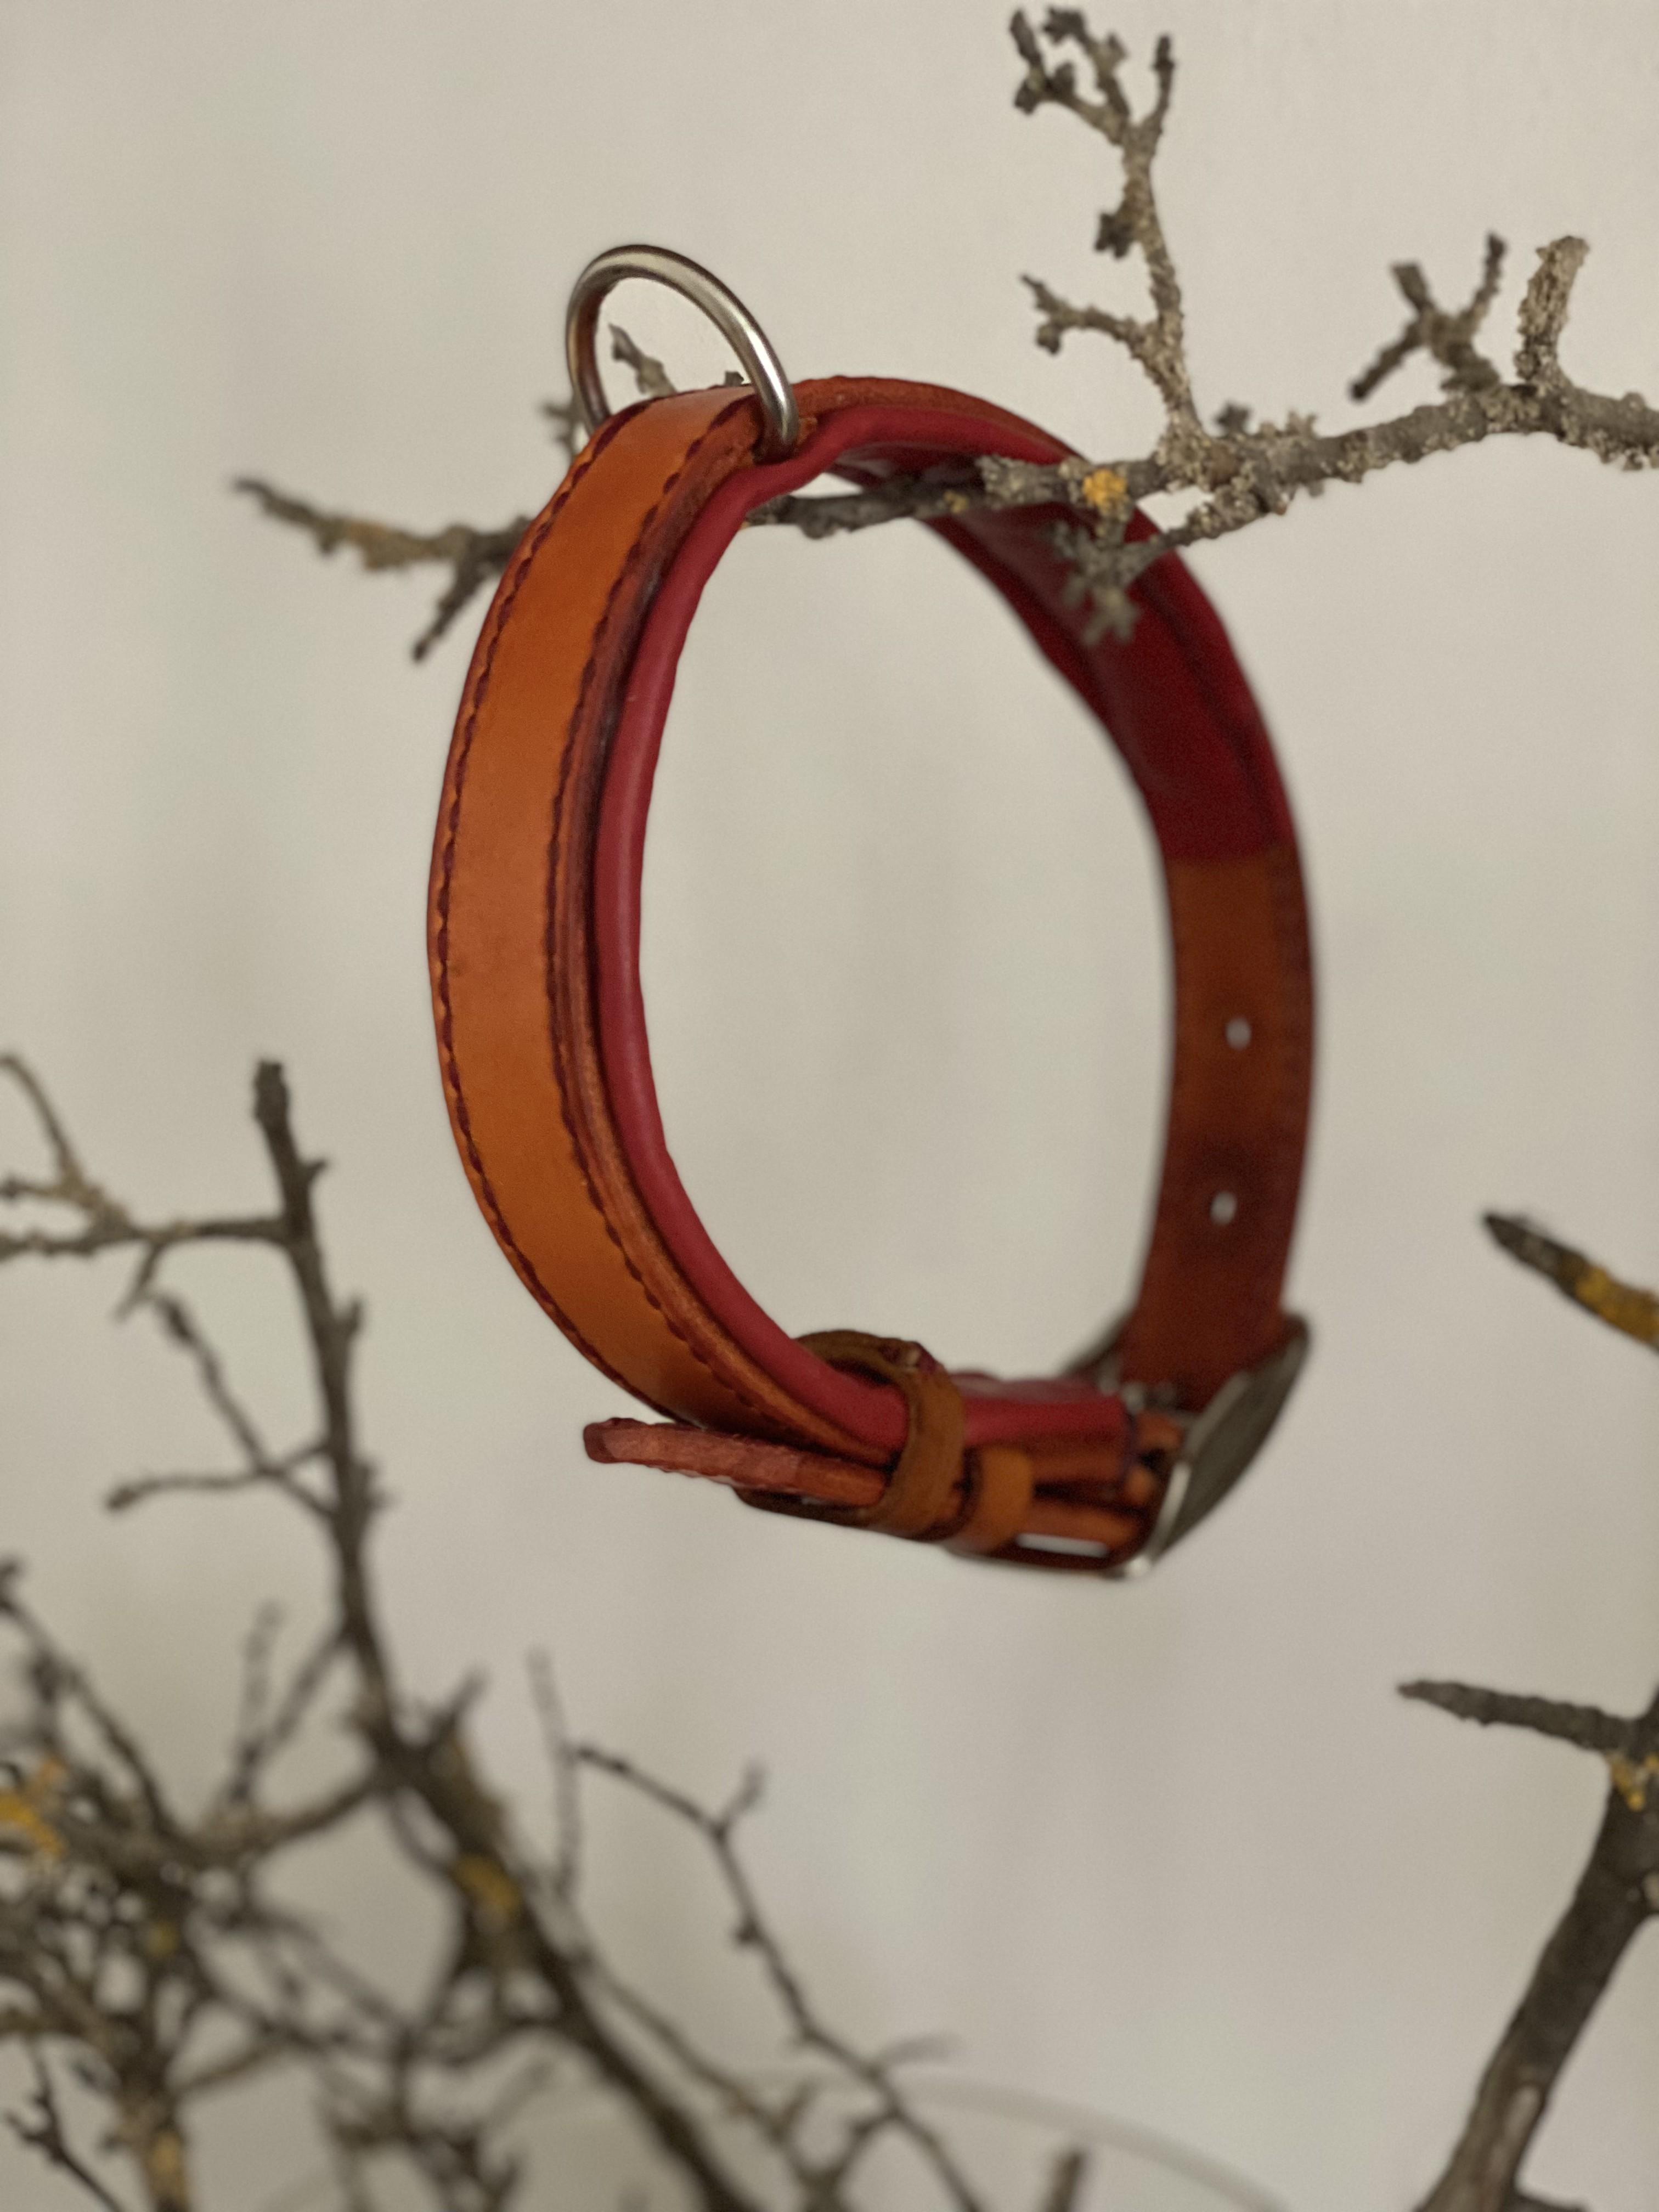
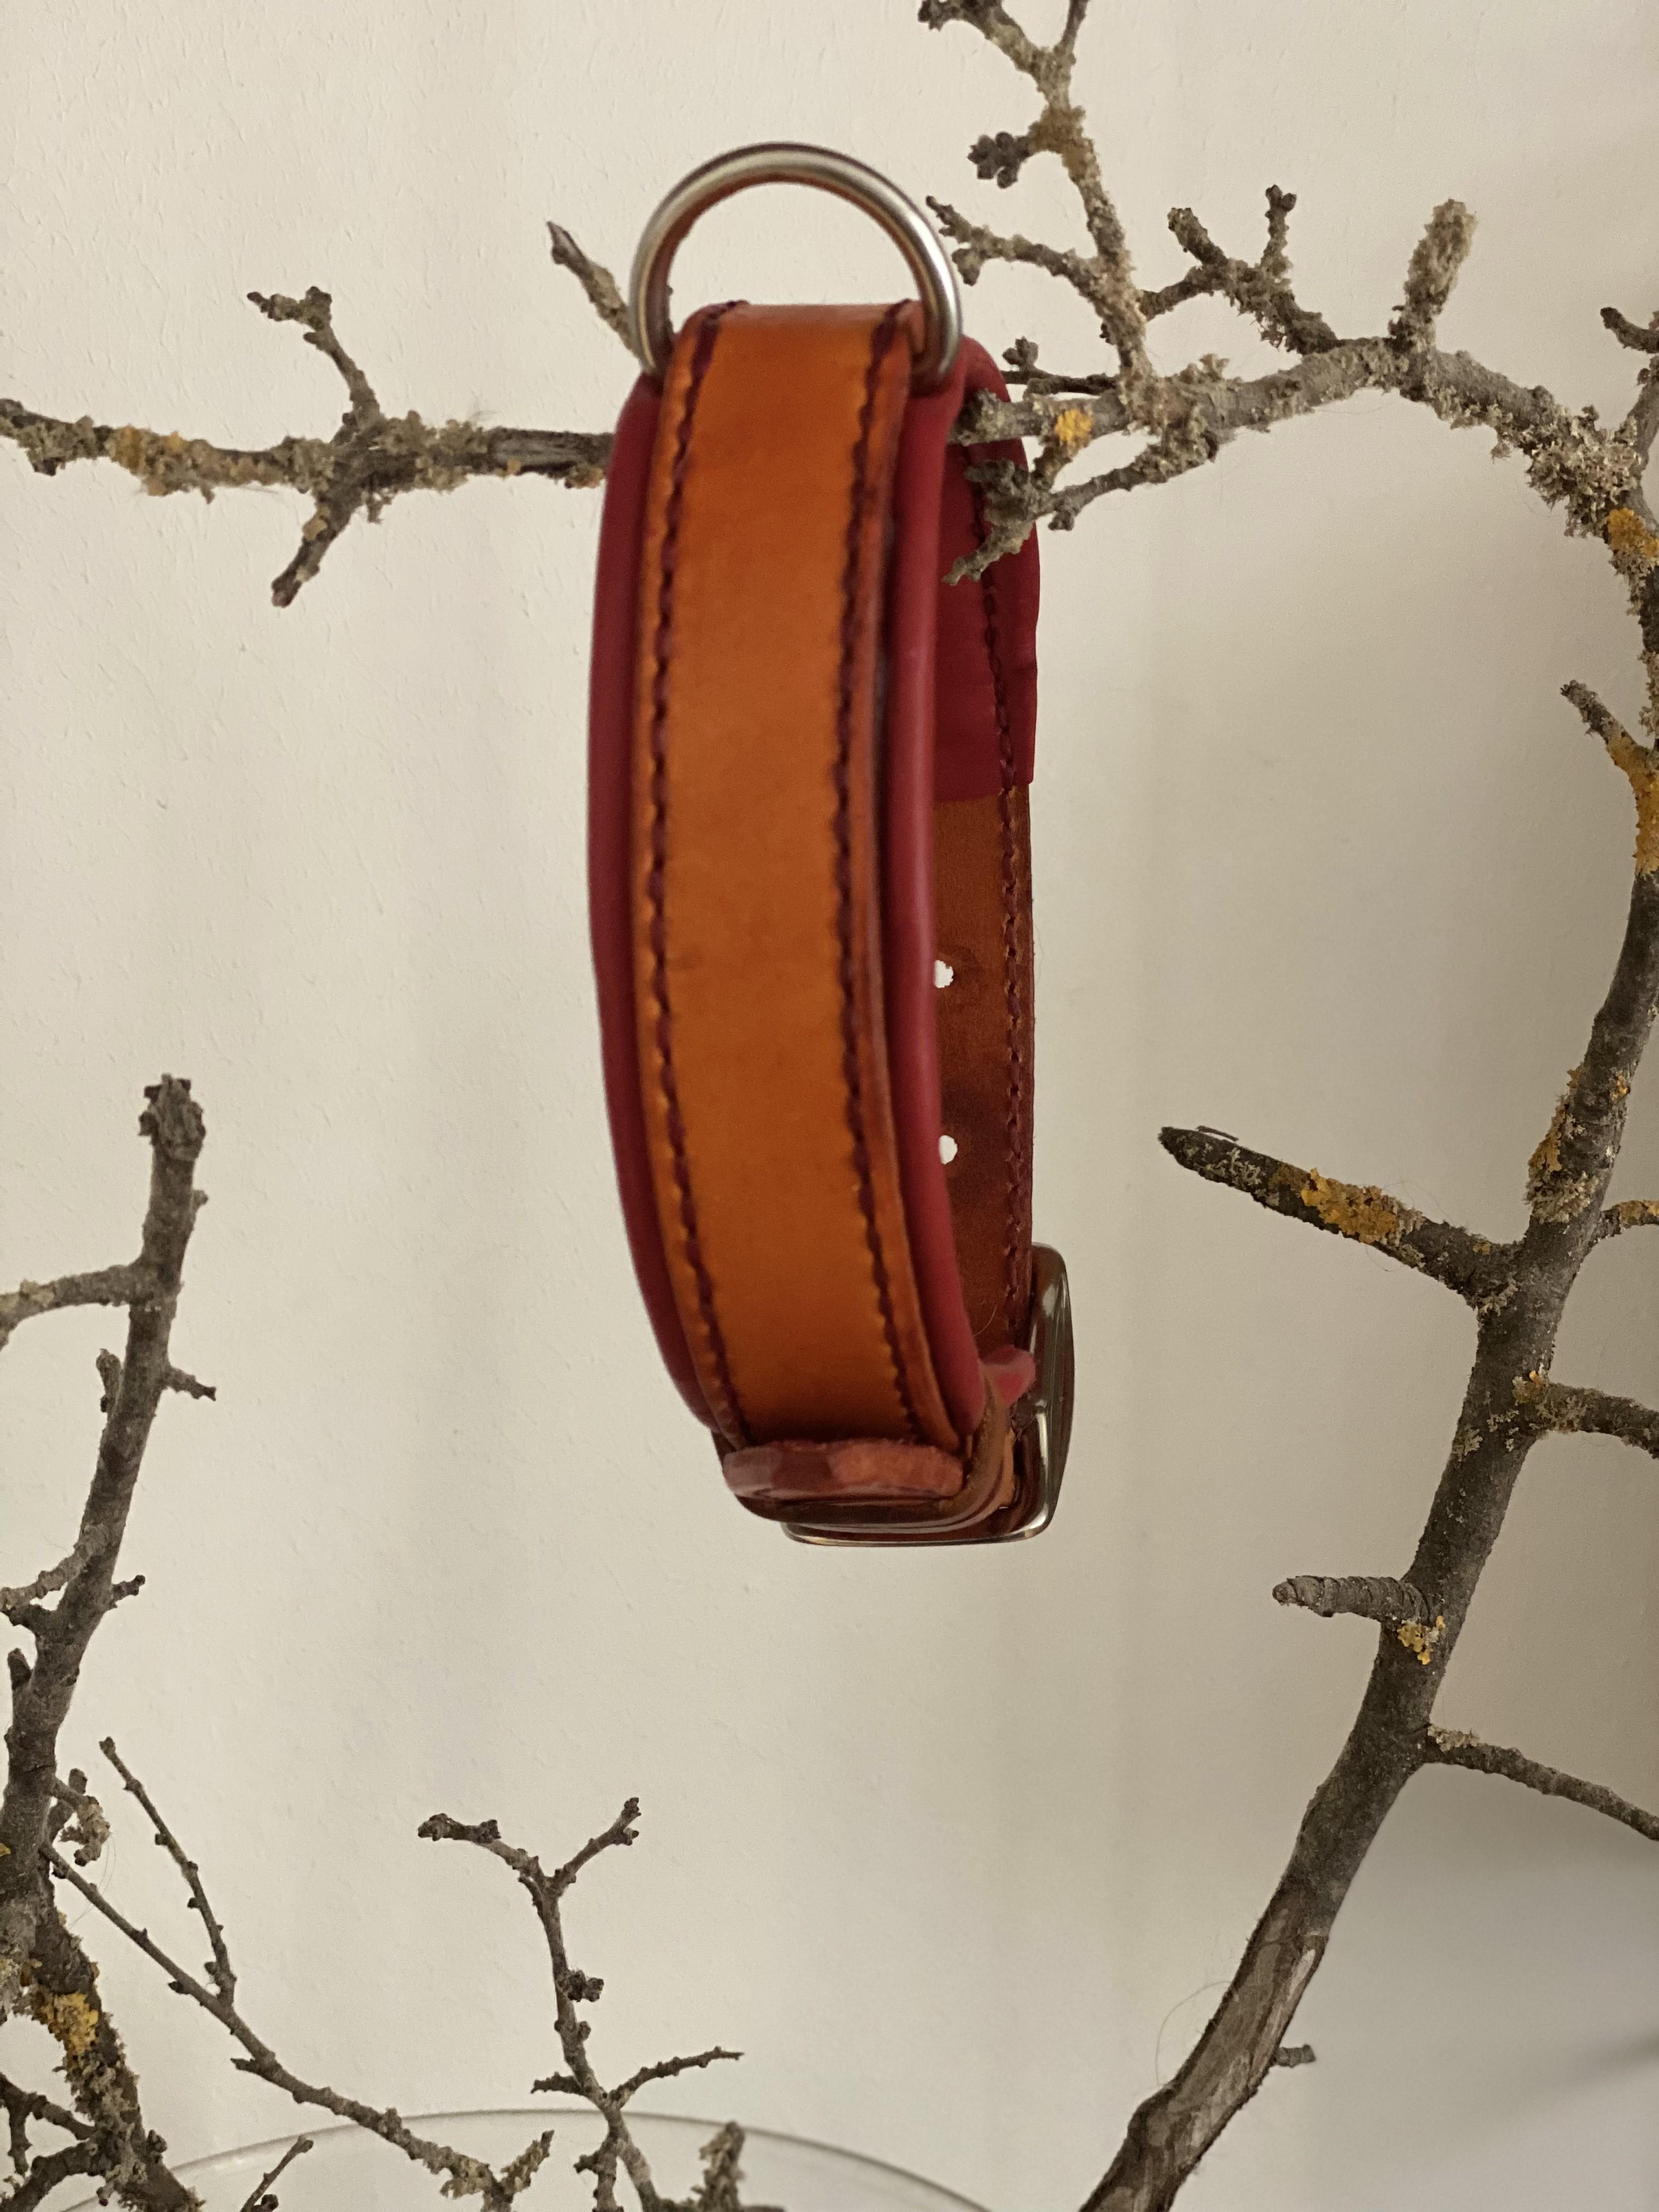
Well, my mum called again and asked for a new collar. Planned was only the yellow one with a matching leash, but as her Spinone Italiono grew out of his old orange collar and I still have a little of this lovely red sheepskin plus some orange dye, she got two. I'm very happy with the collars as they turned out beautifully. The lashes, let's say they are part of a learning process. The blue one is for my dog, therefore the hardware is smaller. I always use the rule of thumb of the dogs weight times 4 as the minimum breakage point of the hardware. The yellow one is solid brass and about 1,70m (custom measure) and the blue one standard length with steel hardware. She already has such a set, entirely hand sewn, in green, that holds up lovely despite being used almost everyday. The orange collar, will for now on be his dog-training collar for when he has professional training. I'm feeling a bit nostalgic as I made his first collar as well as the last ones of our deceased dog. Her last collar was green, her first handmade one orange. This colour become something special therefore, and If I should ever sell collars one type, only available in green and orange, will be named Tilda!

-
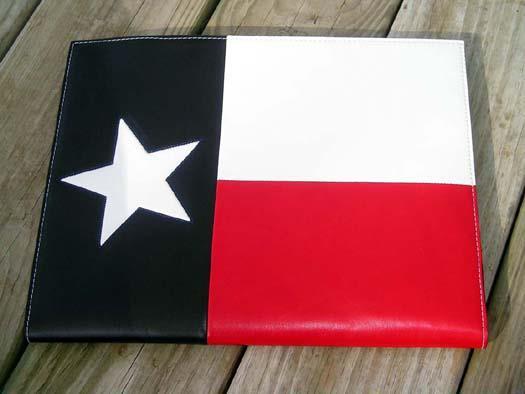
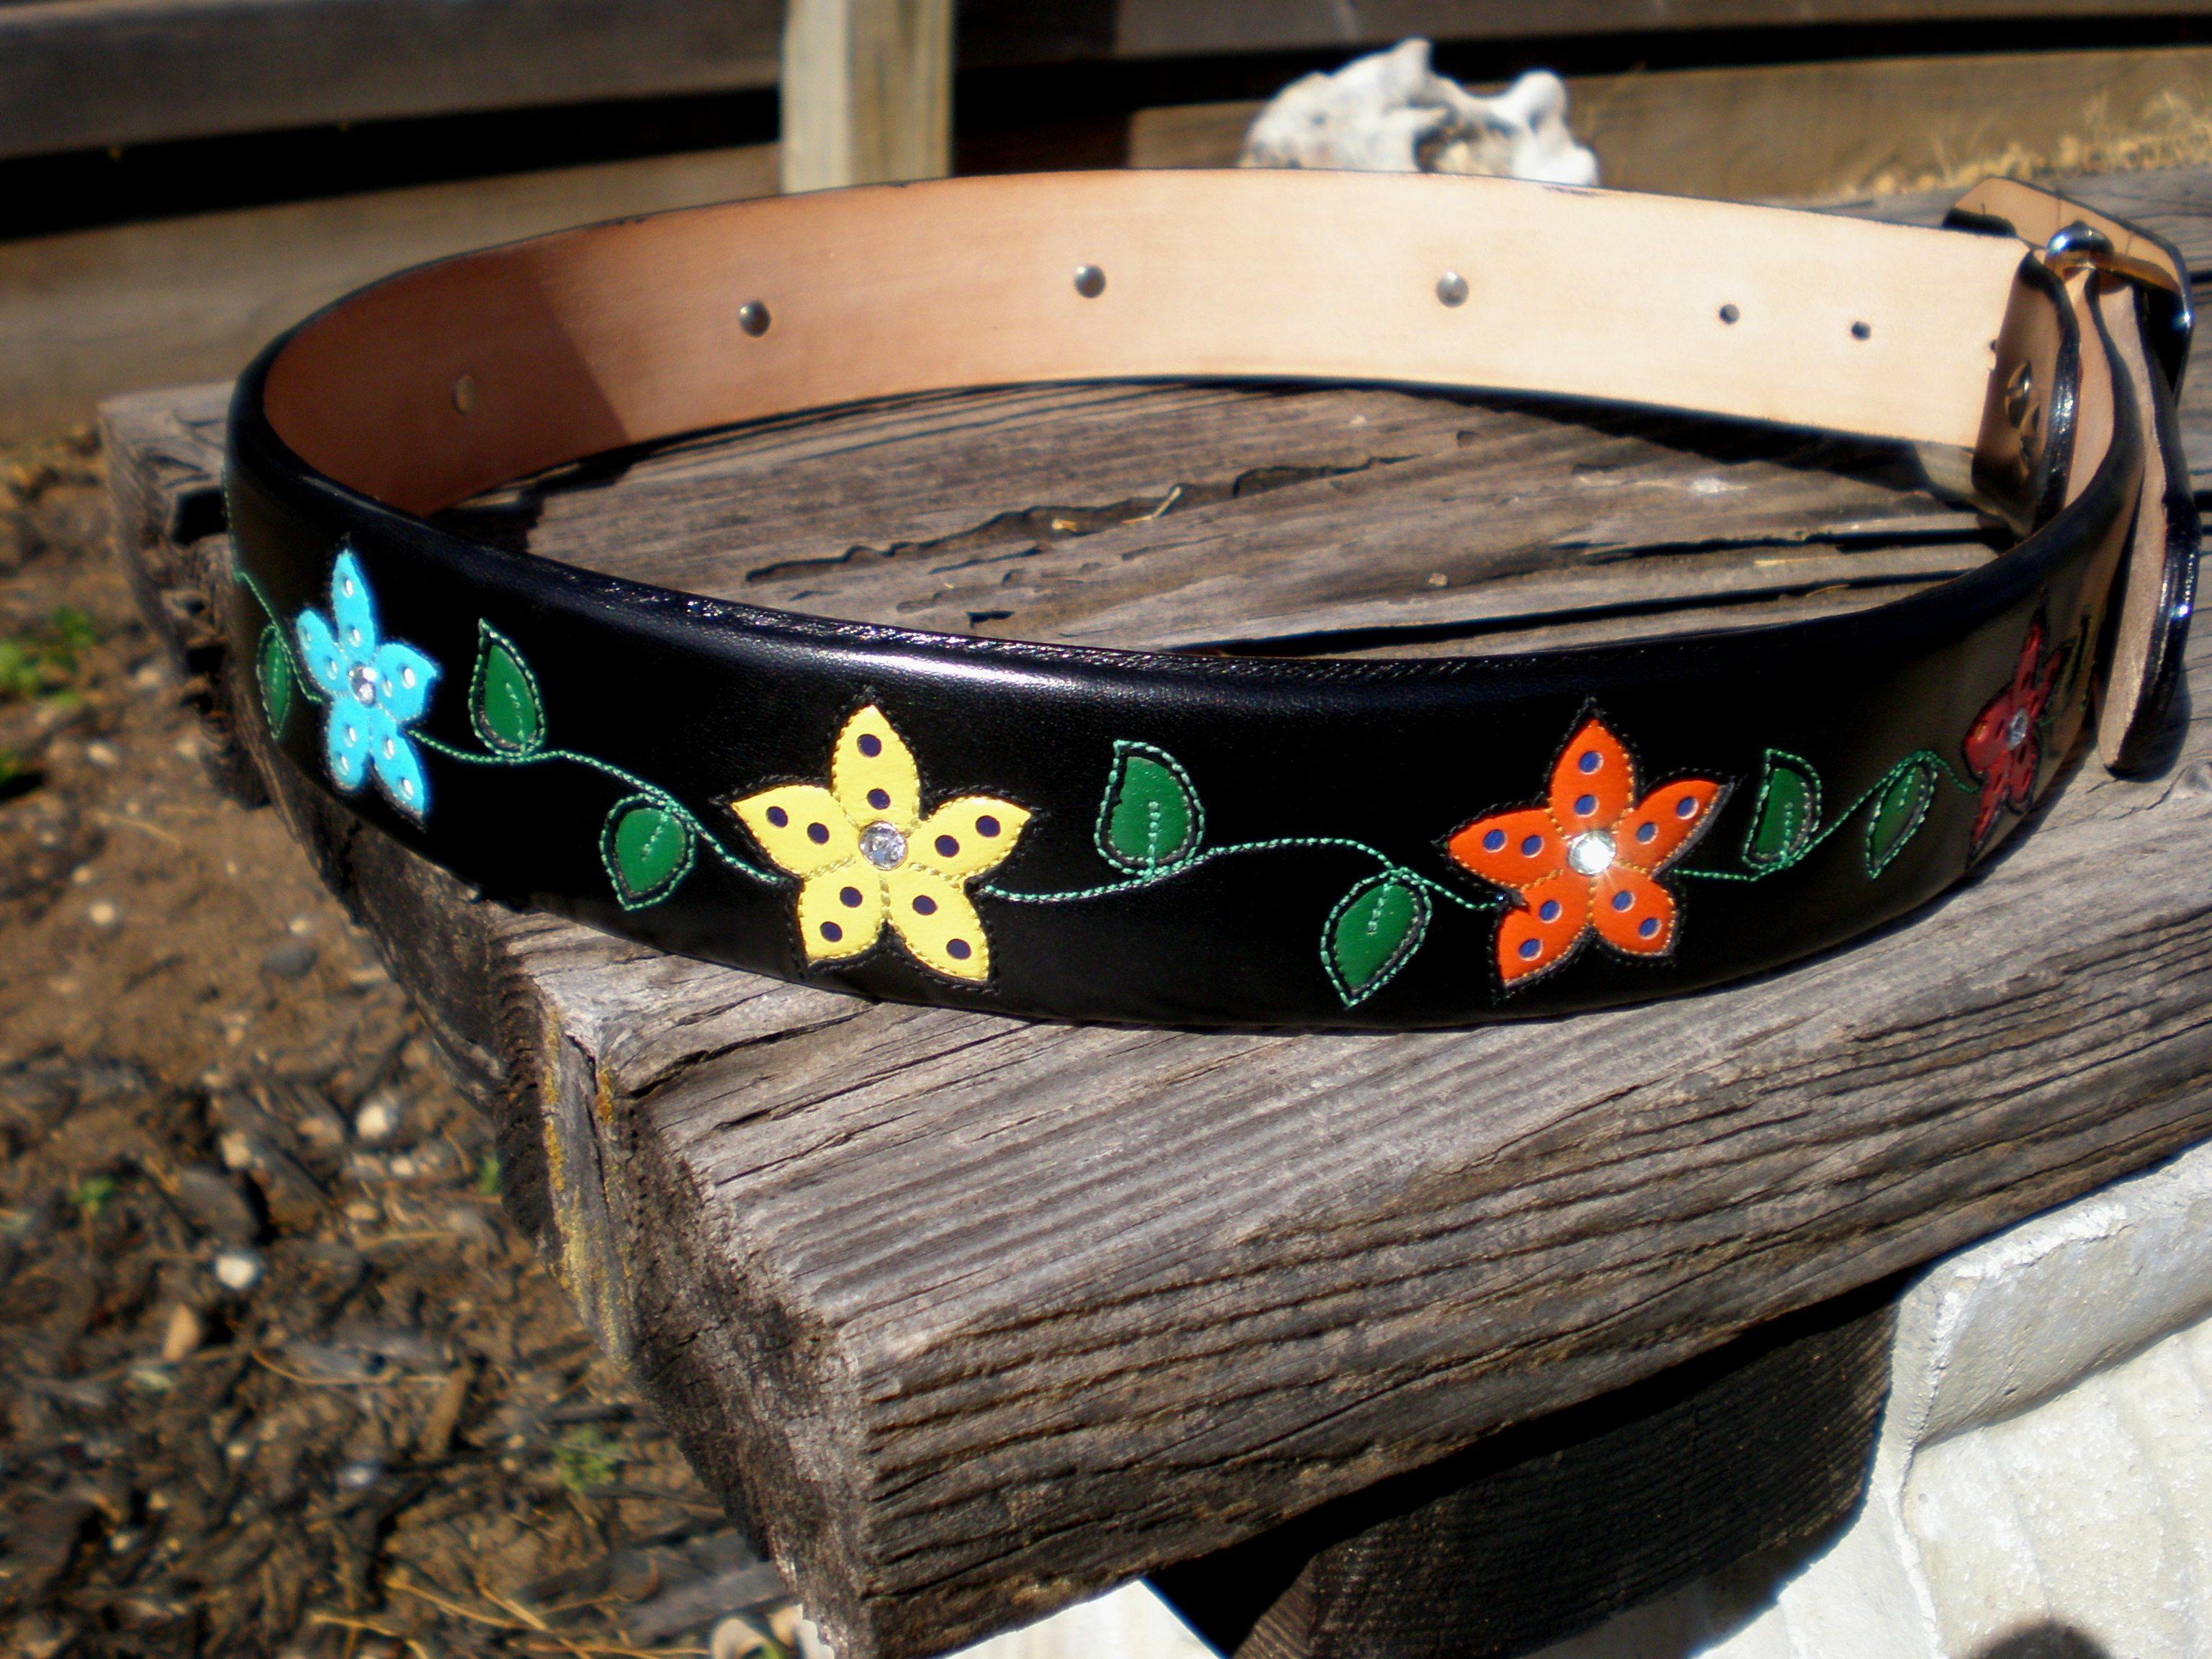
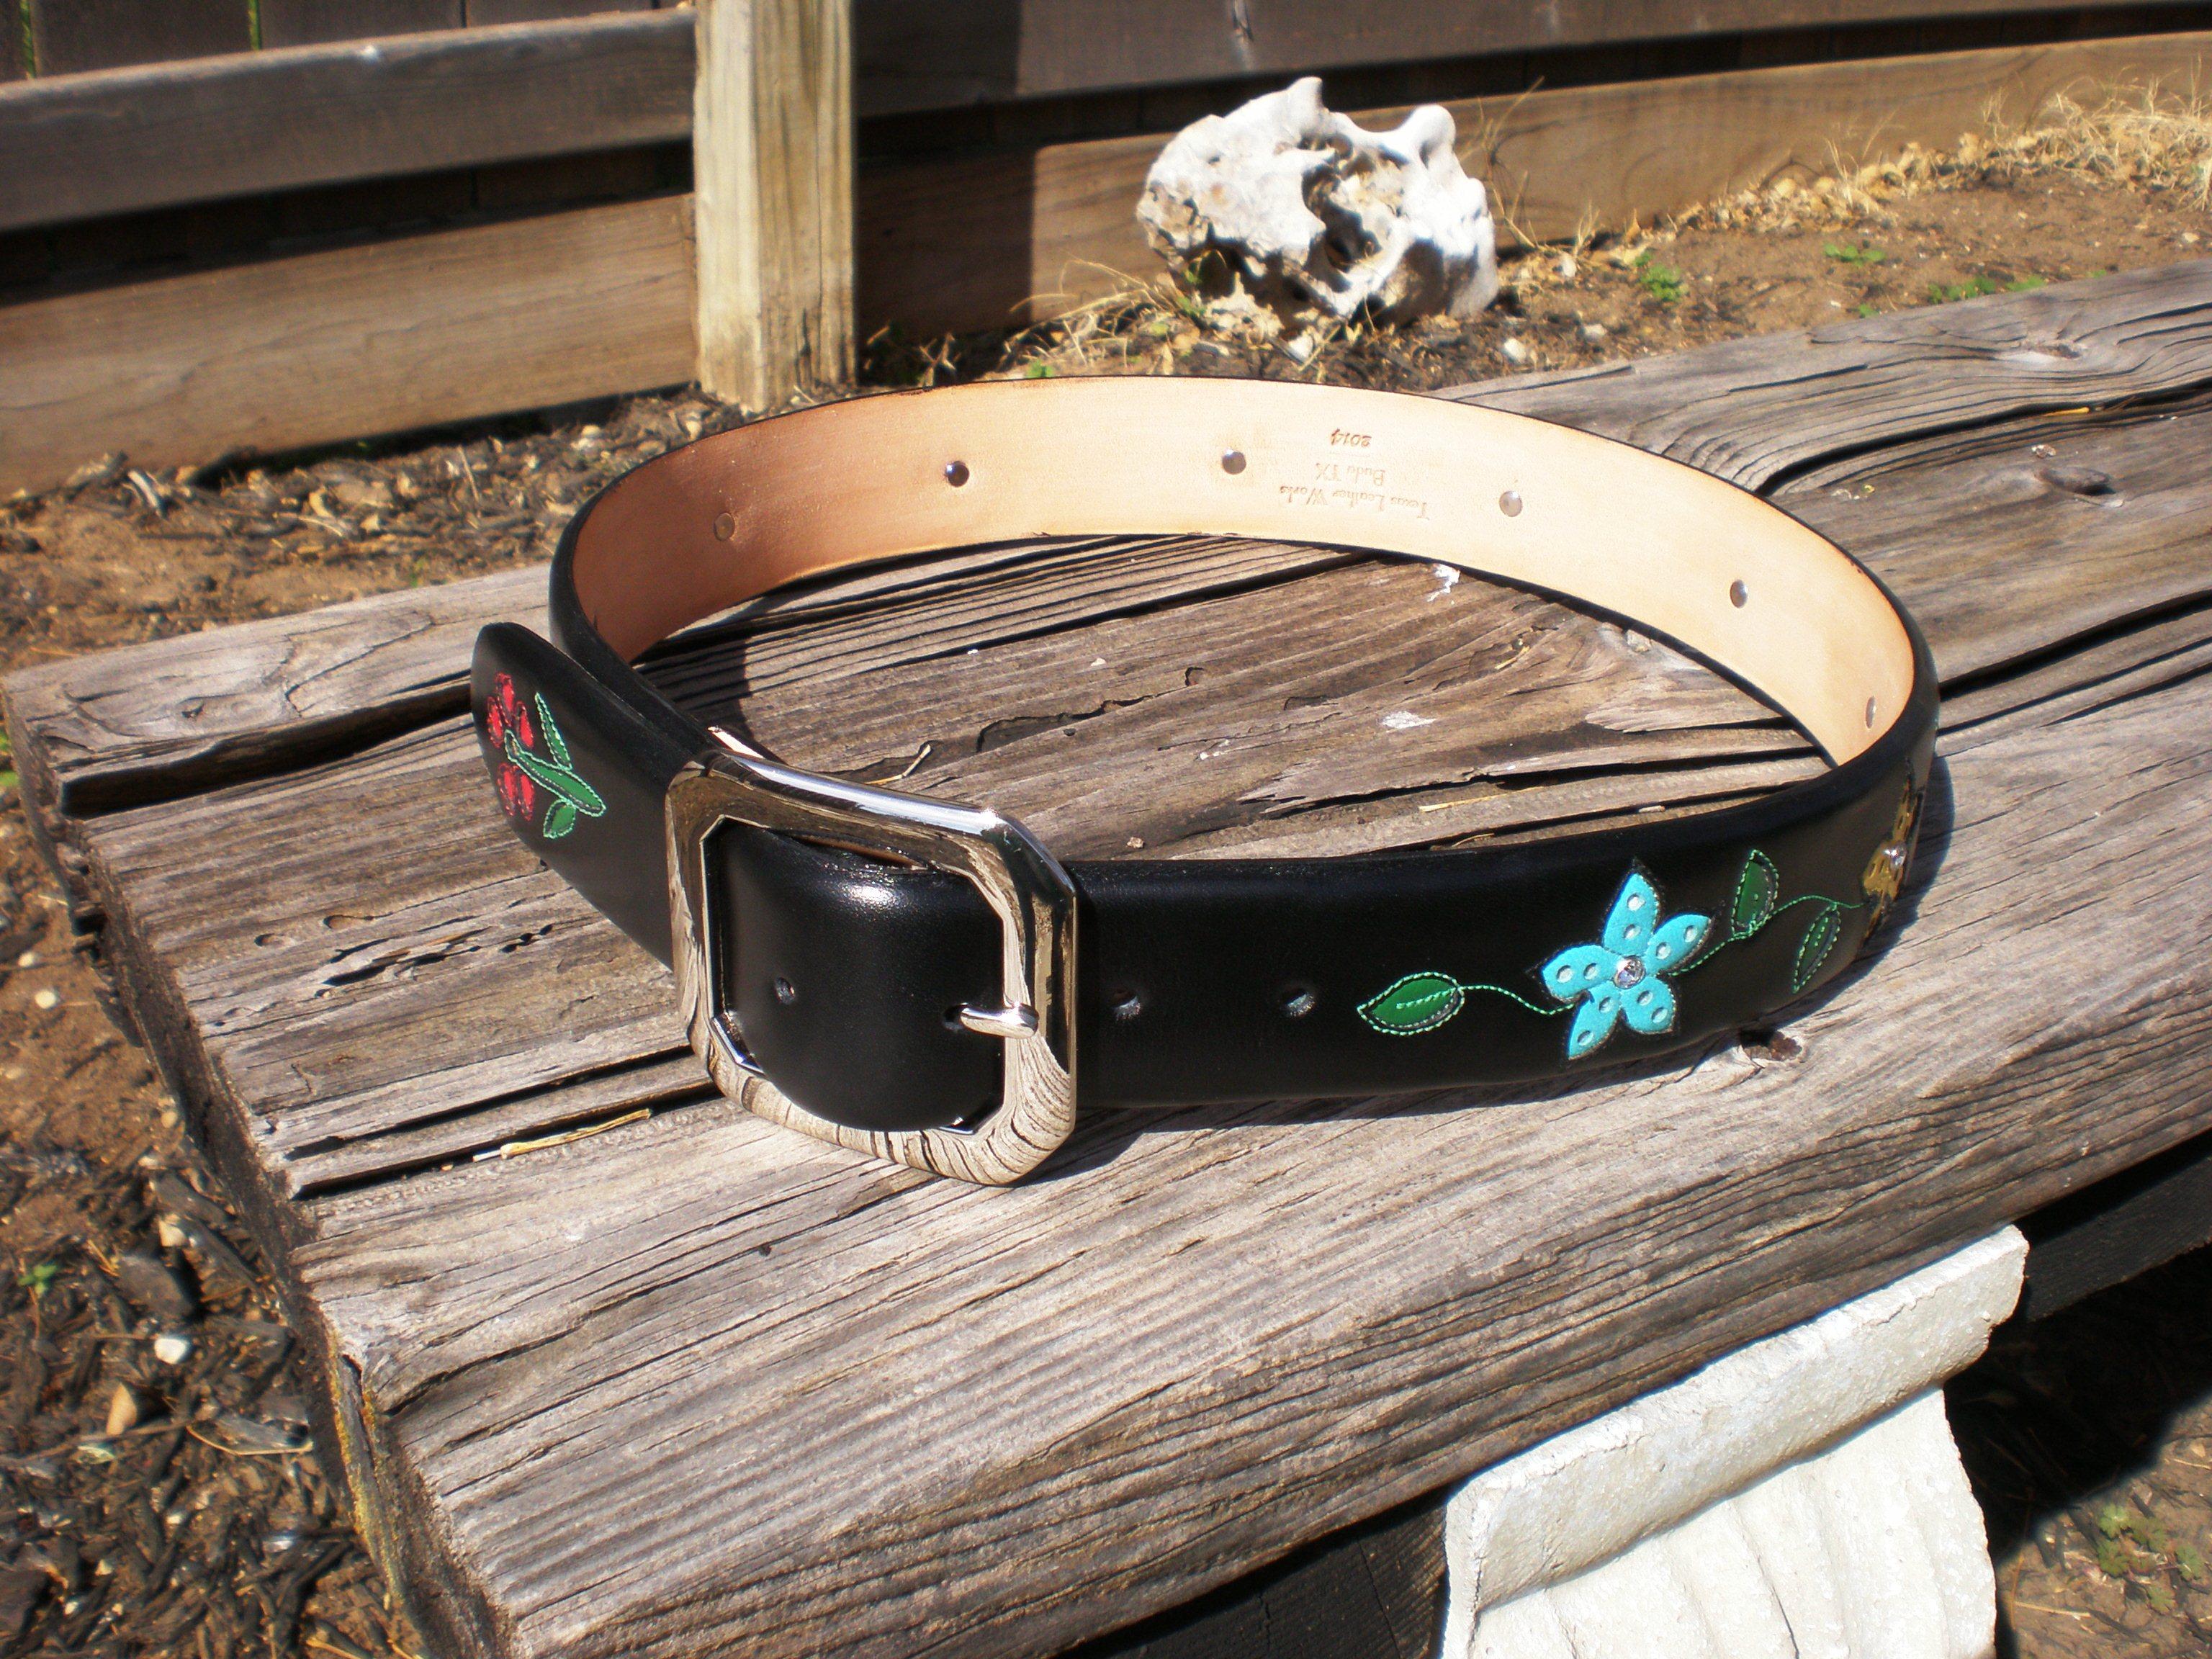
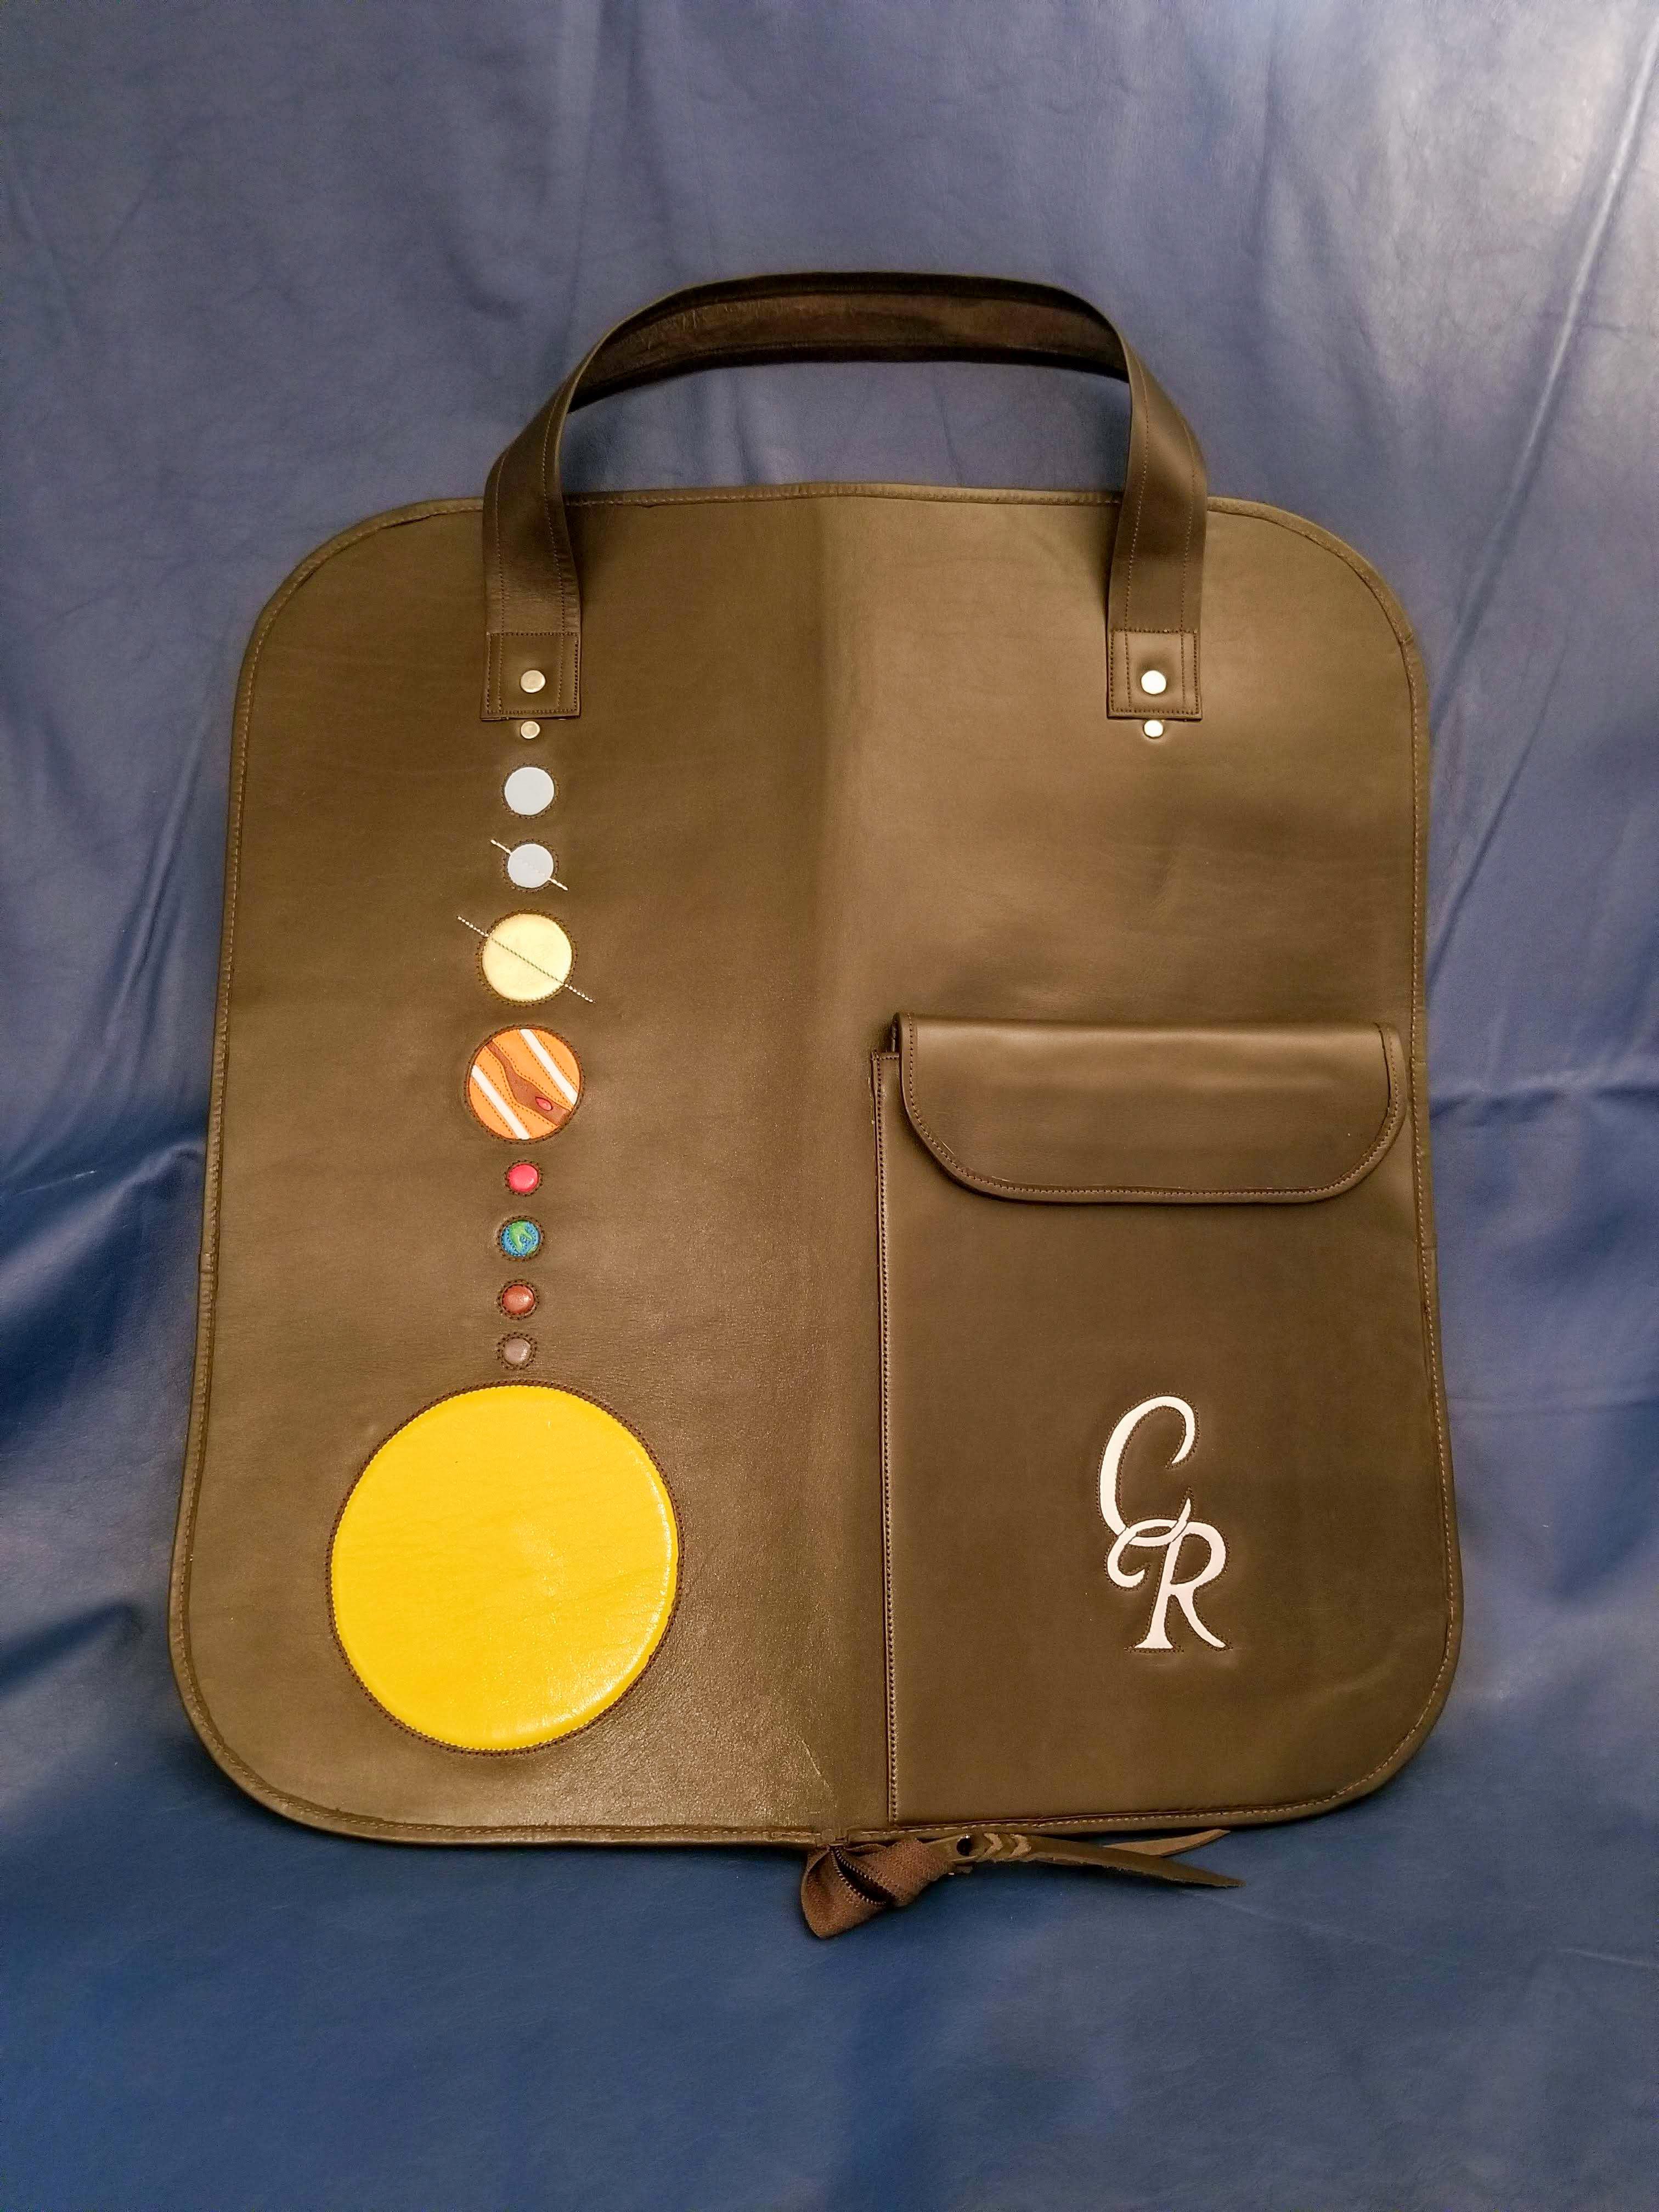
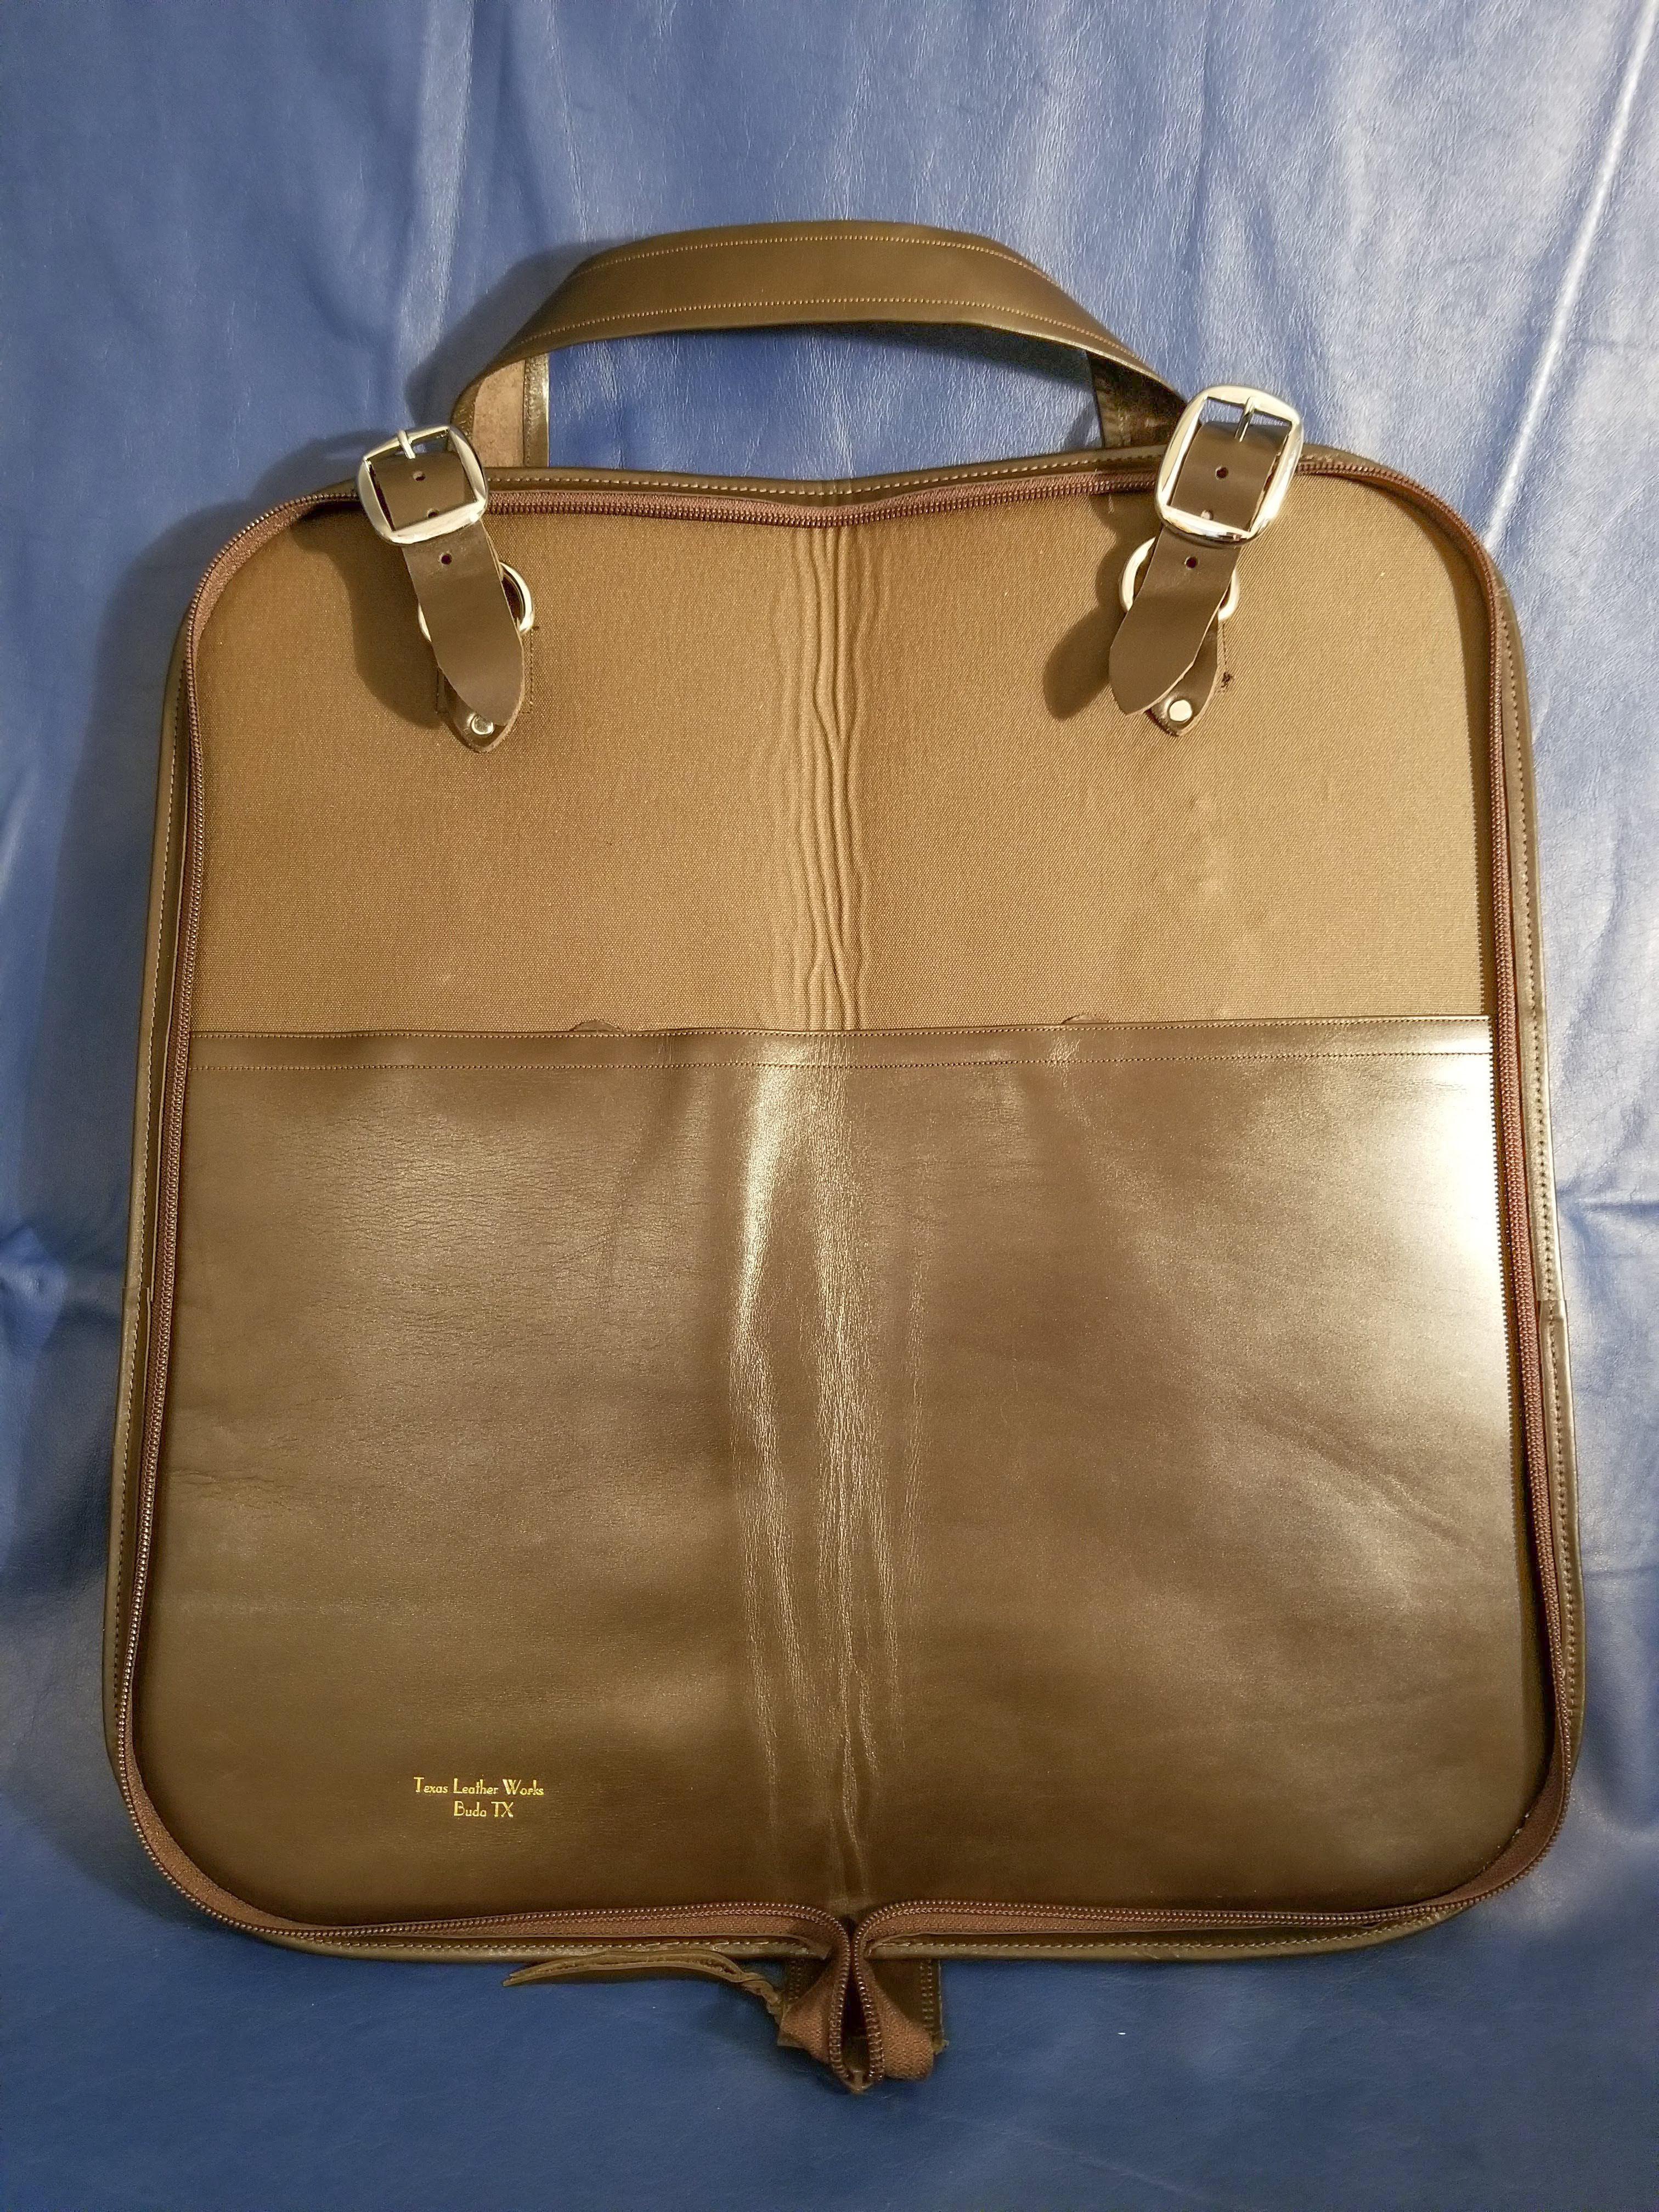
 My shop is in Buda Texas just outside of Austin. I have been leather crafting for about 27 years and totally enjoy making new things. Here are a few things I have made in the past.
-

spring flowers and good food
Darren8306 replied to chuck123wapati's topic in All About Us and Off Topic
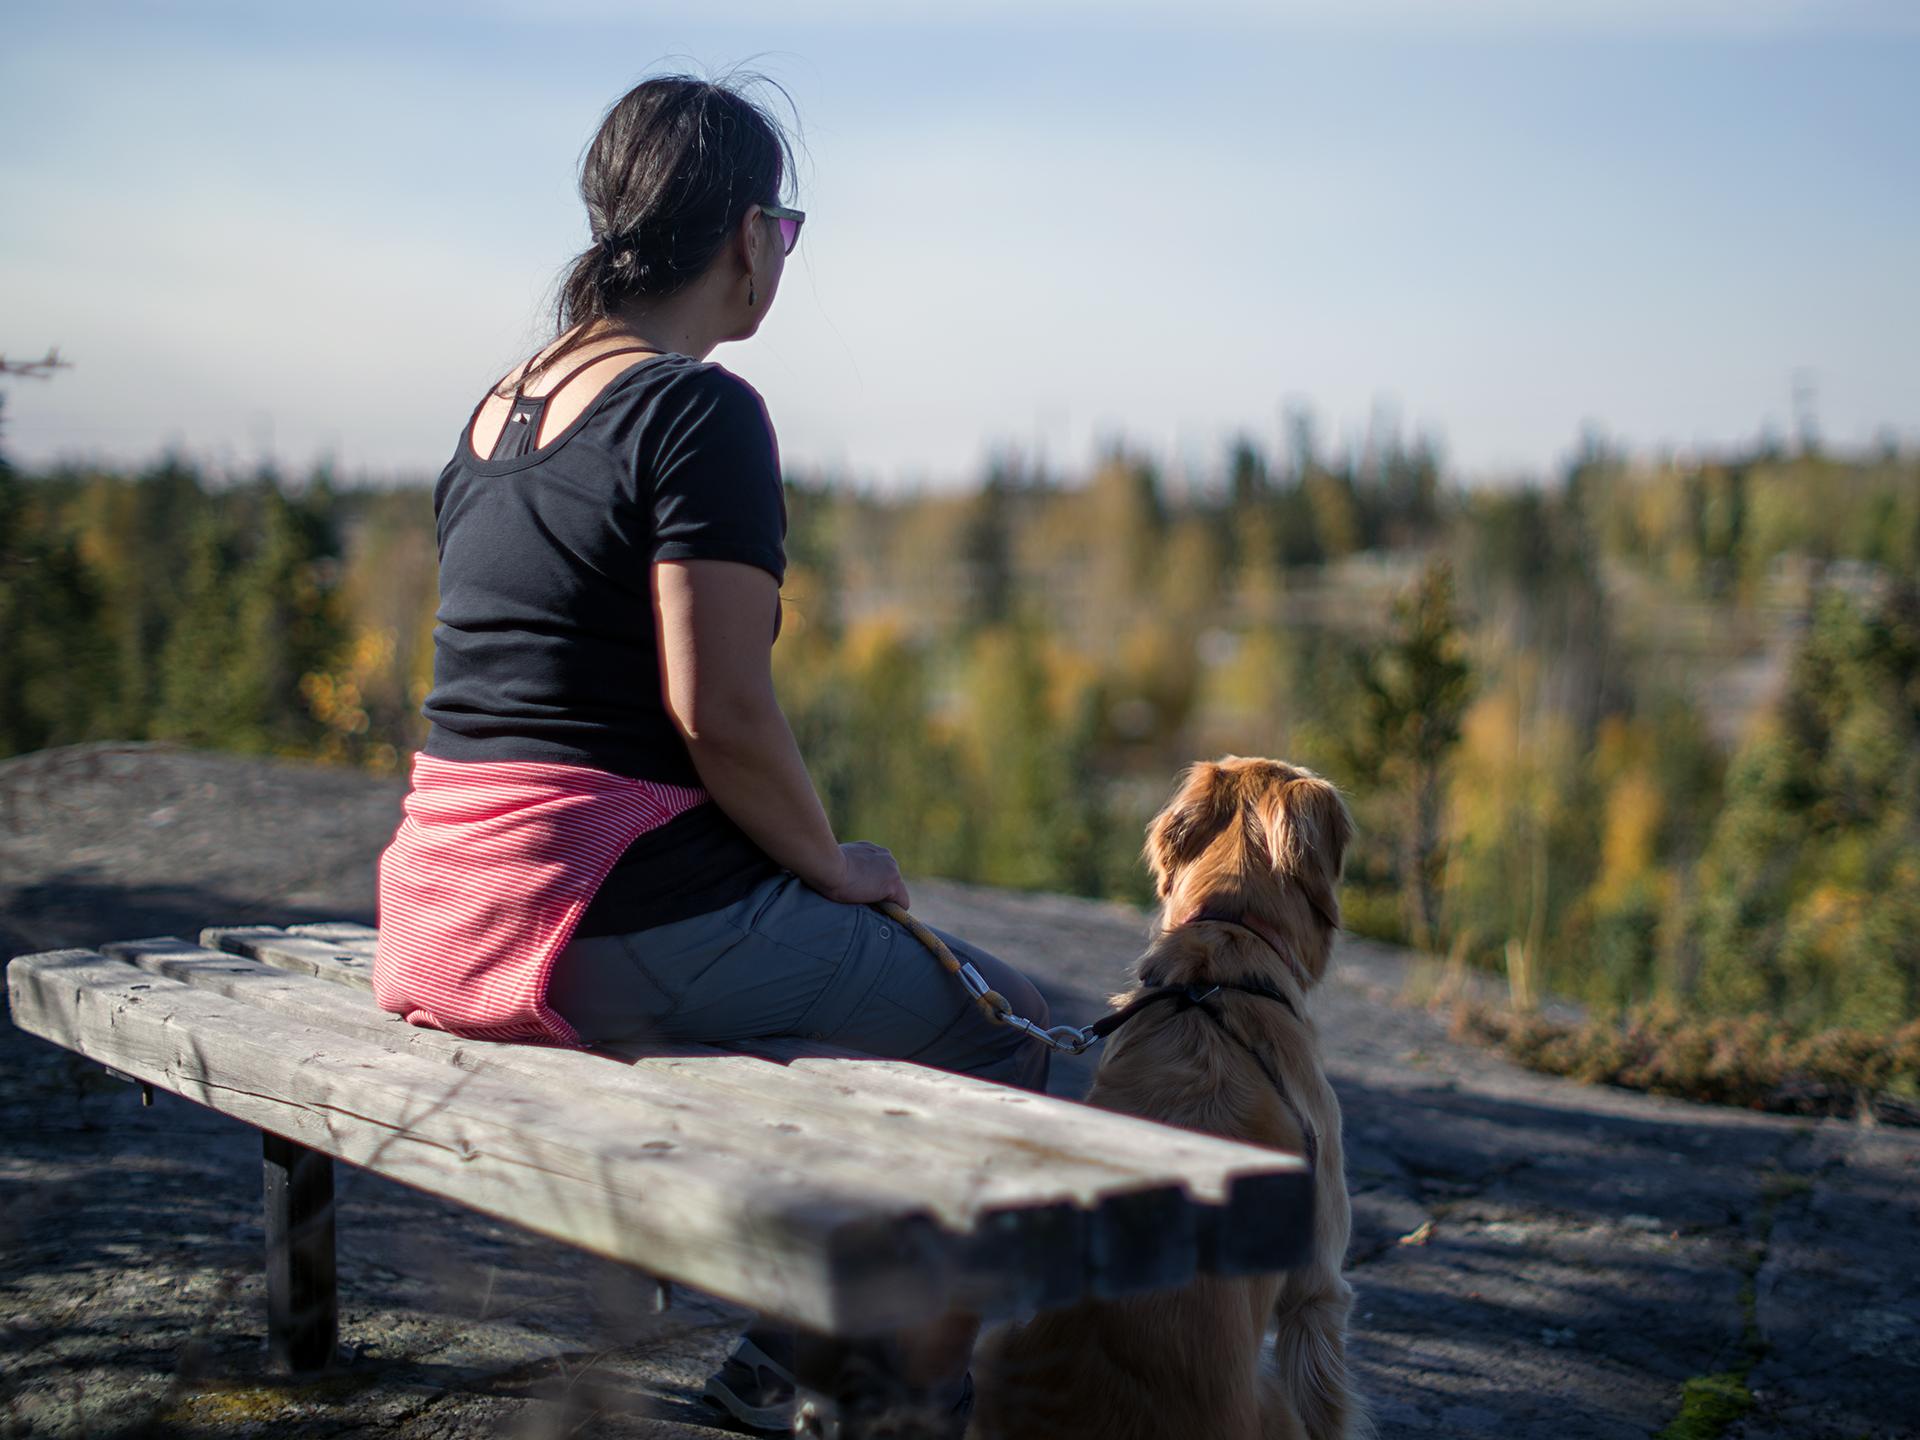
We are also getting fall colours. I've been looking forward to it, as fall is our anniversary. Most couples seem to get by with one day, but my sweetheart and I take the whole season. 25th this year (note: the pic in front of the Yellowknife sign is a stranger, not my sweetheart)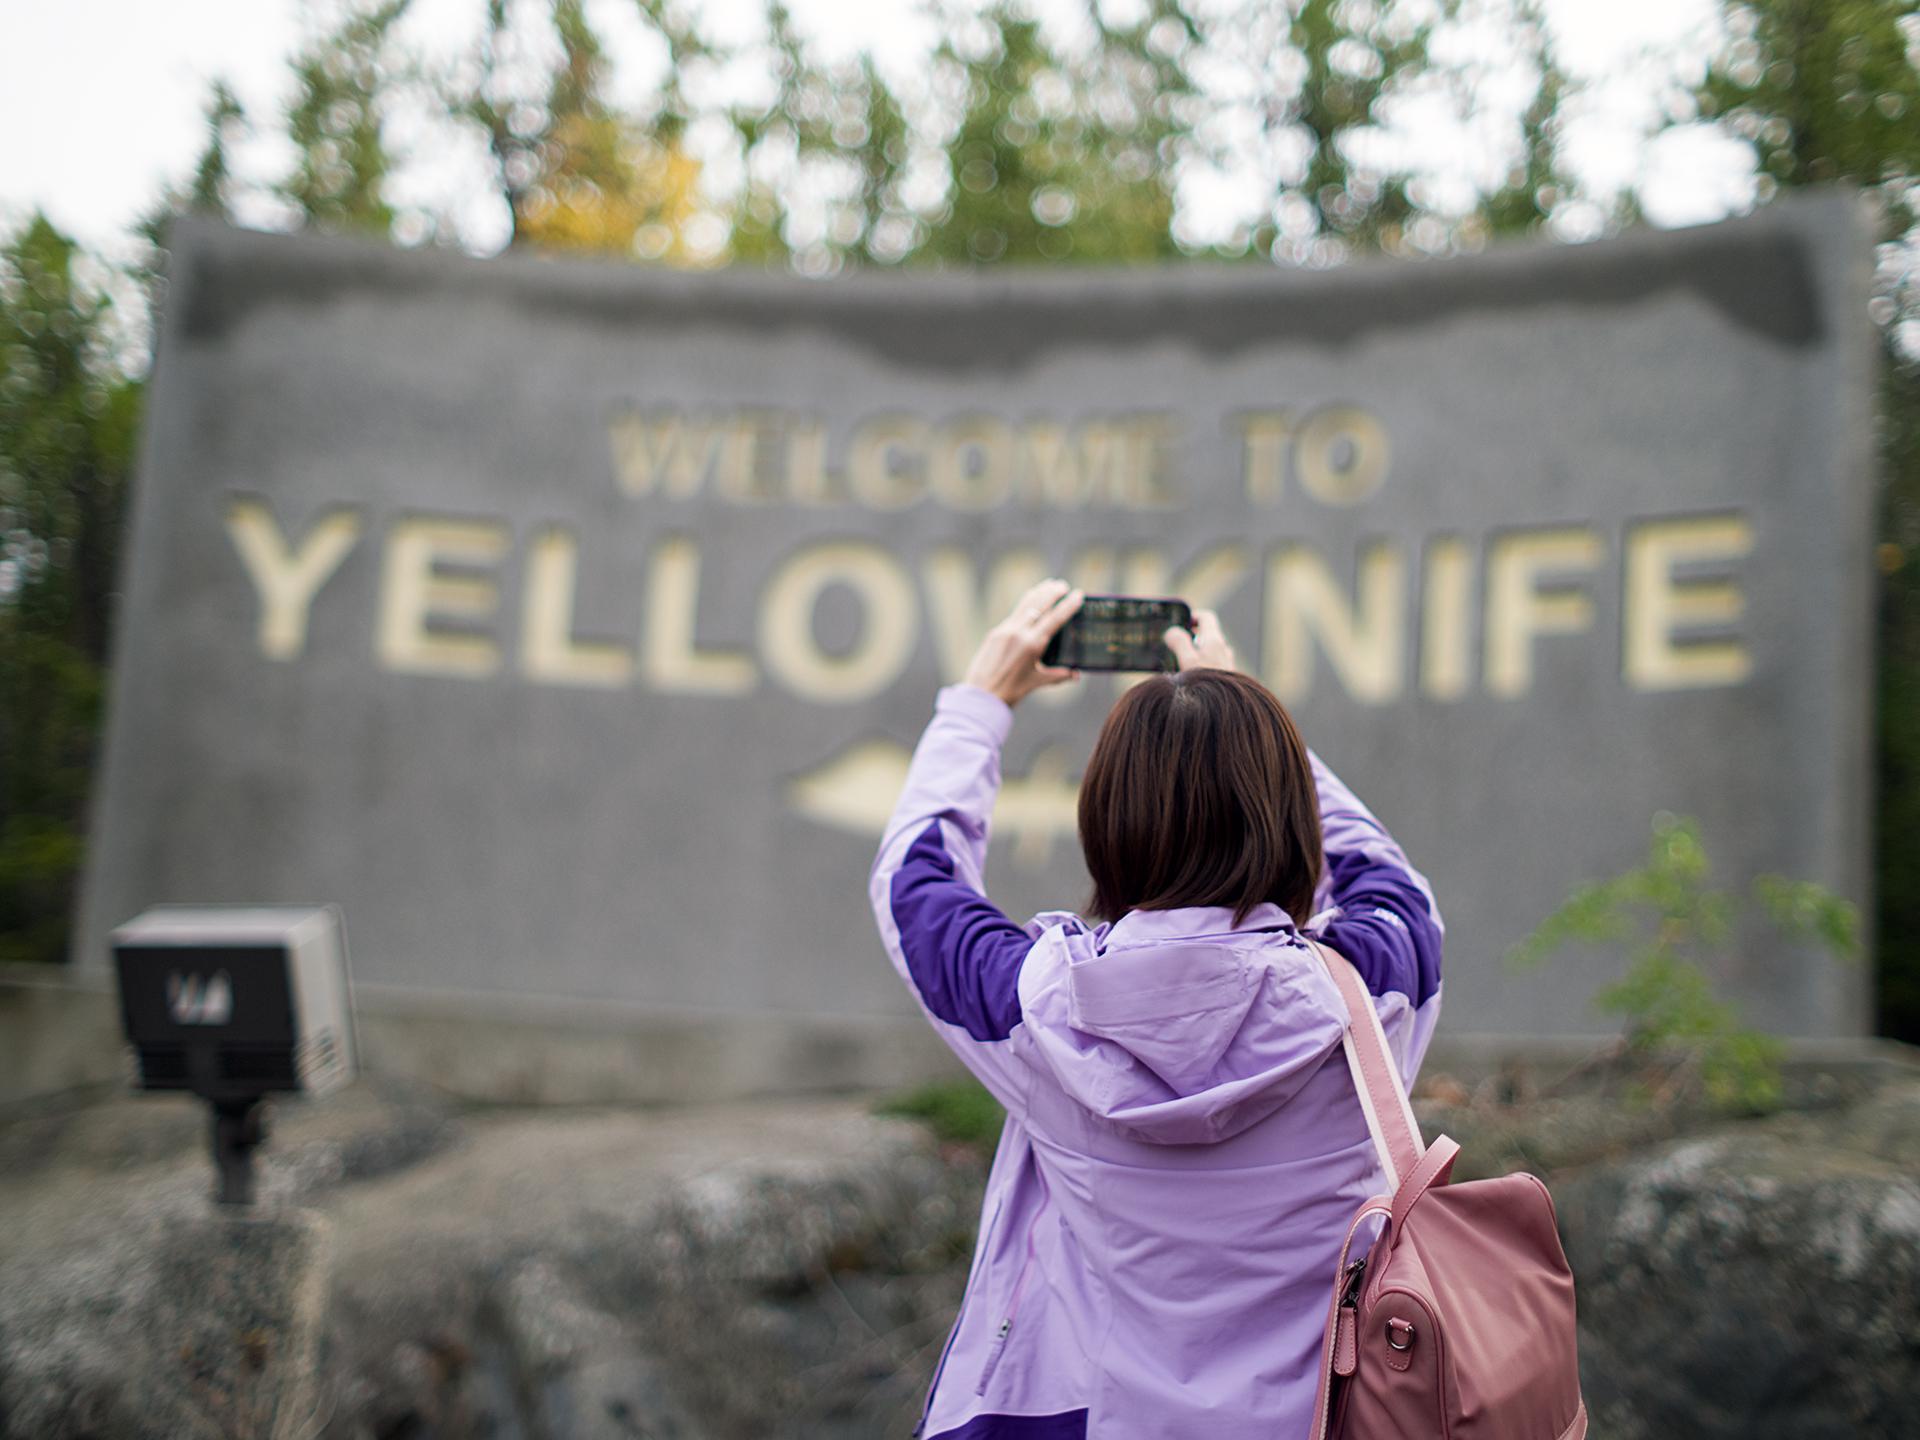
-
Glad someone else has seen it too, I was going to replace the rivets with copper rivets but thought no they are a pain in the rear end to remove maybe damaging the saddle webbing in doing so making it a much bigger repair. So I decided to use a method that I had learned from repairing some race exercise reins for a American trainer who was training in the Middle East when I was there, the bit end was attached with Chicago screws, must add also the reins were double thickness lined with a strong metal insert bent around to make the bend. That's what I used for the billet with a good thread locker knowing the restitch was enough to of a repair in its self. Also forgot to mention who ever had replaced them previous billets before had stitched across the billet as well, that is a big no no. On the saddle you repaired I would think in a saddle of 25 years plus would have had the girths billets replaced a few times over the years before, but you never know sometimes. Just don't like the thought of a bigger hole in the saddle webbing that is needed that's why I checked before that the webbing was still okay and ran it by the tack shop owner who then contacted the owner of the saddle that they wanted stitching and rivets which they did also showed them where it had failed where previous repair had been stitched across the billet, yes that is where it had failed. Hope this helps JCUK
-
I'm always amazed and saddened at the same time. Knowledge that was commonplace and common sense for literally centuries has been lost in just a few generations. Higher learning they call it. We are smarter now or so they say and they actually have people believing it. Simple wax and paraffin were household staples and used for hundreds of common things we are led to believe need specialized products today.
-
I recently encountered double cap rivets on the webs of a 25+ year old dressage saddle that was stamped Continental Walsall England. My online search didn't turn up anything specific about a maker. The client was the original owner of the saddle and I believe these were the original billets. The billets were machine sewn and I suggested that the rivets weren't necessary with hand sewn billets. She wanted the rivets. I guess they look strong. I used #9 copper rivets.
-
oh yea, you could harden that up, and it would be just as effective. I'll give it a pretty cool too.
-
Most of those arent soldered. I doubt you would need to in this case, there is not a lot of weight on it. But if ya want to, then tin them first before putting them on the wallet, then it's just a matter of touching a hot iron to them for an instant. Beware, solder isn't the same color, so it will show, so you have to be careful tinning just the seam.
-

spring flowers and good food
chuck123wapati replied to chuck123wapati's topic in All About Us and Off Topic
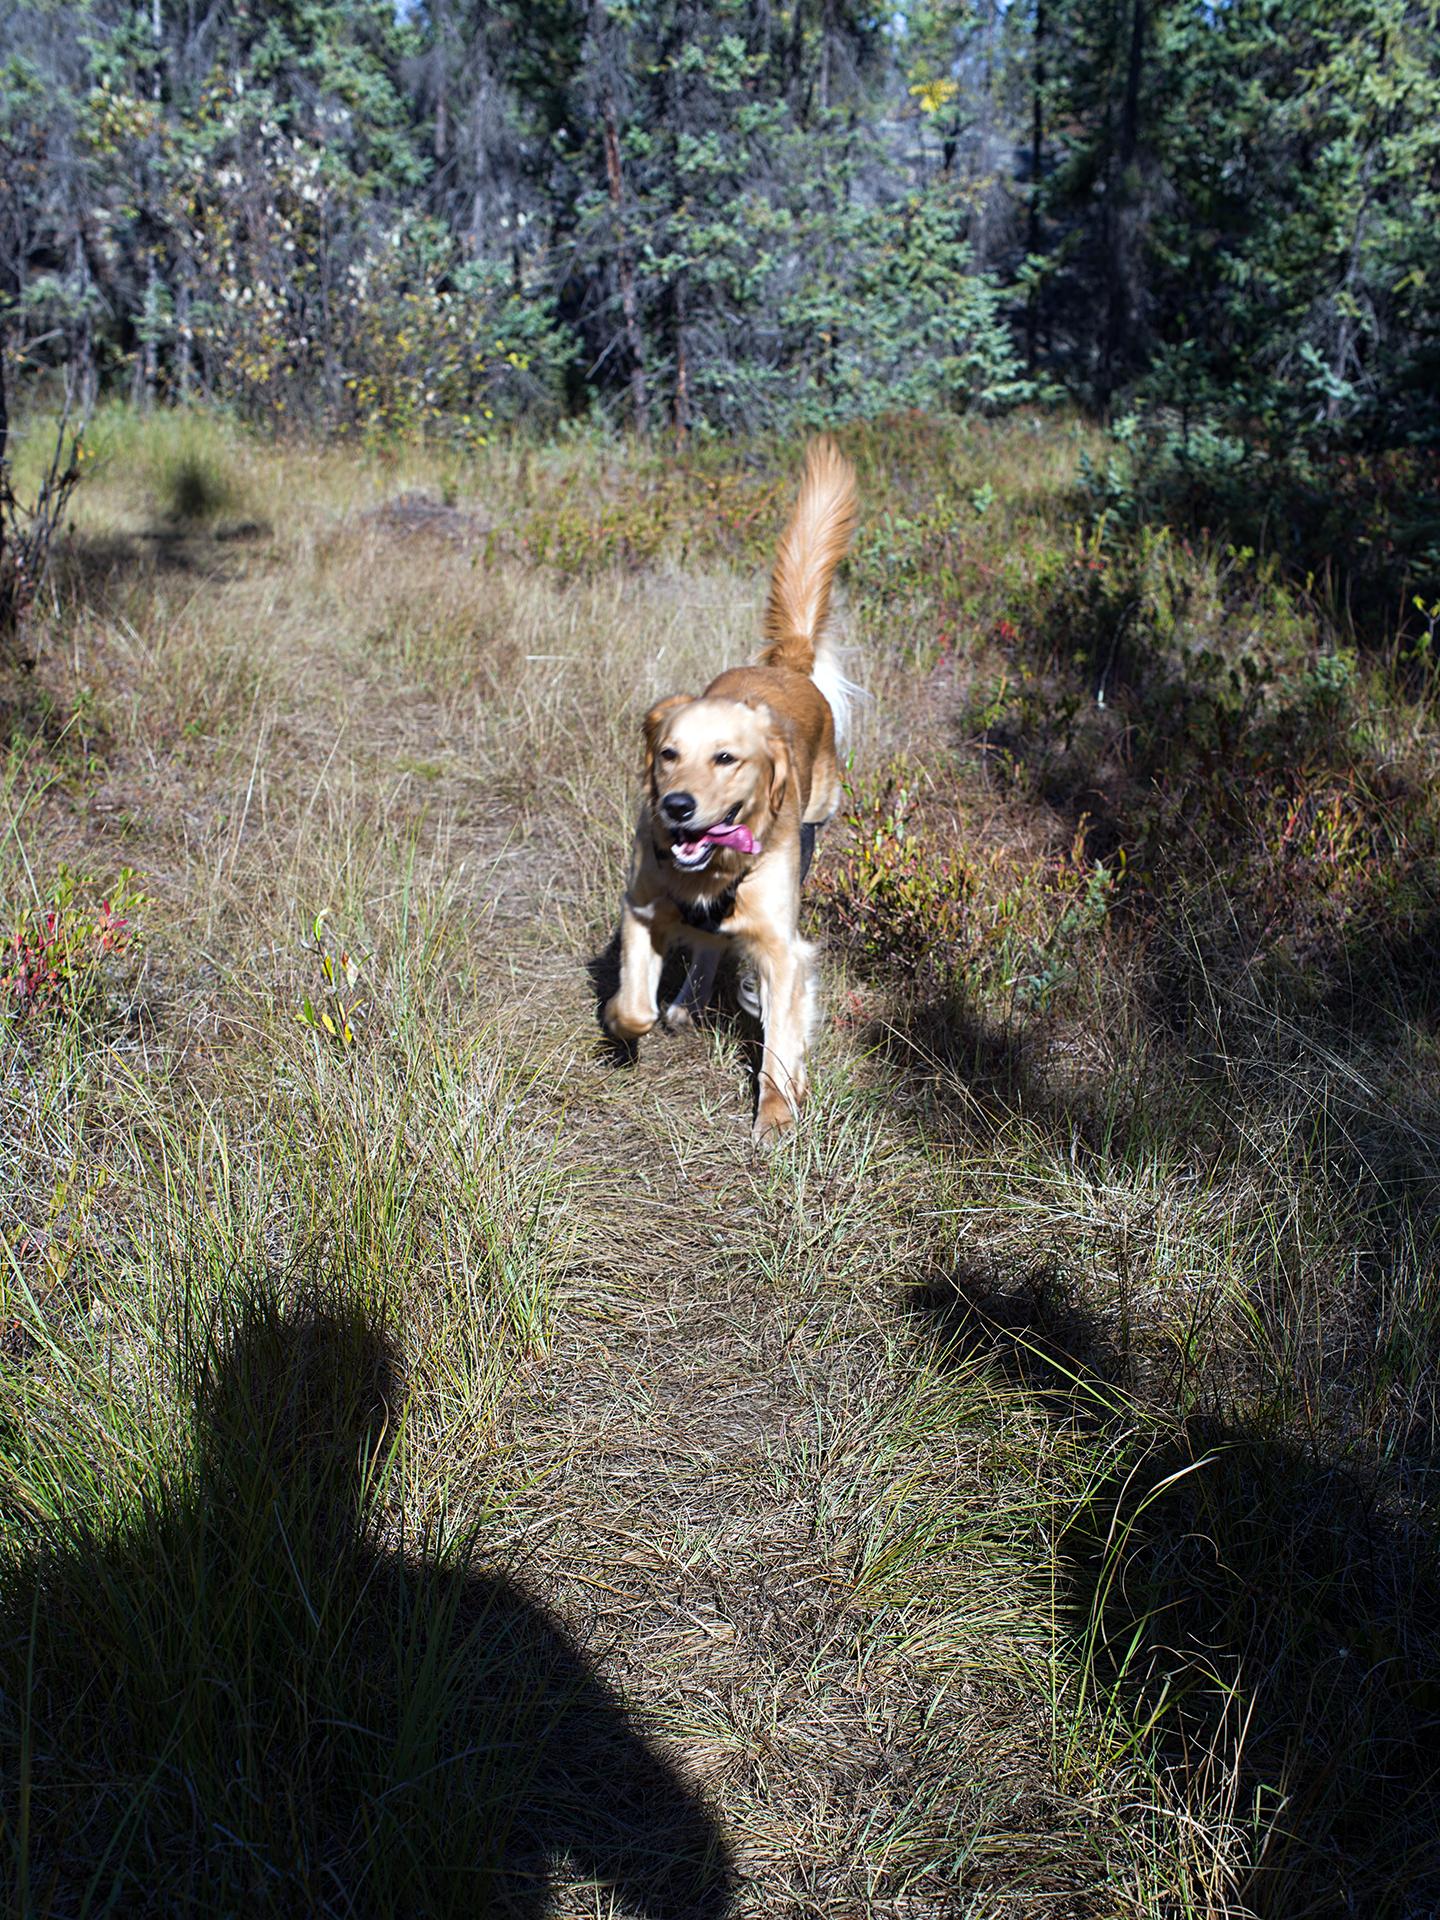
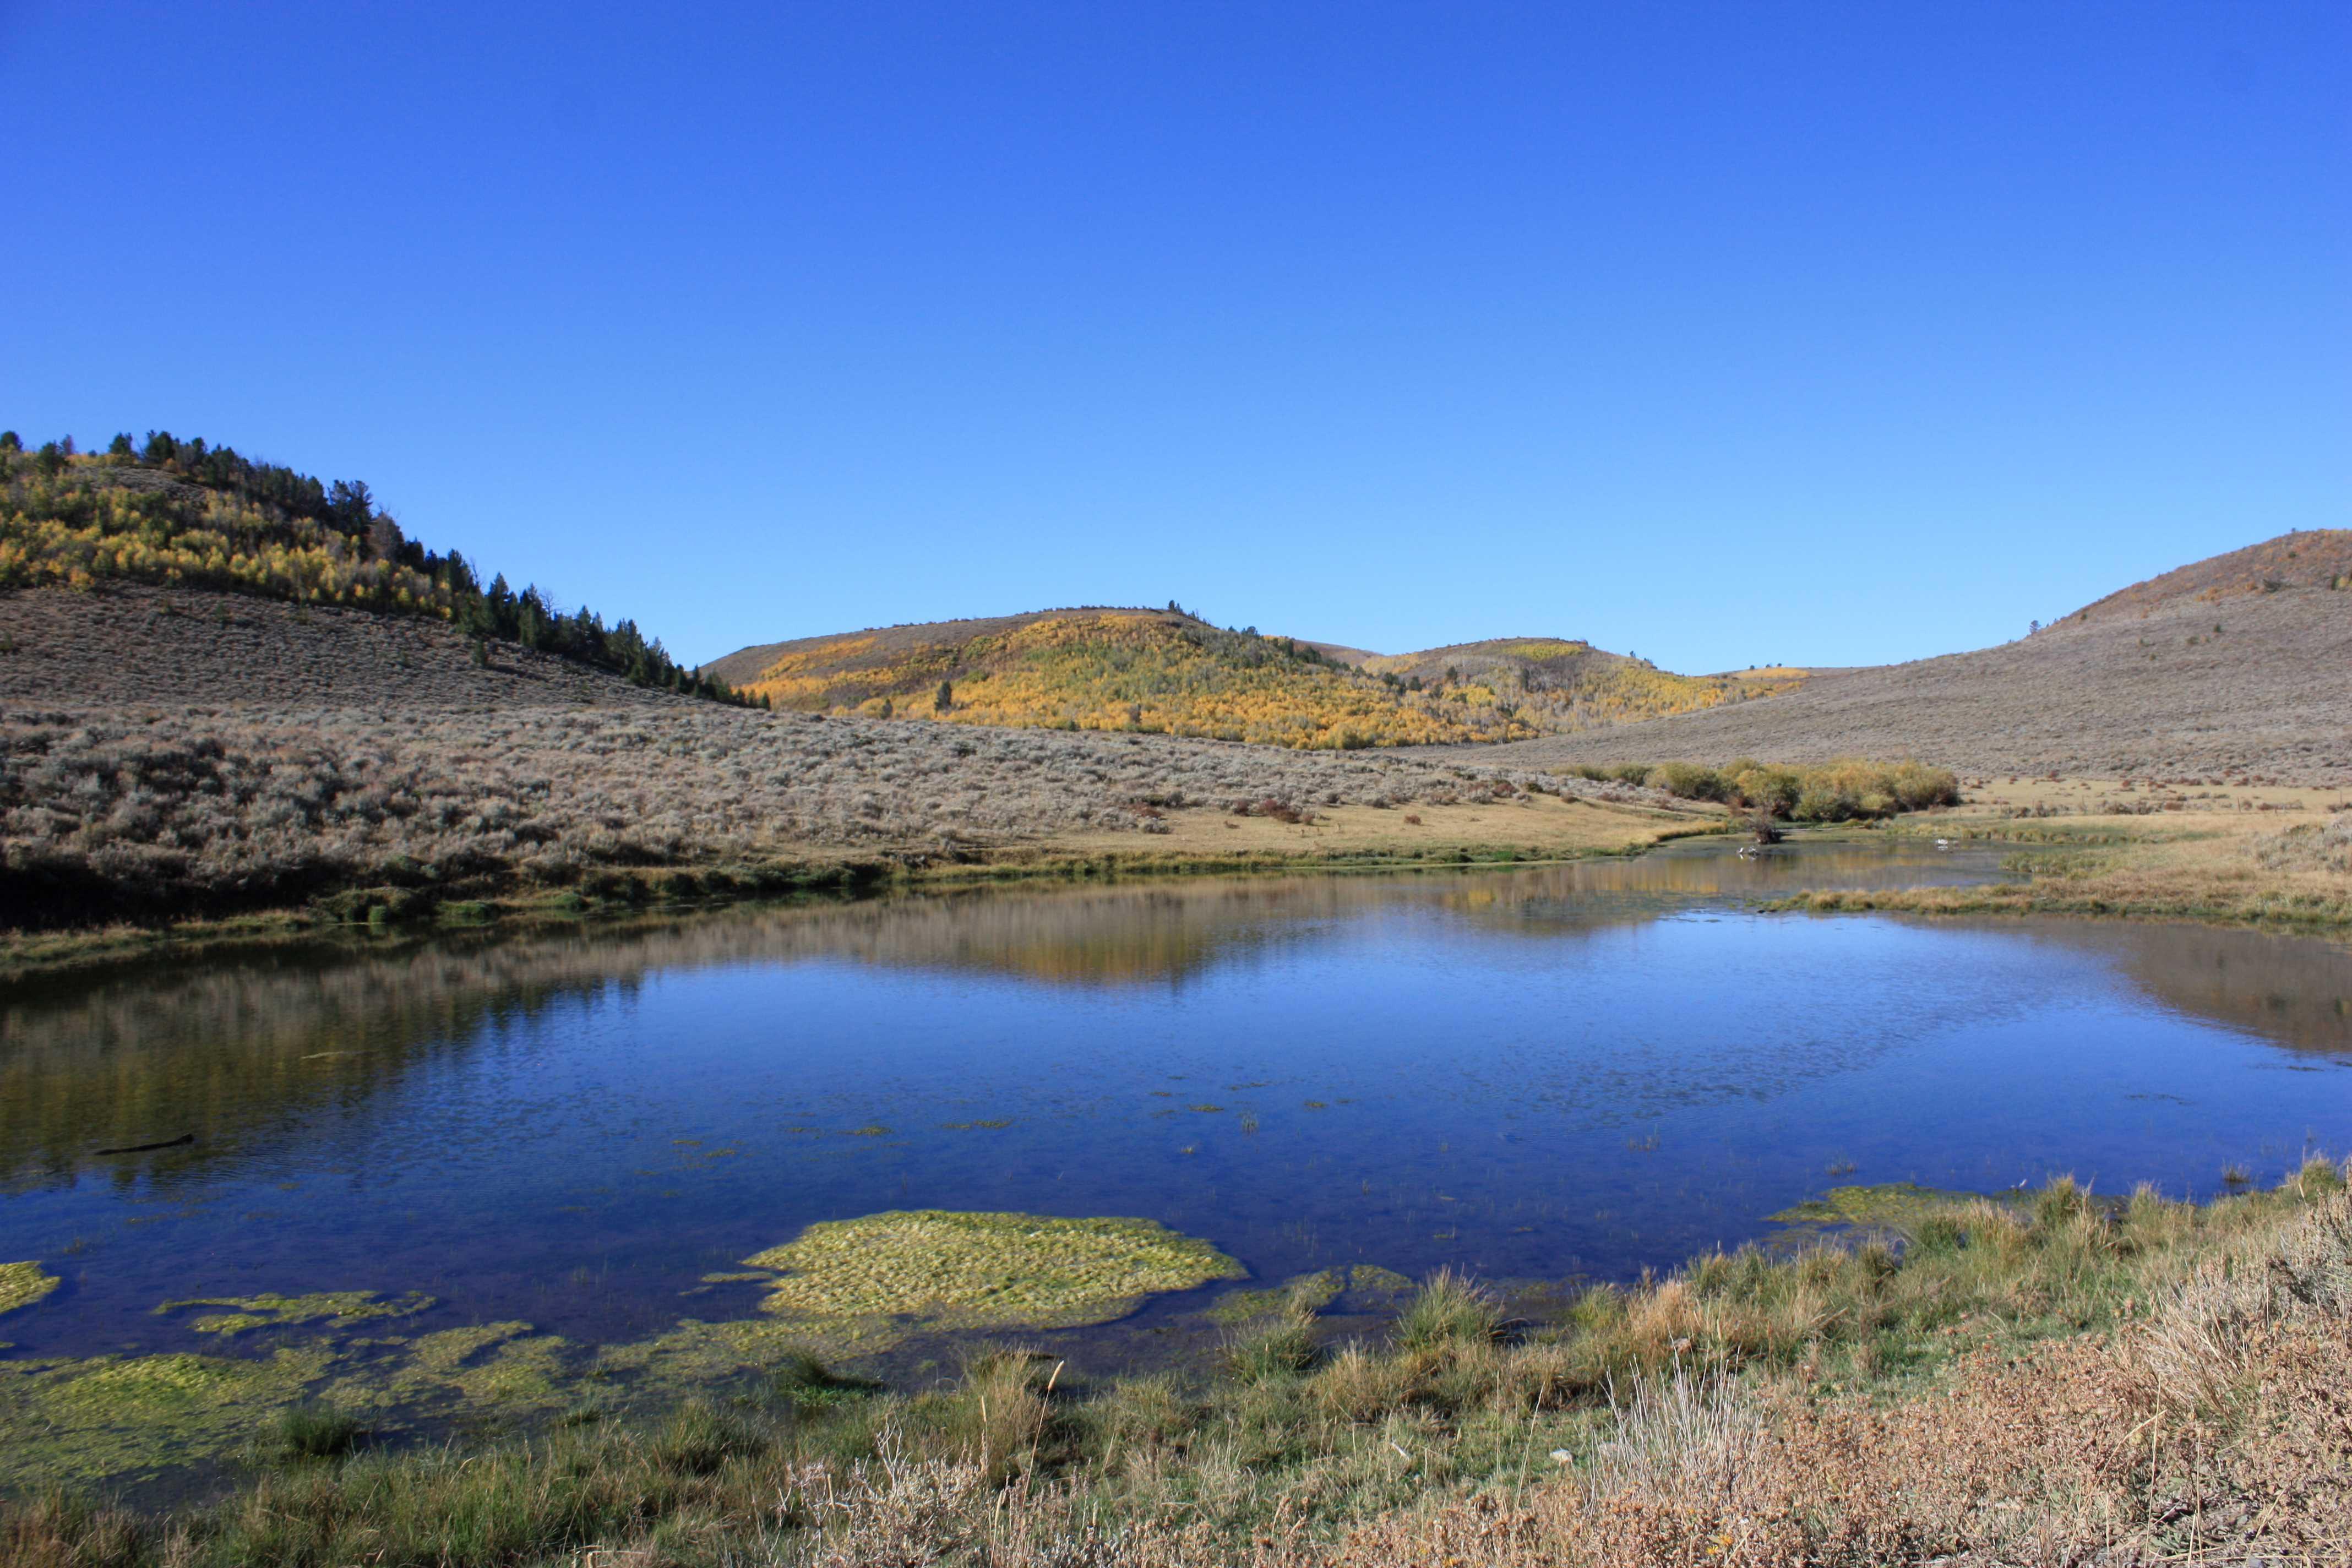
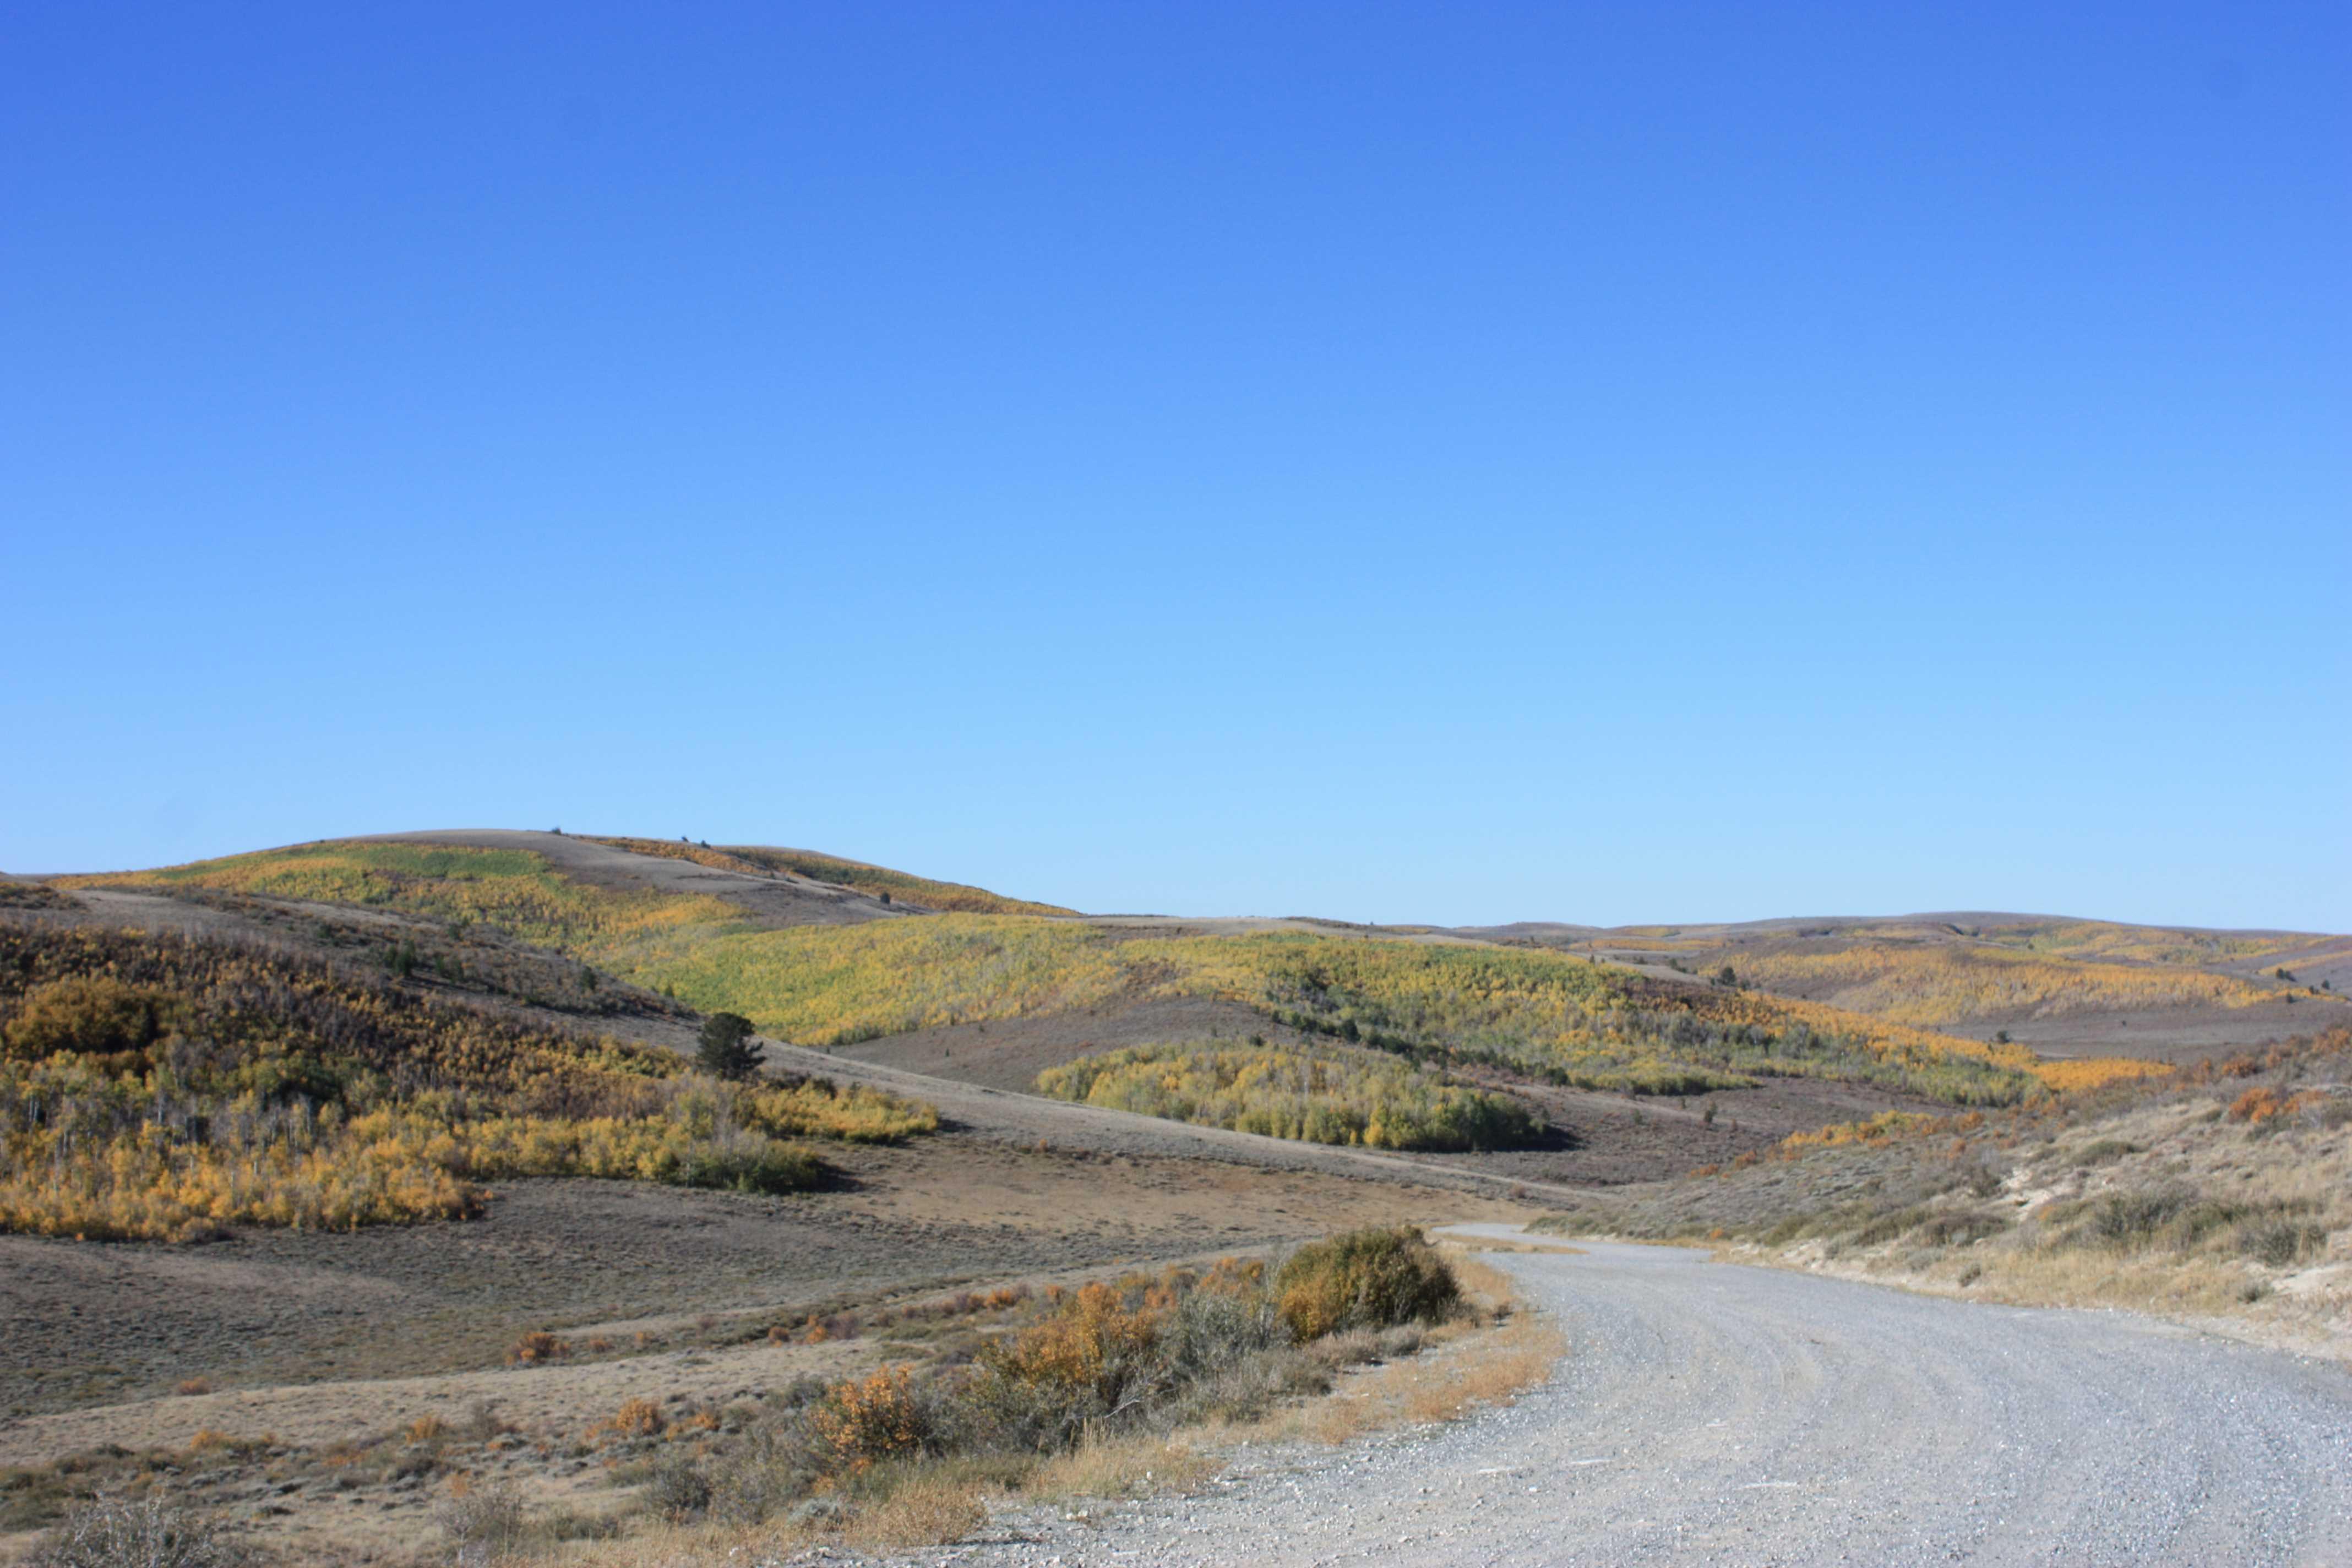
took the burb out for her shakedown run, it was a beautiful day yesterday, only in the 60s but no clouds and the leaves are changing big time lol. did you know Quaking Aspen stands are really one huge living organism not separate trees like pines and such. They grow from the roots of an existing tree so are all interconnected and actually the same living organism. You can see it in fall, as the colors change each stand changes at slighty diferent times and colors.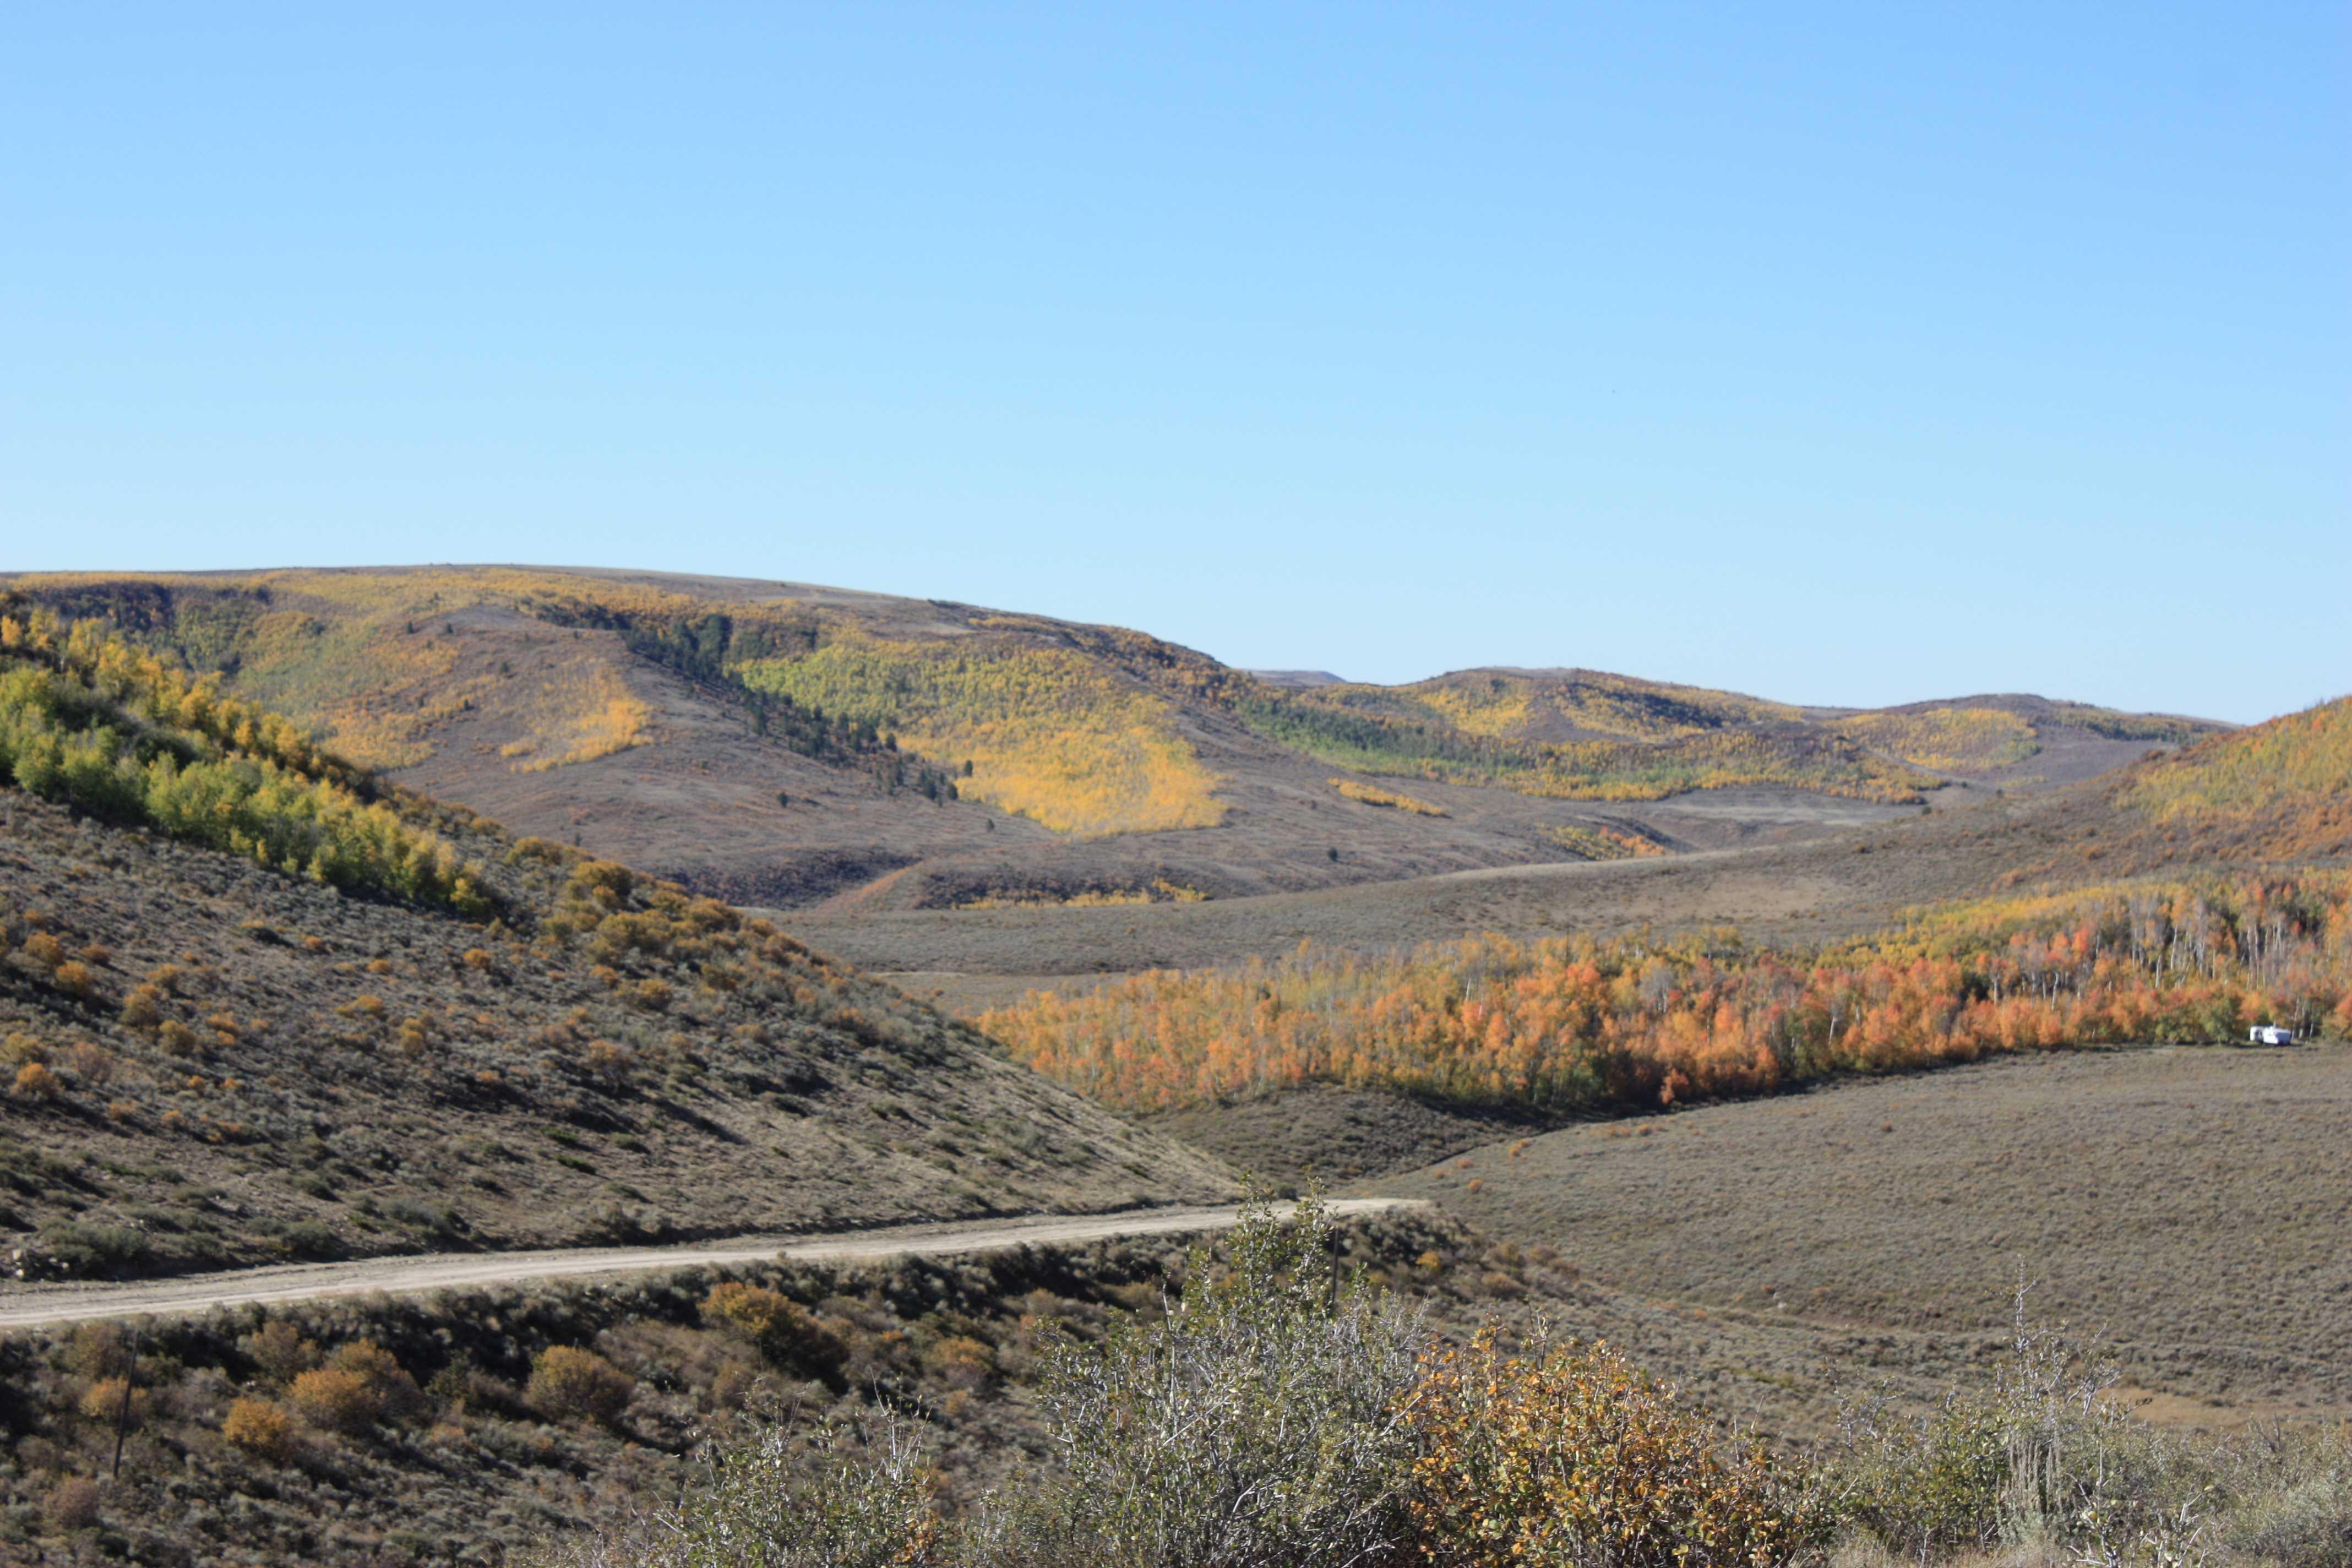
-
I remember scrolling past the post you quoted in the "All Activity" stream. It was there.
-
nfo and Feibings Golden Mink Oil its a water proofing and conditioner for outdoor gear.
-
On people not smoking.... maybe 1/3 of the people I've made pouches for in the last few years have now given up! Running joke is if you want to stop smoking buy a pouch off me
-
They look quite good well done, nice colours too 👍 I've stopped making tobacco pouches, no one is buying them or ordering them, which is no surprise considering the price of tobacco here in oz , anywhere from $70 to $ 120 for 50 grams. Glad I don't smoke HS
-

Snapshot 1 (9-14-2025 8-56 PM).png
Handstitched commented on LokiLeathers's gallery image in Gallery- Our Leatherwork
.png.acad8592b8808df46bcf437236c72272.png) So love the Harley belt , that took a bit of work 😀
So love the Harley belt , that took a bit of work 😀