All Activity
- Past hour
-
 I'm gonna throw you folks a bone, suppressor cases !!!!! Be the first on your block and you're in....
 - Today
-
 stampdycom joined the community
 -

spring flowers and good food
Sheilajeanne replied to chuck123wapati's topic in All About Us and Off Topic
Good one, Northmount! -

Adler 205-370 - help an old man who screwed up
Constabulary replied to councilman24's topic in Leather Sewing Machines
Looks like the shuttle race is not installed correctly, -
 hmm.
hmm. - Yesterday
-
Being a moderator on a forum is a selfless task, often having to deal with all sorts of numpties! If that's indicative of Redhorses's attitude then I wish him bon voyage and good luck on whatever forum he goes to. Unfortunately for him this is the forum he really needs.
-
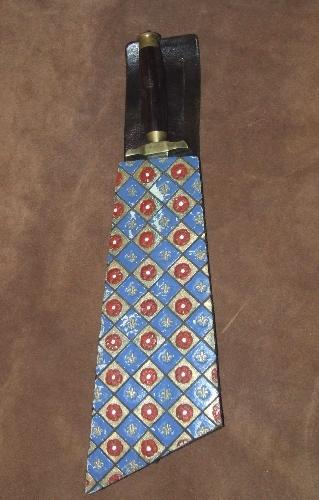
Dilute either the Future or Resolene 1:1 with water. Use several thinned coats, maybe 3. I prefer to use a version of 'Future' which I can get The paint won't help stiffen the leather Thin the paint and apply thin coats to build up the colour This knife scabbard was made in 2007, painted with acrylic model paints with no varnish to protect it. It was used regularly at events, tossed into a kit bag, generally neglected. It came back to me for repainting late 2016. After 10 years;

-
Something else that might work is shellac. It's used to stiffen felt hats, dissolved in alcohol (I used methylated spirits) and sprayed on the hat. I haven't tried it on leather but it might work on floppy leather.
-
Look great. Are those snaps, or dome-headed binding screws? I like that smooth look. I also like the little 'mind changer'. Larry
-
 zsteve joined the community
 -
Thank you and everyone else for teaching me and answering my questions! My family tended to never throw out cleaners, so I do have some of the old Johnson wax Future acrylic floor polish. Not sure though if I should quickly put it up on Ebay. lol. Someone else suggested avoiding chrome tan for my beaks - but it sounds like it's easily recognizable. Yay that. And it also sounds like I could keep using scraps then - even better! Since I do have some of the old-school Future, would you suggest using that or the Resolene? Would you recommend diluting either one with 50/50 water? If I used paint (I have that cheapo acrylic craft paint) would that help with the stiffening or eliminate the need for the floor polish or Resolene? Should I water it down or use it straight out of the bottle? Sorry for so many questions. I tend to stick to dry materials for my projects. I've learned the hard way that when chemicals are introduced to a project, i.e. glue, finishes, clay, paint, etc; they can look great for a long time, but can eventually fail big time. I had something randomly fail 30 months after I had boxed up the items - some were fine, some were not so fine. I've tried acrylic medium that the manufacturer insists always dries rock hard - mine is rubbery with only one coat.
-
One thing that may be of help ... I've found soaking veg tan in hot water and letting it dry makes a stiffer dry piece than room temp water. This was about 10 ounce leather but might be worth a shot. Vacuum sealing the pieces for about a half hour seemed to make them even stiffer. Just a seal-a-meal. The bags have a textured inside, which showed up on the leather.
-
When moulding it; give it a good soaking and a little bit of stretching. Clamp it up and let it dry. Resolene will work if can soak in, so usually not chrome tan Floor wax ? do you men 'Mop & Glo'? despite what it says that is not a wax but an acrylic varnish You can use acrylic paints on leather. Any paints. Don't go buying expensive ones. I use paints meant for plastic models. They're cheap. They'll only crack off if you put the paint on really thick, which you won't have to do
-
Basically you have veg tan and chrome tan. Chrome tan is used on furniture are rarely can it be wet moulded to hold a shape. Chrome usually shows a blue line in centre when its cut. I see from your photos your leather is not showing this blue Veg tan can usually be wet moulded and when dry will hold its shape
-
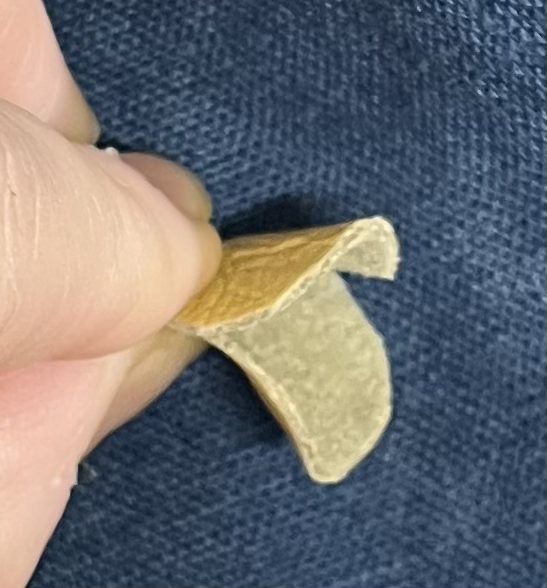
Here's a photo of one of the more curved ones.
-
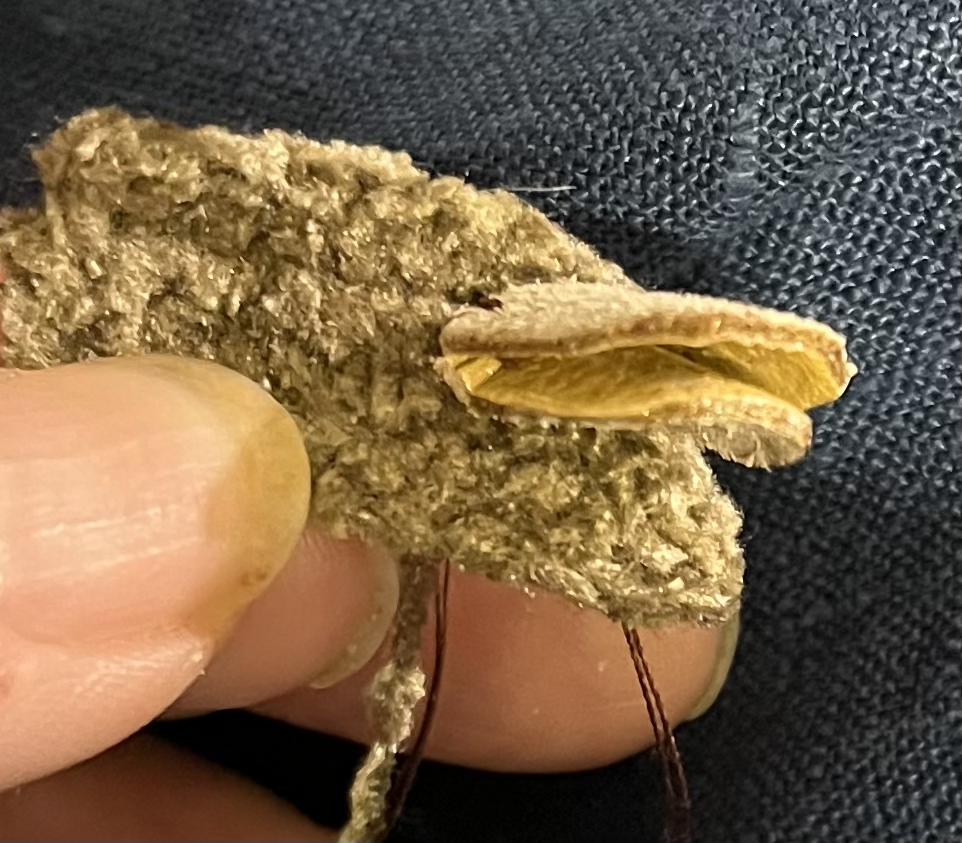
Here's a rough photo of one of my experiment beaks. That's my thumbnail in the photo to show how small it needs to be. That's the one where I put a little Elmer's on the edges. I wrapped it around a skewer overnight, after cutting it. With the same leather, I've gotten a better curve by squishing and hopefully stretching it a bit more. Not sure if it should be stretched or just wrapping it around is enough or if I should wait to cut it out until after I stretch it. If I use the Resolene or floor wax, would that allow this to work with random scraps or should I use veg tanned only? I can use acrylic paints on leather? It won't crack or scratch off?
-
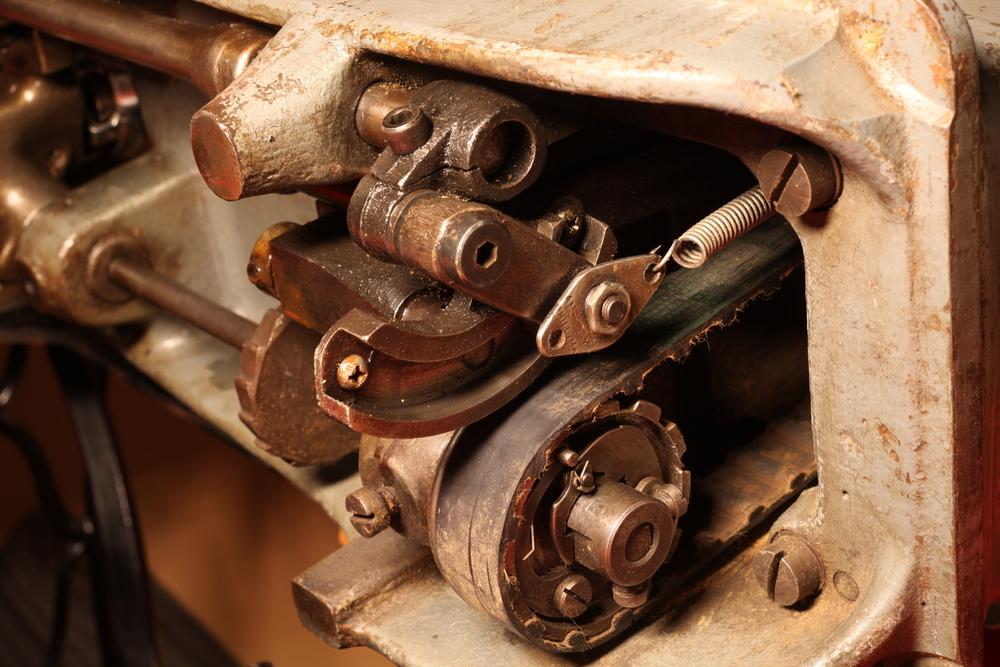
Progress! Looking at manuals for the 144W102 and 144W103, most things seem to match up with the machine that I have. The one exception is the stitch length and reverse feed. Referring to the manuals for the 102 and 103 from @CowboyBobs comments in this thread: https://leatherworker.net/forum/topic/110183-singer-145w-mystery/ , the 102 has a spindle at the center of the machine pulley for adjusting stitch length, and the 103 says to adjust the feed eccentric to get different stitch length. Here's a photo of the large crescent-shaped stitch length adjuster / reverse on this machine. The spring pulls the arm toward the top, where it makes long forward stitches. Pull the lever down somewhat, and you get shorter stitches. Down all the way and you get reverse. Seems it would be well-suited to a foot lever, if all you wanted was full length forward and full length reverse.
-
How do I figure out how it was tanned? Or would it just be smarter to buy it new so I know what it is?
-
 Michael R joined the community
 -
 Well, then you have guys like me that just enjoy working with their hands. I picked up the hobby accidentally while I was on a forced 2 week vacation due to a certain virus. I was only sick for 24 hours and slept for most of it. After that I was bored so I fired up the forge and made knives for my nieces and nephews and needed to make sheath for them. A few youtube videos later and some Amazon stuff ordered and I am making things because I enjoy the hobby, not for profit, dog collars with the dogs name, address, and phone numbers, a belt i wear daily, a few holsters, learning to carve and stamp and ended up making some craters with carved flowers for my mom's birthday. Yeah the OP could have checked back in but with each post the experienced people are adding to the knowledge base ys new guys rely on to learn from.
 -

Holster between the belt and pants
Dwight replied to AlZilla's topic in Gun Holsters, Rifle Slings and Knife Sheathes
There are times I have to do suspenders . . . hate em . . . but whatever. I took some of my shirts with tails on em . . . laid em down and cut the tails off square . . . put a hem in em . . . and wear em Hawaiian style . . . suspenders inside over my tee shirt. Works pretty good for me May God bless, Dwight -

Adler 205-370 - help an old man who screwed up
Goldshot Ron replied to councilman24's topic in Leather Sewing Machines
Sorry, I must have imagined it. I could not find the timing video either. But, Uwe Grosse has some on Youtube that are informative, and there is a Weaver video that offers good information on a 205. One problem I had when I first got my 205 was that I had to order two extra shims to fit behind the collar on the bobbin to accommodate 346 size thread. There was certainly a learning curve between the Adler and a clone 205. Good luck. -
in addition to my last post: Just in case you think the 29K71 (or other patcher machine - no matter the brand) is a great heavy duty leather sewing machine ... it clearly is NOT! Its is a machine for repair work but not for producing leather goods. It may work for odds and ends in your privat environment but not for pro leather work or for producing goods you probably want so sell. I´m barely using mine but if you need it for "odd work" then it is indispemnseable - it can do work that other machines can´t do.
-

Working through some vintage pattern and project books-
Snores replied to MAKleather's topic in Show Off!!
thats very nice. I love those old floral patterns that Tandy has in their library. -
oh heck yea!!
-
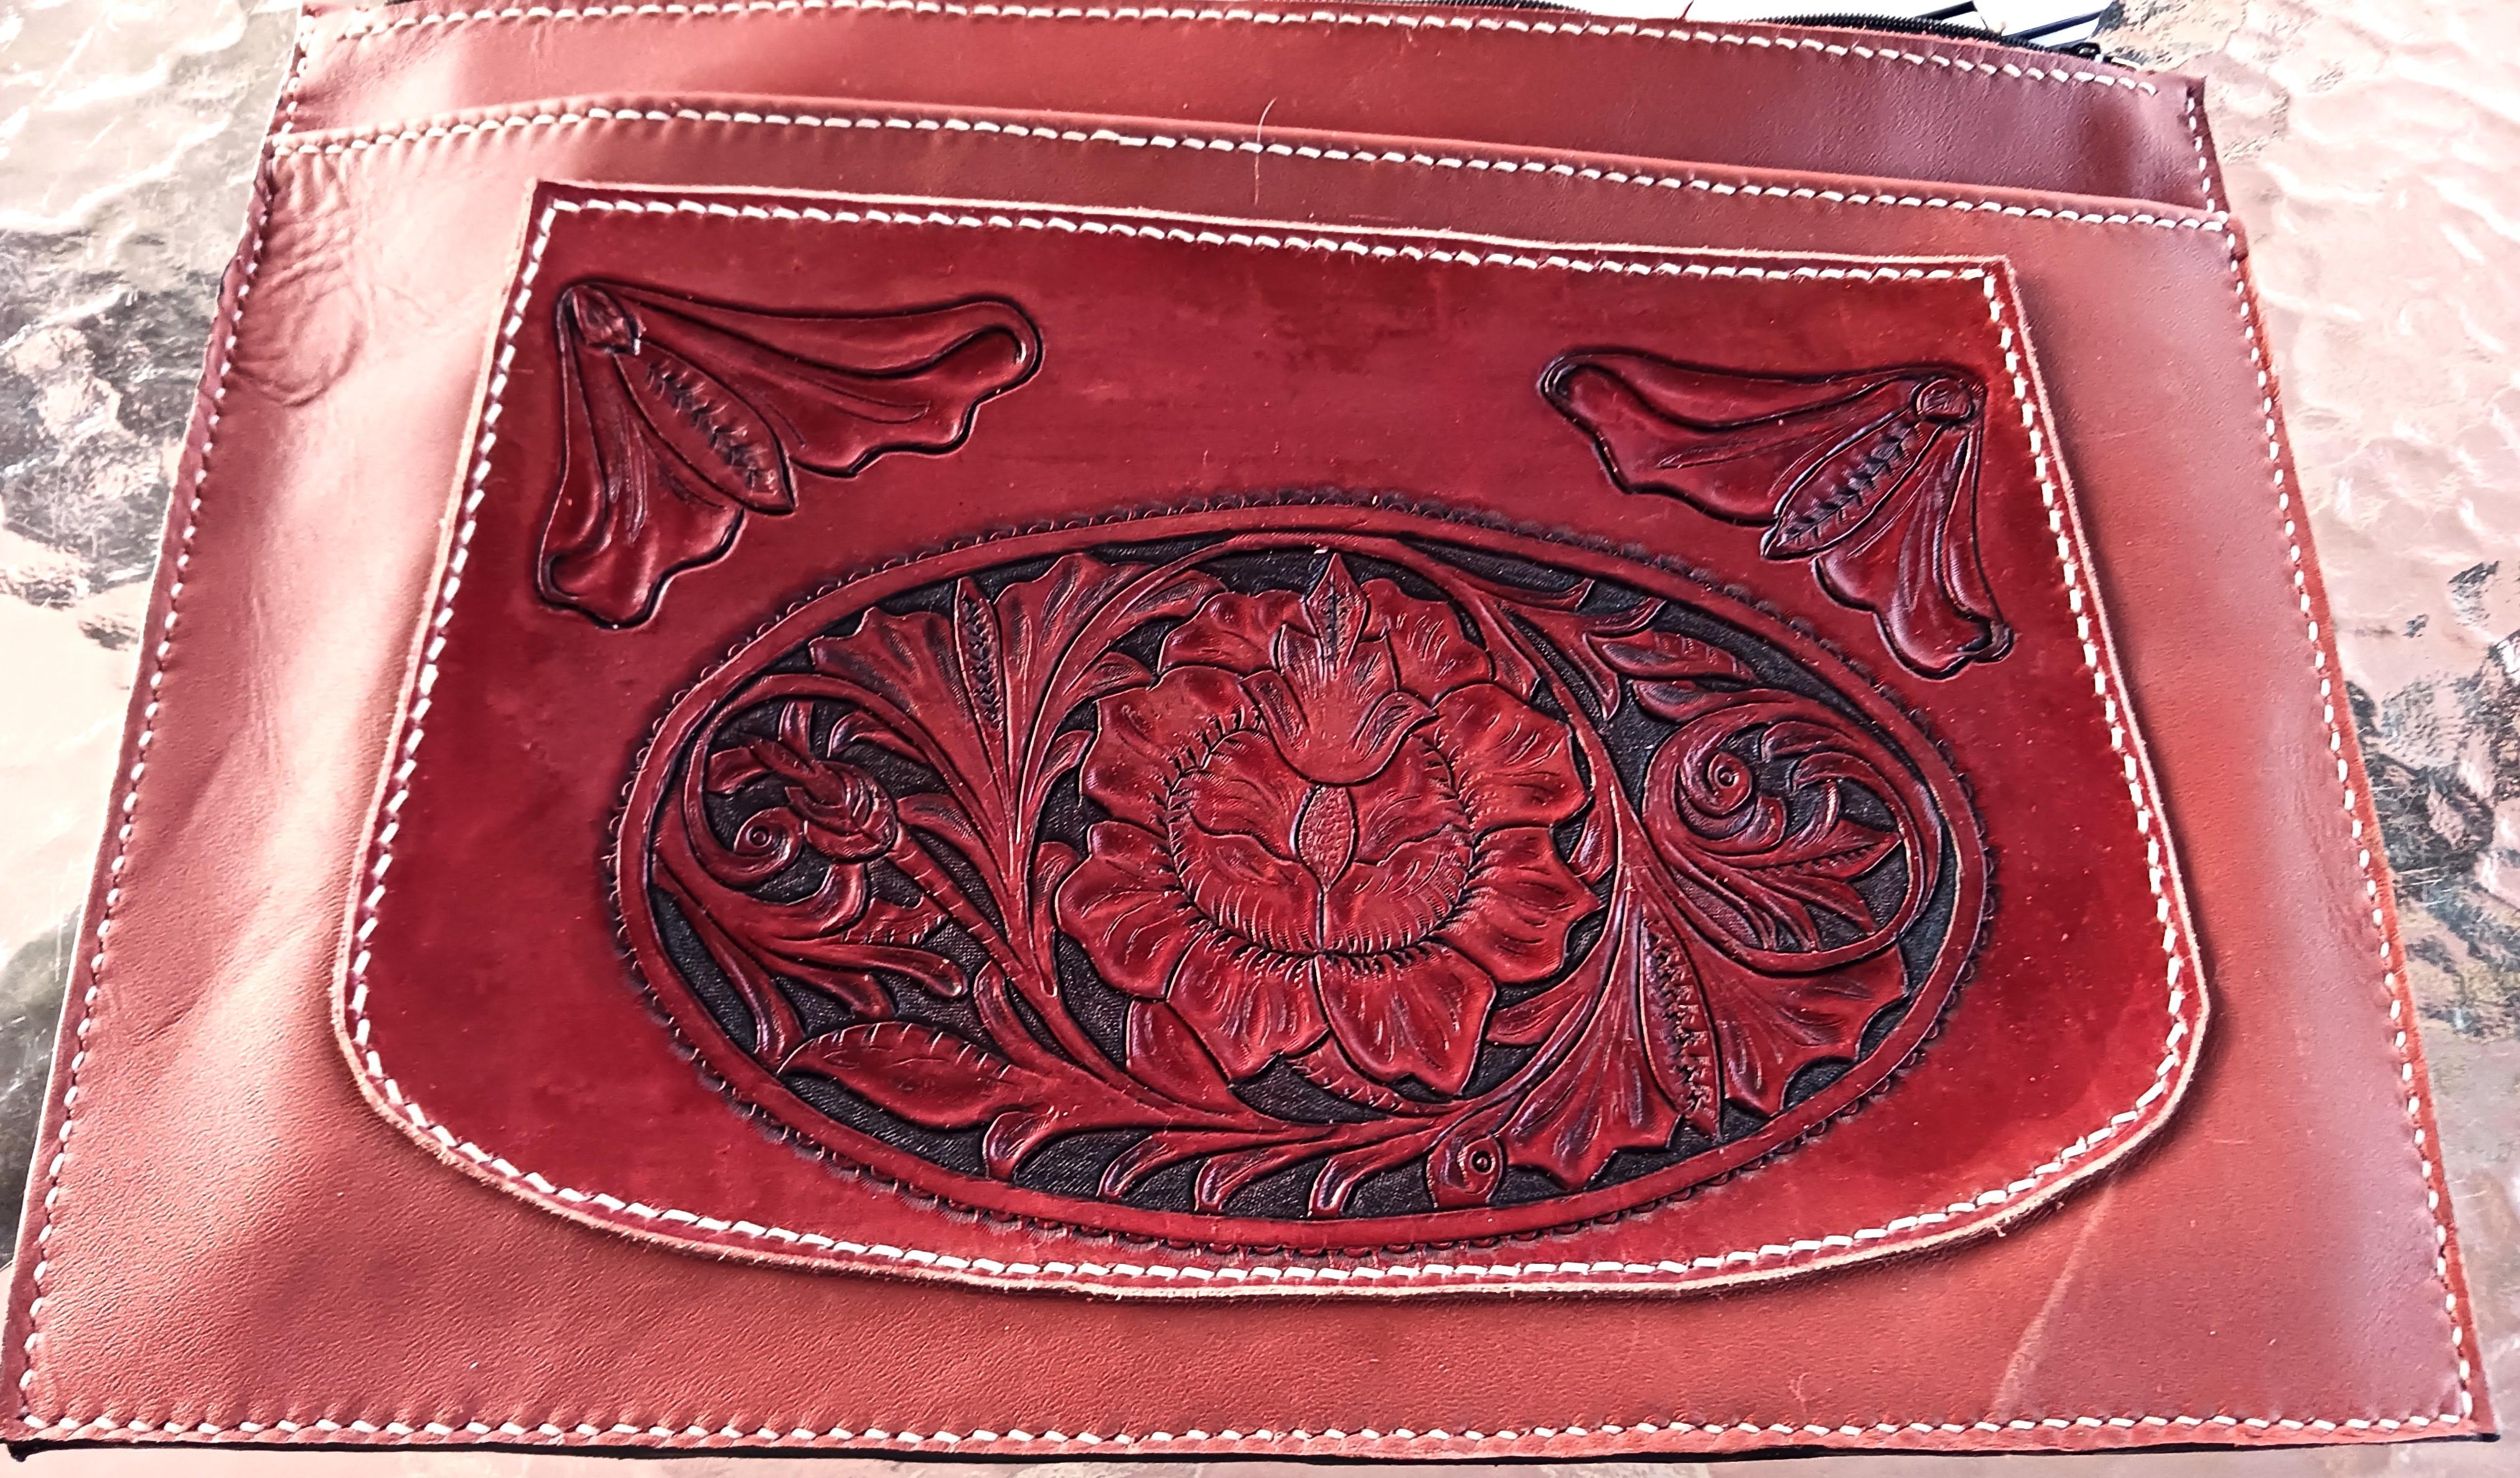
Very nicely done! Not to hijack your thread but here is one that I did for a Chrome book recently. It has a pocket on the front for possibles
-
1. If its veg tan leather you are molding it will hold its shape 2. Several coats of thinned water resistant PVA glue, or varnish 3. Try bees wax, rubbed in, it will protect the edge, not turn it too dark
-
I think veg tan leather would be best for what you're doing, 5 min epoxy inside the beak, cut the beak to shape, so when you fold it's in the shape you want, then stitch under or mold it on a form, Ie, a piece of wood. Then paint the inside after it's dry with 5-minute epoxy , then paint the outside with Acrylic paint, as Chuck said, good luck and have fun!