All Activity
- Past hour
-
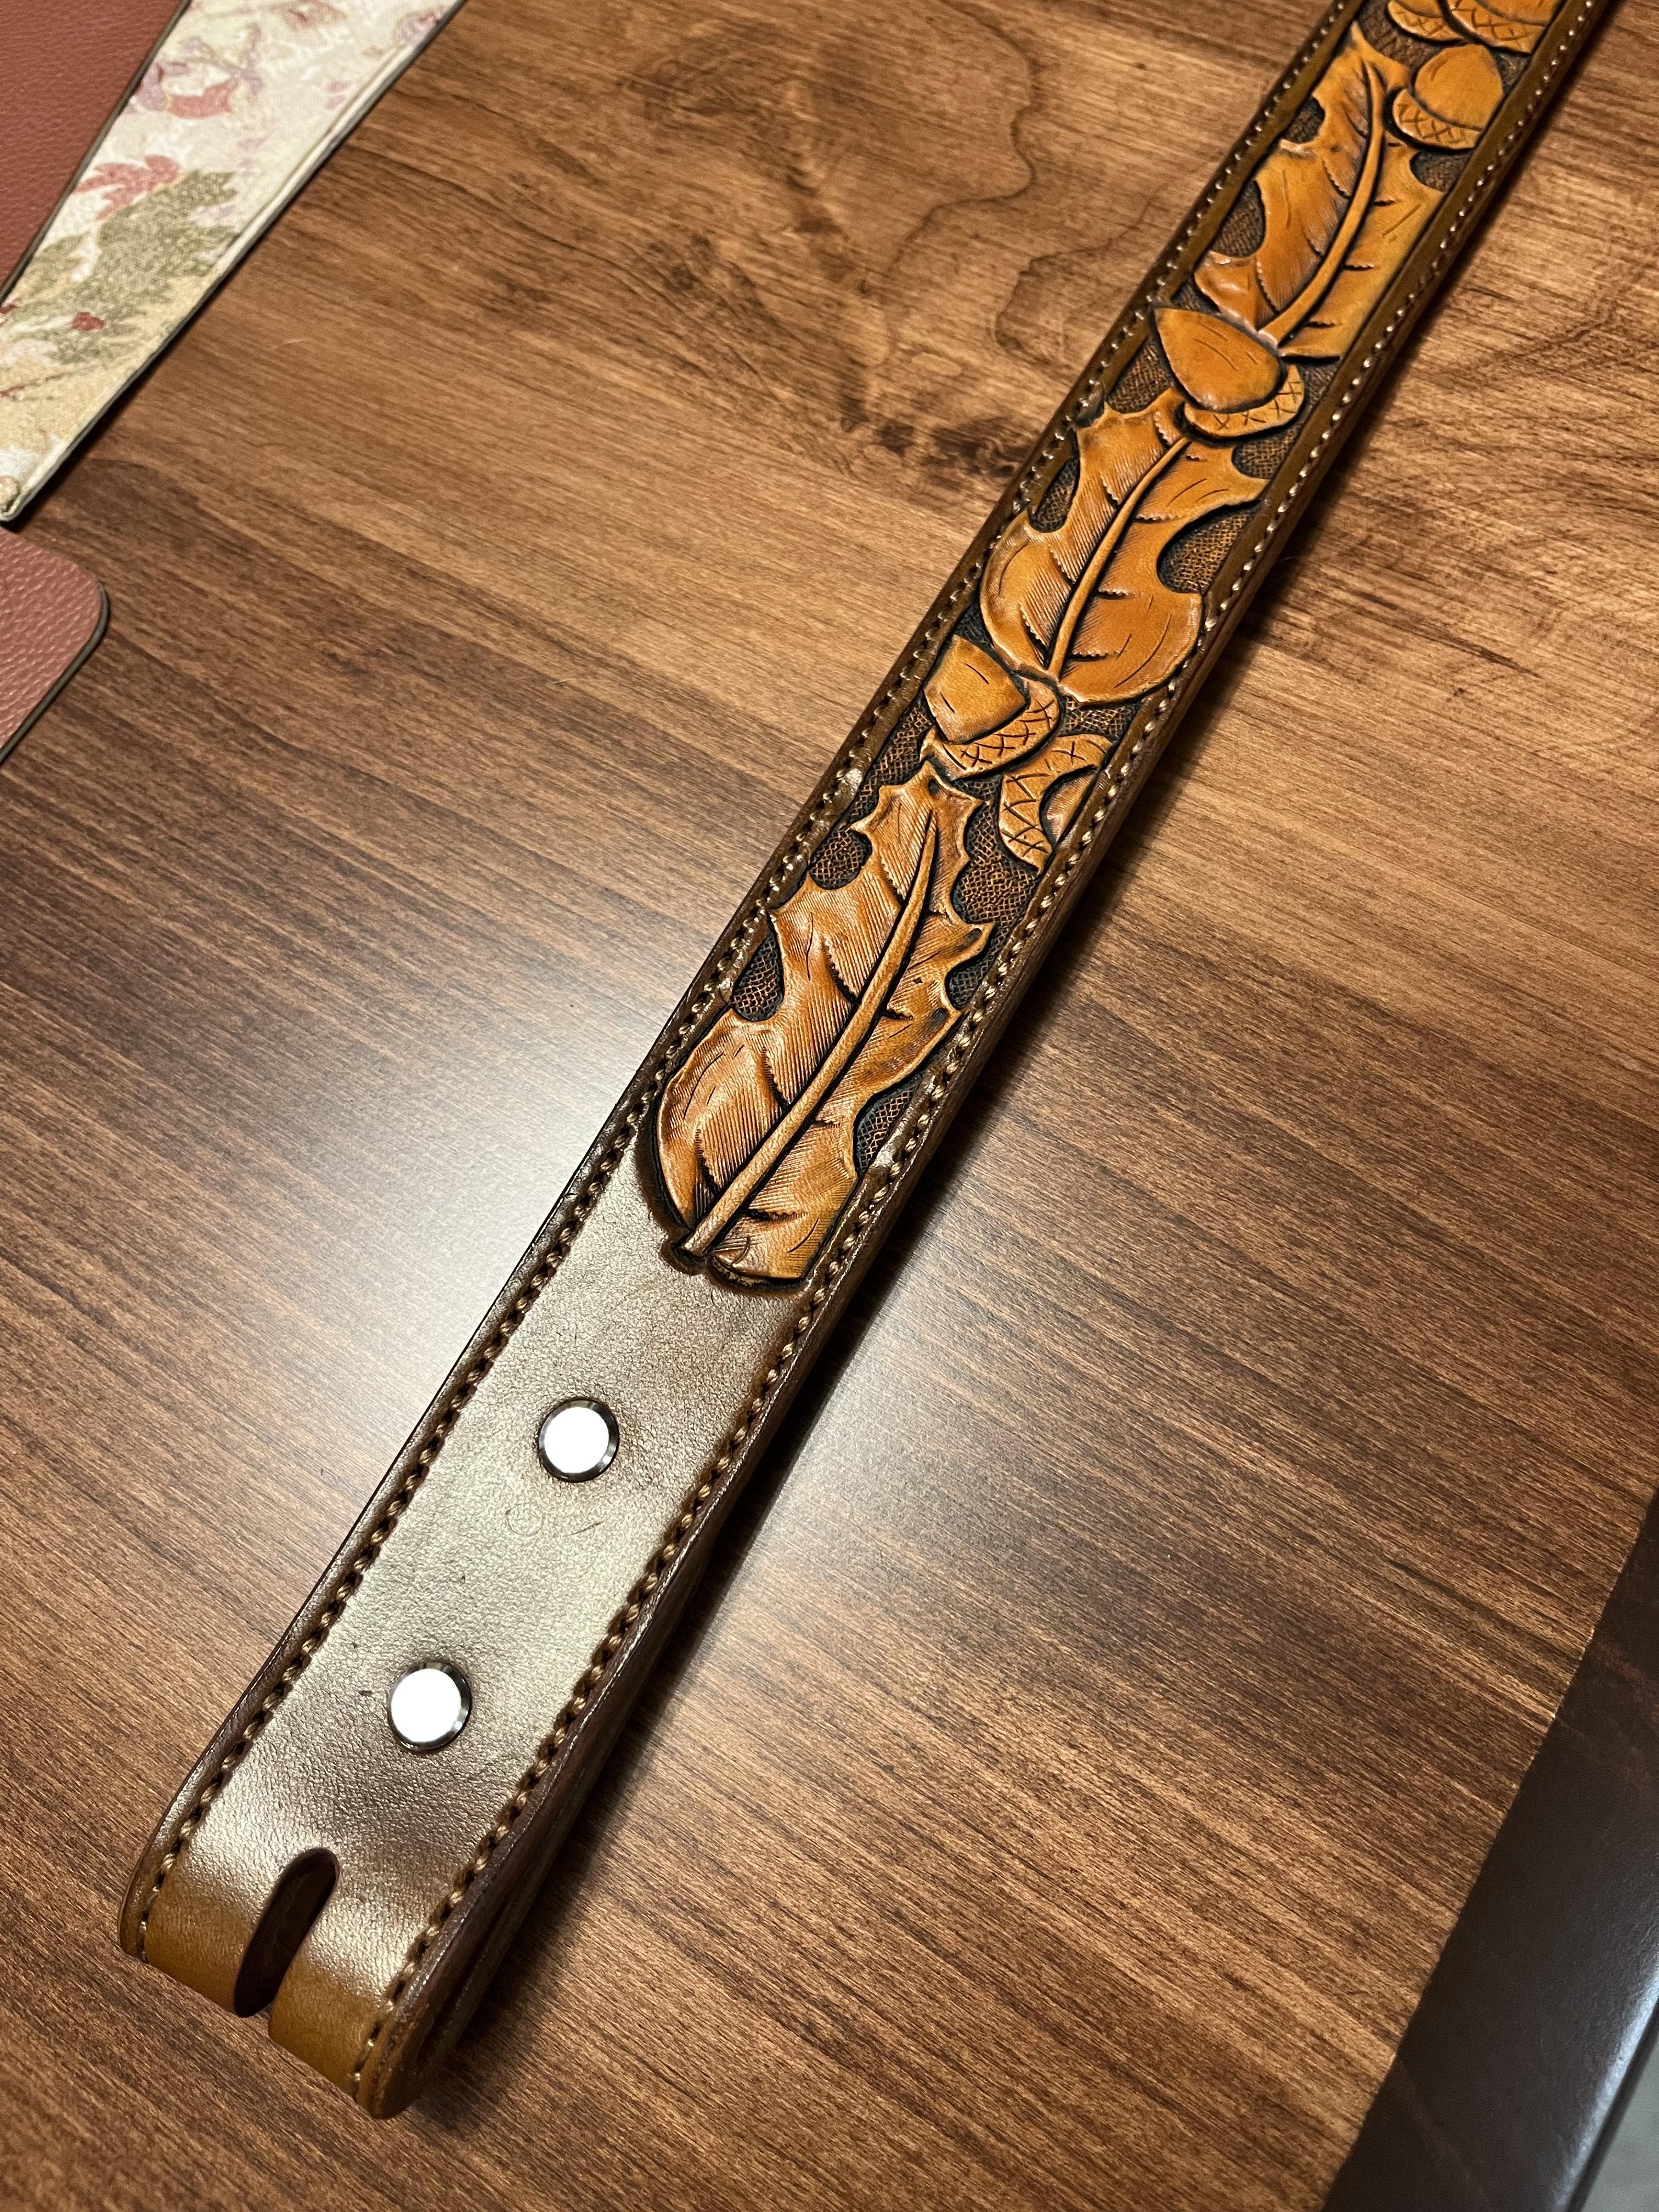
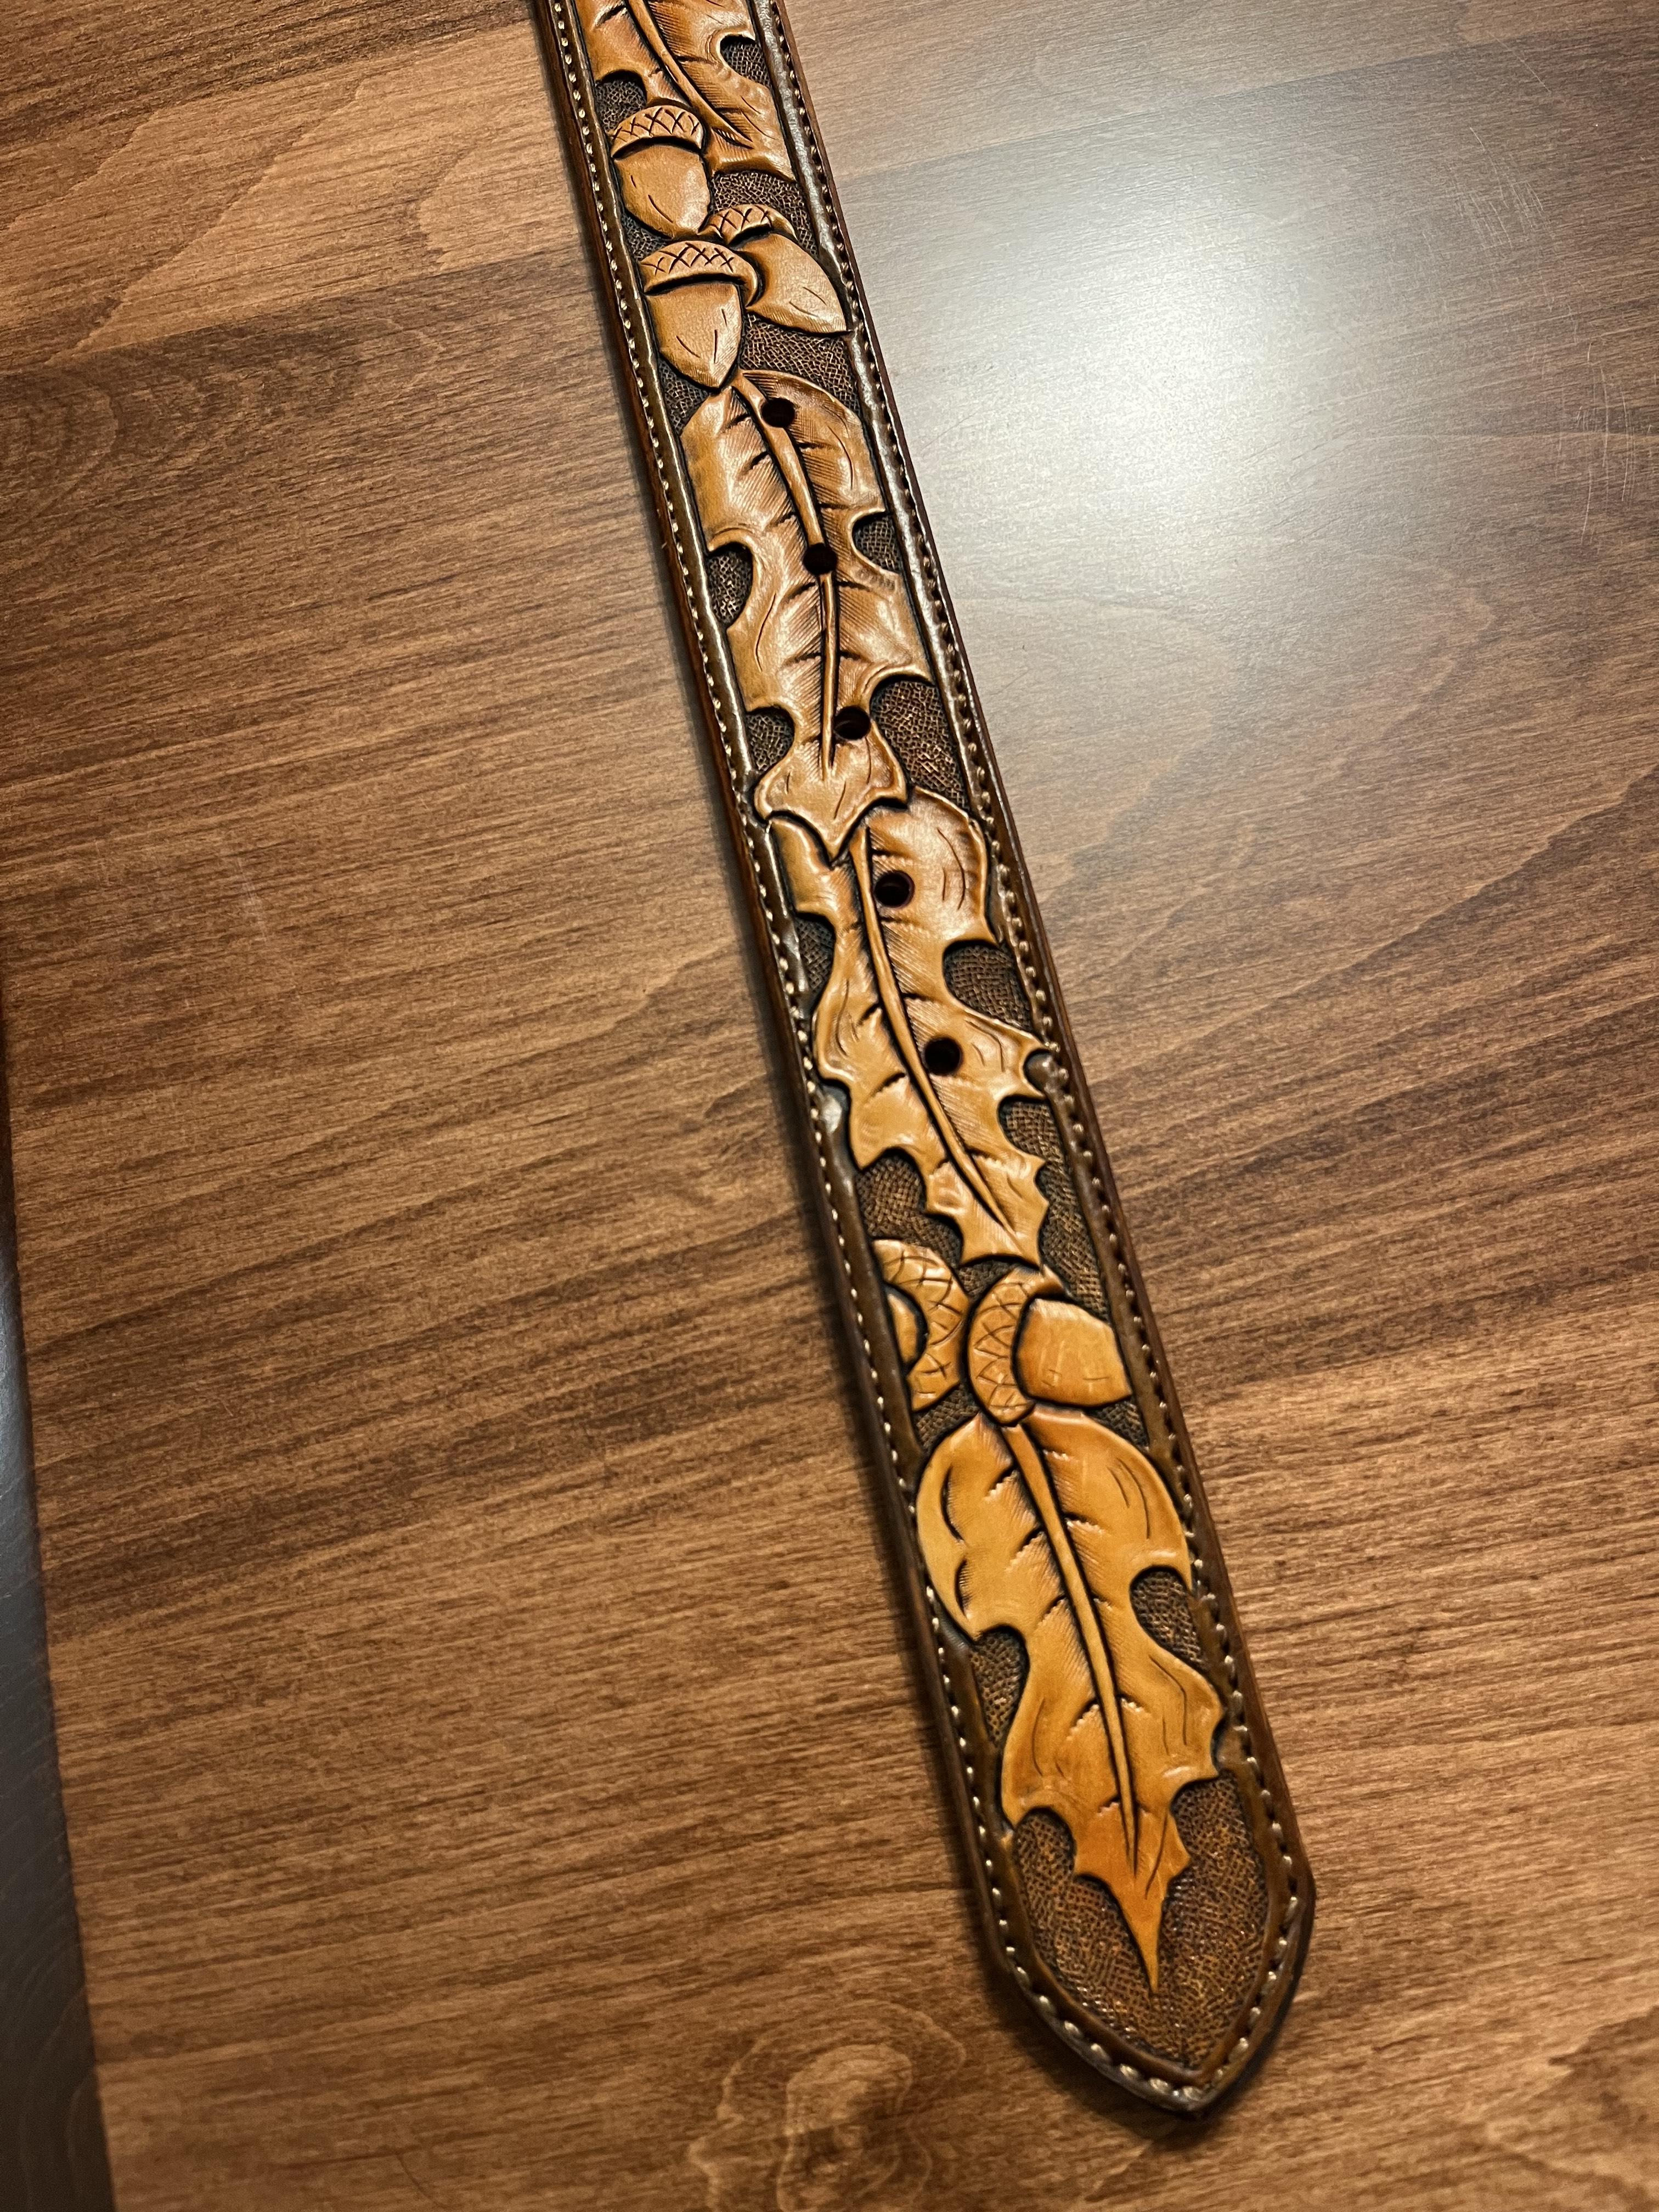
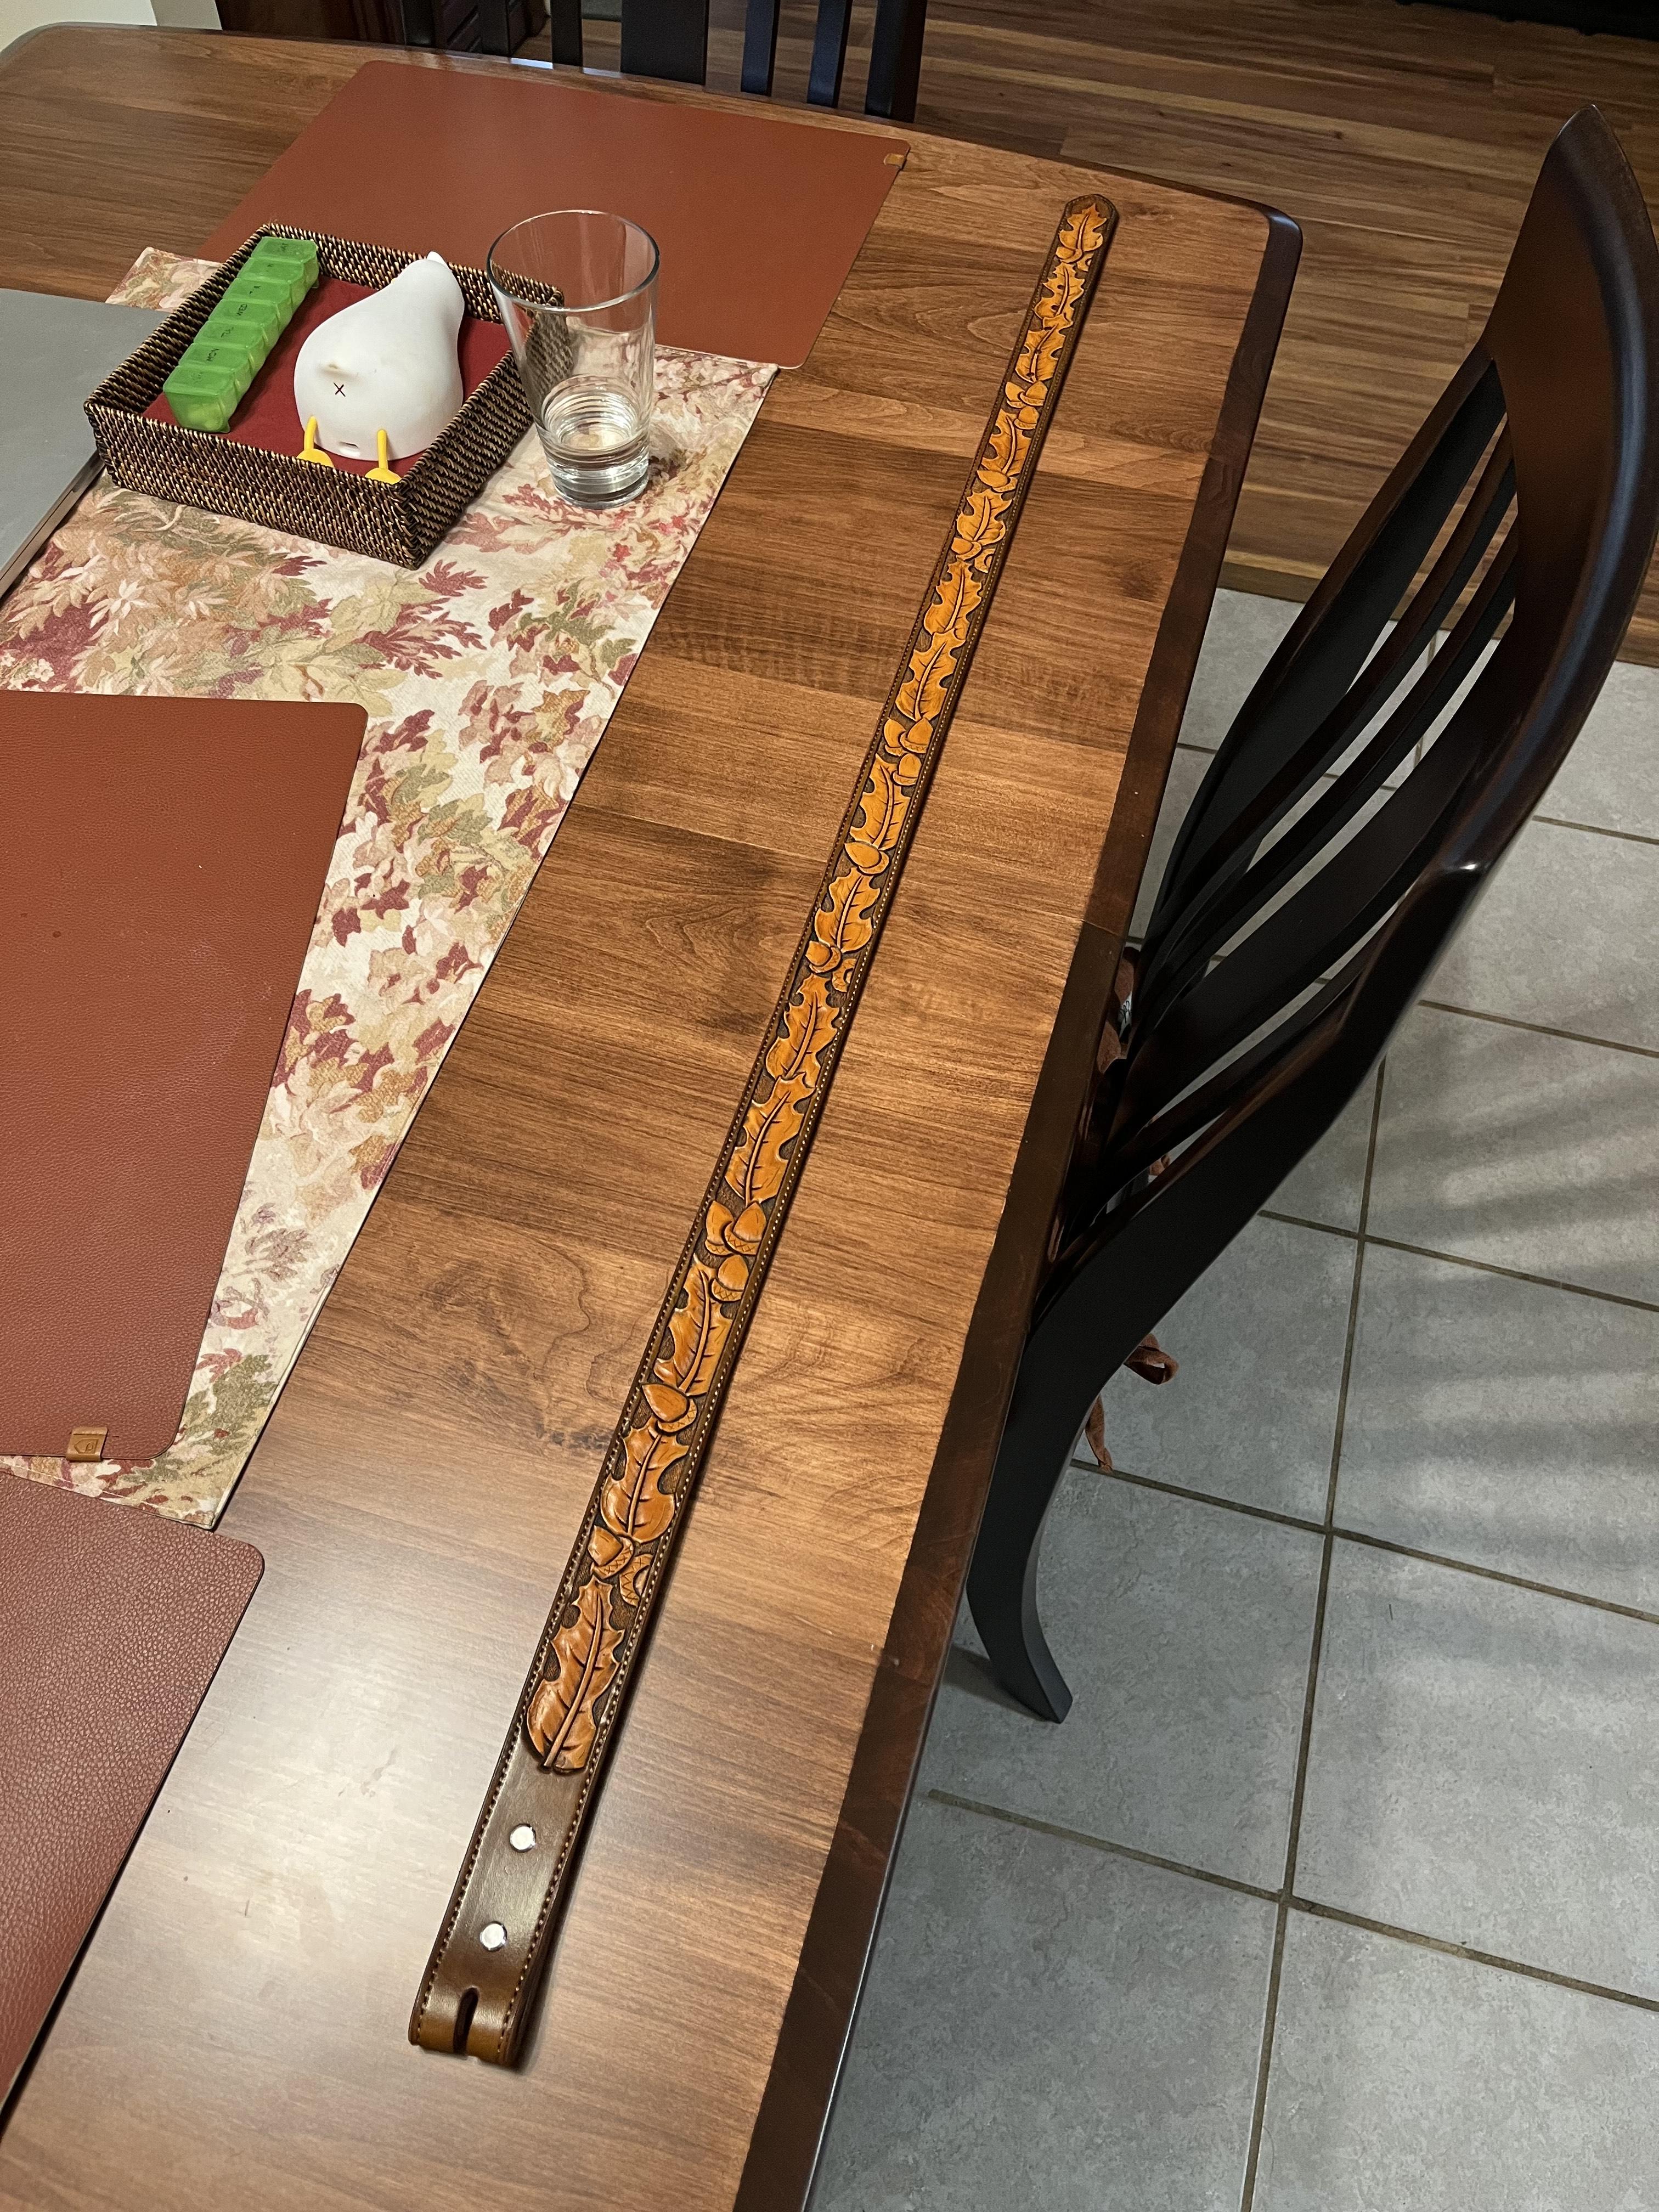
 Focus is on large dogs and lining 8-9 oz tooled leather tops. I have 2-3 oz veg tan leather that seems tough as blazes (yet soft like Herman Oak is in any thickness) and can still get more at the great price. But do any of you have experience in abrasion wear for such linings, with dogs? Would you recommend a different lining, like some synthetic? I have this 2-3 oz for lining belts. I'd probably go 3-4 oz lining in a perfect world (like the rodeo belt I watched made) but the deal on the 2-3oz was sooo much more affordable. Soft and super tough but I know nothing of abrasion resistance over a bit of time. Thanks for your thoughts. Jeff in Silver Springs / Ocala Forest, FL
 - Today
-
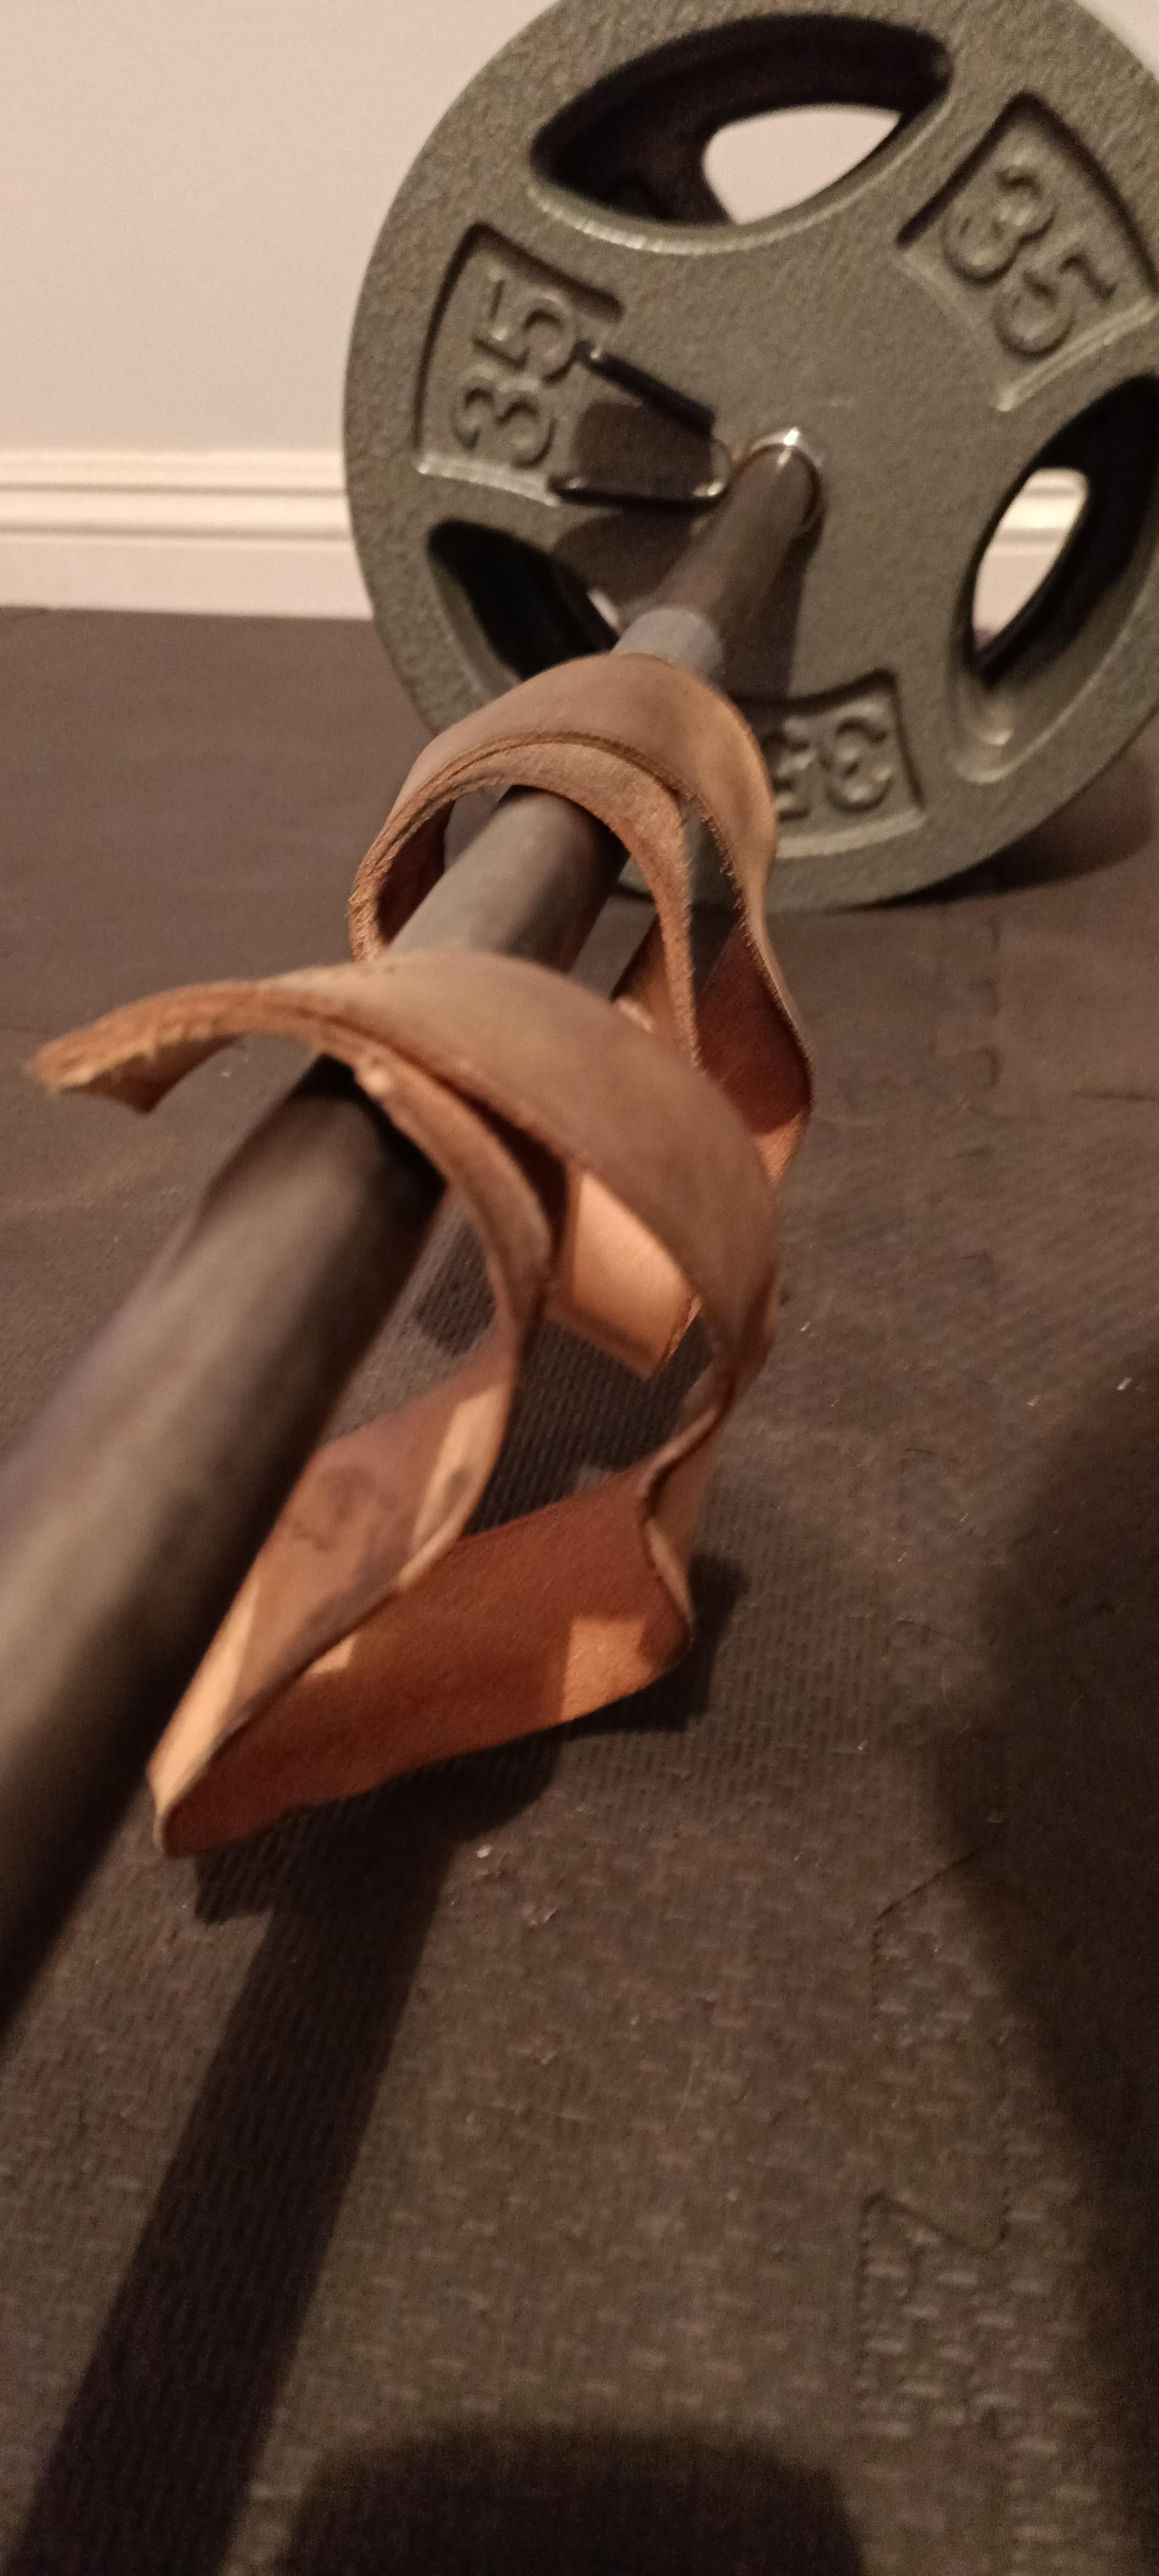
Yes, those were the first type I made. Used leather that was too thin so tried this with 6oz ish scraps. There is the loop you suggest, with the trailing end passed through. Another type is this one, simple loop stitched together (both these types with half-twist) The other (I haven't tried) is a figure 8 loop and is apparently more secure. I don't lift much, but my sweetheart comes in here sometimes. It would be nice to impress her, and considering my lifting career, accoutrements may be my best hope! Oh, and as your experience suggests, this current leather may be a bit too thin. So I'll probably need to make a new set eventually anyway, if my luck holds out.
-
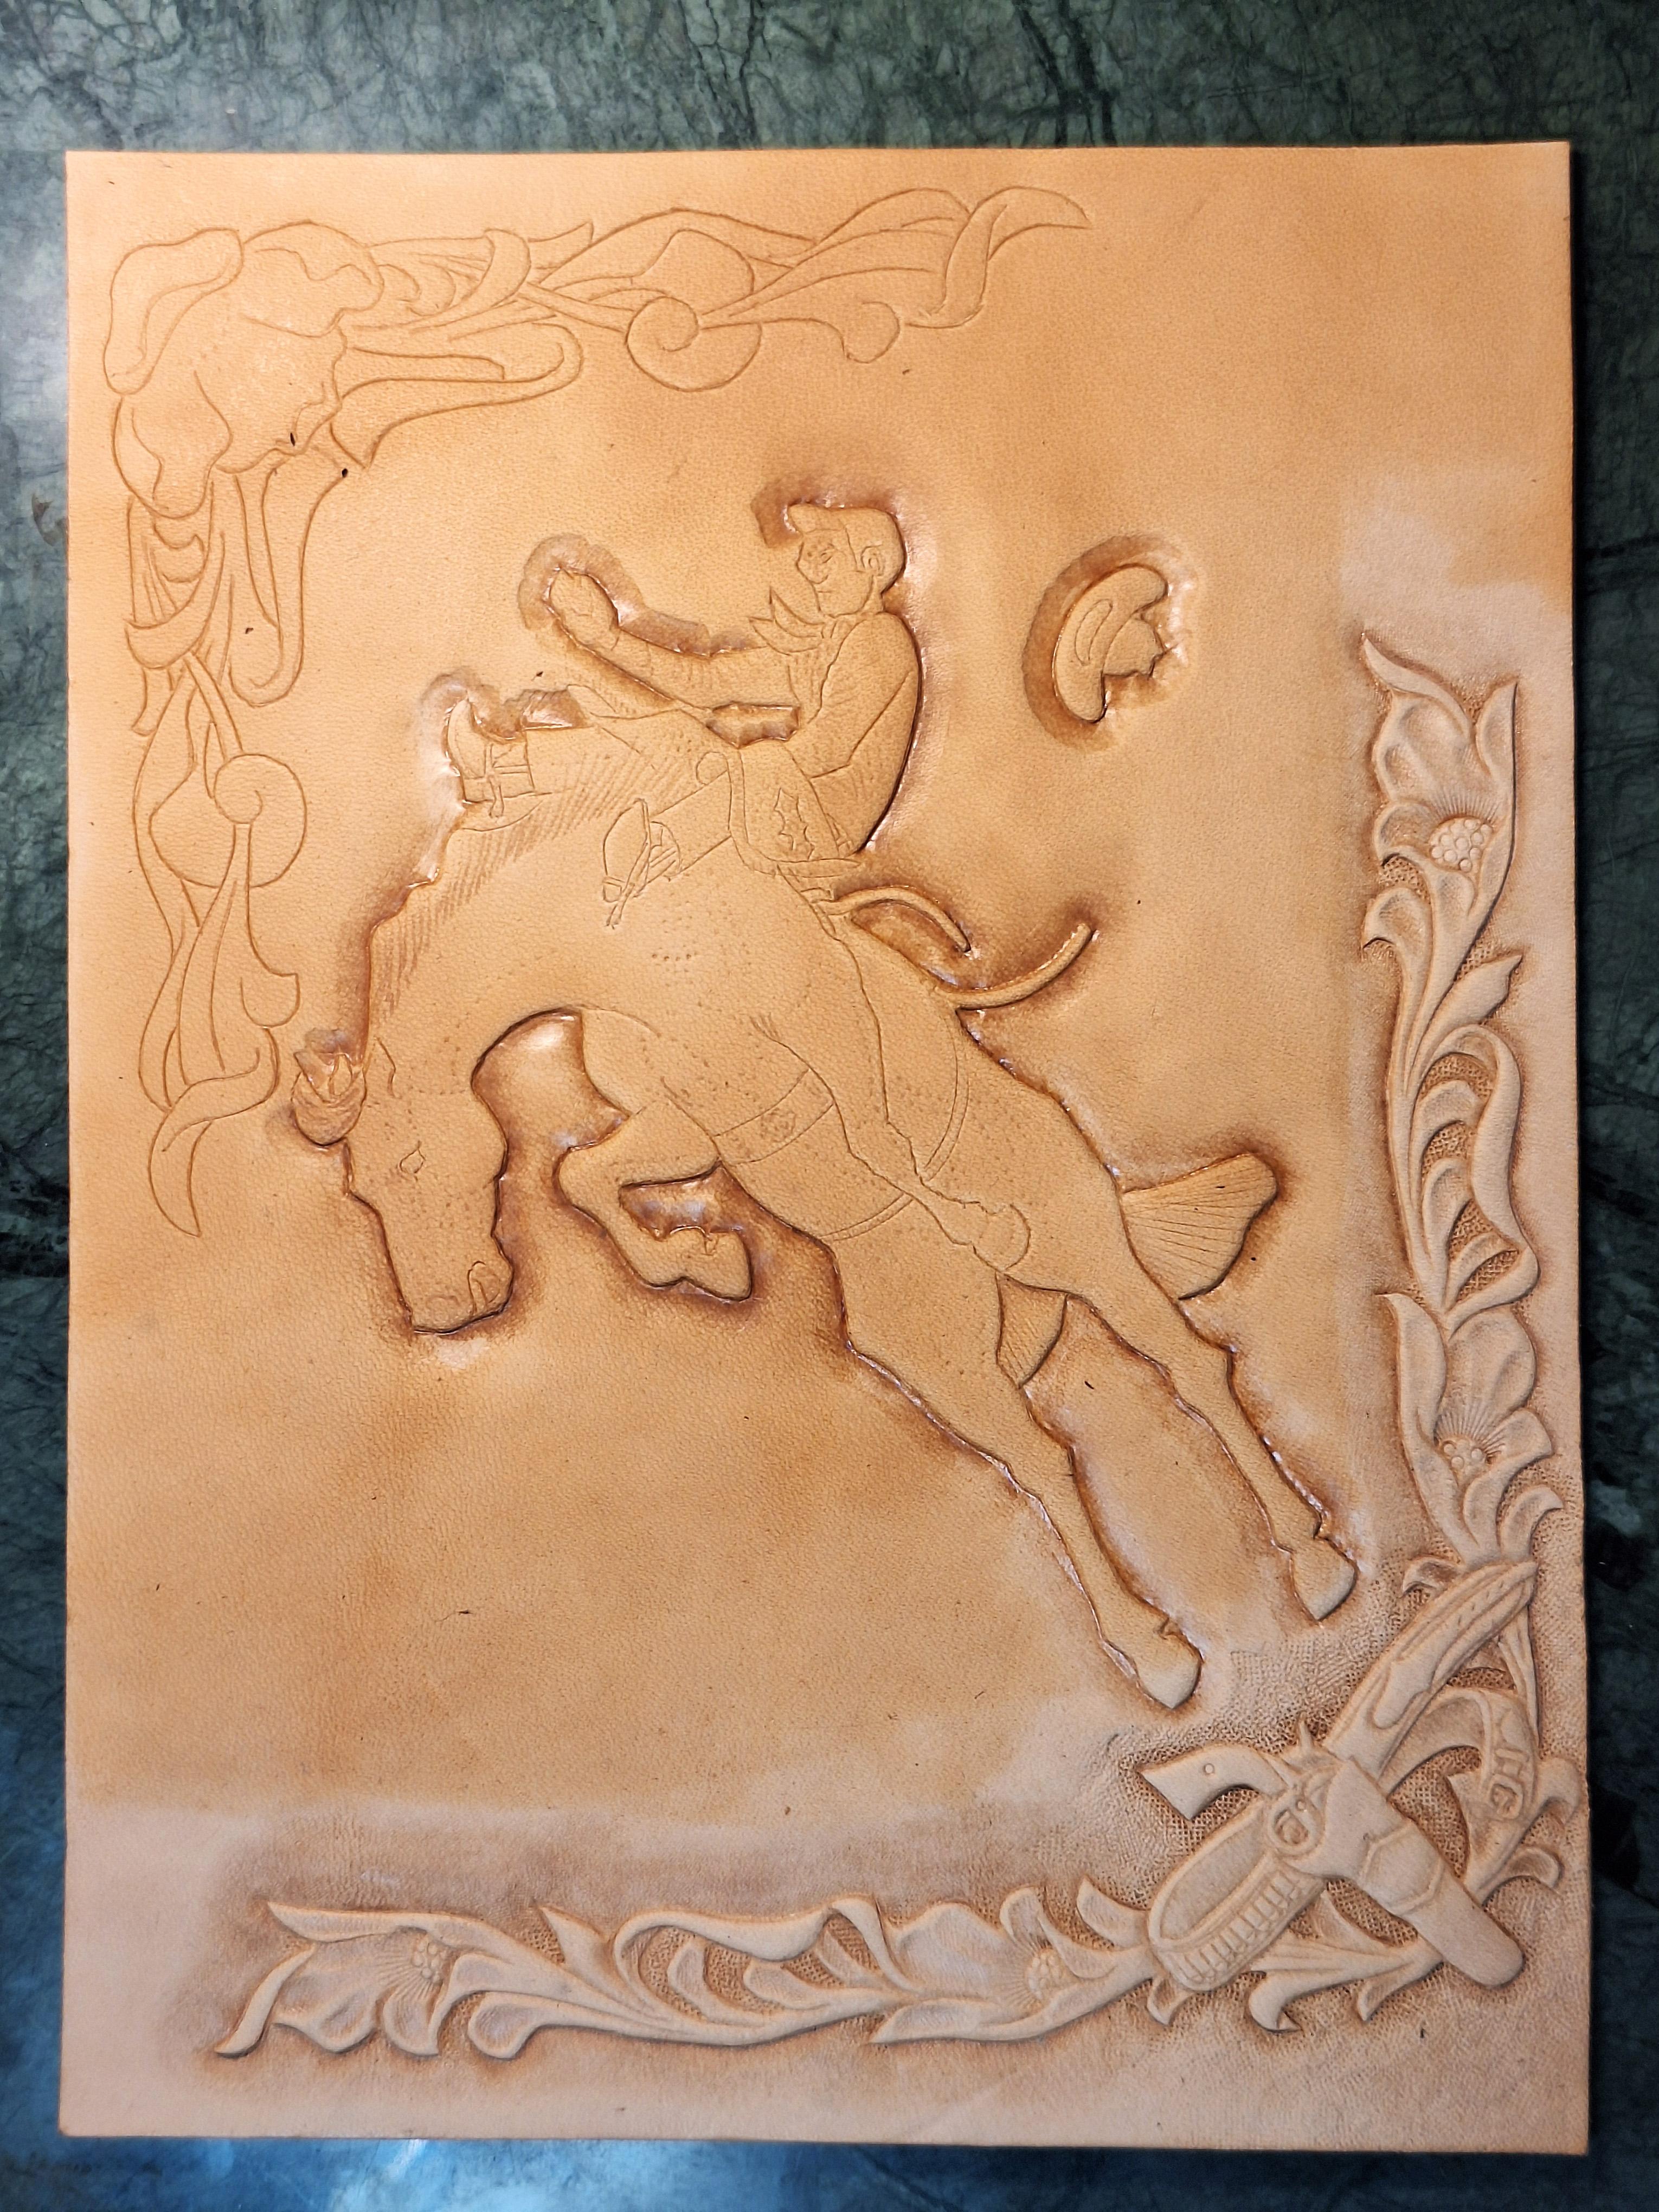
It's raining today so no cutting shooting lanes. Started a new tooliing combining Al Stohlman's Cowboy, and Jim Linnell's corners. This will be a Chriistmas gift for a cousin who rode bulls and broke horses plus loves his revolvers. This is right up his alley, he's turning 76 so his rodeoing is long gone, but he loves his ginni, and mare.
-
Thank you. I took a little artistic freedom on the repeating pattern to break it up a bit.
- Yesterday
-
Do u guys take the brake out of your servos? Mine has a brushed motor and I saw an article about different motors. The article mentioned taking the brake out. is there a reason why I wouldn’t want to do that?
-
I like the way the details vary where the pattern overlaps the edge.
-
 Seems I spoke too soon. Had a card through the door today telling me that the sender hadn't paid enough postage. I've had to pay another £5.50.
 -
I have been into leather crafting for a few years now but only recently got into belts. Started out mainly making knife sheaths and holsters. I have cranked out a couple of belts with standard basket weave patterns. This is my first attempt at tooling in a pattern. I got this pattern from Joe Meling from twentythreeplus.com. I am extremely happy with the outcome. I need to work on my decorative cuts but all in all I thing it turned out exactly how I saw it in my mind. Made it for a buddy of mine I grew up with whose dad use to do leather work making belts and the like. Just thought I would share.

-
 Marshal joined the community
 -
 Harley Jim joined the community
 -
 LeftLane Leather joined the community
 -
Mine were thicker nylon straps. They had a loop sewn into one end that resembled maybe a dog leash handle. You made a noose thru the handle, wrapping it around your wrist and trailing down across the palm of your hand. Then the loose end wrapped around the bar and you held it in your hand. [Edit: maybe the end came back up through the loop] Maybe an inch wide?
-
 DMH joined the community
 -
 It’s a handbag, 3-4oz econo veg tan, probably closer to the 4oz end. I was hoping to attempt oiling/conditioning to soften it and make it a bit more pliable (I know I would have only limited results, but I was going to try anyway), but because I made the mistake of using a water-based dye, I had to seal the bag with Pro Resist (it’s what I have on my shelf), which leads to the conundrum of how to best treat the leather. — AZR
 -
I may have a hard copy of the 20-20 parts list, not sure though. I´ll check that in the days to come... stay tuned... 😉
-
I have a home gym, and sometimes lift beyond my grip strength. These lifting straps are one way to progress beyond that grip strength limit. There are a few ways to create them, and none look nice, at a glance. Mine least of all. Question is, have any of you made such? Even better, did you find something that doesn't look like steamed manure after a bit of use? These are admittedly minimal effort, but if there is a way to make them better, I would probably try. Stretching, iron filings and caustic persperation are all challenges this will face... forgot to follow...
-
 lauerpatrick joined the community
 -
Very nicely done. kgg
-
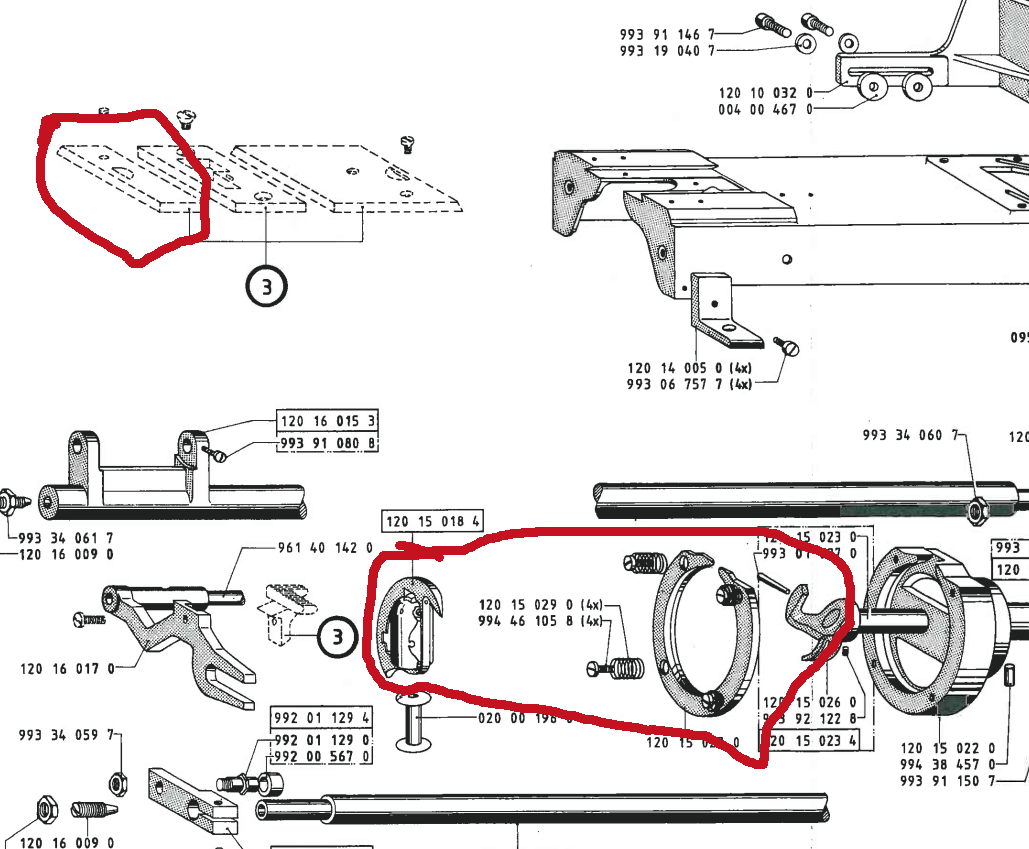
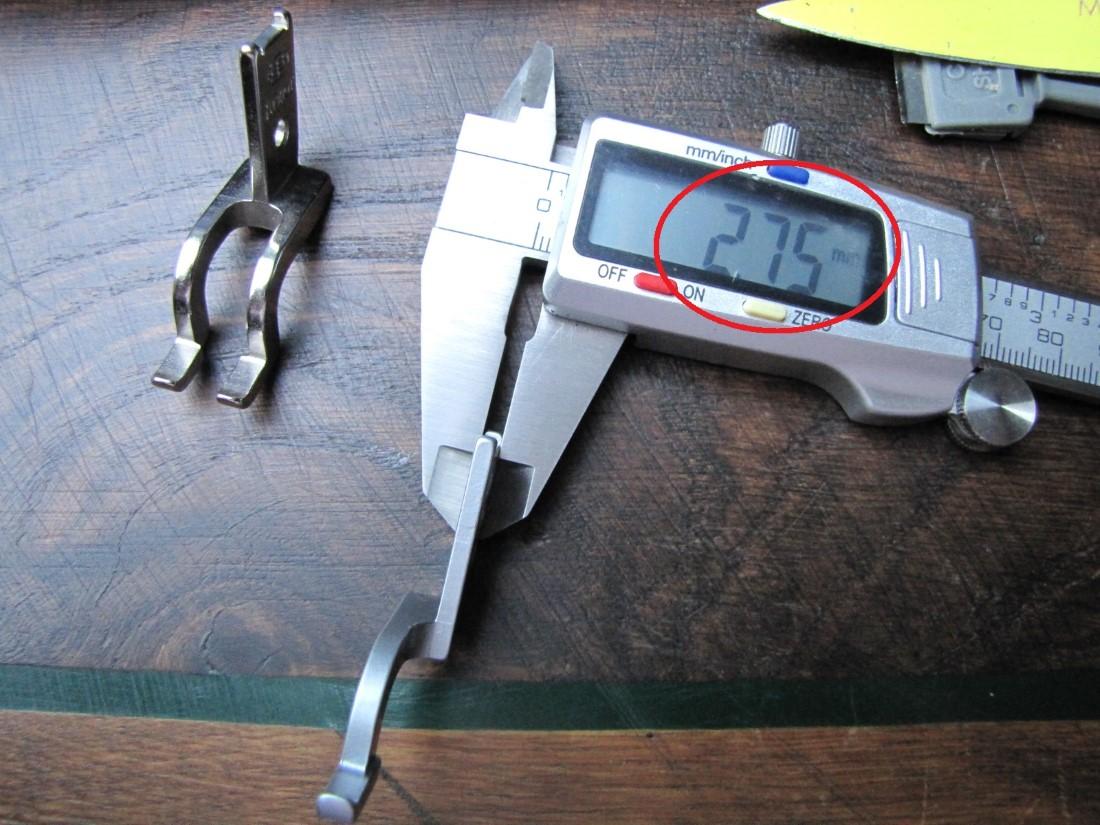
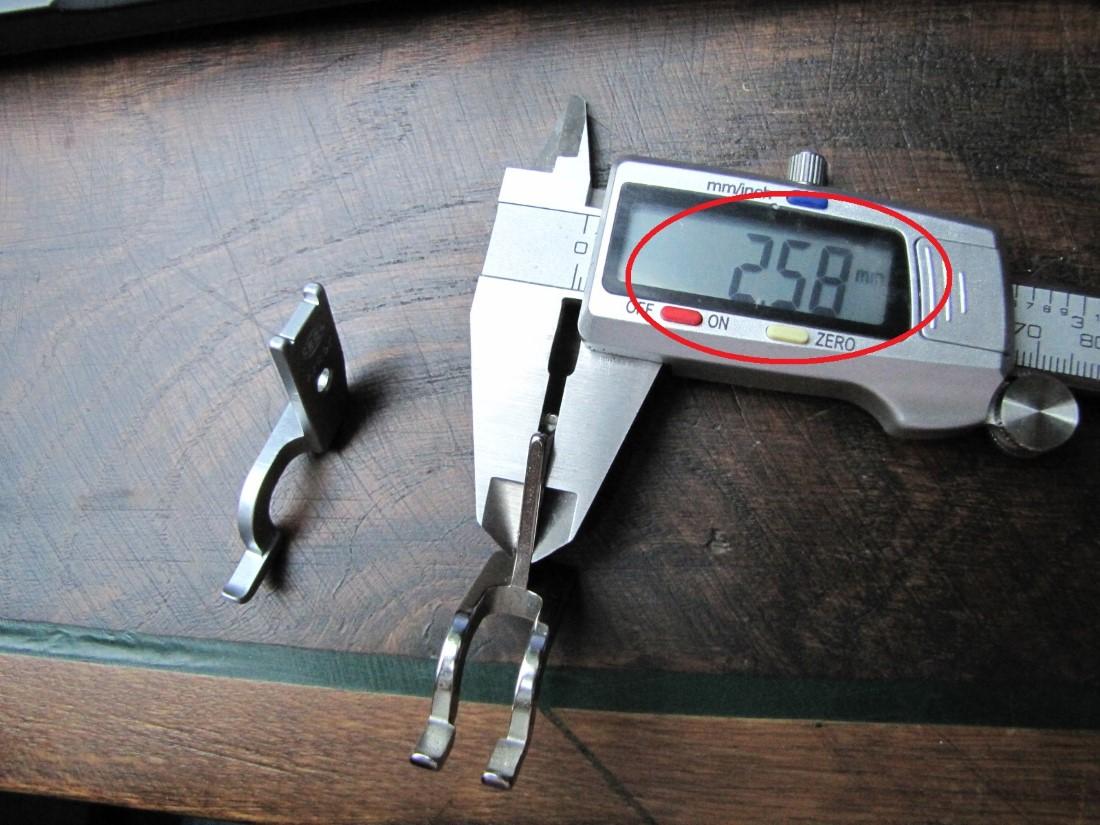
I'm restoring old Adler 20-20 machine. There is however few critical parts missing from it. I know it would be very difficult to source these missing parts for such old machine, all leads would be appreciated. I have not found any parts diagrams for this exact model, so I don't even know what I'm missing exactly. I know that I'm missing presser foot, leftmost slide plate and needle clamp. I do have original bobbins, but I'm missing shuttle hook and holding parts for that. Based on dimensions of my original bobbins (43.9x32.4mm), I have figured out that hook that I can find with part number #58669 could work, apparently it's used on Singer 7 series along with some other models. If that hook fits, I still need parts that keep it in place. Can anyone confirm what I'm actually missing? Is it just one part with fours screws keeping hook in place, like in Adler 120 (diagram here), or more similar with Adler 20-2 where there is two parts and spring (Singer 15K style)? Based on four threaded holes I have there, I'm guessing first mentioned Adler 120 style part is probably what I'm looking for this machine. Other than that, my machine looks very complete, however before diving more into this project I need to find these parts first. Can anyone confirm anything from my thoughts here? Could that (#58669) hook work in this machine? I have not found dimensions for that part, or photos of original hook for this machine. Is it possible that adler 120 part for holding it in place is identical? Any other machines that could share parts with this, or have parts that are more easily available and adaptable for this after some modifications? In best scenario someone here has obsolete old stock spare parts available for this, or has similar behemoth in his garage as a doorstop and wants to sell me some parts from it. Or at least someone here has this same machine and is willing to take some pictures and possibly measures.

-
That is a great idea. kgg
-
 cannot edit anymore. Here are some pictures:
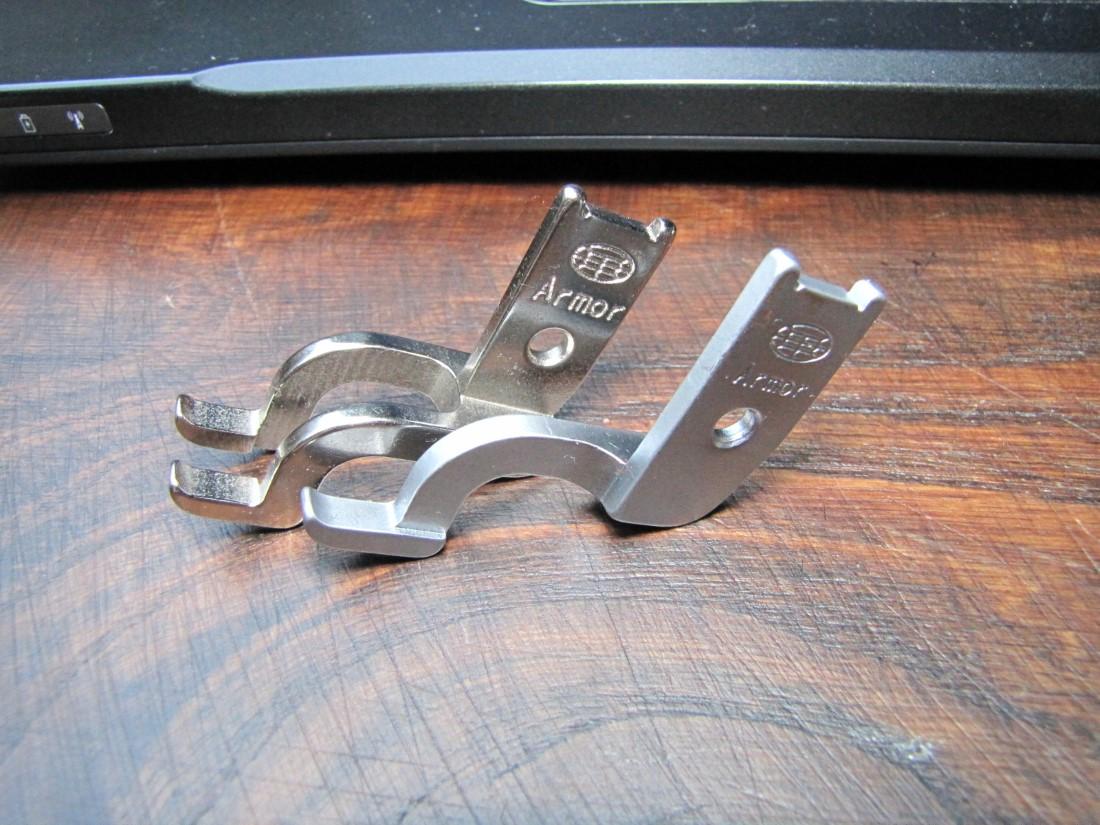
-
Thank you But don't be thinking #1 son is a wee child - he was 36 when I gave him this set for a Christmas prezzie
-
 Looks to me like you can use that 'un either way. The blades are thin enough to not leave a gaping hole on the top side if you're going all the way through. The tips are wide enough to give decent guidance for an awl. Best o' both worlds. - Bill
 -

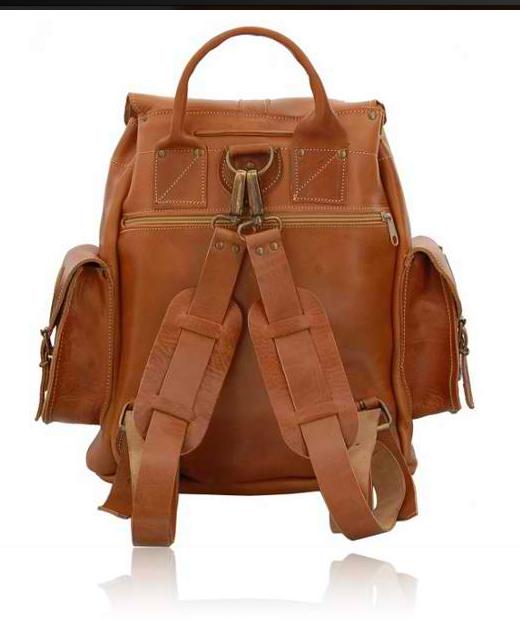
Help wanted for designing a Leather Backpack
Dwight replied to Black Phoenix's topic in How Do I Do That?
I would take my cell phone / camera . . . and go visit a half dozen camper / hunter supply stores. They have oodles of back packs in there . . . Take a bunch of pictures . . . print em when you get home . . . then cut and paste the parts you like best. Personally . . . all my back packs have two main compartments . . . both the full length and width . . . but separated in the middle to only give me half the depth. As well there are two pockets on each side . . . a larger bottom pocket in the back . . . and a smaller one also in the back. As well there is a little slip pocket on the flap cover . . . it lays up on the top . . . for papers / permits / licenses etc. Multiple pockets means you have to fold stuff up tight . . . but you also don't have to sort thru the whole pocket to find just one thing. Kind of a "file cabinet" back pack. I would also consider the one in the pictures if I was in a hurry . . . as it is less complicated to make. But to each his own . . . May God bless, Dwight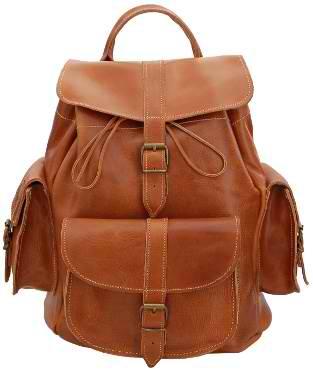
-
Using that pattern . . . I get an end product that I really like . . . as the piece making the front of the belt loop has the hair side showing. A lot of others don't and while it won't hurt the function . . . the flesh side to me is just not as desirable. I think it is "purtyer" this way. I took the knife blade . . . used it for the back template . . . then used that for the template for the front . . . and for a wedge that goes all the way around in the stitching of the sheath. That blade was really thick . . . and I just didn't want to do a fold over . . . so the bottom is three pieces. May God bless, Dwight
-
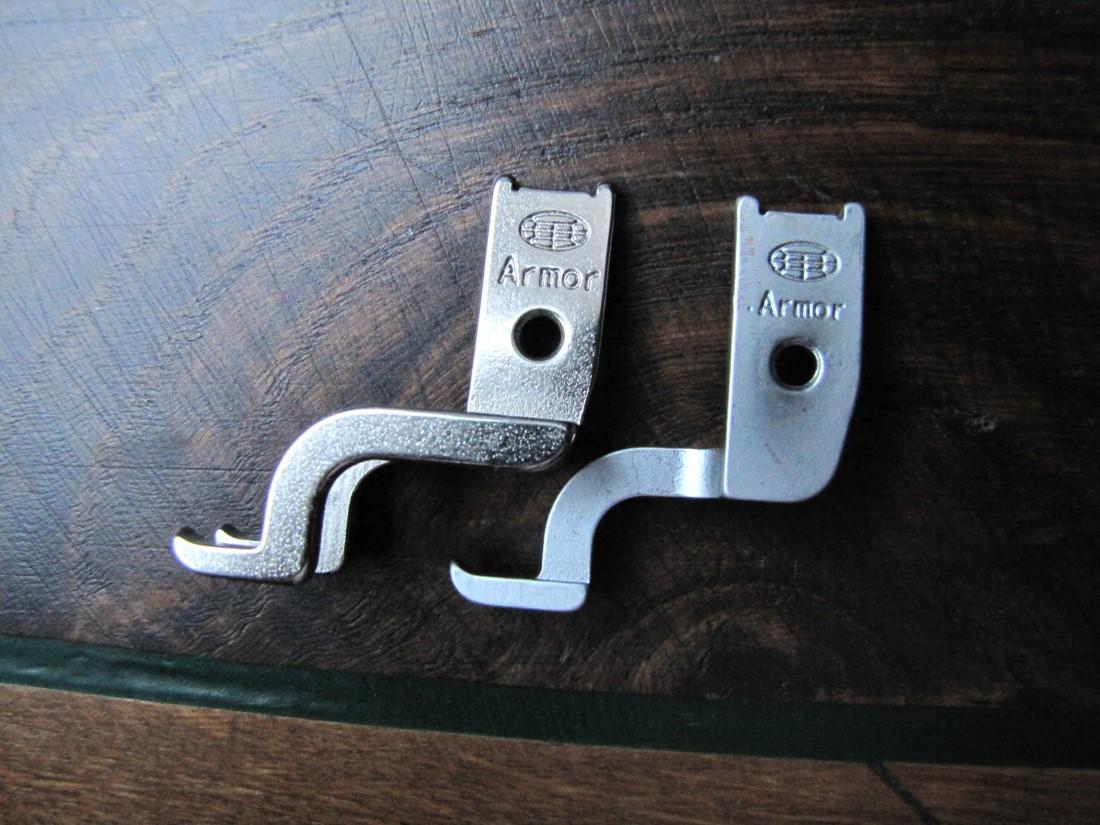
They have arrived! Took 10 days from China to Germany and no extra charge. I´m using them on my 111G156. First glance.... The "fork" foot set works fine and line well with my feed dog - no issues. The right toe foot is touching the thread guide but the one I have installed is not the "original" one I have one from a 211 so that is on me. The left toe foot does not fit into the foot bar. The end that goes into the foot bar fork is a bit thicker than on the other feet It also has a different finish, the other feet fit well. Maybe I´ll do some grinding but I´ll check with the seller first. The scissors are sharp a hell. I ordered them for just having a pair in my tool box. REALLY SHARP!!!
-

New Knife Sheaths
PastorBob replied to Dwight's topic in Gun Holsters, Rifle Slings and Knife Sheathes
Thanks for sharing! I have a pile on my table as well from a client who makes handmade knives. i really like the sheath design on the left. I think you have inspired me to try that design. Thanks. -
Mounting Indian Head nickle in a key fob
PastorBob replied to TerraKacher's topic in How Do I Do That?
Definitely use a hole punch if you can get one relatively inexpensively. I think you'll be forever trying to cut it with your laser and then you have the cleanup of the edges afterwards. -
Man, your son has the best dad. If I had received a gift like that as a child, I would have been the happiest kid in the world.
-
Personally I'd use a hole punch. Mainly cos have one that size. I'd also use one with can be used in a press, and I have one of those too. I think a good sharp punch can give a good clean cut