All Activity
- Past hour
-
 Please read the entire post before you contact me. I have or will be listing these stamps on other sites and update sales as they occur. Not that I owe anyone an explanation of my pricing, but I will comment on it at the bottom. You must PM me for questions or purchases. Inappropriate or negative comments will be deleted. I have a bunch of 3D leather Stamps for Sale. The proceeds will be used to payoff/buy leather tools and supplies for use in Scouts. $500.00 - Rodeo Alphabet Set $3,000.00 - 9 Piece Wood Badge Set $200.00 /each - Wood Badge Bear or Fox $500.00 - Wood Badge Eagle -SOLD $200.00 - Craftool O.A. Stamp $30.00/each - Girl Scout Daisy Stamp $25.00 - 4H Stamp - SOLD $60.00 - 3 Piece Midas Reeds Stamps (left, center & right) $50.00/each - Cactus Stamps $25.00 - Craftool Bowling Stamp $30.00 - Craftool Saturn Stamp $50.00/each - Midas Roaring Bear or Pig Stamp $30.00 - Midas Bull Riding Stamp $40.00 - Craftool Barrel Racing Stamp I'm a Leatherwork Merit Badge Counselor and also work on Cub Scout Day Camps. These are from my personal collection. and the proceeds are going to pay off/buy leather tools for use in Scouts. I only ship within the 50 USA States. Sorry, no international shipping. I only accept Paypal. I will invoice you prior to payment. Shipping will be made by USPS and will include a tracking number $6.00 for 1 to 5 Stamps $12,00 for 6 or more stamps and will ship USPS Priority Mail. Orders over $200.00 will require insurance at the buyers expense. Orders under $200.00 Insurance is optional and at buyers expense. I will ship the stamps within 24 hours after I receive cleared payment from Paypal. Sorry but I do not offer returns on purchases. Explanation of pricing Some of you may be shocked at the prices I have posted for some of these stamps. I believe that you are specifically talking about the Scout related stamps and the Rodeo alphabet set. These stamps do not come up for sale on ebay very often so this classifies them as rare. I agree that the prices are higher than normal. Would I pay these prices? Maybe. Most of the time I'd say no. But if I was down to needing the Wood Badge Eagle stamp to finish my collection, I definitely would pay $500.00 for it. I'm not one of these people that buys and sells leather tools as a business or for extra income. I have 3 sets of leather tools. My personal set and 2 sets that I use only with Scouts. In addition I have donated thousands of dollars in leather tools, mostly stamps, to the Las Vegas Area Council of BSA. And I continue to keep their multiple sets stocked. For free. Why am I selling these from my PERSONAL set of leather tools. It turns out that as much as I want to spend a lot of time doing leatherwork as a hobby, I only do it with the Scouts. And they only work on small project kits. The prices on those items are high, not only because they are rare, but also that's the price it will take me to part with them. So if you don't like the prices just move on. You are not my audience and that's fine. I'm looking to sell to someone that not only needs these items, but also is a supporter of the Scouts and has some extra money to contribute to my cause. So what is the money going to be used for? I'm planning on buying some of the rolling tool cases to store the Leather tool sets in. They are currently using large rubbermaid totes which are not sturdy enough for the job. In addition I need to replace most of the cardboard boxes for the 3d and alphabet stamps. Plus come custom storage solutions for other tools. The cheapest option for that is to buy a 3d printer and print our own. There are also a bunch of newer leather stamps that I'm going to order from overseas and from Tandy. That is where the bulk, if not all, of the money would go. BTW I'm also looking for donations of tools. There is a list I've made on Leatherwork.net in the wanted section if you're interested. Donations can be tax deductible. So read that post. If you would like to discuss any of this with me please provide a phone number in a DM and I can call you.
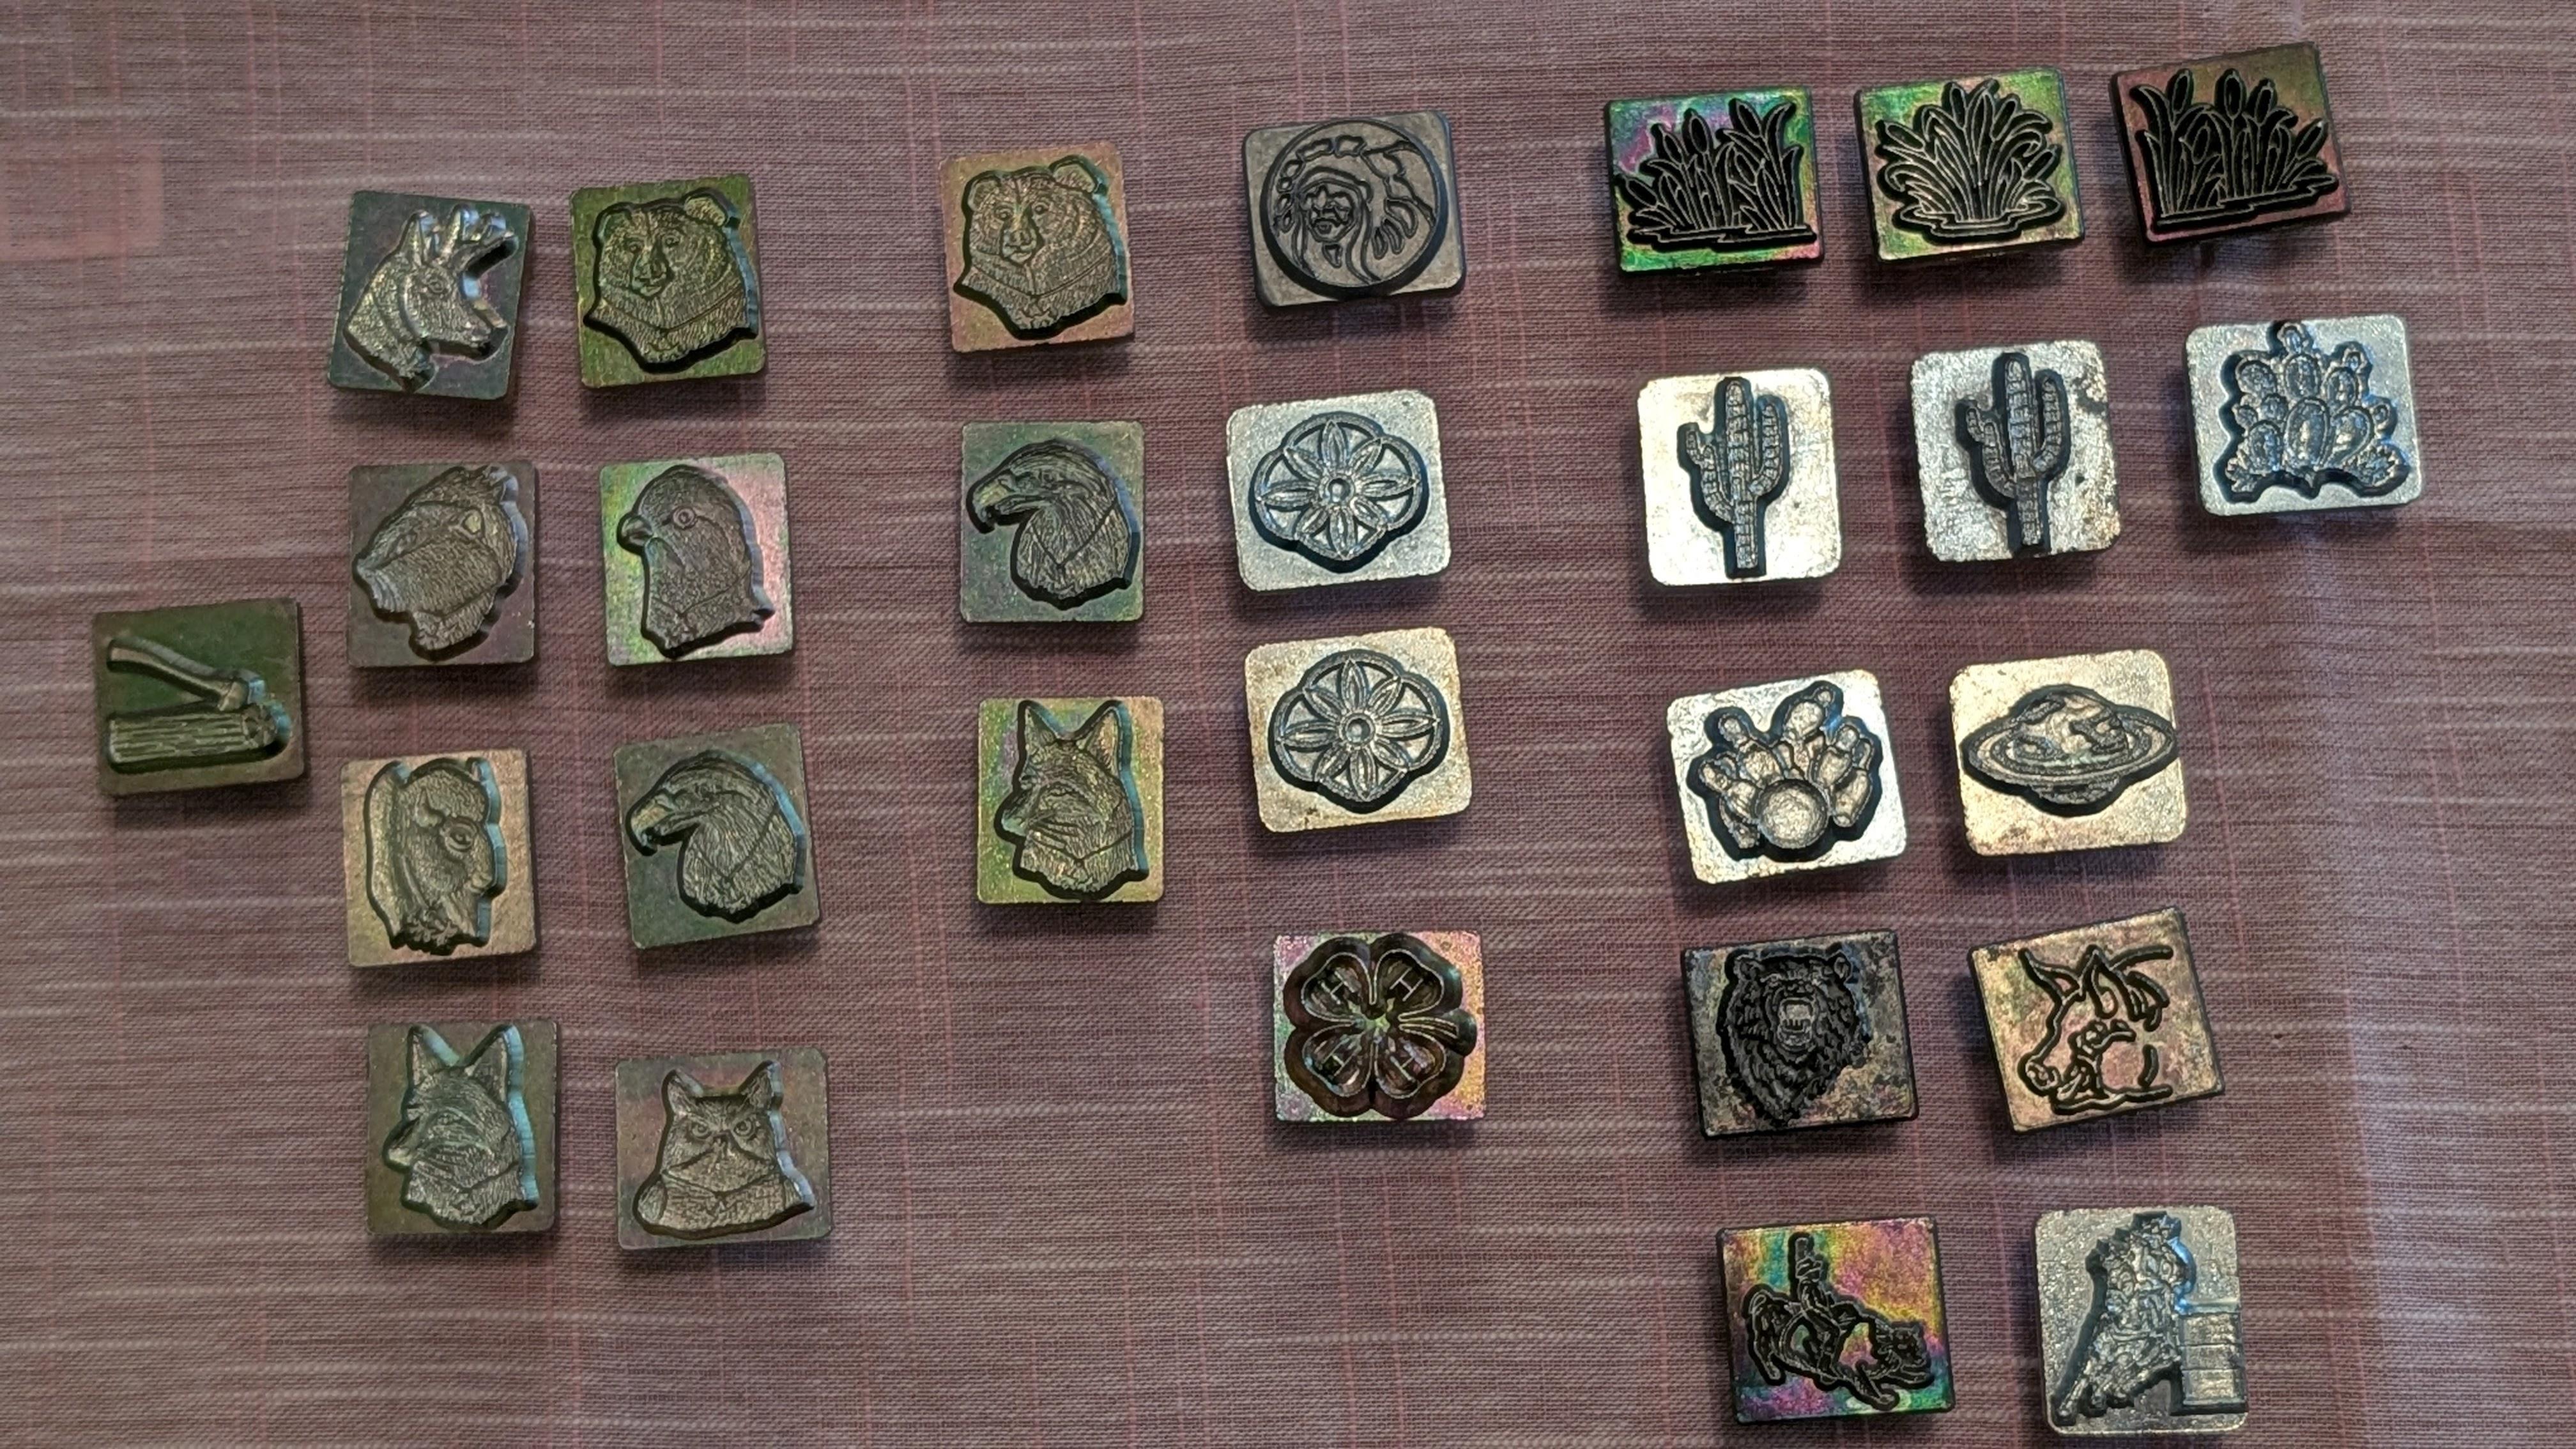
- Today
-
Thanks for your suggestion - have tried both painters and magic tapes with limited success 😳
-
Yes, tried roller feet, painter’s and magic tape on the bottom of presser foot. Currently have magic tape on the needle plate which helps a little. I am using a domestic machine as the leather is only 0.3mm thick. Would love to purchase an industrial walking foot but think the size of the presser walking foot and the thread may be too large.
-
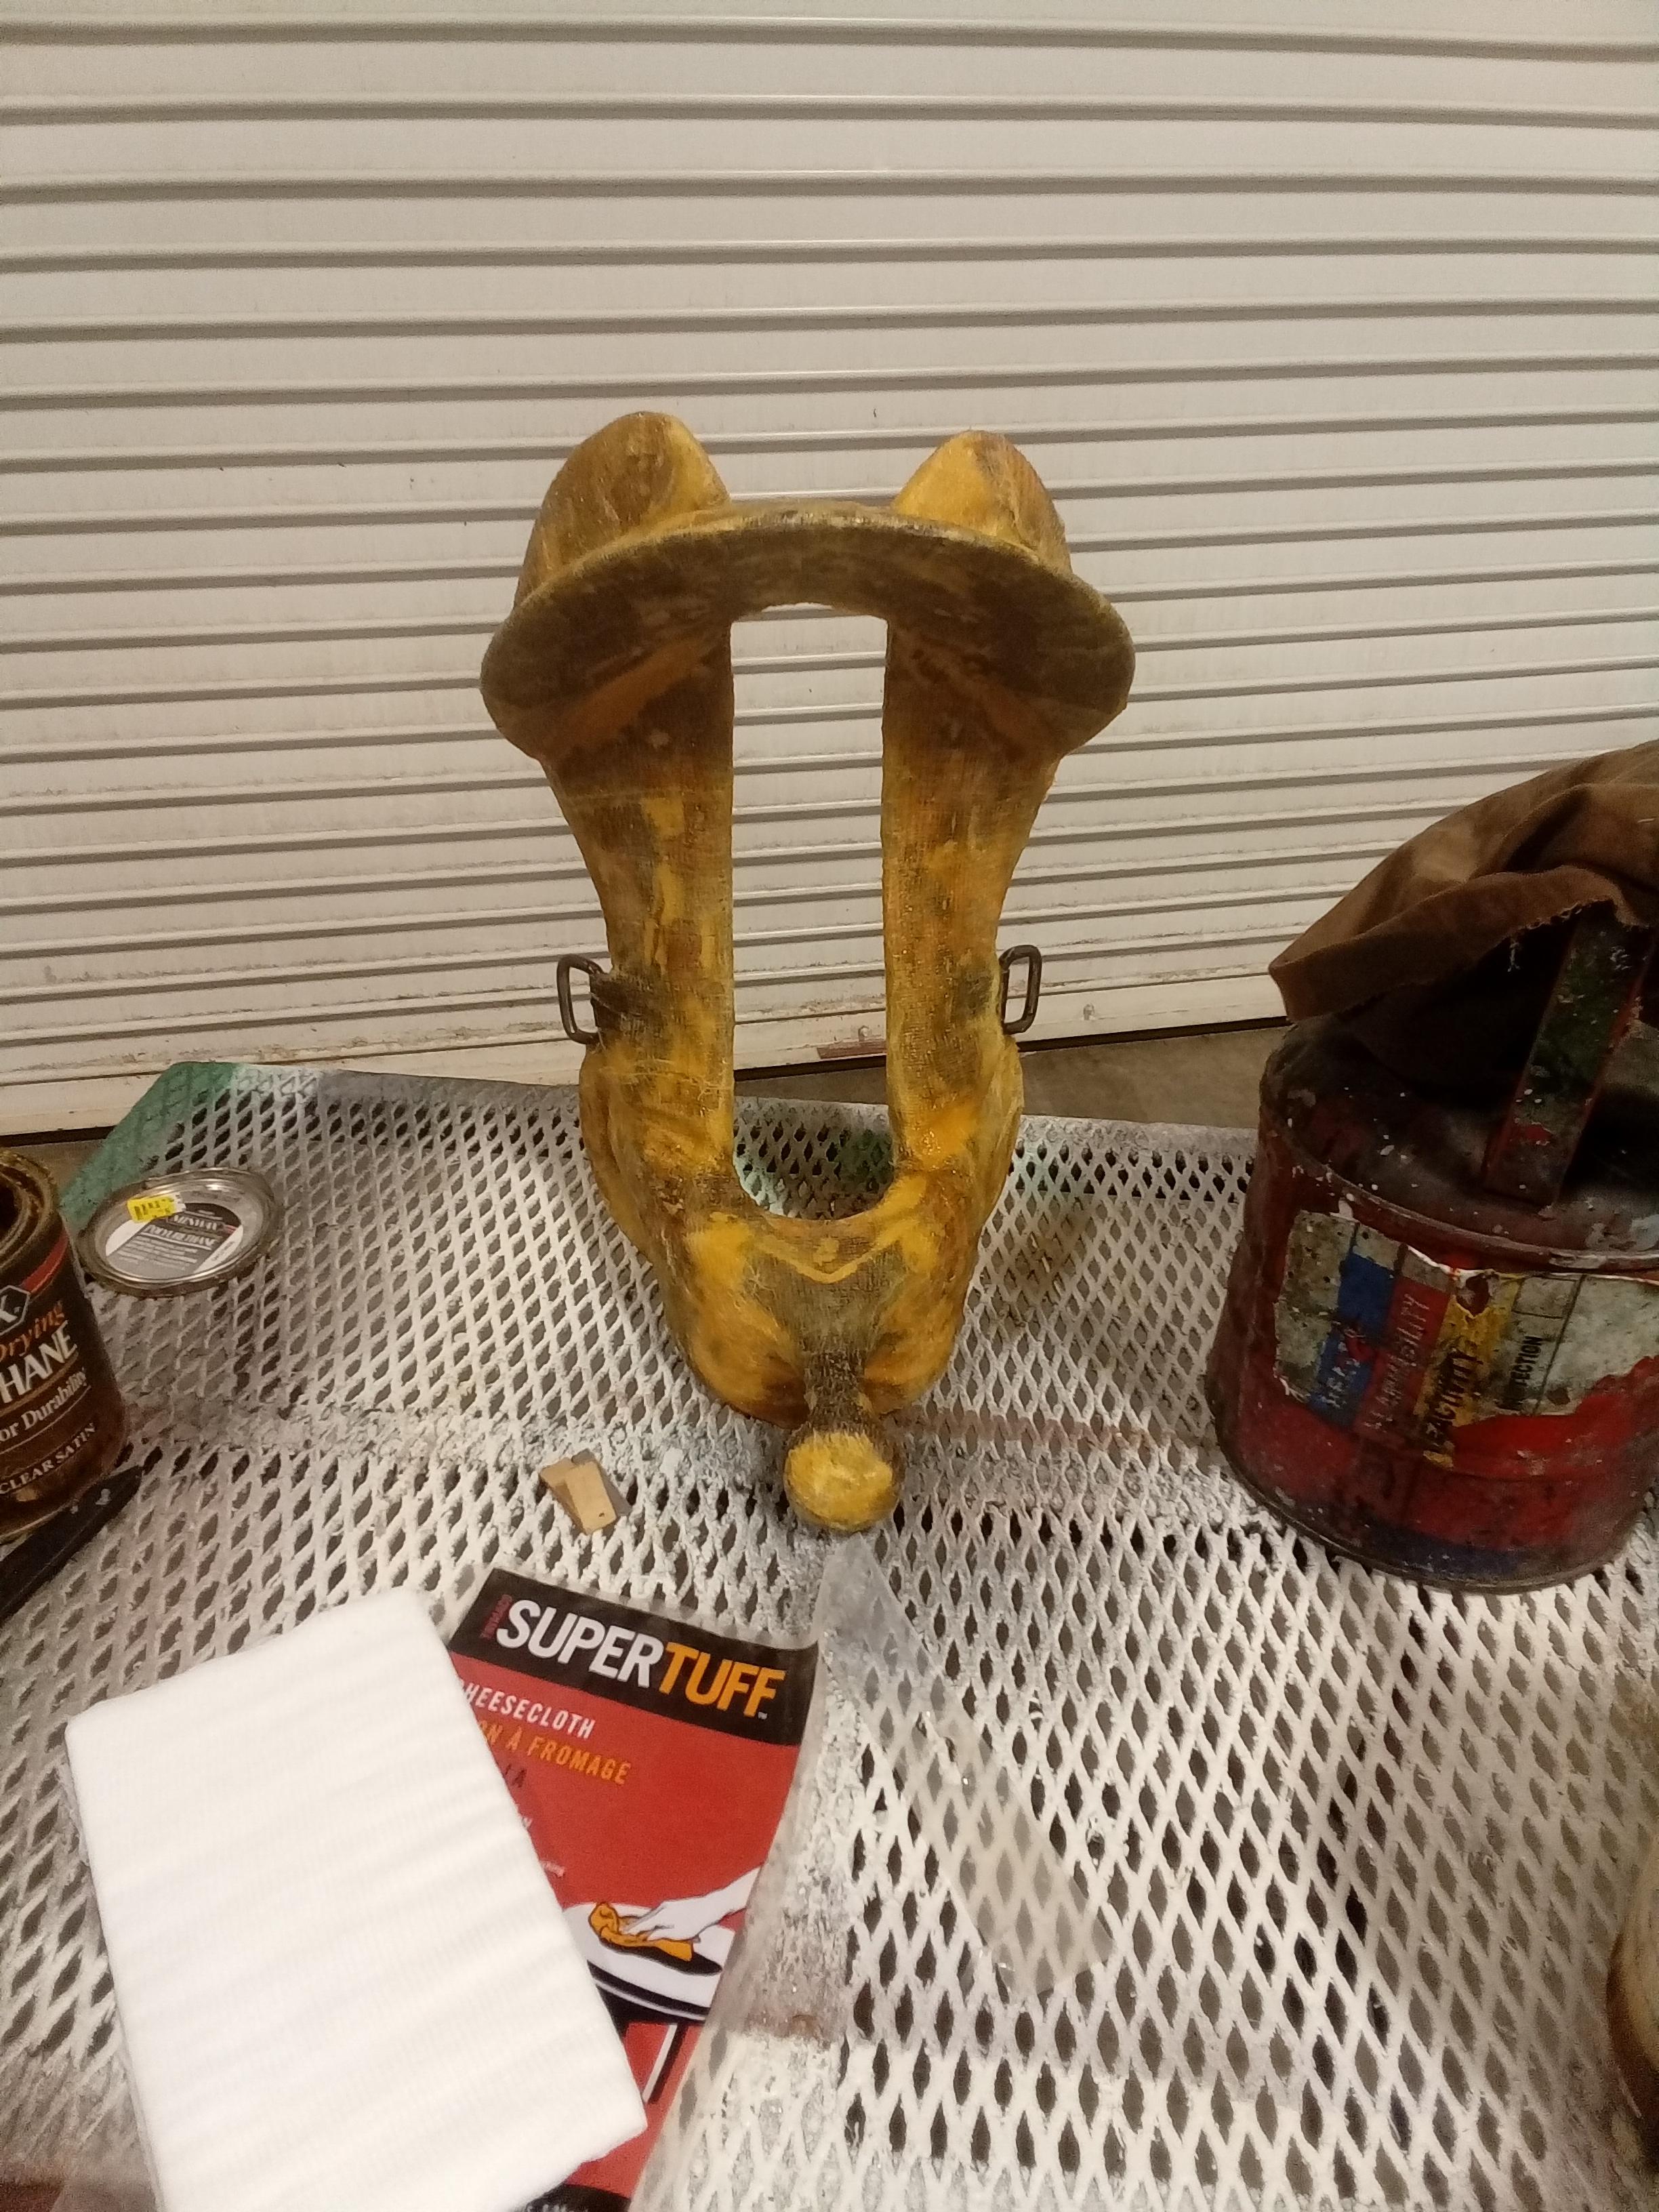
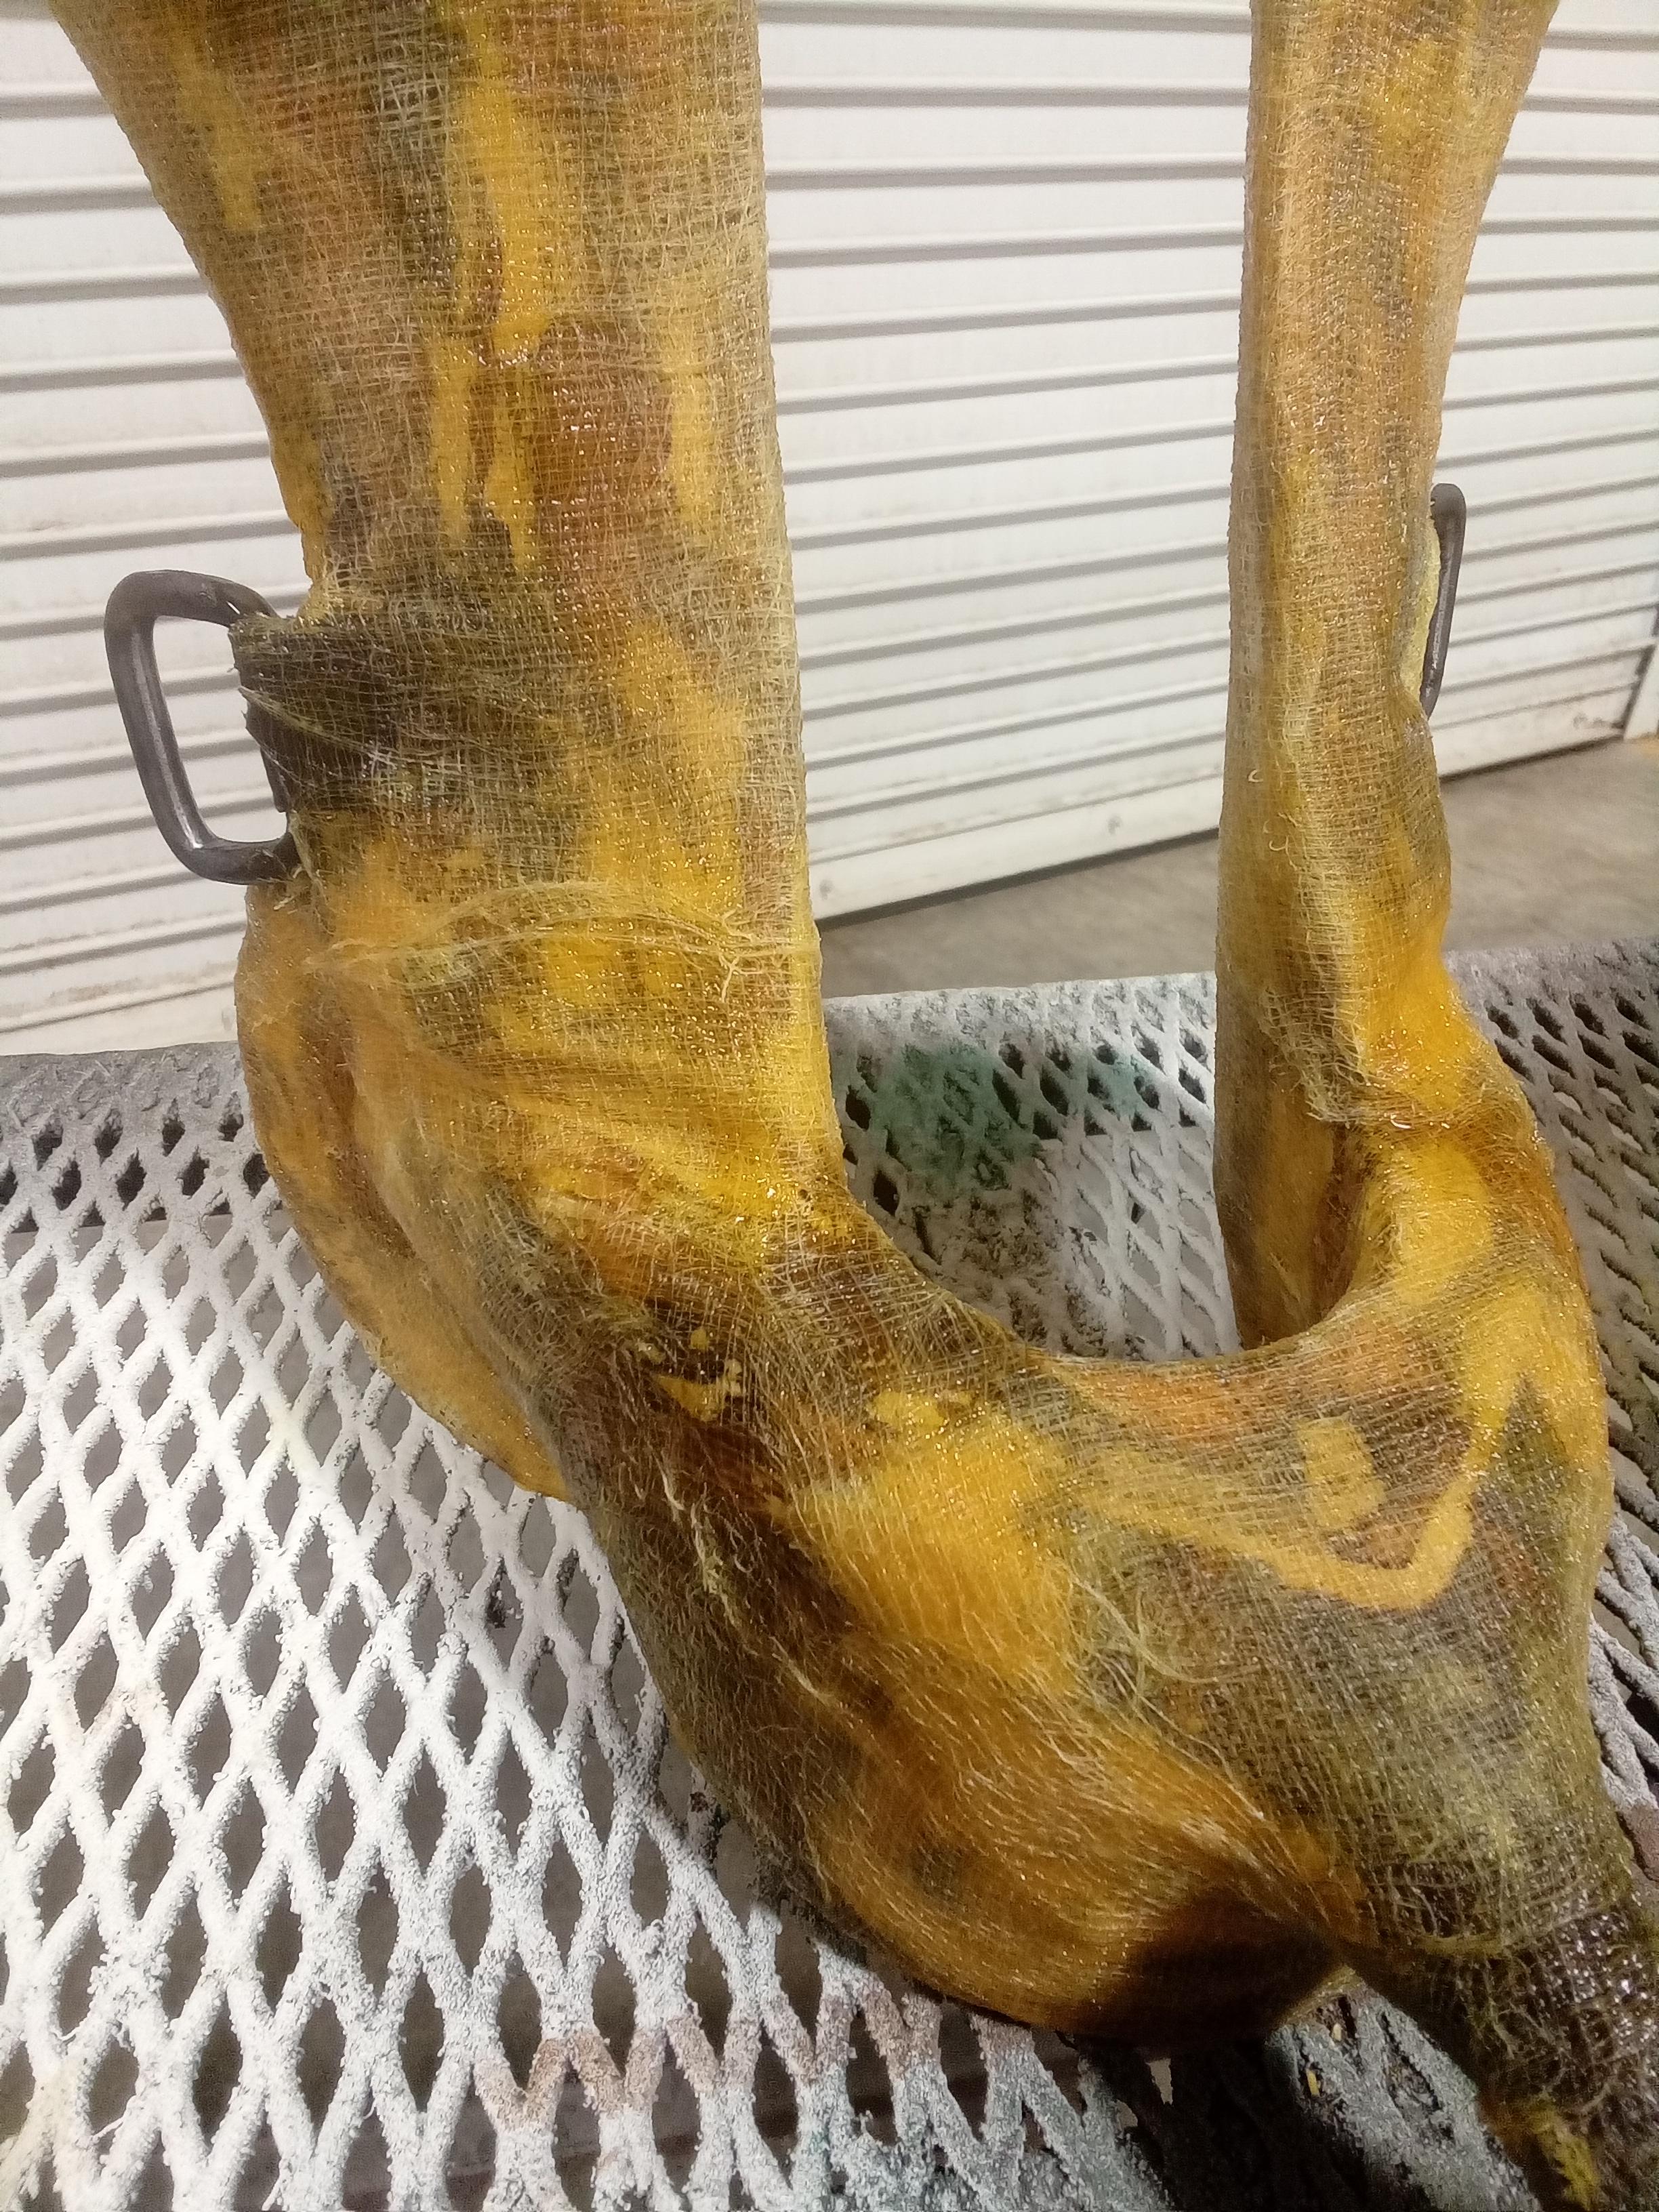
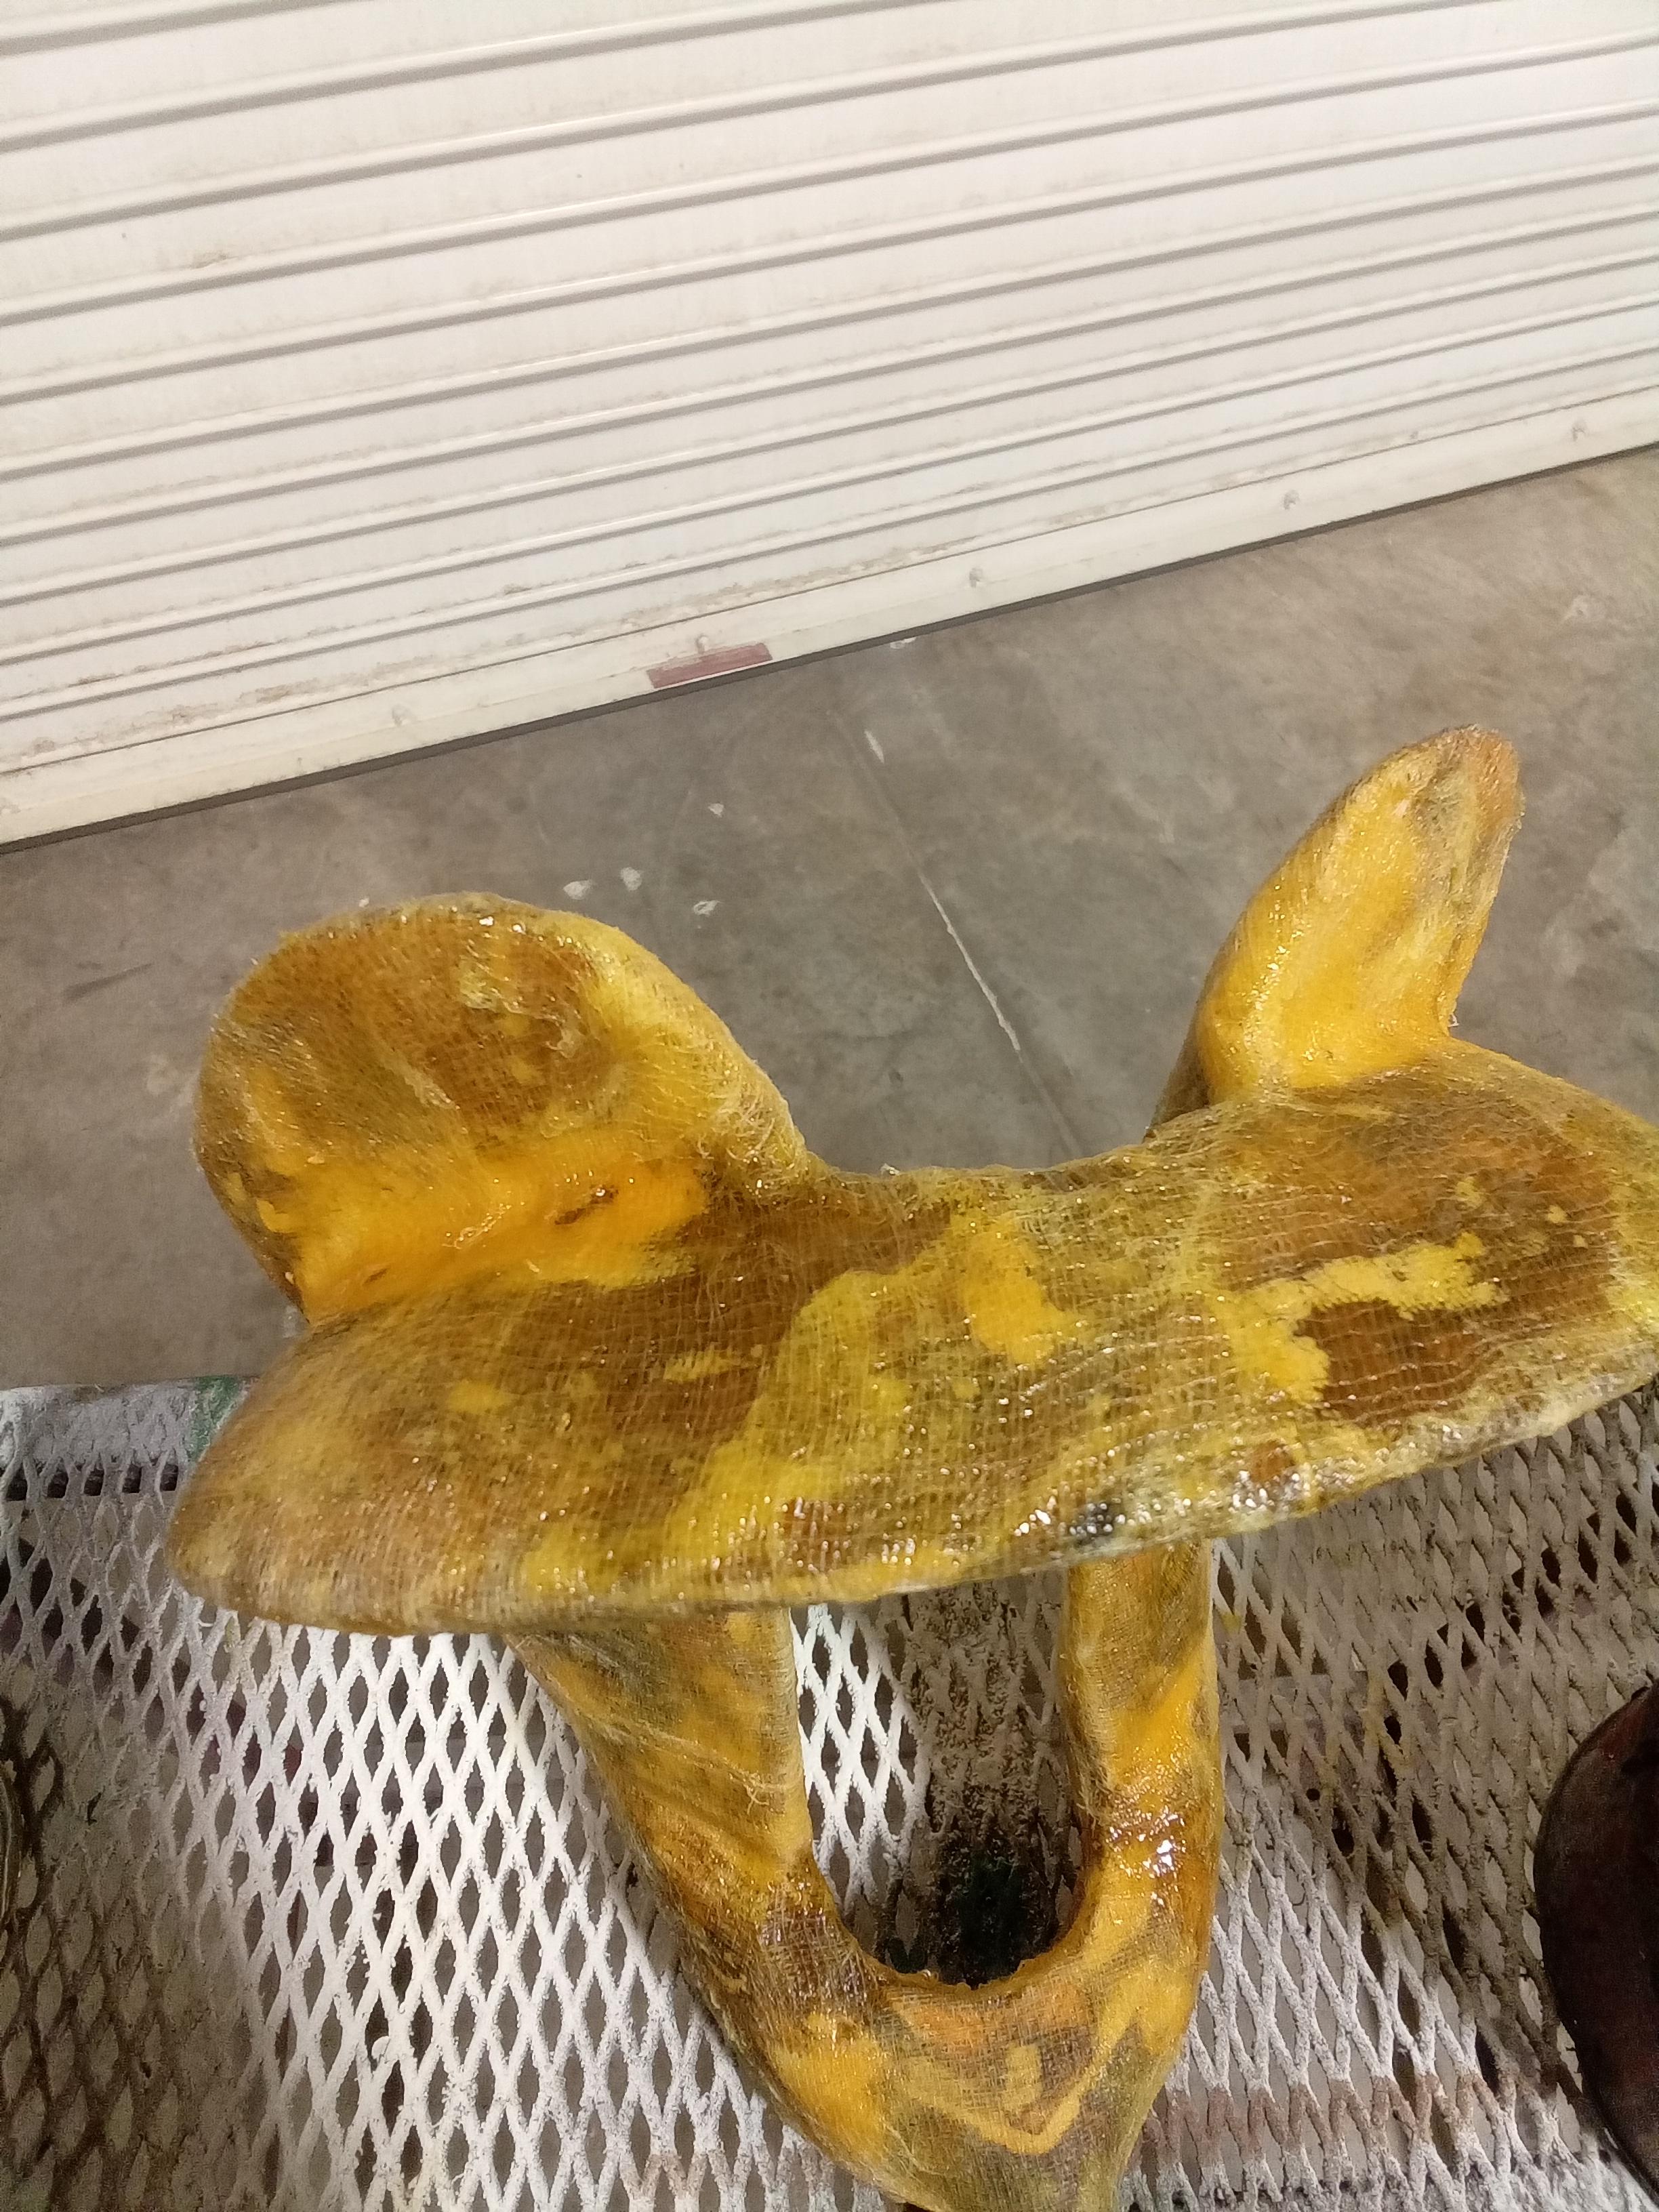
Been a few months, but got the sanding done and got around to applying new cheese cloth. I'm sure it's nowhere near as good as rawhide or fiberglass, but I get why companies used to use lacquer and cheesecloth for economy saddles. It's easy (and cheap)! It's kinda fun too! It's similar to laying fiberglass as it helps to lay down a layer of varnish first, but then you stick the cloth on and apply the varnish until it kinda goes clear. The cheesecloth is a lot more moldable than fiberglass though. It's easier to bend it around corners and overlap the ends, such that you really have no waste. Even if you have a little patch cut out, you can just lay it into an area that looks a little thin. I'm using a can of Polyurethane varnish that had dried out to the consistency of leather cement, but it still spreads easily and it's a "fast drying" variety which helps. If you keep on it and keep painting down any loose ends, wrinkles, or bubbles, it comes out pretty fare. My only flub so far is that there's a couple of lumps of wood putty I didn't smooth out enough, and some of the old cheesecloth painted down but formed a lump. I found that letting it dry you can shave off the high spots with a razor and then just add a few layers of varnish and cheese cloth to blend in the hole. I'm not going to bother getting it perfectly smooth, but do want to smooth down most of the lumps, especially on the bottom, seat, and visible parts of the saddle. That way the leather has an easier time faring over the surfaces. I'm going to let this round dry, do some trimming, and do one final round of varnish and cheesecloth. The cloth and varnish do seem to add some strength (better than bare wood or course), but it's not going to be a hard use saddle. I expect a saddle like this would have been for a kid to learn on and play with, but on a well broken and docile pony. It's like kids shoes though in that they'll grow out of it before long and need a bigger saddle anyway, which I think plays into the economy construction and likely a low price point. One other thing I've been thinking about with these youth saddles, is that while they don't give good practice in designing a saddle or in making a strong and durable saddle, they should give me some practice in reproducing the elements in scale and assembling a saddle, which is one of the big things I'll be doing with the family saddles. Making a saddle of my own design would be fun and rewarding, and I'll get a little bit of that with these youth saddles, but with my goal of reversing the effects of age and deterioration on the family saddles, I'd rather have experience in reproduction than with making something new. Thinking of it in terms of classic cars, it seems that most custom saddle making is akin to building hotrods and customs, in that you master skills to produce something that borrows from the past, but is often a new creation that combines the best of function and art, and while there are patterns and pictures to follow, the intended use and his imagination are the ultimate driving factors in how it's designed and built. These saddles I'm wanting to do would be more along the lines of restoring a classic car, reproducing parts that are correct for what it once was, regardless of if it's the best design or has the most crowd appeal. In that way making it look and work as good as it once did is more appropriate than making it better.
-
Have you tried a roller foot?
-
How about painters tape or something like it on the presser foot? Might be a middle ground between Teflon and glue.
-
Unfortunately no additional knife pics. There was a hard leather knife sheath with welt made first and then the elk and deer skin applied after. You will notice the leather just to the right of the red lace goes over the lip of the underlying sheath.
-

What would your ultimate needle positioner/synchroniser do.
fibersport replied to beefy's topic in Leather Sewing Machines
I can understand the desire to make something, good luck with it. Keep us informed, might be something others would like to have. - Yesterday
-

Inadequate knife sharpness, or too much moisture. Ugly "drag line"
Mablung replied to LakeOtter's topic in How Do I Do That?
Having had a similar issue on the most recent carving I did, I'd say that looks like excessive moisture. I find the "wait until it dries to the point that it looks close to its natural, dry color" tip the most helpful, as far as assessing moisture goes. My swivel knife is not quite as sharp as yours but more than adequate, and once I let the leather dry sufficiently, I didn't have that wrinkling problem anymore. -
I have been painting the suede side of my very soft, thin leather with washable school glue as a barrier to prevent sticking under the presser foot of my straight sewer machine. After sewing I then wash the leather under water to remove the glue and dry. Is there another method or product that would be easier to apply and remove? If I don’t use the barrier of glue I have trouble with the feed and stitch length. I have tried sewing with a teflon foot, on tissue paper etc. As I sew small pieces and very close to the edge of the leather some methods are quite cumbersome.
-
 JackLeather joined the community
 -
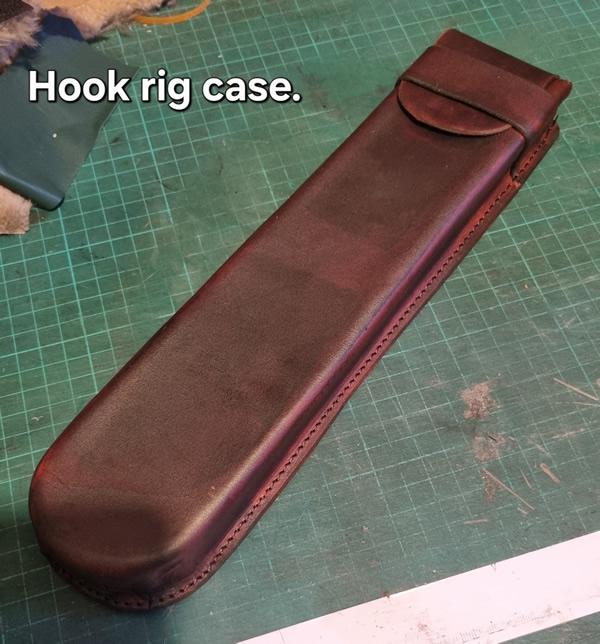
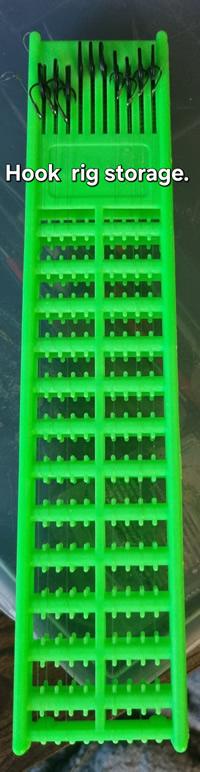
I bought some of these spring loaded hook length holders for fishing. They're great except for the hooks being vulnerable. So I made a case. I hadn't done any wet moulding for a long time and it gave me the flavour so I dug out my centerpin reel which doesn't have a case. So I found some old chipboard. Watch this space.....

-

What would your ultimate needle positioner/synchroniser do.
toxo replied to beefy's topic in Leather Sewing Machines
Did dust ever cause the optical sensors to work correctly ? No! It usually has a cover over it and looks the same as any other. -
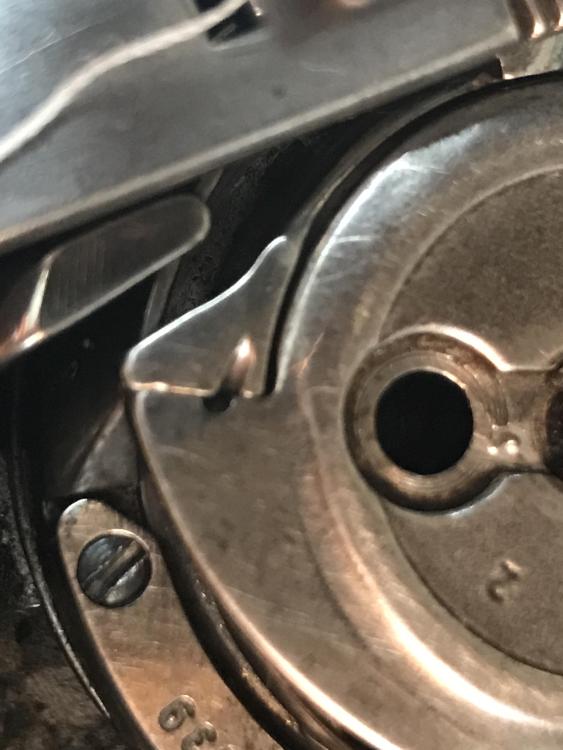
I had that same thought. But if they made 10 different bobbin setups, I'm thinking the spring must be l pretty fine tuned to the intended thread size.
-
You may want to grind it to accommodate your desired thread. Here is a photo of my pfaff 545 when I got it. (note the ill-fitting bobbin case)
-

What would your ultimate needle positioner/synchroniser do.
dikman replied to beefy's topic in Leather Sewing Machines
I can understand that! I often do/make things because "it seemed like a good idea at the time" or it was just a challenge to do it. I suspect it will end up being more complex than you think but best of luck. -
 Arwen joined the community
 -
 JoJo81 joined the community
 -
Anyone like to have both of the YAPA calf skins. Discounted price today is $225.00 plus shipping
-

What would your ultimate needle positioner/synchroniser do.
beefy replied to beefy's topic in Leather Sewing Machines
Thanks for explaining that AIZilla. Had a little laugh with what you said, "Simple to do, but apparently takes a lot of words to explain..." That's just like the programming of my needle positioner. Seems such a simple task yet the coding takes a lot of time and focus, and keeps getting longer. -
 southwestskydive joined the community
 -
What would your ultimate needle positioner/synchroniser do.
beefy replied to beefy's topic in Leather Sewing Machines
Hi Toxo, Thanks for posting that picture. I might actually use the design method of that one to make my own but with magnetic hall sensors instead. Only problem I can foresee is a hall sensor on on disk may pick up the magnet field from a magnet on a neighboring disk. No I've never seen your old type, as I am very new to this industrial sewing machine stuff. I've only seen the ones all over Ebay, Aliexpress, etc. My guess is the sensors on your old one are infra red receiver/transmitter types. What I like about that physical design is it's easy to build (I've got a lathe). Downside is it's a bit more bulky as more position disks are added. Did dust ever cause the optical sensors to work correctly ? Yep, seems many Chinese sellers think the need for instructions is just plain silly. The instructions that came with mine are just completely wrong, and probably based on some other controller. And when you hassle them enough to give you some instructions it's still terrible and not complete. That's what has made me give up on them and play with this idea instead. -
In N.I. they put a pork sausage in a long bun and call that a 'hot dog' ! The nearest proper hot dog can be bought at the Bistro food counter in Ikea when its open. At least that one tastes a bit like a wiener. You put on your own sauces et cetera
-

Cobra NP4 Leather Skiving Machine - bad presser foot mechanism?
NeilMott replied to NeilMott's topic in Leather Machinery
Just tried to call and they're closed until Monday. Yeah, it's frustrating because it shouldn't happen on a new machine. It seems like they rushed this out the door. There's no way this worked properly when they tested it and then doesn't now. To me, it seems like air is getting into the mechanism because after I pump it a few times, it'll go down smoothly. I'm definitely not going to play mechanic on it. -
Would you by chance have a link to a place that sells Schneider's Veg-Tan? Thanks in advance. Jim
-

spring flowers and good food
AlZilla replied to chuck123wapati's topic in All About Us and Off Topic
In New England you can even start a Holy war by bringing the wrong kind of hot dog bun. This is a proper Hot Dog bun. Although a righteous Chicago Dog requires an entirely different bun.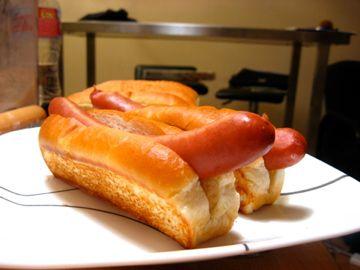
-
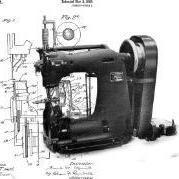
I have been trying to figure out how the weaver Master Tool Creaser and Embosser is able to release pressure and lift up to move belt and then put pressure back to where it was and how the gears fit into all this. I would love to see some pictures of how this is done. Thanks
-
What would your ultimate needle positioner/synchroniser do.
toxo replied to beefy's topic in Leather Sewing Machines
@beefyI haven't understood half of this thread so I just want to throw in my two penn'orth. Firstly the Chinese usually copy everything so I doubt that your servo won't do what all the other servos do. I still haven't got to the bottom of tuning my N/P because my machine came with a speed reducer. My China contact has asked for a video which I've sent and am awaiting a reply but Chinese holidays can be quite long. The N/P on my new machine has a N/P that I'm not familiar with so Im wondering if yours is the same. Here's a pic of what I'm gonna call "the old N/P". This is completely different from "the new one". The old one was a breeze to adjust (no speed reducer but a very big handwheel instead) As you can see, the old one can be adjusted simply by turning the relevant disc which breaks the circuit by way of a cutout. I'm thinking that you might not have seen this type. Forgive me if I'm teaching granny how to suck eggs.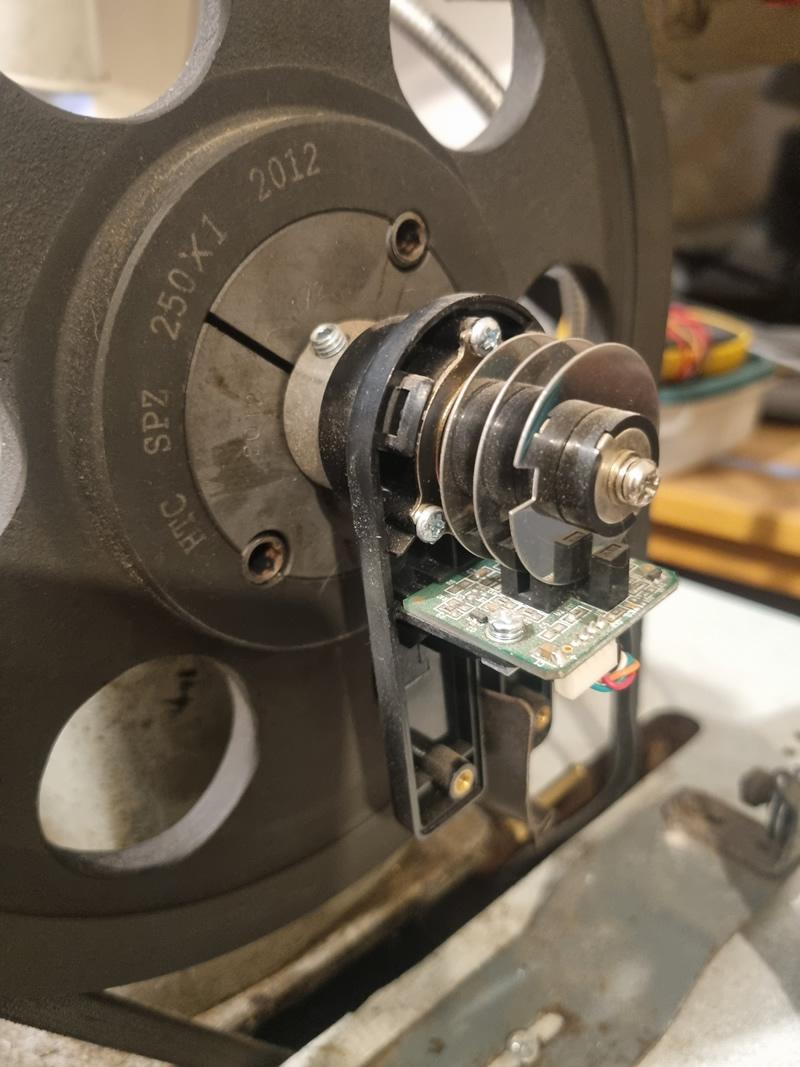
-
Cobra NP4 Leather Skiving Machine - bad presser foot mechanism?
AlZilla replied to NeilMott's topic in Leather Machinery
I know nothing about that machine but I know a little about mechanical things. From your video, it just looks like a rough spot or a piece of metallic debris need to be cleaned up. I would definitely get LMC or whoever you bought it from to bless you taking it apart beforehand. It shouldn't be like that on a new machine but it doesn't seem like a fatal flaw. I'll be interested to find out what it ends up being.