All Activity
- Past hour
-
Folks like myself . . . you would almost have to give it away . . . as I can easily go pick up my stuff . . . basically no cost because I'm there for multiple reasons. The shipping will be your bullet in the foot . . . except for those who have to have every thing shipped to them. Price accordingly to sell to whichever market you want to. May God bless, Dwight
-
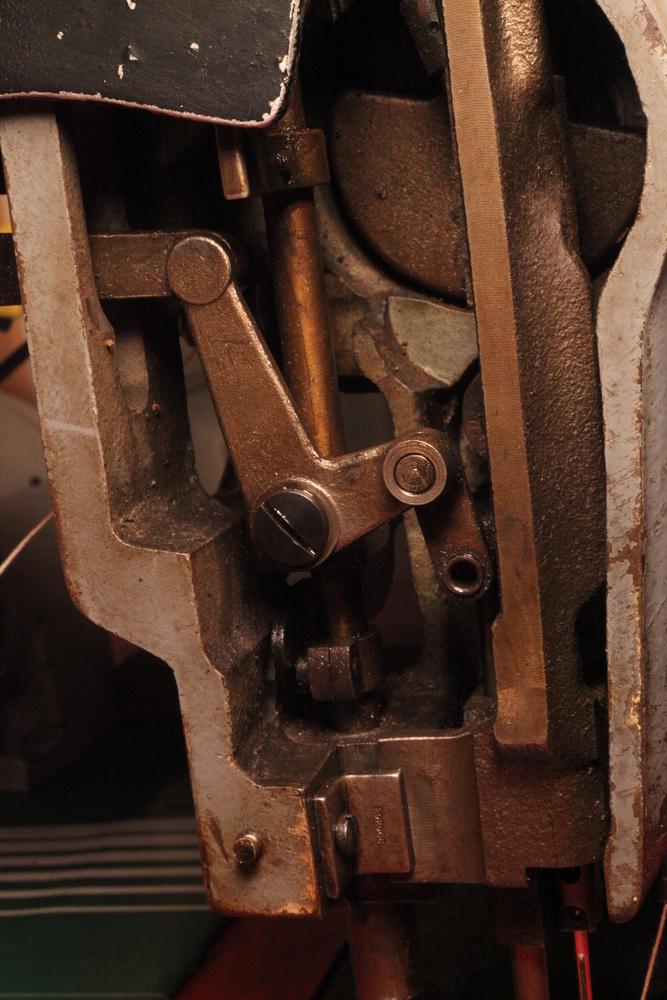
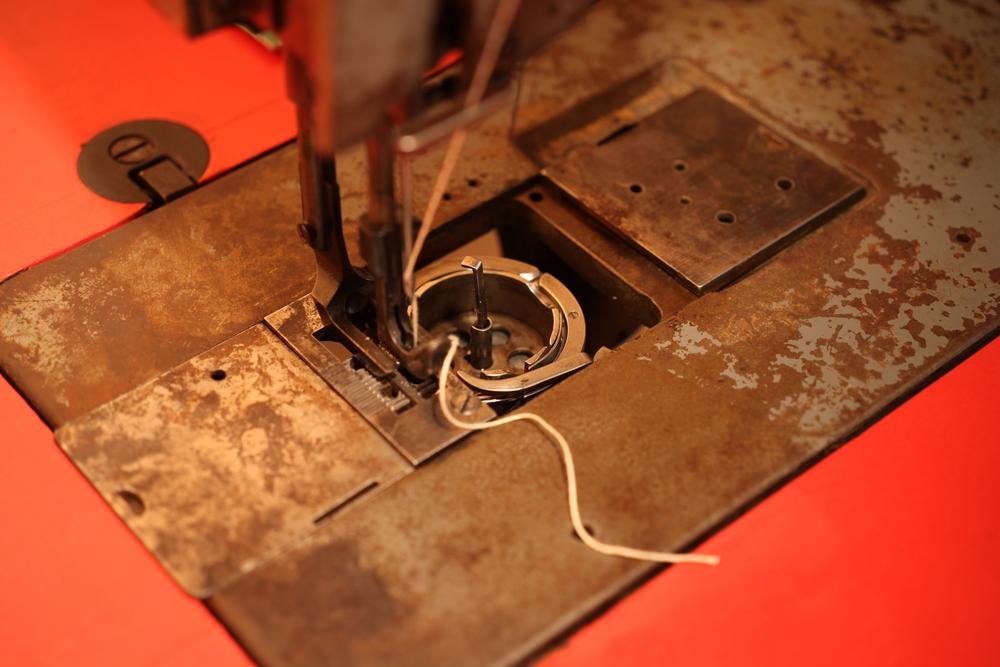
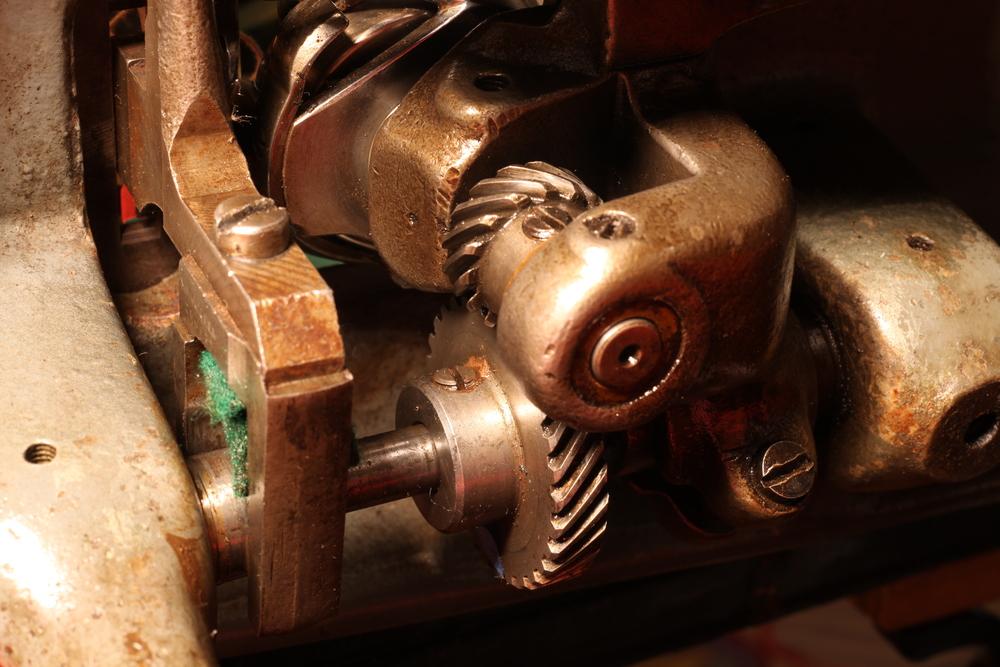
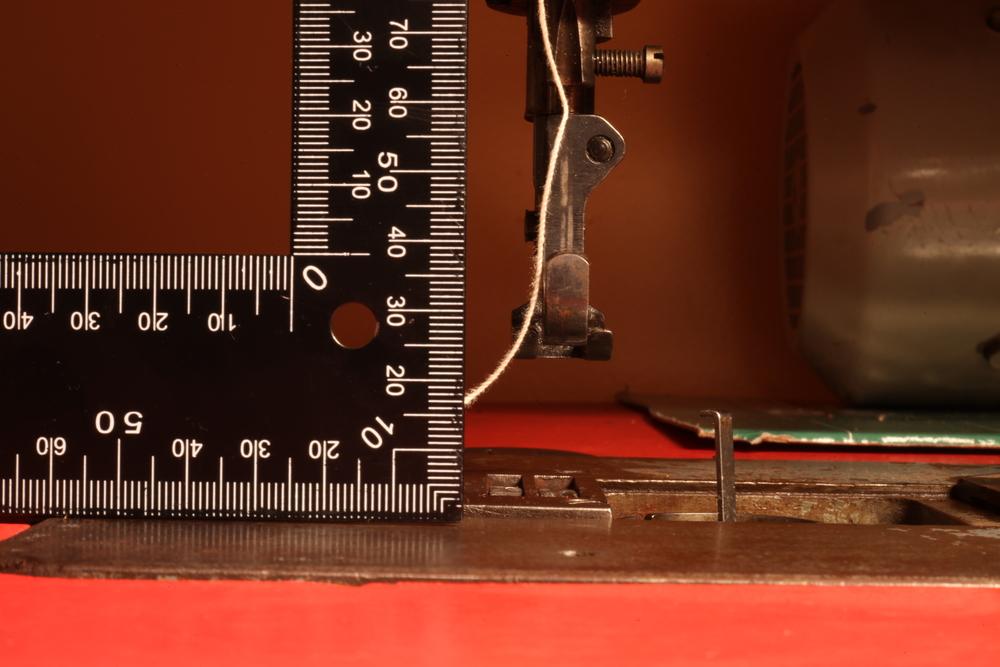
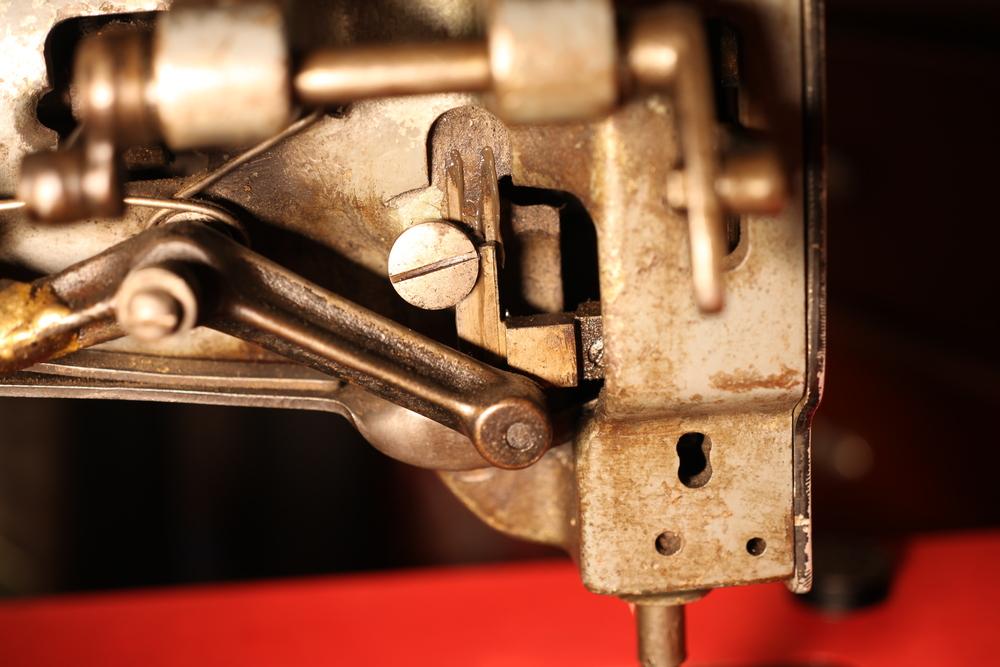
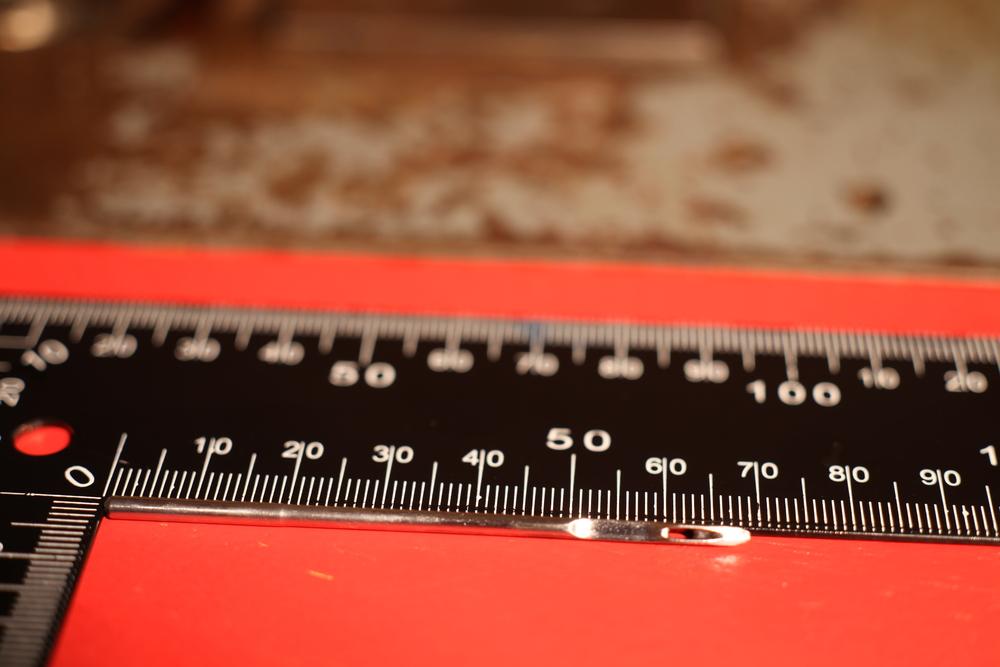
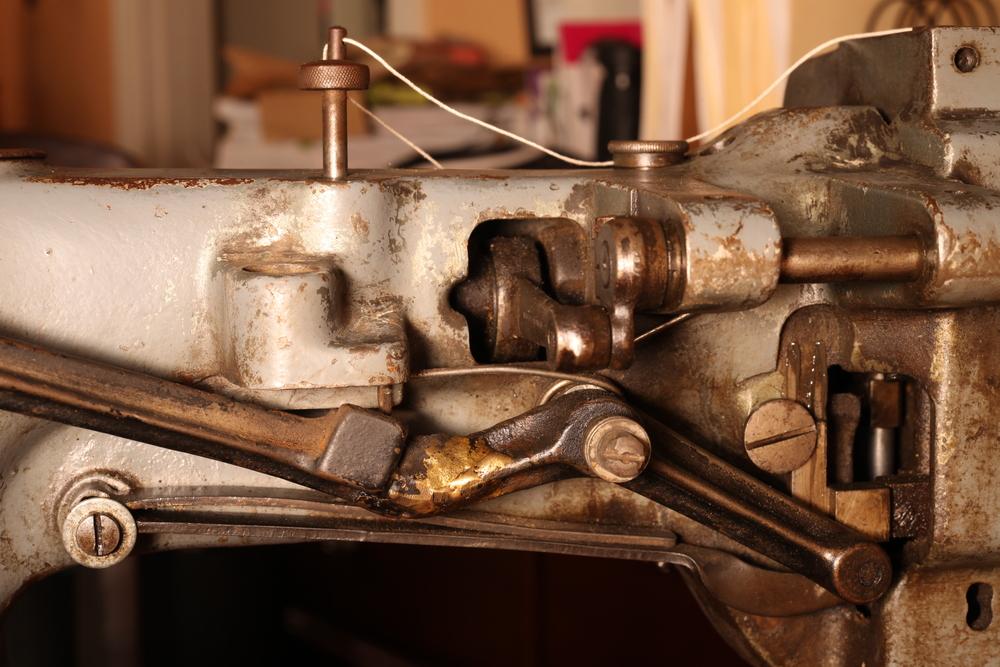
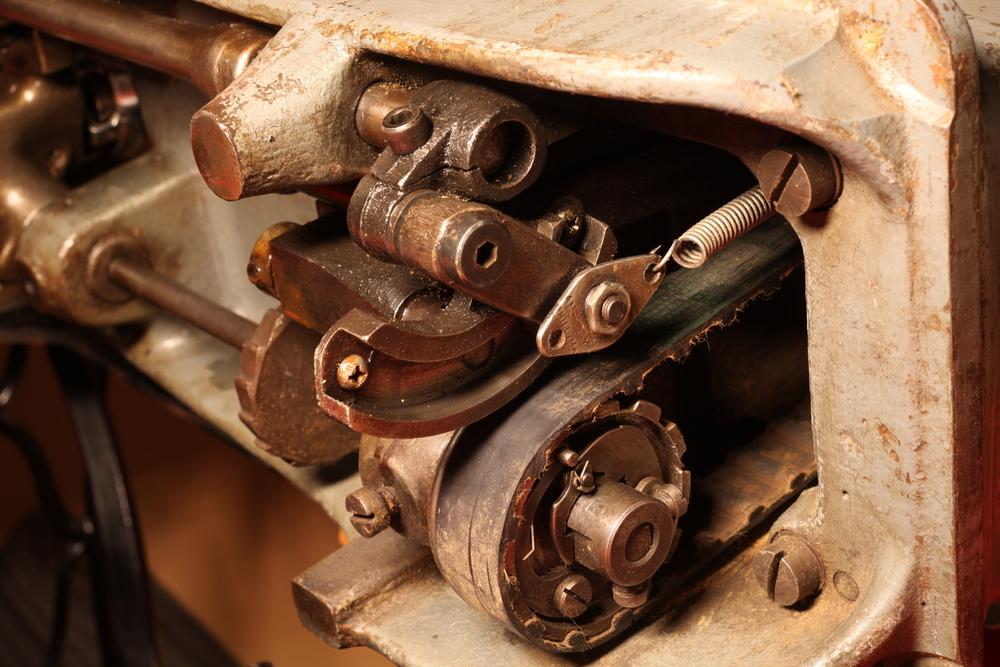
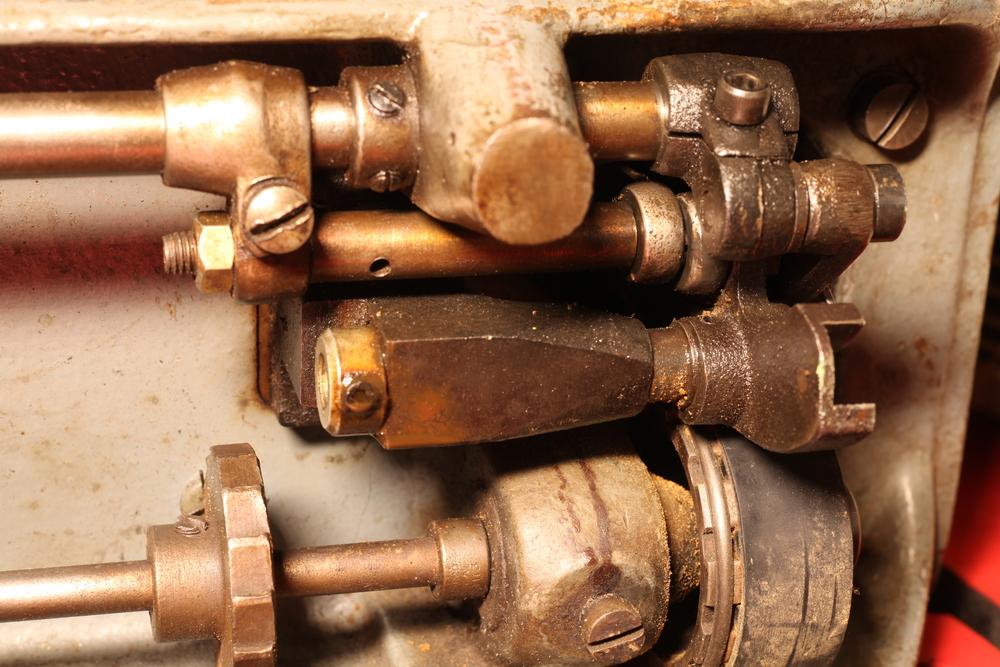
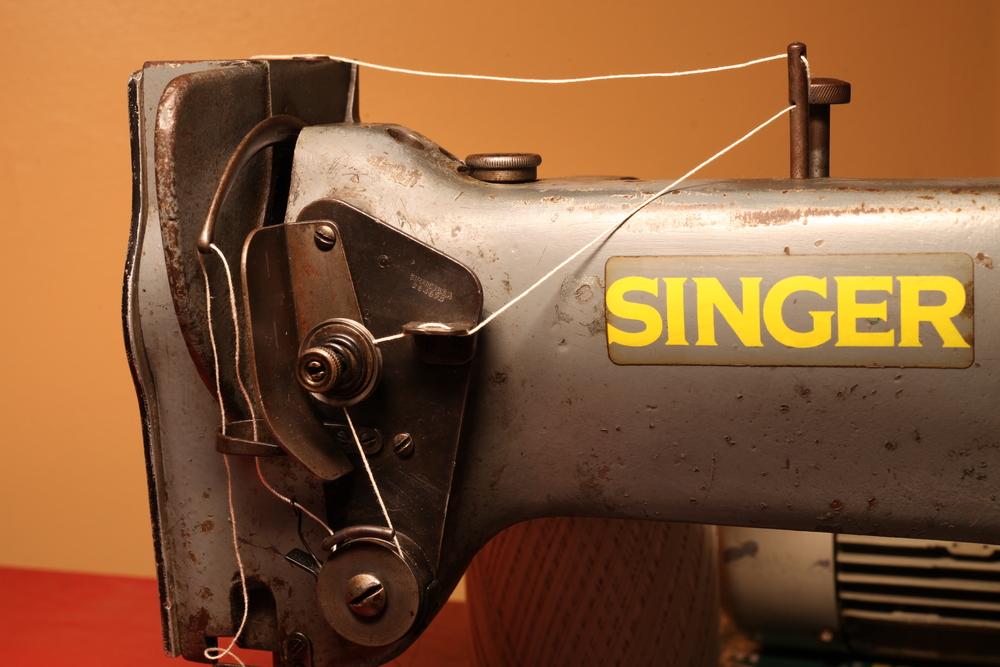
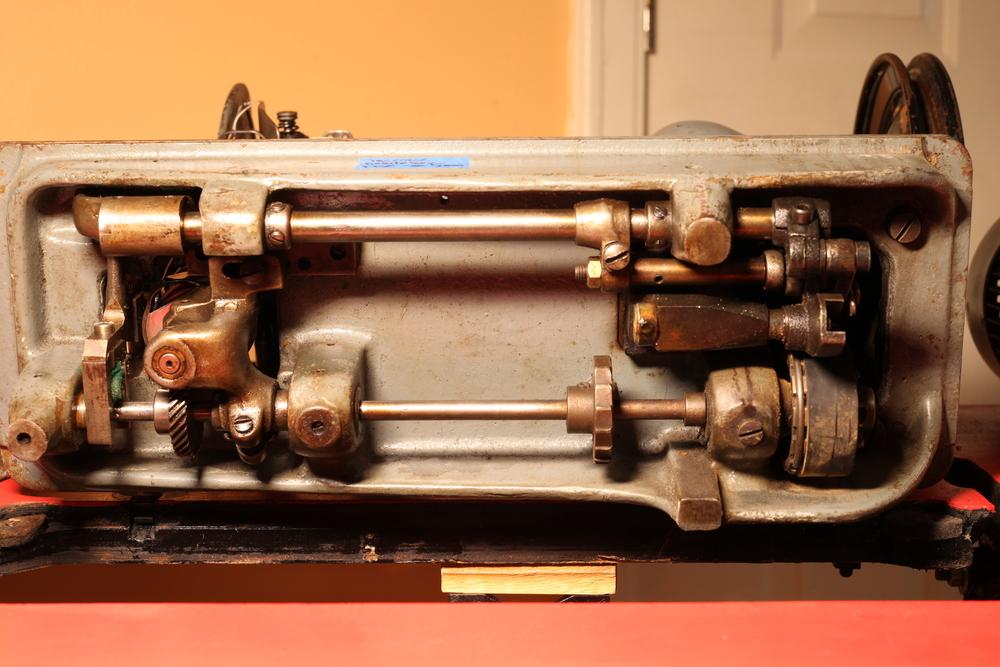
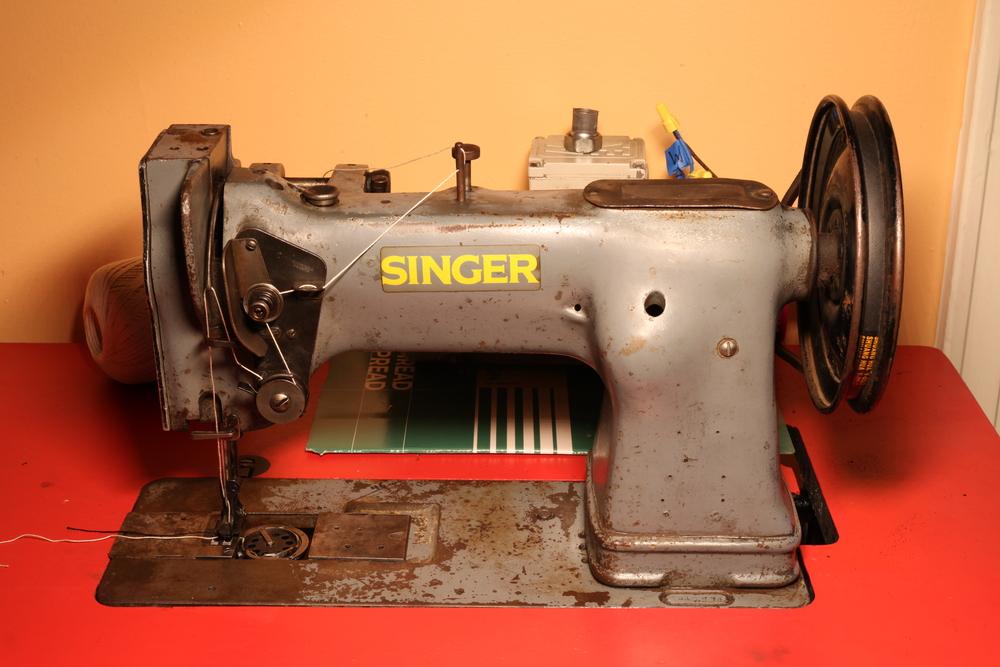
Looking for help to identify this machine I've been fixing up. (Click on any image to enlarge) Serial number: W940XXX Thread take-up lever is nestled between two rails. Enormous bobbin. Just today I finally used up the bonded TEX 200 that came on it. Stitch length and reverse mechanism, my first time seeing this style. If anybody has pictures of what would attach to this to actuate the reverse, do chime in. So far it makes 6.9mm stitches all the time. The hook safety mechanism, also visible in this shot, had been disabled by a glob of solder, but I scraped that out and it's working now. Another view of the reverse Needle that came with it, Nm 270 narrow wedge. I'm assuming this is system 7x3 (794) Foot lift height. Did these come with a standard presser foot lift? If so, it's missing on this one. The cover plate on the left is mostly empty underneath, except for an oil hole. The needle bar clamp screws are hard to get to. I might grind some material from the needle bar block to allow better access for a screwdriver, and buy some new screws. The knee lift or foot lift arm has been brazed. Odd kinks in it too. I'll leave it since it's functional, but I'd be curious to see what shape these started out as if someone has a photo. Worm gears for the hook, the kind where both gears have a screw that goes into a slot for positioning. The you slide the gear on the horizontal shaft left or right to effect hook timing. I'd like to purchase a thread guide for the needle bar, you'll note it's missing in this video from the "My First VFD" post. vfd-sounds-new-bearings-no-fan__small.mp4
- Yesterday
-
nicely done. kgg
-
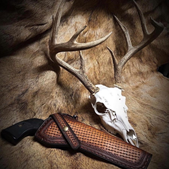
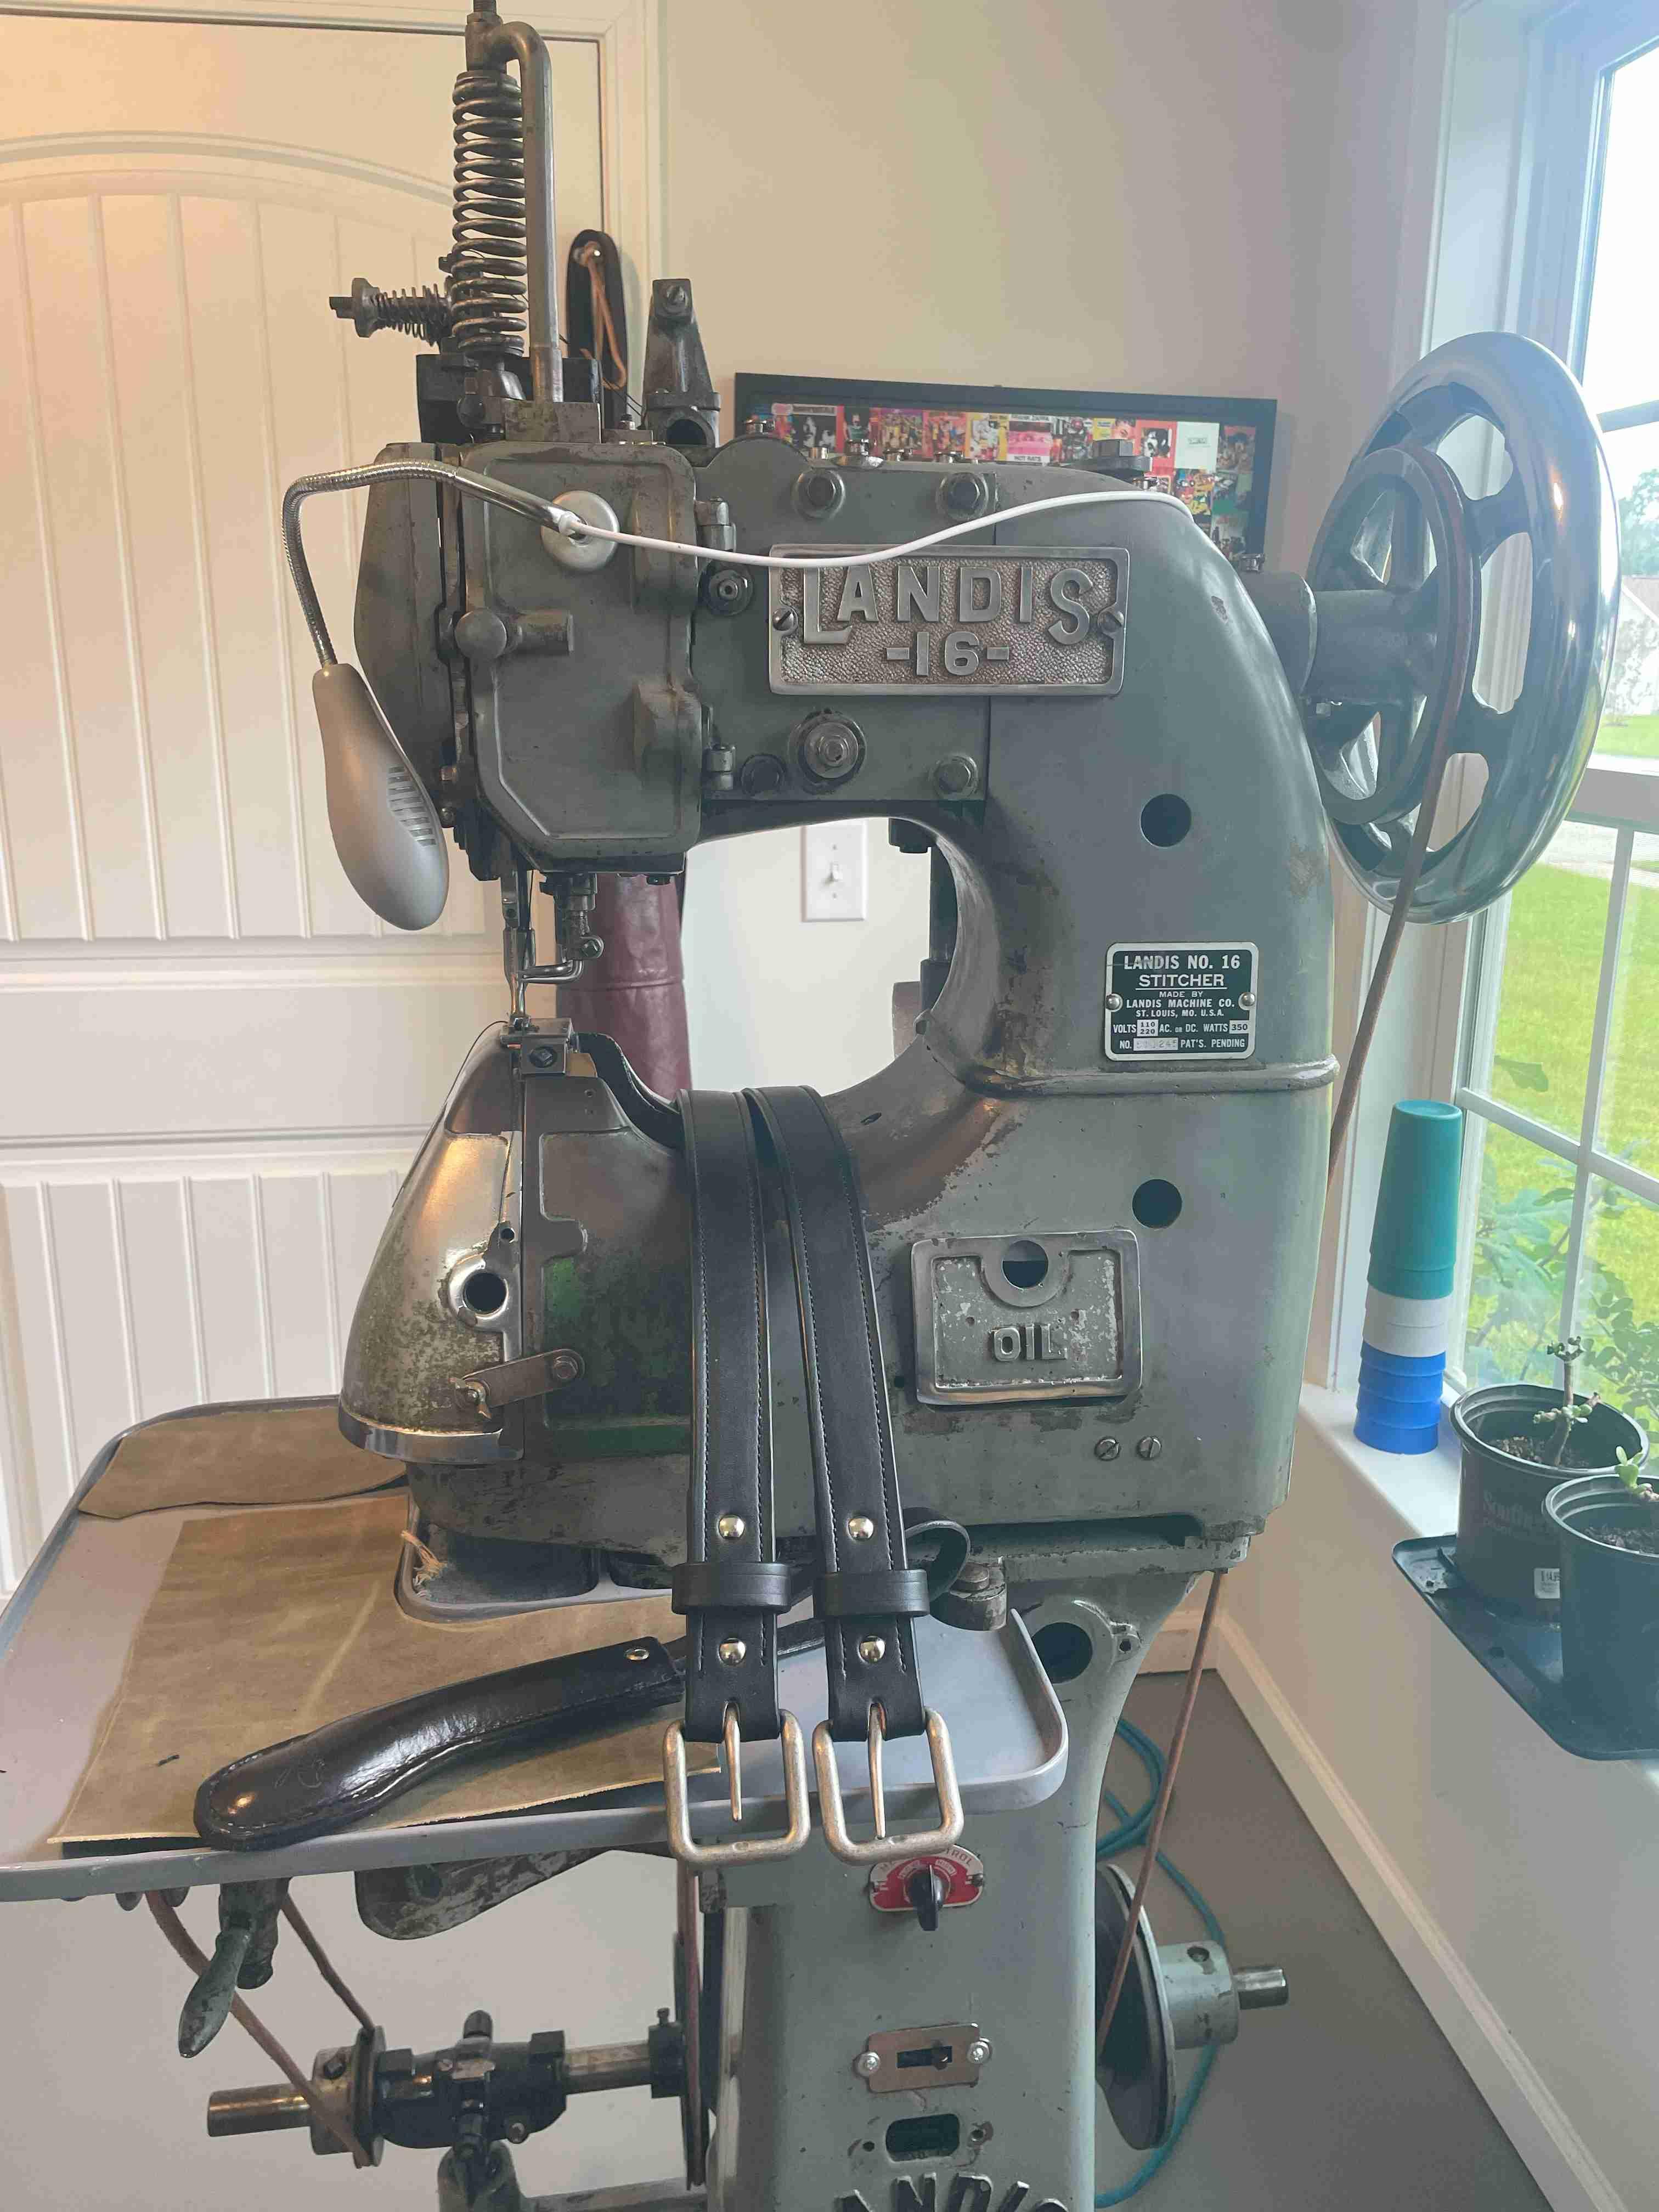
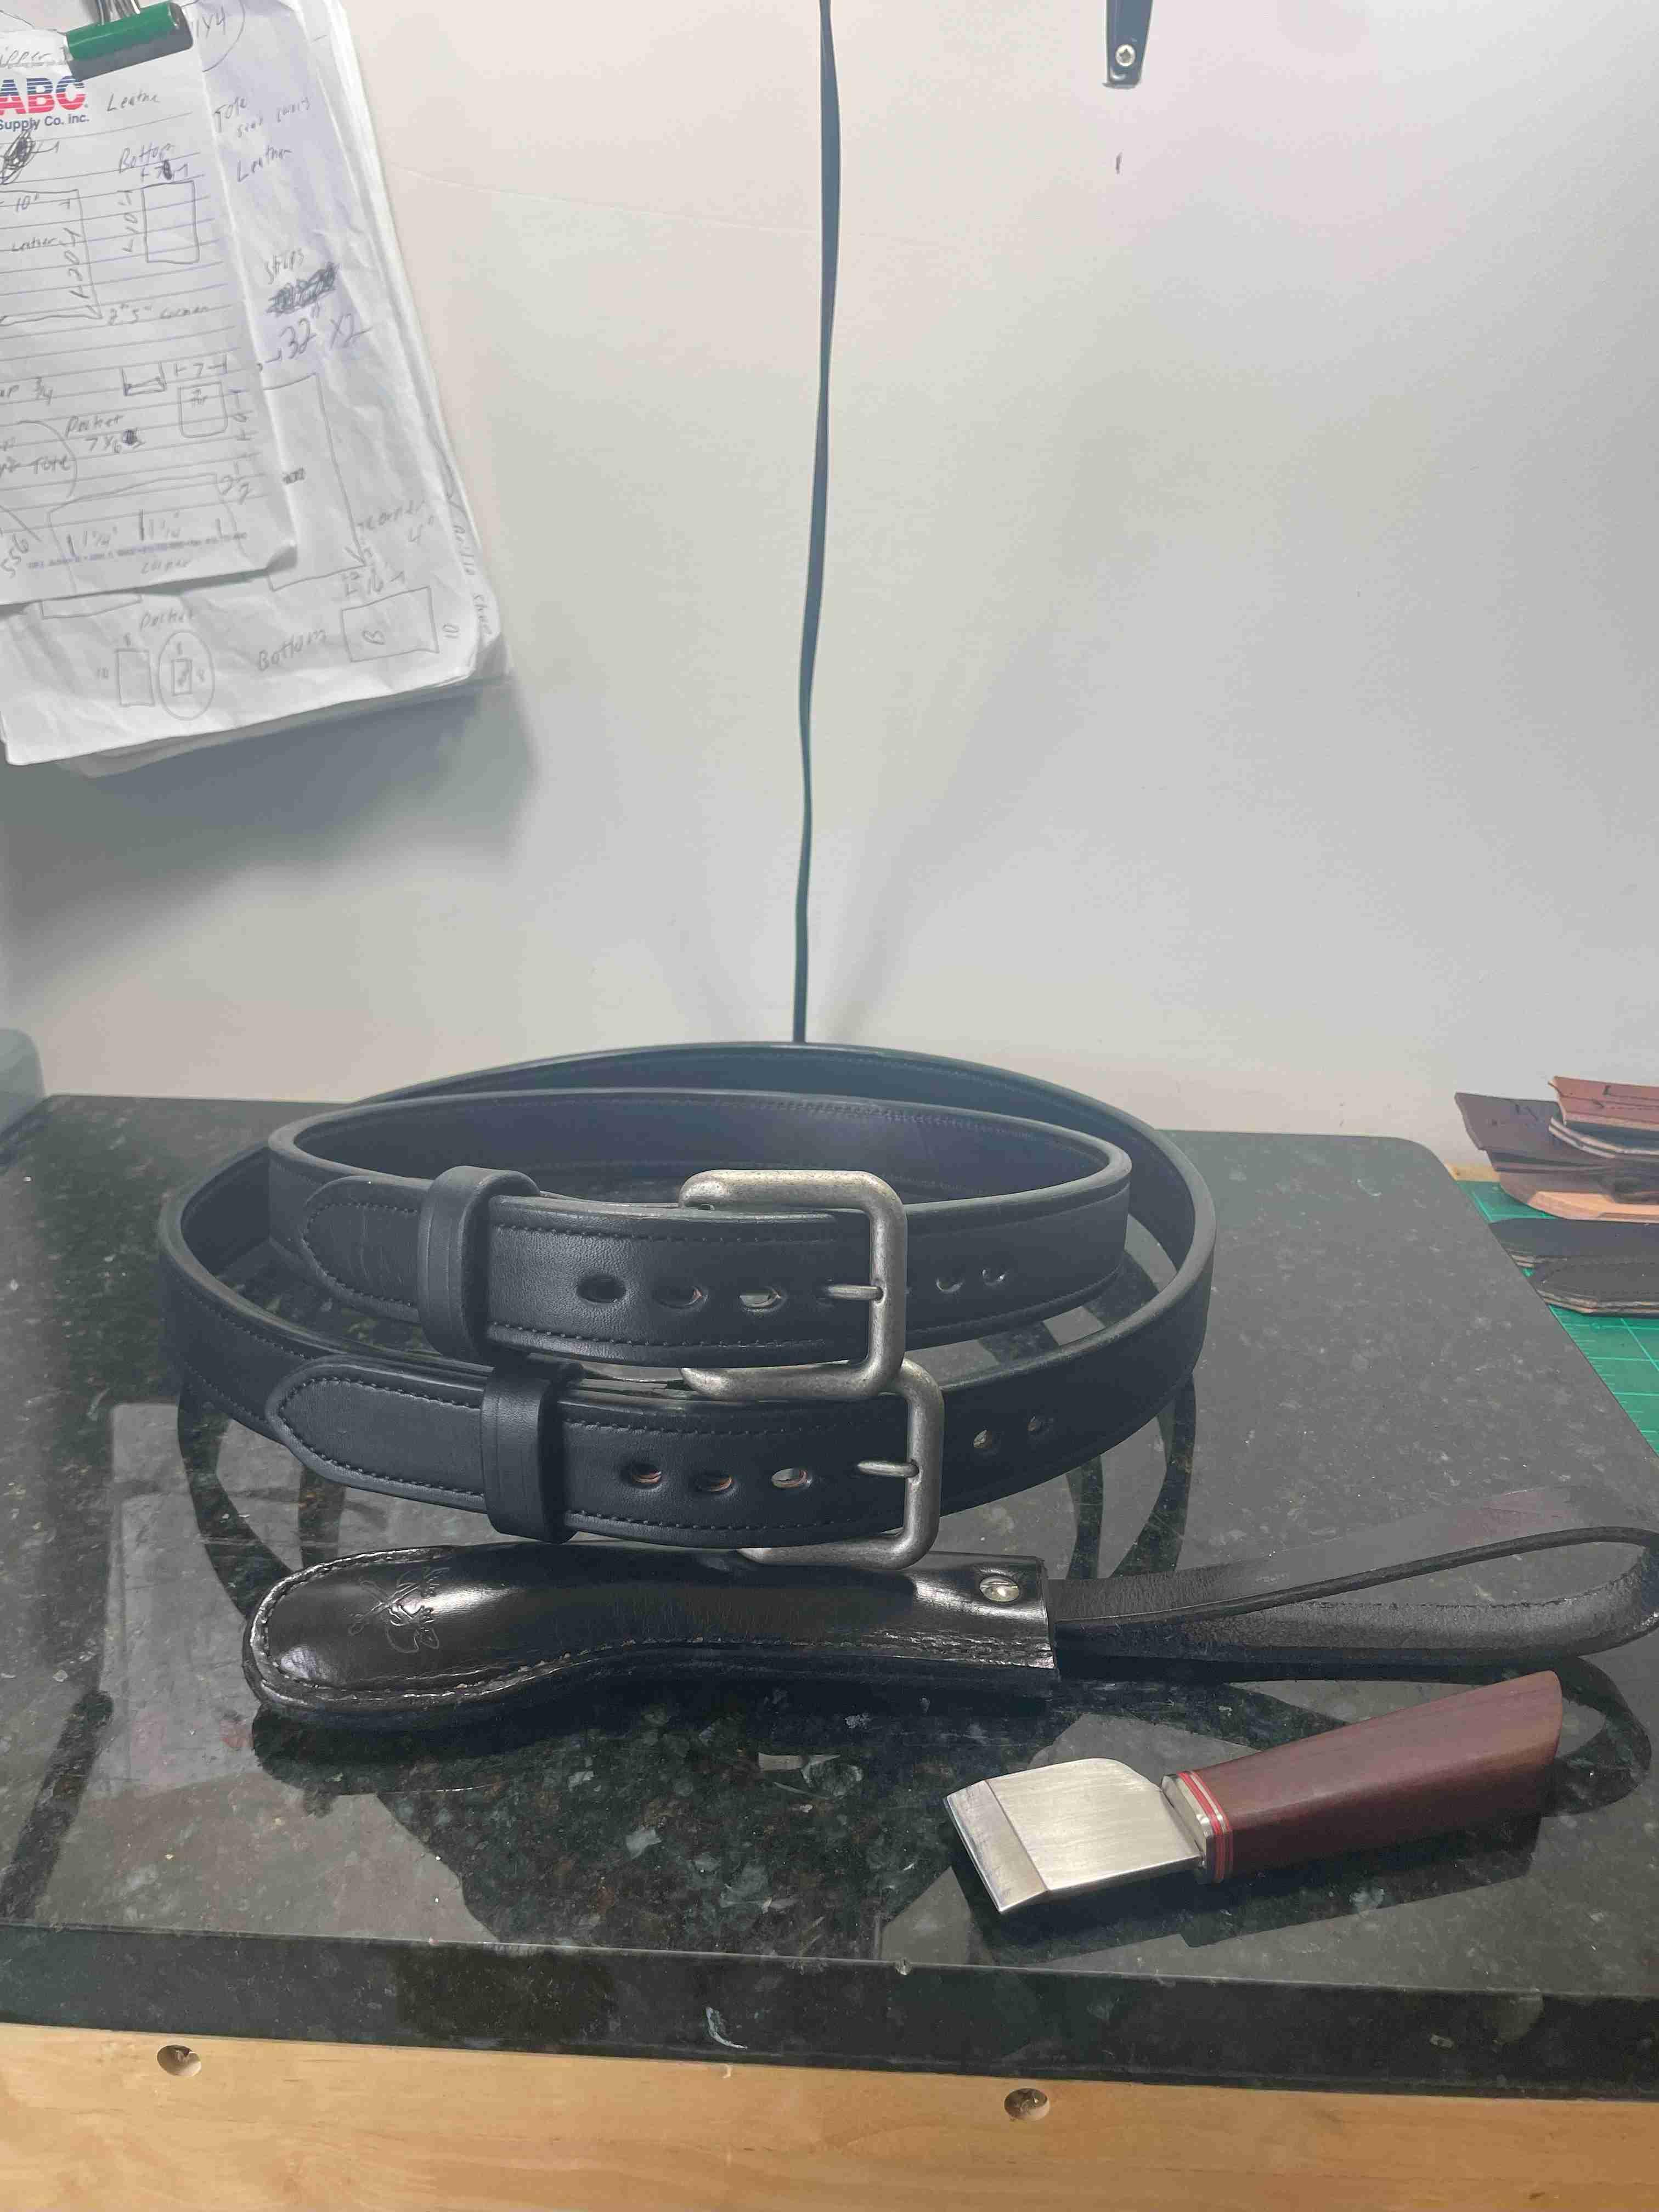
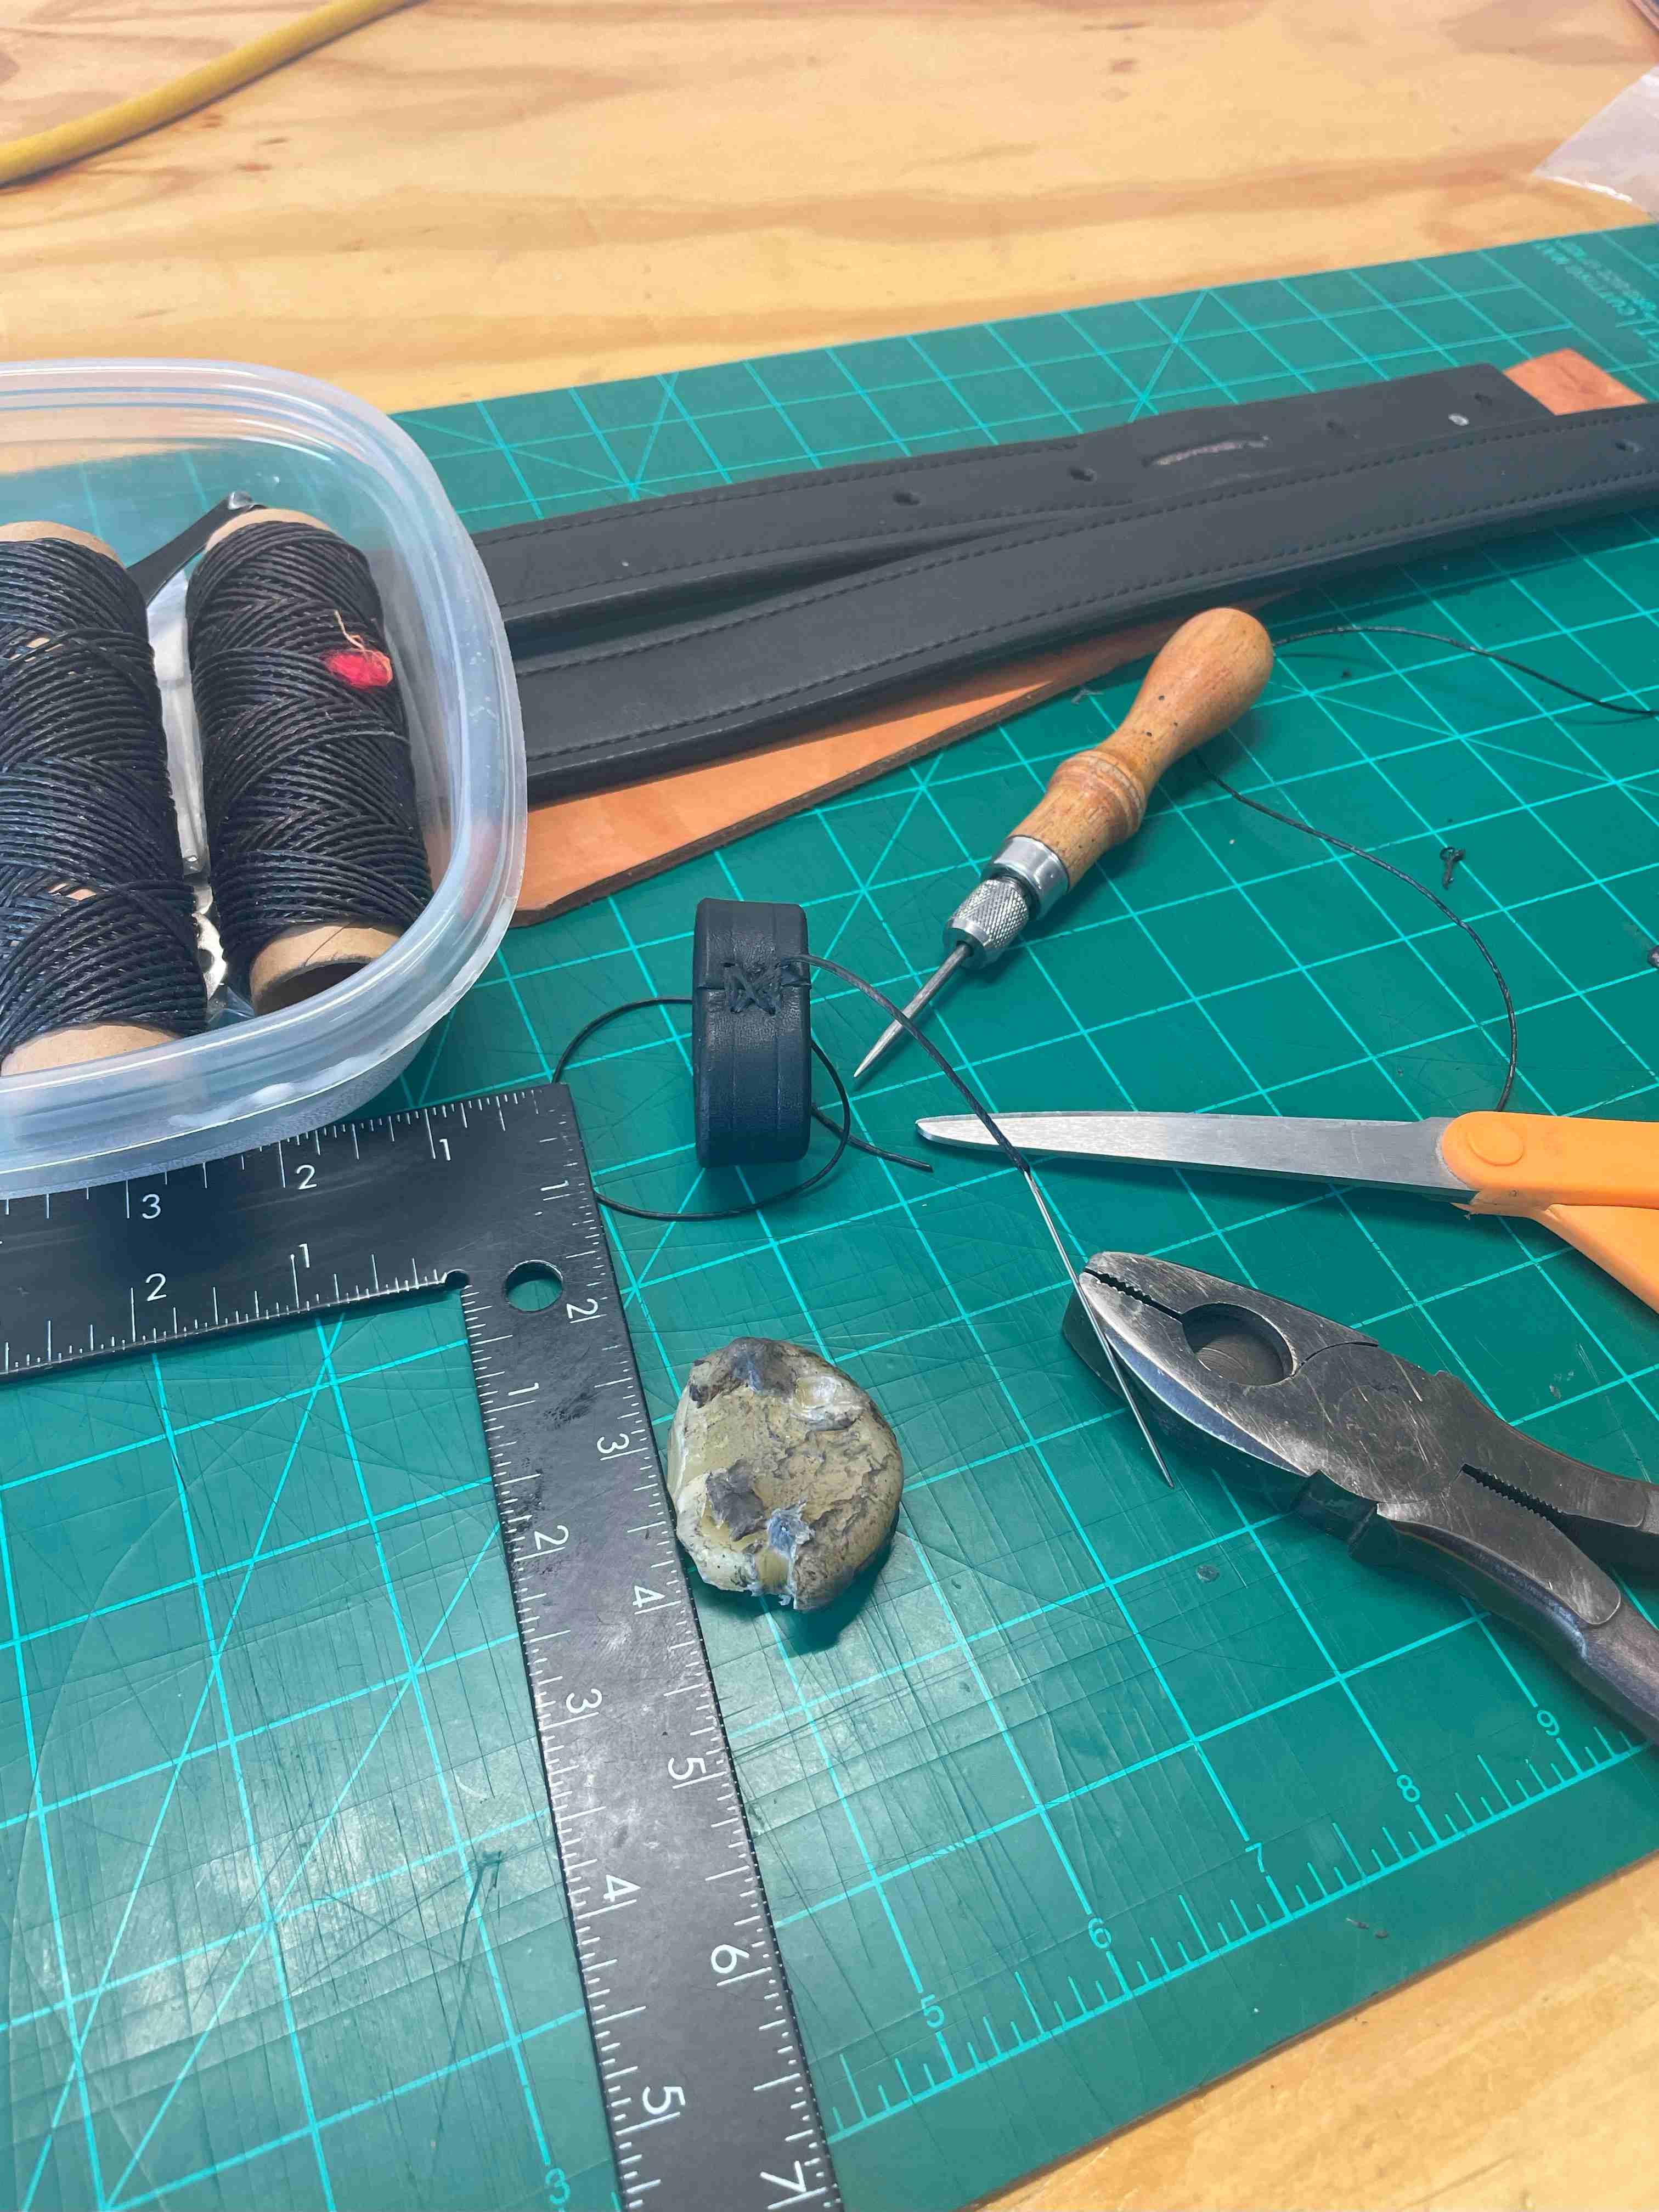
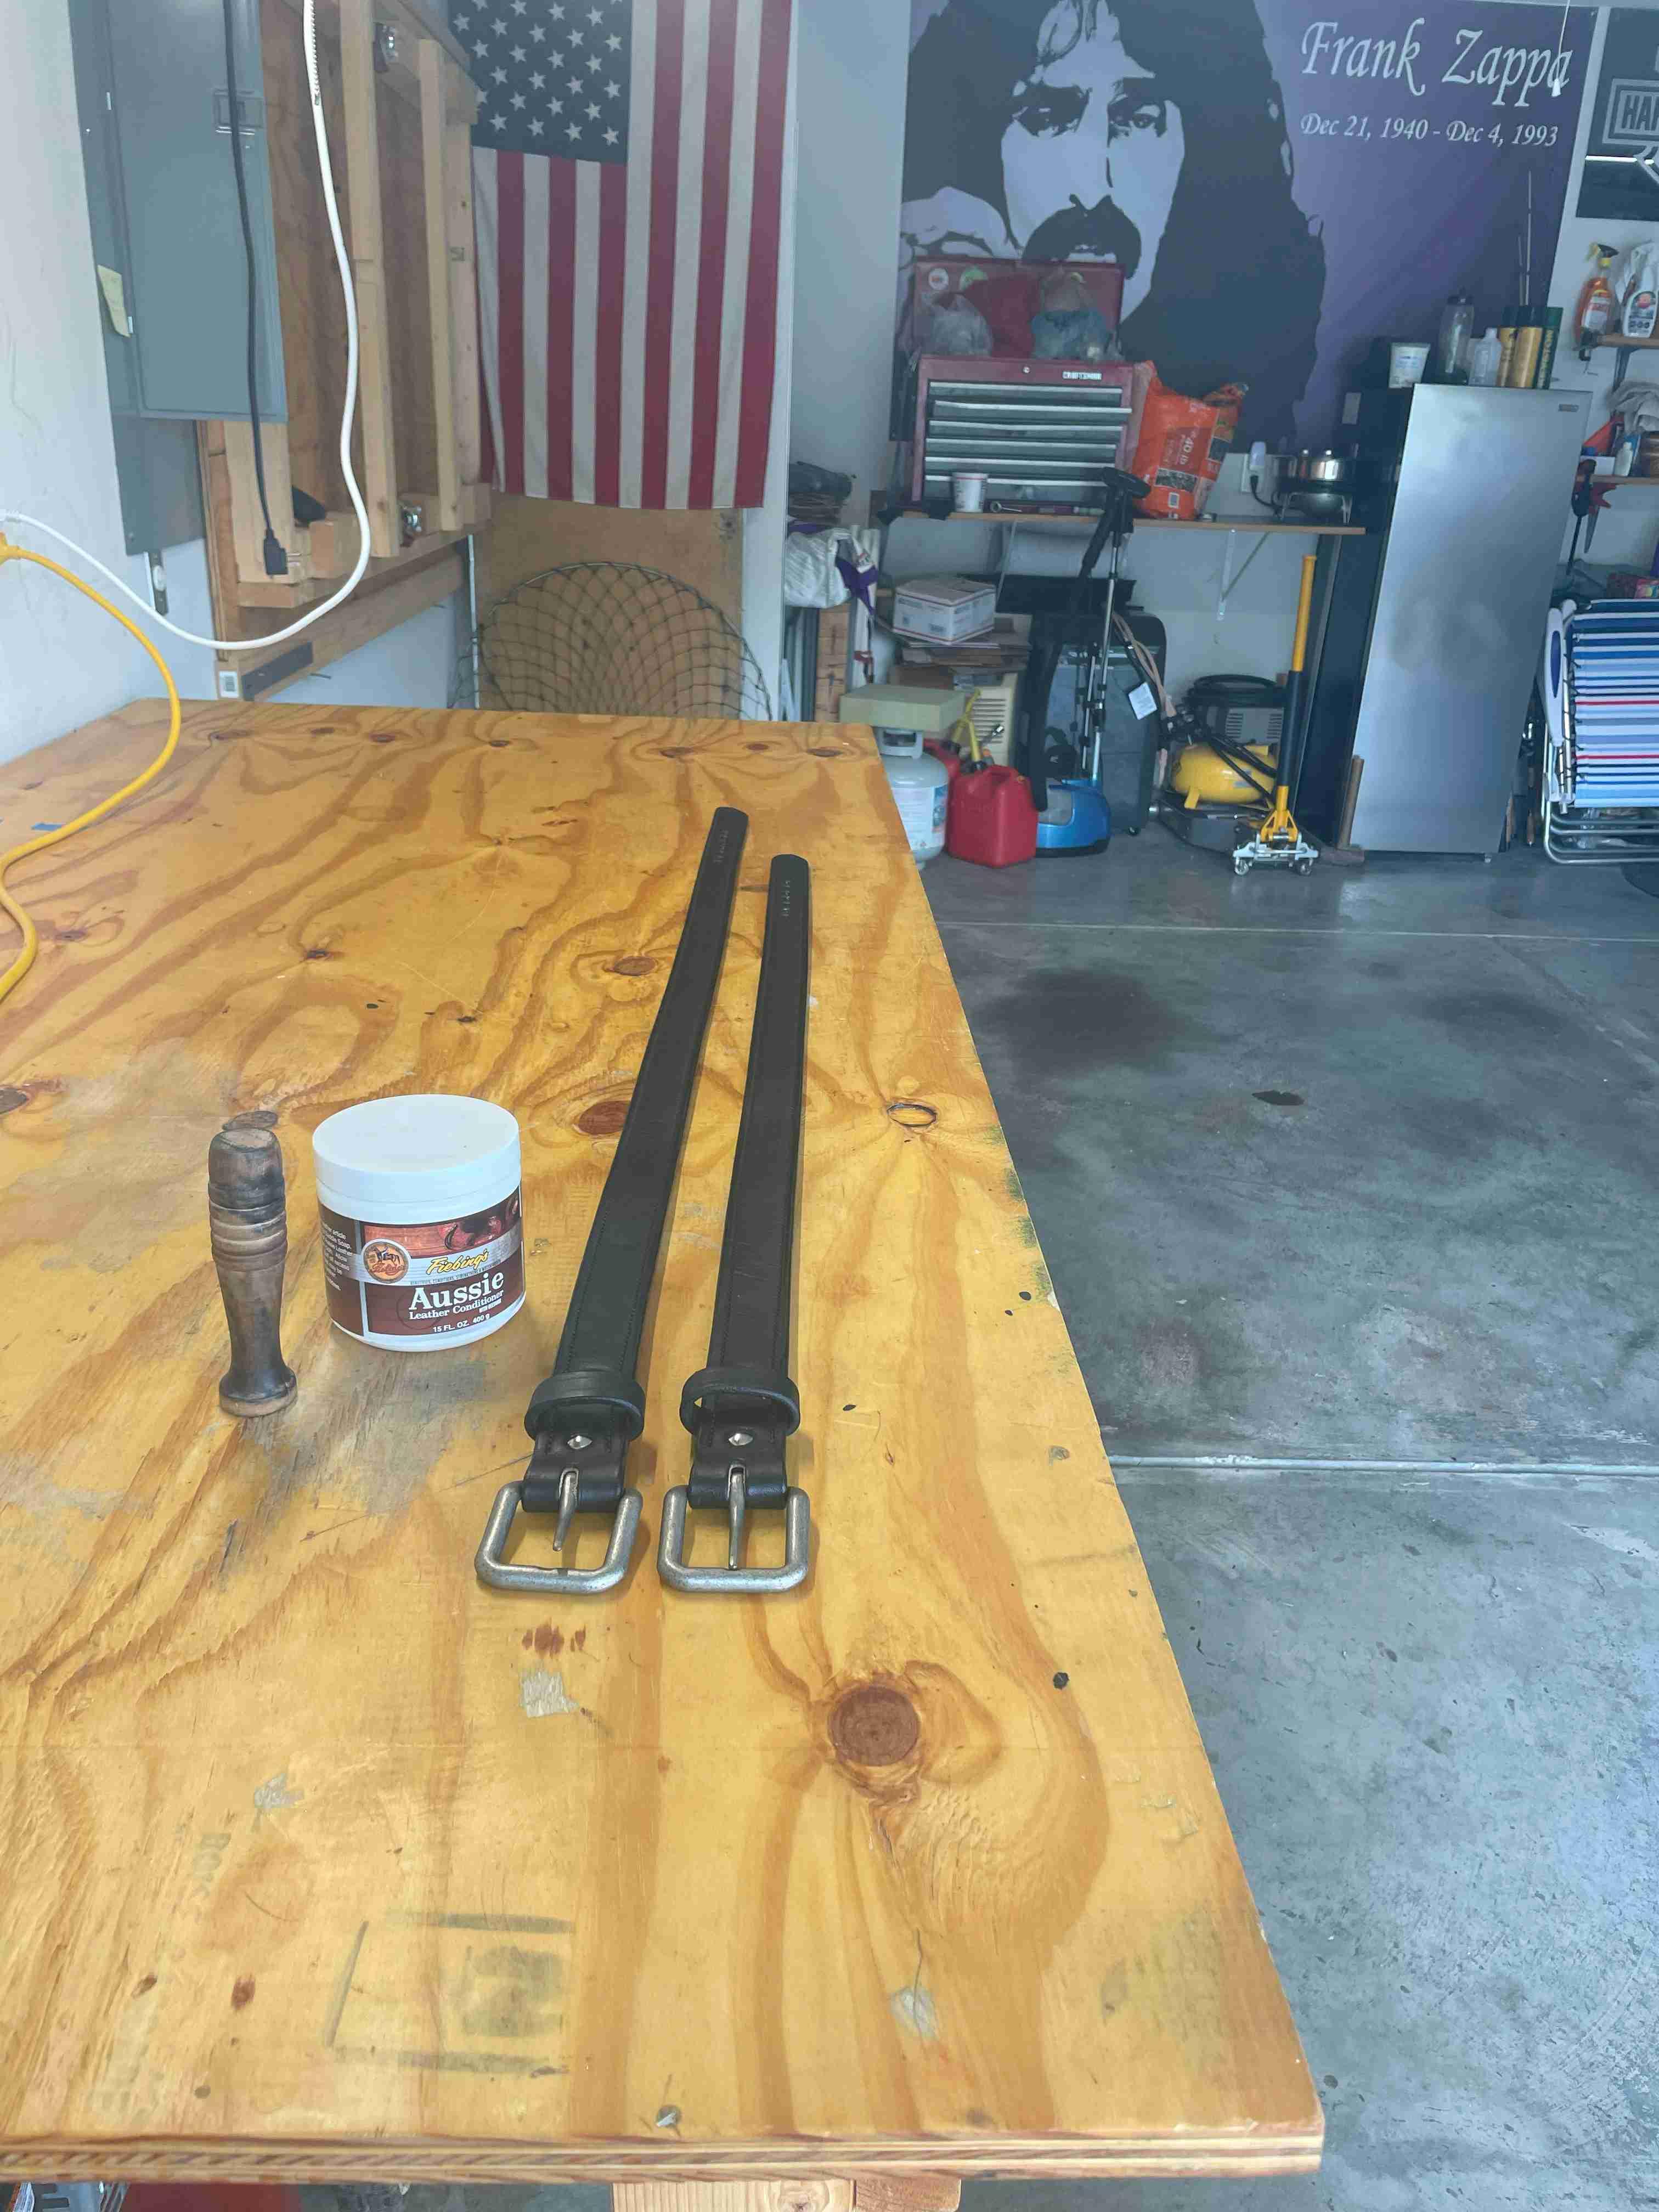
Finished up a couple of gun belts for some really good friends. The old Landis 16 is sewing a beautiful tight stitch. Old Eli over at Landis Machine Co replaced a few parts and dialed the girl in.
-
Not sure if you're selling just the bellies but I got an email from Wickett & Craig for bellies at $5-$9

-
That would be great, I have sent you a message!
-
Assuming they're not all full sides, the simplest way to go would be to price per ft or per metre having discounted from the current price.
-
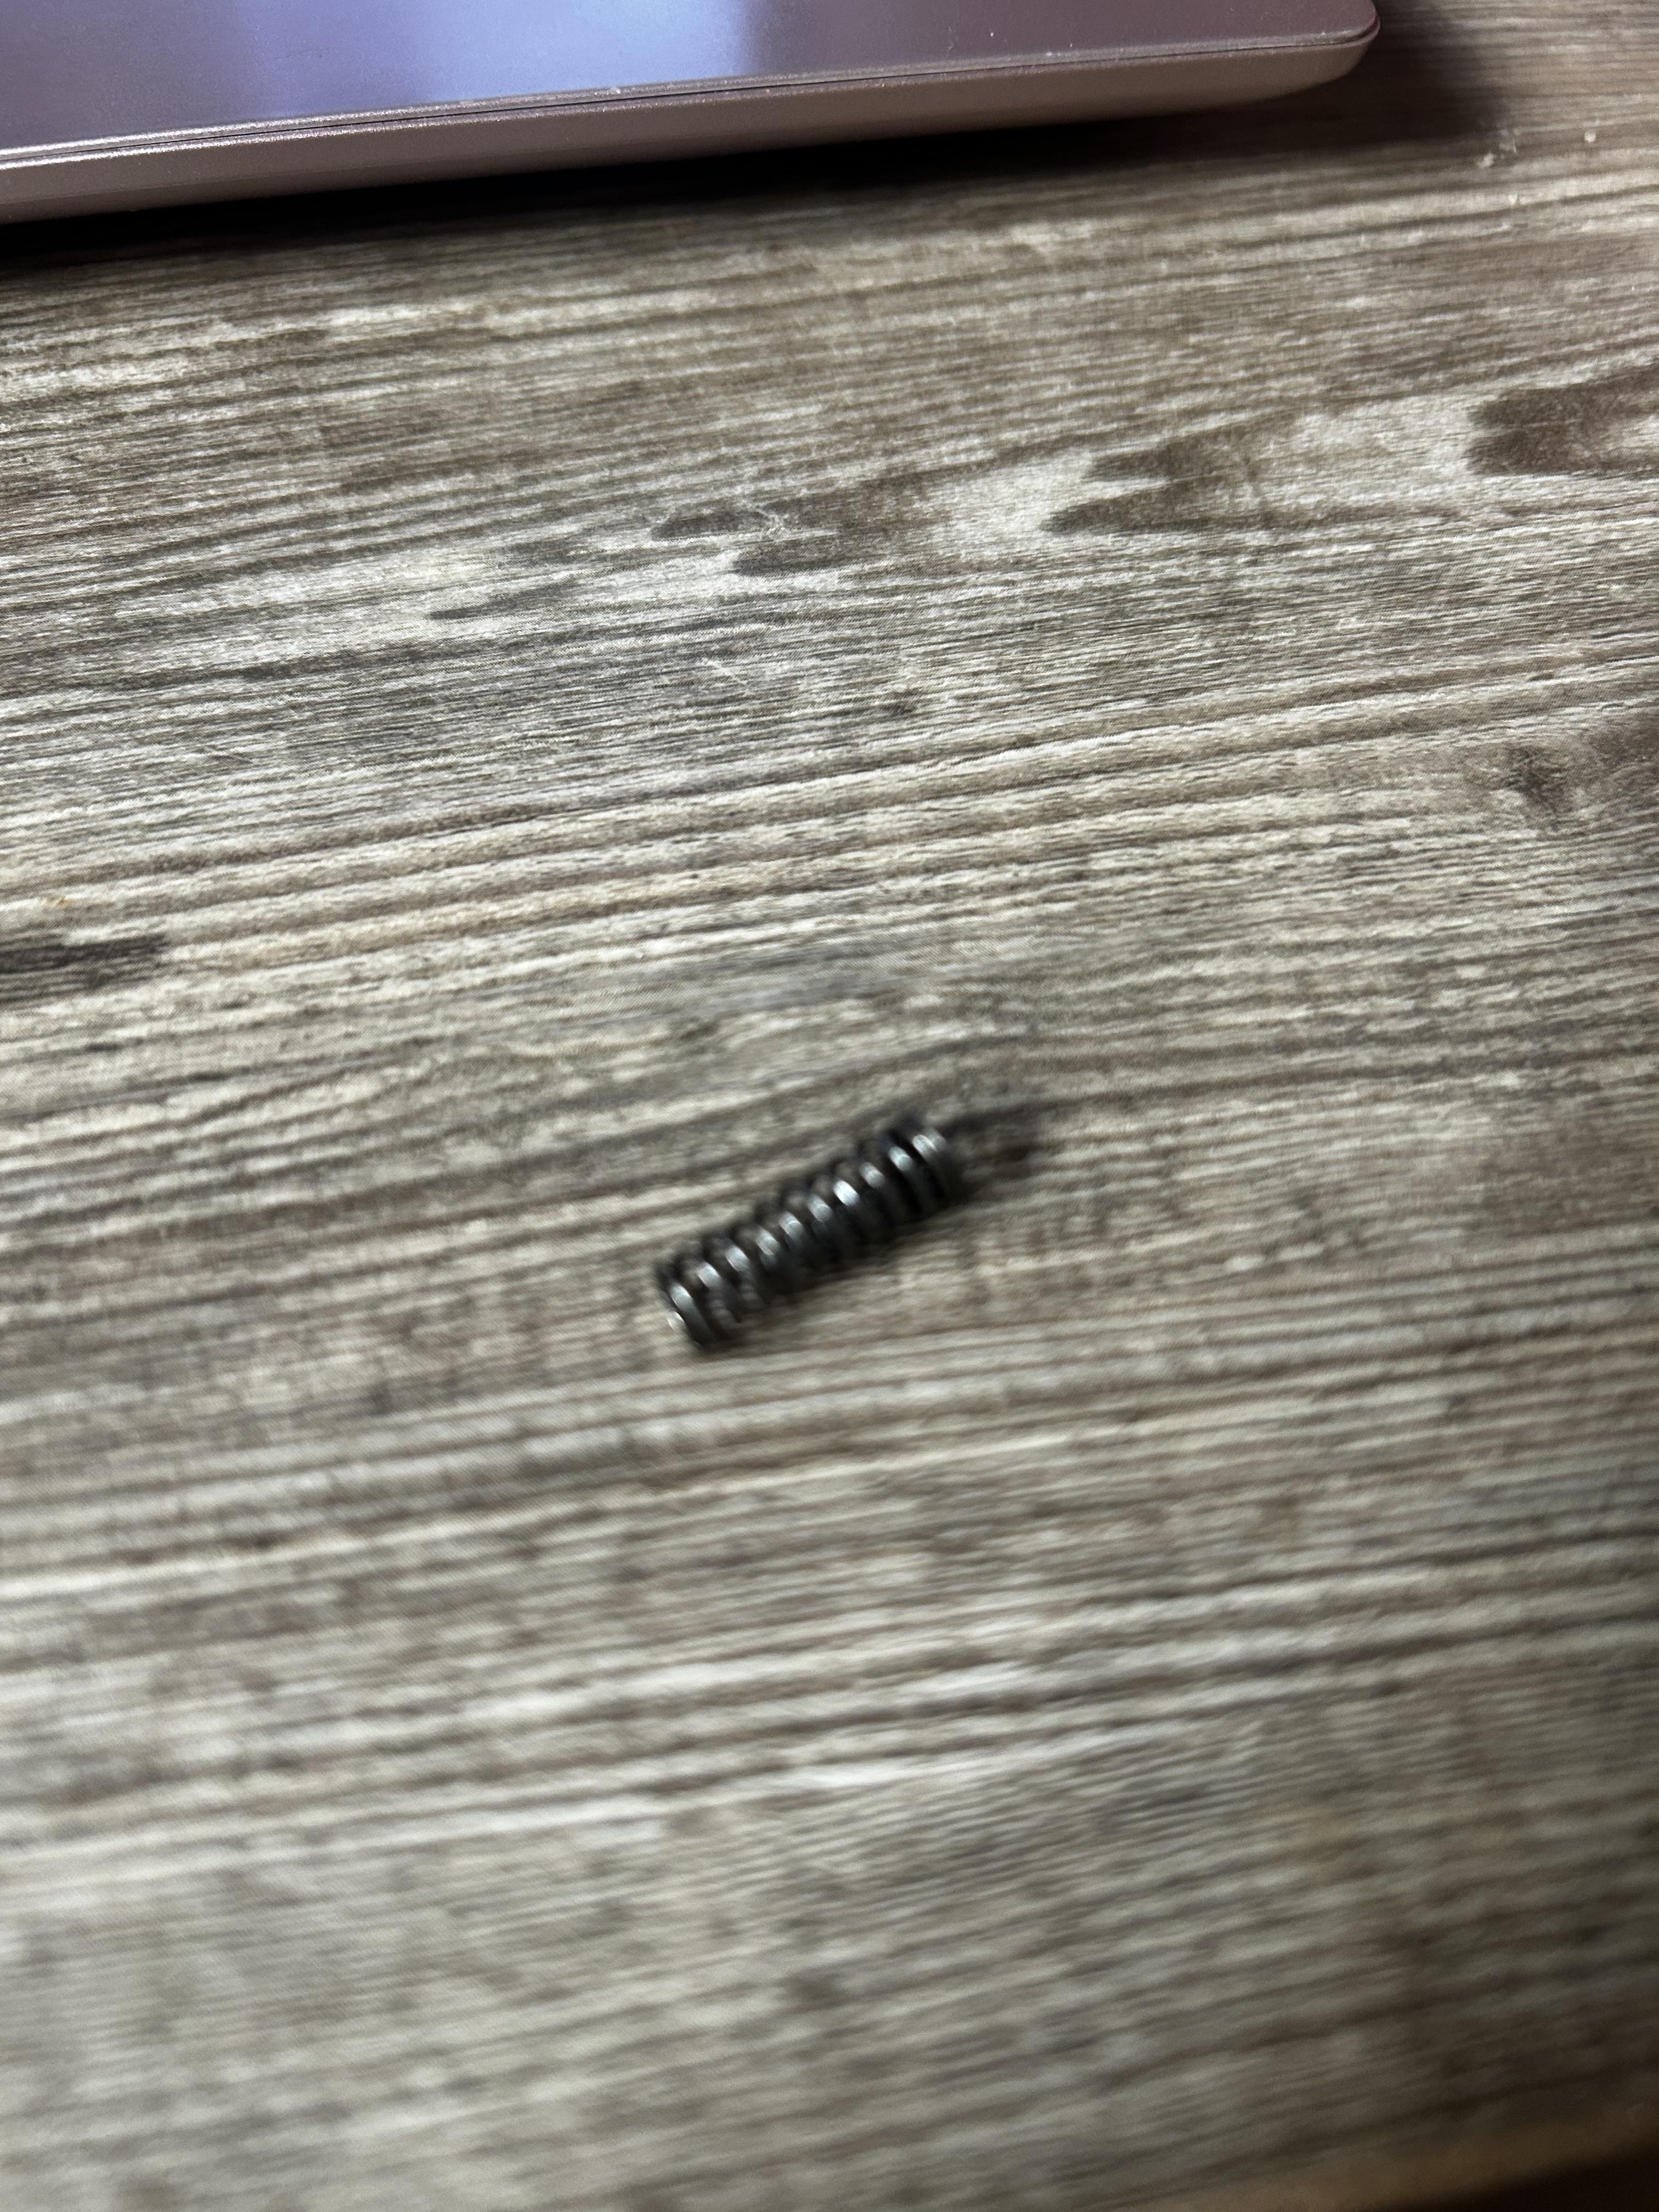
That spring likely slides around either the outer presser foot bar or the inner presser foot bar. On my machine, these two bars are different diameters, so that will tell you which one it goes around. Looks too short to be the one that drops in the top for your pressure adjustment. By any chance do you have pictures from before and after? Perhaps someone with a 335 can post a picture to show where the springs belong.
-
 JustDucky joined the community
 -
 Bird Lady joined the community
 -
Beautiful, very nice design and execution.
-
Thanks, I really appreciate the compliments.
-
 MelissaViarengo joined the community
 -
Outstanding work! Thanks for sharing with us.
-
A couple of ways to go about it... Try to recall what you paid and price it at that point; knowing you probably paid less at full retail when you bought it than what it's currently selling for. Look up current pricing from vendors that carry the same, and drop the price by some percentage. Percentage depends on how quickly you'd like to move it, whether you add in shipping, packaging, etc.
-
Very Sharp!! Great job!
-

Getting started, mainly wallets and gunslings (salmon leather inlays)
PastorBob replied to Birchee's topic in Getting Started
Welcome from SW Missouri! I would suggest a good maul or hammer. Maybe get a starter set of stamps for patterns. -
Glad this got reposted. Thought mine didn't go through!
-
 This is exciting! Marked on the calendar! ((hugs)) Randy
 -
 You could get along without the chisels if you punch the holes with a stitch awl. I've been working leather for 50+ years and never had a set of chisels. You can make a good, even line of holes with a bit of practice. I learned to stitch in a saddle shop and we just learned to use a stitch awl. There are good books on saddle stitching that can get you going in the right direction. Then, if you wish, you can invest in some chisels but it will b e a choice, not a necessity. I used to have a stitching pony but it never held the work tight enough without marking the leather so I finally got rid of it and just work without it. FWIW, we never had a stitching pony in the saddle shop, either. You may be able to find one that does the job, though.
 -
Friq I have already put the back of the machine back together, but after dropping the presser foot, the outer presser foot won't let go and stays hanging. I also discovered that there is a spring left in it and I don't know where it belongs.
-
Beautiful. I had to look all over for a bag to carry my laptop with a 17" monitor. This is way more classy.
-

What’s the maximum thickness the Singer 29K71 can handle
CowboyBob replied to JRodriguez's topic in Leather Sewing Machines
There's a wingnut adjustment on the back side you need to move to the "H" side.This will make the foot lift higher when it walks. -
Thanks a lot I made a post about my knife.
-

Getting started, mainly wallets and gunslings (salmon leather inlays)
Birchee replied to Birchee's topic in Getting Started
Thanks, great example of doing lots with little. -
Always hard to tell from a mic input as sometimes they can be overly sensitive but definitely better than before!
-

What’s the maximum thickness the Singer 29K71 can handle
dikman replied to JRodriguez's topic in Leather Sewing Machines
If you're feeling keen then just sew a few different scrap pieces, of differing thicknesses, together so the buyer can see the results. No excuse then for not knowing. -
I forgot, your round knife looks interesting.