-
Posts
1,536 -
Joined
-
Last visited
Content Type
Profiles
Forums
Events
Blogs
Gallery
Store
Everything posted by katsass
-
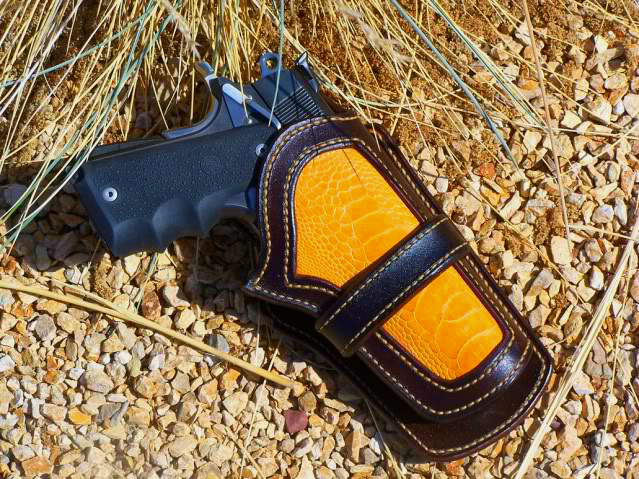
AA3JW: I dug around and found this pic of a holster I made for a Colt 1911. Thhe inlay is ostrich shin. Hope this helps a bit. mike
-
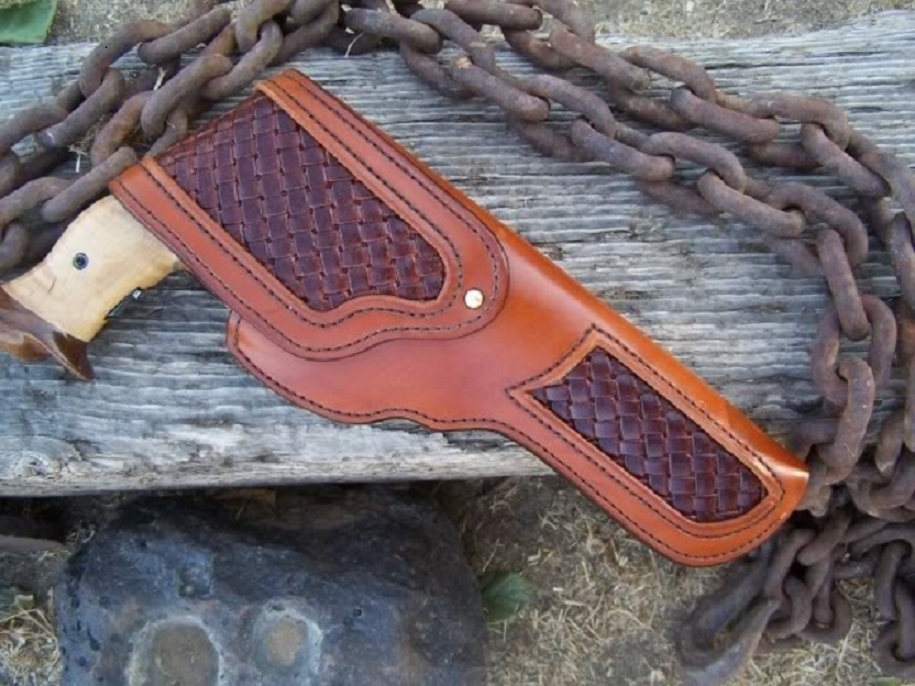
katsass here: First off you need to use lighter leather than you would normally use for holsters. At least 3/4oz and if the weapon is large and heavy, 4/5oz. You will use two patterns for your project. To draw my patterns I use the cheapest manila folders that I can buy at a stationery store, they are heavy enough to stand up to damp leather when transferring the pattern. Actually you can use the same one here, but you will reverse it so that you have two pieces of leather cut out - one being the mirror image of the other. On the pattern for the outside piece, draw your design for the cut-out (window) for the inlay (snakeskin). When you cut the leather for the outer piece, cut that window out at the same time. DON'T try to draw a separate design for the inlay window. You will NEVER get it to line up properly as far as centering, size, angle etc. when the rig is done. Draw that puppy right on your main pattern and cut it right when you cut the overall piece. Now, use your stitching gouge and gouge around the window in your main piece. Dampen the leather and use your overstitch to mark the stitch length right in the gouge you made. (I use 6 spi on all of my rigs) Set that piece aside. Take the piece you cut out for the window. Lay it down on a piece of paper (or manila folder) and draw that pattern 3/8 to 1/2 inch larger all around, This will be the pattern to cut the snakeskin. Cut it out. Apply Weldwood contact cement, Barge cement or any other good quality contact cement to the outer edge of the GOOD side (the side that you will see) of the snakeskin, being careful to NOT get any inside of that 3/8 or 1/2 inch edge. Apply the cement to the inner (rough, or flesh side) of the main, or outer piece leather, being careful to not get the stuff much outside the 3/8 0r 1/2 inch. This narrow area is used to secure the skin to the outer piece of your masterpiece 'till you stitch it.. LET the goop DRY FOR 10 MINUTES or so. Now CAREFULLY apply the skin to the main (outer ) piece of leather. roll around the edge of the widow to ensure that the snakeskin is attached. Stich that puppy all the way around the window, really adhering that chunk of dead slither skin to the outer leather of your holster. You now have a piece of dead slither skin inside of a window with decorative stitching all around it. Cut out the second main piece (the mirror image) of your leather -- this one without a window. Apply cement to the flesh sides of each of the two pieces (including the slither skin) and stick them together and finish off your masterpiece. I apologize for not showing any of my holsters but my old computer took a serious dump and ate all of my pics of prior work . If you search "katsass" you should be able to find quite a few here on this forum. This is a pic of the only purse I ever did, but you can see the inlay work on it. Good luck guy and remember: leatherwork is NOT for those seeking instant gratification. Take your time !!! mike
-
Latest Revolver Holster
katsass replied to Gus90's topic in Gun Holsters, Rifle Slings and Knife Sheathes
Gus90: First off --- My initial suggestion is, if you are going to make holsters --- beg, borrow or whatever and get Al Stohlman's book on how to make holsters. Every holster maker I know has their own copy and it's cheap ($14 - $15 or so) and, though dated, holds a wealth of information in it. Mine was purchased in the late '50 I believe, and I still have it. If you want to take a look at actual old time gun rigs, go to the library and look up the book "Packing Iron", or try Barnes and Nobel and just thumb through a copy. . That will get you looking at styles and what has been done with holsters from the civil war 'till the 'golden age' of the T.V. westerns. After seeing it for the first time, I promptly bought a copy and use it often when making western rigs. Now, please don't take any comment of mine as a put-down, We all start somewhere and only get better as time and experience accumulate. I'm just commenting on things that I believe will make you a better holster maker. First thing that pops me right in the eye is the flat, straight top end on your rig. As a general rule, long areas of straight edges around rounded parts are something to be avoided. Long straight edges of leather along an of area rounded steel just aren't esthetically pleasing, they just don't look good. Looks like something just doesn't "fit". On your next one I'd try to round over around the cylinder and then down and curve outward toward the trigger guard -- sort of a big "S" curve on it's side. Proper curves, when possible be sexy! Another thing I see is the use of rivets. To me, (and to LOTTS of folks) the use of rivets makes your work look , well, flat out , cheap. With good stitching you just don't need any excess reinforcement at that location. A single line of stitching or lacing is plenty, unless it is being done as decoration. Also, your stitching has come a bit too damned close to the edge. Leave a bit of space, say --- 1/8" or so between the edge and your stiches, and the appearance will be more pleasing. Look at commercial holsters, and the multitude of rigs made by the fine craftsmen on this forum. You just don't see the damned rivets, nor stitching so close to the edge. (I'm not one much for mechanical stuff on my holsters anyhow, and don't even like to use snaps, but rivets are almost an absolute no no) Now, you have molded that puppy -- really molded it. Many folks like the appearance of a deeply molded holster. HOWEVER -- think about it. With the apparent depth of the molding in around the trigger guard, every time you draw the weapon, and every time you replace the weapon in the holster, you are deforming that bit of work. If you are using that bit of work as weapon retention, you should use more wet forming. The area around the trigger guard will be gone in short order and start to look poorly done. You might want to back off a bit on that type of molding and concentrate on tight stitching and wet forming rather than molding My final comment on your work is about your finish. It's there -- really there. It seems to look like ?plastic? To me, (and it may just be me) but I want my leather to look like -- leather! You might want to back off a bit in that area and allow the grain of that piece of dead cow skin show itself. As I said earlier, I'm not trying to put you down, and you most likely have never seen any of my work so you may believe that I'm just blowing smoke, but I'm hoping to see some fine stuff from someone truly interested -- so I open my mouth (or keyboard) and try to give a hand. We all started at one point, and initially our stuff wouldn't be fit for public consumption. You are farther ahead than many just keep at it and observe and ask questions. Mike -

Most likelly my last one
katsass replied to katsass's topic in Gun Holsters, Rifle Slings and Knife Sheathes
Thanks to all of you for the kind words. I may have given some a wrong impression, I'm not about to kick off --- just that my hands and eyes will not allow me to do the work I feel I should be able to accomplish. For example, I made two 'false starts' on the damned holster and tossed three partially finished but totally screwed up knife sheaths in order to get to the finished product you see. I have however, seen the inside of the ER room and a patient's room at the local hospital more than I like, BUT I'm still kicking and I don't get the impression that the medical community wishes me to visit again soon. -
Well Ferg, thanks for the kind words. Ma's doing ok. I'd sure like to see that book you're writing. The friend that this little holster and sheath is for, keeps wanting me to get with him and put together a book on some of our more colorful experiences in our 60+ combined law enforcement years. all we ever get done is to start talking, laughing, remembering and that's it. I guess that I may have misled all on here. I not about to kick off -- I just can't see well enough and I can not wield an awl well enough with hands that have no strength and that cause the discomfort mine seem destined to do.
THANKS to all for their kind word and considerations. Mike
-

Hi Mike,
I didn't think you were on your last legs. Our generation is too dam tough to let go so easily. Glad to hear Ma is doing better. Tell her I think of her every time I think of you.
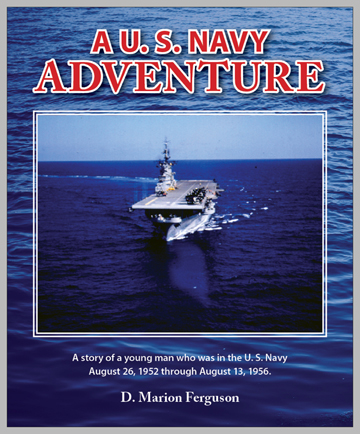
This book is hard work. Four years of my life, you would think it had been fifty. My oldest daughter had been after me to write what I remembered from those days.
I told her I didn't think I could remember enough to make it interesting. Finally told her in June I would try.
After about a week my infamous memory kicked it into high gear.
Other than some things I will probably re-write, that portion is finished. I have "proof read" several times, corrected grammar and sentence construction. I continue to catch "funky" punctuation
I hadn't seen before. Formatting for the printing company is another story. It won't be more than 150 pages I think and I am not going to sell it. Will only get relative few printed.
I will certainly put you on the list. Send me your mailing address.
Stay well and give MA an extra hug every day.
Ferg
-
-
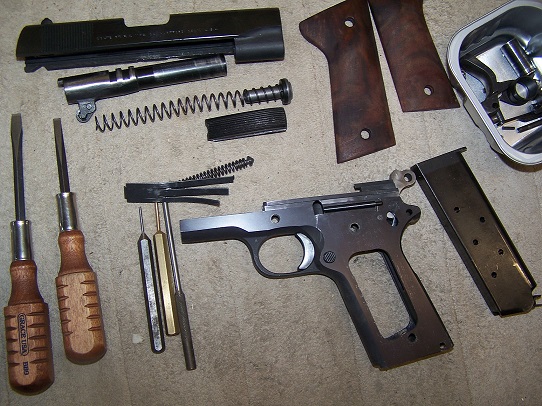
Well, it's been a while, but here is probably the last bit of work I'll get myself involved with . A holster for a Colt Commander (as you can see, after I get it cleaned up & back together) and a sort of matching sheath for a little "Beretta" issued toad sticker. My hands are not as strong as they once were, my eyes or not NEAR as good as I want. On top of that I have gone from a comfy 40" trousers to now (in almost a moth) a 34" pair of (a little loose) cutoff Levi's. (After all I live in the desert and it hasn't been under 100 degrees for the last 3 weeks). --- a slimmer and more dapper self I guess. Did this job for a close friend after my last go-round with the hospital staff a couple of weeks ago. A note you all -- nowhere does the nursing staff actually care a damned bit for their charges. It's a fact. At about 1:00am EVERY DAMNED NIGHT they change shift, and it seems that they always decide to have some sort of shindig. Loud talking, giggling and screams of laughter abound UNTIL someone (myself) hauls his butt out of bed, grab the damned wheeled goody with a bottle (of who knows what) hanging off of it (complete with a tube that's stuck in my damned arm) wearing a gizmo with my bare ass, hanging out, and wander out into the hall and over to the nurse's station. Unseen!, I might add. Then in a loud voice ask where the hell the music is, who's dancing, and who the hell is ordering Pizza, because, if you all are going to have a damned party I want to be part of it. That seems to shut things down some.
-
Well, Frankly I didn't think I would ever be showing anything else on this forum a year or so ago. Hell, at that time I couldn't even sign my name! I could make some pretty good squiggles with a writing implement, but my hand just wouldn't go where I told it to go. Ma Kat is able to sign my name better than I can anyway so that worked out.. Figured I was done with anything that needed a reasonable amount of manual dexterity to complete. NOTE: Manual Dexterity was not a personal friend at that time, even though I have known him for some time. Anyhow, a month or so ago a friend of my son's wanted a holster for a type of competition pistol work he was engaged in, and he and my son began working on me in an effort to get me to work out a design according to his specs. That worked out reasonably well but would win no trophy for artistic endeavor. Then they began to bug me about giving a try at making the damned thing. They kept it up until I finally agreed with the proviso that when completed it would be dumped, or at least I would keep it if the result was as I figured it would be with my digits not working to my satisfaction. Well it was finally done (after three attempts) and actually it doesn't look too bad for a strange design and stitching not up to what I like to think I could do. It's a competition holster for a Glock. It has a pot-load of drop, a tie-down strap, very little retention and some very thick filler strips (3/4 inch thick) front and rear. It showed me I can still do some work even if it takes much more time and effort than it used to. The trigger guard seats on an interior 'shelf ' and the slight forward cant creates what retention there is by wedging the top of the slide against the front reinforced section of the rig. Kind of strange looking but it's quick - requires only about 1 1/2" upward movement to clear the leather. Mike
-
Well, Frankly I didn't think I would ever be showing anything else on this forum a year or so ago. Hell, at that time I couldn't even sign my name! I could make some pretty squiggles with a writing implement, but my hand just wouldn't go where I told it to go. Ma Kat is able to sign my name better than I can anyway so that worked out.. Figured I was done with anything that needed a reasonable amount of manual dexterity to complete. NOTE: Manual Dexterity was not a personal friend at that time, even though I have known him for some time. Anyhow, a month or so ago a friend of my son's wanted a holster for a type of competition pistol work he was engaged in, and he and my son began working on me in an effort to get me to work out a design according to his specs. That worked out reasonably well but would win no trophy for artistic endeavor. Then they began to bug me about giving a try at making the damned thing. They kept it up until I finally agreed with the proviso that when completed it would be dumped, or at least I would keep it if the result was as I figured it would be with my digits not working to my satisfaction. Well it was finally done (after three attempts) and actually it doesn't look too bad for a strange design and stitching not up to what I like to think I could do. It's a competition holster for a Glock. It has a pot-load of drop, a tie-down belt, very little retention and some very thick fillers strips (3/4 inch thick) front and rear. It showed me I can still do some work even if it takes much more time and effort than it used to. The trigger guard seats on an interior 'shelf ' and the slight forward cant creates what retention there is by wedging the top of the slide against the front reinforced section of the rig. Kind of strange looking but it's quick - requires only about 1 1/2" upward movement to clear the leather. Mike
-

Poll on Revolver Safety Strap
katsass replied to JLSleather's topic in Gun Holsters, Rifle Slings and Knife Sheathes
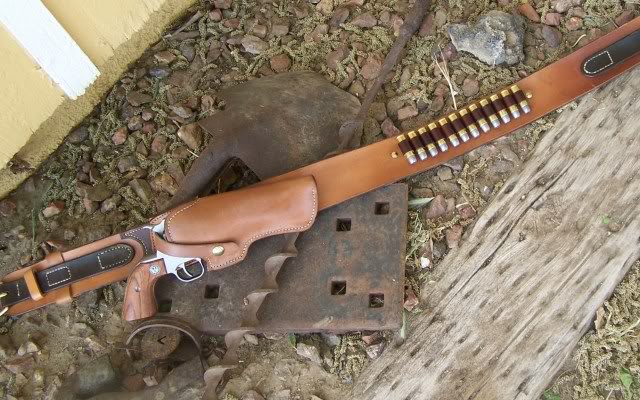
Actually, I very seldom add a safety strap on most holsters, but when I do it is behind the hammer like on this rig for a custom Ruger Vaquero with an extreme cross draw cant. Mike P.S. The holster had to be located by the shooter to his requirements, and then stitched in place.- 7 replies
-
- revolver holster
- safety strap
-
(and 1 more)
Tagged with:
-

FIRST TRY AT INLAY
katsass replied to Buzzard Bait's topic in Gun Holsters, Rifle Slings and Knife Sheathes
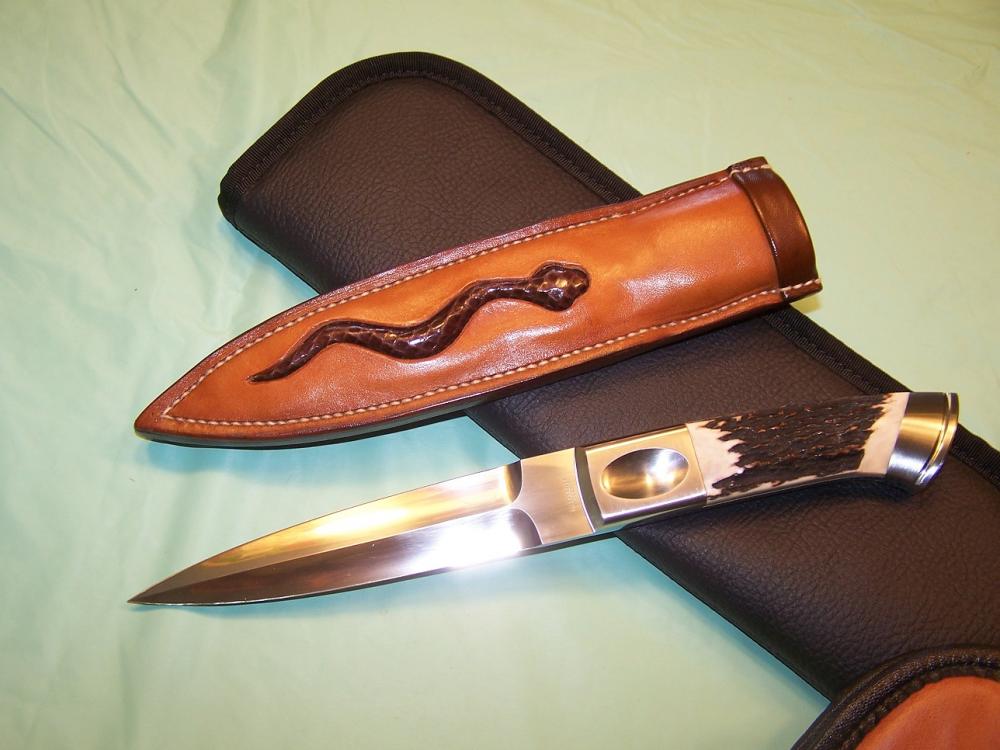
Buzzard Bait; Nice work --- thought you might be interested in one or two of the sheaths I made for Herman Schneider (master knife maker -- really does some fantastic stuff but I believe he has passed recently google him to see some fantastic knives) -
OK -- what weight leather did you use AND what type, shoulder, back, side, belly ??. Wrong part of the skin of the poor deceased cow critter can cause problems. I use only shoulder leather. I usually dye prior to molding or even stitching. That allows me to ensure a smooth even dye job. Just to let you know -- black will give you fits in that it will rub off on everything you get near AND it can be difficult to get an even dye job. BUT to answer your question: If using a dauber, wad of cotton rag, piece of shearling etc, wipe on the dye in one direction, all over the thing (As I said,I prefer to dye prior to any assembly) -- wait a bit --- wipe on more dye at 90 degrees to the first run --- wait a bit ---- wipe on another coat at 45 degrees to the last and if necessary another coat at 90 degrees to that. Allow to dry (12 hours at least)and check for full coverage. HOWEVER!! dead cow skin is not always made up of equal and even density --- variations WILL occur, even from the best of tanneries and dye will show these variations. The trick is to know if it's the leather or your own damned fault. . In your piece I'd guess that your wrinkle problem was to much water and/or a little too loose on the gun. As I said, the gun getting stuffed into the wet (damp) holster should take a bit of effort to get it in and seat fully. If not -- it will never tighten up. Going in tightly it will slightly stretch the leather and not allow any wrinkling. Just the opinions of a grumpy old man -- take from them what you will. Mike P.S. You forgot to run your edger. If you don't have it, get Al Stohlman's book (about $12) 'How to Make Holsters'. Damned near every holster maker has their copy --- mine was purchased in the early 1960s. and I'll still look at it now and then
-
OK I'll give it a go. First off, I don't quite know what you are talking about. WRINKLING; never had it occur. Some thoughts though --- first, hopefully you used heavy enough leather. and something other than belly type cow skin. second; don't over wet the damned thing (common mistake). All that is needed is to get your masterpiece wet (NOT soaking) and then allow the item to sit a while 'till it's evenly DAMP but pliable and cool to the touch. Go to town with your hands and especially thumbs to mold. I figure it's a holster so you will have the shooter (or reasonable facsimile thereof) stuffed down into it -- and that should fit tightly, tightly enough that you should need to use a bit of force stuffing the gun into your masterpiece. Hand mold around the gun 'till you feel comfortable and satisfied with your effort THEN sit it down and --- run!! don't walk away from it and ignore that voice in you that keeps saying "pull that damned gun out and look at ME!! Go try to milk a duck -- do anything but mess with it. Finally after a couple of hours (unless you live in the desert like I do and the temp is sitting at 100+) EASE the gun out of the holster and sit your masterpiece right back down again and allow it to fully dry. Why? 'cause Inside it aint fully dry and in some areas it'll take all damned day to get there. Don't go stuffing your gun back in to see how it fits until fully dry. Basically, wait until tomorrow. Now, as to dye. I use only Fiebing's dyes and have never had any problem. One thing --- ALLOW THE STUFF TO DRY. By dry I mean FULLY dry. Minimum of 12 hours (over nite) but usually 24 hours is best. The stuff can feel dry to the touch very quickly BUT it ain't on the inside of the dead cow skin it was applied to. When dry -- buff the snot out of it. At this time you can proceed to wet mold your item and apply a finish. NOW. all of this takes time and one thing to remember is "Doing good leatherwork is NOT for those looking for instant gratification". My translation of this is "Take your damned time!! Best wishes and good luck in your endeavor. Mike
-

FIRST TRY AT INLAY
katsass replied to Buzzard Bait's topic in Gun Holsters, Rifle Slings and Knife Sheathes
One thing I learned early --- the inlayed piece is cut slightly larger than the "window" in which it will go. Skive, or in any other way you can figure out thin the outer edges of the inlay; tack it in place behind the "window' with a good contact cement; stitch that puppy in place then cement the lining piece in place. I use two layers of leather (a lining piece and an outer shell) and sandwich my inlayed piece between the two, but stitch only the inlay and top piece on most projects. The reason to cut the inlay a bit larger --- they almost never fit exactly to the cut-out --- and when drawing your pattern, include your inlay on it -- never try to draw a separate inlay and try to align it to the basic pattern -- it'll never fit correctly. . As to the tension question --- I got no idea. I hand stitch everything. Here is an example of my normal inlay and an example of an inlay drawn and cut separately. Notice how the inlay is not perfectly centered in the second one. Mike -

Knife Sheath Leather?
katsass replied to TheShiek2008's topic in Gun Holsters, Rifle Slings and Knife Sheathes
FWIW from a grumpy old fart, I use 3-4oz on most all of my sheaths. That appears too light for most folks , and on the surface it would seem so. I do however, double them up. That is two layers of 3-4 oz bonded together on their flesh sides, then treated as a single piece of leather. I've done this on reasonably heavy Herman Schneider fighting knives (one shown) as well as others and find that they work well. This has the added benefit of leaving a smooth interior for a polished blade to move against. Mike -

Loop Holster for 5" 1911
katsass replied to Josh Ashman's topic in Gun Holsters, Rifle Slings and Knife Sheathes
Good looking rig Mike -
Hi there. I haven't been on here for a while due to some medical problems, but maybe they have run their course and I'll have no more troubles You shoot sporting clays -- I shoot at trap. My son got me into it. I fired big bore rifle for the Navy, at least that's what they called it back then to differentiate from .22RF or small bore rifle. Now I shoot an old Mod 12 Winchester with barrel work done by Wright's gun smithing. It has a left hand Anton adjustable stock on it and is sort of stepping back into the 50s & 60s with that set up but it fits me. Good to hear from you. Mike
-

Kimber micro raptor iwb
katsass replied to mnelson8758's topic in Gun Holsters, Rifle Slings and Knife Sheathes
Well, it's been a while since I have even been able to get my hands on some leather, but, at the risk of irritating someone with my opinion I'll give a go at this. First off, I like the dinky .45s more than I should, but as Dwight says -- I wish I could make mine do what my old (worked on) Govt. mod does for me. My first impression is that the rig looks 'rough'. I suggest that you look into selecting a bit better grade of leather to start with. A good quality of shoulder leather is perfect for holsters and that shaggy inside doesn't do much for the appearance of your work. Second, your molding needs to be a bit more definite - not so much that you could read the cartridge designation on the barrel, but more so to provide a higher degree of retention. Next, in my opinion (maybe only mine) your stitching needs work. To me that stitch length is a bit short for a holster, ie. too many stitches per inch. I'd suggest no more than 6 SPI or maybe even 5. The stitches give the appearance of crowding and in turn they pucker. This can be from too much tension or irregular tension on each stitch BUT, you might have been able to help soften that appearance by use of an overstitch. That could even out the appearance quite a bit. Your edges also need work. A nice cut with an edger followed by a good edge burnishing would really help on the finished appearance. And finally -- as Dwight asked, How are you holding the thing together? Now, I'm NOT telling you that your work stinks or anything of the sort. You have done a pretty damned decent piece of work BUT by paying attention to some of the details, your work could stand out. The opinions expressed herein (that is sort of legalese) are just from a grumpy old man that has put together a holster or two himself, so take from them what you will and know that there is only sincere criticism meant to assist included. Mike -

First Knife Sheath
katsass replied to Flask's topic in Gun Holsters, Rifle Slings and Knife Sheathes
For what it's worth. Dwight is right, everything that I do that is wet molded, is initially wrapped as he describes for a resultant proper fit. Beware though, especially for a knife that is used as frequently as mine, an initial fit for an easy draw will, in time, loosen up --- probably a little too much. mike -
Had a shipmate first class sonarman that had a bad habit of over indulging in adult beverages until he was dead broke.He would then hitchhik back to the base on Point Loma. One night he wandered back aboard soaking wet and cussing up a storm. Seem like he got a ride from a 'nice' guy in a funny looking sports car. After a short discussion after which the driver threatened to 'kill us both' he drove directly into the bay off of Harbor Drive just west of the Coastie air station. My shipmate bailed out and swam ashore quickly but found that the car was an Amphicar and the driver was laughing his head off. Bill took money for at least a bus ride home after that. mike
-

Designed by Katsass, executed by Dwight
katsass replied to Dwight's topic in Gun Holsters, Rifle Slings and Knife Sheathes
Dwight, thanks for the mention, and I'm glad that you find that this style works as well for you as it does for me. mike -
I'll buy that. mike
-
That is usually a matter of opinion, but my opinion is that it could be slimmed down a bit. Mike
-

Some More Noob Stuff
katsass replied to OLDNSLOW's topic in Gun Holsters, Rifle Slings and Knife Sheathes
Well, for what it's worth, I'm a little strange maybe, but I MUCH prefer hand saddle stitching over machine work - even if I do have access to a good antique machine for use anytime I would want or need it. Hand stitching takes a pot load more time to do things by hand, but I prefer the appearance. mike -

Some More Noob Stuff
katsass replied to OLDNSLOW's topic in Gun Holsters, Rifle Slings and Knife Sheathes
Well, OLDNSLOW, (I be the same, only more so lately) you are on the right track. There are a few points that I feel just might give you a hand in your efforts. First off -- No sharp corners Pointy corners will, in very short time. get bumped, banged, and frayed. That don't look good. Round those puppies over and make nice smooth curved changes in direction when drawing and cutting your patterns. Next, you obviously spent a good deal of time in doing the stamping. tooling, (whatever you want to call it) the working of your pattern into the face of your project. Let's look at it. It is your artwork, it's not just a bunch of impressions stomped into the leather -- it's artwork. For artwork, you need a frame. I suggest that on your next one you mark a line about 5/16 to 1/2 inch in from the cut edge of the leather OR where you will stitch on the inner portion of your rig. . Whip a swivel knife along that line then use a beveller to sink the inside edge of the cut. Bingo you now have a frame -- sort of. Make a frame around each area that you will apply your tooling. You have not marked where the belt slots will go and these should be marked and cut prior to stamping. I think that you would be much happier with your effort if you split up the area to be stamped into three separate sections -- the center (main area) and each side, where the belt loops should be. Each area will need it's own 'frame' like I mentioned. Do your work inside of each 'frame' for a more finished look. When you are pretty well done cutting, stamping and stitching you would then smooth the edges and burnish. I don't do much (if any) tooling anymore -- used to -- but I prefer inlay work. You seem to have done a pretty good job in that area but since I don't do that sort of thing, I don't comment on it. I kind of know a bit about hand stitching ,and strongly believe that stitching is supposed to be seen. I can't see your stitching at all since it blends into your stamp work, so again -- no comment. The one thing I would suggest, if you plan on doing more holsters, is get Al Stohlman's book on 'How To Make Holsters. It has all kinds of good info and 'how-to' stuff for around $15 or less. Most all of the holster makers I know own their copy -- mine is a bit creased, crumpled and coffee stained since I bought it in the 50s. You are well on your way, with a bit of 'tweeking' here and there you will be really doing work to be proud of. Keep it up. mike


