


Wizcrafts
-
Posts
7,811 -
Joined
-
Last visited
Content Type
Profiles
Forums
Events
Blogs
Gallery
Store
Everything posted by Wizcrafts
-
Both the Randall and Union Lockstitch machines were designed to sew harnesses and saddlery. They originally used Z twist linen thread run through liquid beeswax. Other uses for these machines included holsters for law enforcement, tug straps for sulkies, weightlifters belts, footballs (Union Lock), briefcases and some saddlebags. Both use a separate barbed needle and an awl to punch holes. The Randal machines use the awl to move the leather, while the Union Locks are needle driven. The Randalls like to chug along at about 300 stitches per minute, maximum while the Unions are designed to fly at 800 spm. They are a higher speed production machine for long straps, whereas the Randall is for more precision sewing. If you ever get to meet someone selling a Union Lockstitch in person, have the owner run it flat out for you. Bring earplugs and hold onto your junk!
-
@JoshHov Once you settle upon a price, or choose to take offers, please place your ad in our Marketplace section, under Machinery > Sewing > Used. Include your location, pertinent details, and asking prices, as well as some small file size photos. 800x600 pixel jpgs (sometimes called 3x4) are fine and should be well under the forum's upload size limit. Let members contact you via our personal messages system.
-
This was first done by Campbell Randall, the rebuilder and primary dealer for Campbell and Union Lockstitch machines. Check out their video where they sew a penny onto a stack of leather. There is a full description of the machine and its setup.
-
Capable 138 thread sewing machine options?
Wizcrafts replied to DieselTech's topic in Leather Sewing Machines
I sewed professionally on a Consew 206RB, making ballistic material blackout window blinds for schools. The machine takes a large M style bobbin and has no problem sewing with #138 thread. I also used Nomex thread in that machine to repair some firefighter turnout gear. I normally kept it threaded with #69 bonded nylon for the thin blinds. But, it didn't hiccup with #138.. -
Watch this video clip:
-
Upper thread gets stuck in the bobbin case. Any ideas?
Wizcrafts replied to Nico619's topic in Leather Sewing Machines
You ain't the Lone Ranger! Today, I was hurrying to sew a wallet for a customer on his way to pick it up. I had to re thread from #277 to #207 thread. I changed the bobbin and needle, then ran a test in a piece of bridle leather. Strangely, the knots were all on the bottom, where they were perfectly balanced earlier with one size larger thread and needle. I decided to add some top tension and looked at the tension disks as I went to turn the nut. That's when I noticed that the top thread was NOT inside the disks! Doh! It even happens to seasoned sewers. -
Newly Aquired Adler 30-15 Need a Manual Needles and Bobbins
Wizcrafts replied to JJN's topic in Leather Sewing Machines
@boarlord, you didn't state what make and model your patcher is? Parts and accessories vary with the make and model. The Boss hand operated stitchers normally use thicker thread than any patcher can handle. The largest thread I've used in my Adler 30-7 is #138, The small bobbin Singer patchers are best limited to #69 and 92 bonded thread. Parts are available in the aftermarket supply chain (e.g., Amazon, eBay, Etsy), and from established industrial sewing machine dealers, like this one. We also have a member who goes by @shoepatcherwho has parts for Singer, Adler, and Claes patchers. -
Yeah; get a 2:1 or 3:1 speed reducer.
-
My thinking was that you might get the benefit of the wax from the bottom thread. All of the knots would be waxed by the bobbin thread when they get pulled into the leather. They sell spools of 5 and 6 cord left twist glazed Irish Linen thread at Campbell-Randall, in Texas. I also found one spool of 3 cord still for sale on Etsy.
-
I have a 111w153. I mostly use #69 or #92 thread in it. But, I occasionally thread it with #138, which is the maximum it can practically handle. This calls for a #23 needle, which requires a hell of a lot of torque to punch it through 1/4 inch of veg-tan leather.
-
Do this at your own risk. Wax on the top thread will clog up the top tension disks, then the paddle spring, then the eye of the needle. I imagine you can use it if you clean those items after each use. This means ramming the threading rod down the thread channel in the needle bar to push out the wax. You should be able to simply wind waxed linen thread onto your bobbins. It might be worth trying waxed thread in the bobbin and dry glazed linen on top. You'll have to clean the wax that gets caught under the bobbin tension spring and the thread feed slot and the little output hole in the case.
-
The harness stitchers are cylinder arm machines, best suited for use with heavier thread and thicker work. For a smaller machine, consider a flat bed upholstery class walking foot machine. They are comfortable to operate as you are sitting down in a regular height chair. These machines keep the material flat so the seams stay aligned as you sew. You can keep smaller size thread spools on the walking foot machine, in sizes 69 and 92. System 135x16 and 17 needles are not as likely to get deflected and break as the longer System 7x3 when using thin needle sizes 18 and 19.
-
Have you checked their website to see if they have a lease to own program? I know that our Cowboy dealer has one.
-
New Member, First Post inquiring about a Singer 531-8bl
Wizcrafts replied to Woodbender's topic in Leather Sewing Machines
It's new to me too. Since there is no reverse on this machine, you'll have to use the old fashioned methods to lock in the starting and ending stitches. Those are sew all around and cross over 5 to 7 stitches; or sew a few stitches, then with the needle up, pull back and resew into those stitches; or sew backwards then spin the work 180 degrees (I call this Poor Man's Reverse). -
To post/upload a file you must become a member of the forum. Otherwise, host it elsewhere and link to it in a reply.
-
I use my small bobbin Singer patchers for sewing patches onto bikers' vest pockets, or varsity jacket sleeves, or for sewing loose threads on shoe and boot uppers, or for installing zippers in boots, or on jacket sleeves. I alternate between #69 and #92 bonded nylon thread. Period; full stop. I have a long arm large bobbin Adler patcher that I sometimes use with #138 thread, if no other machine can sew that job. The Adler is a much heavier duty patcher all around. Still, I usually have either #69 or 92 thread in the bobbins.
-
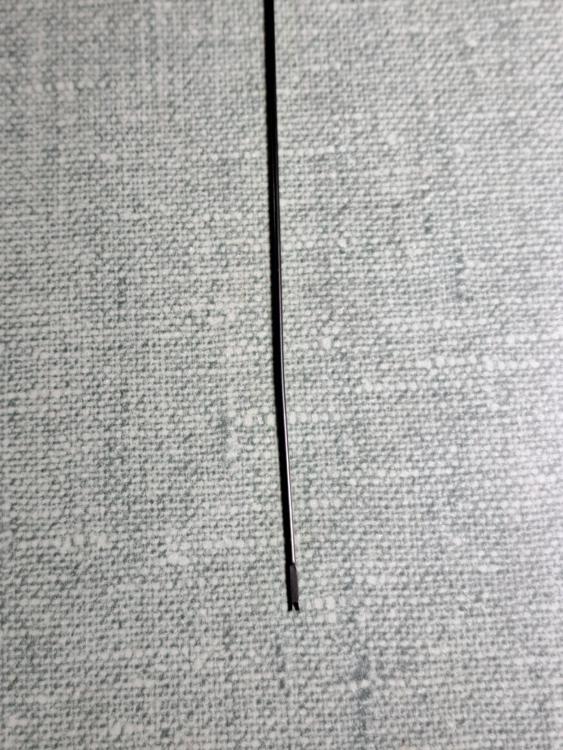
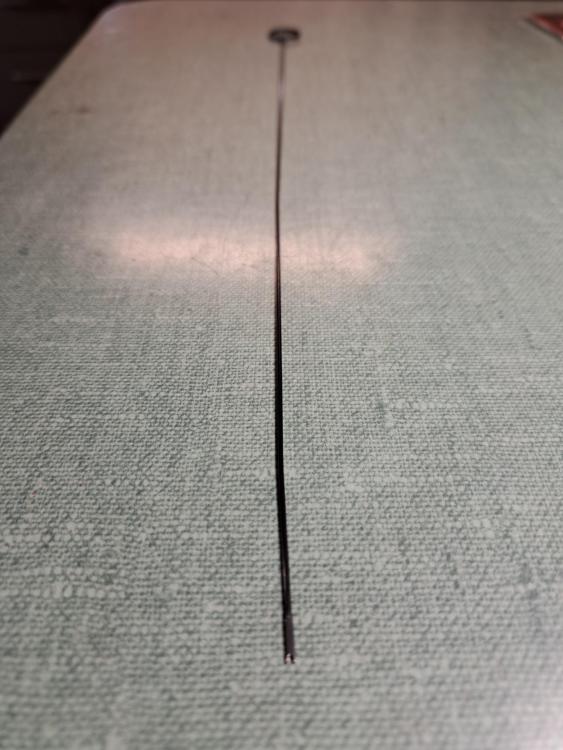
A plain 20 gauge guitar string is too flexible to push past the paddle spring, especially if there is debris under it.
-
A hobby shop, or well stocked hardware store should have thin steel rods. Since patchers weren't expected to use thread larger than 3 cord, buy a rod no larger than .020 inches, if not a little thinner. I personally don't exceed #138 thread in my patchers. That is equal to .0163 inches diameter. I suspect that once you receive your proper threading wire, it will push out any thread stubs that were under the paddle spring. If not, try some solvent down the snout of the needle bar. If that doesn't clear out the crap, you'll have to remove the needle bar assembly.
-
Cowboy CB4500 premium w/eps vs Techsew 5100 se w/eps
Wizcrafts replied to DieselTech's topic in Leather Sewing Machines
@DieselTech, The narrow feed dog and matching narrow throat plate are aftermarket items that are manufactured by two of our members. I linked to their profiles earlier in this thread. One is in Australia and the other is in the USA. I have the Australian narrow set installed in my cb4500 and haven't had to remove it to sew with #277 thread. I haven't tried using #346 and the larger #26 needle yet. That might be a bit too wide for this feed dog. I'll try it when I go to my shop later today (unless I forget!). The other set is best suited to smaller needles and thread. I have switched over to his set once to hem a pair of jeans. It worked perfectly! However, I also have a Techsew 2700 cylinder arm machine that already does that work, natively. With a Cowboy cb4500, or Cobra Class 4, or Techsew 5100, and one or two narrow feeder/throat plate sets, one can sew anything from a pair of denim pants, or a wallet interior, up to a 7/8 inch thick holster. Just change the feeder, needle and thread, balance the knots, and sew the project at hand. The flatbed table attachment makes it easier to sew some flat items. I have one but rarely use it. -
Find a leathercrafter who does this work and hire him or her to make the collar. You can advertise what you want made in this section of the forum. Please start a new topic for your job request. Note, that all guest posts must wait to be approved before becoming visible. Also, unless you become a member of Leatherworker.net, you cannot use our email or private message system. You will have to post your contact info in a publicly viewable manner.
-
The wax pot causes the thread to make a shape turn down and then up. Wetting linen thread weakens it when it is under stress. Linen thread can't handle that sharp angle when it is wet. The Cobra was not designed to use linen thread. The best sewing machines that are designed to use linen thread are needle and awl harness stitchers, like the Union Lockstitch and the Campbell-Randall Lockstitch, as well as the Puritan Chainstitch, and the Landis 12 series curved needle and awl shoe sole stitchers. All of these machines have gentle turns for the thread and use rollers in the wax pots, which typically contain bees wax, not silicone lube. Should you attempt to run liquid wax in your wax pot, it will gum up the tensioners and the eye of the needle. The 441 machines are meant to use bonded synthetic thread.
-
Cowboy CB4500 premium w/eps vs Techsew 5100 se w/eps
Wizcrafts replied to DieselTech's topic in Leather Sewing Machines
@DieselTech You are getting way ahead of your requirements when you say you want the EPS system on a Cowboy cb4500. or equivalent. That is a needle position sensor that either stops with the needle up otr down all the way. This system was developed for the garment needle trade where they frequently sew at 90 stitches per SECOND, or faster! My Cowboy cb4500 is equipped with an analog servo motor which has a speed limiter dial and knob. It has a 2 inch pulley that feeds a 3:1 speed reducer, which drives the huge balance wheel. The overall reduction is between 9:1 and 10:1 from the motor to the machine. When I set the motor to the slowest setting where it still turns over and powers this reduction stack, the maximum machine sewing speed is about 1/2 to 3/4 stitch per second. I can easily feather the motor down to 1 stitch in 10 seconds. You don't need no stinking EPS on a cb4500! @DieselTech You can order your cb4500 and accessories that make sense, HERE -
Cowboy CB4500 premium w/eps vs Techsew 5100 se w/eps
Wizcrafts replied to DieselTech's topic in Leather Sewing Machines
Yup -
That is NOT a proper threading wire! The real wires are totally round and are slotted on the bottom to catch the thread between the slotted legs. Some new replacement rods a just v gouged on the very end. They barely hold onto the thread. The rod should be no more than 1/32 inch in diameter.
-
@Nametaken, Something may be plugging the paddle spring. It could be a balled up or ripped off piece of thread. Or, the spring may have gotten twisted out of position so it is blocking the threading wire. If you can't ram the wire through, you should remove the needle bar and see what's going on under the paddle spring. If you remove the spring, keep the tiny screws apart and in the order you removed them. They are shaped after assembly to fit one side OR the other, not either side. Both the paddle spring and its screws are replaceable. I recommend that you take a clear close-up photo of the screws so you can reshape them after replacing the assembly.

