ClayB
-
Posts
2,063 -
Joined
-
Last visited
Content Type
Profiles
Forums
Events
Blogs
Gallery
Store
Everything posted by ClayB
-
LEATHER JOURNAL Cheryl Smeja & Sharon Stauffer Saturday, August 16, 2008 10—4pm Make a handsome journal with a leaf-embossed leather cover and heavy watercolor pages. Cheryl is a leather worker who will show you how easy it is to make a leaf imprint in the leather and apply dyes to color the leather and show off the design. Sharon is a mixed media artist. She will lead you through some fun techniques to color the pages and create “artful” backgrounds for whatever you choose to put in your journal - writing, poetry, journaling, memorabilia. And, we’ll use a type of binding that will enable you to add more pages later so your journal can expand endlessly to suit your needs. CLASS CODE: 8B-890 Student Fee: $55 For more info, check out Shake Rag Ally's website
-
Glad some of you find the tutorials useful. I would have re-posted this earlier but I didnt realize it was gone. Like I said before, there are LOTS of different ways to carve an oak leaf so if anyone else has a way they like to do them, please let us see! Crystal, my "dont do this list" could be really long. It's funny how quickly we remember that we weren't supposed to do that right after we just did it. As for weight of leather, 3-4 will work for carving, but I prefer something a little heavier. Depends on what you are making out of it. I'd maybe use 3-4 ounce on something like a checkbook cover or maybe a phone case. I'd prefer to carve on something around 6-7 ounce if it didn't interfere with the use of the project. I think I can get better depth on it without worrying about cutting or stamping through the leather. It will also still emboss pretty good and hold its shape. I have also carved pictures on heavier leather all the way up to saddle skirting. You can really get some depth in that. So really it depends mostly on what you are making out of it. Some people can carve really nice stuff on really thin leather.
-
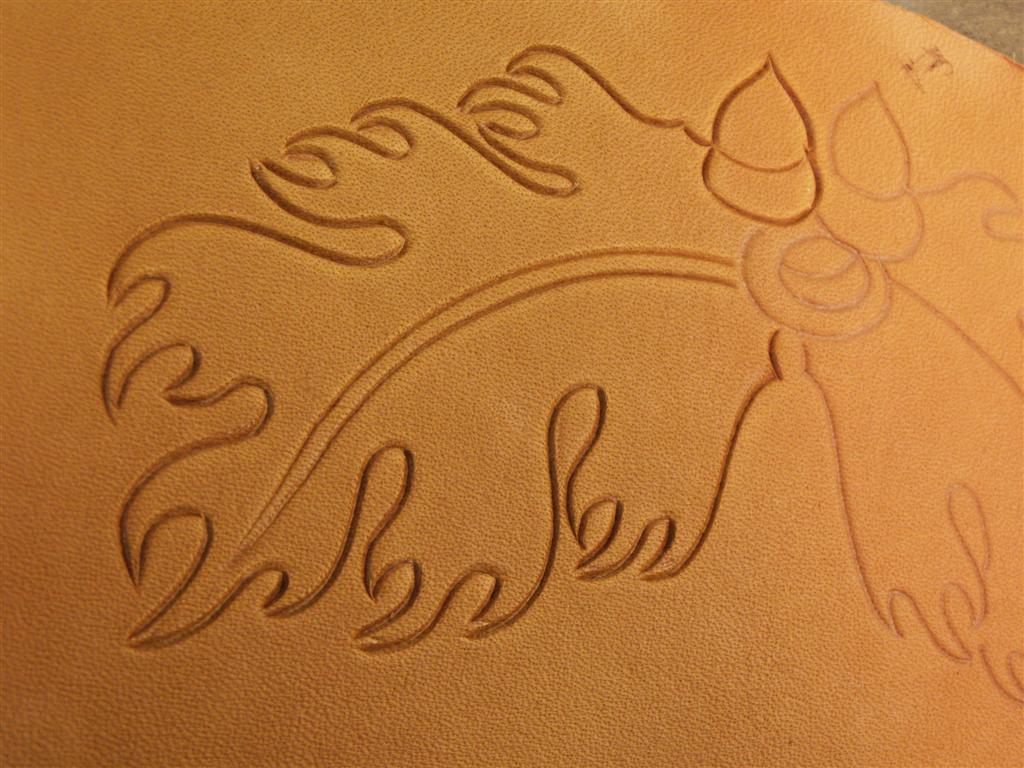
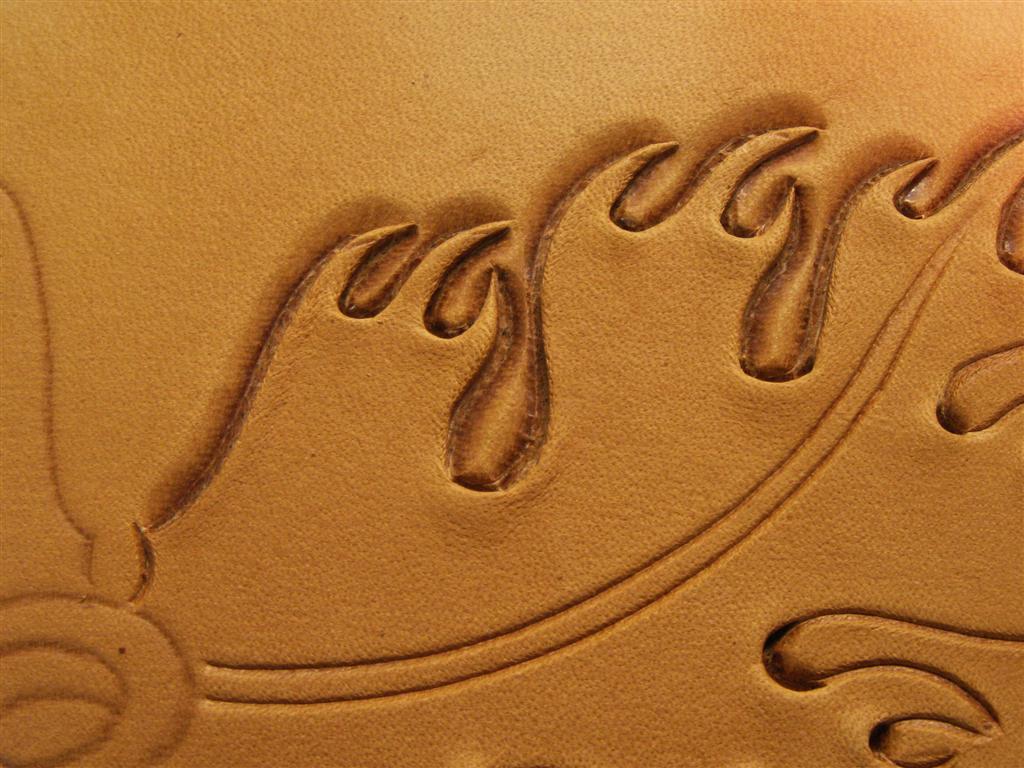
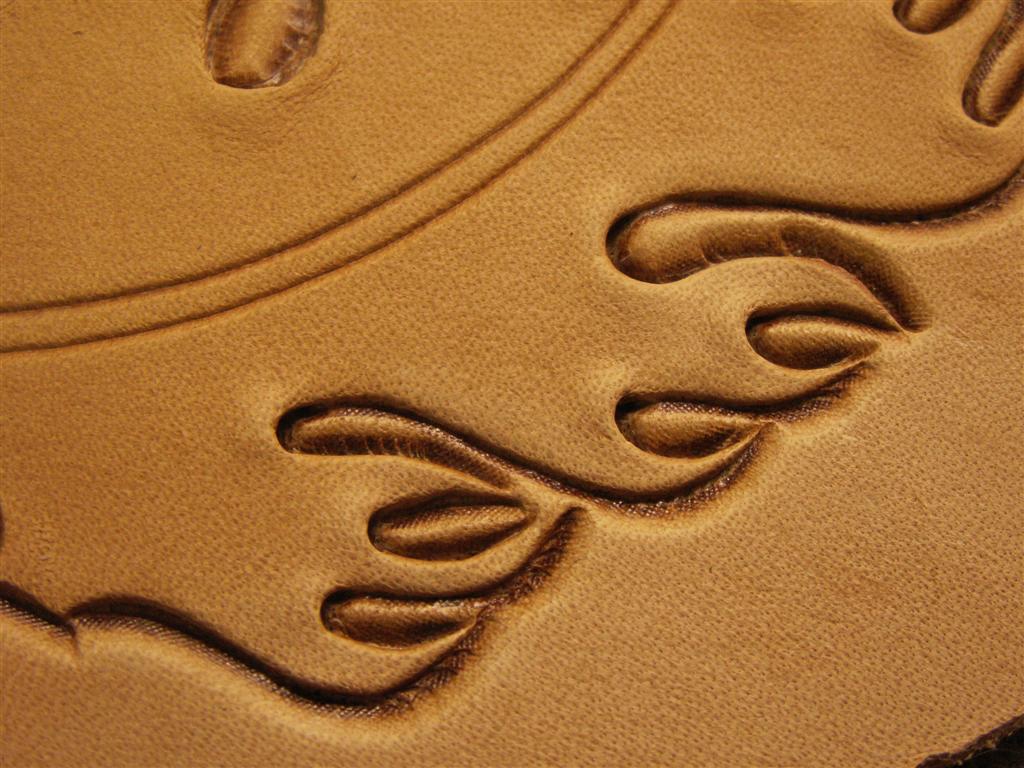
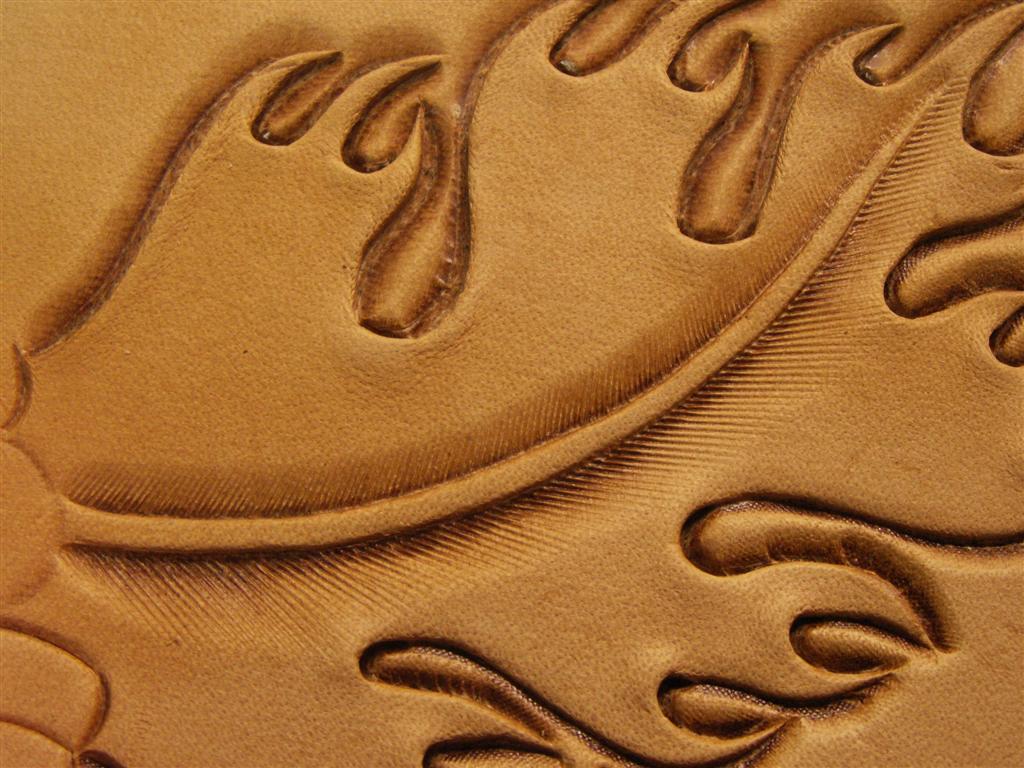
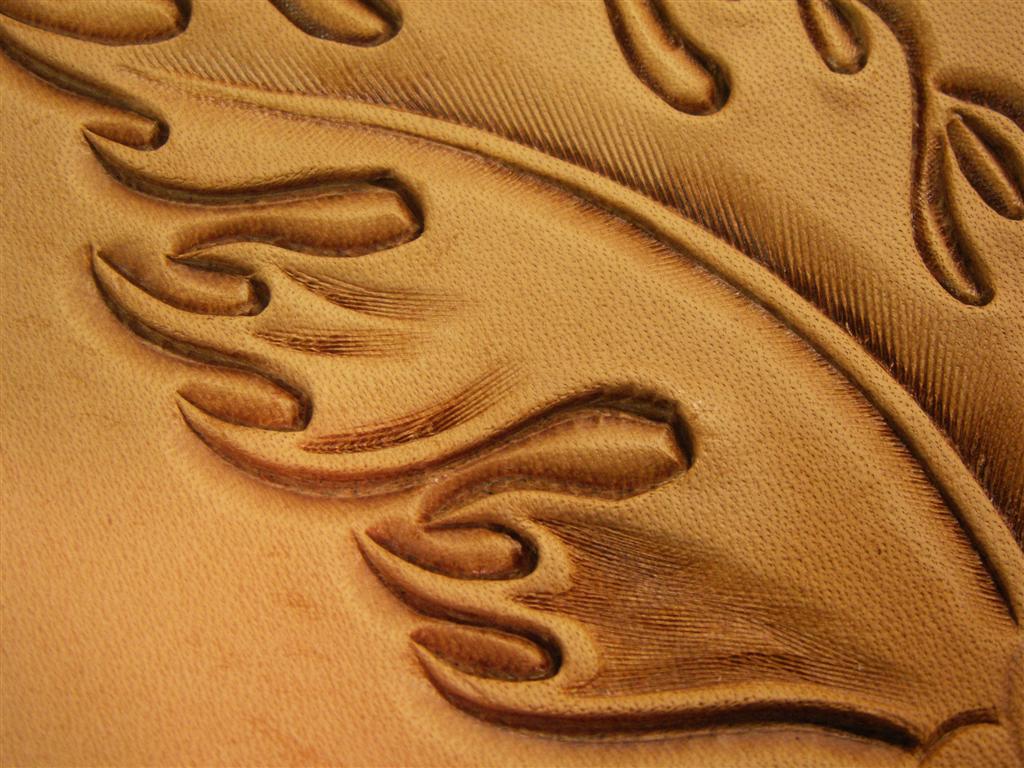
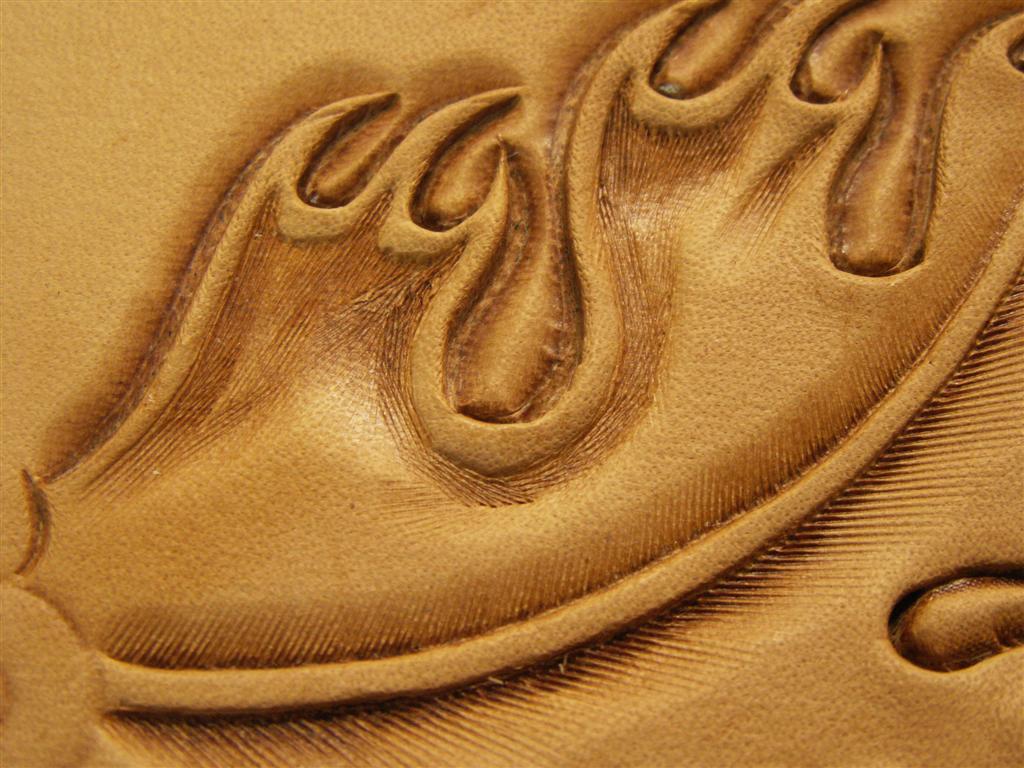
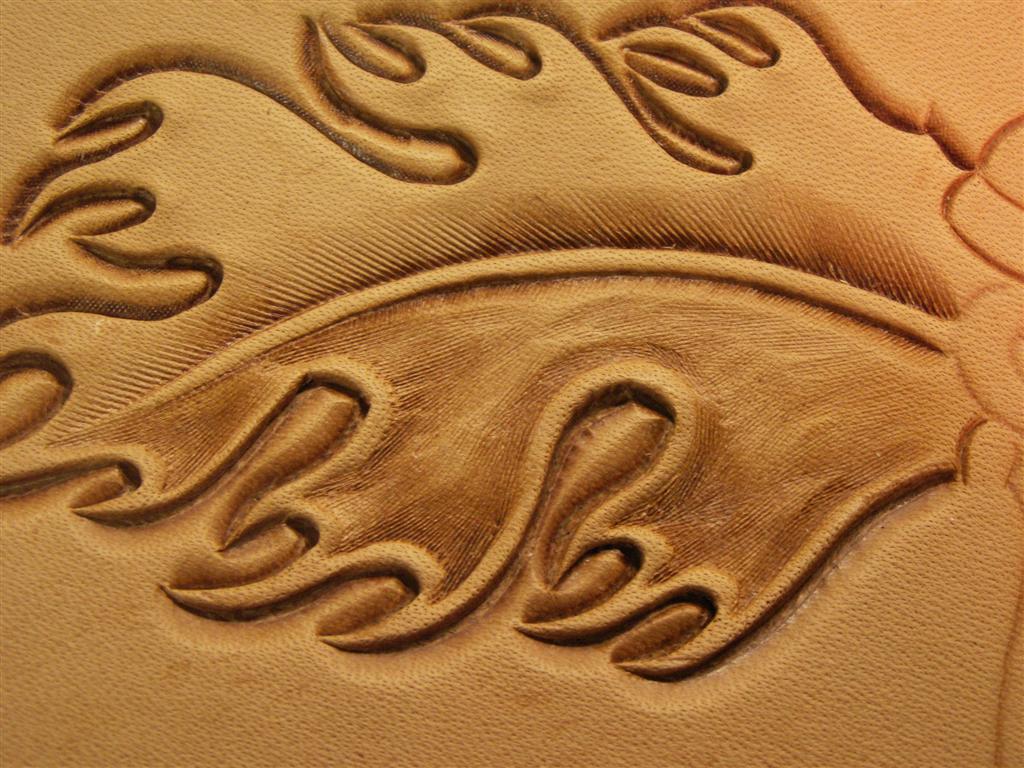
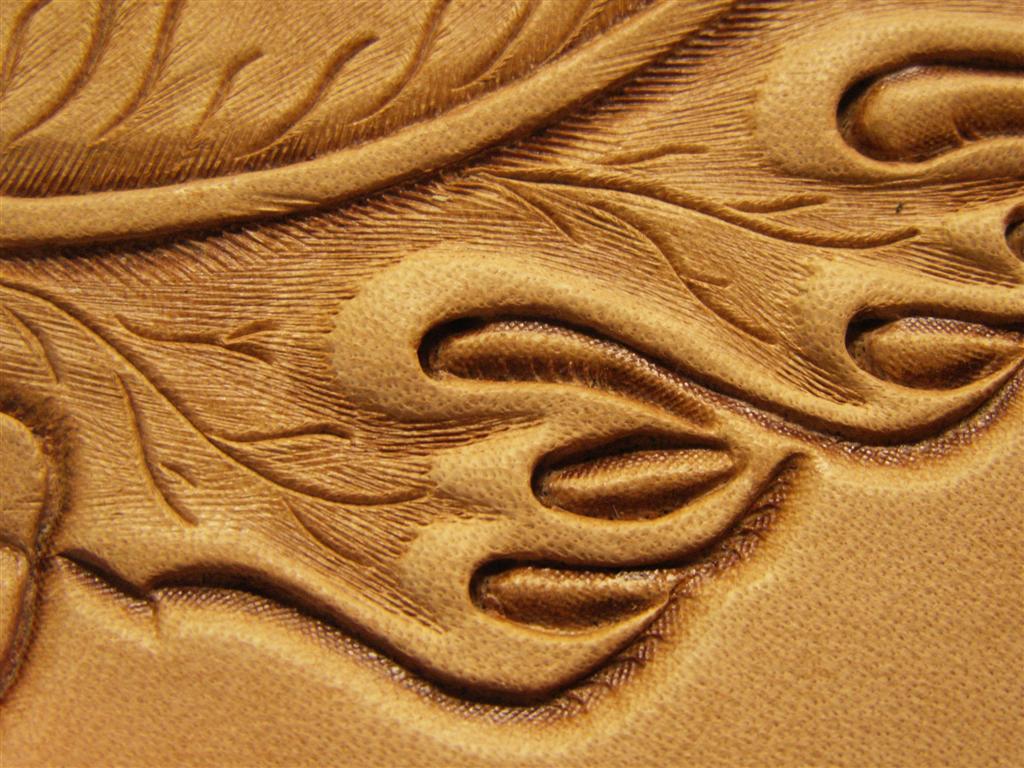
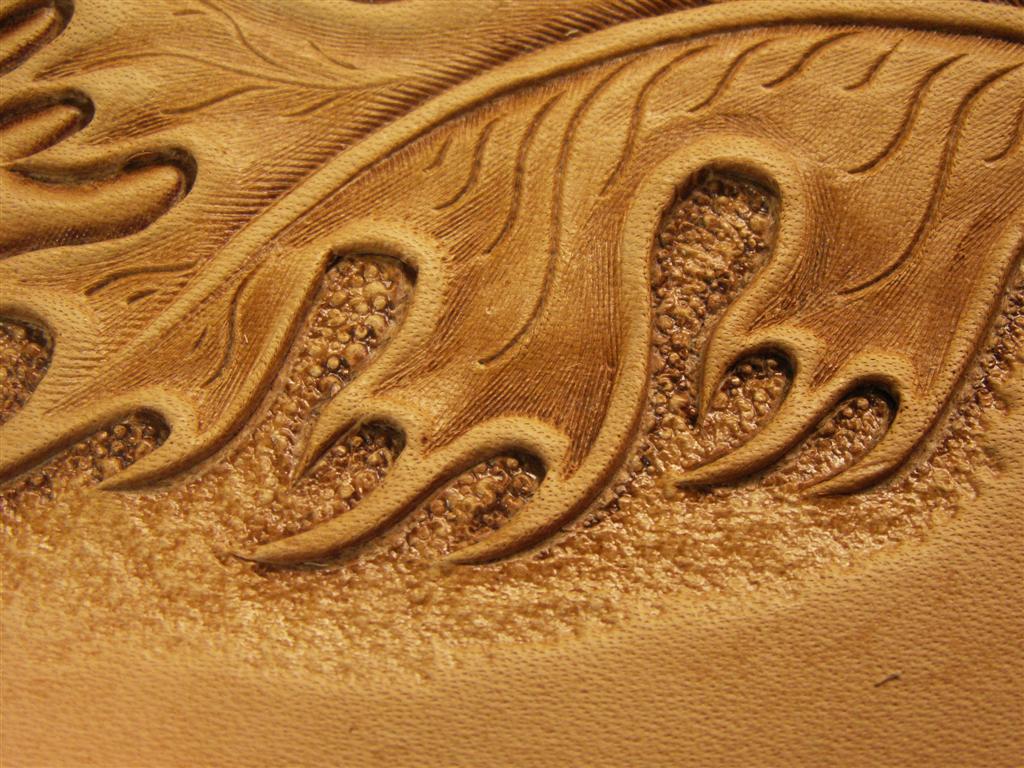
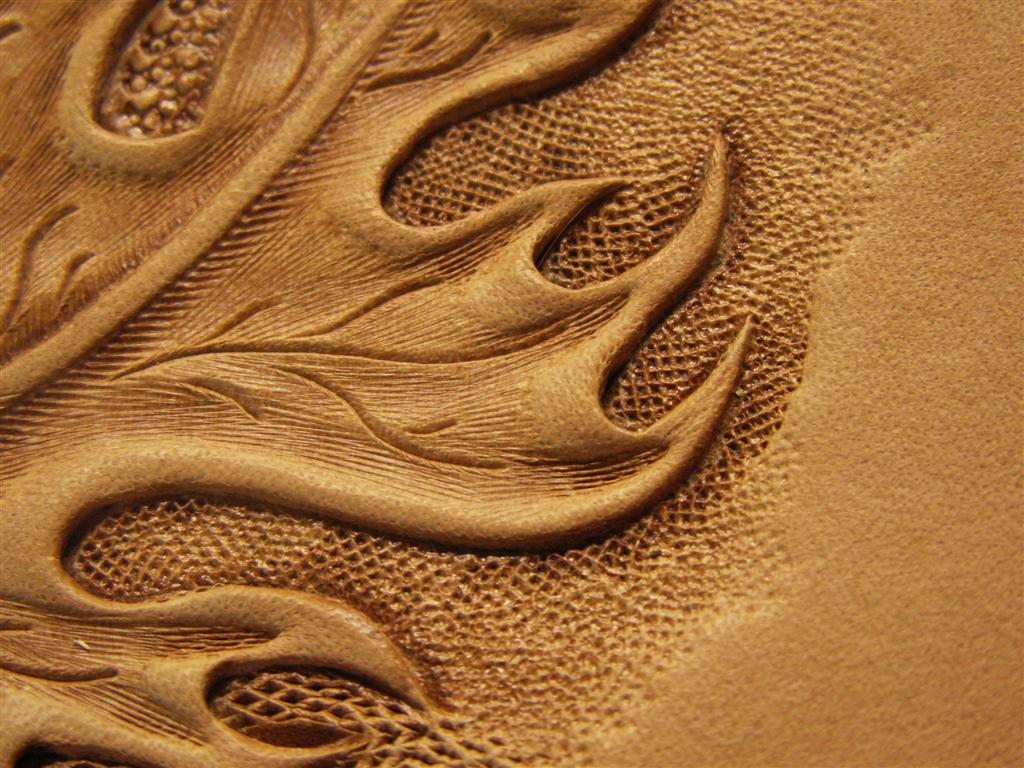
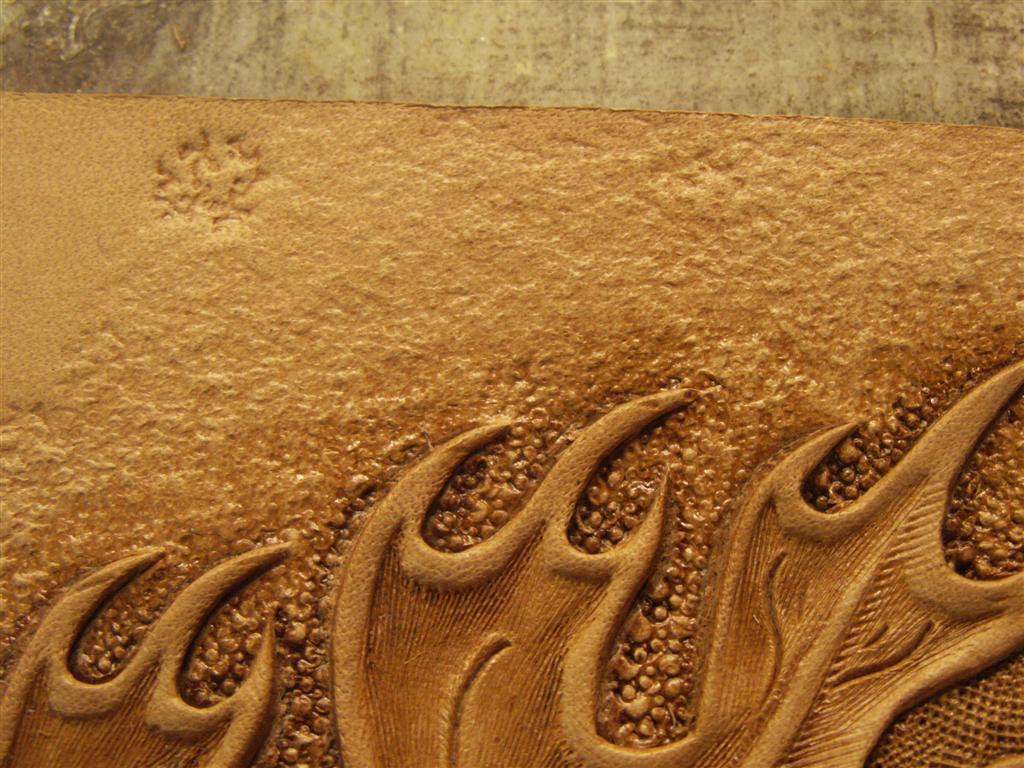
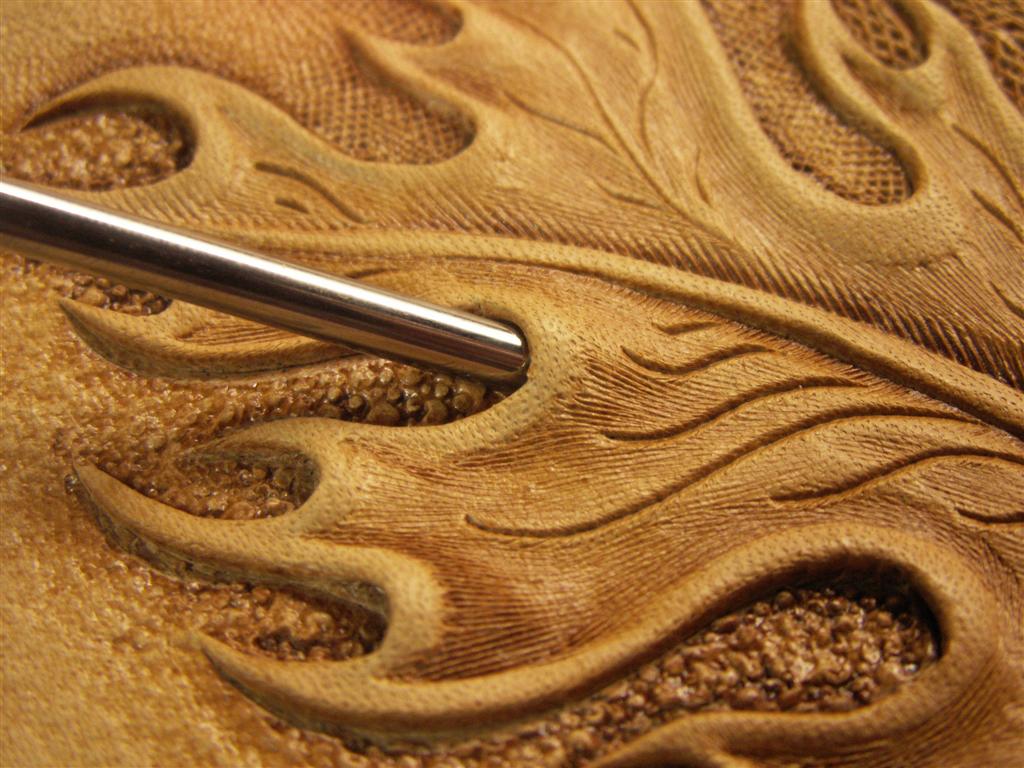
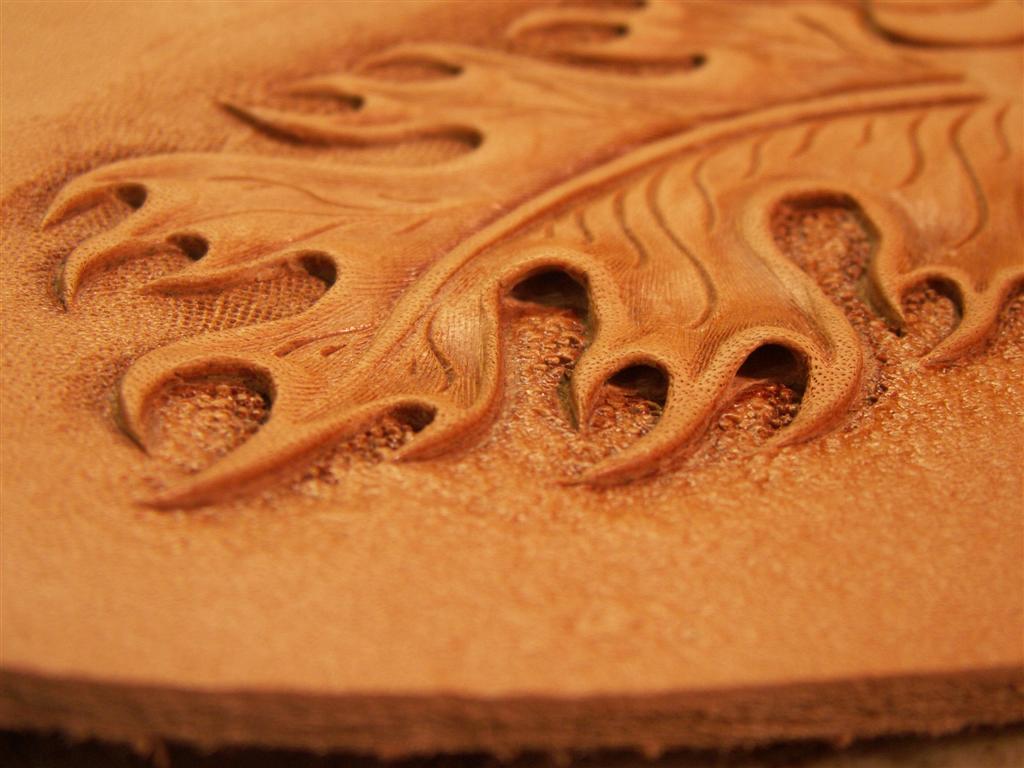
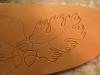
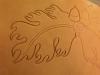
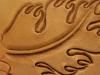
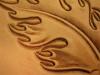
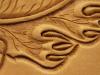
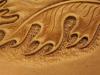
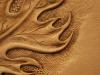
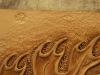
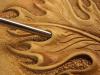
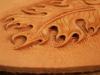
Freak mentioned a tutorial on carving oak leaves in one of his recent posts and now someone asked me where they could find it. Unfortunately, it's lost in cyber space somewhere with all the rest of the missing posts from the crash awhile ago. I still have the pictures, so I'll try and re-post it here. Remember, there are probably hundreds of different ways to carve an oak leaf. George Hurst did a book on them called The Mighty Oak, and a video. After I posted my tutorial, Kate posted one showing a different method. Then we had our first contest here on Leatherworker.net and a bunch of people showed different styles of oak leaves that they had carved. You can see all the entries here Here's how I like to carve an oak leaf. The pattern is based on one out of George's book. Case a piece of leather, transfer the pattern onto the damp leather and then cut the outline with the swivel knife. When you get to the tips, don't connect the cuts. If you do, the tips can come loose and curl up off the leather. In most cases, you dont want that to happen. When I trace the pattern, I only trace one side of the center vein. Cut that side with the swivel knife, then using the cut line as a guide, try to make the other one parallel to the fist. The cuts should start out deep and fade out and get closer together towards the tip of the leaf. NOTE: I am going to add some tool numbers because people always ask. Don't feel like you have to run out and buy a bunch of different tools to carve a leaf. Lots of different tools can be used to do the same job. Try using what you have, you can probably make it work just fine. Nest step is to bevel around the outline of the leaf. You can use smooth or checkered bevelers, whichever you prefer. A smaller beveler (B935 or B936) will be useful on the inside curves. For really small areas, the small figure carving bevelers (F890 and F891) might be helpful. For the longer lines, use a bigger beveler to speed things up and make for smoother beveling. One the bottom side of the leaf I used a steep angled checkered bevelers (Hidecrafter PB011 and PB013). The steep angle of the beveler helps in areas where lines are close together so you aren't mashing down another line when you bevel. When using a regular beveler, you may need to tilt the beveler back in tight areas. To bevel the center vein, I like to use an angled beveler. There were 2 sizes made, B193 and B194 were the smaller version, and the B202L and B202R were the larger version. Not sure if they are both still available or not. Hidecrafter and some of the custom tool makers also make a tool that had both angles on the same tool (Hidecrafter PB016). I always have trouble telling which way the angle of the tool is going to be so I keep a scrap of leather handy to stamp it on first. To give shape to the inside of the leaf, I like to use a long, narrow, pointed pear shader (P368). You could also use a smooth or checkered one to get a different effect. I start with the pointed end towards the tips of the leaves. Then start to fill in between the tips with the pear shader. I work the pear shader around the corners leaving a ridge of leather all around to border. Continue shading the inside of the leaf. Decorative cuts finish off the inside of the leaf. You can try and make them look like the veins on a leaf, or just make a decorative cut. I have showed two different styles, neither very well done. Hey, I am still learning too! Background around the leaf. I have shown several different background tools and the different effects they give. A pebble backgrounder, and then a fine textured checker and a coarser texture checker. If there isn't a border around the carving, I like to use a matting tool to fade the background out. One of my favorites is the E294. Then if you want a more realistic look to your leaf, a pro petal tool can be used on the inside cuts. This tool is slid under the leather, raising these areas.


-
Makes me wonder what you two could come up with if you worked together at it. You have years of experience working at Tandy and in a shop. You know leather and tools and how they both work. You know what it takes to make a profit. He has experience with different materials and enthusiasm to put that knowledge to use working on leather. You both have an opportunity to teach/learn from each other. If you add your practical knowledge to his technical skills, I bet you could make something really great. Teach him how to miter corners and gouge fold lines to make the sides line up perfectly. Help him mark the stitch holes and make sure everything lines up. He can probably make a wooden mold to fit inside to make sure it all fits right and lines up. Then add the kids into it. Let them stamp on the pieces or color it. By being there in the shop with them, you could have made sure that special piece of leather you were saving didn't get used (or decided this might have been the special project you had saved it all this time for) You could also make sure things got sorted back out and put away where they belong. I could use a lesson on that too. I think I'd do pretty well in a messiest shop contest. By making it a family project, you could achieve all the goals of this forum, education, entertainment and fellowship and end up with a really special project to boot. Then on second thought, you might all end up frustrated and screaming at each other. I can see that happening here. Maybe you should ignore this whole post. But hey, in defense of men, I can mix up and cook supper with one pan and a fork where the women in my house seem to need to use every pot, pan, bowl, utensil and gadget in the kitchen!!
-

Thinning dyes
ClayB replied to DavidD's topic in Dyes, Antiques, Stains, Glues, Waxes, Finishes and Conditioners.
I take some dye and then mix in enough alcohol to make it the color I want (or as close as I can get). Some people oil the leather first some dont, depends on the project, or how you learned. Try both on scrap and see what you like. Some people also use extra virgin olive oil instead of neatsfoot oil. There are different schools of thought on that but the people that use it, like it. The best thing to do with most dyes and finishes is to try them on scrap and see what works for you, what doesn't and use what you like best. -
Thinning dyes
ClayB replied to DavidD's topic in Dyes, Antiques, Stains, Glues, Waxes, Finishes and Conditioners.
They make a dye reducer, but I just use rubbing alcohol. -
Hey Freak, The lady at the Tandy store isn't the only on that is REALLY impressed with your work!! That is really cool, just like all your stuff is. I love how you made the leaves in the background look like they are in the background. That is such a cool technique you have been doing. The different levels of depth really make things stand out. GREAT JOB!!! One thing you need to get straight though. Bert is Clay M (the tall one) I'm Ernie. It's ok though, I get confused on that sometimes too.
-
I think you did a really nice job on this too. Your leaves have a lot of shape and depth to them. Like others have said, you could probably get some more depth with a lifter, and clean things up a little with a modeler, but this is a nice piece. The green man seem to work on leather very well.
-
Karl, Yes, I think what you have is the right stuff. Drakes is a Fiebings product, or was, not sure if they are still making it or not. Super shene would probably do the same thing. The sealer also stiffens the feathers or hair on projects where they are cut loose or lifted and helps them keep thier shape. You have to work small areas at a time to do that, paint on a little sealer then lift and shape the feathers. When they dry, they stay in that position. On flat pictures I have sprayed Krylon matte acrylic sealer on as a sealer before painting and that works too. Then, something I have been experimenting with. Say you paint the feathers on your eagle and are pretty happy with them, spray on a coat of sealer. Then continue painting the background. If you dont like how that turns out, I have had fairly good results removing the paint that was applied after spraying on the sealer, and the paint that was sealed remains as it was. If you are going to try this though, I'd practice it on something and see what kind of results you get before you do it on a big project. This all works on pictures that just hang on a wall. Not sure how good an idea it would be to use sealer first when coloring something like a billfold that gets lots of use. In a case like that, you might want the paint to actually soak into the leather to make it stick better. These are some things that have been working for me, no promises they will work the same for everyone. Painting can be scary, but when you start to get the results you want, it's really fun. I did see your saddle. I do think that it would be fun to do some embossing on a saddle. It would end up being a piece of art instead of a using piece, but nothing wrong with that.
-
Hi Karl, I have done the deer a couple times and the pheasant once. Both are fun projects. I think the deer is a lot easier to color than the pheasant though, but if you have some irridescent powders to put in the paint, the pheasant looks really cool. Biggest thing I have found with the painting is make sure it's watered down pretty thin. You can always add another layer if you want more color. Also, seal the leather before you start painting with the acrylic. Drake's X-1 is what I have been using. I think Tandy's Highlighter is close too, but a little darker. If the leather has been sealed, the paint doesn't soak into the leather, so you can actually take it back off sometimes if you don't like it. I have saved a couple projects that I didn't like that way. I haven't tried the fish yet, but will get to it someday. Looking forward to seeing the eagle finished.
-
Karl, I think this is my favorite of the pieces you have done so far. The eagle looks really cool, and a perfect time to be working on it too.
-
Hey Karl, Glad you figured it out. I still haven't Clay Miller and I were discussing this last week and we had decided maybe you had to be in Australia for it to work, but I guess you blew that excuse for us. I'm gonna have to give it a couple more tries. So are you gonna set a stone on your wife's ring??
-
I hope you can get someone to listen to you Denise. That would be so frustrating. We have satalite internet and has a lot of advantages over dial up. It is faster most of the time. It doesn't tie up your phone line. You can have more than one computer online (a big advantage if you have a few teenagers that need to be on MSN all the time) It also has disadvantages. You are limited to the amount of bandwidth (uploading and downloading) you are allowed and they dont tell you that, you need to read the small print! You can buy higher packages and need to have biggest one if you have kids that download a lot of music or a movie or two. Once you reach your max bandwidth for the month, they slow you down to a speed that makes dial up seem fast. They also threaten to shut you off completly. We pay around $90 a month and it's really stupid as you said. You also loose connection when it rains or snows and sometimes for no reason at all. Seems like with technology these days, there should be better options for us that live in the boonies.
-
Since I leased out my ranch a few years ago, I dont put up the hay myself anymore, but I sure feel bad for the guys around here that do this year. We had a dry winter and spring. Had a couple weeks of wet weather to make things green up in May, but then it got hot. A few days of mid 90's and things are really drying up fast. There wont be much hay around here and the crops are not looking good either. With the price of fuel, not sure too many people are going to be able to haul hay in. My 3 horses might end up going to town this fall too.
-
Hey Bert, Great idea for a challenge. I am looking forward to seeing what everyone comes up with for this one too. And just so everyone knows, I saw some eagles that Clay carved while I was visiting his store last week and he cant get away with saying he isn't good at figure carving anymore. They were really well done.
-
You might have been able to get away with saying you were "just a middle aged mum" a couple years ago before you joined up on Leatherworker. Now you are an internationally known leather artist with fans and everything. You aren't going to be able to hide behind that avatar for a whole lot longer. The paparazzi are probably hiding in the shadows waiting for thier chance already so make sure you are smiling
-
These make great gifts
ClayB replied to Hammerhead's topic in Purses, Wallets, Belts and Miscellaneous Pocket Items
My favorite swivel knife has been living in a similar holster for a few years. I'll have to see if I can dig up the pattern I used. It's fun seeing all the ideas floating around.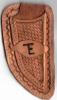
-
I think it's great that this video is once again available. Billy does things a little differently than the traditional ways most of us learned to carve leather and he has developed some new techniques and he shares all his tricks. Another thing that makes his video unique is you get a look at who he is, where he was living, the music he likes etc. Some of the other videos available from other artists can be a bit..... dull (great for teaching, but lacking in entertainment value) And to top it all off, the donation price is about half what the video used to sell for. ] Thanks Billy and Johanna for making this happen here!
-
"I'm a good ol' boy, You know my mama loves me But she dont understand They keep showing my hands and not my face on TV" Dont know if they have The Dukes of Hazard in Australia, but that theme song by Waylon was the first thing that went through my mind when I watched the video. I'll try and write up some instructions for you Caroline on the differences in how you did yours and how I did the one I sent to Leathercat. (you could just take her's apart and figure it out yourself, she wouldn't mind would she?) I learned it off Rene Berend's video so I am not sure it would be ethical to do a tutorial here on the forum on it.
-
ClayB is Clay Banyai. I used to go by just Clay on places like this cuz not too many people other than relatives can pronounce or spell Banyai and there just aren't that many Clays anyway. Then, what the heck, another Clay showed up. Who'd a thunk?? So I just added the B to avoid confusion. Last weekend I was visiting Clay Miller at his store in Rapid and it was really weird everytime the lady he has working for him called out "Clay". I usually dont have to wonder which Clay someone is calling for.
-
That is really nice Cindy! You did a really nice job on the carving and coloring. And you did it fast too. I'll be looking forward to seeing a lot more of your work.
-
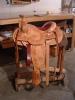
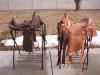
I was talking to Clay Miller this morning and somehow or other, this subject came up and I decided maybe it should be posted here on the forum too. I think every state in the US has an arts council. You can do a serch on the internet and find the website for your own state. Many states have a Traditional Arts Apprenticeship program. Through this program, master artists are paid to pass on traditional skills to people that want to learn, therefore keeping the tradition alive. Many different crafts are eligible for the grants through the program including saddle making, knife making, braiding, bit and spur making etc. You have to apply for these programs up to a year in advance, so there can be some planning involved and each state administers thier program differently so you have to talk to someone and see what is available in your state. Here in North Dakota, grants are available for up to $2000 with half that amount being paid to the master, the other half being available for materials. I have participated in the program twice here in ND to learn how to build saddles. At the end of the program we are required to write a final report and then give a demonstration somewhere on the craft that we learned. We did our demonstration at an art festival in Jamestown and it was a lot of fun and a good way to meet and talk to a lot of people. I would like to encourage you all to check and see what is available in your states. I was pretty surprised to find out they actually give out money like this, but hey, it's our tax dollars at work! Here are photos of the 2 saddles I completed through this grant program.
-
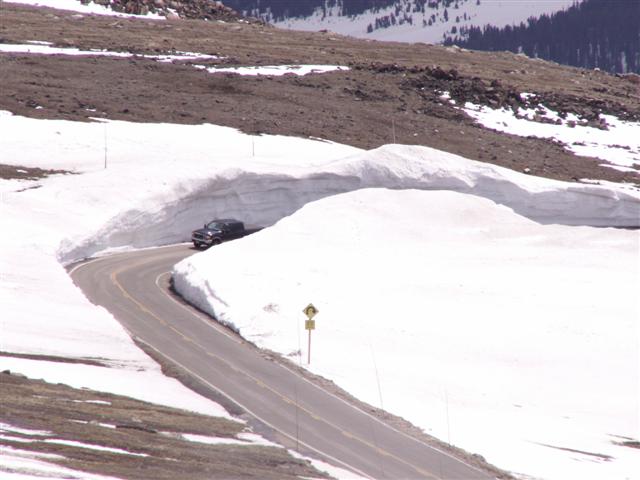
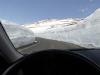
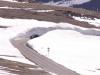
It's a little warmer here in ND, 80's. Everything is nice and green but we can always use more rain. If you start to missing the snow too bad, go back to WY. On our way home from Cody last week, we went over Bear Tooth. The snow banks along the side of the roads were 15 feet high or more in places. They still had the snow blowers and plows out. Someone said the road had been closed for a few days the week before we were there. Sure is pretty drive but you can't see it if you have to close your eyes like my wife had to a few times.
-
Hi Anne, I think it's great that you are finally getting some time to work on projects and you certainly aren't limiting yourself to small stuff. You done good on the first panel! It's neat how you incorporated elements in your design that define "you". It's going to be a really nice project when you are done. Now get busy, you have a LOT of work to do!!!! Clay (was that nice enough?)
-
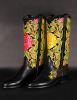
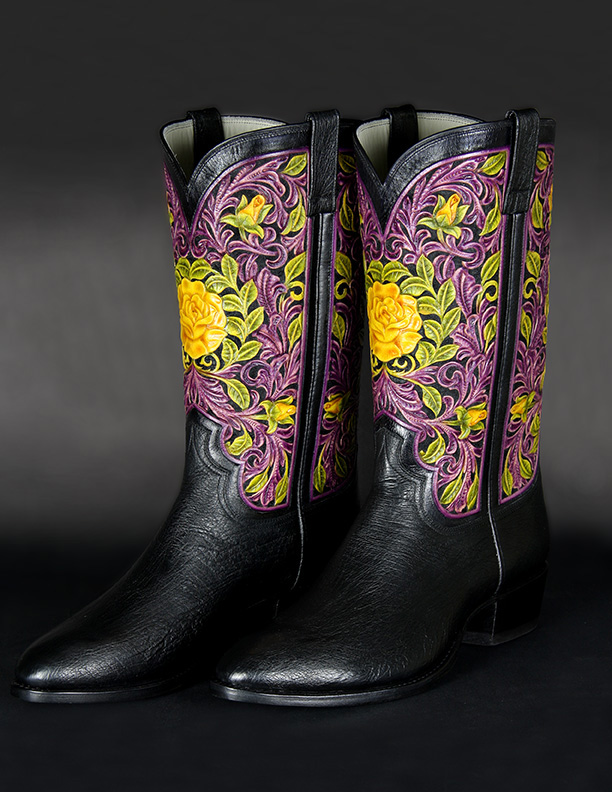
Peter Main boot tops and belt
ClayB replied to ClayB's topic in Shoes, Boots, Sandals and Moccassins
Here are a couple pictures of the finished boots Peter carved the tops for. Comments from Peter ...I posted some boot tops some time ago...and now, here are the completed boots made by Wheeler Boot Company...Dave Wheeler is a master.