Bobby hdflame
-
Posts
283 -
Joined
-
Last visited
Content Type
Profiles
Forums
Events
Blogs
Gallery
Store
Everything posted by Bobby hdflame
-
Looks nice! How did you do the distressed look?
-
I purchased a burnisher from someone on here several years ago but it is HIDING in my shop! I searched the site and the only one I found was from 2012 and the guys website no longer works. Can someone point me in the right direction? Below is a link to a picture. I want one like the top one in the picture or something similar. https://leatherworker.net/forum/uploads/monthly_04_2012/post-12512-092417500%201334152181.jpg Thanks, Bobby
-

I had no idea...
Bobby hdflame commented on Lifesaver3123's gallery image in Gallery- Our Leatherwork
 What was it for?
 -
Good explanation Rawhide! I realize some people have problems maintaining the correct angle. I don't really need or use it anymore, but here's an excellent manual sharpener that's also affordable. I used one for years. It is easy to maintain the correct angle and with just a little practice anyone can put a perfect shaving edge on anything from a small paring knife to a machete! Guys at the fire station would line up with their pocket knives when I brought it out to sharpen mine! It got to the point that I had to go into hiding when sharpening mine to keep from sharpening everybody's knives. When I first bought my round knife it was not as sharp as I wanted, so I used this sharpener to put the initial edge on it. Since then, all I need to do is strop it on leather with some fine rouge. If you have a buffing wheel with some rouge, it's quick and easy to keep it sharp. When using it, start with the coarse stone until you get the same angle from one end to the other. Then gradually work your way down to the finest stone to get a polished razor edge. If you use it to maintain your round knife you'll only need to use the finest stone to bring it back. The secret is after every few cuts, strop the edge on leather with some rouge. Maintaining a perfect good cutting edge on your round knife is a constant thing WHILE YOU'RE USING IT! https://www.amazon.com/Lansky-Professional-Sharpening-System-Serrated/dp/B001KN3OKO/ref=sr_1_3?ie=UTF8&qid=1487792044&sr=8-3&keywords=lansky+knife+sharpener https://www.youtube.com/results?search_query=Lansky+Professional+Sharpening+System BTW, I bought a sapphire and a diamond stone for mine. I use them after using the fine stone that comes with the basic kits. Hope this helps.
-
I know there's a place that makes templates out of laser cut plastic. Maybe someone will have an answer for you. I'd be interested to know too.
-
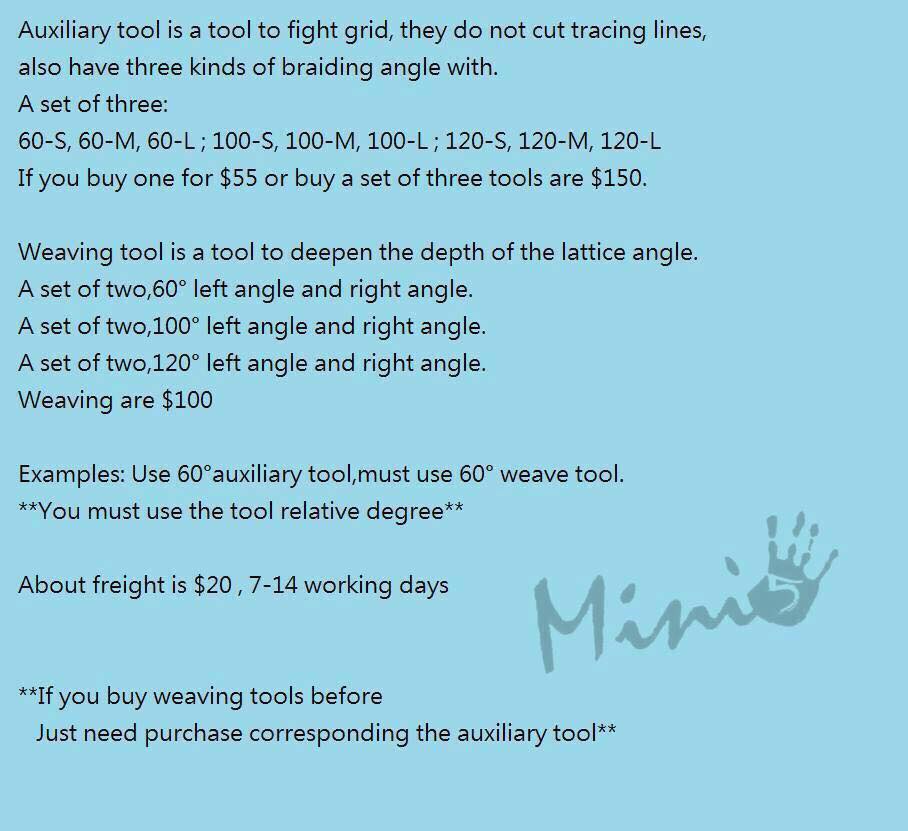
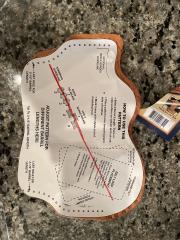
Well, I just bought the 60-S, and 60 left and right angle. $55 + $100 + $20= $175 total? Sent the money PayPal. He said I should have it in about 14 days. Coming from Taiwan. I'll post a review when it arrives.
-
I just ran across this thread and really like the looks of this pattern...lots of depth. I've been looking and clicking on different links until I got to the FaceBook page and sent them a message. I'll post below what I've found up to this point. Not cheap, but you pay for good leather tools, and these appear to be high quality. There are 3 sizes of Auxiliary tools, Small/Medium/Large and 3 angles 60/100/120 degrees. You can get 1 tool for $55 or 3 tools for $150 There is also a $20 shipping fee. You also need 2 weaving tools that match the degree of Auxiliary tool that you buy in Right and Left angles. They also do PayPal so I am trying to get them to send me an invoice now. I think I'll get the 60 Auxiliary small and the 2 60 degree weaving tools to go with it. Should be $55 + $100 + $20 = $175
-
Few More Wallets
Bobby hdflame replied to LeatherLegion's topic in Purses, Wallets, Belts and Miscellaneous Pocket Items
Nice looking wallets! Where did you get your cutting dies made? -
Flat Back Pancake
Bobby hdflame replied to chiefjason's topic in Gun Holsters, Rifle Slings and Knife Sheathes
You know, I just ran across this post again, and while reading it over I had a thought. There were a couple of questions about how much to allow extra on the top/front piece of leather to allow for forming. When I make a pattern for a semi-auto, I allow 1/2 the thickness of the gun as the distance around the guns outline for the stitch line. Since you're molding the front and back, 1/2 the thickness works out because you have twice the leather you're molding around the gun. If I wanted to just mold the front piece of leather, I could allow the thickness of the gun (Instead of just 1/2) on just the top piece and not the bottom. Wouldn't this work out? Now I'm trying to think about how to attach the two sides together?? Finish one side, like was said above, mold, then sew and finish the other? I'm thinking for a flat back, that I could make a press using wood on the bottom and neoprene just on the top. That way only the top should form to the gun, the back should remain flat on the wood. Also, just wet the top. I could just form the top and then stitch to a flat piece of leather I guess. Since I use a machine to sew, wasn't sure how easy it would be to stitch close enough to the edge of the molded area. I guess I just need to try it! Any thoughts from anyone else? -
My First 3 Knife Sheaths.
Bobby hdflame replied to Bobby hdflame's topic in Gun Holsters, Rifle Slings and Knife Sheathes
Thanks for the positive comments. Yes, it was one of the Phrobis III M9 bayonets. These were made by Ontario. Someone gave me 10 of these to make the 2 black sheaths for door prizes. He also gave me one of the sheaths designed by John Bianchi. It's pretty cool, It allows you to cut wire with the knife. I made the Python for him as a surprise. I didn't realize how much these knives sold for until I started to do a little research! -
I know this is an old thread, but it's still an awesome site for info. Wanted to post new info for those interested. Great site, but it's moved. I just happened across this site when I was trying to get my el cheapo HF back together. Here's the new URL https://sites.google.com/site/donsairbrushtips/
-
I had a friend give me 10 bayonets in return for making a couple of sheaths to be given away as door prizes. While I was at it, I made one with Python inlay to give my friend. He was surprised! I'll have to say I learned a lot and I'm ready to make some more. Leatherwork gives me a nice change from doing upholstery. The two black ones are just plain Jane basic.
-
Singer 29-4 What Are Vertical Tension Disks For?
Bobby hdflame replied to Graham97's topic in Leather Sewing Machines
I have a 29-4. If you need any more info, I'll share with you what I have. I thought that it would sew anything when I first got it.....found out that it wouldn't sew at all! It was missing a couple of parts. I now have it sewing, but it's really only for specialized jobs. I actually used it to repair the zipper in a pair of fire station boots...just to see if I could. I got it for a good price and keep it around just cause I think it's cool. I spent more on parts than I gave for it. -
American Alligator 1911
Bobby hdflame replied to mmirob's topic in Gun Holsters, Rifle Slings and Knife Sheathes
After some more research, I found the seller. Their ID is "southnjent". A little different spelling. -
American Alligator 1911
Bobby hdflame replied to mmirob's topic in Gun Holsters, Rifle Slings and Knife Sheathes
I just did a search for "southerngent" and they came back with nothing for sale and living in NC. http://feedback.ebay.com/ws/eBayISAPI.dll?ViewFeedback2&userid=southerngent&ftab=AllFeedback Actually, after looking at it again, it says that they're not a registered user??? -
American Alligator 1911
Bobby hdflame replied to mmirob's topic in Gun Holsters, Rifle Slings and Knife Sheathes
I LOVE the gator. Both colors look good. Where do you get your gator from? -
Vinegaroon And Boning
Bobby hdflame replied to J Hayes's topic in Gun Holsters, Rifle Slings and Knife Sheathes
I have been using Vinegaroon myself for several reasons. I wanted to share my experiences with you too. Someone said not to let the Vinegaroon come in contact with your gun. I don't remember exactly why I had an LCP in a pocket holster without it being in a plastic bag, but it was for a short time and the Vinegaroon caused some removal and light rust of the finish. Lesson learned! Other things I've experienced: The vinegar smell does go away after a while. I have used baking soda washes and not, and have not noticed any difference in the finished product. Maybe it will show up years down the road?? I did use neatsfoot oil after vinegaroon. The oil also turns the finished product a much darker black. Wet form and bone before vinegaroon. I think the vinegaroon adds some water resistance to the leather. I also leave the gun in the holster while it dries. I vinegaroon after it dries from wet forming and boning. Since the iron in the vinegar reacts with the tannins in the leather to turn it black, rusty water could be used instead and avoid the vinegar smell. Will Ghormely shows this on his website. He uses a steel barrel with scrap metal in it to dye holsters. Here's his how to. It's close to the bottom of the page. http://www.willghormley-maker.com/MakingHOGRig.html [url=http://www.willghormley-maker.com/MakingHOGRig.html%20%20I][/url] I have not personally tried this but it seems to work well for him. He also shows his technique to age the holster by rubbing wax in areas that you want it to look worn. This keeps the vinegaroon from absorbing into the leather which is what some of you have experienced while using waxed thread. You will/can get some black on your hands when using the vinegaroon but it washes/wears off pretty quickly. I have not experienced it wearing off onto clothing after it completely dries. I have had Fiebing's Professional Oil Dye and the USMC Black wear off especially on belts even after thorough drying and buffing and sealing with Leather Balm w/Atom Wax. You can Vinegaroon after stitching without turning your natural colored thread, black. Can't do that the with dye! You can submerge your leather or brush it on. Depending on what I'm dyeing, I've done both with equally good results. And another reason I like using Vinegaroon....it's cheap to make! All in all, I like it and have used it more than Fiebings since I first tried it! BTW, using other metals does sound interesting. Be sure to post your findings. -
Flat Back Pancake
Bobby hdflame replied to chiefjason's topic in Gun Holsters, Rifle Slings and Knife Sheathes
I really like the snap idea. The silver snaps look good, but you could use black snaps for someone looking not to draw attention. I don't know if you know about "Pull The Dot Snaps, but if you're concerned about them accidentally coming unsnapped, you could use them. Here's a couple of videos showing how they work and how to install them. http://www.sailrite.com/Pull-The-Dot-Snap-Fasteners-Locking-Snap-or-One-Way-Snap-Streaming-Video You can set up a commercial account with Sailrite in order to get better pricing. Thanks for sharing your snap idea. -
Yes, that's the same videos I have. Thanks for the help. I would hate to spend the money for the same videos. I was hoping that he had made another video with the comment he made at the end about "See ya in the next video."
-
I have the 3 DVD set of John Bianchi's "Western Holster Making" videos. In it, he takes you through making a basic Buscadero Style holster. Not a fancy holster, but lot's of good info including making your own pattern. At the end of the last video, he says that he'll see you in the "NEXT" video. I've seen some references to a 3 video set called "Advanced Western Holster Making". Is this a more advanced video set or has someone just called it the wrong name? I was hoping that someone could tell me if this is another video set or the same one before I paid for a video that I already have. Thanks in advance.
-
Old Ugly Seat Gets A Facelift And New Guts!
Bobby hdflame replied to chancey77's topic in Motorcycles and Biker Gear
OK, I went back and looked at ALL of the pictures again. I still don't see a hammer or a hammer hanger. Am I missing something? -
I love the design and the braiding. I can see a little brown through the braid. Someone had made a post about dyeing underneath the braid black so it wouldn't be noticeable if the braid didn't completely cover a spot. I don't remember the exact process, maybe one of the pros will chime in. I hope my first one turns out that good!
-
She must be pretty bad ass! I'd ride on it. Nice detail.
-
I didn't realize that you could tool it. Mine seems so hard. If it's good for making water resistant holsters, motorcycle seats and such, wonder why they don't sell whole hides? There must be a specific market or reason...maybe more money elsewhere? It just looks like you'd see bigger pieces of it for sale.
-
I just looked at your process again. Looks like you glue the pieces together, press with neoprene, and leave them glued together. I was thinking about using veg tanned leather. Also use the press, but don't glue. After drying, I'm hoping it would hold it's shape. Then it would only be one layer of leather. Has anyone tried doing it that way? BTW, there's a guy on YouTube that has some videos on leatherworking. He gave a recipe for softening the leather when molding. Here's his: 50% Rubbing alcohol 25% Water 25% Baby shampoo I haven't tried it yet. Here's his video: http://www.youtube.com/watch?v=VKtNynEugZs