Bob Blea
-
Posts
1,771 -
Joined
-
Last visited
Content Type
Profiles
Forums
Events
Blogs
Gallery
Store
Everything posted by Bob Blea
-
Definitely get Bob Park's book. It is worth every penny. I have Pete Gorrell's book too but I wasn't 'getting it' from his book, but that's just me. Bob's book made things clear for me.
-
Hi Gilbert, The piece in the picture looks like it has no finish at all but you can get close to that. If it were me I would apply a thin lacquer coat (Neat Lac / Wyosheen (what I use) / Clear Lac, all pretty much the same product) to seal it. It would protect the leather but leave it basically that same color. I would also oil it first with Neatsfoot oil but that will darken the leather slightly. This will work to get you a very natural finish but please note that over time exposure to sunlight and other bright light will cause veg tan leather to slowly darken. You can probably get the same result using acrylic Resolene but it you put too much the leather will feel a bit plastic. However, Resolene does have some ability to block UV rays so it can better prevent the leather from darkening due to sunlight. Hope this helps, Bob
-
Neatsfoot oil will naturally darken leather, so will exposure to sunlight. Could one of these combined with your dyes maybe get the color you are looking for?
-

My First Wallet
Bob Blea replied to DR80's topic in Purses, Wallets, Belts and Miscellaneous Pocket Items
I think it looks very good. It puts my stitching to shame. -
 Thank you both!
 -
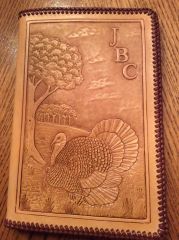 Thanks, I think you will be able to. The turkey comes directly from Al Stohlman's book Figure Carving Finesse. He was a little vague on exactly how he got the feathers to look like they did but a few practice pieces later I'd figured out how I think he was doing it. The result gave a pretty realistic looking feather. It's a great book for figure carving techniques if you don't have it it's worth getting.
 -
Very cool to make it from start to finish. I think your finished product looks nice.
-
Turkey And Deer Notebook
Bob Blea replied to Bob Blea's topic in Purses, Wallets, Belts and Miscellaneous Pocket Items
Thanks all, you are very kind. -
Very nice. I'm an Escher fan as well and you created that design in leather very well!
-
New Biker Wallets.
Bob Blea replied to VanDutch's topic in Purses, Wallets, Belts and Miscellaneous Pocket Items
Very nice, I love the different shapes. It looks like it will last a very long time. -
Looks really good Ron. And I like your lacing.
-
Turkey And Deer Notebook
Bob Blea replied to Bob Blea's topic in Purses, Wallets, Belts and Miscellaneous Pocket Items
Thanks all, I really like figure carving just don't get many requests to do it. -
Turkey And Deer Notebook
Bob Blea replied to Bob Blea's topic in Purses, Wallets, Belts and Miscellaneous Pocket Items
Thank you all! It took a lot of practice tries to get it to where I thought it was passable. I'd never carved a turkey before and it took a lot of work to get the feathers to look right. -
From the album: Turkey and Deer notebook
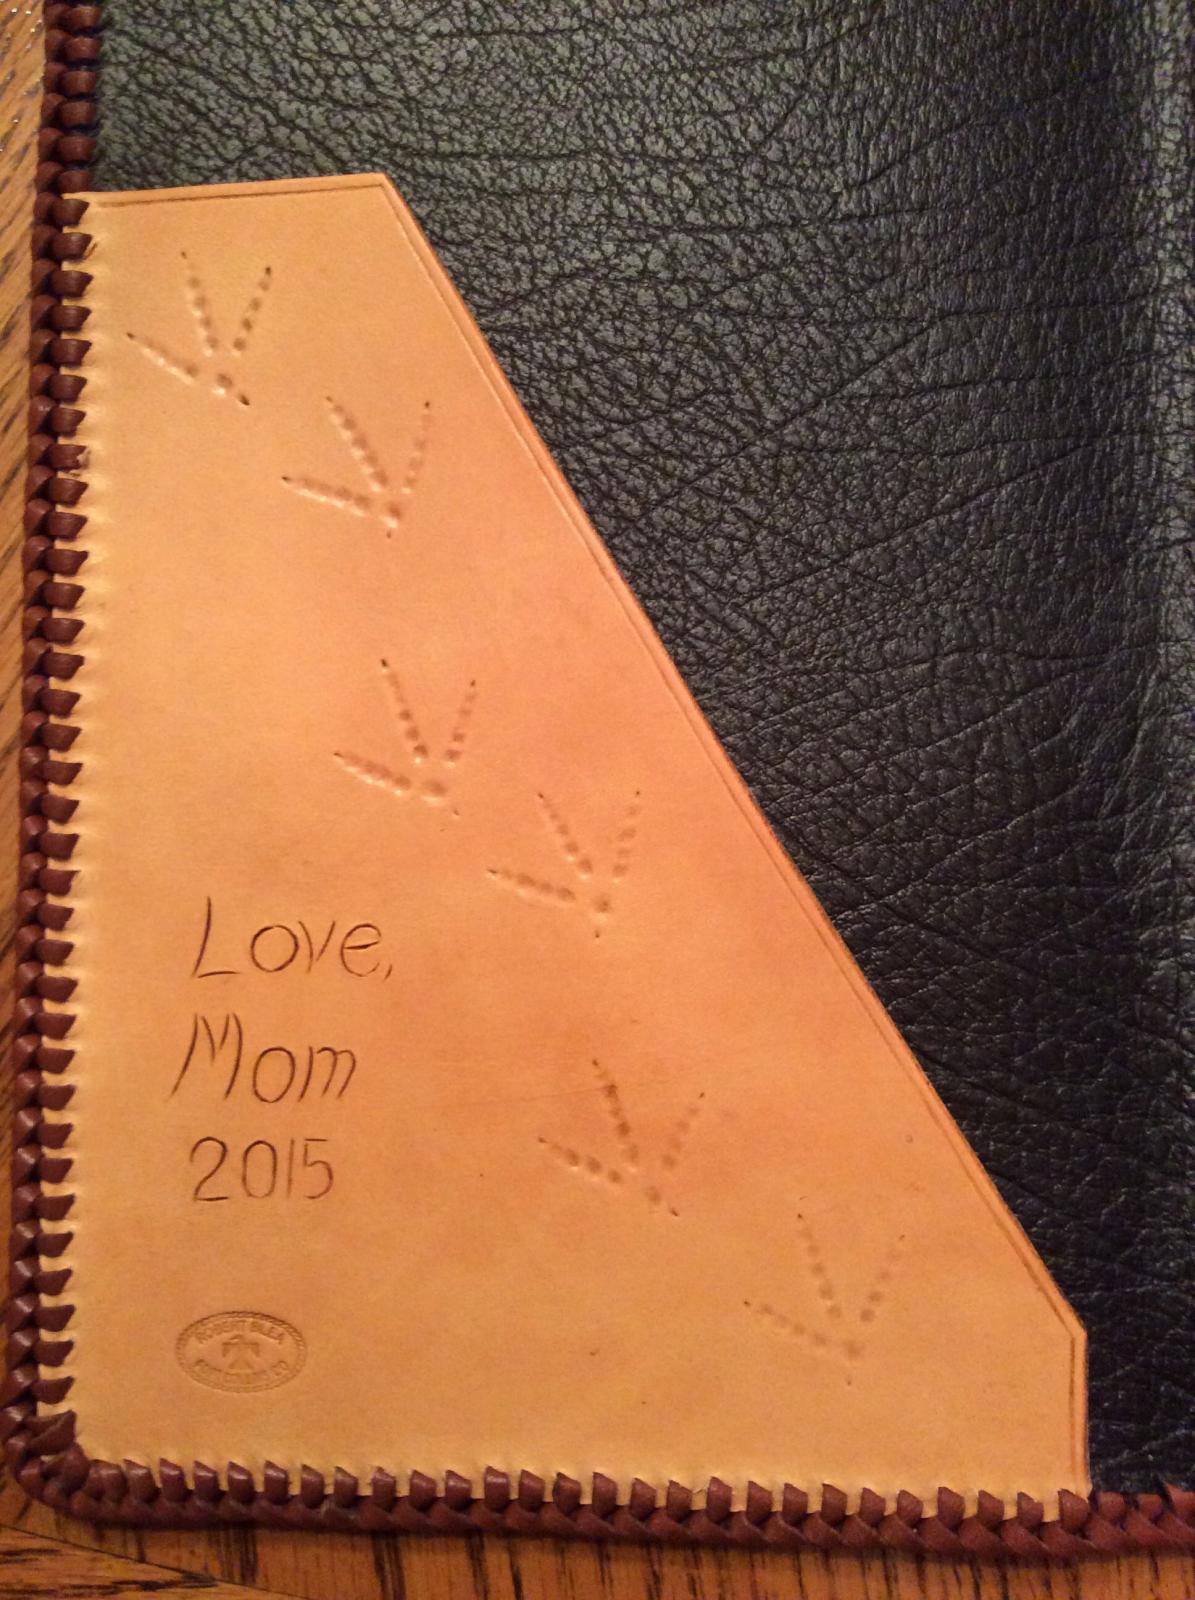
This was the back. He hunts deer in Kansas too so the notebook needed to show this too. For a customer order of something similar to this or any of the works seen here in my gallery, please visit my Etsy shop at http://www.etsy.com/shop/CandBLeather?ref=si_shop -
From the album: Turkey and Deer notebook
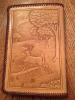
This is the front cover of the notebook. The turkey was the key element they wanted on this notebook. For a customer order of something similar to this or any of the works seen here in my gallery, please visit my Etsy shop at http://www.etsy.com/shop/CandBLeather?ref=si_shop -
This was a custom order I finished recently. The customer wanted a notebook with a turkey and a deer carving on it because her husband likes to hunt both animals in Kansas. She also wanted turkey tracks to appear on it somehow. Finally it needed the message 'Love Mom, 2015' inside because it was really going to be a birthday gift from his Mom to her husband and she was just organizing it. Sound complicated enough? After a few practice carvings to get the turkey and landscape right, this is what I came up with. Apparently the husband was thrilled with it.

-
Personally I would dye before applying the Neatsfoot oil. Dyes often stiffen leather and the oiling helps return natural oils to the leather. Also, if you are tooling or carving, I would do that between steps one and two.
-
One thing I would recommend is using a checker matter or a backgrounder in the eye sockets. That will make them darker and make them recede from the face, giving your carving more depth.
-
I share your pain! I'm interested in attaching fabric linings to wallets and I'm having similar problems. I use Weldwood contact cement to assemble my items and I've run across several people here that use it to attach fabric to leather successfully, but I've always had the problem of the glue solvent soaking through the fabric and showing up on the visible side. I've tried using very thin coats but then I have trouble getting good adhesion. One problem is the thickness of your fabric. It sounds like many who use Weldwood for this are using thicker fabric, like canvas, which is harder to soak the glue through. I've recently bought (but have not yet tried) 3M - 90 Spray Adhesive as an alternative to see if it will work with thin fabric better. There are apparently lots of tricks to making this work, I just haven't figured them out yet. Bob
-
I saw someone on FB recently that took a small eyeglass screwdriver, the kind with the handle end that spins freely, and they sharpened the screwdriver tip and used it as a swivel knife for exactly this purpose.
-
I can add that Tan Kote will cut Feibings Antique Paste and it will remove some of the dried antique from a project. I've seen it used to remove antique streaks on leather and even out the finish on a completed project.
-
Practice Piece - Critique Wanted
Bob Blea replied to paris3200's topic in Floral and Sheridan Carving
Hi Paris, You've got some good information here but one thing I would recommend differently on is the use of the bar grounder. The way you are using it is the way it is traditionally used. You stamp rows of neat little dots next to each other, and yes it is difficult and takes lots of practice (and good eyesight). The leather also needs to be drier than yours is to help eliminate the unevenness you are seeing. Striking to tool with consistent force is important too. What Acorn Biter said is more how you would use a backgrounder when matting down the background. A backgrounder has a wider face, is usually tear drop shaped and it has a checkered face. It's much easier to use and you do rotate it as you use it to eliminate a pattern from showing up. If I tried to rotate my bar grounders on each strike I think I'd go crazy trying to get it even because it's so narrow. And there is nothing wrong with using a backgrounder instead of a bar grounder, just 'traditionally' in the Sheridan style they always use bar grounders. As JLS said, you can develop your own style so play around and see what effect you like best. Good luck and keep practicing! You will see improvement fast! Bob -
What Is The Point Of A Head/round Knife?
Bob Blea replied to Windrider30's topic in How Do I Do That?
For me the difference is very basic. With a utility knife I have to pull it towards me and with the round/head knife I push it away from me. Seems much safer. -
Hello and welcome to the forum! No rule of thumb that I'm aware of. I would recommend printing off your pattern and test fitting it together to see how much you want to take it in. Adjust that gusset piece till it's how you like it, then that becomes your new pattern piece. Also keep in mind that the lambskin is very soft leather so it will easily compress and fold in on itself. Your gusset as you've drawn it will probably taper itself to fit the flap the contents of the clutch unless your front and back pieces have a stiffener to make them hold their shape. Bob
-
I think I get what your asking and for a bag I would prefer a pouch that the pen slides into (the full length pen holder I think you are describing) rather than just a pen loop made with a strip. If the tip of the pen is covered it won't be catching on things in the bag, which might lead to the pen getting twisted around and breaking the pen loop strap as stuff shifts in the bag. 25b has good points too about why not to use the pen loop.