Phatdaddy
-
Posts
480 -
Joined
-
Last visited
Content Type
Profiles
Forums
Events
Blogs
Gallery
Store
Everything posted by Phatdaddy
-
I notice too, everything from full costumes, to leather cuffs and bags. It's funny, it's sort of like when you get a new car and then it seems like everyone is driving the same model.
-
The tiled sections are to be printable on a home printer on 8.5x11 paper, then you supposedly can tape them together. The large pages are included so you can have them printed at staples or the like. In any event, it was just a suggestion.
-
https://www.leathercraftlibrary.com/p-1410-4364-western-classic-ii-handbag-kit.aspx This says western classic II but it might be close? Anyway, hope that helps
-

Triple Ostrich Inlay!
Phatdaddy replied to Sixer's topic in Gun Holsters, Rifle Slings and Knife Sheathes
This is really nice. Thanks for sharing. -
A New Shark/horsehide Belt
Phatdaddy replied to JRCHolsters's topic in Gun Holsters, Rifle Slings and Knife Sheathes
He'd be silly not to like that. If he doesn't I know someone who does! Very nice! -
My Sheath- Dcknife
Phatdaddy replied to kid terico's topic in Gun Holsters, Rifle Slings and Knife Sheathes
Love the sheath and the knife, as always, awesome job! -
Those are really nice! Great colors too.
-
Latest Suit Of Armor - Imperial Sea Dragon
Phatdaddy replied to Prince's topic in Historical Reenactment
Simply amazing! I can't imagine the effort you have invested in this. They'll definitely be pleased with it. -
Custom Edge Burnisher Review Leatherburnishers.com
Phatdaddy replied to 2Yutes's topic in Leather Tools
I haven't been at the bench or at the computer much these last couple weeks, I'm on vacation (staying close to home but have a lot of work to do lol), but I wanted to let you know that I received my burnisher on Monday!! Super happy, looks awesome and exactly as the pics. I haven't been able to test drive it yet, I'll be sure to update once I do. Thanks a ton, Kevin -
Biker Wallet
Phatdaddy replied to reddevil76's topic in Purses, Wallets, Belts and Miscellaneous Pocket Items
Beautiful wallet. I like everything about it. -
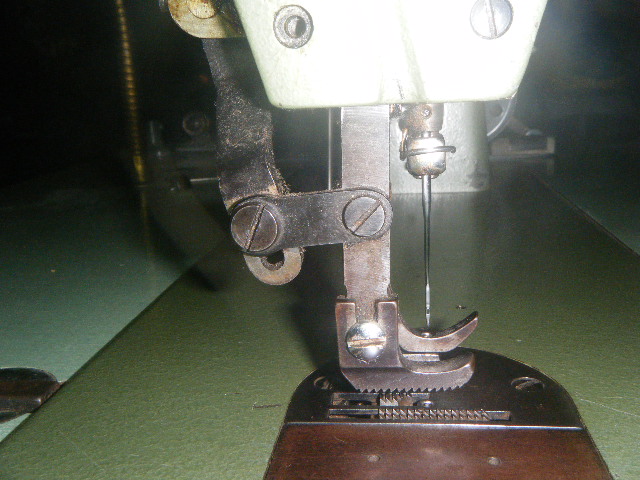
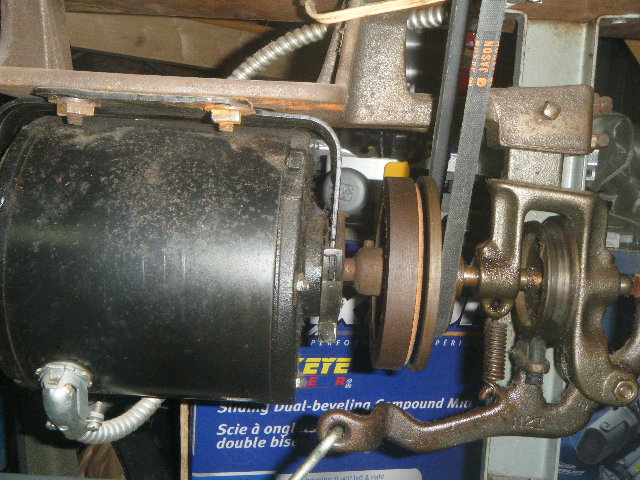
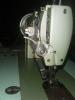
After closer inspection i found that that hook thing that pivots is meant to relieve the upper tension when the presser foot is lifted. It was still very stiff and once i put a few drops of oil on it, and worked it a bit, it moved very freely. Now when the foot is down the tension on the disks is enough to push that hook up and the tension on the top thread returns properly where before that hook was constantly relieving the tension. I'm Thinking that buying this machine was probably the best thing I could have done starting out, it's helped me learn a lot about the different parts and how they work. I appreciate all of you, and the information you provide. I'm sure there will be more questions, right now I think I just need proper thread and needles and a lot more scraps. Cheers Kevin
-
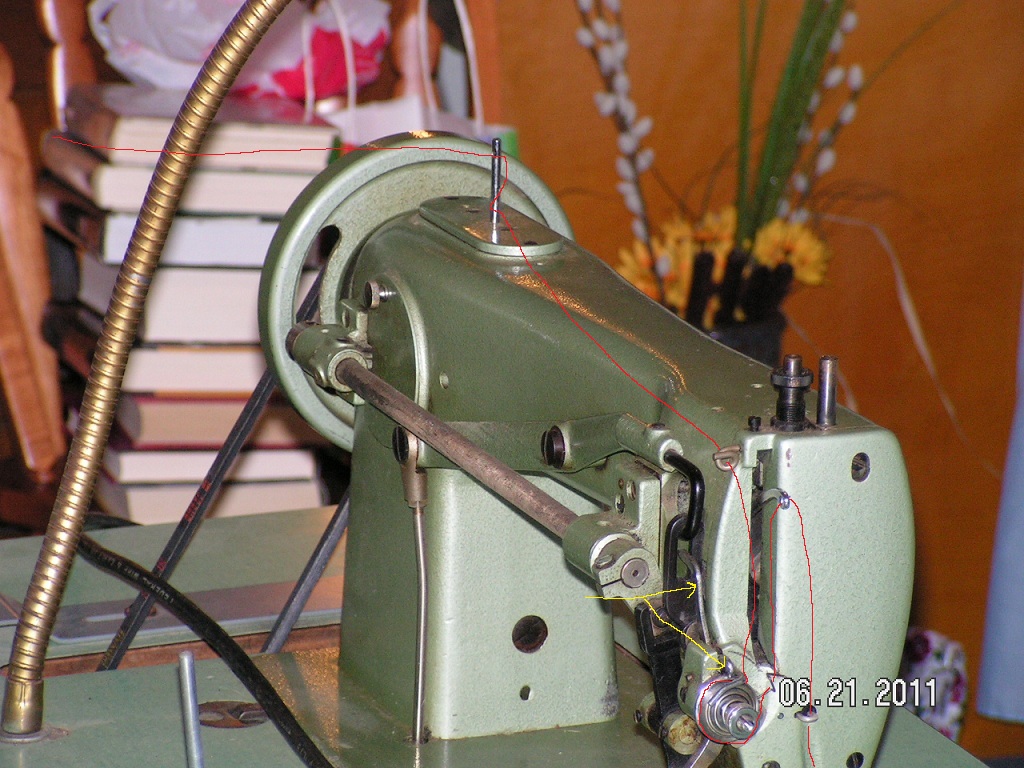
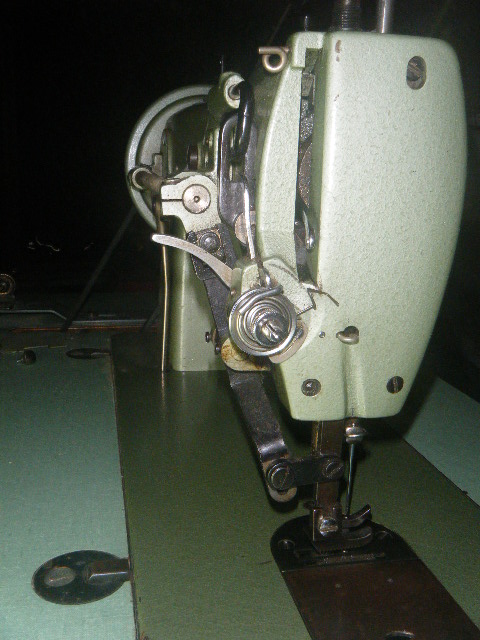
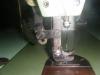
In the picture, that isn't actually the thread. I drew that in there with paint to show how I was threading it. I do put the thread around the 2 disks, however on the top part of the disks there is the hook I mention in the previous post that pivots and runs to a link above and also a bar that i'm unsure how the thread should be routed around. I'll try to take a better pic tonight.
-
Welcome and good luck if you go ahead with it!
-
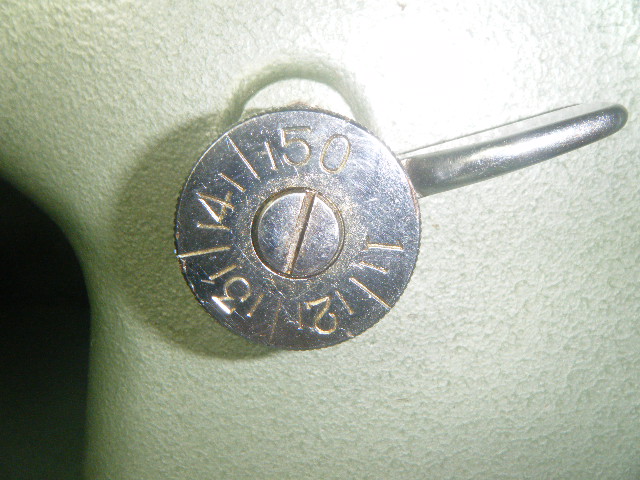
Well, the machine is lubed well. With the belt off, I can very easily roll the hand wheel. That silver knob I've figured out is the stitch length and have got it freed up and functional and I can easily adjust it. I also cut off that old plug and put a new one on I've tried sewing with it, I found some upholstery thread, I think it's #69 although it doesn't say on it anywhere, found some #20 needles which seem too large for the thread. I'm looking into getting some better suited thread and the appropriate sized needles from Bob, however, I'm having a heck of a time getting the adjustments for the tensions right. Some times the thread ends up with huge loops all mangled on the bottom other times the thread is straight across the bottom. I don't know for certain that I have it threaded right. I think I have the jist of how to thread it but the top tension seems off. I'll post a pic to show what I have done. I'm a bit confused by this one bar (yellow arrows) It sits in a link on an arm near the top and has a pivot point and then a "hook" that sits in between the top of the two disks of the top tension. I think I have something wrong there. Sorry for the complete noobiness. Thank you, Kevin I can take a better picture if this one isn't good enough, I think one of the kids drug my camera off, but i'll find it.

-
Another Pad Folio
Phatdaddy replied to hidepounder's topic in Purses, Wallets, Belts and Miscellaneous Pocket Items
I just drooled on myself, very nice! -
That looks very cool, braiding is still beyond me. Thanks for sharing. ps. I think the mods will move this to the braiding section after awhile anyway.
-
Custom Edge Burnisher Review Leatherburnishers.com
Phatdaddy replied to 2Yutes's topic in Leather Tools
Order submitted. I'm excited! Kevin -
Those are SWEET. That has to be the prettiest horse i've ever seen also.
-
Blk. Stringray
Phatdaddy replied to kid terico's topic in Gun Holsters, Rifle Slings and Knife Sheathes
Sexy! -
40 Key Tags, Finally Done!
Phatdaddy replied to flyingcuda's topic in Purses, Wallets, Belts and Miscellaneous Pocket Items
I agree, i don't know how many times per project I say "well, I know for next time" or something similar. nice job. -
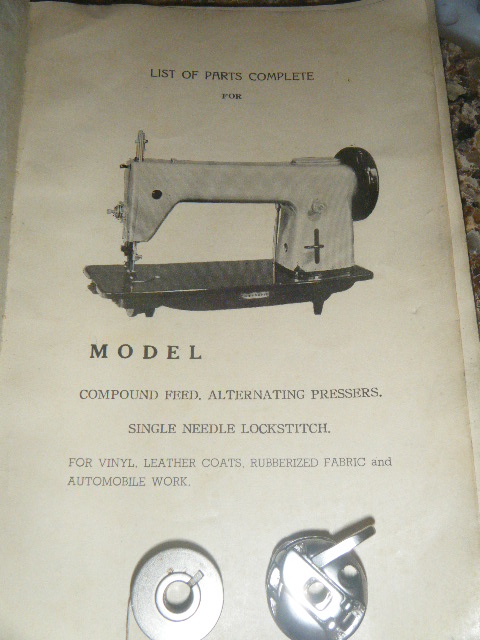
I was looking at the parts manual and on the back it says TDU N62, I think this is actually the model number and the other number that the seller gave me originally was the serial number. In any event, here are some more pictures. Thank you Wiz, I'll definitely get some more suitable oil, and will definitely post pics or a vid once I figure out how to thread and adjust this thing lol Thank you to everyone for their help thus far.

-
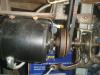
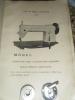
Well. I went to look at it, drove 150ish kms 1 way. All they could tell me was it worked when they stopped using it x amount of years ago. The plug was ancient and cracked so I didn't plug it in in fear of a fire or at least melting in someones home. I tried "rolling" it over by hand and it was very very tight and would move about an inch or so and everything was moving together. I talked to them a bit, thought about it a bit... and asked what their bottom line was. They said $100. I thought about it for a second or two and I figured wth, I've spent more than that on a night out drinking and lost more than that before at the casino (earlier years) if this failed it'd be no different. I got the machine home and got it in the basement. Looked it over for a few mins, then reached for the oil can. I'm pretty sure it is filled with 10w30. I know nothing about oiling a sewing machine, but everywhere there was a hole or a plate to remove I was adding oil. - side story - I was unscrewing a few screws in the top plate(where spool goes)...turns out I shouldn't have, there was a little tray with wicks that dropped off the bottom...I put it back on but it looks like it could go left or right. There are 3 wicks / I I <- that is how I put it back in, should it be like that or this? I I \ (one shoots off to a 45 degree angle. I let the oil soak while I examined the cord and plug. Cleaned the plug up a bit and plugged it in. Hit the switch the motor ran fast and quiet, no dragging or noises just a quiet hum with no vibration. I was pleased. There is a very beefy clutch system, cast iron I believe, I soaked the oil to the bearings down there too (not the clutch). By this time, I was wiping oil up that I dripped and decided to try and turn it over by hand again, to my surprise it was much easier to move and could move full rotations. I didn't do many, and then gave it more oil. I wiped out some dust and used some compressed air to blow it out of some more oil holes. (forgot to mention it was covered while they stored it with a vinyl cover so it wasn't THAT dirty. However some dust and lint was in some of the holes and cracks. I couldn't wait any longer, I pulled up a chair and eased down on the peddle, first some light scratching(from the clutch), then a little more scratching as I eased the peddle, then a chirp and it was engaging gave it a little help with the hand and off she went. No clunking, or odd noise. I didn't run it long only a few seconds and not even near opened up. I peeked in the couple holes and windows and the moving parts in sight were nicely coated with oil. I gave it more and filled up that wick system again. Looked through the parts manual and some parts that were with it. I was hoping there was a manual with threading instructions but there wasn't. I tried rolling the machine over by hand again and it is now MUCH easier, I can turn it over with just a palm and a bit of pressure, no need for a grip or anything. Couple questions if you don't mind answering, maybe I'll need to post pics( I will anyway): I still need to wire a new plug on, anything else? Threading instructions/directions. Proper bobbin threading and direction. Also there is a silver knob above the reverse with a silver lever. the knob is numbered 1-5, the level with lift up, but the knob will not turn. What is this knob and should I do something to free it up? Recommended needles and thread. I really appreciate your input, I know it must be taxing answering these questions. I'm sure there'll be more. (Thank you) Thank you greatly, Kevin
-
I hope that wasn't my pet beaver! Very nice!
-
Those are all great original looking seats.
-
http://leatherworker.net/forum/index.php?showtopic=30846 this topic shows what i think you mean on an antique car.