


wizard of tragacanth
-
Posts
573 -
Joined
-
Last visited
Content Type
Profiles
Forums
Events
Blogs
Gallery
Store
Everything posted by wizard of tragacanth
-

First holster
wizard of tragacanth replied to GnewVFL's topic in Gun Holsters, Rifle Slings and Knife Sheathes
Oh yeah... looking much better here. Yes, I said sanding block but of course, a spindle sander performs the same function. I use either one, at different times. The steps for each process can vary depending on several things. Sometimes you will have an edge that is impossible or difficult to burnish if the holster were already assembled. In that case, you have to burnish it before assembly. Any edges that meet should be sanded after the holster is assembled and then burnished together. You said that there is a gap in the leather but I cannot see it in the pic, so I cannot comment on it. Did you use an edge beveler (aka edger, aka beveler) before sanding and burnishing? At the top left of the pic, where the leather goes over the sights, it looks like there is a "burr" there, like when sharpening a knife. Beveling knocks off the corners of the leather so that this doesn't happen. So, edge first, then sand, then burnish. Where edges meet, you will only edge the grain side because the flesh side needs to be flat, to make it look like one piece after burnishing. When sanding two-ply edges, make sure to get all of the glue off or it will spoil the look. It appears that your inside stitch line could/should be closer to the gun, as close as you can get it. After a while, the glue will release and the fit will become sloppy. The glue is really mostly to hold the holster together while it is being stitched and to make the edges a solid unit. The stitching is to keep the gun in position where it should be. You are really doing well... keep it up! nick -
This is a very good point that no one had mentioned. For hand stitching, you want to buy waxed thread or wax your own. nick
-
First holster
wizard of tragacanth replied to GnewVFL's topic in Gun Holsters, Rifle Slings and Knife Sheathes
Hey... that looks much better! I'm nit-picking now but in this pic, the curved edge of the holster, going around the stitching, looks a bit uneven. It's not a smooth curve. You could still fix that. Use a sanding block to smooth it out. Try something in the range of 120 - 150 - 220 grit It won't take much at all, just a few sweeping strokes. You will have to re-dye the area, probably. Use a q-tip. I can't see the edges of the holster but it looks like they may not be burnished. Burnishing is not necessary but it does add a professional touch. Search this site for "burnishing the edges of a holster" for details. Did you put a finish on this holster, or just buff it? nick -
First sheath
wizard of tragacanth replied to GnewVFL's topic in Gun Holsters, Rifle Slings and Knife Sheathes
Oh... I like that knife. The knife and sheath make a good combo... kinda primitive/barbarian looking. I like that. I'm glad you showed the knife! I really, really like it. nick -
So, you need a snap with a longer post that will pass through thicker stock? What are you using now? Are they Line 24 snaps? Tandy Line 24 snaps have a 5/16" post. Is that enough? https://www.tandyleather.com/en/search/?sSearch=line 24 snaps nick
-
Did you vigorously buff the leather after dyeing to get all of the residue off? That could be a problem if you didn't. For the next iteration, instead of using two pieces of leather, use one long piece and fold it under the knife, then mold and stitch it exactly as you have done here, then trim off the excess. Haven't done this myself but it seems like it would work. nick
-
First holster
wizard of tragacanth replied to GnewVFL's topic in Gun Holsters, Rifle Slings and Knife Sheathes
Are there two sides on this holster? Just kidding! It looks okay for a first effort... way better than mine did. I wouldn't even show my first one. It would look better with the tape off of the gun and maybe a nice background. Since I mentioned backgrounds, I wonder how others feel about the backgrounds for pics. I like both workbench photos, with tools around and I like more "set-up" type, with a nice surface of some type (more like a catalog pic). nick -
First sheath
wizard of tragacanth replied to GnewVFL's topic in Gun Holsters, Rifle Slings and Knife Sheathes
Looks good but we have a tradition here. We like to see both sides of the project in order to really see what is going on, and we like one pic with the knife out, beside the sheath, because we like knives! Also, it doesn't hurt to give the specs on your project... weight of the leather, color used, finish, etc. Not at all necessary, but it is appreciated, I think. I appreciate it, maybe others do too. nick -
This could be relevant to your purchase if you hand sew. #346 sounds like machine thread, which I know nothing about. I believe that most, if not all machine thread is left-twist. I also believe that if you sew right-handed with a left-twist thread, it has a tendency to "unravel" as you sew. I could be totally wrong about this. Some one will straighten me out on this, I hope... nick
-
Wet form holster after resolene applied?
wizard of tragacanth replied to GnewVFL's topic in Leatherwork Conversation
Well, here are my thoughts on that... The good news is that the color is Black, so you can get away with things that you may not on lighter colors, but don't dunk the whole thing in a tub of water. Is there any Resolene on the flesh side? I hope not. If there is no Resolene on the flesh side, you can use a sponge to dampen it. It doesn't have to be crazy wet. If the color is affected on the grain side, you should be able to dye over it without a problem. In the future, top-coats should be the last step in your process. I'm sure that other people will chime-in with their advice. Welcome to the forum. You can learn a lot here. Have fun. nick -
Tandy advises to use water for dilution. https://www.tandyleather.com/en/product/eco-flo-waterstain nick
-
Frodo, you are not weird at all... you are imaginative and creative. That is a nice effect and I think that it fits your style, quite well, actually. nick
-
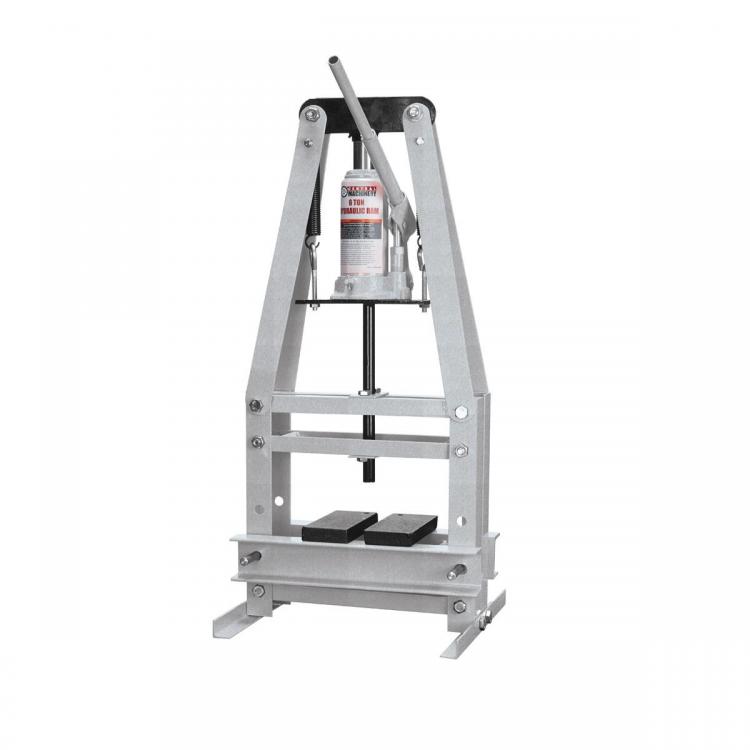
The Harbor Freight Arbor Press is rated at 1-ton and may work with a cheater-bar. The A-frame shop press definitely has the power but I just don't know how you would modulate the pressure. With no feedback, you can't know when to stop. It would work for cutting dies of course. For stamping, maybe you could rig up a dial gauge that would tell you when the press has been moved half a millimeter? I don't know. I like Matt's solution of the heated press, however, it sounds pricey. The Tandy version is $500 but I'm sure there are cheaper ones out there. nick
-
Many of us own a version of that one, obtained from Harbor Freight. I use it for my 1" maker's mark. Don't know how well it would work for a 3" stamp. It may work but you would have to make sure that your leather is well cased and you would have to really lean into the press with all of your weight... I'm guessing. You may need to go with something more beastly, like a 6-ton shop press. The problem with the shop press is that you have no feel for how hard you are stamping. The shop press is only about $20 more than the arbor press. HF has frequent sales, so if you are not in a hurry, keep an eye out. Oh, and If you are on their email or snail-mail mailing list, I think that every month they will give you a coupon for 20% off of any one item. https://www.harborfreight.com/6-ton-a-frame-bench-shop-press-1666.html nick
-
I like it! Years ago, a guy on this forum, made a holster with sort of a "granite" looking texture to it. I really liked it. He had pressed the leather into a sidewalk IIRC. Tried it myself, but I couldn't get the same look. Didn't have the right type of sidewalk, I guess. One time, I embossed some leather using a piece of canvas, to give it the look of fabric. My technique wasn't perfect but it worked to some degree. I will be trying this technique again. nick
-
Free spill stand for Fiebings 440ml dye
wizard of tragacanth replied to chrisash's topic in 3D Printers and Lasers
That is a fantastic idea and absolutely wonderful that you are sharing it! Wish I had a printer -
Sig 938 Holster
wizard of tragacanth replied to AA3JW's topic in Gun Holsters, Rifle Slings and Knife Sheathes
Well, it was a good effort. Consider that to be prototype 1. Please take my constructive comments in the gentle manner in which they are intended. The gun is sitting too high in the holster. The stitch line in front of the trigger guard needs to be lowered, at least to the point that the leading edge of the trigger is below the top of the holster. You don't want to get a shirt tail or something caught between the trigger and the holster. There is plenty of depth left on that holster. It is difficult to know how much because these guns are small, but I would say there is at least 1/2" - 1" of extra depth there. Use it. However, do not drop the gun so low that you cannot get a full firing grip on it while it is in the holster! Also, there is no sight channel. The holster has been molded too close to the slide, behind the front sight. I use a small dowel or chop-stick, flattened on one side and taped to the slide, running from the rear of the front sight to the rear sight. This maintains an open path for the sight, when drawing the pistol. Otherwise, you may find yourself, scraping leather out of the holster with every draw. As you mentioned, this leather is a little too thick for this project. Since this is a small gun, maybe try 7/8 oz leather next time. Can't wait to see your next one. nick -
For measuring, I often use a transparent orange, plastic 12" ruler, and for cutting, I use a cork-backed 12" stainless steel ruler. I have a 48" stainless steel ruler, to cut the long straight edge that I need for a strap cutter. I don't need a square because I don't make anything square, in leather. Maybe some day though, I will make a wallet. nick
-
Around 40 years ago, I dyed a white cotton T-shirt, using Black Tea, and called it my Tea-Shirt. It was a private joke. Still is. nick
-
I guessing that this is in Los Angeles, California, based on the Palm trees and that the book was published by the Autry Museum of Western Heritage, in Los Angeles. I cannot remember when color photography really came around for the general public but I am thinking it was in the early 1960's. Based on that, I am guessing that the photo could have been taken in the 1950's. However, some people still used B&W film after the advent of color. So, who knows? Puzzling, however, is that I could not find a reference to the "Autry Museum of Western Heritage" having ever existed. The "Gene Autry Western Heritage Museum" was founded in November of 1988. Perhaps the OP can cite the publishing date for the book but it is of no consequence because the photo could have been taken before or after the book was published. Today, the Roar Parade is a motorcycle gathering. nick
-
Adam savages portable leather tool box
wizard of tragacanth replied to Treesner's topic in Leather Tools
Thanks Treesner. To me, the most interesting aspect was that he built the box as a box, then sliced it to make the doors... perfect fit, every time. Also, the vertical "chemistry set" design was a very good idea. The work area is not crowded with tools. nick -
Okay, Fred... maybe on your side of the Pond. It seems like every time that I pick up my ruler, I have the wrong side up. If I need inches, its millimeters or vice versa. Ha! I once had a girlfriend from Oxford. I asked her what was the best thing about living in the US? Her answer was -- flow-through tea bags! That was nearly 30 years ago. Maybe you have them over there now! nick
-
Beeswax for holster finish
wizard of tragacanth replied to bcraig's topic in Gun Holsters, Rifle Slings and Knife Sheathes
You might want to try Sno Seal. It is "emulsified" (can't think of a better word) bee's wax... ready to use. It's pretty soft in the jar. Warm the leather, apply it and repeat if necessary. Personally, I do not want to make my holsters softer. I want to make them firmer. nick -
Pardon me. I should have been more clear. I was referring to Police Officers, who often must wrestle with the bad guy, without killing them.
-
All of my measuring tools have both inches and millimeters -- rulers, yard sticks and steel tapes. I didn't know that you could buy one that didn't. nick
