bruce johnson
-
Posts
4,408 -
Joined
-
Last visited
Content Type
Profiles
Forums
Events
Blogs
Gallery
Store
Everything posted by bruce johnson
-
I have some tools from Jeremiah too. I would make a recommendation however. You live on the east side. Why not call Jeremiah directly? You don't have to have a resale number, will have them a lot faster, shipping will be less, and you will be talking to folks who know something about the tools if you have a question. Colleen and Jeremiah are way easier to deal with for me. Another guy that makes good tools but doesn't always get the press is Wayne Jueschke in Elko. If you like geometrics, Wayne has some centers, blocks, and baskets nobody else makes.
-
Julia, I missed this one too. I am pretty much with Brent here. It seems like the different tanneries each have their own process for making strap leather. Some may be nothing more than wet split, and others use compression. Some tanneries have strap sides which are firmer than "molding" sides. Probably has to do with how they process and compress it. I used to use Caldwell Moser for molding over picture frames because it was softer and molded easier than a similar weight I was getting of HO. I probably was getting sent strap sides of HO and the CM wasn't any more than split. I have mostly used golden oak. I have used some russet. It has to do with how they color up. I talked to a couple guys who use the darker skirtings, and they say it takes more water and casing time compared to some other tannages.
-
I got an old HF Osborne Latta pattern draw gauge. I don't really collect any tools that aren't a user, and this one looks like a hundred year old plus user too. Fits the hand well, and easily adjusted.
-
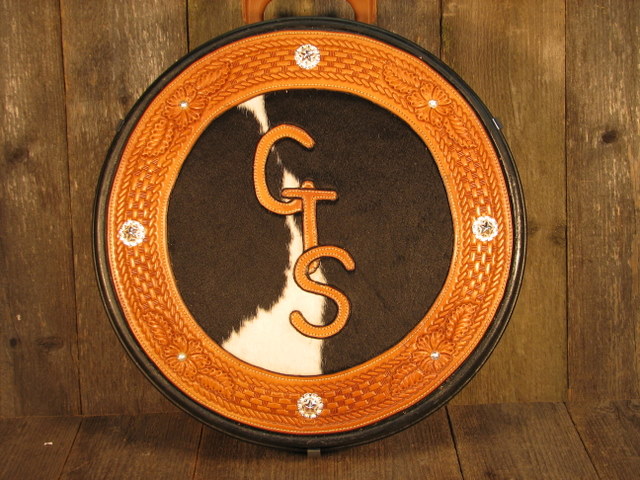
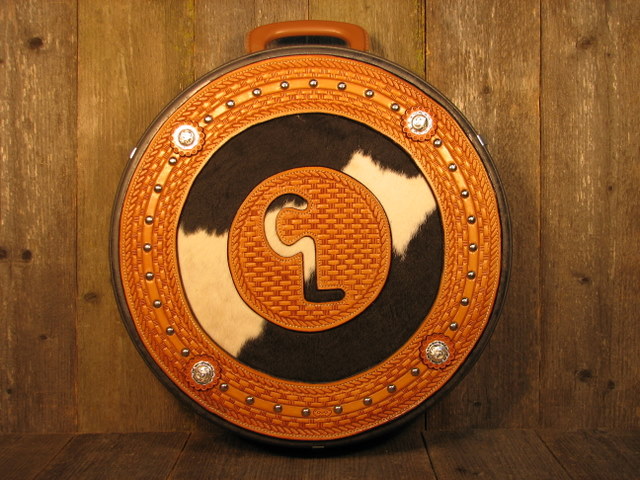
Thanks to all for the compliments. Dually, there are so many here who do so much better work I can only hope to keep picking up on what they do to keep improving. Thanks to all of them. Bob, I have been putting pockets on rope cans for a while. One night a customer and I were sitting around and he complained about powder getting in his wallet and watch and stuff when he put them in the center well. He asked if I ever saw a can with a pocket, rope bags have had them in or out of the bag for years. Nope, and I'd seen a few cans. (My first can was metal with the star embossed in the lid). He was ordering a can for a guy who had kept him mounted that fall. We stuck a pocket on it. This guy went to the buildings all winter, and I was getting a fair amount of orders off it. I called up Smith Bros to order a pretty good sized lot of cans. Cole had seen that first can somewhere back there, and credits me for the first pocket on a can he knew of. A blind sow will root up an acorn once in awhile. I was putting hoofpick pockets and baby powder pockets on can straps too. Some of those guys got back to TX and OK after the spring rodeos out here, and pretty soon a lot of makers were doing all of it. I am sure someone had done it before me too. Not much we do is new, just new to us. Merry Christmas to everyone.
-
 Traveller, I think you get more movement from a thicker pad for most riding. It sits up higher, and will tend to negate the fit of bars where they need to sit to "grip". The only place I think a thicker pad is good is on saddles that are too wide and sit too low in the front and are going to have a forward jerk. The ideal fix is not to have one in the first place. The old theory of roping saddles need to fit low in the gullet has been kind of taken out of context by some. They want no more than two fingers of clearnace under that gullet. One way to get that is to make a wider gullet and the saddle does sit lower in the front. It also sits downhill (and some go so far as to call that a "level seat"), and brings another set of problems. If you use a 1" or thicker pad, and over/under pad to rope with, then it raises your gullet up more than that 2 fingers of clearance that has been pounded into our head we need. The simple fix for that is make an even wider gullet. Using a regular pad raises everything up as a unit, and it still sits downhill. Some of these trophy saddles we see out here are too wide for what the guys ride. The pads with the inserts in the front will raise that front up a little and still let the back sit lower. Not an ideal situation, but these guys won them and they are going to use them. I also think that using two pads, and especially the cotton underpad may be an issue too. You have a slippage factor between those two pads besides the back and the saddle. A lot of the hype on padding is advertising. Just because a national finals roper uses a particular pad doens't mean it's the one a trail rider, day worker, or barrel racer needs. They are not necessarily riding the saddle they endorse either.
 -
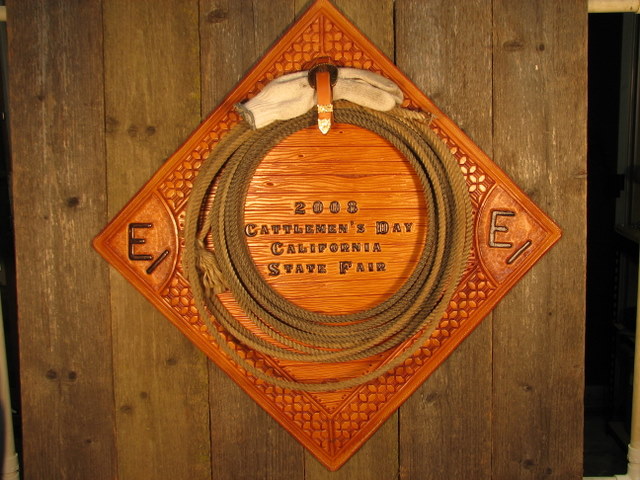
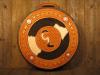
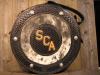
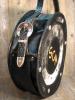
It is close enough to Christmas I guess I can show these and not spill the beans. I am attaching some pictures of some of the more unique things I have done this last little while. These rope cans are mostly variations of some popular styles for me. The rope bag is the first I have done in black. The wall hanging is the last rope and glove used by a cowboy at a cattlemen's day branding contest. He died from cancer not too long after that. His buddy ordered this done and wanted his buddy's brands tooled on it. It seems like you get one really special project every year, and this one was mine. Misty eyed cowboy picked it up.


-
your saddle pad of choice?
bruce johnson replied to Traveller's topic in General Saddlery Discussion
I don't like the pads that fold and lay flat. I like the contoured felt pads. I have had the Tod Slone's, Toklats, and a few others, and really haven't seen that much of a difference. On a wider fronted saddle I have had good luck with the Ricotti pads. They will fill that area in a little and make a wider front saddle more tolerable. A few guys out here who have trophy saddles with those monstrous gullets like them. The have a tapered gel insert under the bar area on about the front half of the pad. If I am riding my narrower cutter on my wide horse, a thin countured felt with a wool navajo over the top works. I try to fit my pad setup to the horse and saddle. It is the one thing I have more immediate control over. -
Joanne, Got any pictures of where the hair is getting rubbed out? Is it over the spinal processes (middle of the back) or off to each side in the loin areas? If it is the loins, both sides equally? Is it swirling or messed up when you unsaddle him? Is it just thinning or falling out. One indicates movement to me, and the other is pressure. I hate to bring up "dry spots", but are there any? (granted, with the snow in background, getting a decent sweat pattern might be hard) What's his back look like 5 minutes after the saddle is pulled? Tried him without the cotton pad under the impact pad? I have pretty much found the saddles that bind from laces over the middle would have done it before 6 months no matter how he moves now. My logic (not always logical) tells me that as his back develops and he rounds up, he should be lifting that up more than have it binding now. Hollowing out should bind more. I'd agree that not lacing all the way to the back is best in most cases. I don't do it myself unless the customer insists on it (one was dang sure not yielding), and then I change my skirt pattern to flare up. I saw results of one of the early pressure pad studies several years ago that convinced me of that. The thing I just can't wrap my brain around here is this. He is moving better, he is being treated by the physiotherapist and doing better, he is wearing off hair now like he did with the last saddle, and he is not perceptibly sore. Three of these add up to me, one doesn't. Interesting problem, and it is going to be interesting to see how this works through. Thanks.
-
Steve and Joshua, Same from us to you and all of the great folks here. I might however suggest beef on the menu.... Edit - Steve I will however be enjoying a bit of spirits from north of the border - Crown or Pendleton. I see they have a $160 a fifth special Crown Royal (not the Special Reserve), but Rundi tells me "some things you will just have to wonder about".
-
Steve, Thanks for the tip. I can see one less scar on my thumb doing that. Have a good Christmas.
-
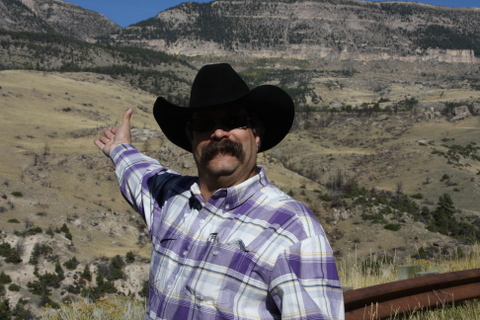
Of course you gotta believe a guy with a big hat and a big mustache! Baxter is one of the guys I look up to. I wish I had the pic of him and me in swimming suits in Manhattan, KS back about 25 years ago. At least one of us amounted to something.

-
You can also use a fine point soldering iron to trim the tags with. I try to pull both tags to the backside on machine sewing and do that. It burns a little knob on the end that resists pulling back through. Shoptalk sells a little battery operated cautery pen to use as a thread burner. I use them a bit in my other job. It cuts clean and works well but doesn't leave a knob, it tends to cut flush. I like that wrap the needle too. I had an old Irish harness maker show me that. He wrapped once on every stitch. He put 2-3 on the last couple depending on how thick the leather was. He taught me to tie in buckles, took my awls and made darts from the old ones, rasped my stitching horse jaws to be proper without asking, and we enjoyed a wee bit o' Bushmill's Black. A grand time was had that day....
-
Joshua, It just keeps getting better. Good looking work. Yeah, they'll like it. Sehr Gut.
-
It really depends on how much leather you are going to run under it, how much you will use it, and your budget. When you said saddle bags I am thinking that you are going to prefer a cylinder arm machine for them. You can always build or buy a flat bed attachment for doing other stuff. I would shy away from the 440 and similar machines. There is a thread somewhere already on these. If you are going to spend that much on one machine, then pop for the extra $500 and get the 3000 or whatever machine there is in your price range. Personally I had a cast iron Boss and liked it for what it did. When I bought mine, there was no Toro 3000, nothing that would sew close to what the Boss did within $3500 of the Boss' price back then. I had to buy it out of necessity and budget, and would do it again in a heartbeat in the same situation. My business outgrew the Boss and I sold it. For the $750 price and 10 minutes away, that is a pretty good deal on the Boss. Tippmann will inexpensively rebuild them if they ever need it and warrant it like new. There is a little bit of a learning curve for the Boss, but there is on every other machine if you haven't run one too. I taught 2 wives and a 15 year old son to sew on mine in about 5 minutes each. If you want a powered machine then you have some better priced options than I ever did. If two machines are an option, the Boss to sew the things you need a cylinder arm for, and a flat bed for the other stuff might be a good way to go. A good flatbed like one of Artisan's or Ferdco's new ones, or a good used Pfaff 1245 might be the way to go to have the best of both worlds on a decent budget. I wish someone had told me that years ago instead of trying to make one machine do everything. My thoughts.
-
Gum erasers are those brownish tan erasers. I use one of those blocks made for cleaning off sanding belts. That is crepe I think, and works well too. Just kind of pulls the hair from under the stitches. Another tool that works OK is the bent stylus end of a modeling tool. Just kind of run it so the bent end is next to the stitchline and run it along the stitches under the hair kind of lifting as you go. You may still have to pick some hairs with whatever you do for the best effect. Not everybody does this, it just depends on how finished you want to get. They sure sell a lot of production overlaid belts and purses with hair buried under the stitches.
-
For what it is worth, Bob Douglas doesn't make jerk needles. (Sorry, couldn't resist). Most all of the jerk needles seem to chuck up into about anyone's awl hafts. You can get hafts from most all suppliers from TLF to anyone who carries Osborne to Dick Anderson, Barry King, or Bob Douglas. You can order the jerk needles from places like Weavers that have some parts for the needle and awl machines. I got a few kind of for the asking from an old shoe shop. I'd check around from a guy like that first.
-
Just to throw out another name - Sheridan Leather Outfitters sell some really nice awl blades. Can someone refresh me on who makes them? Bob somebody I think. Yeah Rickey, I would have to say in four or five years of leatherwork internet leather groups, this has been the most unanimous reply for a maker or supplier of ANYTHING I have ever seen. They really are that good.
-
Johan, He has sent some to us at the cowboy museum as well. I am sure it is from the same guy. He has been around the country a bit and has done saddles in different regional styles. Some are quite good for what he has to work with. In one of his letters he said he was doing some miniature holsters in historic patterns too. Thanks for posting.
-
Luke, It sure sounds like a problem with the motor. My servos make no noise when on, and very little if any when sewing. The dial on mine go from almost a stitch every 5 seconds to ripping a strap out of your hand.
-
WILD COLOR COMBO
bruce johnson replied to Elton Joorisity's topic in Clothing, Jackets, Vests and Chaps
Elton, If he doesn't like the colors, she just needs to find another boyfriend who does. They are looking good from here. -
Ed, that concho turner is a decent enough tool. It is not for Chicago screws in any great fashion. It is alright to do what it is designed for. It will loosen or tighten screw back conchos on saddles. I can't get it to really get a concho as tight as I like or to budge one that is set. Once you get one loose or are starting one in, it saves a lot of finger twisting. I still have to finish up or start one back out with a padded set of channel lock pliers. I wouldn't jump on it a must-have tool, but it is sort of handy at times.
-
Wolvenstein, There are really a lot of variations in upholstery leather. It can be full grain, top grain, corrected, or finished. By itself it seems like uphostery leather has no standards. It looks like you have a leather that has had a pigmented finish applied. Heres a couple links that might help explain some of the various definitions and processes - Hewit and Chesterfield. I came onto this when someone sent a few of us a warning about some upholstery hides they got to make chaps out of. They bought three hides and cut into all three of them before they found the finish peeled off. No returns.
-
Harvey, I guess I didn't know they still made it. I am sure that formulation has been changed somewhat. I liked it alright when it was Drakes. It was a little thicker than water. I used to kind of slather it on with a cellulose sponge, and kind of keep working it around until it looked alright then leave it alone. It would darken up the overall finish a little. Good for coloring and finishing linings that you might not want to oil and have the oil leach into papers.
-
Chuck, Someone already did it for us, but it is a book. I have it and I use it quite a bit. I am sure there are errors and definitely some omissions, but it is pretty thorough. Here's the link - Old Saddlemakers Book. If you look at the old ones, worth having for sure.
-
I have just started looking into this deal too. Some of these processing deals are nuts. My local banks has enough fees, charges, and set ups that even with the lower percentage I am about $400-600 behind the 8 ball to start every year. It really looks like the Propay deal from what I can read is a better deal than the virtual terminal from Paypal. A few good testimonials for it here. From the other side of the coin, has anyone had a bad experience??