


bruce johnson
-
Posts
4,401 -
Joined
-
Last visited
Content Type
Profiles
Forums
Events
Blogs
Gallery
Store
Everything posted by bruce johnson
-
Holly, smallboxhardware looks like it does have some harder to find hardware, but for 4 binder clips, I might think shipping could add enough to take some of the advantage out of the deal. Ohio Travel Bag has clips too, but by the time you do a minimum and pay shipping, cheaper to go to Office Depot or department stores. You can buy good quality binders and drill out the rivets for less money than ordering, plus you get the stiffeners.
-
I have always had machines with a speed reducer and also put small pulleys on the motors. I noticed more "power" on the wheel when I got the first servo motor and put it on the Adler. I used to "feather" the wheel by hand going into a corner to slow it down, and hand wheel to get it started on some heavier leathers. With the servo motor I couldn't feather it nearly as easily or start it by hand, it would throw my hand off. With the low speed I didn't need to do this nearly as much anyway. It was kind of like breaking a habit of reaching up to the wheel. Another tip I got for speed control from an old guy. Put your whole foot on the pedal, not just the front half of your foot like you'd do on a gas pedal. Load your heel to stop it. It gave me more control that letting the return spring slow things down.
-
I've been playing around with lighter sewing machines to sew up interiors and doing some repair sewing with lighter thread. I have tried several machines in the stores and found the Singer CG 500s do a pretty good job on even heavier leathers. The 1952 Singer 66-16 sitting in my living room does just as good a job, and at least with the upholstery thread I've been comparing machines with seems to do a tighter stitch even. I just got some spools of 69 thread, and have been told it will take 92 also. Seems like the stores all stock a leather needle in size 14, and have a deer in the headlights look when I ask what thread size that is for. My charts all say to use a #100 or #120 needle, but no cross-reference to other equivalent sizes. WHat is the Singer number comparable to the #100 or #120?
-
Randy, LOL, and on the other group you posted this to, they got talking about tanned horse fronts and using it to line wooden legs in about 2 jumps also. Must just be one of those topics...
-

stirrup leather stretchers
bruce johnson replied to lelk82's topic in Saddle Supplies, Tools & Trees
Tim, I stretch them with the fenders on. It is probably more of a shaping deal and mating the fenders to the leathers though. I soak and prestretch my leathers first on a long board. Then dry and cut them to the finished size. While the fenders are still cased from stamping I shape them instead of letting them dry flat. Once I put them together and on the the stretcher, there is not a whole lot more stretch taken out, but it helps to "set" the twist and the outside stretch for the stirrups to hang more level. -
stirrup leather stretchers
bruce johnson replied to lelk82's topic in Saddle Supplies, Tools & Trees
I've got one and like it pretty well. My wife talked me into it with a stand and both have been worth it for me. It looks like he made the handle out of some heavy SS strapping welded to the collar and then bolted the turning handle on the end. The collar above and below the top bar have set screws that bind them into the threaded rod. I like his design although I have seen some homemade ones pretty handy too. Some have jacks instead of a screw mechanism. -
Best tool for cutting out scalloped pieces?
bruce johnson replied to RunningRoan's topic in Leather Tools
To clarify the question for me. Are we talking half round scallops or "flares" for the conchos to sit in? I guess I was visualising flares on a nose band. browband, cheek piece sort of thing. For regular half-rounds you can take a round punch and grind half off like Brandon said. Do it slow and keep it cool and it works. The end punches are not half round. They have longer legs that go part way down the straps to help line up. You can gring them off a little. Be aware though, some makers round end punch cutters also are not a true half-circle, but more elongated. -
Best tool for cutting out scalloped pieces?
bruce johnson replied to RunningRoan's topic in Leather Tools
I use an old head knife that has been pretty used. Pretty short front to back and the tips are good. It maneuvers a little tighter than my bigger knives. Another knife I still use sometimes is a grapepickers knife I got at the local surplus/supply store. Basically a hook blade knife with good steel, like like a lino knife but smaller. You pull the knife and it gives me maybe a little more control on really tight curves. I used to cut a lot of shaped pieces with that grape knife. Now it seems like I am regressing and using older tools more and more. I use draw gauges more than my wooden strap cutter, the round knives more for other cuts, etc. -
saddle fit question
bruce johnson replied to STPENNER's topic in Choosing the Right Saddle for the horse(s)
Pete, Welcome to the forum and thanks for jumping right in. Feel free to go back through any old posts and add to them too. Thanks for your insight on this thread, and a situation I think a lot of us deal with. You can have a pretty good tree combination for the horse, and if they set it in the wrong place, it all goes for nothing. As an aside, if you are the Hennessey who makes the gear - thanks again for joining. Your reputation precedes you. This is an area several of us deal with kind of on the fringes, but the insight of those who have done a bunch is sure welcome. Pretty sure it is a Hennessy bareback rigging one of my best friends had in his bag when he died. His mother got it to me to put in our local cowboy museum. If it is and you are interested, I can get you a picture and the museum info. -
Thanks for finding the forum and jumping right in. Here is a link to a discussion we had on bronc halters a while back and it drifted to flank trips. - Clink on this and it should get you there - Flank Strap Buckles
-
Troy, I guess those bugs are pretty common around the gulf coast area. I have had other guys tell me they use synthetic woolskins for that same reason. The weevils or whatever they are don't bother synthetics apparently. I kind of remember a pleasure/reining horse trainer from the southeast, maybe Georgia promoting the foam lined saddles at the QH Congress in the late 70s. I got to take apart one of the foam lined saddles a while back. I want to say it was from Denny Sargeant or Pard's. This particular saddle had been through a few tack sales and finally a buyer noticed it was loose and wanted to see what was up with it. The fork was loose at the base. He opted for me to remove the silver for him, and just throw it away and learned "when a deal looks to good to be true...". I took off the bottom lining for grins. The foam was starting to crumble and powder in spots, much like some of the seat foams or the firmer foam in some splint and bell boots. Probably not much difference than woolskins that start to wear at pressure spots and get thin.
-
Leather Shop for sale.
bruce johnson replied to froginthefog's topic in Saddle Supplies, Tools & Trees
One of those deals you're just gonna have to go look at. If the handtools are all Gomphs or HFOs in great shape, they could almost be worth the dough by themselves. The splitter just depends on what kind and condition. Three in ones are fairly common and handy to have one for the skiver if nothing else. Benches are good if you don't have any. Hardware could be alright, but usually not a lot of resale value in it. If there are old stamping tools, they could be a great addition too. Depends on who made them and condition. Notice how I'm avoiding the machines?? The Singer patch machines are common as dirt. Every shop had one seems like. Some are still functional and some aren't. Some are finicky and some aren't. They sell on ebay for a hundred or so up to $500 in good shape from a reputable seller. The Randall might be OK as a user. Again depends on condition and who wants to buy it in your area. These are not easily shipped. -
To get the easier one for me out of the way first. I use woolskins. Haven't ever used felt, but would have to question some of the reasons for it. I know it was used for either supply issues (war rationing when wool was going into war production) or cost issues on lower end saddles for the most part. Not sure how much of history it has ever had. Skirts have a few functions. One factor that is sometimes overlooked is the protection from rigging hardware and distribution of pressures of the riggings, latigos, and billets. One of those things that matching the right hardware with rigging type and skirt size and plugging would all be inter-related. No defintie answer to just skirt size without considering the other factors in play there.
-
Trees Explained<--that's what I want.
bruce johnson replied to Echo4V's topic in Saddle Construction
Broken forks off the top of my head. One was torn off intact after the horse hooked a squeeze chute handle under the gullet and took a jump. That was when the guy decided it was time to leave the buggy. One was broken next to the horn - flipped over on in the salebarn alley. One was a barrel racer with fiberglass that wiggled after it fell off the top saddle rack in the trailer to the driveway below. Not really broken except at the joint where it was stapled to the bars. Most of the breaks I see in users are in the bars. Most all of these breaks have occured from being flipped over on. I can only think of one that had scored rawhide. Several of the oldies I have worked on have the higher thinner cantles. Seems like the common break on them is the upper part breaking across the width of the cantle. -
Darryl, Actually I think for me this is one fo the better products they have come out with. I used the old HiLliter some. I didn't like it because it was too dark. I used Leather Glow but it was too light. No, I this isn't about 3 bears or anything. I did without special colorants and only used a final sealer. I used to like Drake's X1 and rediscovered it was back - right before they took it off again. I tried a few shades of the new HiLiter. I tried the coffee brown and it was bit too dark, the briar brown is my favorite. I use it a little differently than many do. I have cased my leather in lexol and others. I have NF oiled it. I have sealed it with a couple coats of LeatherSheen and let it dry. I used to like the way it looked right there. Now I take my briar brown and dilute it about 2 parts BB/1 part water in a squeeze bottle. I squeeze it out on a cellulose sponge cube and wipe it over the piece and squeeze a bit as I go. I want it to puddle just slightly in the cuts and low spots. I wipe over the high spots lightly to remove any up there. I leave the piece undisturbed and let it dry. I wipe on another coat of LeatherSheen to seal it. The sponge for the final LS application will slightly lift a bit of the dried HiLiter but not much. A guy who likes to clean an airbrush could use that for the final seal, I toss the sponge and cleanup is complete. I tried it like I was told first. Resist/apply full strength, wipe off quickly/ wipe off that part that got over the edge/ do all the stitch line because some got in there in one place and won't come out/it all wiped out of a beadline and you have to reapply. Now if I get some in the stitchline it looks alright. The water gives me a chance to wipe over applications before it stains something I wish it didn't. There are a lot of people where finishing is religion, I like simple by the time I get to that. The one experiment that did not work. I tried to mix the HiLiter with some LeatherSheen and come up with roll your own X1. It resembled Mountain Dew/Copenhagen spit.
-
Ed, Norm's slicker that I have is made from 1" stock. It is the first one he made and I am not sure if he still uses the same stock. I used to go through one of Weavers about every 6 months or so. I am still on the first one. Seems like I have had it at least a couple years?? It's the real deal.
-
Leather picture frame. Small slip cover to go over a "brag book" for snapshots. These are two pretty standard baby gifts for my customers.
-
I was taught this tip by a Tandy manager several years ago. It has worked well for me. The tip should just protrude from the leather. Forget the domed setter for now. I set the piece on a small bench anvil. I use a normal ballpeen or regular hammer - usually a 16 oz is handiest on my bench. A good smack or two sets it. If I want a "dome", then I grab the domed setter and dome both sides (I use the double capped rivets) after the rivet is set.
-
Pictures from the Boot and Saddlemakers Show
bruce johnson replied to Rawhide's topic in Leatherwork Conversation
I haven't been to a IFoLG show yet, but we have been to Sheridan 3 times, Wickenburg the first year, Reno a few times, and Elko for Ferdco's show. If I had to pick one, Sheridan would be it for the first time. I hear from suppliers that do most all of them that Sheridan is far and away the biggest in attendance and definitely vendors. More total classes, more variety, and more sponsored social events. This past year had issues because the management was late in getting out class info and the schedule in any timely manner. Hopefully that is going to be fixed. I didn't hear the foot traffic numbers, but class sizes were down because of that. Three vendors said sales were average or better compared to past Sheridan shows. I got my money's worth out of every class I have ever taken at these shows. It does help to research the class a bit to see if it is over/under your skill or expectation level. The social events are a blast, and a lot of friendships come out of the classes, socials, and vendor booths. -
Pictures from the Boot and Saddlemakers Show
bruce johnson replied to Rawhide's topic in Leatherwork Conversation
Marlon, Thanks a bunch for posting the link to the pictures. I appreciate it, and a special thanks for showing pics of some of the exhibitors booths. Nice to see faces of some friends too. We haven't been to Wichita Falls yet, but plan to. I hope this kicks up some interest too. A lot of people on these lists wonder what goes on at these shows, or asks "where can I get this or that?". Folks, this is it in a nutshell. You can go to these shows and put your hands on this stuff. People wonder what makes some old tools better than what you see in the catalogs now. You can handle them. You can look at stamps by Bob Beard, Wayne Jueschke, or Barry King and see the differences. Sit down and test drive mauls from a couple guys, swivel knives, whatever. Everyone is welcome. Attendance is the lifeblood of these shows. It has been worthwhile at every show we have been too. The friendships with vendors and other attendees have been just as valuable. Seeing the works on display is just the icing, the cake is what you can take home. -
The splitter has been sold. Thanks for the inquiries.
-
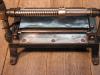
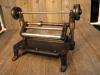
On my recent travels I picked up a Krebs splitter and an old museum kind of piece - an HF Osborne Chase style splitter. I already had two Chase splitters, and don't need them all. One Chase has some sentimental value, and I am offering the better one for sale. It is a CS Osborne 8" Chase style. For those who have never used one, they are the most reliable splitter style besides the Krebs. Like the Krebs, they have top and bottom rollers feeding your leather into the blade. It just can't flip up and chop like the other pull through styles. It can't go anywhere but into the blade. Everything can be adjusted with a flat blade screwdriver as the only tool. The set of the rollers as the blade wears, the pitch of the rollers, position of the latch spring - everything. The handles on top adjust the height with a simple turn. Anybody who has asked about a splitter on these lists knows how happy I am with these Chase splitters. This particular one I am offering for $400 plus shipping. That is less than new models of other styles that are not half the splitter this one is. It might be a little higher compared to some other Chase pattern splitters you'll find, and there's a reason. I have seen a lot of these splitters in several shops, ebay, and from the guys who resell quality old tools. This is one of the cleanest, which anybody can clean one up. I have yet to see one that has any more blade left than this one though. Look at where the adjustments are, this one has its whole life ahead of it still. It's a good one.

-
A few factors from where I sit. First off - Is there someone close by that can teach you what you want to learn? Some makers are not really good at teaching. Some are just too busy with maintaining their own production. Some just don't know but the way they were taught. Just because a guy makes saddles doesn't mean he can teach you how to put in an all leather groundseat, a strainer seat, a skirt rigging, plate, one piece fork and seat cover or other variations if he doesn't do them. There are some really good guys at doing each of these, and you may have to travel some to find the right guy who can teach it. Classes - I did the saddle week at Sheridan a few years ago, and it is funny how many guys on this list did it that year. We all probably learned as much from each other as we did from the instructors. I got my entire money's worth when Don King stopped by and held court for a while during a break. A couple of special times spent around him, and that was one of them. There are classes at several shows. You can ask away. You may or may not do anything like the instructors, and may not after you leave. At least it makes you question what you think you know. The biggest thing I have learned in the last few years is how many different approaches there are to do things that seem to work. The old "closed shop" mentality seems to have faded from the guys I visit and talk to. Yeah, they may not be telling me everything, but nobody has withheld the big stuff. You can pick stitches on a few skirt relines, then someone tells or shows you how to skin the topstitches before you pull the wool. You appreciate it that much more. I am pretty lucky. I have had access to some old guys who can tell you how it used to be done, and on this list you can talk to some modern makers at the top of the game. Not everyone agrees and shouldn't. I am in an area kind of thick with saddlemakers on several levels. I have only ever had one guy totally refuse to tell me something, and that was pretty minor. I used to get a lot of telephone advice, pre-internet. I have had guys invite me to "come and spend a day, and I'll show ya how I do that". They have universally refused any money. Later I have either sent them a pair of monels, something I have that we talked about, or a gift certificate for a toolmaker. It has been worth that and more in every case. I am lucky with my wife too. She is pretty tolerant of me visiting folks when we're traveling. Last spring we stopped by to see Clay Miller in Rapid City. He told me that I should really go visit Ken Nelson. About 4 hours later we left Ken's. We stopped by Keith Pommer's and looked at machinery and tools for a few hours last week. I always end up smarter after I have talked to Bob Douglas, too. Last week we were at a dance in Cody WY. We met Keith Seidel there and he invited us to his shop the next day. Had a very enjoyable visit that morning. Most all the people on these lists are pretty approachable, and some of the best talent in the country is right here.
-
zippered rifle case
bruce johnson replied to Hilly's topic in Gun Holsters, Rifle Slings and Knife Sheathes
Hilly, I can only think of one item I ever did where I sewed the zipper directly to a case. I sew to gussets. I don't much like to use vegtan for most gussets. You either use thin enough leather that the integrity might be an issue or score it for the sharp crease to stand up. And that score might be the weak link. Another downside is they stand up once you do that and can be a pain to get things in and out of unless the piece opens flat. I like to use something flexible. On planners I go down to thinner chap. On bigger things like briefcases I like to use either heavier chap - 4/5 or so, or hair-on hide. I did one for a guy who is liking Diamond Tan better. For rope bags I use the heavy chap if they want a bag that collapses or my preference - Siegel's Diamond tan. The DT has a little more body and doesn't slouch like chap, but not as firm as latigo. Holds its shape, but you can reach into it and it moves out of your way. All of these can be had in a color that either matches pretty close, complements, or contrasts depending on what you want. Remember if you want a match, your vegtan will age and darken faster than the chap or DT. -
Exotic Ethics?
bruce johnson replied to badLoveLeather's topic in Exotics, Reptiles, Furs and others
I come from a livestock background, and am just as narrow minded as anyone. Hides are a by-product, although now they call them "co-products" and animals are "harvested". I worked on the "kill floor" of a ''slaughter plant", so I guess that makes me a senior. I have no issues with animal rights people if they are informed and actually have seen the issues for themselves or might be affected. I had issues with people in San Francisco or LA, people who will never own a horse or be affected in the least, voting and telling me how I can or can't dispose of a dink horse. That was the the start and it ain't over yet. Legislated animal rights is not probably the answer to most of these issues. Ask the folks on the CA Monterey peninsula who voted to ban mountain lion control. Their dogs and semi-pet deer are being eaten in front of them now. Most of the exotics we deal with are not endangered, and that distinction is sometimes lost on the uninformed. The non-farmed exotics covered by the CITES program may not be perfect, but it is probably closer to the bone than other systems. Our generation didn't make all this mess we are in, but I am not thinking we need to go back to ripping out fence and great buffalo herds on the plains, or things like that. World-wide the whole thing is off - prey animals with limited territory and feed, limited or too many predators, and disease due to concentration. Things got off at times without our help too. If they are managed by controlled hunting (and then utilized) to enable the rest of the species to at least maintain, I have no issues with that. If those hides are used and not fed to bacteria, bugs, and buzzards - so much the better for the by-product users and the awareness it brings.


