bruce johnson
-
Posts
4,401 -
Joined
-
Last visited
Content Type
Profiles
Forums
Events
Blogs
Gallery
Store
Everything posted by bruce johnson
-
Bruce, who has been out of his shop for 3 weeks is now mostly done with the electrician, and has spent 2-1/2 days of insulating, sheetrocking, finishing walls, trim work, and doing it all with my lovely bride as helper. Yes, I am bleeding, and we are still speaking. On the down side, I didn't find the 4 or 5 Gore stamps I was missing when I moved in. On the upside, I have a lot of chap leather. Some I knew I had, some was "Holy crap, I have 5 sides that fell behind the rack?!". Before I resort back to the same ol' system, how would everyone else store about 12-15 sides of mulehide and chap leather to keep it neat and organized? Thanks
-
I like that one too. I have heard a couple different guys recite that one, and they both give credit to Gary McMahan for writing it. A bit of trivia. Gary had a yodelin' dog that performed with him (died a few years ago), and has written some songs that receive good play from the singers we like.
-
 I am not particularly crazy about gum trag. It does ok, but for me was always a mess to apply and get it slicked before it was too dry. I kind of like it for edges with a veg-tan and chrome tan mixed. I hit a decent way to apply it a couple years ago. I got one of those Weaver dye box things meant for holding dye for edges, one of the trades where niether one of us got anything really great. In my hands a total messy, ill-designed, too deep in the well, piece of fecal material (* credit to Greg G for the term) for dyeing edges. However when filled with Gum T it lays down the right amount, easily, evenly, and quickly. Cleanup is a breeze because I don't. I snap the cover back on, and add more as needed to keep it up to the roller level. I like the dye Box and Gun T a little better now, but still not my go-to first choice for most things.
 -
Art, The problem I see with the modified flaring tools are that the step down from one size to the next is too much. I start with a big size go to the next smaller to round it in a little more, go to the next and so on. I have a 9 hole Osborne and it pretty well does what I want. Five years ago I paid about what Greg is selling his 11 hole for. If I wasn't in the middle of shop remodeling and fencing, I'd buy his rounder and his strap creaser.
-
Noah, I use the one that Leather Factory sells or used to sell. I see Weavers have it in their catalog for $26.60. It doesn't have a lot of reach, good for strap work. Handy by the splitters and skiver.
-
Dave, Their webswite is http://www.leatherworksproducts.com/. It has their contact info. I thought they had moved to Stockton a few years ago. Looks like they don't sell retail, but a phone call to them might put you in touch with a local retailer over there.
-
Stainless Steel Nails
bruce johnson replied to jwwright's topic in Saddle Identification, Restoration & Repair
JW, Sheridan Leather Outfitters sells them in reasonable quantities. -
Shelly, Just from my experience, I'd go with the Optivisor. I know their optics is probably the biggest reason. I found them at a couple places around $30 on-line. The quasar light attachment for $25, and the loupe attachment for $7. That light looks a lot handier than the one I tried out.
-
Shelly, I wear the progressives too, and can never tilt my head just right handsewing anything. I used to make fun of mall-walkers and people who looked over their glasses. I don't do the Sears to Penneys laps yet, but I look over the top of my glasses a lot. As far as magnifiers, I have used a few different surgical loupes that fit on glasses, and the flip-down that goes on a headband. I am with Troy. My favorite is still the Optivisor I have used for 25 years. It flips up or down with the back of your hand or arm, is tolerably comfortable, and the lenses are really pretty decent. Most affordable to try for sure. You can wear glasses under it if you need to. Like I said before, I usually flip it up to find the tool or instrument, and then forget to flip it down to use them. I tried a knockoff with a light source on either side, didn't like it. Enough spread to have two lit areas on either side of where you really need it.
-
Shelly, I am with you on the bifocal deal for sewing bindings and horns. They aren't designed to tip your head in that direction. I use the magnifiers for some surgeries. I have used from the low end Optivisors up to good quality clip on lenses. The problem I have with them mostly is that they have a fixed focal distance. Some may be as fixed as 16-18". If you are outside of that, you are blind. I can see the area, and not be able to tell one tool in the using rack or one instrument from another. I look around or under the lens to find them, and then continue to look around the lens to use them. We gave a ride back fromKings reception at Sheridan to a guy from Kentucky. He was there selling kind of a decent little light and lens setup. His business is QED, Inc. They advertise in the LCSJ, and I just found a web address - www.qedisit.com. For lights, if I need a focused area light, I have an exam room floor lamp like the doctors blind you with in the little rooms. They are a floor lamp with a stiff gooseneck up higher. They can be had at medical surplus and used medical equipment suppliers. Kind of handy around a sewing machine at times, and will really light up under a Cheyenne roll. If they are not shining directly at you, they are good.
-
Can someone tell me which is best, is there a difference?
bruce johnson replied to Noah's topic in Leather Tools
Noah, I had an American splitter. I haven't owned or sold a Landis splitter. The American feeds from the back and the blade is on the front as you crank it. The Landis 30 I recall (and the ebay picture backs it up) feeds from the front and the blade is in the rear. My experience is that the American feeding from the back (and the advice of my old tool pal who was in the leather business for about 60 years) is more versatile. As I said in my other post, softer leathers, even 10 oz latigo, can wad up against the blade and not feed well. You can tension it a little from the front and help pull it through. Actually for most latigo I would start it with the crank, let go, pull it through, and let the handle freespool. That is harder to do with the Landis. My nod went to the American. I bought an Landis crank skiver and that will never leave my shop though. The downside with some Americans - there was apparently a minor casting issue with some of them. The table the blade sits on and bridges on some has a bit of a "bow" to it. When tightened to the frame some of them developed a hairline stress crack over time . Once the blade is in place it bridges that. I have seen it on several of them. Some guys have fixed them. Others left them because they are solid enough with the metal and blade, they aren't going anywhere. I heard about that casting deal from the guy at Pilgrim Shoe and a couple others too. If you get an American without a crack, that is a plus. Mine had a crack and a shoe shop bought it for something like $585. The crack didn't bother them. As far as resale, ebay seems to set the price standard now. Nobody is stealing any of them there. You can buy them from a guy like Keith Pommer, Ron Burkey, Bob Douglas has had some at times, and I'd be pretty confident. Just depends on who is selling and how fast and bad a guy needs one. -
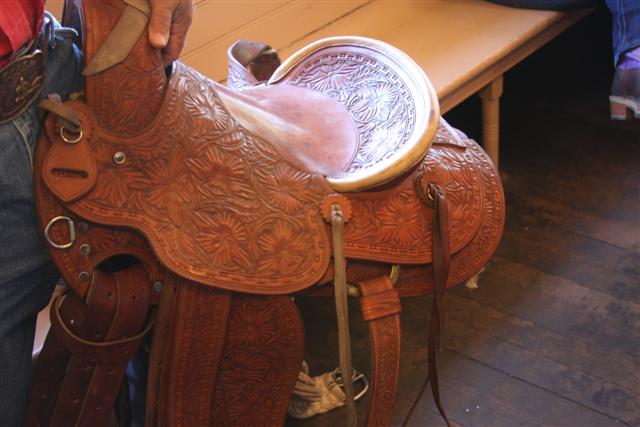
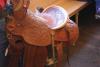
Steve, This saddle was bought in a San Francisco bay area shop or at the Cow Palace in the early 70s as the memory goes. The entire back cinch was carved, under the gullet - there weren't a lot of unstamped areas.
-
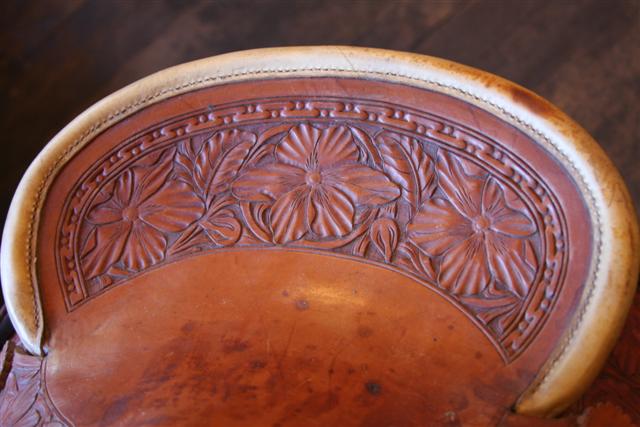
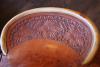
This is a saddle that came through the Cowboy Antique Roadshow today. It is an unmarked saddle, but we have some suspicions who made it. We have some pics going out to some collectors who might have an idea too. I thought the border was kind of an interesting use of the Carlos border tool. It was stamped adjoining to make the dot in the center of the impressions.
-
Cowboy Capital Challenge
bruce johnson replied to bruce johnson's topic in All About Us and Off Topic
Blake, Here are some from the appraiser's collections. Some people are pretty funny about having their individual items photographed. I am posting a picture of a saddle over in the saddle section. It has an interesting Carlos type border stamp pattern.
-
Randy, Hansen's have a lot more than is on their website. Best to call and get a catalog and current price sheet, unles you know what pattern you want. I'll agree with Russ, Dale is one of the secrets of Texas. He does some really nice work, and is a good guy in the business too. He puts out a little catalog and worth having that too. There are a lot of guys doing silver, but for the affordable/quality combination these two suppliers are right up there.
-
Cowboy Capital Challenge
bruce johnson replied to bruce johnson's topic in All About Us and Off Topic
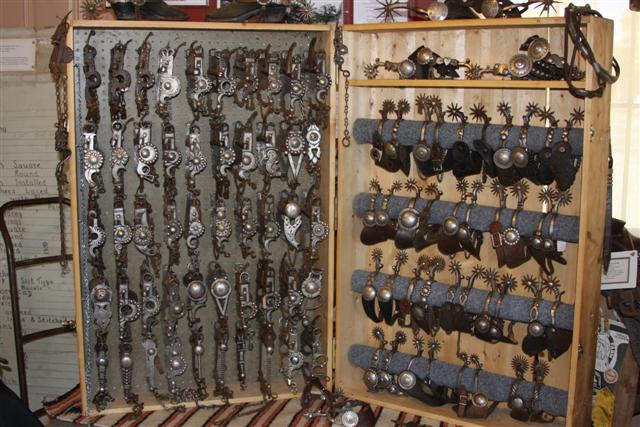
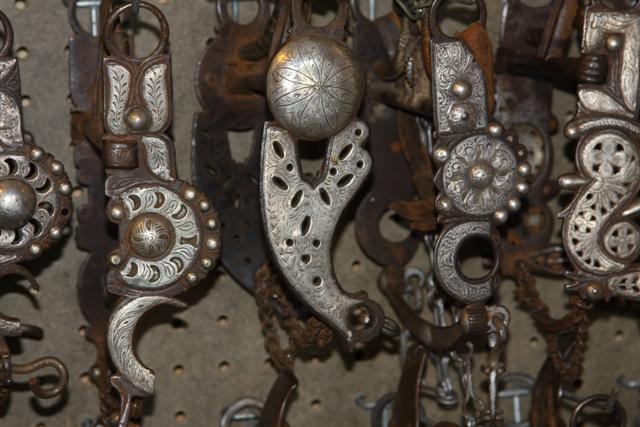
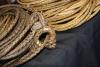
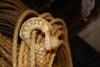
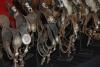
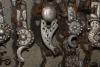
Blake, We are doing the appraisals again today. I'll get some more pics of the bit and spur collections. Some of the people coming in with items are apprehensive about having their items photographed, some don't care. A couple of the reatas are Ortega, and some reins too. Bits and spurs are Morales, Herrera, Figueroa, Estrada, Gutierrez, and others. -
Cowboy Capital Challenge
bruce johnson replied to bruce johnson's topic in All About Us and Off Topic
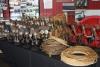
Thanks to several here who have visited our museum's website since the original post, and some bought tickets to help support us and help out in the Cowboy Capital Challenge. We had a great National Day of the American Cowboy celebration here today. We had a silversmith demonstrating engraving. I am a sucker for jewelry for my wife, and Rundi is sporting a new cuff tonight. We also had a braider demonstrating and that was excellent. The highlight of our celebration the last two years was the Cowboy Collectible Roadshow. This year followed true. People bring in items for appraisal, and it is always exciting to see the treasures that some people have. Some nice old California bits as usual, a couple of special Hamley saddles, and the highlights were two prison made hitched horsehair headstalls in super condition. They came in back to back. Our appraisers also bought some examples from their personal collections. Cools to see all that old stuff in one place. I am attaching a few pics from their collections. More appraisals tomorrow. BTW, Oakdale CA won the challenge vs. Stephenville TX, and we are the Cowboy Capital of the World. That would explain my excitement in the fourth pic as it was announced. It was a fun contest, and both areas got a chance to showcase their western heritage and future.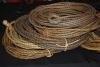

-
It all depends on the conchos. The standard Chicago screw posts are 8/32 that I get. Some of the Tandy conchos I used to use were metric too and I needed longer screws than were provided - they were 4 mm. I got some conchos that the screws were smaller but the ones provided were long enough. Maybe 3mm? Most of the bigger hardware stores carry the metrics. I found some of screw part of the Chicago screws with the flat thin heads at Orchard Supply Hardware. They are a big hardware kind of store out here - subsidiary of Sears now. The screws were in the oddball fastener/fittings drawers. They had them in some major lengths too. In a pinch I have also use drawer pull screws, the heads are a little flatter than normal machine screws, not as flat as Chicago screws are regularly though. They come in some really good lengths too.
-
Noah, It all kind of depends on where you buy these. If you buy from Ron, Keith Pommer, Pilgrim, or guys like that, you are probably getting something that has been gone through and is ready to go to work. I have an old friend who trades in these kind of bench machines too. It takes a box of parts on some to go through to get another working. A guy who is pretty handy can strip them, fix them, machine any parts needed, and sharpen the blade. They do show up on ebay fairly often. I sold a pretty good American last winter there for just under $600, if that will give you kind of a benchmark for price. A good Landis ought to bring more. There are several styles of splitters out there, and the reason I sold mine was that I found I liked the Chase patterns better. On the hand cranks, softer leather can wad up against the blade and not feed very well. On any of the pull-throughs it is not a problem. Where the handcranks shine is splitting heavy hard leather. They are sure not any faster for me, in fact slower than a pullthrough for most splitting. Someday I'll probably replace one of my Chases when I find the right Krebs at the right price.
-
Tae, Not to dissuade you from ebay stores and sellers, but I have bought pretty much the same wing dividers at Orchard Supply and Harbor Freight for less money and no shipping charges. There are several tools that cross over into other crafts. Another source for tools is antique stores. I have found very few antique stores that don't have an old keg o' tools or wooden tool tote that don't have decent wing dividers for a couple bucks. I recently bought a set of 24" leg dividers at one for $7. That was a find, I didn't even ask for the customary 10% discount.
-
Casing leather
bruce johnson replied to UKRay's topic in Purses, Wallets, Belts and Miscellaneous Pocket Items
Ray, There are folks here who know a whole lot more about leather chemicals than me. I think Lexol is a sulphonated neatsfoot oil. I am not sure if it comes under other trade names that might be available there or not. I would anticipate the Listerine called for in the original mix is the plain old brownish looking stuff from the old days. I am also thinking eucalyptus oil, tea tree, or some of the other reported natural antifungals might be fine. I have heard that one of these is the antifungal in ProCarve. Who knows. Regarding the saddle soap. Apparently in the good old days of the old soak until drowned leathers, saddle soap was purchased in buckets by some shops. They soaped leather to block out pieces. They soaked it and soaped it again to swivelkinfe and tool it. The problem I have with it is that it resists dye somewhat. I have had dye roll off the lettering then soak right in an inch from where you laid it, black can become violet, etc. I don't use it anymore for something I am dyeing, and really haven't used it since I started the other mix. As far as burnishing effects you can get a somewhat similar effect from antiques and HiLiters too. I have been using a diluted HiLiter to bring out dec cuts and deeper lines. -
Casing leather
bruce johnson replied to UKRay's topic in Purses, Wallets, Belts and Miscellaneous Pocket Items
-
Casing leather
bruce johnson replied to UKRay's topic in Purses, Wallets, Belts and Miscellaneous Pocket Items
Regarding ProCarve. I used to use it for the mold inhibition properties. In my old shop I had a heck of a mold problem. It was a very small shop, and I can trace it back to taking apart an oldy moldy saddle. Green dust poofed out of it. After that I had a problem and ProCarve stopped it. I had a guy from Louisiana tell me at a show that he had a customer tell him his finished headstalls didn't get moldy in the trailer and tack room like they used to. He traced it back to starting to case with ProCarve. Since I moved to my new place, I kind of got away from the ProCarve and haven't had a problem. Probably a resident spore deal. I have a before and after work schedule. I generally case overnight. I cut, tape backs, wet, and bag overnight - which is about 5-7 hours in my case. I do my sewing and finishing work after that. I do my carving and stamping early mornings usually to fit my schedule - nobody else home and few people stop by between 3:30 and 6:45. I was using plain water and getting by OK. When I was using the lighter weights of HO (under about 7 oz) I found that a longer case made my basketstamping round up a little nicer. Not so much of a difference on the heavier weights. Those I could slather on water or PC water, let the color come back, and go to pounding. I tend to do a lot of stamping and like the leather to be more to the dry side for better burnishing and rounding of the unstamped areas. This baby shampoo/lexol mix seems to hold the moisture longer for me to stamp bigger areas without rewetting. If I need to, I mist more on with a spray bottle. To my eye, I get a little more tool burnishing with the mix too. I recently did a photo album, cased about 8 hours and was really looking good right up to the part where I mispelled the guy's name. I did a quick case on the second one, and it came out OK. Took a little more maul to get the same effect with the Assoc basket, but the floral corners are identical. -
Shelly, Third time to reply will hopefully be the charm. The cyberspace dog has eaten my reply twice. First off thanks for rejoining us and posting the pictures. I favor that border stamp also. Looks like the edging lesons worked, and the the entire saddle looks good. I like the color, and the antiquing sets it off nicely. Cool story to go with it too.
-
Tippmann Boss - the bottom line...
bruce johnson replied to UKRay's topic in Leather Sewing Machines
Rolf, I can appreciate your enthusiasm for the Boss. I had one of the early ones, and they will do the job. However they do have the drawback of not being powered, a narrow throat, and require one hand to run them. Tedious on production or even a single set of doubled and stitched reins. They are easy to operate and learn. Once I go the tensions right on mine, it seldom needed tweaking. However I am going to respectfully disagree with your statement that they are the only real sewing machine for western saddlery work. They will sew whatever you can cram under the foot. That said, I have had good results sewing any type of saddlery work I needed to do with an Adler 205. Likewise with my Pro 2000. I am pretty sure most people are very happy with what their Artisan 3000s and 4000s will do. The servo motors and speed reducers provide all the power and control I need. To back up, there are quite a few who like their Pearsons and needle/awl machines too. The Boss fit a niche when it was introduced, nothing else had its capacity within $2000 of it. Not the same story now, but it still is solid little machine.