rdl123
-
Posts
366 -
Joined
-
Last visited
Content Type
Profiles
Forums
Events
Blogs
Gallery
Store
Everything posted by rdl123
-
From the album: Misc
-
I agree with Keith, Here is my experience: The more educational material you have on hand the better. Each piece will give you perspective that the other does not. DVD's are incredibly valuable - They will help you fill in the blanks. I started with Al Stohlman Books and the Harry Adams book and then part way through my first saddle I purchase both Jeremiah Watts and Dale Harwoods DVD's - I wish I would have bought them both right from day one. The advice they contain will prevent you from making mistakes and wasting expensive Hermann Oak. They will almost pay for themselves in saving you from expensive screw-ups. As Keith says - Saddle making is a dubious hobby - It's expensive, time consuming and at times frustrating. That said if your personality is like mine you will still enjoy it. However be prepared to have some bad days while you wrestle a hunk of Hermann Oak that doesn't want to conform to what you have in mind. That said - Riding and roping out of your own hand made saddle that fits you and the horses you ride is hard to beat! Also - Buy only the best tools - I started with junk, ended up buying good stuff. Bruce Johnson on this site is great to buy from - I've got splitters a round knife and general hand tools from him - All quality, old school tools. Good Luck and looking forward to seeing your progress. R
-
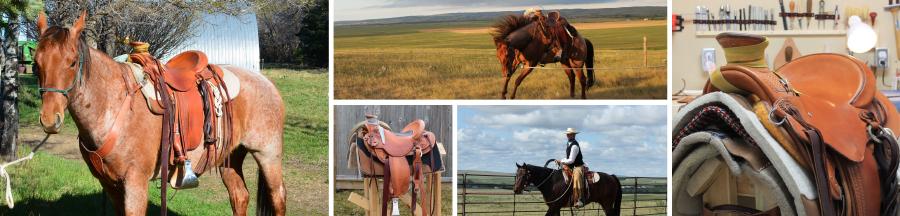
Good Job Adam! I like the clean overall look of this rig & I think your seat profile from the side view looks good. I believe less rise helps with staying centered - Is that what you find? I'd be interested in more info on this. Anyhow, excellent overall! This site sure is invaluable for us first time makers - Really ups the ante and helps with relevant info on specific issues. Looking forward to seeing more of your work! This saddle of yours inspires me to try and do better on the rig I have underway! Ron L
-
Thor, I'm no expert but I like to use 3/4" thick wool pads from Reinsman or 5 Star Equine. Sometimes I'll run a Navajo over this if I need a little extra for a narrower horse. This is the 3/4" 5 Start I currently use. It's shaped (or contoured) and I like that - Conforms to a horses back easier. It's also long, probably 33" which works good on ranch saddles with bigger skirts. To some extent I believe multiple layers is a bad thing - Creates shifting - Also, thicker pads often seem like you end up cinching tighter to keep everything solid. Like Bob says if the saddle fits you don't need a pile of pad. I guess I like all natural products - I haven't used neoprene cinches or pads - But the all natural products seem to work and last if you take care of them. R
-
From the album: first saddle project
-
I like it - Very nice work for a first rig! What kind of tree did you put in it? I like the old timey look. R
-
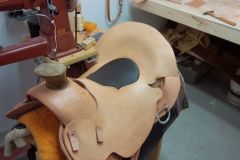
So no earth shattering progress recently as I have been busy getting a house fixed up... But I did sew in the inlaid seat on this rig. I have the house largely under control now so maybe it will free up some time for me to get this saddle done... Ron
-
From the album: Second Saddle Project
-
From the album: Second Saddle Project
-
I couldn't say which one is best - However I own a Cobra Class 4 machine and love it so I can speak well of Cobra for sure.
-
Randy, Congratulations - Really nice job! It's neat to see your progression from saddle to saddle. Ron L
-
From the album: Second Saddle Project
-
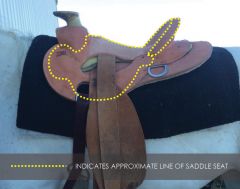
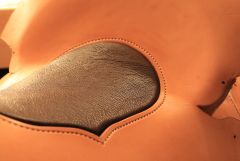
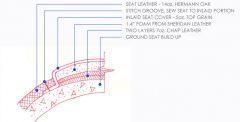
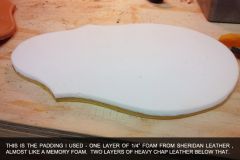
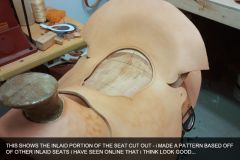
30/03/15 Hello! This past saturday I made some decent progress. Cut out fenders, billets and finally got up the nerve to proceed with the inlaid seat portion of this project. Built my pattern by looking at saddles by Kent Frecker, Cary Schwarz & Steve Mason...I'm sure it isn't as nice as what they do but overall I'm happy. Here's what I did: Pulled the seat off the saddle. verified by measurement approximately where the pattern was going. Using the center line I had scratched into the back I ran an awl hole up through the seat 2" in from either end of the pattern. This let me center the pattern on the top side of the seat accurately. I then traced around it and cut the pattern out. This required very sharp knives and nerve...once mis-step and you can wreck a piece of prime Hermann Oak. I used a piece of nice top grain chap leather for the inlaid portion - This sets in a 5/8" by 1/16" deep channel I cut into the bottom side of the seat around the inlaid portion - Used a french edger to create this channel. The padding is the foam you get from Sheridan leather - It's 1/4" thick. My seat leather is close to 3/8" in the center so I needed to build it up. I used two layers of pretty heavy chap leather - The were probably in the 7oz. neighborhood and I glued these two layers to the underside of the foam. The top grain leather was glued to this. Prior to gluing the top grain leather on I skived the outside edge to a near feather. This whole set-up fits into the inlaid cut out very tightly. I cut the foam piece 1/6" smaller on all sides than the cut out I took out of the seat. This gives the chap leather space to fold and wrap under. Here are some cell phone pics. R
-
From the album: Second Saddle Project
-
From the album: Second Saddle Project
-
From the album: Second Saddle Project
-
From the album: Second Saddle Project
-
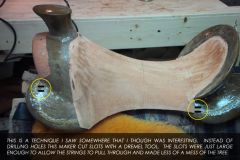
Very interesting thread! I am a very inexperienced saddle 'maker'. I am currently building my second rig for my fiance and I have in the past liked strings to run through the tree. However, on the first saddle I built I ran into the situation Keith describes of there being very poor fastening material left for the latigo carriers up front. Since, I have come across this theory: I would value input as I am getting close to where I am going to need to make a decision on the method I use. Ron L
-
From the album: Second Saddle Project
-
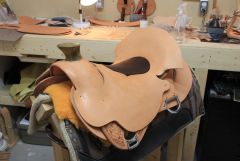
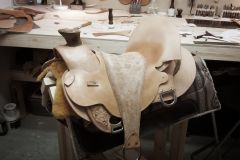
Saturday: Got seat rough fitted - Pulled it in and then let it dry up to where the seat and front jockeys were firmed up. I follow Jeremiah Watt and Dale Harwoods theory that you need to pound the leather into the middle - Draw the bubble into the center and pound it in. I also do like Jeremiah Watt and work a bubble into the cantle face and then compress it in - Really helps leather fit into cantle dish. Sunday: Wet the center part of the seat down and pulled it back into rig. Marked my cut lines on the on side and cut that out. Flipped it over off of center line and cut off side. Pulled it back into seat and nailed in. Went in very symetrical. My clearances off of rigging rivets tuned out to be identical on either side. Here is a grainy cell phone image - I will post proper images soon. There is one thing I do not like. I made my handhole too shallow. I wish I had the back edge of the handhole 1" further back. I used a centerline on this seat and worked off the centerline on the ground seat - I believe this really helped the seat go in square. The other thing obviously is that this tree is dead square - Sure makes the amateur saddle makers life easier. More images to follow. This saddle is going to have a padded seat. Hope it looks like this: (Saddle by Gordon Andrus Sage Creek Stock Saddle Co.) Maybe without the scallops on the back edge though... I picked up my 3" monel stirrups on sunday too. R
-
From the album: Second Saddle Project
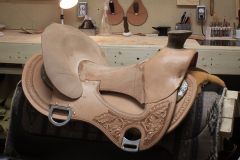
Seat pulled in and fitted. -
Thanks for the kind words Randy... My only concern with this swell cover is that I really pounded it in with a flat faced hammer (over a protective leather)...despite the protective leather it still left some subtle 'hammer tracks'...I am going to tool the swell but next time i'm going to be a little more discreet with the use of a hammer... Overall though the swell is better than the first one! Still want to get the third one better than this though! How is your third saddle coming Randy? Sure would like to see it! R
-
From the album: Second Saddle Project
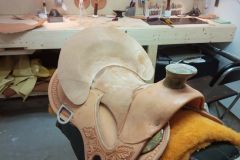
Just another picture... Should be a little crisper than my other cell phone pics...Was taken on my Canon Rebel T3... -
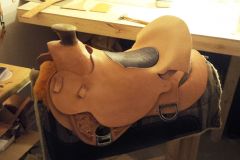
Last night I tooled up one of the skirts - Just a simple border pattern set 3/4" in from the outside edge. Here it is sitting under the rig... And then I cut out the cantle filler / cheyenne roll stiffener...It's out of 10oz Hermann Oak - and skived to a feather edge where it fades into the seat. Once the barge is dried up solid i'll really wet down the outside edge and pull and glue it down onto the single ply that is the start of the cheyenne roll. Once that's done I'll start the seat fitting process...i'm still apprehensive of seat fitting - It's probably the trickiest thing to get right - The ear cuts require a fair bit of careful attention. Thankfully Jeremiah Watt has a really good section in his DVD series going over seat fit - So that definitely helps. R
-
From the album: Second Saddle Project