toxo
Contributing Member-
Posts
2,263 -
Joined
-
Last visited
Content Type
Profiles
Forums
Events
Blogs
Gallery
Store
Everything posted by toxo
-
Fair enough, I don't think you can have a conversation about the shape of edging tools without including the thickness of the leather being used. For example, a rounded edge could be achieved on thick leather with a flat edger with a few passes and a curved edger would be equally unsuitable unless it was the right size for the leather being used. With the myriad of widths and shapes out there I would first adapt a tool that was longer needed but that's just me.
-
Maybe look for a tiny round file and put a curve on the ones you have. Edgers I've bought in the past have come with a tiny stainless steel rod that you can wrap some fine emery paper around. Good for touching up in the future.
-
I should have added, "When using a different colour in the bobbin".
-
Not the same at all but you can get a similar look on the machine by deliberately loosening the bobbin tension. Great job by the way.
-
This is one way to do it: cut a piece of ply to the size of the interior of the box. Cut another piece of ply to the the same size PLUS 2 thicknesses of the leather. Cut the two pieces of leather allowing for the sides of the main box on one piece and allowing for the sides of the lid on the other. Place the ply pieces on the leather and cut a groove all round on both. Cut out the corners, this is the tricky bit depending on the thickness of the leather. You can end up with the two pieces butted up or you can mitre the corners for a much nicer job. Once you're happy with the way it folds, (wet the grooves), lay the pieces flat and punch the stitching holes starting from the same point all round. I would do it with scrap first. Good luck.
-
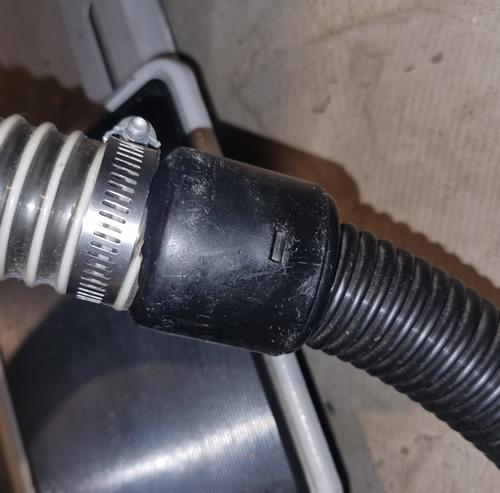
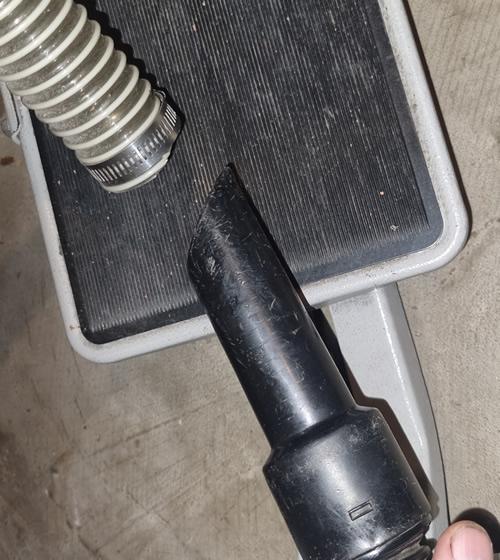
Update 2. New one arrived old one still here waiting. After some playing I'm having trouble siting the vacuum hose next to the bell knife. The suction seems adequate but some bits are not going down. I'm wondering if there's an optimum shape and position for the intake hose? I'm starting to think about building an all round chute with the suction at the bottom. Thoughts?
-
Overwhelmed - Which industrial for leather bag making
toxo replied to Novalee's topic in Leather Sewing Machines
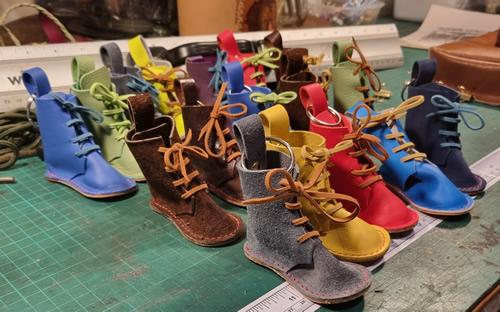
I use a 341 clone myself and am very happy with it. The only fault I'm finding is the size of the feed dog hole which may be problematical with very thin leather but I intend to address that. Another point to consider is a speed reducer with a servo motor will give more torque. On mine I can dial in the whole range of speeds from very slowly to quite fast enough thank you. The downside to speed reducers can be they don't always get on with needle positioners which I like very much but am having to live without for the time being. I am learning to do without though and it's not as bad as I feared. You seem to be on a similar journey to my own and I hope I'm not teaching Granny to suck eggs but I'll offer some advice. Save the veg tan for special. Likewise the Decovil and other stiffeners. Look to Chrome tan for some inspiration. Some leatherworkers will spend months on a project for others to say "well done", I'm not one of em. I like working with leather and being constructive and if I can get a tiny bit back on the £1,000s I've spent I'm not gonna turn it away. When I go to my leather shops I'm always looking for coloured Chrome tan of the right thickness/temper. Saves all that dying and gives me inspiration. I'm about to tackle piping in a proper way and if I can make the piping in a colour to contrast the bag it will give me an edge. Here's a pic of some keyrings that I did while messing with a new compressor and my skiver. All different weights, Made with what I could find amongst the leather. -
Overwhelmed - Which industrial for leather bag making
toxo replied to Novalee's topic in Leather Sewing Machines
@Novalee Before you confuse yourself with machines you need to think a bit more about what you might want to do in the future. If it's bags that you want to do (as I do mostly) working with thin leather is fine for bags that don't need to stand up but might limit your options in the future. Having said that, even the most robust bags like satchels and briefcases don't use uber thick leather and even then it's likely to be softer than the stuff some are using on here for their saddles, holsters, gunbelts, etc. Just saying your machine doesn't have to handle the thickest material and usually the price goes up with the thickness. -
Welcome from a fellow Brit. Changing to a servo is a must and is pretty straightforward. You'll still want a speed reducer. Smallest pulley on the motor and either replace the handwheel with a large pulley or fit a speed reducer in between. Either way will enable one stitch at a time if that's what you want. Having College up the road will be very handy but they can be pricey, especially for original parts.
-
How can I get an exact match of these two wet molded pieces?
toxo replied to LMullins's topic in Leatherwork Conversation
Use a straight edge, sew, cut off surplus. -
As I wrote elsewhere, I ordered a compressor from Amazon and it arrived with a slightly damaged air filter. I reported it and told them it was the air filter, they asked me what I wanted to do and I said replace it with another. I think this was Tuesday. They then told me to view the returns label, the replacement would arrive on Thursday and someone would pick up the defective one on Saturday. I then spent a goodly amount of time trying to tell someone that a replacement air filter would suffice. There's nowhere on the site to do that. Amazon have things so slick that it's actually better (for them) to do one in/one out. Once I got over myself and stopped getting frustrated it dawned on me that I couldn't fault the service. They have things so dialed in that it would mean more faffing around to do it another way. Rant over. I have my new compressor and I've got it setup and it's working well. If I can nit pick just a little, I have my skiver working really well. It has only one motor but I can use it reeaally slowly and get a very good skive but the microswitch on the vacuum won't open unless I go just a tad faster. I have had it perfect but then the switch doesn't close completely. Like I said, nit picking. Maybe I'll sort it in the future. I'm happy.
-
Thanks for the info @ElfLeather. It's not an experiment I intend to repeat anytime soon. Too many variables. Worked on the dividers, didn't work on the feed dog. Being an ex fabricator/welder It's surprising I haven't had to use it before now. The mig is too handy and less faff where it can be used.
-
Update! I decided to go with the Hyundai 8ltr (above). I checked it out first on YouTube and there's a guy there who bought one from B&Q. It turned up with a dented air filter so he decided to return it. Had lots of problems cos was bought with some coupons some of which weren't B&Q. Took awhile to get a replacement and that was damaged also. I should point out that both times the problem was minor and the compressor itself was better than expected. I decided to run with the odds which is not like me because if I didn't have bad luck I'd have no luck at all. It turned up today and guess what? The air filter was dented. It wasn't bad at all but I decided to report to Amazon thinking they'd send a replacement air filter but Amazon doesn't work that way. No way to contact the seller and within minutes they were asking me to print out a returns label for the whole thing and giving me a date when someone would be picking it up. I'll probably cancel the return. Even I was impressed with the noise level and when I connected to the skiver it worked like a charm. Just have to fine tune it to come on when going really slowly. The small spray gun and airbrush are in my future.
-
Looks like a good solid job Keith. Is your brother that slim or does it need more holes/another keeper? The only belts I've ever made have been bog standard one piece jobbies. I was pondering on your build and I wondered if anyone had ever turned the edges on both pieces before glueing and sewing? Would it look cool or naff?
-
So, after it being fine with my big noisy compressor I've decided to go with a small dedicated one that'll double with an airbrush. so not knowing much about these things, which one of these should I go for, (or other)? https://www.amazon.co.uk/gp/product/B0CNQHPZWN/ref=ox_sc_act_title_1?smid=A3A26UX6N932Y5&psc=1 Hyundai Low Noise Electric Air Compressor, 550W Air Compressor, 4CFM, 100PSI Oil Free Air Compressor, 8 Litre Tank Capacity, 2 Year Warranty, Quick Release Fittings UK 13 Amp Plug, White : Amazon.co.uk: DIY & Tools
-
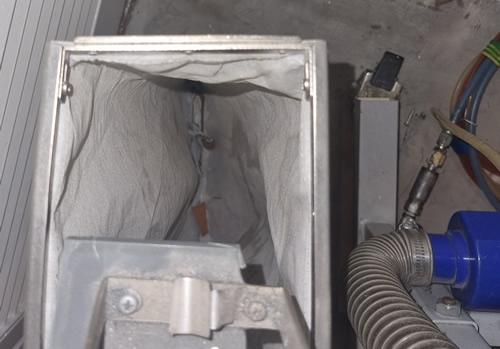
WELL! Just plugged the compressor into it and blow me, it works a treat. So thank you @RidgebackCustoms I wouldn't have tried it without your explanation. I'll try to get a video but in the meantime, rather than having a 35ft air hose running through the house, can someone please find me a cheapish quietish compressor? Well I tried but as you can see I'm no film maker. It's short but you can just see the waste bag shimmering. Also the black air hose on the floor. I can't believe that after all the time I've had it, all I had to do was plug it into the air. A feeble attempt to show the waste in the bottom of the bag. It's in there I promise.
-
I might just have to try it with the air to see if it's better. I've just noticed it's got a treadle activated on off micro switch. I was thinking the air had to be on continuously.
-
That is cool. So does that mean my system is worth a few bob then?
-
Had it stripped down today and removed the wiper. Couldn't find anything loose or wrong except the bar on the end of the con rod was missing which was strange must've fell out today else it wouldn't have worked. Had to move the intake a bit and elongate the hole co a couple chunkier bits didn't want to go down but apart from that it's been great. Might have to treat it to a new presser foot. Is there one that leaves the center and skives down both sides of say an inch wide to make a non piping piping if you know what I mean. I think Cechaflo does it by just skiving either side and leaving the middle.
-
Thanks for the info. More than I've received in two years of asking. I've decided to go the simplest way with my domestic (for now) vac and it's doing a good job. I need to put a different shape to the intake nozzle because some of the chunkier skivers can get caught up.
-
I'll certainly look at those redundant pieces Brian. I wondered what good the wiper was doing when I first got the machine. The video was taken because after the first try with the vac, I could hear it gobbling up the small piece I put through it but I couldn't see it. The video shows only the second small piece I put through it. The piece that was stuck in there was already there and I think was forced in there from a previous build up of waste. I'm rather more concerned with the movement of the bell and maybe other worn bit's. It moves with the speed of the bell. So much so that it can sometimes take a chunk out of the leather when speeded up after chugging along nicely. It does an excellent job if going slowly or at a medium speed but if you slip up and go faster it will give you a different depth of skive or even take a chunk of the leather. Are there adjustable or replaceable bearings that can be seen to? You can see the movement in the video.
-
Short answer is no but you can turn your work to do it with the needle down or needle up and manually manoeuvre the work 2/3 stitches back and go over again.
-
Sorry Keith. Tagged the pics on the end of @keithski122s answer. Thought it was you.
-
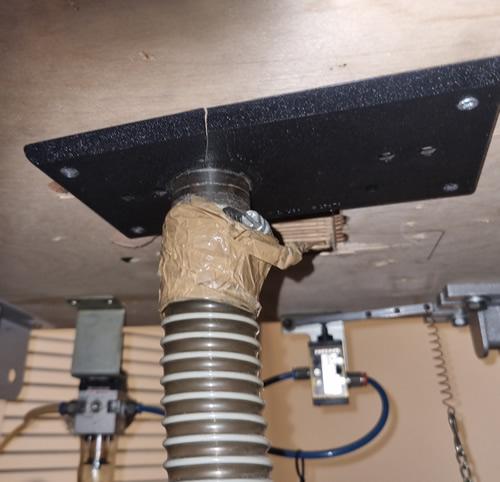
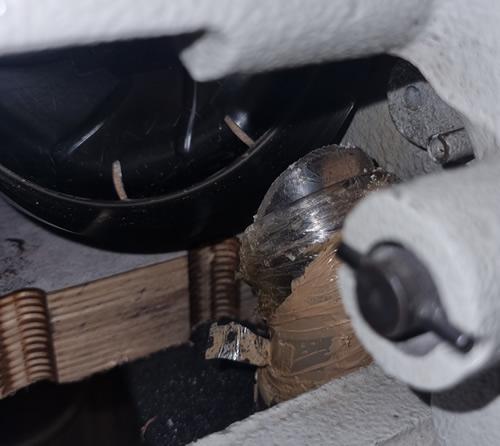
Tried em all. Have a rubber one now. Steel was the worst. pics: Vac nozzle. Great fit. Under table plate. Angled top of pipe (brown tape around it.)
-
I saw a few like that online but they were too small. Just as good a design as any if you're gonna make one though. The ones I saw had three pips though.


