toxo
-
Posts
2,263 -
Joined
-
Last visited
Content Type
Profiles
Forums
Events
Blogs
Gallery
Store
Everything posted by toxo
-
Not that easy to get bonded polyester in all the colours over here and then it's an arm & a leg. Have lots of colours but not for this project. Have a great grey but it's V69. Have lots of V69, have a few V138 but not for this except black & white and don't have the needles til Tuesday. Found a couple a couple of V92s, here's a toast and a powder blue but I'm almost sure it's gonna be black in V138.
-
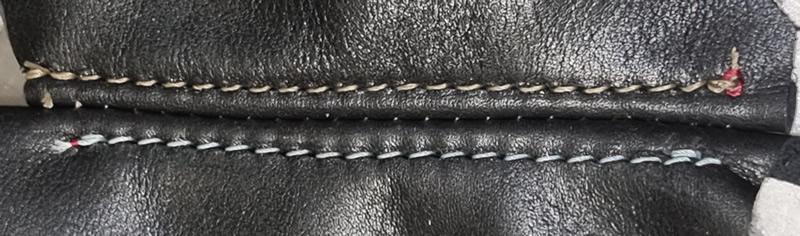
They look like the ones I bought the other day. Great on the top side. Not so much on the flesh side.
-
Did you miss a link SUP?
-
I agree but black or a maroon/burgundy also. Depends how brave I'm feeling. Black won't show mistakes so much. Here's some musing. Red is too thin and too bright I think.

-
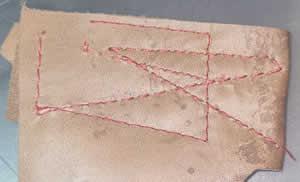
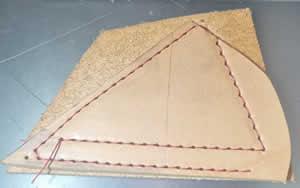
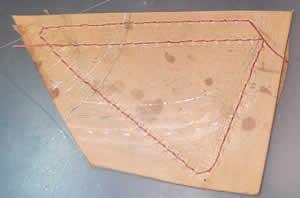
inally making some progress. Turns out, for a project like this, unless the die is perfect, lining up can be a problem. A perfect square made out of card and my little notcher got me out of trouble. Now I'm thinking about what colour the decorative seams should be. Typical situation, some colours are not thick enough and the ones that are I don't have big enough needles for until Tuesday.


-
I'm on the flesh side of black leather so normal methods don't work. I'm used to using the silver pens but I ran out so I looked on Amazon and found these. They seem to have some remarkable properties. Read the blurb. I can say that they seem to work very well on the grain side but schools still out on the flesh side. They do work but I'd like the line to be a little brighter. You can't complain about the price though. 100Pcs Heat Erasable Fabric Pens Heat Pens White High Temperature Disappearing Pen for Leather, Fabric, Quilting, Dressmaker : Amazon.co.uk: Home & Kitchen I've just ordered some of these in the hop that they are brighter. 100pcs Leather Marking Pen Toold For Leather Cutting Leathercraft | eBay The best I've found out of what I have is a correction fluid pen which I think is some kind of liquid chalk. Lines too thick but it's the brightest so far (on the flesh side). Would love to hear if others are using something better.
-
The bigger ones can be glued together and used as feet on the bottom of bags or small boxes/trays.
-
Was looking for that specs page but couldn't find it.
-
Thanks @Northmount. I have always used leather points but the info that came with my machine stipulated DPx17 needles and I couldn't understand why I could never find any with LR points. @DieselTechs explanation seems right because the DPx16 LRs that I do have seem to work fine.
-
Now there's a thought but t'other way round. The DPx16s that I've got are LRs.
-
So - The needles that came with the machine are DPx17 in sizes 130 and 160 but are round point. I've since bought some LR needles in sizes 100/110 and 120 but for some reason these are DPx16. Now before I buy any more I'd like to know what the difference is. The only reason I can think of for buying DPx16 is maybe I couldn't find DPx17 with a leather point at the time. I will point out that the DPx16s with the leather point seem to be working well. Thoughts peeps please. Thank you. Had a quick search on "Schmetz" and all it could come up with is DPx16LR.
-
Thanks Keith. I think I already have that somewhere but in my world it starts with thread colour. That might mean using a thinner thread than I would like because I don't have all threads in all the colours and all the sizes. I usually start with running a needle down the thread at a 45degree angle. If sluggish I go up one. If too free I go down one. Once I sew some scrap I might change the needle if necessary. The reason I'm struggling here is the new needle system and the thickness. I've had this piece of leather for years and I don't suppose I'll ever use it again.
-
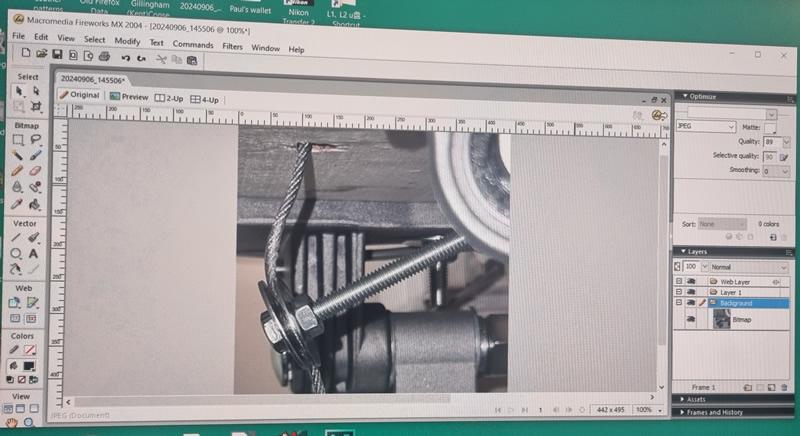
@NorthmountThis is what I use. I can crop, resize, transform etc etc. This pic is 800 x 436 and is 100kb.
-
Thanks @Constabulary and @kgg. The biggest leather needles I have is 120. Just realised the needles they sent with the machine are 130 and 160 but they're round point. I'm just about to order some LRs. I'll probably sew this thickness about once in a blue moon but the boy scout in me likes to be prepared.
-
That can't be right can it? I normally keep 600 across the top but was too much for these. I had to go down to 300 for these, crop more and decreased the resolution from 90 down to 60. Maybe I overdid it. The limit is still 1.47 Megapixels right?
-
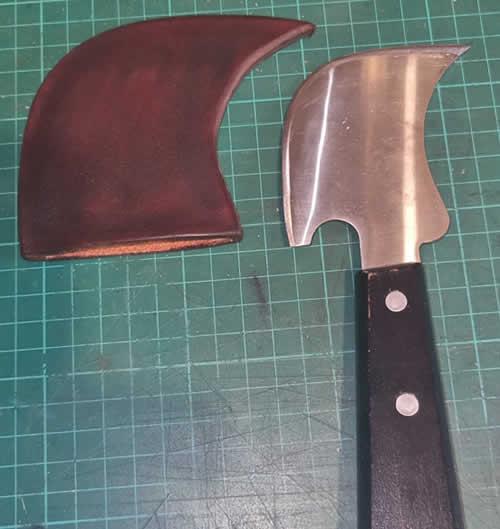
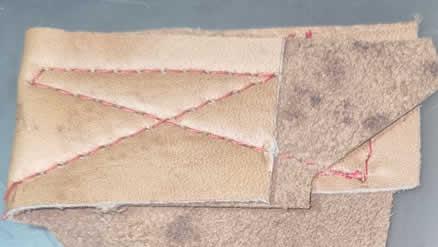
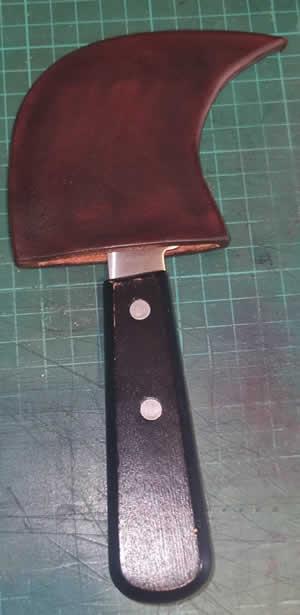
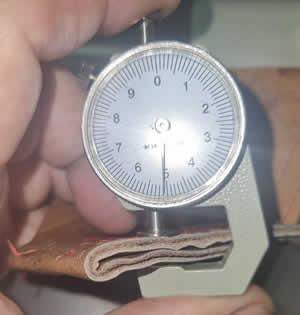
Wanted to make a cover for one of my knives but this is the first time I've asked my new machine to sew some thickness and I can't get it right. This is hard thick veg tan and I'm wondering if I'm asking too much of it. Top looks ok but I can't get the bottom to match. Apologies for the bad pics. Had to downgrade them to get them all on. This is softer leather. Not perfect but better. Tension discs and using 20s thread and a 120 needle. Have adjusted top and bottom tensions . Have lowered the check spring. Am I missing something?

-
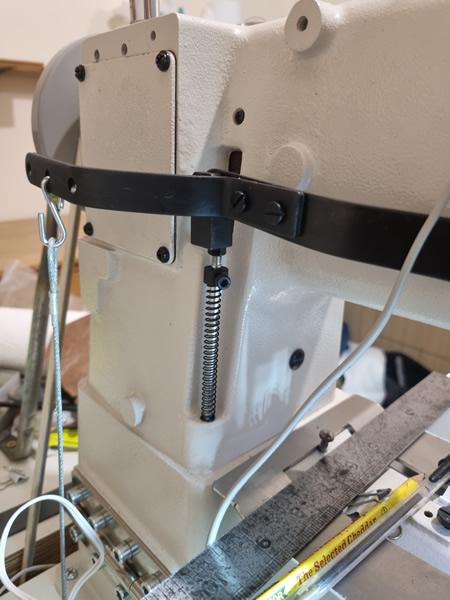
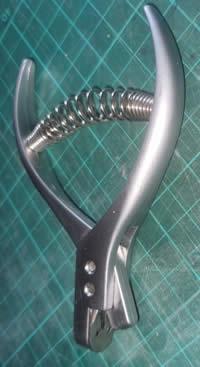
Trust me, it won't slip. Turned out the bolt was too long. A more direct pull had the end of the bolt hitting the table and I wasn't about to dismantle it again. It works fine as it is and needle down as well, yes! Time to make something. I can feel a Hobo patchwork bag coming on.
-
Great minds think alike. Can't access photos from phone for some reason.
-
If you're serious I can point you to everything you need. I did do a post about a year ago detailing what you need and where to get it. You might do a search for "Rule Steel".
-
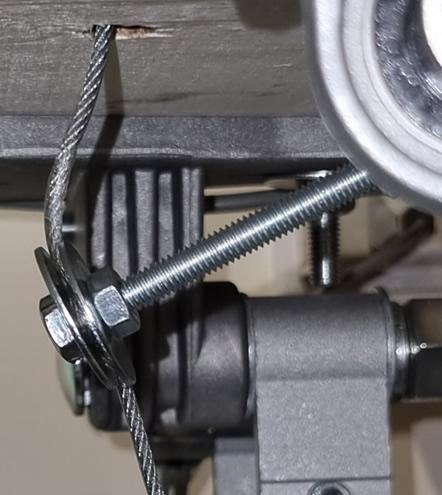
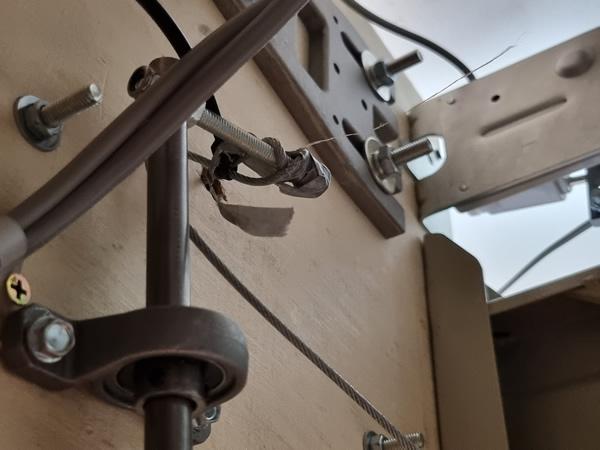
Pics not very good, video even worse but it shows the necessary. I tried to wrap the cable around the bolt in nan effort to leave everything in place so it could all be reinstated in the future but it's already got slightly loose so I'll have to do that bit again but it does work.

-
Welcome @CreativeName From the UK. You'll find the selling part a bit of a learning curve because there are so many variables but, hopefully you'll enjoy the journey.
-
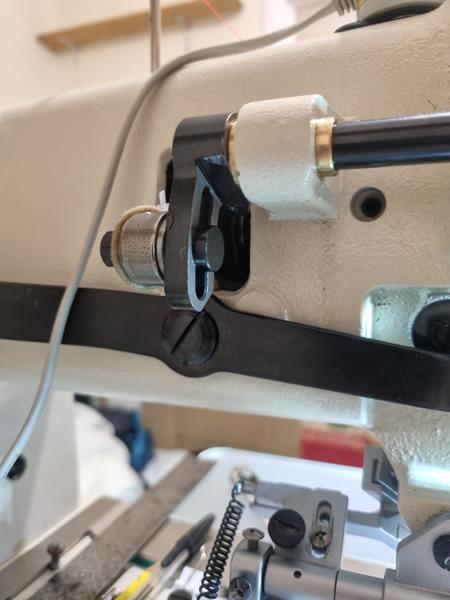
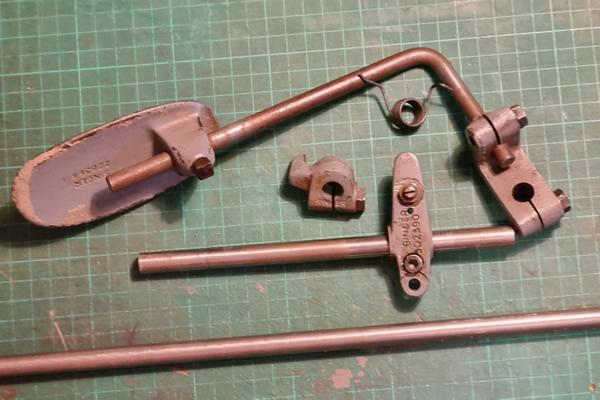
Had another go at the needle positioner yesterday and I think I've got it to stop down. Don't mind wheeling it up so I'll leave it there. Sourced a longer shaft for the knee lift. Had to keep it at 11mm in order to keep the knuckles which meant having to order two 12mm pillow blocks/bearings cos I could find any 11mm. Not a problem cos they have set screws to clamp the shaft. Hopefully will get here today or tomorrow.
-
Exactly that.

-
I think discounting clicker is a mistake. A die doesn't have to be expensive. Doesn't have to be for a repeating project either. It can be extremely useful for part of a project though. I make em with a wood core, my most recent I showed in my patchwork post. Now I can cut lots of patches in no time. It would take hours to cut 50 patches by hand. Don't need an expensive press either. Before I got mine I used a 1 ton arbor press.
-
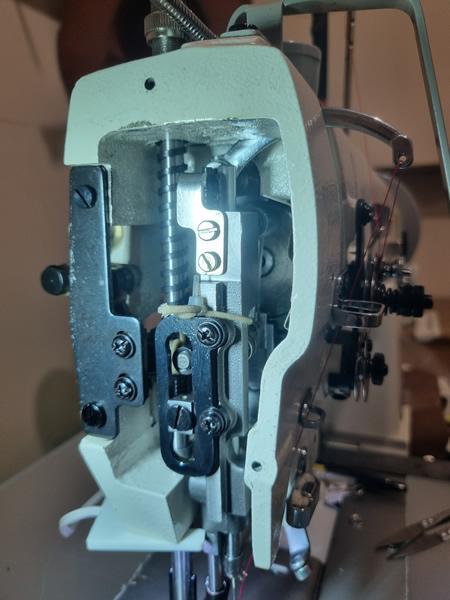
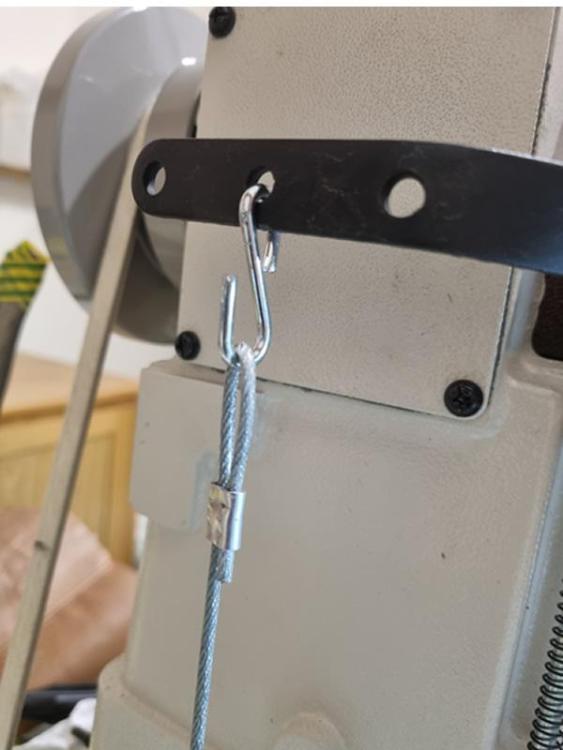
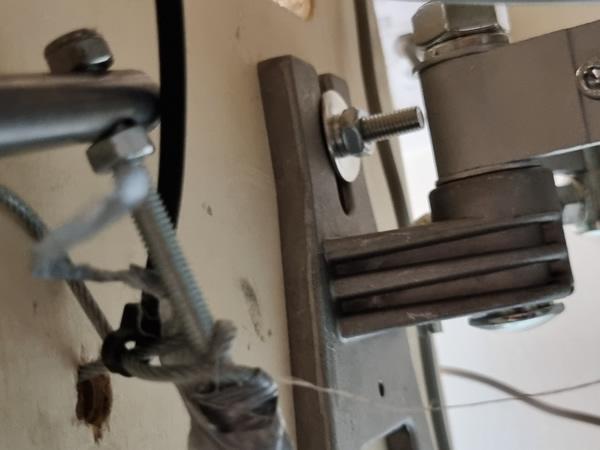
I moved the wire rope to the furthest back hole. The fulcrum screw was a bitch to undo but I got it. It wasn't that. I unscrewed the top P/F tension screw to the max. All done has made it a bit lighter but juddery where it's binding on something. The angle of the rope going through the table is not excessive. I think it might just need wearing in. It's perfectly usable especially now that it's a bit easier, will be even better when I install the knee lift. This is my first new machine and discounting the old Durkopp 239, the first with the elliptical feed dogs. My Adler 69 is an excellent machine but the linear feed dogs sometimes made it challenging where I asked too much of it. This new machine is working like it's supposed to with no dramas at all. I look forward to using it now. Just have to sort out the needle positioner and along with the knee lift I'll be an even happier bunny.