Double Daddy
-
Posts
331 -
Joined
-
Last visited
Content Type
Profiles
Forums
Events
Blogs
Gallery
Store
Everything posted by Double Daddy
-
Not sure what your access to building materials is like in Ireland...but...here in the States, a SOLID core door blank makes a fine table top for various grades of work duty...they are available in several different widths, are smooth & flat, and, thanks to their solid internal construction, can be cut down the required size. I've used them on several projects, including my current workbenches. The current trending price for one in my area (36"x80") is about $70. https://www.homedepot.com/p/Masonite-36-in-x-80-in-Smooth-Flush-Hardboard-Solid-Core-Birch-Veneer-Composite-Interior-Door-Slab-104280/100064572 Be sure that it's not a hollow core version, mind you...they look very similar...one of those will never last under the strain of the pounding, clamping, etc...even if you manage to cut it and it not fall apart.
-
GP100 Field Holster
Double Daddy replied to Josh Ashman's topic in Gun Holsters, Rifle Slings and Knife Sheathes
Here lately, I've even been playing/sampling around with combining a light pre-treatment (of sorts) of paste saddle soap along with the N.O. before final finish...darkens things up a tad and adds a little depth. to the color. as well. Not sure if this idea is any more beneficial that N.O. alone as far as getting conditioners back into the leather after it comes out of the drying cabinet. However, this technique did wonders for the newer non-gunleather/accessory dye colors I've been experimenting with (red, royal blue, green)...they're too "light/bright" for my taste, otherwise. -
GP100 Field Holster
Double Daddy replied to Josh Ashman's topic in Gun Holsters, Rifle Slings and Knife Sheathes
As always from your bench, Josh...fine lookin' leather for a fine weapon. That oil coat (prior to finish) sure looks rich, don't it? -
Ruger LCP IWB Holster
Double Daddy replied to alpha2's topic in Gun Holsters, Rifle Slings and Knife Sheathes
Very nice craftsmanship, alpha2...I really like the stitch line at the trigger guard...it follows the contour of the weapon very well. -
Recent Builds
Double Daddy replied to IngleGunLeather's topic in Gun Holsters, Rifle Slings and Knife Sheathes
All of its top shelf craftsmanship, Ingle...as usual from your bench, sir! I'm particularly fond of that medium brown pancake with the white stitching. Still trying to lay my own hands on one of those John Bianchi push bevelers you recommended here'while back...keepin' my eye's peeled. Thanks for sharing! -
My Second Bible Cover
Double Daddy replied to Equiplay Saddlery's topic in Books, Journals and Photo Albums
Very nice...fine heirloom workmanship. -
My first attempt at a bag
Double Daddy replied to stormcrow's topic in Purses, Wallets, Belts and Miscellaneous Pocket Items
I'd say you figured it out pretty well...great job! Fine workmanship! Nice color and design. -
Sheath number 2
Double Daddy replied to Stef1966's topic in Gun Holsters, Rifle Slings and Knife Sheathes
The contrasting colored stitching is always a nice touch against a dark colored dye (IMO)...I really like that border design, just enough embellishment without being gaudy. Very nice job! -
Thank you, Sir! Appreciate it...thanks! Thanks! It was my first time trying it on a complete rig...the saddle tan dye usually gives me fits but it turned out all right this time. Thanks, Josh! This particular clip is at the tail-end of a product design that I've kicked around on the workbench for some time now...they're normally used on Kydex holsters but I like their design better than what's normally used for gun leather. I was bending a similar item out of 1/8" black kydex (doesn't break like the thinner stuff or the FOMI clips) but when this tempered steel clip came out I abandoned all that work...much cleaner appearance than any best result of all my heating/bending/sanding. I've got several IWB holsters with the hand-formed 1/8" Kydex clip in use by customers and they really like them. I'll probably at some-point issue a complementary swap-out to these steel versions...just as a customer service good-will thing and to keep things consistent.
-
Second attempt at a holster
Double Daddy replied to DocDaddy's topic in Gun Holsters, Rifle Slings and Knife Sheathes
The biggest thing for me on edges is like SpaceRanger42 said...make sure you apply glue (the good smellin' DAP Welwood Contact Cement in the red can, in my case) all the way out to the edge, especially where you're gonna be sanding/edging/burnishing. I tend to trend toward saddle soap for my edge "salve" after knockin' the corners off...it lets me apply dye afterwards or before (depending upon what's going on with my project or m'mood)...whereas gum trag isn't as forgiving (or as least I haven't found it to be so). Search within the LW forum for HidePounder's edge tutorial...that thread has his method and input from others on this very subject. Might have to give one of those pastry rollers a try...or a j-frame laminate roller...Mmmm? Costs me money every time I log on here... -
Distressed Holster - & story
Double Daddy replied to Brooks125's topic in Gun Holsters, Rifle Slings and Knife Sheathes
Interesting technique, Brooks125...thanks for sharing! Definitely something I'll be bookmarking for my trick-bag. Lots of different ways to skin a cat, 'eh? -
My very first Leatherwork - Part 2
Double Daddy replied to MacB's topic in Gun Holsters, Rifle Slings and Knife Sheathes
Nice sheath design. I agree with Vaelloc about the dye work...it has depth to it. Beautify craftsmanship for a great looking blade... -
Second attempt at a holster
Double Daddy replied to DocDaddy's topic in Gun Holsters, Rifle Slings and Knife Sheathes
Nice color and skull pattern effect ...I would be interested as to how you kept those separate...that part turned out great. So do your belt slots...my very first looked beaver-gnawed...nice punches weren't in the budget when I first started. I'm with Bolt...can't see what you're talking about...gap? Give us some close-up pics of the edge work, please. Thanks! You might want to work on your stitch line in reference to its location from the weapon...it needs to follow the contours of the handgun a little more closely...unless it is your intent for this slide to be for more than one pistol. Also, bringing the weapon up out of the slide holster a bit would give you a bit more gripping space than appears to exist currently and would get rid of that sweeping stitch line at the back near the trigger area. The way I see it, slide holsters are a mixed bag, opinion-wise. Some folks love 'em (low profile...especially if you have to take your weapon off for some silly reason...you can leave the low bulk slide on without drawing much attention...it looks more like just part of the belt than other holsters). Other folks are like "meh...take 'em or leave 'em". Still, others hate them because part of the slide/barrel sticks out below...they say this can cause the weapon to be pushed up and out of the security and safety of the holster (not a good thing). I've worn some before I started making holsters...made and sold a few since I started...seen many makers on here that I respect on both sides of the argument...read good points from both. TETO, I guess. Good luck to you... -
Thanks, Chief. I half considered using the pistol itself as a hammer when I was stamping the border on the front shield...just for kicks, you know...but didn't want to damage my tools or the Behr House Paints black finish on the pistol...although I probably have some Hi-Temp grill paint around here that would have worked for touch-up...I doubt he would have noticed.
-
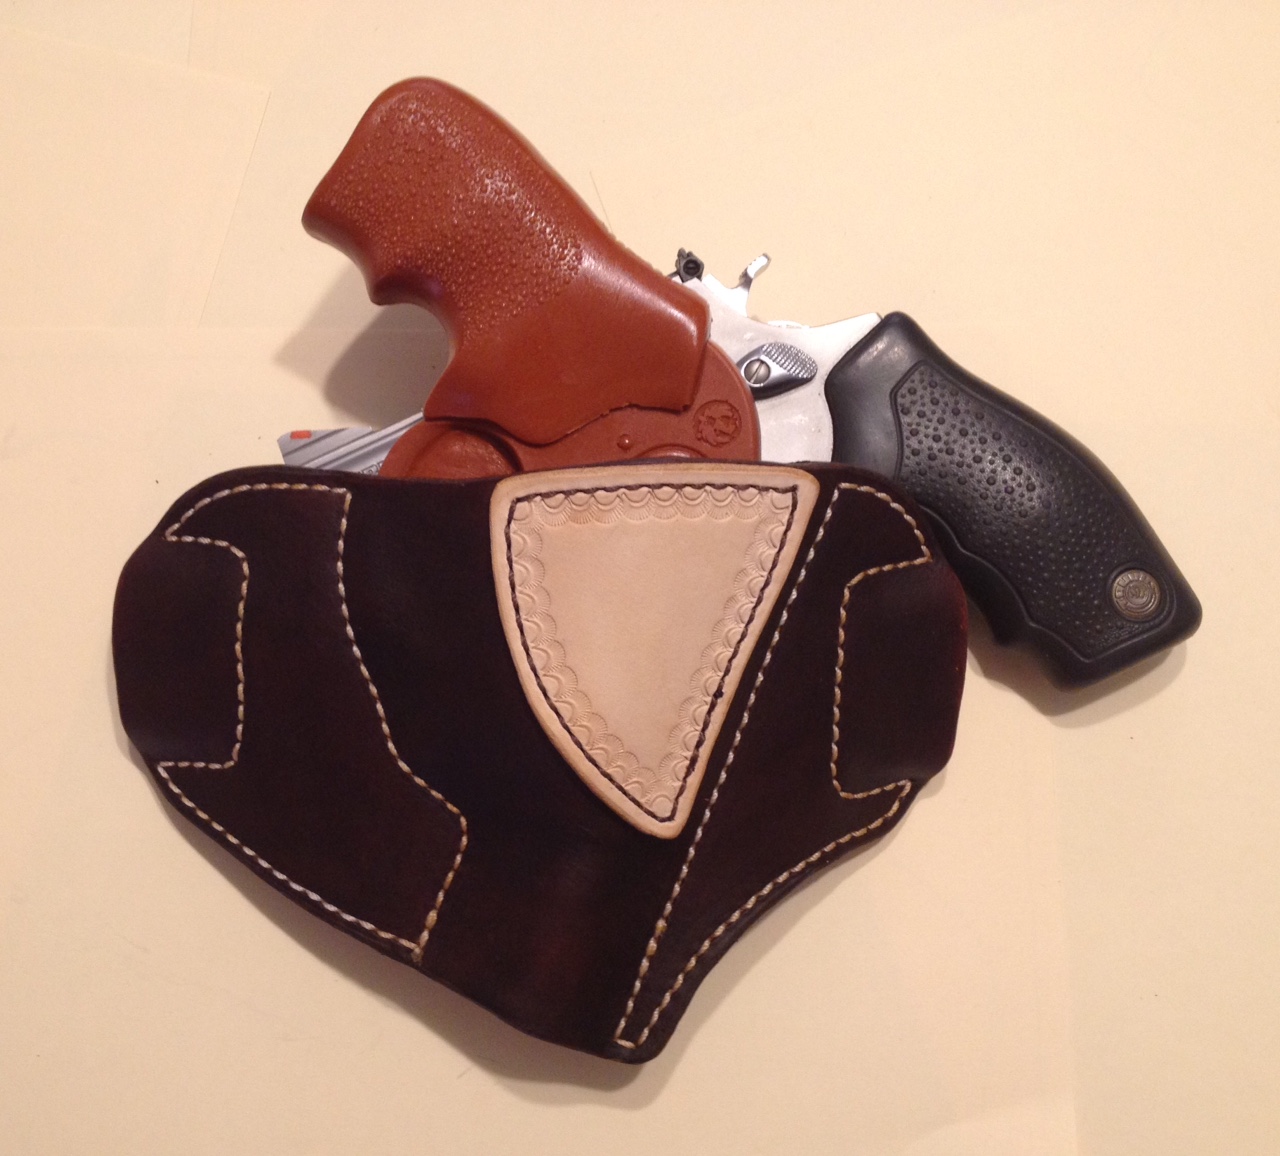
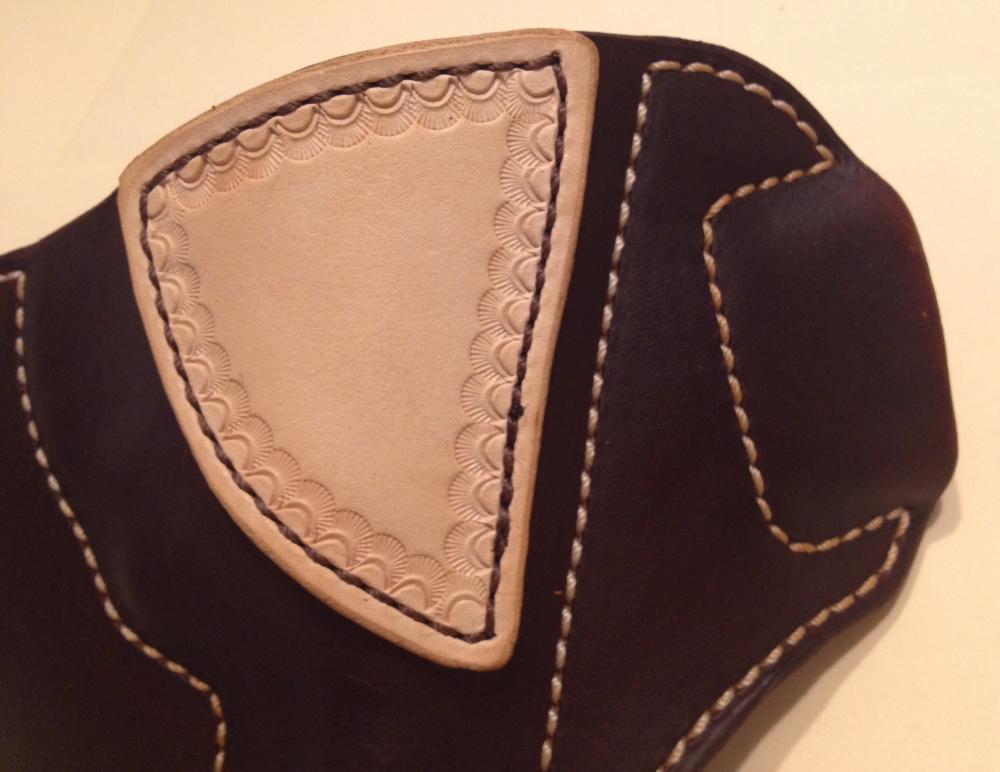
Two Tone Pancake style holster for Ruger LCR...will also fit a 2" J-frame and similar (a Taurus 94 9-shot 22lr shown in background)...finished out in natural over dark brown with brown and white stitching and a little bit of border stamping...concealed loops complete the "smooth" look. Not shown in these pics...I left the inside natural for contrast...harkening back to my cabinet-making days (I loathe dark stained cabinet interiors).


-
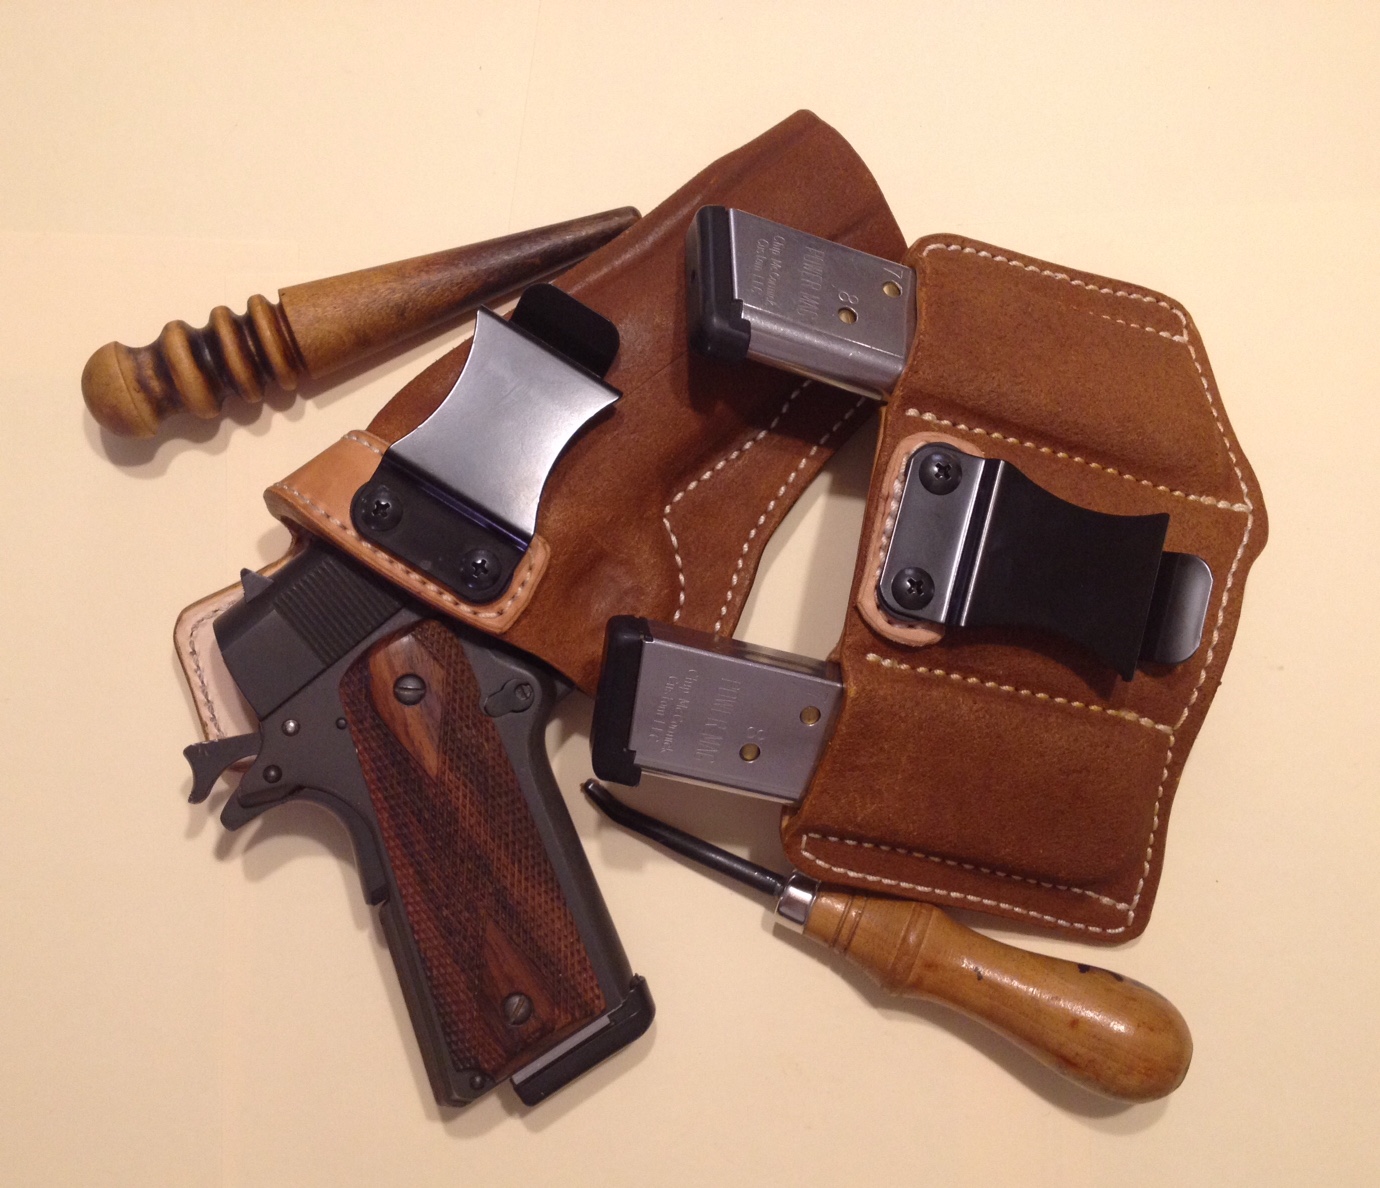
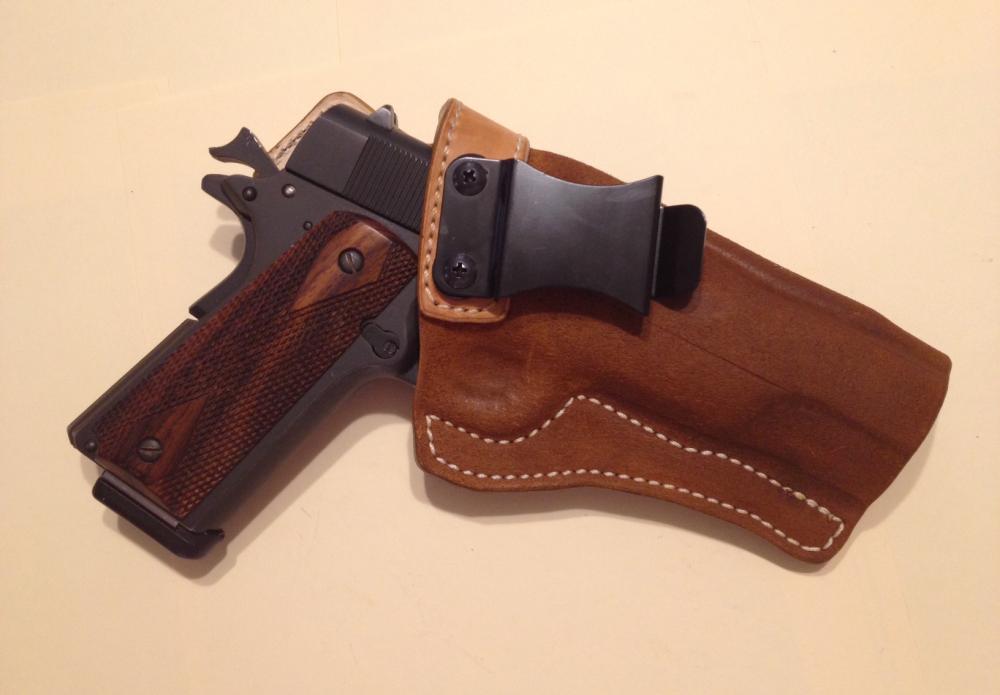
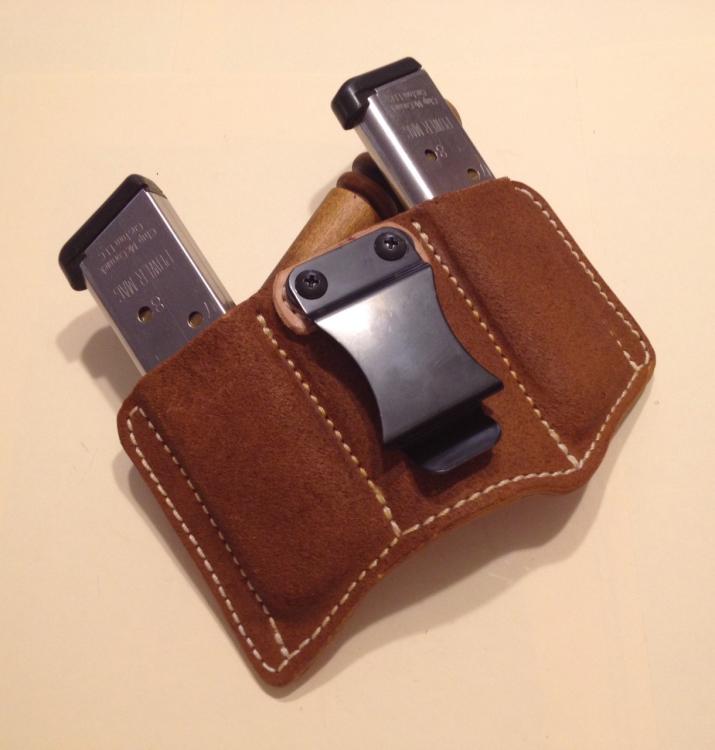
A simple single point steel quick-clip IWB holster for a 1911 and matching double magazine carrier...in "rough out" saddle tan & natural with white thread...the mag carrier is pre-curved for comfort...easy on/off yet stays secure on the belt.

-
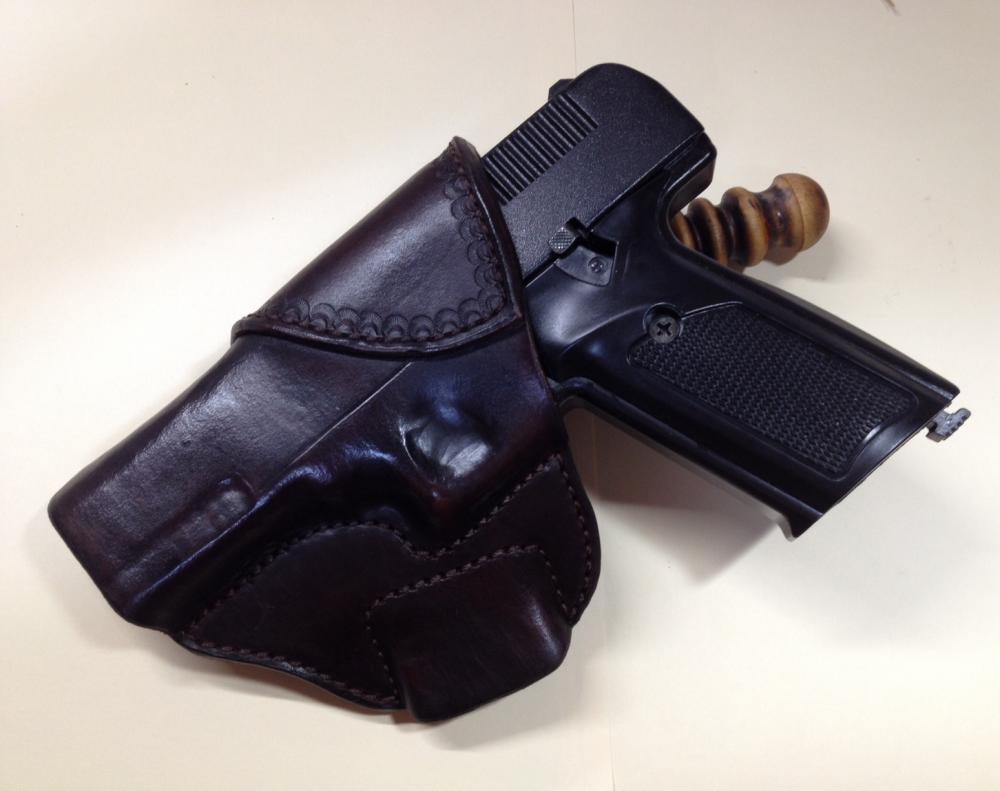
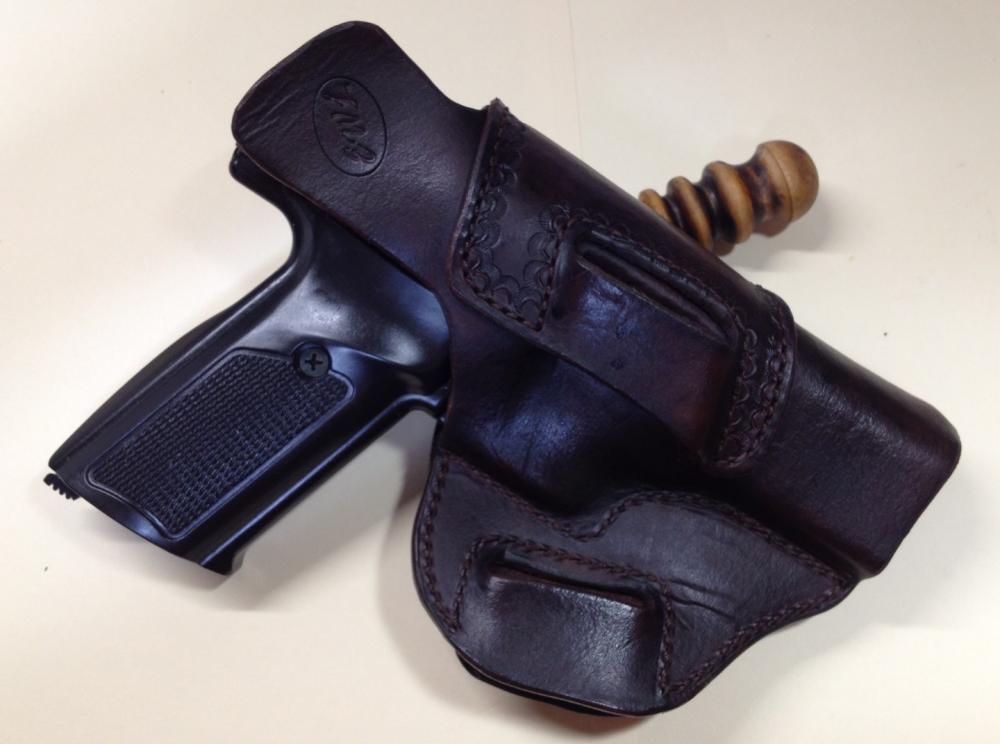
For the past few months, I've been retooling and redrawing all of my patterns as part of a process to "streamline and make more efficient"...I built a pretty sweet drying cabinet (pics available on Dwight's Hot Box Cabinet thread) among other equipment upgrades...and a cursory look thru my patterns showed way too broad a spectrum of styles so I've been re-CADing all of my patterns for a more "homogenous" look. Anyway...had this return customer come to me this week, asking for a holster for one of his pistols that he doesn't carry a lot (a 9mm HiPoint)...just needed a holster "in case [he] want[ed], to carry it around a little." Yeah, yeah, I know...Hi Point, Schmi Point. I'm a daily basis C&L 5" 1911 man myself...but I'm not a snob about it either...especially when somebody's got money to spend. Besides, I saw this is the perfect opportunity to try out my new patterns on a handgun model other than the mold dummies. A quick CAD modification to the Glock 17 Avenger pattern to account for his being a south-paw and for the slightly different stitch lines, etc...and there you have it! Y'all let me know what's what!
-
Kimber K6S Holster
Double Daddy replied to IngleGunLeather's topic in Gun Holsters, Rifle Slings and Knife Sheathes
Clean work as always, Ingle...very classy. -
There goes em Tony Lamas
Double Daddy replied to Sblades76's topic in Shoes, Boots, Sandals and Moccassins
Very unique...nice color contrasts, too. Fine 1911's deserve great leather...looks like you accomplished just that. Well done! -
A big "Thank You" to you, Lobo! Your willingness to share your knowledge and experience are most appreciated, especially by us budding leather workers. Your detailed posts on the inner workings of your leather business are inspiring and to be modeled upon...if it ain't broke, don't try to fix it! Your "Nyah, Nyah, Nyah, Nyah's" are well earned, Sir! Enjoy!
-
Heirloom work...
-
Great craftsmanship, Chief...as always. Each one unique, not just in this post, but from pretty much all the other posts I've seen of your work. Do your customers typically collaborate with you on a design for a pieces such as these...or do many of them just give you creative license to do as you please after having seen some of your past work, resting easy that they will be pleased with the final product? Your dyeing skills, especially on the lighter tan tones, is positively covetous, sir. Feel free to share your methods, if so inclined.
-
How to make a press for moulding leather pouches and such
Double Daddy replied to RockyAussie's topic in How Do I Do That?
A more recent film (late 90's) to try the "ice projectile" concept was Most Wanted, a complete flop of a film staring Keenen Ivory Wayans and John Voight. -
The "reverse knife technique" is really useful. I started using it myself...went and ordered a large X-acto knife that would use the bigger #2 fine point blades...with a little practice, they just sink right in and glide thru like Sam said and demonstrated in the video. I still have my utility knife and strap cutter for some things...but for pattern work with lots of curves, that #2 X-acto is really nice.
-
I will pick your brain, Ingle, a bit more concerning the dyeing technique...how would you modify your sequence if the customer requested contrasting stitching (white thread on tan, dark brown or black leather)? It seems to me that airbrush dyeing after the sewing and molding would work against that goal. Maybe you don't get many requests for such an item...or simply don't offer it as an option to simplify things for yourself...a lot of my customers ask for the option.