


Double Daddy
-
Posts
331 -
Joined
-
Last visited
Content Type
Profiles
Forums
Events
Blogs
Gallery
Store
Everything posted by Double Daddy
-
Ran across this online...his last FB post was the day before his death. https://ohiocremation.org/obituary/kenneth-e-hockenberry/
-
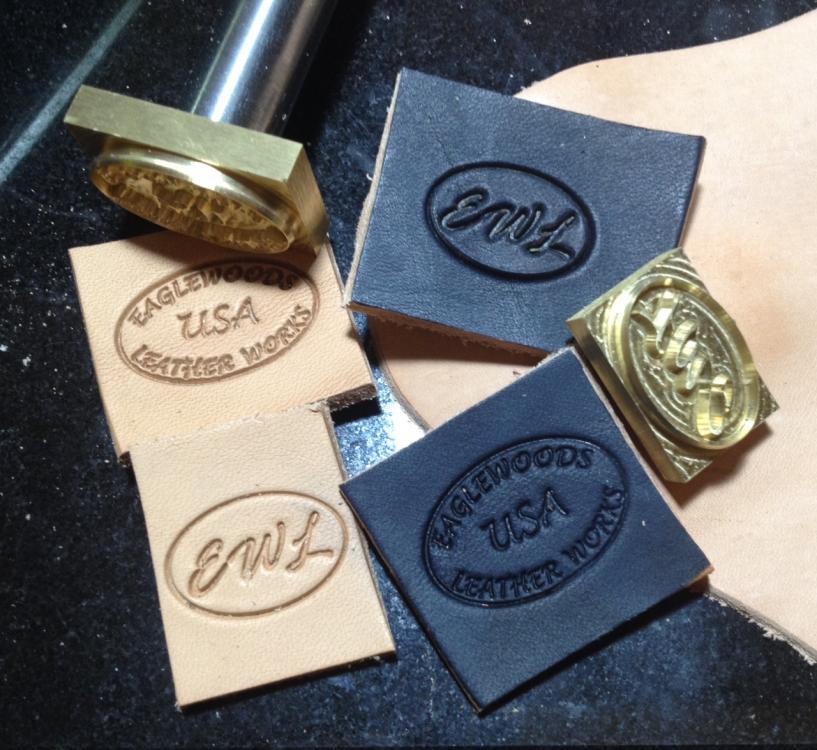
I will echo Steve 75's recommendation...Leatherstampmaker.com crafted my new makers marks stamps last year outta solid brass...quick turn-around time and not too expensive either. They also do custom font sets...and stamp/die combination sets (stamps the impression with an outer groove for the cutter die to lay in...custom tags, coasters, things of that nature) https://www.leatherstampmaker.com/?gclid=EAIaIQobChMI5q-Nxozy3gIVq_7jBx0f_QC_EAAYASAAEgJlEPD_BwE https://www.facebook.com/leatherstampmaker/
-
Great information, @JazzBass...most appreciated. I've been playing music for 30yrs but I'm a sit-down type player and have little to no need for straps...I've made a few for other musicians but have always used the slotted design (what they wanted). Your info is very insightful.
-
Glue on edges squeeze out, won't burnish well
Double Daddy replied to AllanD's topic in How Do I Do That?
Ditto what Dwight said...my experience is from back in my cabinet and countertop days where we used gallons of the Weldwood Red Can Original. Don't use too much...let it dry til its DRY...then be sure you get the pieces where you want them THE. FIRST. TIME...it's unforgiving in placement but I've found it pays off in strength...and availability in my area. YMMV. -
Orders to ship
Double Daddy replied to Mattsbagger's topic in Purses, Wallets, Belts and Miscellaneous Pocket Items
I've seen mechanics and electricians carry them...as a quick mini-tote for just the essential tools for very small fix-it projects...grab it and stuff it either in their front shirt pocket or back pants pocket while squatting or bending...they can lay them nearby and still have those few tools kept together in a handy package without the bulk of the normal toolbelt. Excellent work, Matt...as always. You make what works well and sells...and from the numbers, your customer base would appear to be satisfied with your handiwork. Others would do well to silently take notice from your example. -
That's some fine craftin'...great job on the tooling work as well as the snake skin overlay.
-
As a person who carries such things...that is a quality thing! Flawless, sir!
-
Inkscape and Pattern making, 1911 holster TUTORIAL!
Double Daddy replied to Stetson912's topic in How Do I Do That?
You should be able to customize the command buttons (user/menu interface), similar to AutoCAD or other software programs...keep working with it. AC calls the command "CUI" (Custom User Interface)...then you just go in and move/delete/add the desired command/buttons around within sub-menus, etc. Update: Yep...here it is (slightly older link...but something similar should be in the current version): http://www.cadoasis.com/customize-commands-draftsight/ -
Inkscape and Pattern making, 1911 holster TUTORIAL!
Double Daddy replied to Stetson912's topic in How Do I Do That?
Yep...that one's a pretty tough command to master, Jeff...it's all subscription based nowadays, starting at about $1600/year. Luckily, there are a few alternatives...check out DraftSight. They have a free, lower feature version (plenty for what a leather worker would need!) as well as a full-feature paid version. I use Autodesk products (AutoCAD and Revit) simply because I have access to them thru my employer (I do my patterning during lunch and down-time, etc). I've used DS at home before and its very similar to AutoCAD so the learning curve wouldn't be too steep and the wallet wouldn't suffer. Plus, as I understand it, the DS software (like AC) has the capability to plot directly to PDF as a built-in feature, if that were something a pattern-maker required. -
Inkscape and Pattern making, 1911 holster TUTORIAL!
Double Daddy replied to Stetson912's topic in How Do I Do That?
Excellent tutorial, Stetson! Thanks for taking the time to put it together. I typically use AutoCAD for all of my patterns (non-hand-sketched ones, that is)...then either print them out or convert to PDF...but that's only because I have access to the software and am familiar with it. It's always good to see other ways to skin the same cat! Appreciate the info! -
Triweave Belt, Black OVER Tan
Double Daddy replied to Albob's topic in Purses, Wallets, Belts and Miscellaneous Pocket Items
OOO-WEE!! Don't that purdy! (so says the hill-billy) Thanks for the quasi-tutorial as well. Fine work you been doing... -
Sheath for my bowie
Double Daddy replied to Albob's topic in Gun Holsters, Rifle Slings and Knife Sheathes
Looks REAL good from here in NE Georgia...(says fellow Toledo Sewing acquired CB3200 owner). Great job! -
Sunflower Notebook
Double Daddy replied to Bob Blea's topic in Purses, Wallets, Belts and Miscellaneous Pocket Items
Awe-inspiring work, Bob...as always. -
Proceed with caution... I'm the kinda person that also factors in the value of my time to get such a beast running as equally well as a new machine after outfitting it with said purchased parts (ASSUMING it has no hidden internal problems). How long is it going to take you to get this machine up and "producing" (might be time & $$ away from other things you could be doing) vs. a simple purchase of a dealer-set machine by a professional vendor that you know will work the way you ordered it??? I don't mind an education...life is a continual learning experience...that's one of the reasons I took up leathercraft in the first place...just doesn't make sense (IMO) to waste time and money unnecessarily if it can be avoided.
-
Working Chaps (Bison)
Double Daddy replied to Rolandranch's topic in Clothing, Jackets, Vests and Chaps
Quality looking work...as usual from you. The initials subtly placed into the serpentine border are a nice touch. Being from the NE GA mountains, I have almost no need or experience with this type of gear...no critiques from me on that front...but like garypl, I like the stamping work. -
This is exactly how I use SS paste...the water spritzer I keep on the bench is real handy for controlling how much water ends up in the can. Depending upon how the particular project's edge is cooperating, I'll even follow up with wax or gum trag, per battlemunky's suggestion above. On my desk at my full-time job I have a leather edge sample that I did just for kicks...used nothing more a pocket razor knife, a black sharpie for the edge coloring (and burnisher ), spit (in lieu of GT or SS) and elbow grease...wouldn't want to do an entire holster or belt that way but the process works...in a pinch.
-
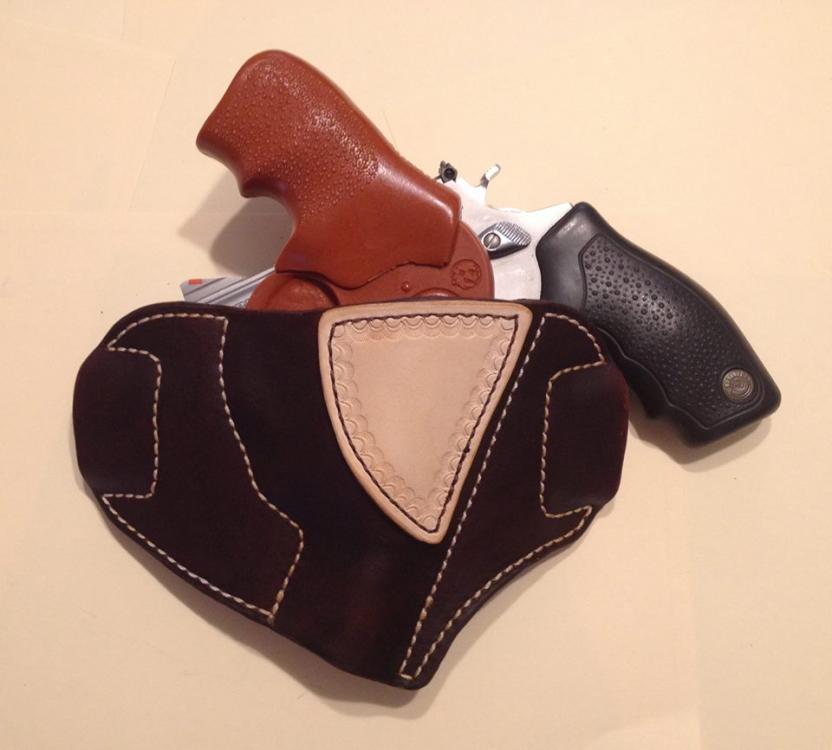
Very nice work! The stamping and inlays are a nice touch. Your loops seem to work similar to the way that Lobo GunLeather does their Enhanced Pancake and Avenger style holsters...Ray Cory was the first on here that I recall doing that...was perhaps the one the originate the design. It's a really smooth look...I like to do it on my holsters as well. Those of us that live with 1911's daily as our boon companions know that anything other than Condition 1 carry is best left to that fictional TV/Netflix sheriff in Absaroka County, Wyoming

-
Josh...great work, per your typical. It's always nice to be able take an accident and make something good come of it...in this case, it gets to stay close to home for the missus! I share the other sentiments...that's one fine lookin' hog-leg! The holster compliments it very well!
-
Elephant Billfold
Double Daddy replied to thefanninator's topic in Purses, Wallets, Belts and Miscellaneous Pocket Items
That is really sharp...clean design and great choice of materials. Fine work, sir! -
Pancake sheath for folding knife
Double Daddy replied to battlemunky's topic in Gun Holsters, Rifle Slings and Knife Sheathes
That's purdy and functional from where I sit...I like your choice of colors and the contrasting thread is always a nice touch. Mr. Gonzalez' website and channel is indeed inspiring/addictive...very talented yet down-to-earth guy who doesn't mind sharing his knowledge. -
I concur with battlemunky on the knives. I've gotten by just fine with just a general purpose utility type...and a large Xacto with #2 which I use for my pattern work (learned this trick from a YouTube video watching Sam Andrews cut out his holster pieces). As others have said, these blades come 'sharp' from the factory but can be improved and maintained to last longer than the common user would normally expect. Thus far on my leatherworking journey, I have no reason to purchase a head knife...TETO! Another thing that stays on my bench is a plastic bin full of wooden clothes pins...purchased at the local Dollar Tree/General...they provide just the right amount of tension for small projects during glue-up without leaving marks on most any decent quality VT leather. Around the mouth of said bin I keep black metal binding clips (also purchased in bulk at the same stores)...I use those for slightly heavier clamping needs.
-
Thanks for the info, Gary...another reason for me to get to "Capital City"...maybe find something decent to eat as well. I've looked over their website before...they don't list anything in the Used section...might have too much to show online (as you pointed out above).
-
Gary - is that where you got that Consew the other day? Sweet deal! Atlanta is barely a hop/skip/jump for me as well...
-
Really great work...as always from your bench!
-
Holster and Gun Belt
Double Daddy replied to Rolandranch's topic in Gun Holsters, Rifle Slings and Knife Sheathes
Most excellent work, sir! I like the concho at each end of your cartridge loop run in lieu of a rivet or stitching...very nice little embellishment to go along with the "high" placement to showcase that nice carving work.


