SARK9
-
Posts
391 -
Joined
-
Last visited
Content Type
Profiles
Forums
Events
Blogs
Gallery
Everything posted by SARK9
-

Singer 169 - A Relabeled Adler 169 Or What?
SARK9 replied to Constabulary's topic in Leather Sewing Machines
Looks legit- There is a parts manual here: https://www.universalsewing.com/images2/parts_lists/all/mnlffcg0.pdf -DC -
Assembling New Consew 206Rb5. Pulley Won't Turn
SARK9 replied to Cthomas1998's topic in Leather Sewing Machines
I bought a 206rb-5 from Zamir a couple of years back, it arrived set up perfectly, and hasn't needed any further adjustment in the time I've had it. I had looked locally for a silver 206 forever, and finally had to jump ugly for a white one. I've had no issues at all with the machine or Zamir. -DC -
There are several models branded "Electro Hygiene"... some are straight stitch only, some zig-zag. Basically they are one of the Japanese-made "HA-1" clones of the Singer model 15 domestic sewing machine. Many were made by Toyota. Some are very well made, but it is still a home machine. -DC
-
What Is Normal For Using A Sewing Machine?
SARK9 replied to lranger's topic in Leather Sewing Machines
You should mention what model of machine you are using, plus the needle and thread size/type. Off the cuff, your thread tensions look FAR too high for your material, and the stitch length looks a bit short. -DC -
>>4 layers of standard tack grade beta or biothane<< As that seems to be over 0.40" of material (10mm+) it is going to take the word "smallest" right out the door. The thread and #26 needle size indicated by Wiz probably removes the "cheapest" part as well. You might find a Singer 111w 155 that can be adjusted to do the "cheapest" part with a more modest thread/needle combination, but its still a full sized industrial machine. -DC
-
210 is definitely max for it, but not having done it all day every day myself, I'm not qualified to answer that one. I suspect it depends on *what* you are sewing with the 210 thread. Nothing seems the slightest bit strained when I use it, but YMMV. -DC
-
I have a Consew 206-RB5 which handles T-210/207 thread without issues. I've run 207 top and bottom on a couple of my Juki LU-563's as well. I'd say the Consew gets the nod for slightly more foot lift, stitch length and no thread tail holding, the Juki wins for bobbin capacity. Both are capable. -DC
-
I believe some of the other Singer SV models were contract-built machines which had subtle differences such as custom heat treatment/hardness specs on some otherwise identical internal components. The differences may be non-obvious. -DC
-
-
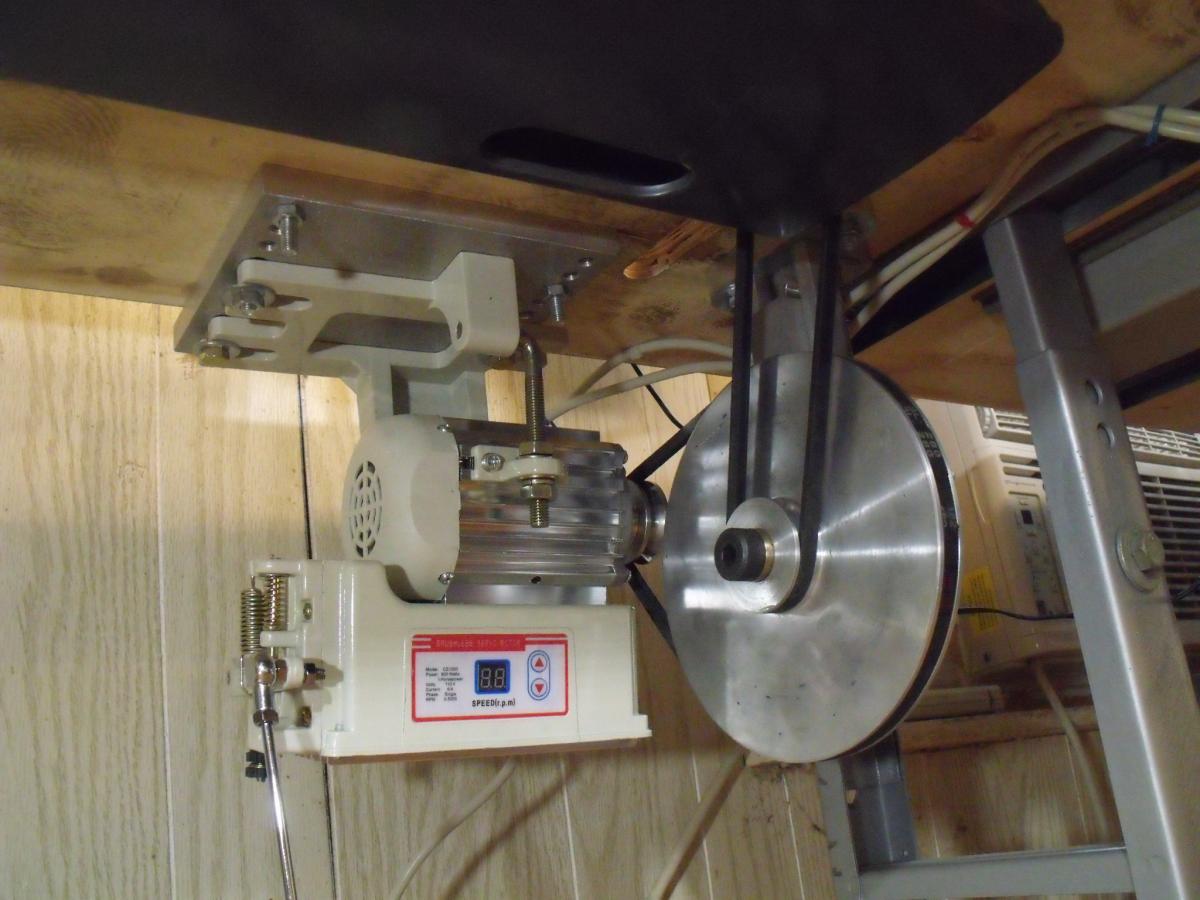
I couldn't play the video, but from your photos it looks like you have a 4L belt on the machine's add-on pulley, going to the 3L groove on your speed reducer's small pulley. This may not end well LOL. The servo plus the speed reducer alone should provide all the torque and speed reduction for anything I can think of, and when you get the hard turning part corrected, the machine will be very easy to turn by hand using only the original pulley on the machine. If you have the right belts to swap stuff still laying around, I'd consider whether there was a *need* for the wooden wheel and its pulley. 4L belts generate a bunch more flexing tension and friction loss. -DC
-
Quick diagnosis for your hard to turn issue: Remove both presser feet and rotate handwheel; report back. -DC
-
If your "new" 206 is a 206-RB5, one thing you might try when removing the bobbin case is to match the dot on the handwheel with the dot on the body casting and remove or install it in that position. Some of the 206 manuals have a different set of instructions concerning the position of the needle bar and feed dogs. This position seems to make it easier for mine. -DC

-
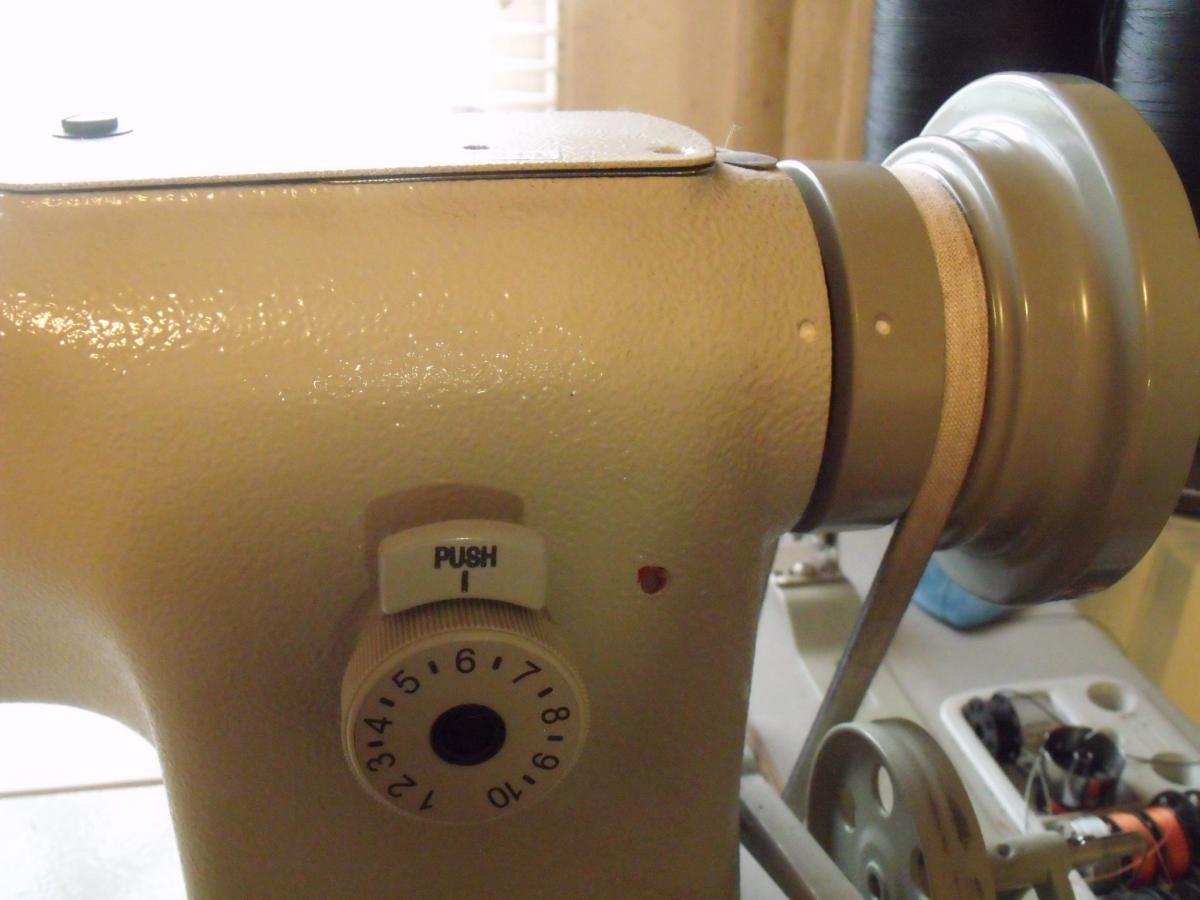
I too noticed the shopmade handwheel pulley, which is a larger diameter than the stock one. It would reduce the RPMs to the head. When backtacking a starting stitch, I've just been using my elbow to depress the reverse lever on the Juki LU-563's and the Consew 206RB5. It does free up both hands to guide the workpiece, but it feels kind of....awkward. I've been waiting for the right piece of PTO cable to connect mine up to a pedal as well. -DC
-
This is covered fairly well here: http://leatherworker.net/forum/index.php?s=8c7fdfdb9d755c9adf24cd073403b084&showtopic=25239 -DC
-
There are several brands of low-cost "servo" motors which share a common type of speed control....the ones I am familiar with are made like the Consew CS-1000. They appear to have an "optical" speed controller of a sort, which functions by having an opaque shutter progressively reduce the amount of a light available to a receptor. Mechanically, its very simple. Having done the well-known reshaping mod of the small shutter blade on four of these motors, I would expect that its very possible to completely unmount this sub assembly and mount it remotely, connectiong back to the motor using only lengthened wires. It looks like a trivial bit of tinkering to work out whatever pedal or knee control etc. would be convenient for the operator, if that is what the issue is. At least it gives you an option for less than $599! -DC
-
To me, it looks like a standard low-shank hinged straight stitch foot with the narrow toe broken off. -DC
-
Can't go far wrong with a new one. I was just going to mention there is a Singer 531 and a Consew 756R on CL there in Tucson, but no prices posted. -DC
-
Hi CD- That Singer 251-21 I got for a binding machine had one of those type of clutch motors mounted on it, and I was amazed by the fact I COULD actually control it pretty well. I plan on overhauling the bushings/ sleeves and look into substituting a smaller pulley for the pretty large one that is on it. The mechanics are totally designed for use with a leather belt The way it mounts is also pretty different....it uses 4 "legs" rather than the more common 3-hole pattern usually seen, and the width of the leg spacing puts the rear pair off the back edge of any of my tables when the pulleys and slots are aligned. I'm studying that as well. It works so well I feel its worth a bit of effort. -DC
-
FWIW the manuals list the max stitch length as 5 to the inch. -DC
-
Stitch Length On Singer 111W151-Need Advice
SARK9 replied to patches's topic in Leather Sewing Machines
On my similar machines, once the handwheel is turned toward the operator and adjusted to the maximum stitch length, it reaches a "stop" and can only be turned back the other direction. -DC -
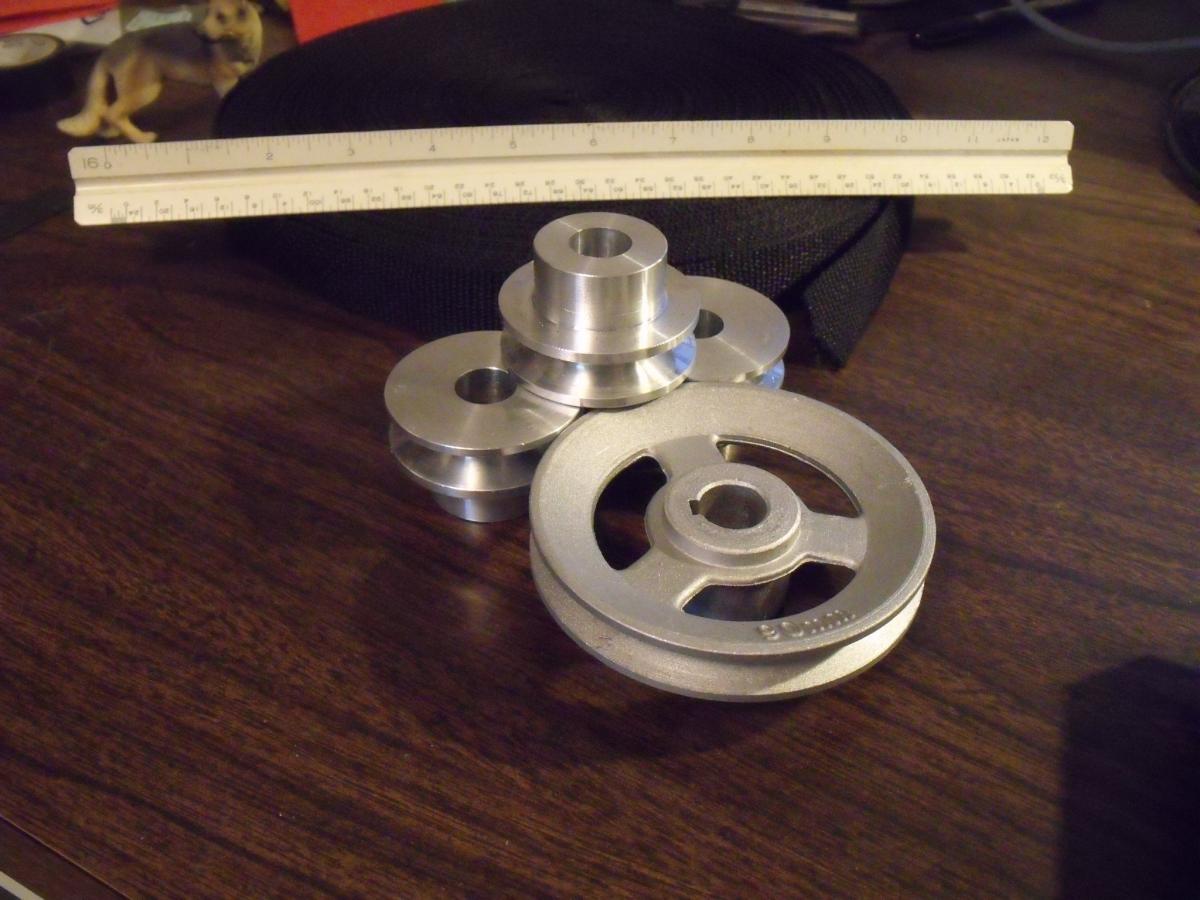
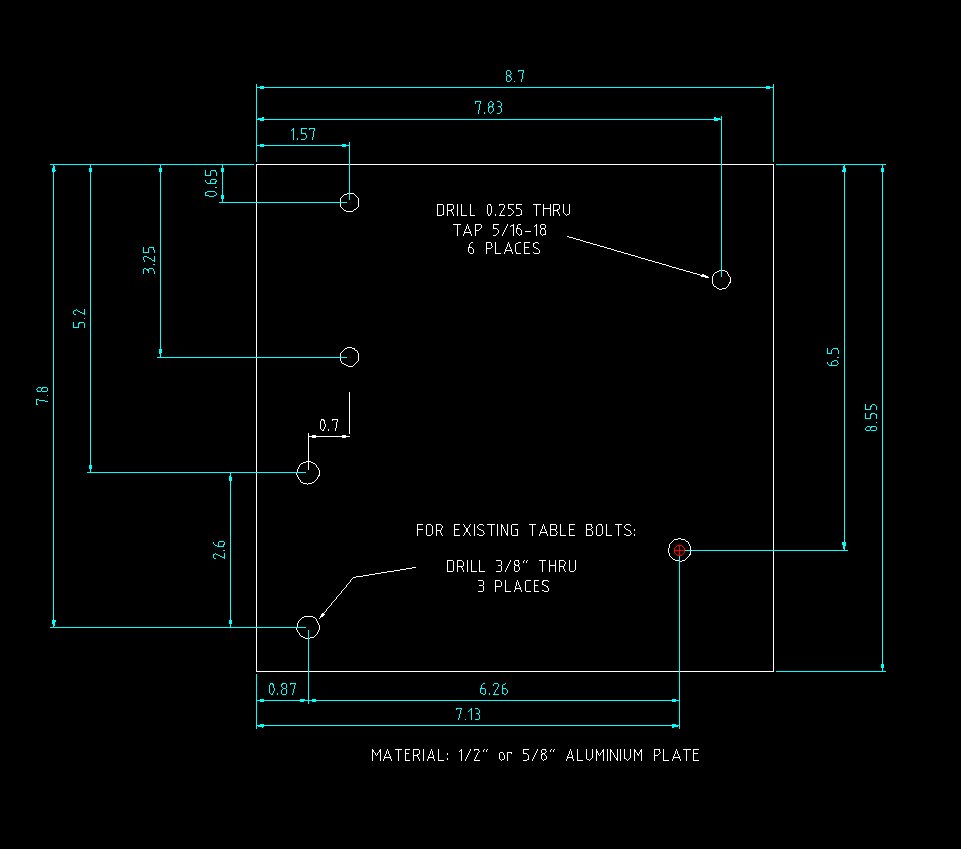
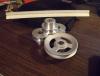
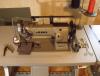
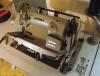
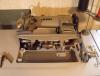
Some speed reducer observations and the reinvention of the wheel- I've installed servos + speed reducers on 5 flatbed machines (3 Juki LU-563's, a Singer 251-21 and a Consew 205RB5)-- mostly to sew multiple layers of heavy webbing and ballistic nylon. Although I've not tried every single brand and style of the inexpensive "servo" motors, many of them do seem a bit more predictable and controllable when used in conjunction with a speed reducer/torque multiplier, which lets the motor begin rotating somewhat faster before becoming loaded, notwithstanding miraculous advertising copy to the contrary. My servo motors produce 5000RPM, which I almost never need. YMMV. Anyway, when using one of the types I'm familiar with, I find its desirable to use the smallest motor pulley available....for reasons of physical clearance (as you will see later*) as well as gaining the max reduction for your $$. *The smaller the pulley, the further "back" towards the motor the reducer pulley can be located. Notice the relationship between the large reducer pulley and the 50mm motor pulley...its close! Some homemade 50mm pulleys awaitng the 5mm broach shown with a 90mm for comparison. In order to preserve the easy of tilting your machine back for service, I have found it convenient to use an accessory mounting plate adaptor to relocate the position of my servo motors. This plate moves the motor attachment back to the rear table edge and offsets the mounting position towards the right about 0.700 inch. This lets you mount your reducer far enough back that the new geometry allows your machine to hinge back normally and unload the long drive belt as originally designed, and helps compensate for the additional width of the reducer pulley set and its alignment with the table slot. This usually eliminates the need to lengthen or extend the table slot to prevent the belt from rubbing as well. Here's a quick sketch of one mounting plate solution to help restore the convenient maintenance of your machine's underside when using certain reducers- In a nutshell, there are three holes in the plate for using your table's original motor mount carriage bolts to attach it, then a couple of sets of threaded holes used to bolt on your servo in a favourable offset location. It looks very sanitary and seems to work perfectly for my stuff. [Note- I eliminated 3 of the mount holes on the drawing but didn't change the text about 6 holes. D'oh!] -DC


-
Thanks for that link! I don't have a 29K at the moment, but I fully expect one to follow me home at some point. Yours turned out great, BTW! -DC
-
These are not too hard to adjust- (assumes the timing belt or lower pulley hasn't jumped a tooth). You really should get a good copy of the manual first....but here is the broad brush procedure. Corrections invited! 1. For a rough initial setting on a machine that is too far out to "eyeball" easily: Insert a needle of the most often used size for your normal work. Err on the side of larger. Lay the machine back on its hinges and loosen the two set screws on the larger bevel gear.....the one with the horizontal shaft. Run the screws back in until they very lightly touch the shaft again. 1. Set the machine back upright. Adjust the stitch length to 3.2mm (a longish 1/8th inch). You can test by hand turning the wheel and measuring the distance between the needle holes on a piece of paper. 2. Remove the needle plate. Turn the handwheel until the needlebar is at its lowest point, then turn further until the bar rises 3/32nds inch. Try to preserve that position for the next op. 3. Lay the machine back on the hinges. To get the hook close enough to the needle to set the needle bar height correctly, lightly tap the large bevel gear right or left along its grooved shaft and observe the the movement of the point of the hook. Tap the gear along (without rotating the gear) until the hook's point is at the middle of the needle. 4. Lightly snug the set screws on the gear, and repeat step 2 to verify that the needle bar is accurately at 3/32" above BDC. The eye of a correctly inserted 135x16 needle should now be 1/16" below the point of the hook. If its not, the needle bar height should now be adjusted until its at that position. The needle bar clamp screw to loosen for this is really the only visible screw attached to the needle bar ;-) Set and re-tighten. 5. The machine is now "roughly" set; You can now repeat the steps and get it "precisely" set, and secure the gear's screws in place. 6. Now check the distance of the hook to the needle. There are two large screws that secure the entire hook/gear assembly casting to the main bed of the machine. Loosen and tap the assembly right or left until the hook is not quite touching the needle. Make sure the hook guard isn't overly deflecting the needle as you cycle it by hand. All good? Tightened? Good luck---Sew it off and see how it works! -DC
-
Looking For A Speed Reducer Sheave (Pulley)
SARK9 replied to Evo160K's topic in Leather Sewing Machines
That 1-1/4" bore (plus the bolt circle diameter) will severely limit the minimum size of the small pulley you could substitute, and the hight of the mount will limit the option of increasing the size of the larger pulley unless you mount it on a riser etc. That is an exceptionally cool piece of original hardware as it is....I think I would try to find a reason to use it just as it was designed, somehow. You *will* get an RPM reduction and a torque multiplication with it, and if combined with a decent servo motor, I'll bet you would find it perfectly useful. There are several commercially available speed reducer pulley sets available if you have to go that route.....but the price is so close to the cost of a mid-range servo I believe I'd go that way. -DC -
I have 2 LU-563's and a Chandler CU-563 rebadge. My sewing for the moment is limited to multiple layers of webbing and crossing thick 1000D Cordura seams, so its not *exactly* like sewing leather. I don't find these machines any more "temperamental" than my 206RB5 save for the bother (and good practice) of holding the needle thread tail for a couple of stitches when beginning. I have servos and speed reducers on ALL these machines and I CRAWL them around a good bit of the time, but go wide open on bigger expanses. There are several things that should be "tuned" on these or any other machine, and if you were able to download the JUKI manual generously made available by Greg of Keystone Sewing, it has the complete procedures outlined for a DIY type. Some easy things to check for are any tiny wear grooves or pitting in either face of your tension discs, the spread of the split tension stud and its ability to hold the setting of the knurled knob, the correct horizontal orientation of the "three hole thread eyelet", and whether you always get the "snap" when you route the thread through the lower thread control discs, and whether the needle is inserted all the way and has the scarf aimed exactly at the machine's sweet spot :-) Adjustments to carefully check are the walking foot timing, lift and foot pressure, the max lift of the feed dogs, the timing and "force" of the take-up spring, the VERY important correct needle bar height, the distance of hook point to the needle *you commonly use*, the needle guard adjustment, and the actual timing of the hook. My machines were all acquired used and all had a couple of things totally wrong. After adjusting the common gotchas, these machines now seem pretty forgiving no matter what. Lube everything religiously with the best quality products. I run everything from T45 nylon to T210 poly through mine with no bother other than to test the settings on a sample and go. -DC