


billybopp
-
Posts
1,935 -
Joined
-
Last visited
Content Type
Profiles
Forums
Events
Blogs
Gallery
Store
Everything posted by billybopp
-
Safety skiver, round knife, leather paring knife, or even a small block plane. Bill
-
Fabric sewing stores don't usually have thread that is as heavy as we use for hand-sewing leather, although you might get lucky on that too. It is just possible that you may find the right thing as "beading string" at a craft store, but I couldn't say for sure. If it's not pre-waxed, you'll want to wax it for sure. If you want something comparable to tiger thread, try this http://www.mainethread.com/waxed_cord.html or this http://www.ebay.com/itm/260Meter-1mm-150D-Black-Leather-Wax-Thread-Cord-for-DIY-Tool-Hand-Stitching-/111401102438?pt=LH_DefaultDomain_0&hash=item19f005ec66 I haven't used the mainethread poly myself, but many like it. I have used the stuff from China on ebay and it is good. Not as nice as tiger thread, but close. Their 1mm is closer to tiger's 0.8mm. It's prewaxed, but not as heavily as tiger is, which probably accounts for most of the size difference. Hope that helps Bill
-
 Really nice. Well executed and perfect stitching. Are both sides the same? Will you trade one for a 12 of Narragansett? Bill
 -
How Do I Lay Out Words In Rivets On A Belt Nicely?
billybopp replied to LilyLambda's topic in How Do I Do That?
A program would be great, but otherwise, I'd start with a piece of graph paper. Let each square represent the size of your rivet head, stud or whatever. Figure out the length and width of the space on your leather in terms of number of squares, an mark it on the graph. Write what you want in the space .. I'd suspect that capital block letters are easiest, and voila there it is. You may have to scale the graph up or down to suit the space, but that should now be relatively easy; Particularly if you have access to a copier that can resize. Hope that helps. -
Great job! Keep hittin' it on the two and four! Bill
-
Congrats on a milemark @ 1000. All of those 1000 that I have seen have been excellent. You skill is exceptional as is your ability to communicate what you are doing. It's appreciated. Thank you! Bill
-
Leather Glasses/sunglasses Case Leaving Scratches?
billybopp replied to zaynexpetty's topic in How Do I Do That?
Hmmm. If you were to put in a sewn microfiber cloth liner and attach it only at the case opening, you could pull it partly out to clean glasses with and then just shove it back in when done. That may work or not, depending on the case design. If it works it'd be pretty nice, tho! Bill -
ROFL @ zuludog. Now .. tboyce ... How do you run the same sort of calculation with a cast thread saddle stitch? That lil' ol' knot down in the hole does take up some additional amount of thread. Bill
-
Handy stuff! Thank you! Bill
-
I have to agree, the design is really nice ... but the stitch holes are too big and not angled quite right. What type of awl are you using? If the awl has a lot of taper, it can make the "front side" holes quite a bit bigger than the "back side" holes are. For that reason, I prefer straight sided awls such as Seiwa, or ones with a very slight taper such as Vergez-Blanchard. Also, play attention to the awl angle .. It isn't easy around curves, but it will make a difference. Hope that helps! Bill
-
Provided that the sides and bottom are perpendicular, the rounded portion will always be 90deg (1/4 of a circle ) hence the length around it will always be 1/4 of the circumference of said circle. Where h = Side height w = width of bottom r = radius of curve total length of the perimeter will be: 2(h-r) + (w-2r) + 2(pi*r*2*0.25) = total length Simplified: 2(h-r) + (w-2r) + (pi*r) = total length In your example: 2(20-2.5)+(30-2*2.5)+(3.15*2.5) = 67.85 That said, in my experience even the best measured gusset is never exactly right after cutting, dying, shrinking, stretching, stitching .. Any and all of which can cause the dimensions to change slightly. According to Murphy's law, this change will ALWAYS be on the side of too damned short rather than a little long. So just cut the thing a little longer than you need and trim it in place for best results. Bill
-
I don't even have words to describe how much I like that, and your other work as well. Bill
-
Very cool knives! All beautiful. I especially like the micro knife. There are times when working on very fine detail that it's hard to see what you're doing around the knife body, and it seems like that might be great for those situations. Bill
-
There are things on occasion that I find easier to hold between my knees when stitching (usually big stuff), but I use a stitching pony most all the time. They aren't hard to make if you have just a modicum of woodworking skill. If you don't have the skills, or perhaps live in an apartment you can find them from Tandy, Springfield Leather, or on ebay for anything from $25 to $2500. It's a good thing to have! Bill
-
Cotton Swab,s They Don't Hold Up Like They Use Too..
billybopp replied to Itch's topic in How Do I Do That?
Look around and see if you can find tape head cleaning swabs, or electronic swabs. Something like this: http://www.ebay.com/itm/Tape-Head-long-stem-cleaning-swabs-/300612804119 They aren't as cheap as drugstore cotton swabs, and some are FAR less expensive than others, but the cotton fibers are wound MUCH more tightly so they tend not to shed their fibers. If you search you'll probably also come across foam swabs which may work for you or not. Hope that helps Bil -
Wynfrith's First Holster
billybopp replied to Wynfrith's topic in Gun Holsters, Rifle Slings and Knife Sheathes
I'm looking at getting a belt sander in the not too distant future as well, but in the mean-time I'm using my sanding drum with my dremel mounted in their drill press stand.. The same setup with a burnishing wheel makes quick work of burnishing edges as well. It works well enough for drilling as well, but I don't have too much use for that with leather. It takes up little room, is mobile, and versatile. It's not a perfect tool / setup, but it works well enough. Bill -
I'd say it looks ready for Sergio Leone and Clint Eastwood. Great job. Bill
-
Love the tool, Dwight! The only things I do with regularly spaced slots are guitar straps (so far), and that would be a tremendous help on some of the adjustable straps. I've been using a T-square, which helps get things perpendicular, but then spacing is still a bit touch and go. I'm gonna have to make one. Thanks!! Bill
-
I don't know too much about these, but it seems that it may be a good idea, on style #1 and #2 above, to put a few stitches between each loop. You'd only need a small number of stitches: just enough to prevent the loops from "creeping", and it may also help the back part of the loops, inside the belt, to lie flat. The look you want, and hand vs. machine stitching may be a factor in what you do as well. ( Not to mention your ability to get the slots cut perfectly perpendicular and evenly spaced ... which I suck at). Stitches and slots both might be overkill, but if you're a belt AND suspenders guy it's a good thing. Just a thought Bill
-
Attach a quarter slot, some spinning wheels and sound effects to that Boss, and it won't take long for somebody to come along 'n start pulling that handle for you, and paying for the privilege. Or at least that's how it seems to work every time I take the train over to Atlantic City. Heck, if you offer a cheap buffet you could staff an entire factory. Bill
-
If you like the idea of a bench setter, but not Tandy's price ... Folks seem to have good luck with this less expensive alternative: http://leatherworker.net/forum/index.php?showtopic=51602&hl=%2Bgoldstar+%2Brivet#entry329128 I bought a Tandy before I saw the above, so spent more than I might have ... And wouldn't set rivets any other way unless I absolutely had to. Hope that helps Bill
-
Looks great Chief ... As always. I love the color, but how do you manage to get it so nice and even. I always have a bitch of a time with tan / saddle tan / british tan getting anything approaching an even finish! Bill
-
Grizz may well be right. I recently ran into a problem with a piece of leather when dying it. The dye was reasonably nice and even for most of the surface, except for an area that looked for all the world as though somebody had wiped something off of the leather with a rag. Which is probably exactly what happened at the store before I bought the stuff. Bill
-
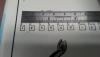
This was more or less covered recently in another thread, although on a quick search I can't find it. (give a look, you may have better luck than I had). Somebody posted a sizing guide, however .. And I saved it ... So here 'tis, with thanks to whomever posted it originally!! Hope that helps Bill
-
There have been a few threads about using an arbor press for clicker dies recently. Mostly centering on 6 or 12 ton hydraulic presses from Harbor Freight and the like. They need to be modified to work as a clicker press. Some people can to that themselves. If you can't, you'd have to pay somebody to do it. Mods mostly consist of a large metal base plate with plastic atop it, and a matching metal top plate for the ram to act upon. Since these presses are hydraulic, they are not as fast as a devoted clicker, but otherwise should work OK. If you search around, you should be able to find those recent threads. Hope that helps Bill
