-
Posts
1,091 -
Joined
-
Last visited
Content Type
Profiles
Forums
Events
Blogs
Gallery
Store
Everything posted by DJole
-
One of the biggest temptations is to jump right in and start making more complicated pieces, before we have the knowledge and experience. It's a very common thing for beginner leatherworkers -- most of us have done it! One thing that will help you learn is good leather, especially if you want to learn tooling. Cheap leather will be frustrating, but you don't want to spend a lot of money on beautiful expensive leather yet (until you know what you are doing). So there should be a mid-range that will let you buy leather that you won't mind throwing away on practice pieces. Is there a leather supply store near you?
-
I have only beveled the flesh side on very thick (think armor thick) pieces, which are one piece of leather. Two pieces of leather, sewn together, are sewn flesh to flesh, so only the grain side needs bevelling.
-
You might want to look at Kevin Lee's stitching irons. Among the sets which are comparable in price to what you note above, he also has inexpensive sets which will help you decide what you like (diamond vs pricking, and so on): https://www.kevinleetools.com/products/basic-diamond-chisel For example, he offers a 1+2+4+6 prong set for 30 dollars. I bought his reverse iron set in 3 mm, to work with my 3mm Japan Goods diamond set. I have used them enough to recommend them as a good starter set for somebody who doesn't want to invest a lot before figuring out if diamond chisels are what they want. They are well-polished right out of the box, which is very helpful. They are light and small, which works for my hands, but big handed folk might find them uncomfortable.
-
Okay, that certainly helps narrow down what you need! You don't have watch straps on there, for example, which use much smaller irons and thread. So, it looks like maybe 4 to 5 mm would match the leather thicknesses required for those items, for strength and visual proportions. It's unclear if you're going for a set of pricking irons (which merely mark the holes with a slit, which are completed by a stitching awl), or a set of Japanese style diamond chisels (which go through both layers, making a narrow diamond hole that usually doesn't require an awl). You also need to make sure to match your needles and thread to the hole size and spacing. Here's a quick chart that I cribbed from somewhere else, which helps me match them up: John James Needles Threads Size Size Length (mm) diameter (mm) Tiger/Ritza (mm) Lin Cable 4 004 48 0.4 0.6 532/632/832 2 002 54 1 0.8 432/332 0 1/0 57 1.1 1 00 2/0 57 1.3 1.2 000 3/0 62 1.6 Most of what I do falls in the middle range -- for my 3mm diamond irons, I use the 1/0 needles, with either .8 or 1 mm thread. For thicker projects, the 5 mm irons are what I pull out, with correspondingly larger needles and thread.
-
I wanna go to your school! But really, that's a very clean and crisp bag. Nice work!
-
I got my reverse irons here: https://www.kevinleetools.com/products/basic-diamond-chisel They are the Japanese diamond chisel (not the French pricking iron/slit style). size: 3.0, 4.0,5.0, or 6.0mm tooth numbers: *1+2+4+6 set *10 *15 *20 *1+2+4+6 reverse set That bottom set is what I have. I use them as a companion to a Japan Goods regular direction set (3mm, 1,2,3,4,6 and 10 tooth). Even though they are a different make, they match up just fine on the leather. These irons are light, and I think they might be small in size for folks with large hands, but they are well-polished and ready to use. ---------------------------- In case you need a French style reverse, Kevin Lee also features those to match his regular irons: https://www.kevinleetools.com/products/kl-french-style-pricking-iron Size 1.93mm, 2.25mm, 2.45mm, 2.7mm, 3.0mm, 3.38mm, 3.85mm, 4.0mm, 4.5mm, 5.0mm Tooth 1, 2, 8, 20, 2+8 tooth reverse, 12, 5, 10 --------------------------------- Kevin Lee has reverse sets for other sets of his irons, both the low budget set (which I have) and a couple of the more expensive sets. I don't work for Kevin Lee, nor do I get any benefits from his company, but I am a satisfied customer who invested in his tools.
-
I have one set of Japanese style 3mm irons with a matching set of 3mm REVERSE irons, in which the slots are angled the other way. (/ / / and \ \ \, to roughly illustrate.) I have found the following steps useful, especially on thicker pieces: 1) Before putting the 2 pieces (or edges) together, use dividers to get a nice straight line, and use the irons to punch one side of the piece, not both. I'll call that the front side. Be sure that the irons are VERTICAL, so the holes go straight without any wobbling. I find that I am much more consistent with the irons running along the line away or towards me (rather than across), since I can just see the vertical better. 2) Tape/glue the front and back sides together. 3) Use the pre-punched front side as a GUIDE, and re-punch every 5th or 10th hole with a single prong, or a diamond awl, going all the way through the pre-punched front layer just enough to show on the reverse side. 4) Use dividers on the reverse side to mark a stitching line equal to the front side margin. That line should consistently cross the guide holes. 5) Use the reverse irons, and the guide holes, to create the stitching line on the back side. The reverse irons should match the pre-punched front side holes, since they are a same spacing. 6) Now I am ready to stitch, using the advice given above about consistency in needle technique.
-
That device doesn't burnish the edges, it merely trims them. I don't think it's quite what the original poster was looking for.
-
It looks pretty good-- the blue thread is a nice color choice that pops out. Remember that if you use colored thread that contrasts, you have to be extra careful with your stitching because every flaw will pop out too! From the picture of the outside, looking at the stitching line, there are some slightly crooked spots. Comparing those to the inside, the inside lines are nice and straight and even. It is likely that you are still working to keep the stitching iron perfectly vertical when you strike it with the mallet. Go slowly, take your time and double-check the iron alignment before striking. After a while, you'll get it. This is normal -- everybody who does hand stitching has to learn this! ;-)
-
It really makes a difference to match the thread and needle and hole size. I found this diagram somewhere, copied it down, and let me put it here, too John James Needle size Length Outside diameter Ritza “Tiger” thread LIN Cable 4 004 48 mm .9mm 0.6 532/632/832 2 002 54 1 0.8 432/332 0 1/0 57 1.1 1 00 2/0 57 1.3 1.2 000 3/0 62 1.6 What is the table telling me? If I am using 3mm stitching irons on my thinner leather project, the best results are using a 004 needle, with the corresponding thread. If I am using a thicker thread (like those Maine threads), then try a 1/0 or 2/0 needle, with a larger stitching iron (5mm works well, 4 maybe) I used to have that similar problem until I figured it out. So you should get a few packages of needles (they're not expensive, after all) to match your thread sizes, and using a stitching iron to match. I have a set of 3mm and 5 mm diamond (Japanese style) stitching chisels, which are my go-to sizes. I have a set of 4mm stitching irons (French or slit style), too. I have a few remaining Tandy "Big Eye" needles, which I keep around for nostalgia. ;-)
-
I have been enjoying watching various of these YouTube videos produced in Germany. They cover an astounding breadth of handwork -- making bagpipes, alpenhorns, French horns, bread, cheese, ham... the list goes on and on! But this forum is for leatherworkers, and there are some videos featuring leather workers. The audio is in German, but subtitles are available in both German and English. I hope you find these enjoyable and perhaps useful! How to make a leather belt | SWR Craftsmanship: < How to make a purse | SWR Craftsmanship: < How to make a leather satchel | SWR Craftsmanship: < How to tailor leather pants | SWR Handwerkskunst: <
-

Shopping cart security tokens
DJole replied to Klara's topic in Purses, Wallets, Belts and Miscellaneous Pocket Items
And to add to the confusion, the industry term for them is a "Baskart".... ;-) -
I got an arbour press last year. (Vevor #1, a one ton press.) I made sure to get one with the hole and set screw already drilled in the square pressing shaft. I use it to set rivets, snaps, and for my custom maker's stamp. It is a lot more accurate than hammering! I don't have any clicker dies for use on it yet, but I'd like to try that next. I have been pleased with it so far.
-

Just wondering. Why such thick, heavy belts?
DJole replied to SUP's topic in Leatherwork Conversation
Maybe you could lose that Chapstick and save a couple pounds? haha! Seriously though--that's a 20 year old belt? It's a tough piece of work! -
You might find some useful information in Ian Atkinson's videos. I have linked, below, his video which discusses what tools a beginner needs: https://www.ianatkinson.net/leather/learn/videos.htm The one video I mentioned above is titled "The Tools You Need for Leatherwork!"
-

Seeking Input on Sheath Design
DJole replied to rktaylor's topic in Gun Holsters, Rifle Slings and Knife Sheathes
Looking at the sheath as a working piece, with the knife going in, coming out, many many times.... I wonder if the stitches along the blade edge will get sliced, especially as the leather stretches over time and use. Would a welt along that edge be a good idea? I'm no expert on sheathes, so I look forward to someone with experience to correct me if I am wrong. -

I am looking for advice on how to add a coin to a keychain
DJole replied to sgtfury488's topic in How Do I Do That?
Type the search term "coin holder keychain" into Amazon, and look at some of the possibilities there. -
Thanks-- it was a complicated project that stretched my skills a bit, and I'm pleased with the results.
-
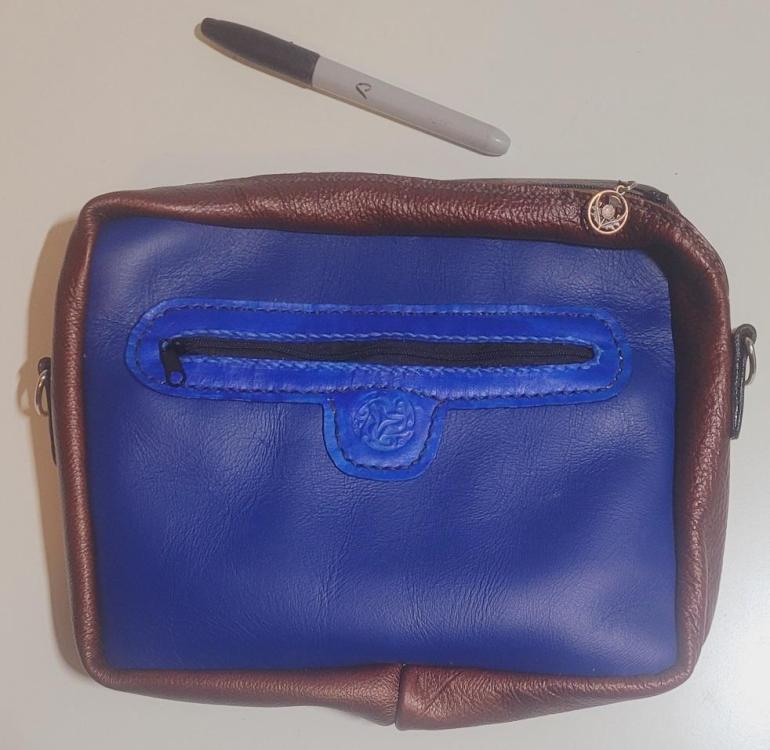
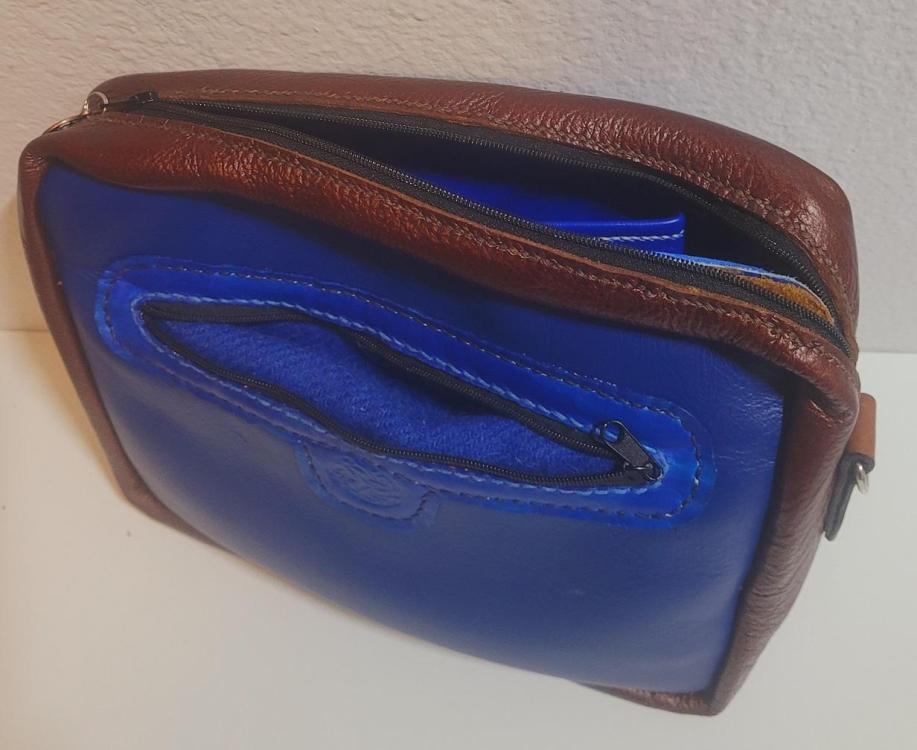
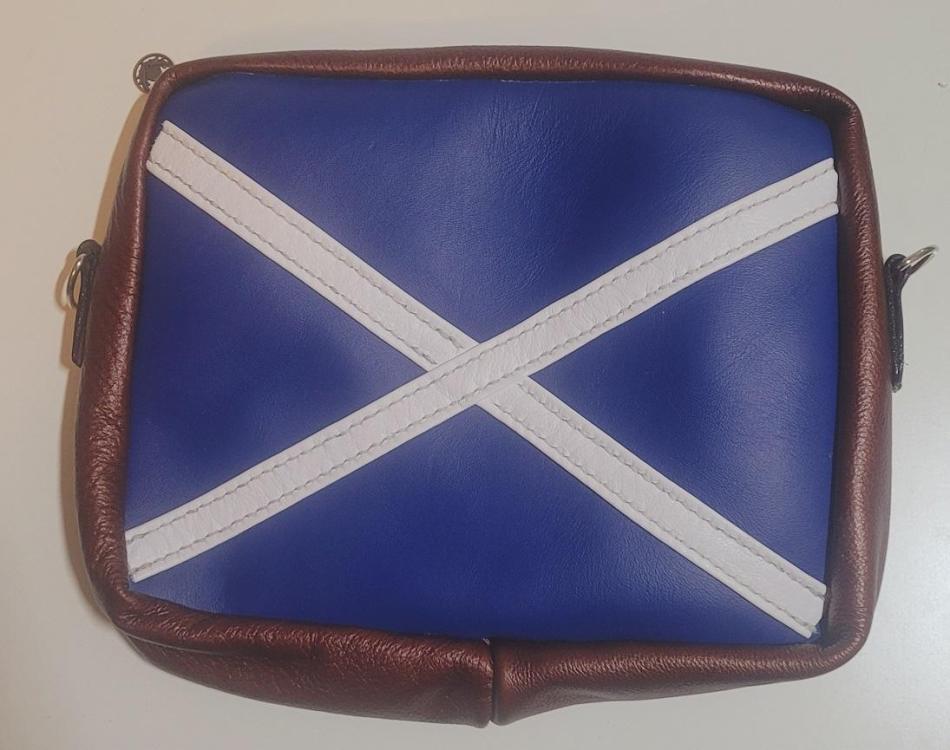
This took me a while to complete, because I had never done an outside zipper pocket like this before (with rolled, hidden edges inside). The outside zip pocket is lined with genuine handwoven blue Harris Tweed, selected from the Harris Tweed shop on the Isle of Harris, Scotland. That blue tweed has come a long way! The interior is lined with a bright blue leather, and has a patch pocket The zipper has a thistle charm I got from Amazon. All it needs now is an appropriate strap.
-
I have one of those "safety skivers" (the silver one), but I never could get it to work right, never making a clean, even skive. I now use two different tools for skiving. One is a French edge skiving tool, and the other is an Olfa Japanese skiving knife. Do an internet search on those terms to see what I am talking about. I spent some time watching videos to see how the Japanese skiving knife is used, and I caught on quickly. I polish the edge up with 1000 grit sandpaper and my leather strop before starting a skiving project, and I have learned the "feel" when I need to re-polish in mid project. For other jobs, such as skiving large bits of leather (rather than just edges, like the Japanese knife), I use the French edge skiver. I keep it sharp and polished too. For some projects using stiffer leather, I can use it for edge skiving. Maybe others have figured out how to get those skiving tools to work, but mine just sits in a drawer, and I reach for the other two tools frequently. I think the only selling point is that they are "safety" skivers, whereas the other skivers (especially the Japanese knife) have a bare razor edge, right there ready to injure the careless. Just keep them sharp and polished, be careful, be aware of where your fingers are, and use a polished stone surface to skive on.
-
Makes any horse look like a throroughbred! ; Nice, solid work!
-
In the lock stitch, the threads are pulling on each other. In the saddle stitch, they are only pulling on the leather. I wonder if that might make a difference? Of course, it's only speculation without somebody putting the threads to a test on an industrial testing machine.
-
I have a tube of Barge all purpose cement, toluene-free formula, here. Unfortunately, I can't compare it to other Barge formulas, or other adhesives, since I have little or no experience with them. I have been quite happy using this particular Barge formula for bags and wallets. For shoes? I don't know.
- 18 replies
-
Interesting... do the original caps have any sort of liner?

.jpg.d60258221c476480a6e073a8805645bb.jpg)
