DJole
-
Posts
1,091 -
Joined
-
Last visited
Content Type
Profiles
Forums
Events
Blogs
Gallery
Store
Everything posted by DJole
-
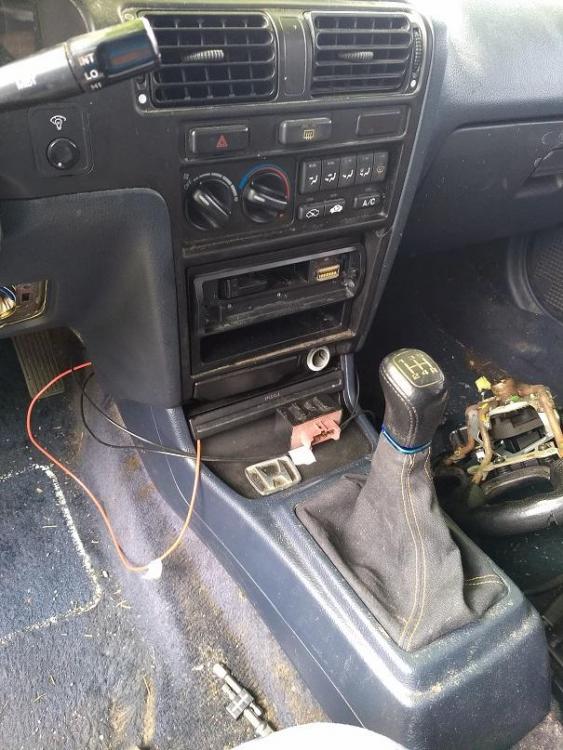
I'm seriously considering using leather to cover up the gouged part of the steering wheel. If you zoom in on the steering wheel in the photograph, you can see the cut section on the rim. Using some leather is cheaper than a new (or old from a wrecking yard) steering wheel!
-
Yes -- in the picture, you can see the steering wheel off in the passenger side footwell. It was off because I'm working on installing an immobilizer switch so that this car won't get stolen again. It was stolen about 10 years ago, but located with no damage. It had the catalytic converter cut off a few months ago, and some lowlife tried to steal it from a supermarket parking lot, a few weeks later, by attempting to saw through the steering wheel and prying the club off. Luckily, somebody saw the bastidge and scared him off. He left the saw in the car, and the steering wheel with a gouged rim. We had another car stolen back in January, and we got it back pretty broken. We can't really afford to lose another car. All the sad details are here: <http://djole.altervista.org/djole/Amusements/Acura sadness/SadCar.htm>
-
I recently took the old crappy vinyl shifter boot off of my 5 speed Accord and used it as a pattern to make a nice, clean.... canvas boot! Black canvas with gold thread, and I used gold acrylic paint on the top of the knob to highlight the shift pattern. I didn't really want to use leather in the car, although I seriously thought about it!
-
 That's looking really nice -- I love your flowers!
 -
For bright white, acrylic paint is what will do the job there. White dye doesn't leave a bright white finish. You don't need to be much of a painter, since it's not really a "fine art" job -- just go slowly and use a small brush on the edges. I used white acrylic paint for these: http://djole.altervista.org/djole/Publications/Leather/GL wallet/GLWallet.htm http://djole.altervista.org/djole/Publications/Leather/P/Pouch/CometPouch-1.htm
-
I used some Fiebing's white dye in a couple pieces, in small portions. http://djole.altervista.org/djole/Publications/Leather/L/LandonWallet/LandonCardWallet.htm http://djole.altervista.org/djole/Publications/Leather/S/Samurai Wallet/SamuraiWallet.htm I wouldn't use it for large white spaces, though.
-
The good old Pulaski! My father had one of those -- he worked for the US Forest Service, and sometimes worked on forest fires. It looks like that one could use some polish to match the beauty of the leather cover for it!
-
You are asking about the white tool in the picture above, used in the video, right? Or maybe you're asking about the OTHER tool in the picture, the straight metal tool?
-
Water Stone Holder for Scythe
DJole replied to KTWolf's topic in Gun Holsters, Rifle Slings and Knife Sheathes
That's a great piece of work you did there! I wouldn't worry about the stitching -- it's a working piece, out in the field getting banged around and dirty. When other scythe users ask you to make one for them, then you can practice the pretty stitching for your customers. -
I've got one, from Tandy. Ditto what Fredk said -- rapid holes in thin leather. I've used it a few times just for that.
-
DIY Shoe Making (Video) My first Pair
DJole replied to Campleathergoods's topic in Shoes, Boots, Sandals and Moccassins
60 dollars US for the kit, eh? Interesting.... That's a really clever idea to sell just the rubber soles. Not a bad pair of casual custom shoes you got there! -
Green and Englush Tan Deco Tote
DJole replied to Silverd's topic in Purses, Wallets, Belts and Miscellaneous Pocket Items
That's a really nice design, and great work putting it all together! Two awls way up! -
Fred is right -- and you most likely have those things already! As many have done, I bought a stitch groover tool years ago, which cut a stitching groove. I haven't used it for at least the past 5 years, though. I found it a bit hard to control and get good straight lines. Now, like many, I just use an inexpensive wing divider. I find I get better results (as long as my edge cuts are straight!), and I can control the distance of the line from the edge a lot better. The stitching groover now just sits in a box somewhere...I'm not even sure where it is at the moment! ;-)
-
I think I wasn't clear in my description. Let me try again! The "diamond" or Japanese stitching chisels, as you know, make slanted lines as in (A) in the diagram below The usual stitching follows the direction indicated by the red "stitches" in line (B). I think your lines on the right side of the plastic window are doing the opposite, as shown by line (C). That's what I mean by "reverse." It seems like all the other stitching on your wallet is done the usual way, but that one line appears to be backwards, and doesn't match the other ones. But perhaps I am just seeing it wrong? The 1 mm thread you used in this project looks okay -- it has a robust look to it which matches the design.
-
The stitching to the right of the photo area looks like it was "reverse" slanted -- was that a deliberate design choice? It looks odd to my eye.
-
Leather Phone Case
DJole replied to DJole's topic in Purses, Wallets, Belts and Miscellaneous Pocket Items
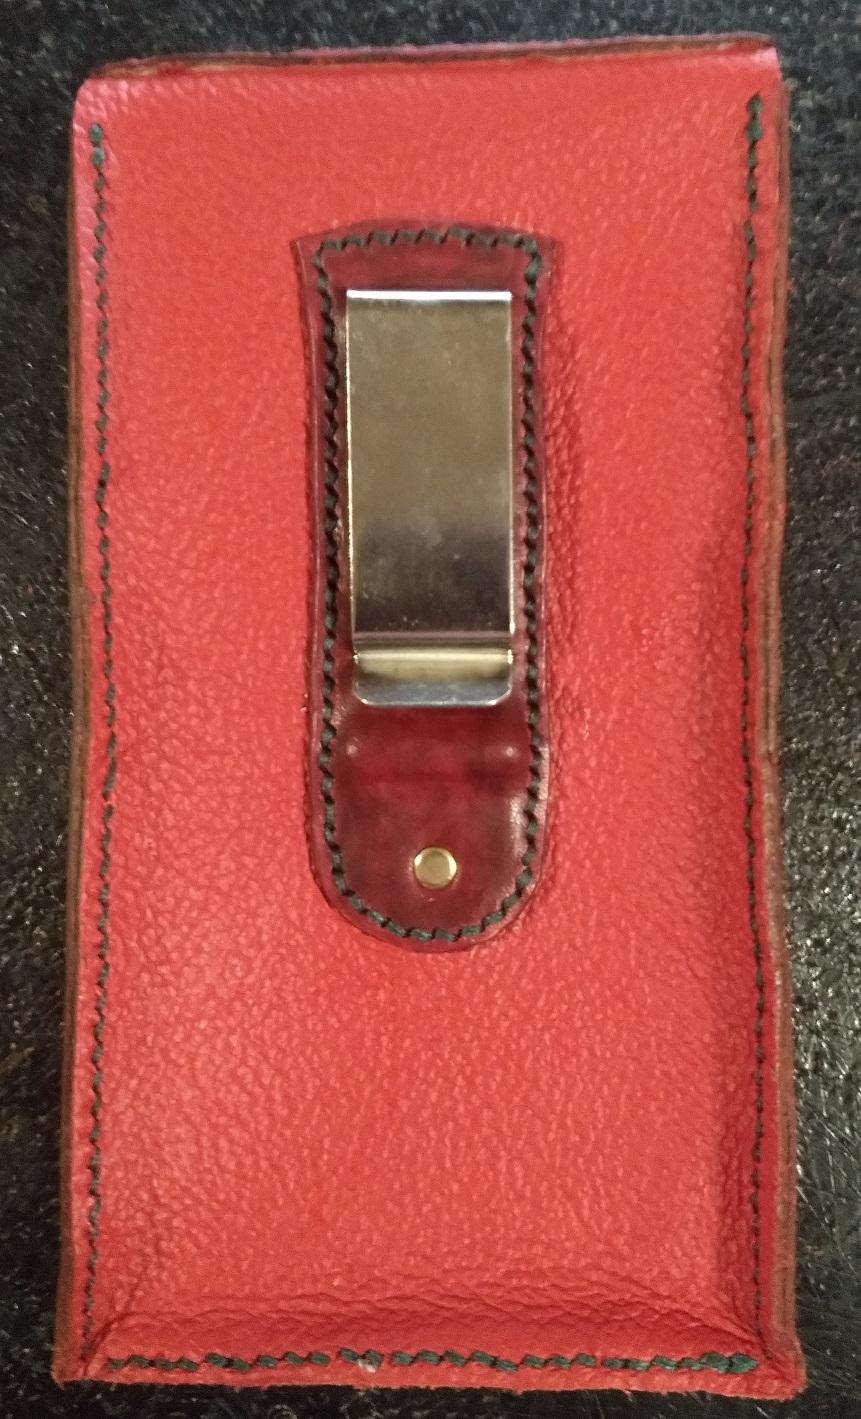
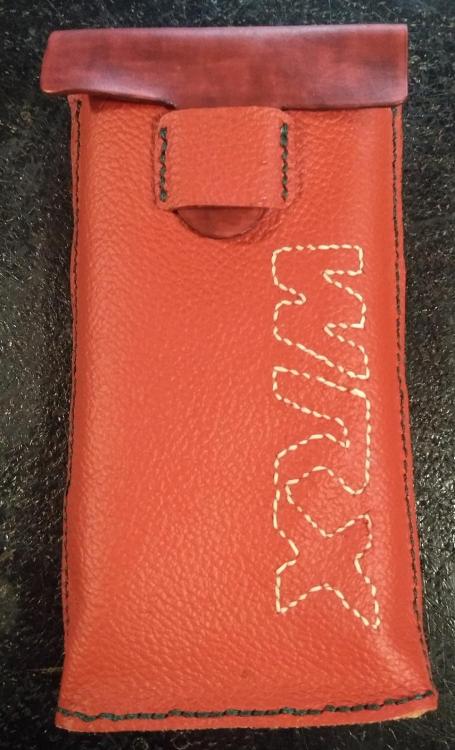
2 mm thick. It was from a side picked up from a Tandy sale table years ago, so I can't put a tannery name on it. I believe it is veg tan--- looking at the side thickness, I don't see the "band" that marks chrome tan. I used my 3 mm stitching irons to mark the logo. First I sized the logo in a graphics program, then printed it out. I then taped it securely to the red leather, and used the irons to outline the letters. The thread I used is Ritza tiger Cream, in .6 thickness. -
Leather Phone Case
DJole replied to DJole's topic in Purses, Wallets, Belts and Miscellaneous Pocket Items
It was quite easy. You can see how I made a slot at the top of the tooling leather to insert the clip in, then I riveted the clip to the strip, then used wet molding to form it to the clip and stitched it on. I didn't want any hardware inside the case to scratch the phone. -
Leather Phone Case
DJole replied to DJole's topic in Purses, Wallets, Belts and Miscellaneous Pocket Items
This is the first time I used a big holster clip like this.
-
I did this one for a co-worker, who is a proud owner of a Subaru Impreza WRX. I had to take some time off from work due to catching COVID a month ago, and he had to pick up the slack. In face, the whole piece was made while I was at home recovering. So I thanked him with this, made to fit his phone.
-
oxblood ?
DJole replied to Thescandall's topic in Dyes, Antiques, Stains, Glues, Waxes, Finishes and Conditioners.
You might find that Angelus dyes has a good color for you: -
You mean plans like these? --> http://djole.altervista.org/djole/Publications/Leather/S/StitchingHorse.pdf
-
small wallet
DJole replied to BroodyLeathercraft's topic in Purses, Wallets, Belts and Miscellaneous Pocket Items
The bottom photo shows the "drifting" stitching line that many of us struggle with. Take the time to make certain the stitching chisel is really vertical. I find it helps to make sure the line is pointing away from me vertically (this way--> |) rather than horizontally (this way --> ---). This helps me to check that the iron really is vertical, and not leaning, before I strike it. Some people have built jigs to help the keep the iron straight. Another way to manage this is to get a set of Reverse stitching irons, in the same size, and use them on the back piece. The normal irons go this way / / / , and the reverse go this way \ \ \ , so that when you put them together, they match up in direction. -
oh, man -- I'll really have to see if I can swing that. Right now I'm in the middle of car upkeep.
-
I don't have Sinabroks-- they're nice, but too expensive for my budget. I began with the Craftool chisels, like most of us -- what else was there, or what else did we know about? :-) Big holes, big spacing-- not much use for the majority of what I make. I wonder what you mean when you say you are punching through a "lot of layers"? The more layers you have, the more difficult it is to keep the lines on the back side of the piece from wandering if you try to do them all at once, no matter what irons you are using. It would be nice to get through 4-6 mm of leather with one whack of the tool, in a straight line on both sides of the leather, but there's a BIG learning curve to get there, and I don't think the irons are meant to do that. I have a set of 3 mm diamond irons from Japan Goods; the original set had 1, 2, 3 4 and 6 prongs. I later added a 10 prong. I find that I use the 2 prong a lot for curved lines. The 10 is nice for making long straight lines, better than the 6. I hardly ever use the 1 (why use it? Just use an awl!) or the 4. Like NDphung above, I have found the 2 prong and the 10 to be the go-to irons I use the most. I also have a set of Kevin Lee diamond reverse irons in 3mm. They are excellent quality for the price-- well polished and finished, but they are SMALL and LIGHT. That could be a deal breaker, since they are so light and small, you have to place them carefully and strike them carefully. Like Kevin Lee states, these basic irons are helpful to get a feel for using irons without spending a lot of money. I have a set of 4mm pricking irons, of Chinese manufacture. I bought them knowing I'd have to spend the time polishing the teeth, which is a pain, and I haven't got them as smooth as my other irons. But 15 prongs makes a nice line!
-
diffrence between Resolene Finish &Tan Kote Finish
DJole replied to stampingdelight's topic in How Do I Do That?
Maybe this video from Leodis Leather will help: https://www.youtube.com/watch?v=zyTg_hfpNUM