DJole
-
Posts
1,091 -
Joined
-
Last visited
Content Type
Profiles
Forums
Events
Blogs
Gallery
Store
Everything posted by DJole
-

A little help
DJole replied to Bawarrior's topic in Purses, Wallets, Belts and Miscellaneous Pocket Items
Maybe Angelus has a color you like? https://cdn.shopify.com/s/files/1/0265/7379/files/Color_Chart_Leather_Dyes_FINAL_8-25_045620ee-4788-481b-acc7-d48d85e74022.pdf?v=1640643954 -
Pink Skull Bag
DJole replied to DJole's topic in Purses, Wallets, Belts and Miscellaneous Pocket Items
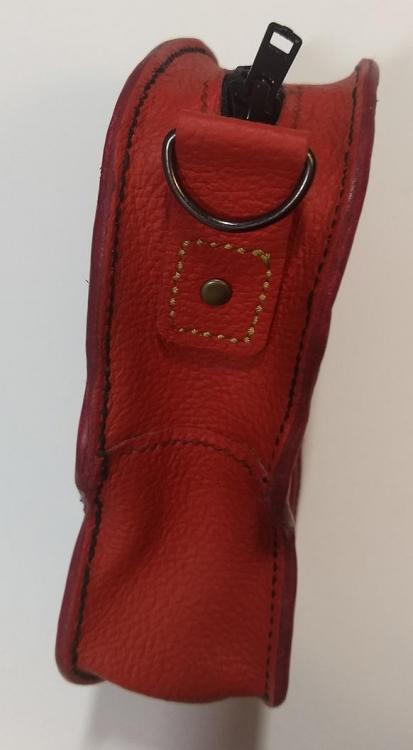
the gussets here are two pieces: one on top where the zipper is, and the other around the bottom. What I did was cut them long, and as I sewed them to the front of the bag, when I got close to the overlap I carefully measured and trimmed them, and then sewed them together right at that time. After the gussets were connected, I finished stitching the back of the bag on. Thanks to careful work, all the pieces lined up very well. -
Pink Skull Bag
DJole replied to DJole's topic in Purses, Wallets, Belts and Miscellaneous Pocket Items
Angelus really does have some great colors! -
You are correct, sir.
-
Sharp blade is necessary to start the cut on the Tandy wooden cutter. I just changed mine a month ago, and WOW did it make a difference.
-
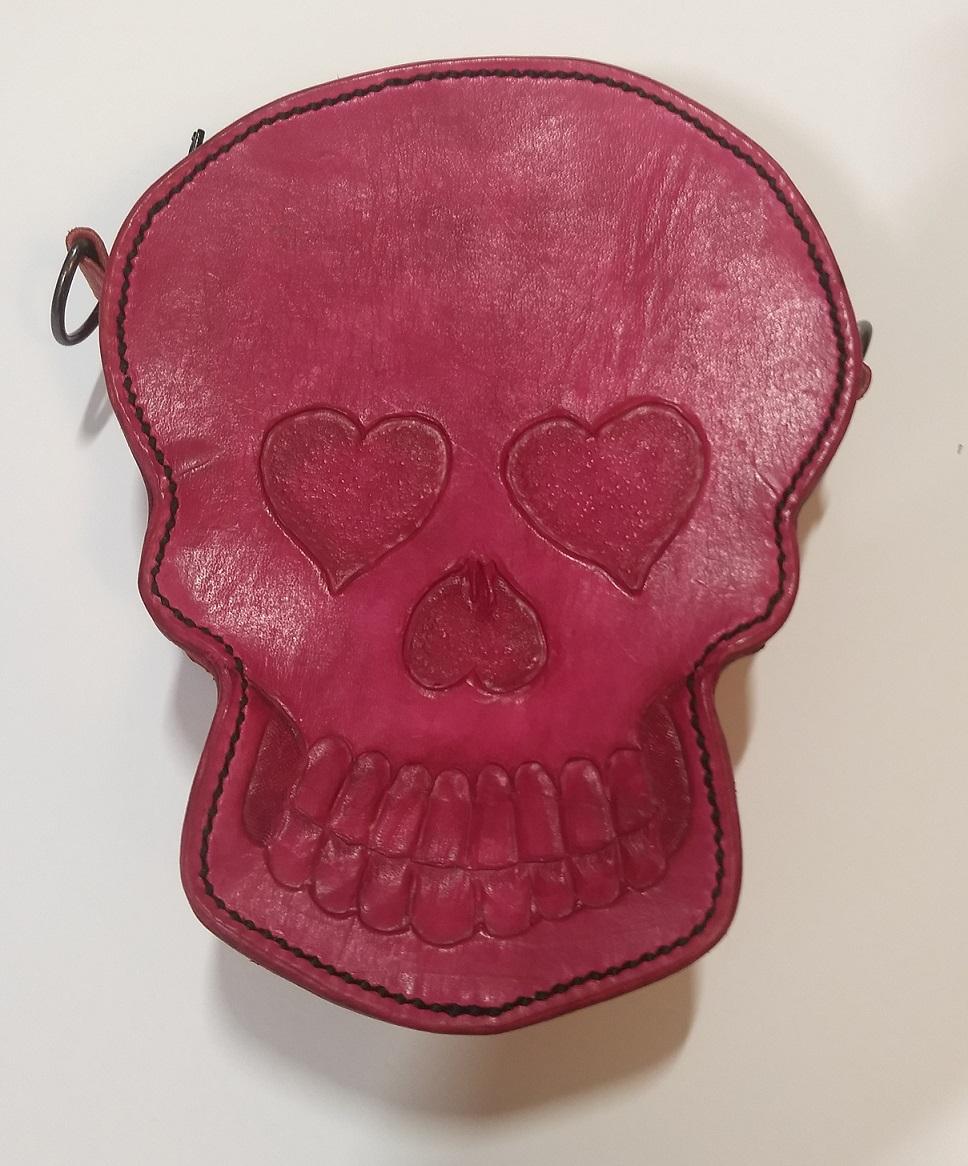
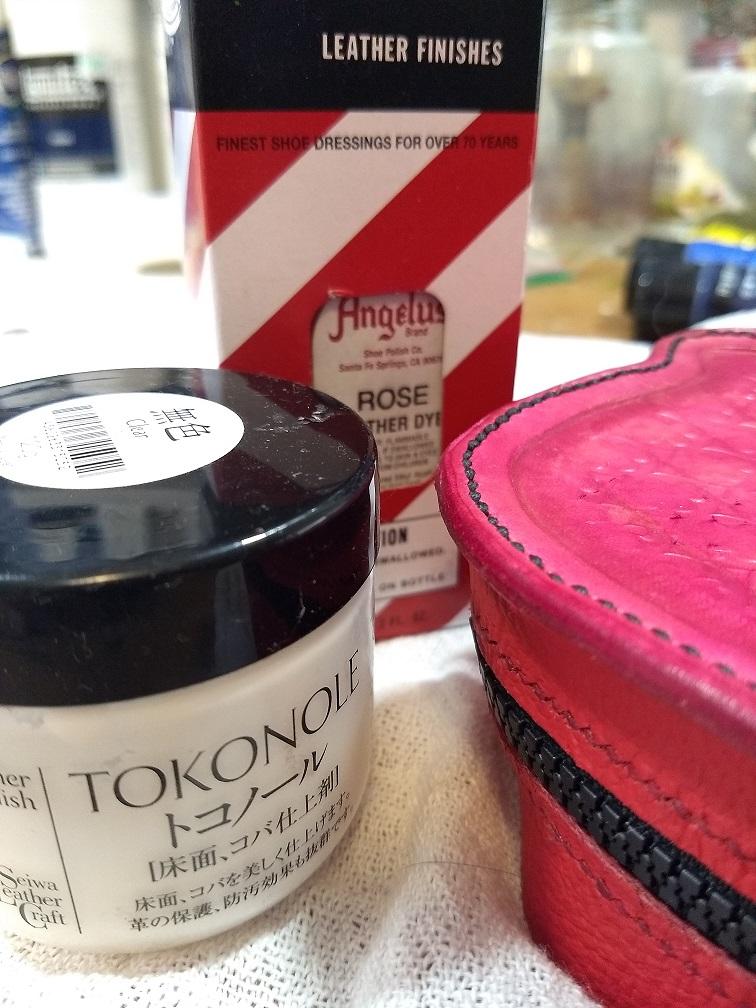
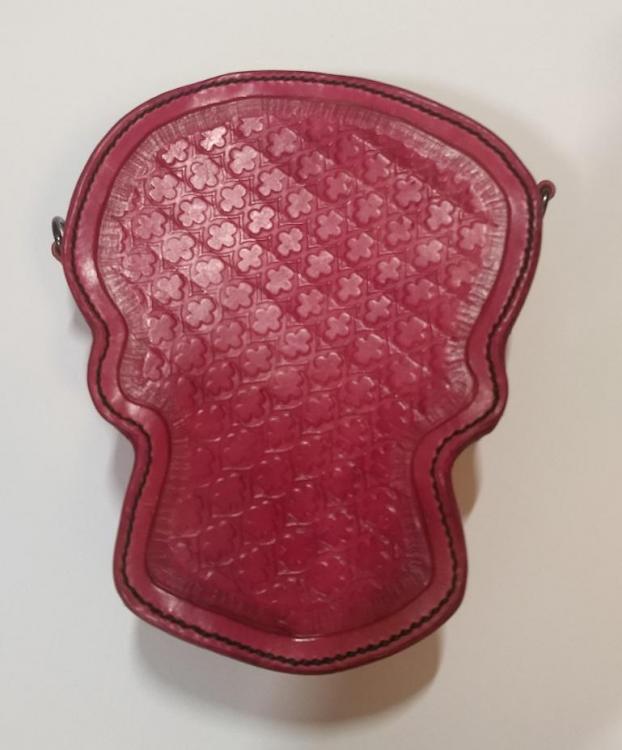
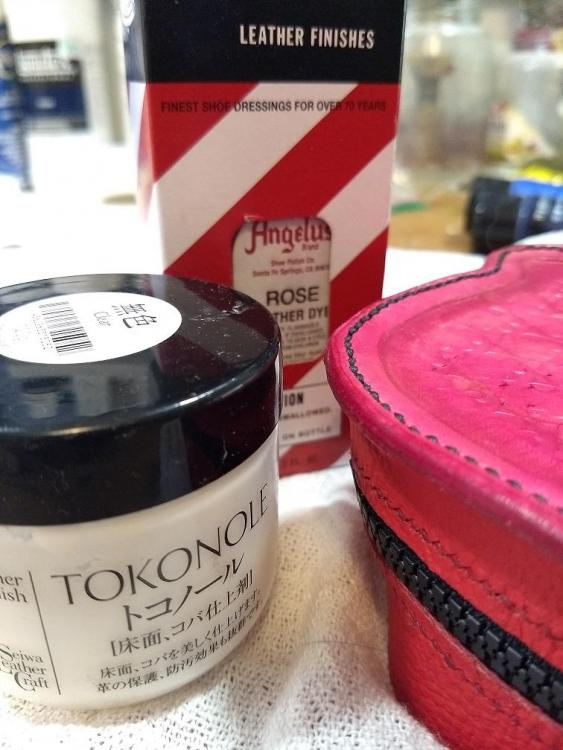
I'm making a series of bags. This is the first one. It's big enough to fit most smart phones-- 7" long by 6" wide (18.5 X 14.5 cm). My sister loves it and wants to give it a home, so this one is no longer in my inventory! The design is Craftool Pro D2171. I haven't really done a "diaper" effect so I thought I'd try it out here to add interest and texture to the back. That's Angelus Rose you see as the lovely pink shade, and Clear Tokonole on those gorgeous smooth edges. Ritza Black thread, some red waxed linen on the zipper, and a metallic gold thread on the D-ring tabs.

-
Nice work! How long does it take you to complete one of these?
-
Coin purse made a few months ago
DJole replied to Abelc's topic in Purses, Wallets, Belts and Miscellaneous Pocket Items
Nice work for an early project! The blue stone laced in is a great personal touch. I think the leather you used for this project was too thick-- hard to make sharp bends and good stitching holes in that thickness. Learning to skive is an important skill, too. -
you should change the title of this thread to "What is a good Brand of sewing machine thread for a CB3200?" You'll get more specific help that way!
-
Try the search box up in the top right corner, and use the term "head knife" in quotations to see a list of threads discussing them.
-
You're a Newfoundlander? I spent 3 fun-filled years in St. John's going to Memorial. Are you a townie or from out 'round da bay?
-
Number of times you pierced the thread when threading for saddle stitch?
DJole replied to NDphung's topic in Sewing Leather
Sometimes, yes...but mostly when I'm not paying attention, or when the thread becomes short. I have a variety of threads I use, from waxed linen to waxed flat synthetic. I find the flat threads don't catch the needle as often. And yes, I pull the thread like you mention, and it does indeed help. it also helps to size the needle and thread to the hole. Too large of a needle, and more stabbing happens. -
Number of times you pierced the thread when threading for saddle stitch?
DJole replied to NDphung's topic in Sewing Leather
I have tried "locking" the needle onto the thread a couple times, but I don't do it anymore. Here is why: When (not if!) I pierce the thread while stitching, if the thread is not locked onto the needle, I can just slide the needle off the thread, and then pull the thread out to correct the error. I then just thread the needle back on, and then back to stitching. I can hear people say, "Well, just don't pierce the thread!" Of course, that's the ideal. I've gotten MUCH better at it lately (just once or twice per project maybe)... -
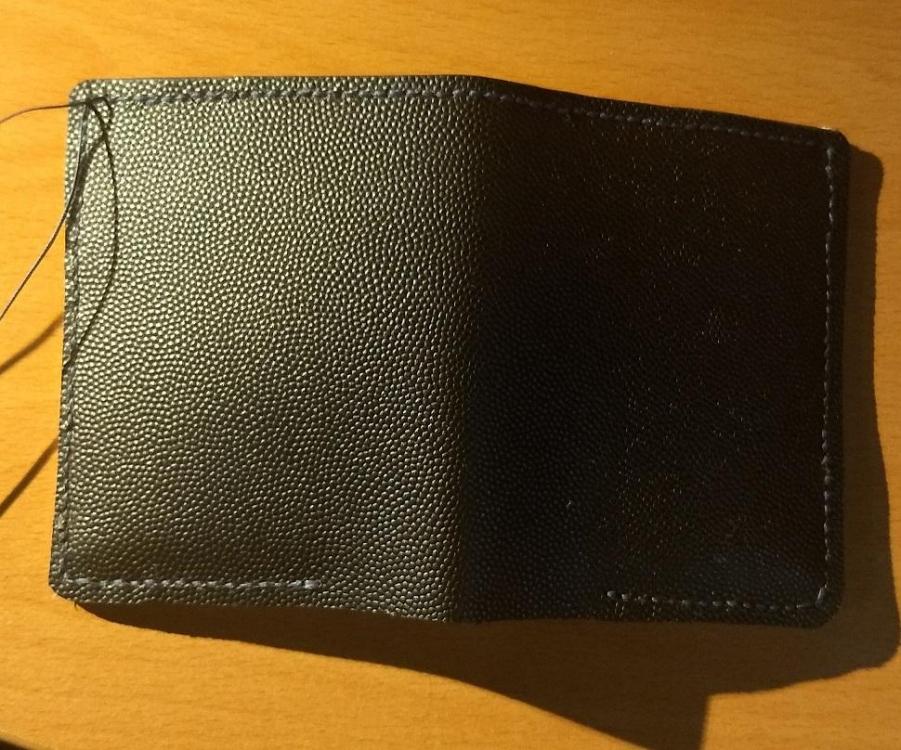
I'm nearly done with this project. It's a wallet for my brother, who is an assistant coach for a high school football team. I used some black "Caviar" leather (from France, bought from Rocky Mountain Leather Supply) because it has a very similar pattern to the one used on American footballs. The inside is a gorgeous, soft bit of calf leather from Orion leather in Texas. It's the best leather I have ever had the pleasure of working with-- too bad I used nearly all of the small sample I had for this project! ;-) The thread is cream and blue Ritza Tiger (.6 size). I completed all the stitching today, and the last step is to clean up and burnish the edges. This wallet really feels nice in the hand. That Caviar is great stuff!

-
2nd Wallet
DJole replied to Selvune's topic in Purses, Wallets, Belts and Miscellaneous Pocket Items
Looking good -- you're off to a great start! doesn't it feel great to know you've improved? I know it makes me happy! ;-) As for the chisel question: Your problem is that the teeth of those Tandy irons are too short to go all the way through the layers, right? 1) Lay out your stitching line on the top layer, and make your holes as desired. Then lay it on the top of the lower layer, and using those holes as guides, use your 2-prong chisel or awl to mark the flesh side of the lower layer-- ends of the stitching line, a few in the middle, the corners. Then take the top layer off, mark the same stitching line on the flesh side of the lower layer, and finish making the holes in that layer. Use the guide holes to make sure all the holes line up. Then put the layers together and sew. 2) Use thinner leather for the wallet! ;-) 3) Get a set of reverse irons, and use them on the grain side of the lower layer. Reverse irons work like this: your normal slanted irons go like this \ \ \ \ , and reverse go like this / / / /, so that the hole angles match up. 4) Learn to do it old-school style: pricking irons to mark where the holes go, and then a sharp awl to go all the way through while the piece is in the stitching pony. I have done methods 1, 2 and three, and though I have a set of pricking irons, I haven't practiced method 4 yet. You could also try switching to a different style of iron, like the Japanese, which are a cross between those straight diamond chisels you have there and the narrow slits of French style irons. You might want to take a look at Kevin Lee's basic tools, which are very inexpensive, yet well polished and well made. As Kevin Lee points out, "This tool is priced for beginners who wish to try out different SPIs with french-style irons before committing to better tools." I bought a set of his reverse irons, and they have worked very well. (https://kevinlee.global/collections/pricking-irons/products/basic-french-pricking-iron?variant=15905154891876) -
Glasses case
DJole replied to Spyros's topic in Purses, Wallets, Belts and Miscellaneous Pocket Items
ooo...that's nice! Love that broguing-- it's a great finishing touch. -
You should certainly check out Ian Atkinson's videos. If you're brand new, trying to figure out what tools you need and how everything works (and what you really don't need to buy), then Ian has some instruction especially for you! Check him out here: https://www.ianatkinson.net/leather/videos.htm
-
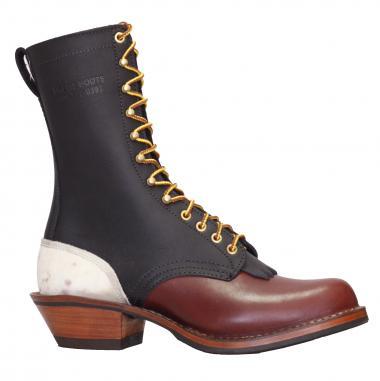
Good stuff. My father did boot repair work after retiring from his United States Forest Service career. Most of what he did were work boots, worn by people working out in the forests. Thus, after he died, I ended up with 5 pairs of White's boots (another Spokane boot company) in my size (US 7-- I have smallish feet, apparently, like my father.) I'll probably never need to buy boots again. The boots in the picture below were ones that he repurposed for me -- they had been delivered to the purchaser's porch, but a dog had smelled the rawhide heel counter and tore open the package and chewed on the rawhide bits. In the shop, my father cleaned them up and changed the sole for me. These boots were one of the last things we talked about before the sudden heart attack he had at the boot repair shop. New, these are about 400 dollar boots. I don't get to wear them often, but each time I do, I am reminded of him, and that he worked on these boots with his hands.
-
My older Dr Martens (made in UK, actual leather) are still in decent condition (though the soles are worn). The newer ones...what is supposed to be leather is not, and the fabric/leather combination has torn at the heels of both shoes. I'm tempted to just make my own uppers out of real leather.
-
I will do that. I might get lucky!
-
I'd love to make a wallet for my brother, who coaches high school football. Using Horween's football leather would be perfect. But I don't need a whole 200 dollar plus hide. Where can I find smaller pieces?
-
I believe the term for your "spacer" is a "welt." You are right, that's a LOT of layers to try to knock a stitching chisel through -- I found the same problem on one of my own projects. The pricking iron and awl technique is likely the traditional method, if you take the time to learn how to get the awl straight through all those layers. But there are other ways using the stitching irons/chisels: 1) make holes in each layer separately. You need to make sure the stitching line is straight, of course. Make the holes in the top layer, then lay that down on the second layer, and using the chisel again, mark the holes on the second layer. Then take the first layer off and complete the holes in the second layer. You must be sure to keep consistent alignment of the chisel, or the holes will wander -- practice keeping it always at vertical! Look, check, and look again before pounding! Use the first layer again, and mark the third layer, and continue as above. Yes, it's tedious and fiddly, but it gets all the holes lined up. 2) Do the same as (1) above, but glue the 1st and 2nd layers (the welt) together, and make holes completely. Then mark 3rd layer and complete separately as above. 3) I have heard of some who use the same chisels on the front side of layer 1, and the back side of layer 2. This causes the holes to cross in an X X X pattern, and might not be what you want. In a piece with more than 2 layers, I don't think it would work. 4) To avoid the "X" holes of (3), invest in a set of reverse chisels. The teeth of those are opposite in alignment, so they keep the / / / pattern. I have one set of Kevin Lee reverse chisels; here's how I use them. I make the holes on layer 1, then glue the next layer to it. Using a 2 prong chisel, I go back through the initial holes on layer 1, making a few holes at the start and end of each stitching line (and a few in the middle), all the way through so I can see the holes on the front of layer 2. Then I use the reverse irons, starting in the guide holes, to complete the stitching holes on layer 2. The prong spacing should match up, if you are careful. Drawback: you need to double your investment in stitching irons!
-
I love it! Whimsy and function together in a great looking piece.
-
If OP is in American Fork, then OP needs to check up Rocky Mountain Leather Supply, just a quick trip north up I-15: https://www.rmleathersupply.com/collections/buckles-hardware/products/hasi-hato-premium-japanese-line-snaps-solid-brass?variant=15318453420141
-
Had a car stolen from a parking lot at work back in January. Some scumbag decided that my 93 Integra GS was too good to pass up, and stole her. She was missing for 4 weeks or so, but then popped up in a nearby impound lot. Here's what the scumbag thieves and tweakers did to her: http://djole.altervista.org/djole/Amusements/Acura sadness/SadCar.htm I just wanted to vent, because I am so angry and heart-broken at what these lowlife animals did to a beautiful piece of engineering. As a whole, she was wonderful. Now, she's broken and sad, and so am I.