-
Posts
2,221 -
Joined
-
Last visited
Content Type
Profiles
Forums
Events
Blogs
Gallery
Everything posted by Uwe
-

Having a tough time finding a good used machine
Uwe replied to mixmkr's topic in Leather Sewing Machines
The problem with some used machine pricing is that often you only hear from folks who got some wicked good deal. It's a little like people who only brag how much they won at the casino - they usually don't talk about how much they lost during the previous ten visits. This sets unrealistic expectations, I think. Don't let stories of super-bargains keep you from buying a machine you need to run your business or enjoy your hobby. The only real price guide on Ebay are SOLD listings, but quite often the sample size is too small to be meaningful, but it's better than nothing. The main problem with Ebay is the russian roulette of shipping by people who've never packaged a sewing machine for shipping before. Many perfectly nice sewing machines have died in transit. In general, at least in my opinion, a vintage original in nice cosmetic shape and perfect working condition is worth as much as a new made-in-china clone. The nice original will be worth about the same five years from now if you take care of it (it doesn't make much difference whether a vintage machine is 20 or 25 years old.) That new clone on the other hand will be worth considerably less in five year's time. Certain popular models also have a higher price on the used market simply because of supply and demand. A lot of people with small-bobbin machines have a hankering for a large-bobbin machine. Once they get one, they don't want to part with it. If the CL lottery is not working out for you in your area, you can check with a reputable dealer of used machines. The main one I use for rough price guides is Advanced Sewing (http://advancedsewing.com/usedsewingmachines/juki.html) Their inventory spread sheet shows they have two dozen Juki LU-563 machines in stock as of March 2017. I'd ask them for a quote for a head only. They may be in your comfort zone. I've personally not bought a machine from them, but I came very close to making a day trip to Pittsburgh to look at their inventory when I was shopping for Juki LS-341. They were also one of the very few used machine dealers present at the TexProcess trade show in Atlanta last May. Best of luck in your search for a nice 563! -
To my knowledge there is no single machine that handles sewing tasks from two layers of lambskin up to nearly an inch (!) of layered material. You're looking at two machines at the very least to span that range. The Campbell Lock Stich is neither of those two machines, I'm afraid. If your budget exceed $15,000 I think a Durkopp Adler 269 paired with a Durkopp Adler H-Type 969 make a nice pair to cover your desired range. Durkopp Adler 269 Durkopp Adler H-Type 969: If your budget is less than $15K, you may have to dial back your specs a little or get creative with two or three used machines or clones. For about $5K you can get a nice new Juki-341 clone and a Juki TSC-441 clone, which will get you 90% there. Used machines are cheaper, but more of a gamble unless you get them from a reputable dealer.
-
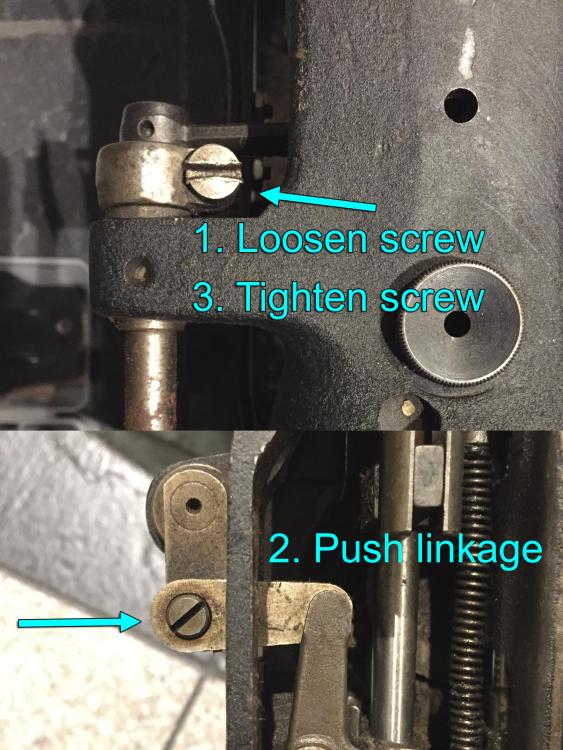
Have you tried these steps I had listed above? 1. Turn the handwheel until tip of descending needle is level with top of throat plate 2. Loosen purple arrow screw (Both feet will drop to be level with throat plate) 3. Tighten purple-arrow screw again. 4. Verify full turn with no bind We'll need to see some pictures or a short video to see what's going on. We're just doing a lot of guessing based on vague descriptions.
-
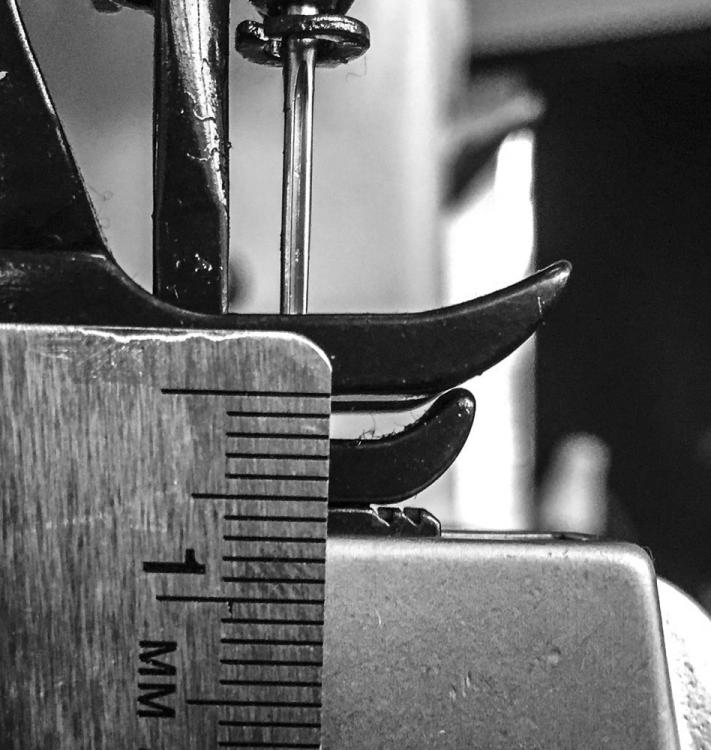
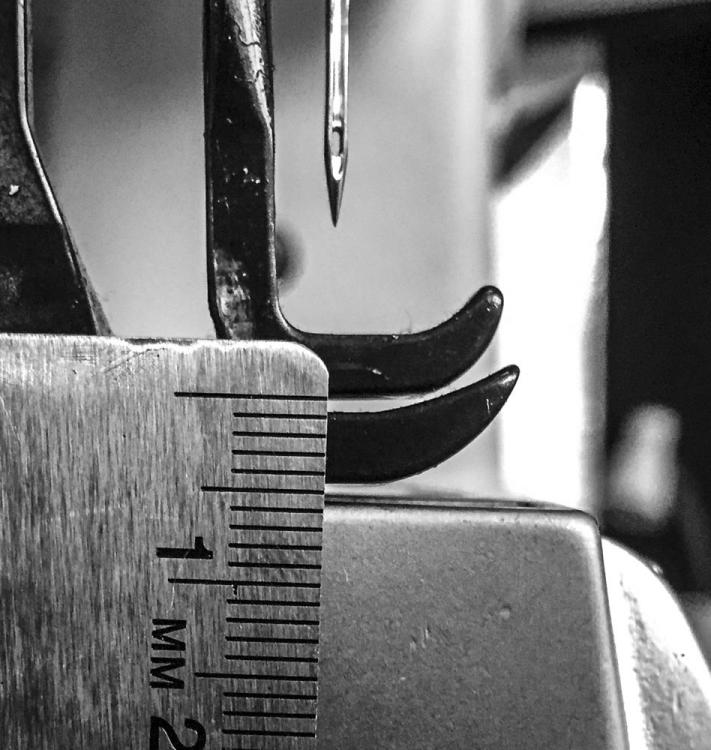
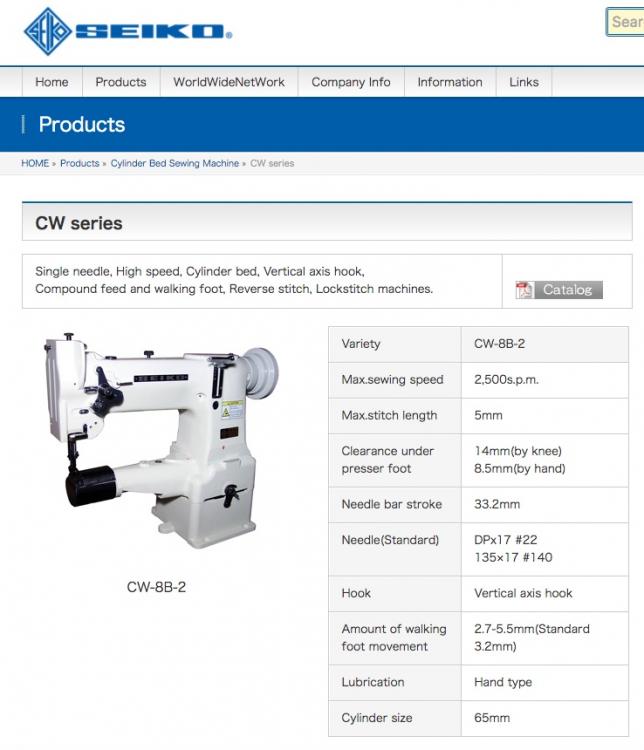
If your Consew 227R-2 is a re-badged Seiko CW8B-2 (check inside for Seiko branded parts), I wouldn't dismiss it just yet. Try adjusting your 227 for maximum and equal alternating foot lift as it walks. The Seiko CW8B specs state a alternating foot lift of up to 5.5mm, which is about the same as my Juki LS-341 (and likely the same for Cobra Class 26). Your Consew 227R-2 may just be able to climb up and down your seams after all. Presser foot design and stitch length also play a role in how willingly the feet will climb up or down big steps. If your Consew 227R-2 can't step onto the seams, the Juki LS-341 and Cobra Class 26 machines will very likely struggle, too. The next step up from that general class of machines is the Juki TSC-441 and its various clones. Here are pictures of my Juki LS-341 adjusted for maximum alternating foot lift (about 5.5mm.)
-
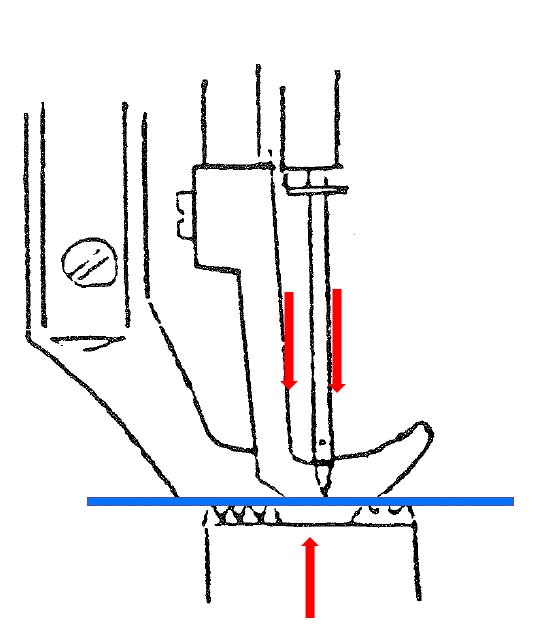
The above adjustment should also equalise foot lift. Try the adjustment above and then check if foot lift is equalized. If not, try these steps: 1. Turn the handwheel until tip of descending needle is level with top of throat plate 2. Loosen purple arrow screw (Both feet will drop to be level with throat plate) 3. Tighten purple-arrow screw again. 4. Verify full turn with no bind In a well-adjusted walking foot machine everything lines up at the top of throat plate level at the exact same time in the cycle. That's the standard adjustment. A you turn the handwheel, when the tip of the descending needle is level with the top of the throat plate, the ascending feed dog is also level with top of throat plate. Both Presser feet are level with top of throat plate. I show this foot lift equalizing step on a Juki LU-563 in this video starting at the 4:00 minute mark:
-
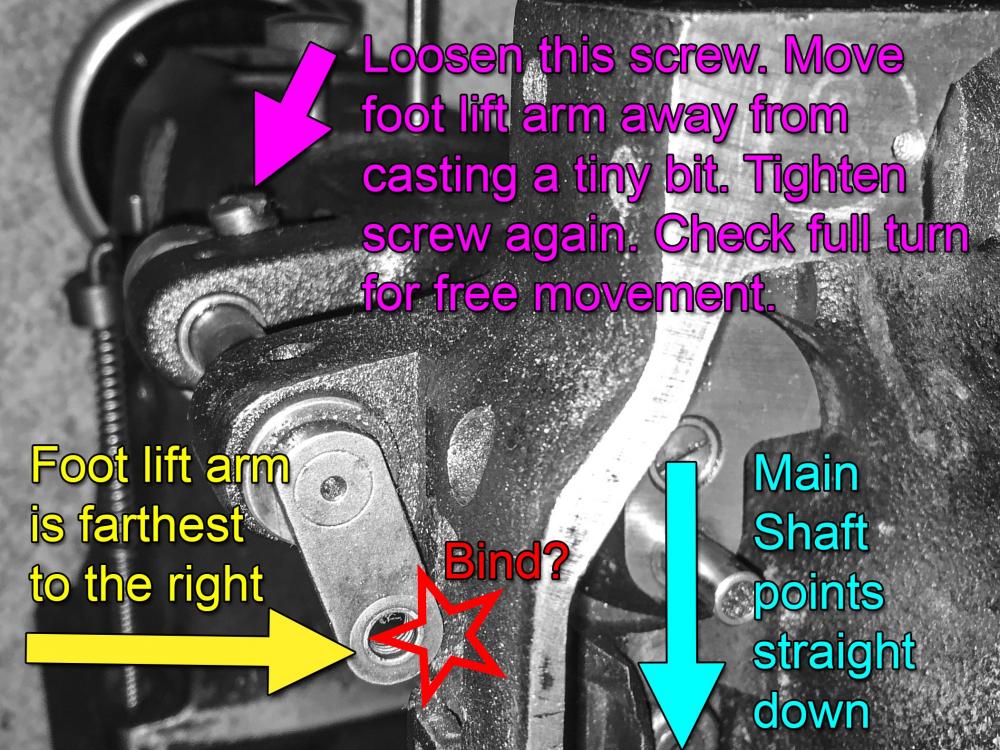
I was able to get my machine to bind and stop turning over just by adjusting it to max foot lift (turning the worm screw counter-clockwise all the way after loosening set screw.) I had taken my machine head apart a few days ago for cleaning, so I know for sure nothing else was interfering. You don't have to take your machine head apart to fix the bind, I just took the pictures like this to show only the parts that matter. Of course you can also back off the foot lift adjustment worm screw a little bit until there is no more bind. The adjustment shown below should avoid the possibility of dialing in a foot lift amount that causes a bind condition. Here's the picture of how my machine bound up at max foot lift and how I fixed it. Timing-wise, when the main shaft points straight down (blue line), the foot lift arm should be in its right-most position (yellow arrow). This should give you equal foot lift This is also where the foot lift arm may touch the housing and cause a bind condition (red star). There should be a tiny gap between the foot lift arm and housing in this position. Fix: 1. Loosen the screw (purple arrow) 2. Turn the handwheel until the main shaft points straight down (blue line) 3. Adjust foot lift arm to have a tiny gap to housing 4. Tighten screw (purple arrow) Turn the hand wheel a full turn to verify fix
-
The two machines have come up in several previous discussions. One notable difference is the fact that the LU-1508 usually costs drastically more, almost twice as much as the DNU-1541. I don't think we ever really figured out where the price difference comes from. It can't be just the different hook orientation/design.
-
Well, I learned something new today. Thank you for prompting that lesson, Ole South! I take back what I said earlier - what you did was not some grave mistake. I was thinking of the other almost-but-not-quite identical machines in that class (e.g. Consew 225, which has a different mechanism for foot lift height adjustment.) The relative foot lift height is adjusted similar to what I described above in the 1. 2. 3. step picture, but the total foot lift is indeed adjusted via that worm screw on the eccentric on the main shaft. There are various scans of that manual floating around, some of them with really poor picture scans. Here's one that has very good detail in the pictures: Singer Class 111 Instructions.pdf , just so we all look at the same instructions. I just pulled out my SInger 111W155 project machine to take a closer look. I'll report back.
-
Now I'm really curious. Can you post a picture or scan of that section in the manual?
-
Ouch, that was probably a mistake, I'm sorry to say. That is one setting that almost never needs to be (or should be) adjusted after the machine leaves the factory, unless you replace the main shaft. Press the "undo" button.
-
That Springfield Leather statement about the Cobra Class 26 being "basically a scaled down version of the Cobra Class 4" is just a bit misleading. It's a smaller cylinder arm machine, yes, but it shares almost no design details with the Cobra Class 4. Some clone manufacturers tweak certain details when they make a clone, so specs can vary to some degree.
-
The Cobra Class 26 is a copy of the Juki LS-341 design. TechSew 2750 and Cowboy CB341 are other clone options for that same machine. Personally I really like that machine design. The Juki LS-341N engineer's manual (Juki_LS-341N_Engineers_Manual.pdf) and the Juki LS-341N Instruction manual ( Juki LS-341N InstructionManual.pdf) should match the Cobra Class 26 (and the other clones) very closely. It contains specs and other useful details.
-
The oil pump system on my Adler 467 appears to work just fine, even at slow speeds. The oil drips from the little brass tube inside the head a little slower when I sew at slow, count-along speeds, but oil does flow and drip every few seconds. At least on my machine I think the 467 pump oiling system would be just fine for sewing at slow to moderate speeds, really. It won't hurt to do the occasional high speed bobbin wind or empty run.
-
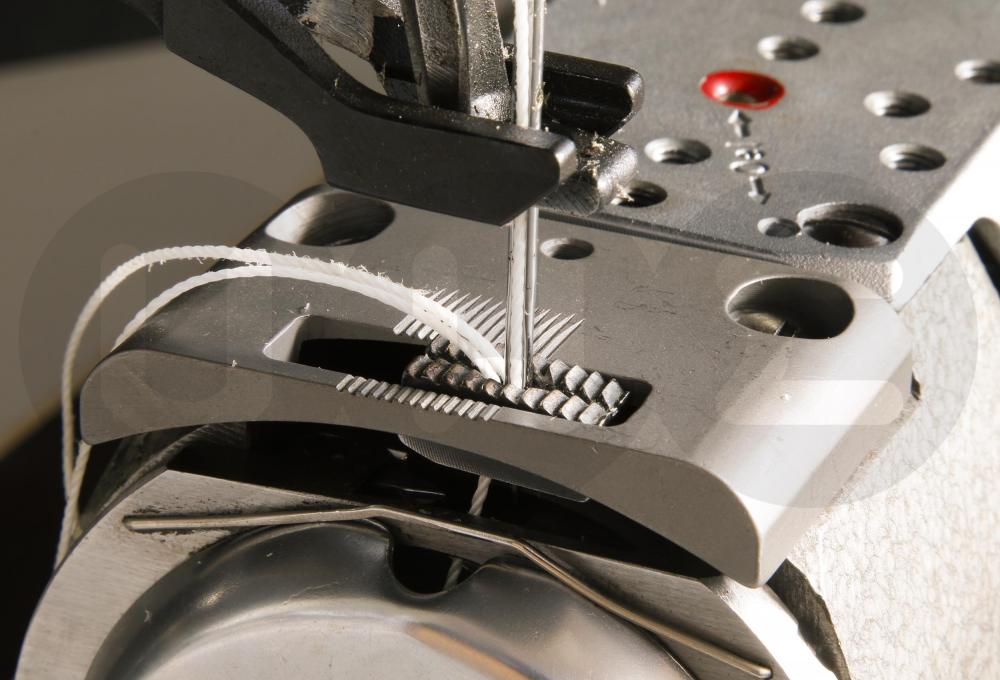
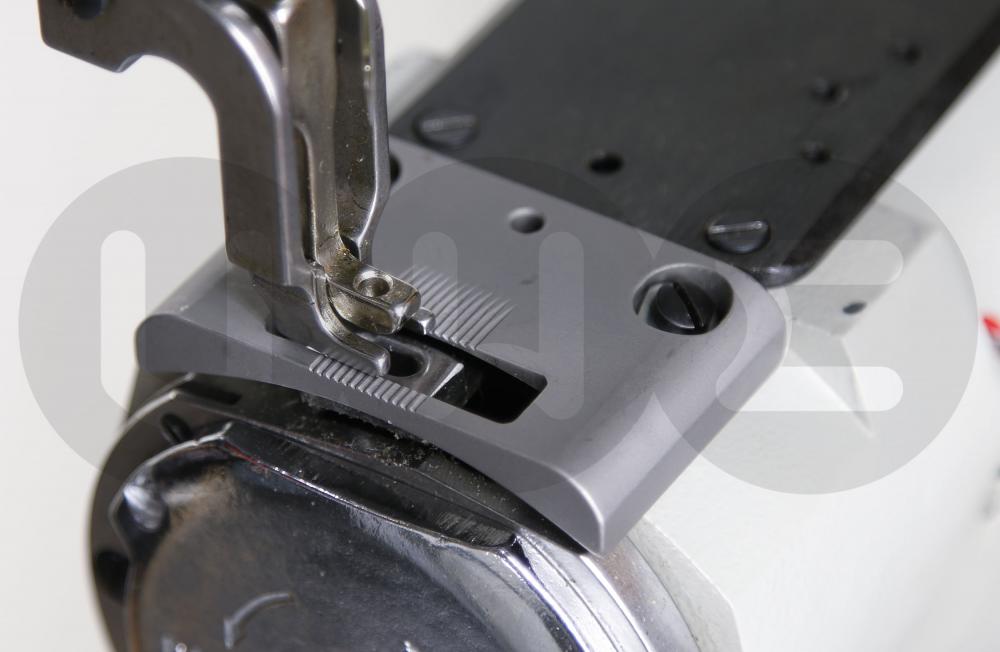
I have some flat-top harness maker throat plates that work with the feed dog in place and fit both Adler 205 and Juki TSC-441 class machines. I call them UTP205HM for the Adlers and UTP441HM for the 441 class of machines. They're the exact same plate. The naming difference stems from the fact that I just recently discovered that they also work on the 441 machines. The price is $59 and includes shipping within the U.S. For international buyers, please look in my Ebay store (http://stores.ebay.com/uwe) in the "Throat Plates and Feed Dogs" section. Ebay's Global Shipping Program (GSP) handles all the shipping and customs details and is actually cheaper than I can ship things directly. On the Adler 205-370 (and clones) you can use your original throat plate mounting screws. For use on 441 class machines, I'll include two small washers for under the screws (the 441 throat plate screws have a smaller head and a different thread pitch). I hope to find a source soon for screws that will work on 441 class machines without a washer. I have a limited number of these plates on hand and won't be able to order more once they're gone. I acquired them as part of a larger inventory purchase and I don't actually know who made these plates. Here's the throat plate mounted on an Adler 205-370 (UTP205HM): This picture shows the throat plate mounted on a Cowboy 4500 (UTP441HM):
- 12 replies
-
- adler 205
- juki tsc-441
-
(and 3 more)
Tagged with:
-
I made a second prototype of the hand lever extension. This one looks a bit more polished, has improved ergonomics and a pretty red dot to aim your thumb at! I'll probably make a handful of them later in March and see if somebody will buy one.
-
As you turn the wheel, the outer presser foot is supposed to start lifting up the moment the vibrating presser foot presses against the feed dog (or against the material if there is any). There must be something that prevents that from happening. Your foot lift linkage is not working properly. I have strong feeling it has to do with how you adjusted the feet for same lift. What exactly did you do to adjust the foot lift?
-
Floyd, you are correct - the clamping arm itself (where we loosen the screw) is indeed fixed in its position by its connection to the feed cam arm on the main shaft. But we're really rotating the shaft that the clamping arm holds on to, not the clamping arm itself. It's hard to explain in words without writing a novel. Might be a good video topic.
-
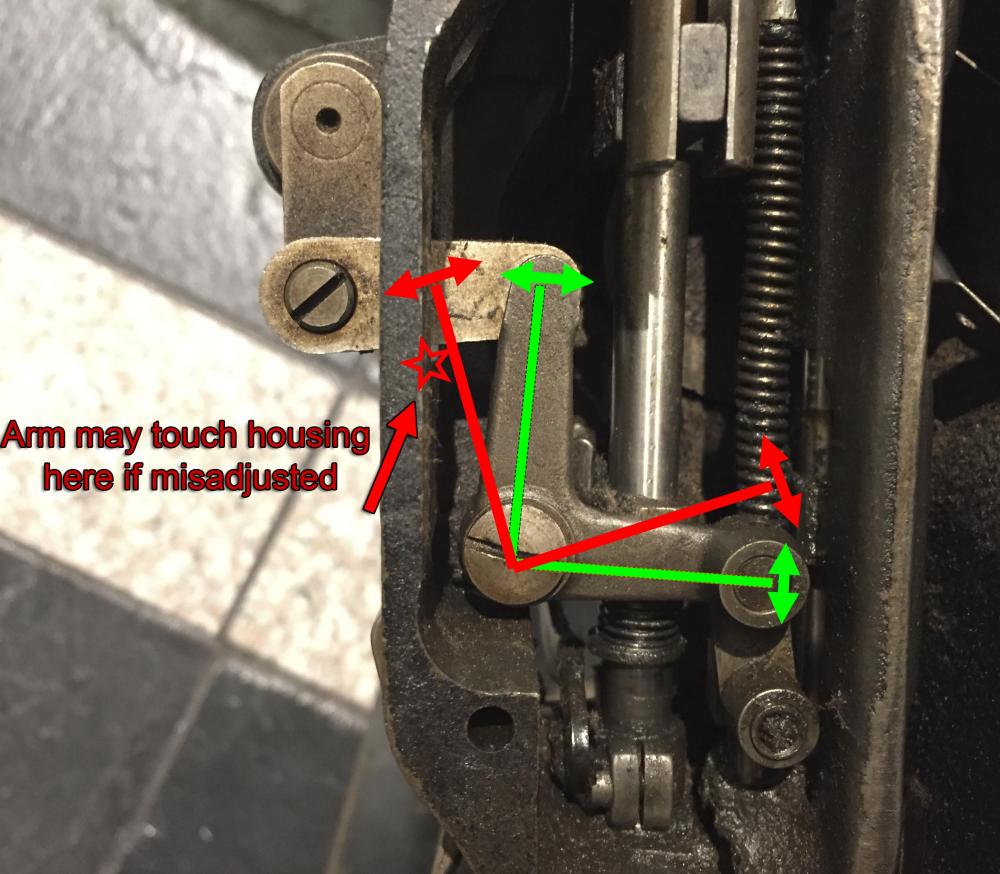
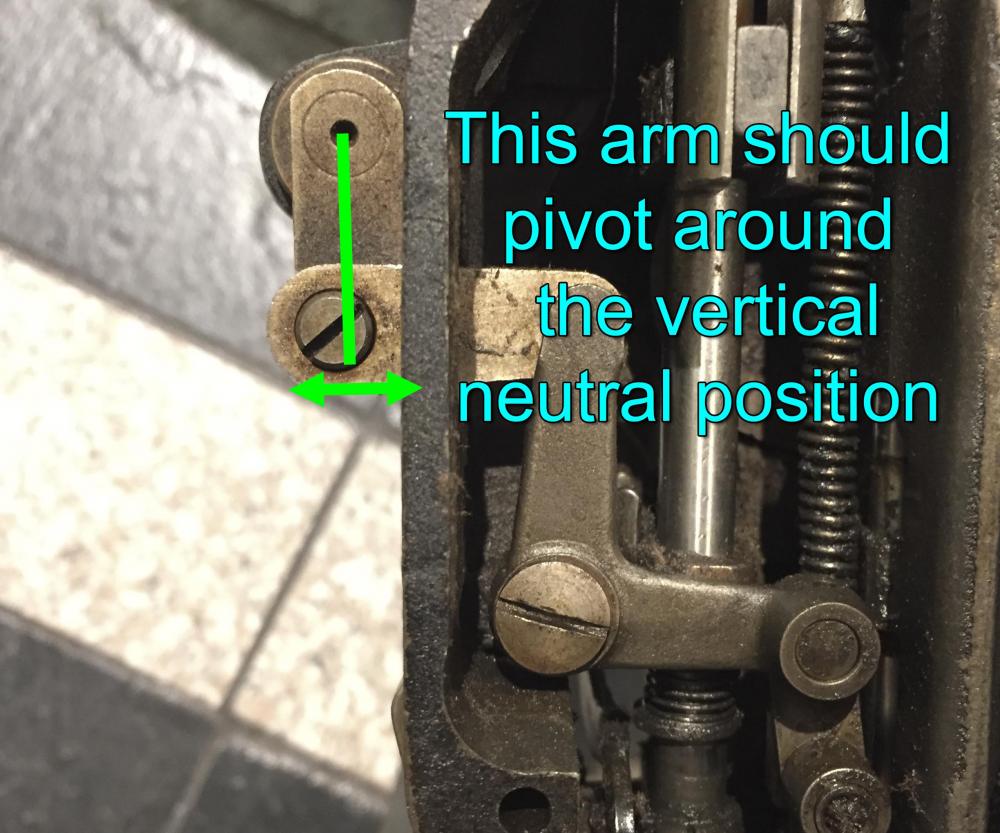
Things may actually bind on the housing, not the fed dog. I've had a few machines where I managed to get the adjustment so out of whack so that the foot lift linkage was touching the cast body and causing a bind. Make sure your foot lift linkage looks something like this: The linkages are all connected and it may be tricky to get it into the right position. Sometimes you can adjust the linkage like shown below to get it back into the correct range of motion: This arm should be vertical in the middle of its range of motion: If things are really out of whack you may need to re-set all the linkages as as shown in this video where I replaced the thread tension release guide:
-
I managed to overcome my fear of drilling holes into perfectly good sewing machines yet again to install a swing-down edge guide on my Cowboy 4500. It was the logical next step after making the extended hand lever. I used the KG-967 edge guide in this video. The KG-967 is the extended version of the KG-867 and has 20mm more reach (the adjustment range is offset by 20mm). Both guides actually work on a Juki TSC-441 class machines. Here's the video for your entertainment:
-
I made a video that shows the rest of the installation. I'll start a separate topic for that, but it makes sense to include it here as well:
-
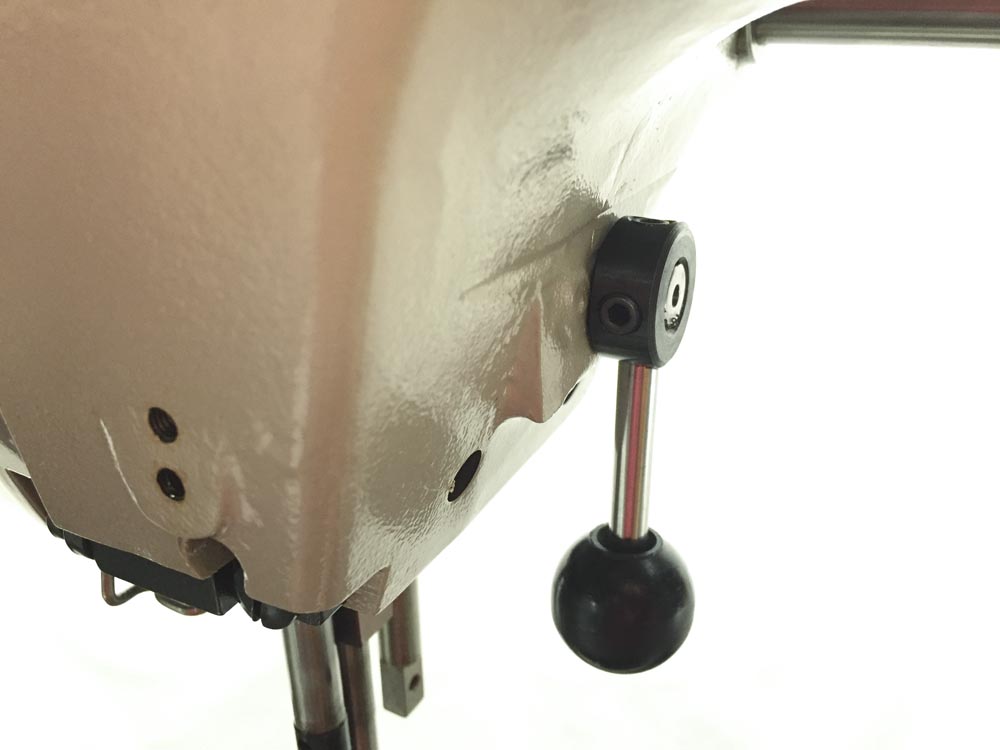
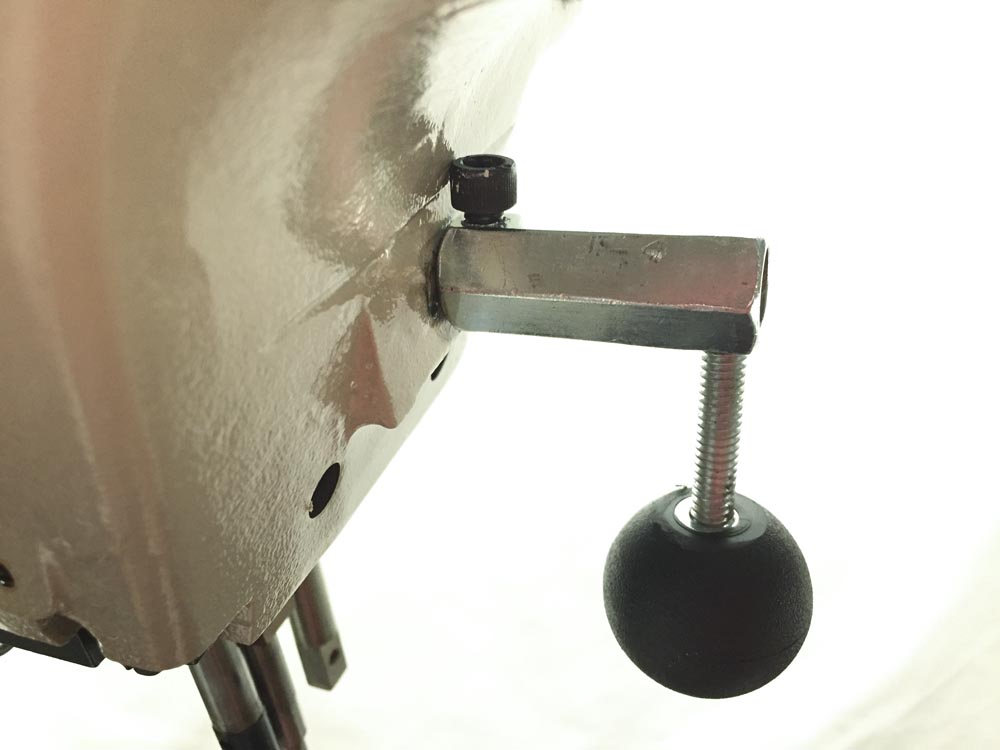
I tried out a concept I had in mind to extend the manual foot lift lever on 441 class machines. The topic had come up with folks installing a swing-down edge guide on their Cobra Class 4 machines. The offset of the hand lever to the right avoids interference with the edge guide and you can use both at the same time. My experiment is more of a proof of concept and looks a bit crude, but it works quite well and feels very solid. The gravity based automatic release when you press the foot pedal works too, which is important I think. My threads are 1/4"-20 which is a bit coarse for this application and wants to work itself loose over time as you operate the lever. A drop of Lock-Tite on the threads might help with that. Here's the original hand lever on my Cowboy 4500: Here's the extended version I made. I used a 3/8" connecting rod nut, drilled out one end with 10mm bit to fit the protruding shaft stub and then drilled and tapped holes for the set screw and the ball lever. The extension could be executed in a more elegant and polished fashion, but I was on a mission to just try and see if it works at all. A "proper" version could be made from a 10mm bushing sleeve like this one sold by KarTek for $4.99: or a 10mm sway bar bushing like this sold by IRO for $1.99 Of course if you have a lathe in your garage, you can just make one from scratch.
-
Can you please post some close-up pictures of your hook and also the spec page of your manual? If your hook as a part number referenced anywhere in a parts list or diagram, that would be super helpful, too. I am curious to see how the specs differ from the Juki LS-341 original. You're one of the few people who have access to this exceedingly rare Cobra Class 26. The Leather Machine Company for some reason is almost secretive about that machine. A postage stamp size image is all the info they offer online. It is possible that your machine's clone manufacturer made some modifications and perhaps used a hook that is different from the original Juki design. Some Juki machines (e.g. Juki LU-563) support two interchangeable versions of their hook, B1830-563-0A0 and B1830-563-BA0, the latter designed for "thick" thread. Perhaps there's a comparable thick thread version of Juki LS-341 hook design available.
-

What needle size do I need for my Singer 31-15
Uwe replied to Natcamp's topic in Leather Sewing Machines
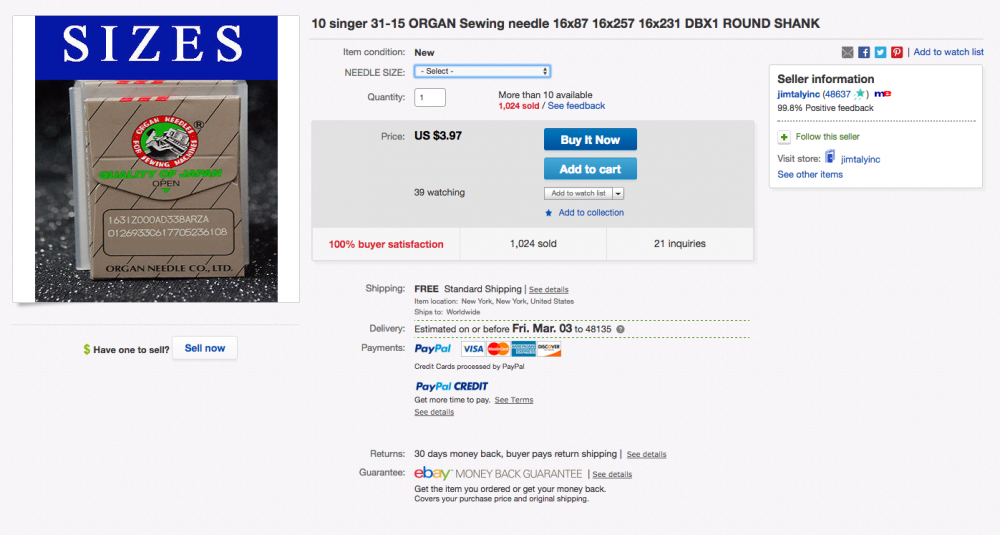
This Ebay seller (Jim Taly) has the needles you need in all sizes: http://r.ebay.com/7z3Umx I've ordered needles from Jim Taly on several occasions and I've had good experiences buying from him. I'm sure several of our banner vendors carry them, too. Your machine may need to be adjusted to make it work with these needles. -
None that I can see for us slow-sewing folks. If you're using the motor without the brake to drive a racehorse garment machine at 4000 stitches per minute, the machine's momentum may cause it to run on for a few stitches after you let go of the pedal. High-speed machines that need to stop on a dime the instant you let go of the pedal will need the brake pad on this motor. My count-along sewing pace does not require a brake pad.
-
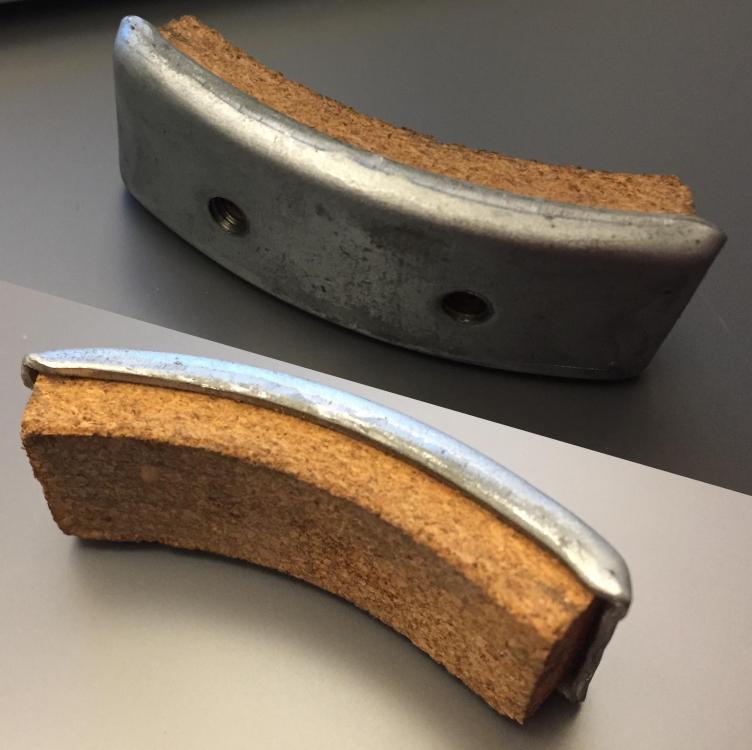
Some servo motors have a built-in brake pad that will keep the motor from spinning unless you depress the pedal a little bit to release the brake. This brake also makes it hard to turn the handwheel unless you depress the pedal. If your motor looks like this: it will have a break pad that looks like this: When I use one of these motors, the first thing I do is remove the brake pad. Just remove the plastic cover on the left (three screws) and then you'll see an arm with that curved metal+cork brake pad that presses against a wheel. Two screws hold that pad in place. Just remove those two screws and the brake pad. If you have a different motor, the tightness may be due to gummed-up bearings from dried-up-oil-turned-varnish glue or general crud in works. I've had machines that barely turned when I started working on them. A few thorough oilings often help: drip oil everywhere you see (or suspect) parts moving against each other as you move the hand wheel. Work the hand wheel back and forth to let the oil get pulled into tight spots by capillary action. Let it sit for few hours to soak in and liquify dried up oil varnish, then repeat. Things often improve dramatically after a day or so. I sometimes spend a few days just oiling and moving the hand wheel whenever I walk past a project machine I plan to work on. If it does not improve, there may be something physically worn, or something's rubbing or touching that shouldn't (like teenagers.) For belts, try an non-big-box old-school hardware store. They sometimes have a rack of general purpose V-belts in one-inch increments. Look for size 3L (3/8" wide) and then the length you need.


