Uwe
-
Posts
2,221 -
Joined
-
Last visited
Content Type
Profiles
Forums
Events
Blogs
Gallery
Store
Everything posted by Uwe
-
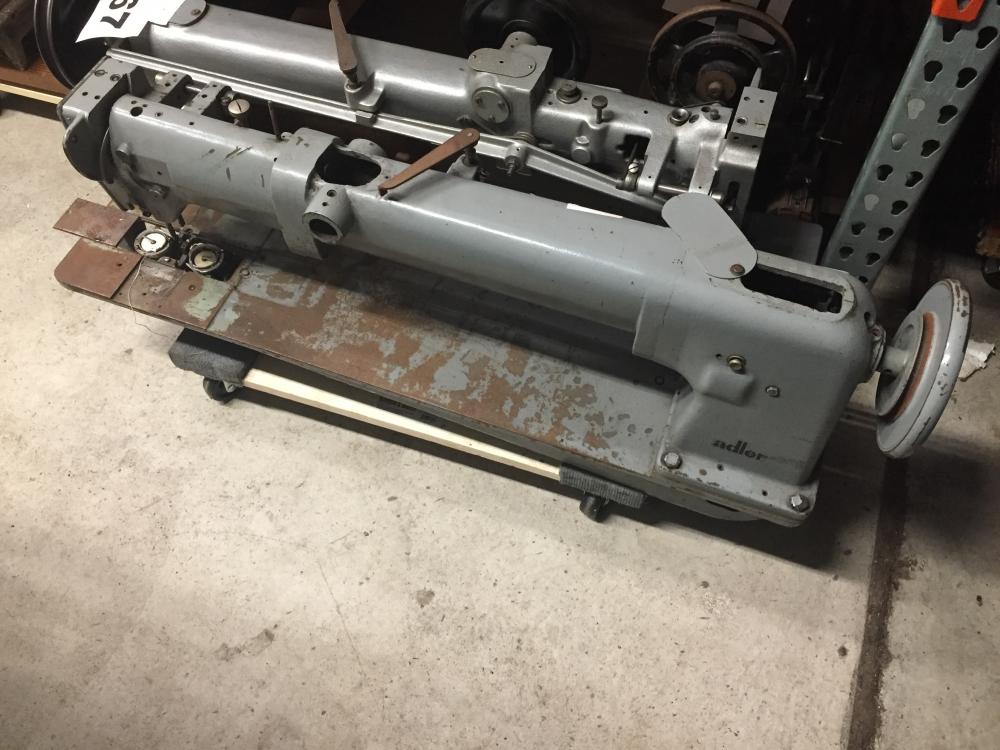
I have a Pfaff 1295 for sale in the Detroit, Michigan area. Earlier in life this machine was set up as a full-function binding station running on three-phase power and an air compressor. It shows signs of only moderate use and the original Pfaff hook is in very nice shape. It's now ready for a simpler, yet still productive life with all manual controls and a new Consew CSM550-1 servo motor. I fabricated some custom parts to make the thread tension release work with the manual foot lift mechanism. The demo video below should tell most of the story.
-
 Sigourney Weaver probably knows.
 -
Machines not only vary in where their intended application range falls, i.e. light/medium/heavy duty, but they also differ in how wide a range of needles sizes they handle well. Some machines are generalists by design and support a wide range of needle and thread sizes. For example, Consew 225 specs supports needles from size 12-24 (Nm 80-180) and threads Tex 35-138. Another generalist, the Juki LU-341 supports needles 14-24 (Nm 90-180) and threads Tex 40-138. Other machines are specialists by design and tuned for a very narrow range. For example, the Pfaff 335 specs officially call for needle sizes 12-16 (Nm 80-100) and threads Tex 35-69. In the heavy duty category, the Juki TSC-441 class has a fairly wide design range of needle sizes 20-28 (Nm130-280) and threads from 92-415. Many machine designs can extend their design range to some degree on either end, but the basic design range they start from does make a difference in how versatile they are in supported needle and thread sizes.
-
If your main goal is saddle and tack repair as indicated in your profile, then the "field plowing" Cobra Class 4 (or any other Juki TSC-441 class machine) would be a good candidate to cover a large range of your sewing projects. If you need to extend that range downward towards more delicate "Sunday church trip" projects, get a companion Juki LS-341 class machine (e.g. Cobra 26). Neither will win the hill climb race, but at least they'll get you to the top to enjoy the view.
-
What needles and where do I find them?
Uwe replied to jlsleatherworks's topic in Leather Sewing Machines
The Nm (Number metric) needle size number is in 1/100th of millimeters, so a Nm 100 is 1.00 mm thick, a Nm 200 is 2.00mm thick, etc. The other number 20,21,22, etc. are usually Singer size designation and do not represent any actual dimensions. -
What needles and where do I find them?
Uwe replied to jlsleatherworks's topic in Leather Sewing Machines
The Adler 104 Operator's manual (Manual_Adler_104_105.pdf) may give you some additional information. It also specifies the 328 Needle system to be used. Here's a picture of the Groz Beckert Version of the 328 leather point needles, which show the various names this needle system goes by. The usual suspects in the banner ads will have them in stock and they tend to offer more guidance than the Ebay sources.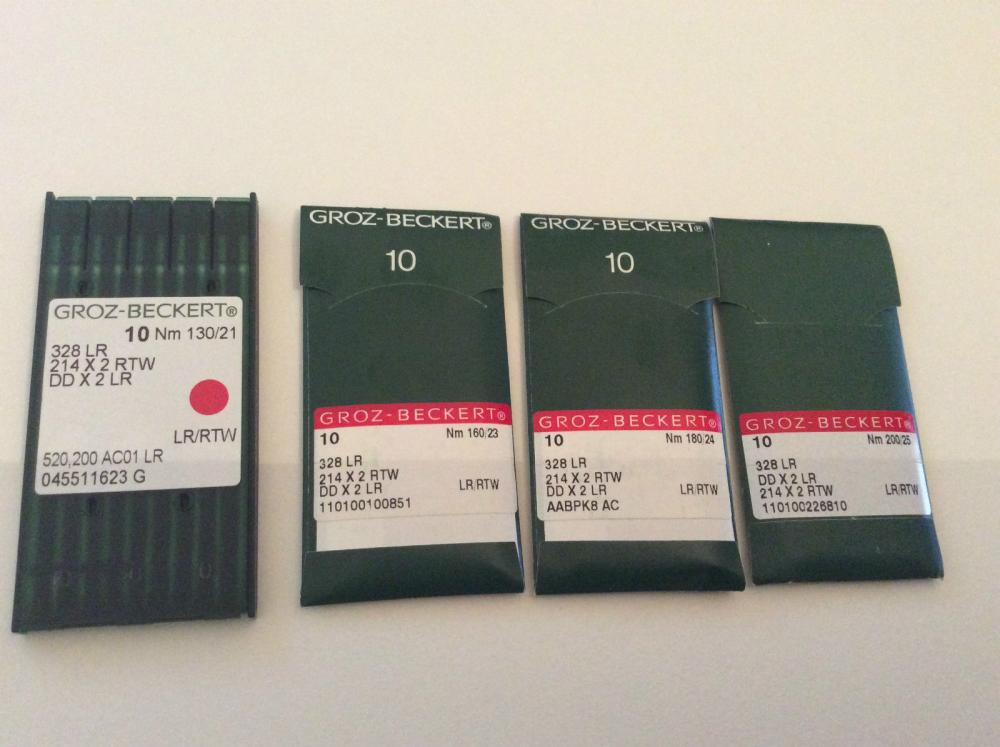
-
Are Pfaff 335 and Adler 69 cylinder arm caps interchangeable?
Uwe replied to Uwe's topic in Leather Sewing Machines
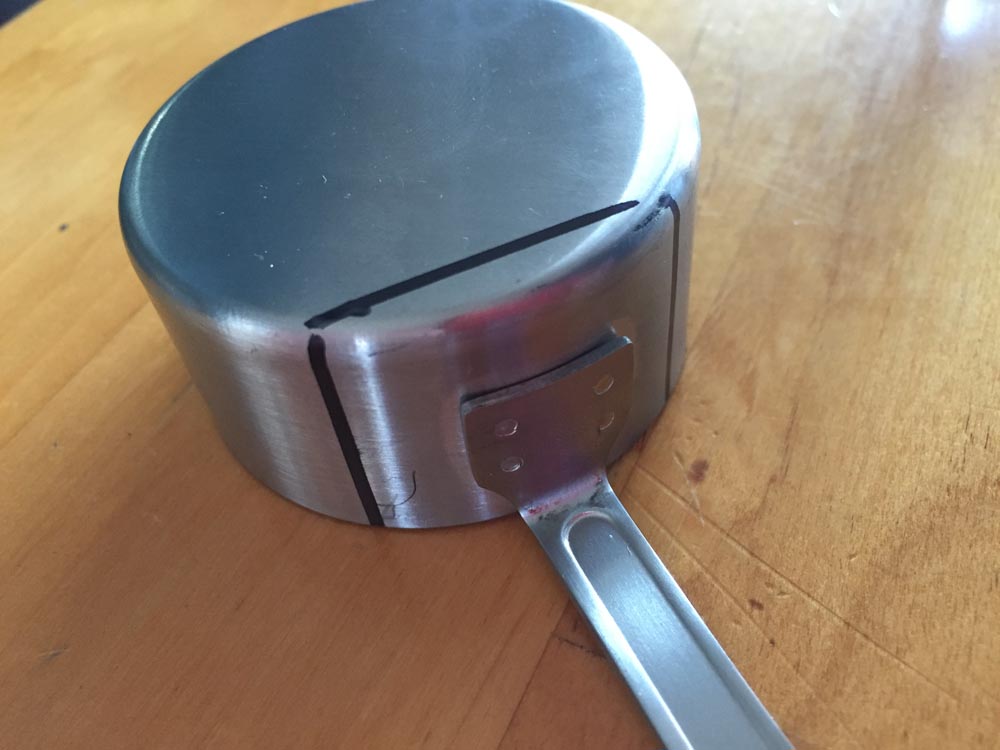
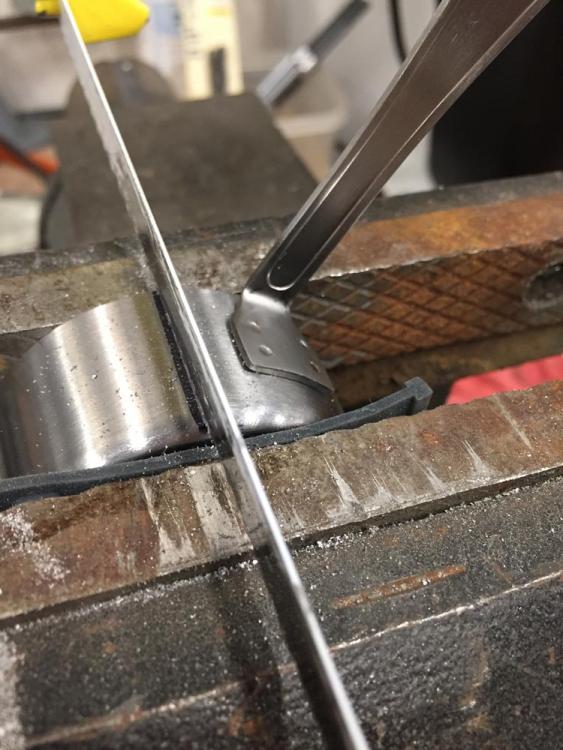
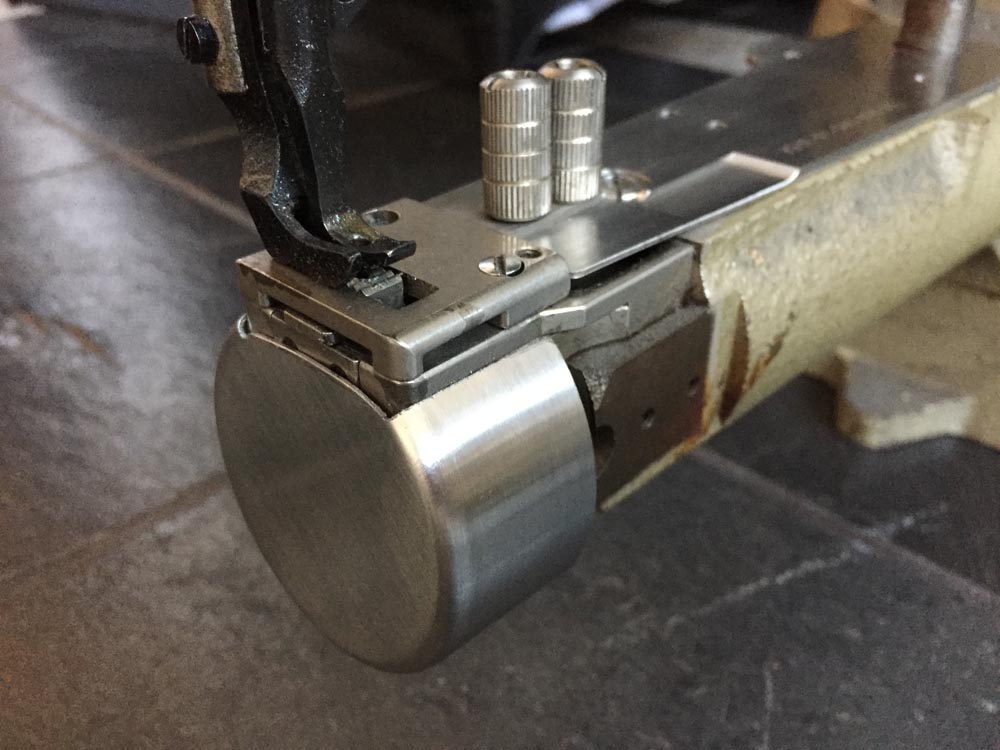
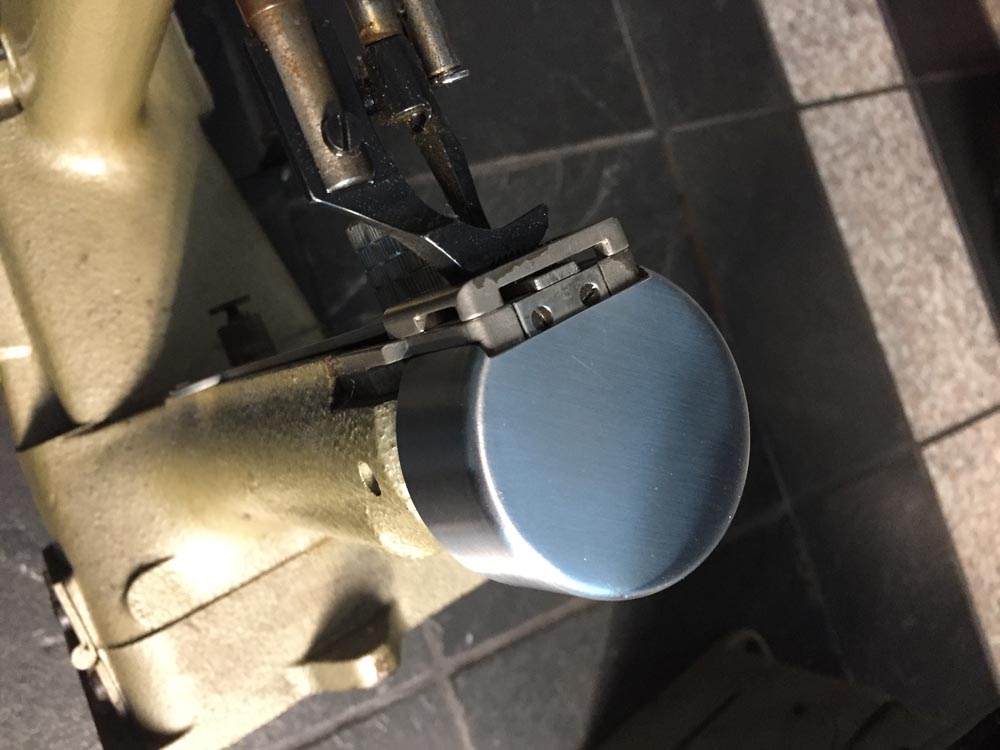
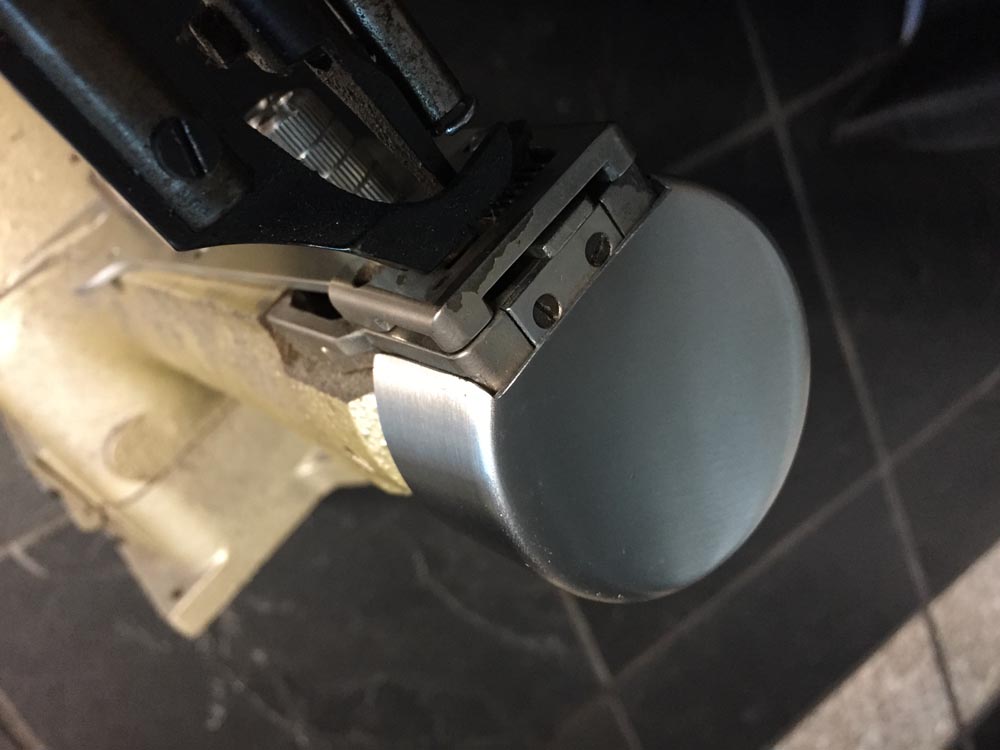
I stumbled across a suitable set of measuring cups at a local surplus retailer and decided to have a go at a stainless steel cap for my Mitsubishi CU-865. $10 for a set of four measuring cups and the 1/4-cup in that set was the right candidate. Here are some pictures. It turned out almost as nice as the $125 Pfaff version, I think.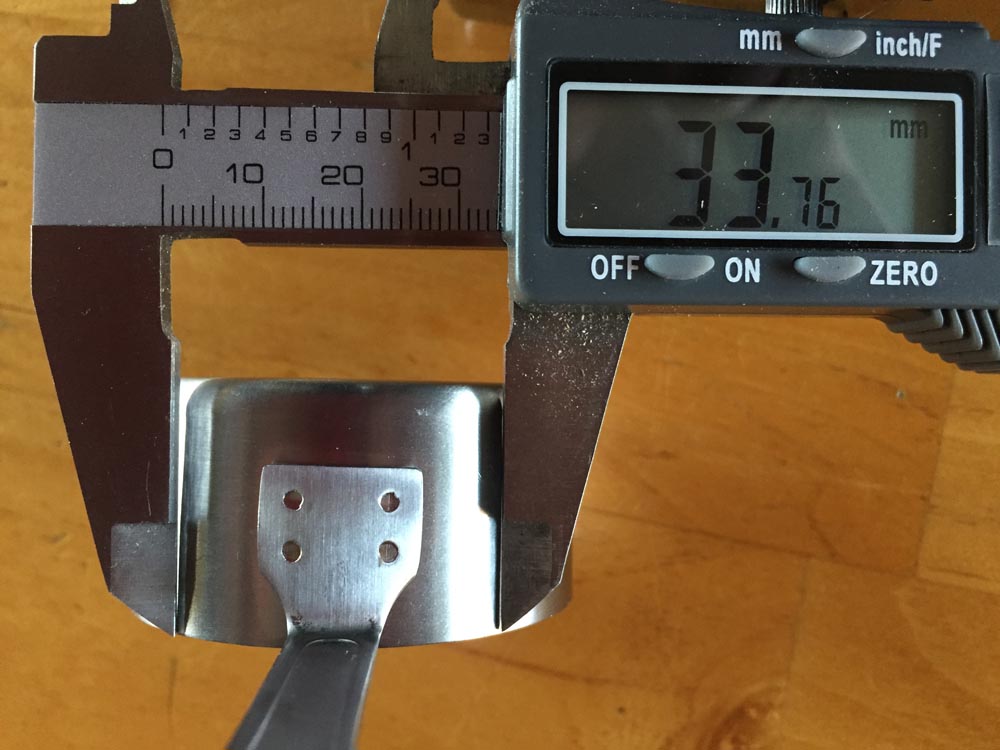

-
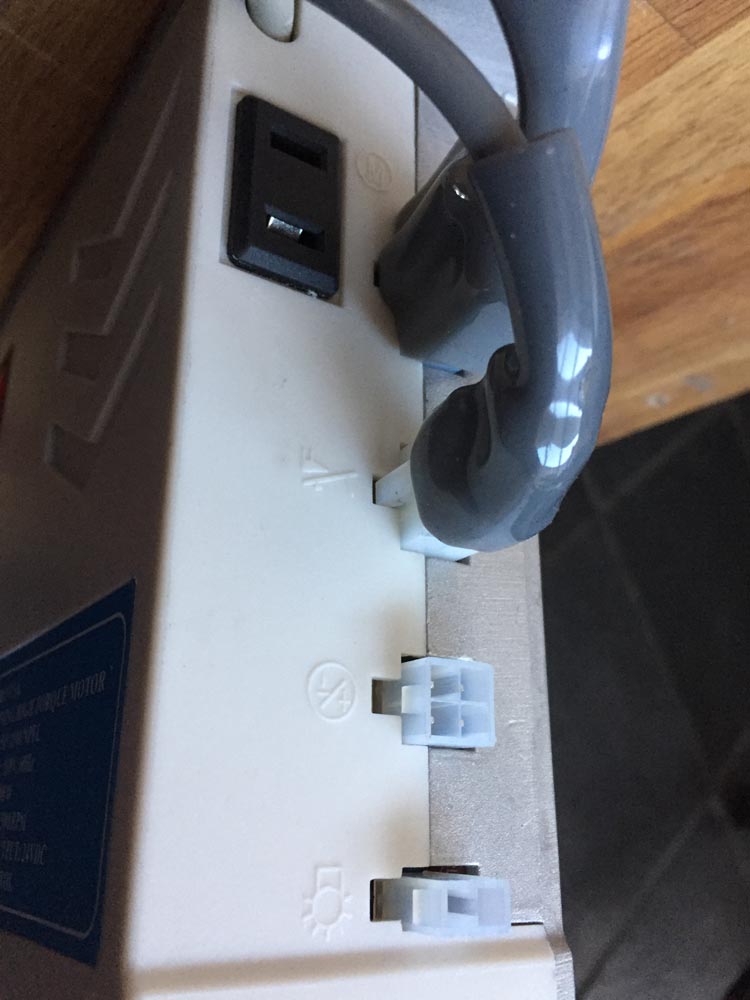
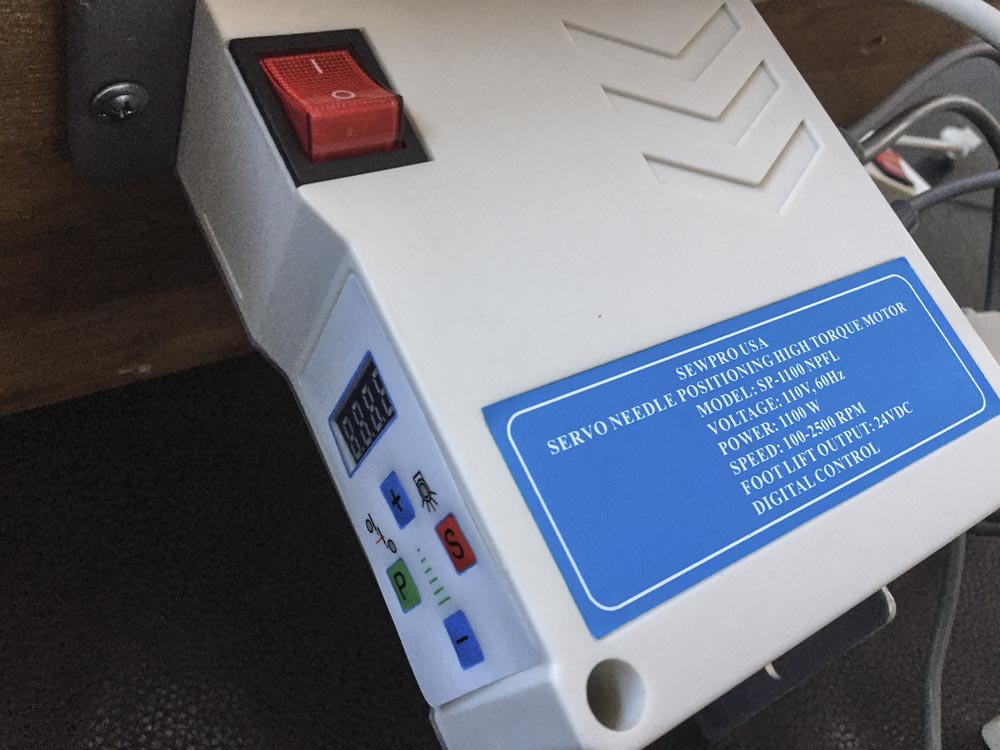
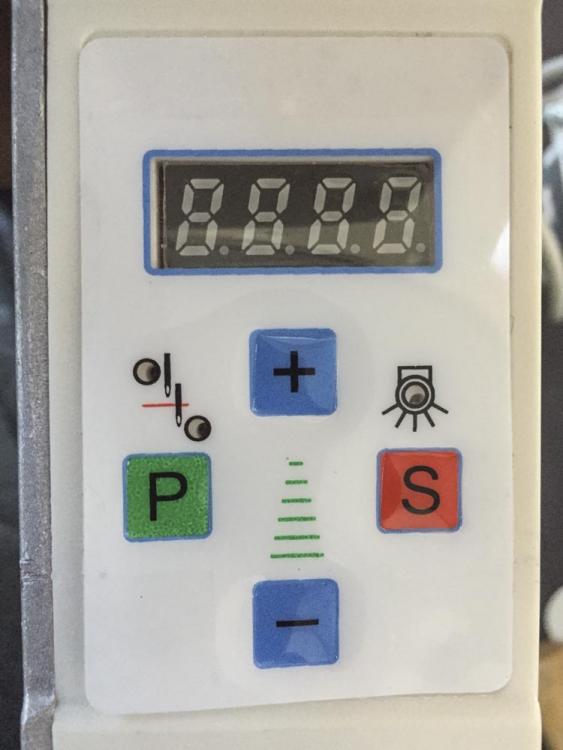
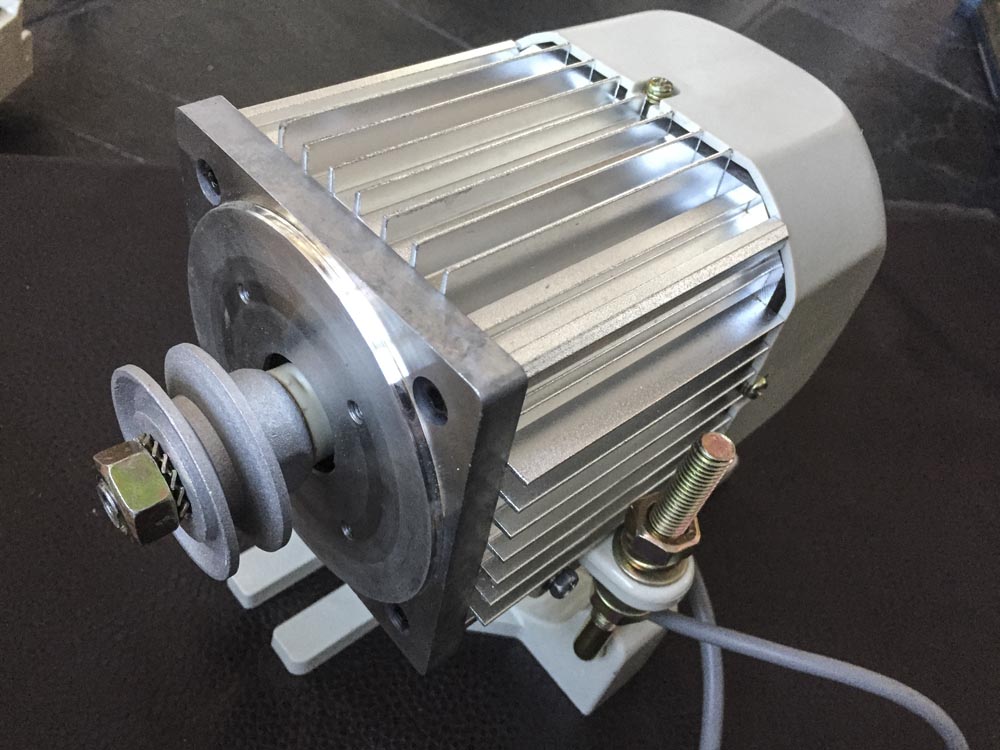
Sewpro does not have the SP-1100 motor (or SP-1100 NPFL with needle position and foot list) on their website yet, I'm not sure why. They had brought the motor to the TexProcess trade show in Atlanta last May, which is where I first met Sergey (Mr. SewProUSA) and we talked about the motor at length. Excellence in sewing technology and webmastering don't always go hand-in-hand. You basically have to call and inquire about the motor, something rather common in the sewing machine world. One key feature I like about this motor system, aside from the power and low speed torque, is actually the control interface. You can control the needle position function with a simple button that cycles through Up/Down/Off states, which is how it should be. Motor top speed is adjusted via simple "+" or "-" buttons, which is also how it should be. Other, more esoteric functions are set via a crude menu system that is just as cryptic as other controllers. The needle position sensor is optional and runs about $25, I think. I'm not connected to SewPro in any way other than having talked to Sergey and ordered two of his SP-1100 motors. I just like the motor, that's all. I took a few pictures of my SP-1100 NPFL motor, which is currently serving mobile test setup duty. The motor body itself measures about 4" square on the mounting faceplate and 6" long (not counting the pulley).
-
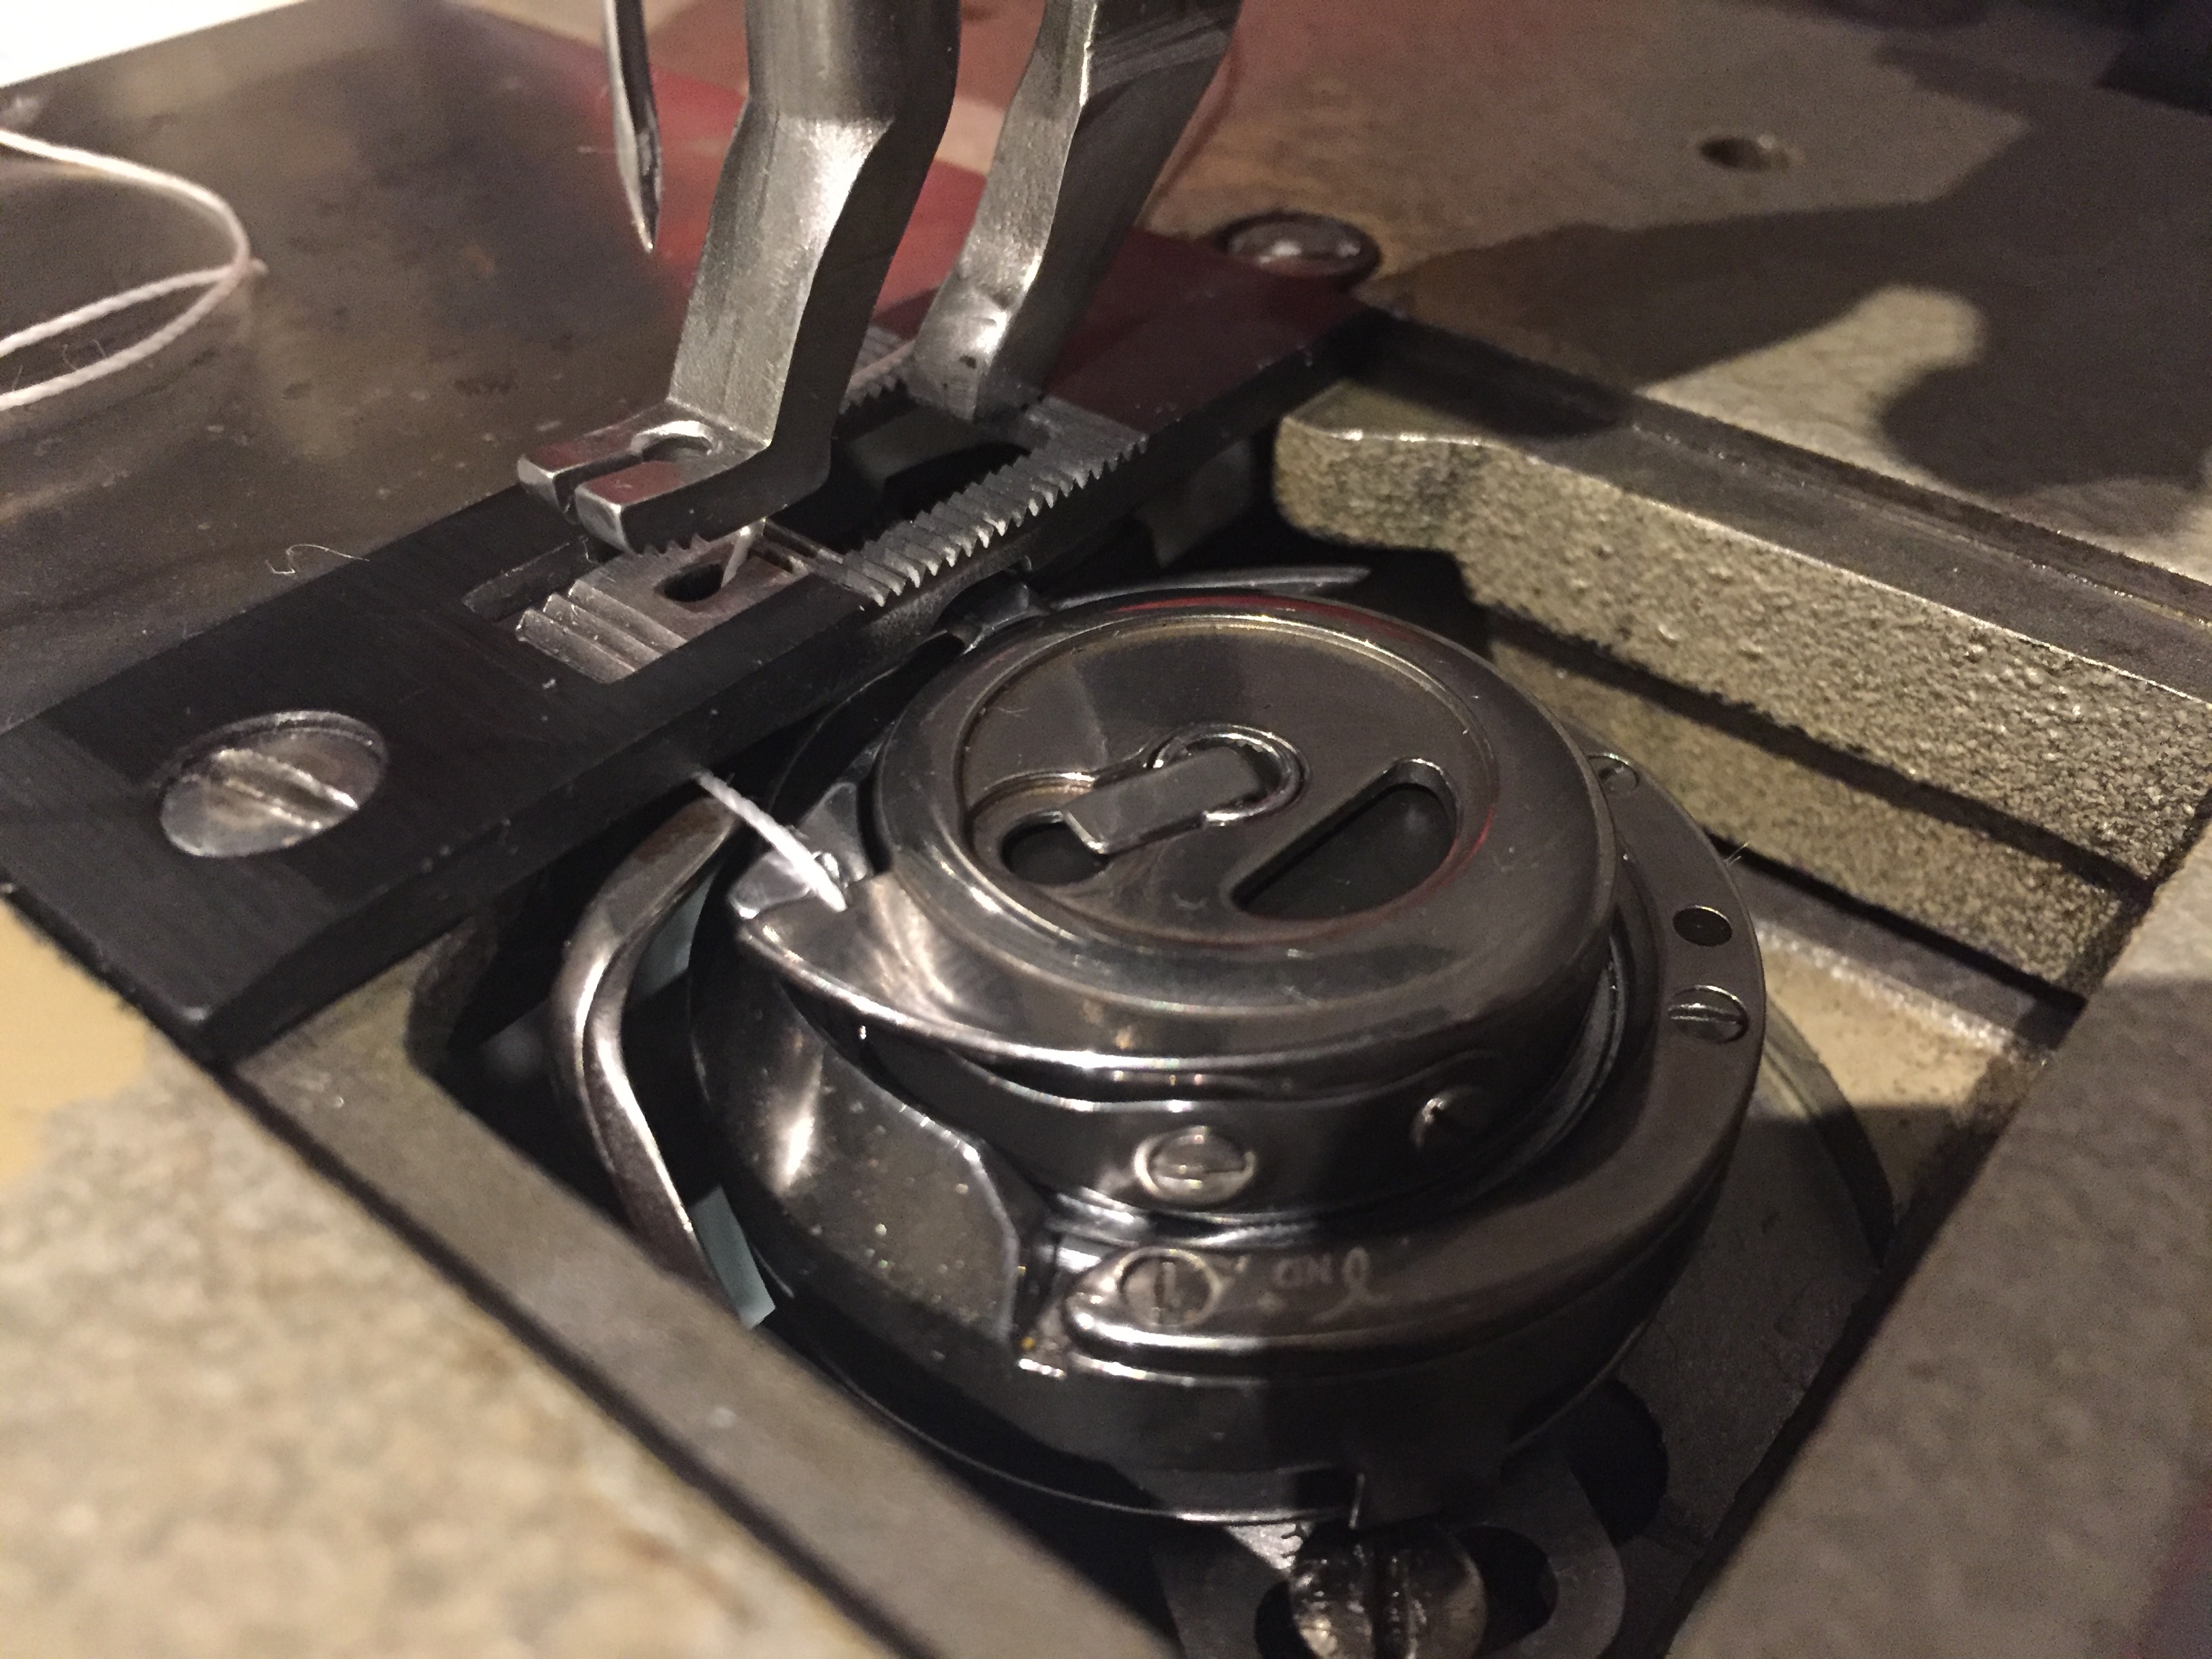
Most hooks of that style have a tension spring that can be adjusted. The bobbin usually spins counter-clockwise. The thread gets pulled through the slot in the bobbin case and under the blade of the tension spring. The thread needs to emerge from under the tip of the tension spring. The bobbin case tension spring has two screws, one fixed and one for adjusting tension. An eyeglass repair screwdriver from the drug store works well for working on these tiny screws. Bobbin tension should be very light - just barely noticeable when pulling out the thread with your fingers.

-
The left side looks better, if not quite good. Perhaps you were listening to Les Miserable and when she said "There was a time when it all went wrong" your top thread popped out of the tension discs.
-
Maybe your hook is correct after all. This picture from MooseTrading shows details and (slightly wrong, but workable) top threading path (visit http://www.moosetrading.com/sites/default/files/products/img_20150310_131615127.jpg for high-resolutuion image) I need to make one of those cool see-through slide covers!
-
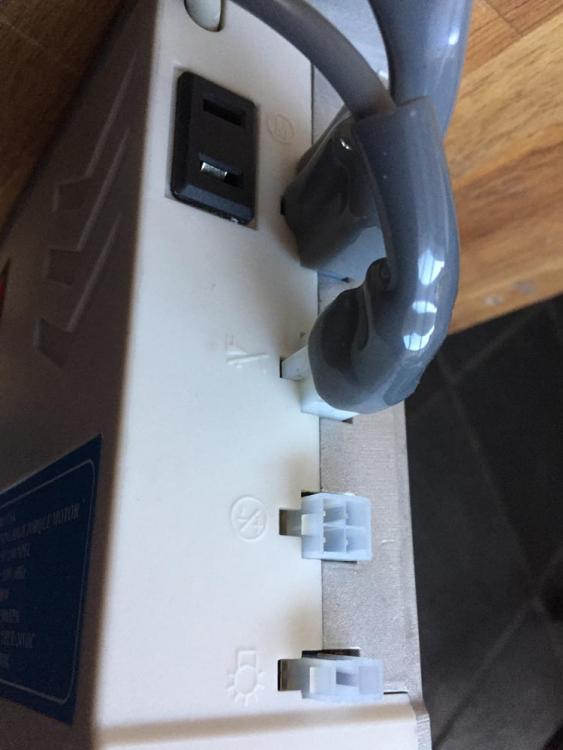
It's hard to tell, but the machine looks a bit incomplete and slightly messed up. There may be a reason it was so cheap. This machine isn't even close to worry about the bobbin thread tension. It's like worrying about tire pressure when you're missing the steering wheel and seats in your car. Post a couple of pictures of the head from different angles and underneath. We may be able to figure what you're missing or what needs fixing. Don't hook up a motor until you can hand turn perfect stitches. A lot of damage can be caused under motor power if parts are missing or wrong.
-
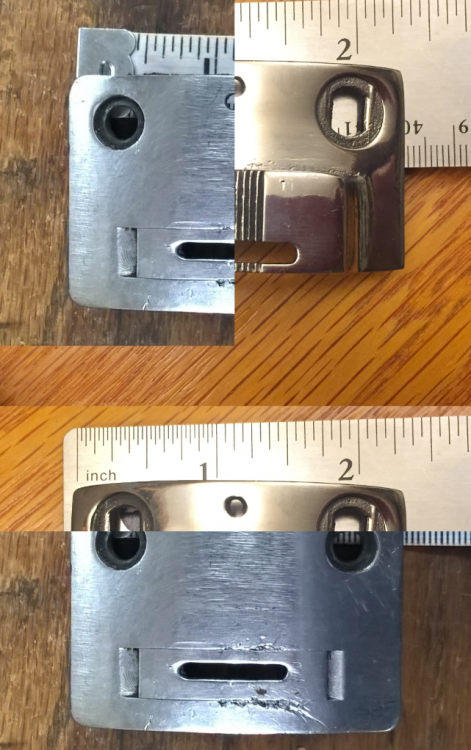
The hook does not look like a Pfaff hook for that machine. The original would have a bobbin cap. A hook from a different machine may not work at all. The Pfaff 1445 Parts Manual will be a good reference for finding out which parts may be missing or wrong. Your hook and bobbin case/cap should like similar to this:

-
Those pictures are smaller than the bobbin itself! I can't see much of anything. When re-sizing a picture, aim for a pixel count of around 1000 in the long dimension.
-
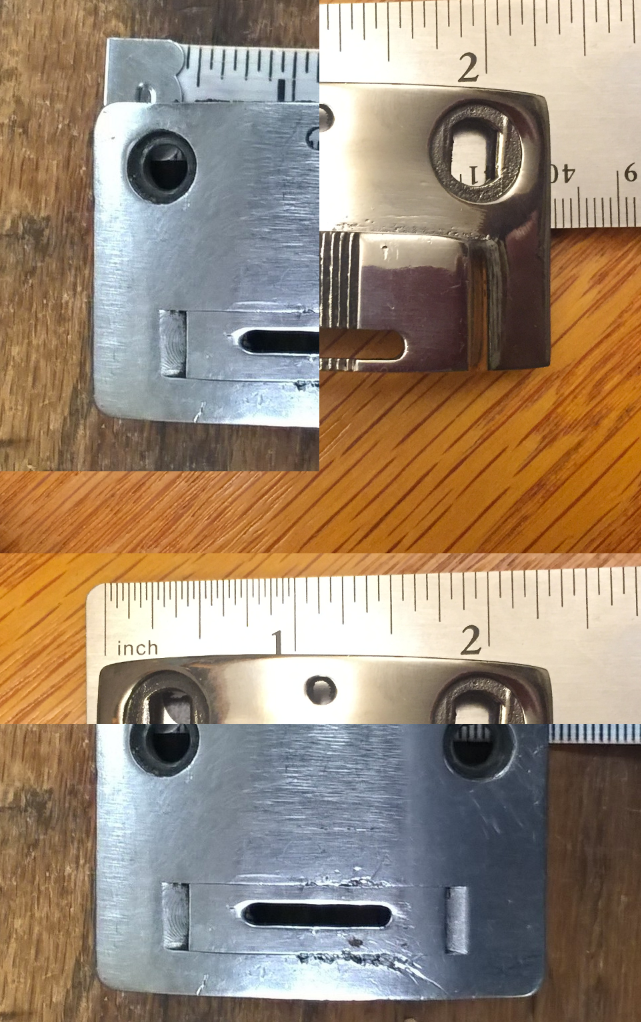
It doesn't look like the Juki TSC-441 (Cowboy 4500 etc. ) style throat plates will work, at least not without modification. I took a picture of my 441 plate and sized it to match the scale of your photo. I lined up the needle slots on both plates, so you can see where the other dimensions line up or not. The Cowboy holster and stirrup plates are not exactly cheap at $160 each - a bit expensive for experiments.
-
Quite often a needle breaks because it's being deflected as it's going down and it hits the feed dog instead of the hole in the feed dog. At the right speed this will break a needle every time, no matter what size or tip. Make sure your needle points at the center of the feed dog hole when no material is in play (check service manual for specifics.) You need to support your workpiece so that it does not pull or push in any direction as the machine sews - that's often not easy to do. If you're letting a heavy bag, or a whole saddle dangle from the end of your cylinder arm, your needle is doomed. You also need to make sure your workpiece lays perfectly flat on the throat plate so that the needle does not hit a slope as it goes down. According to the Durkopp Adler 8967 manuals, your machine uses needle System 2134-35, which may not be the same as System 134-35. The slim cylinder arm machines are usually designed for light to medium duty work. If your "pretty thick leather" is a couple layers of 10 oz. veg tan, your needle (and eventually the machine) is doomed. For "pretty thick leather" you probably need a Juki TSC-441 or Adler 205 class machine.
-
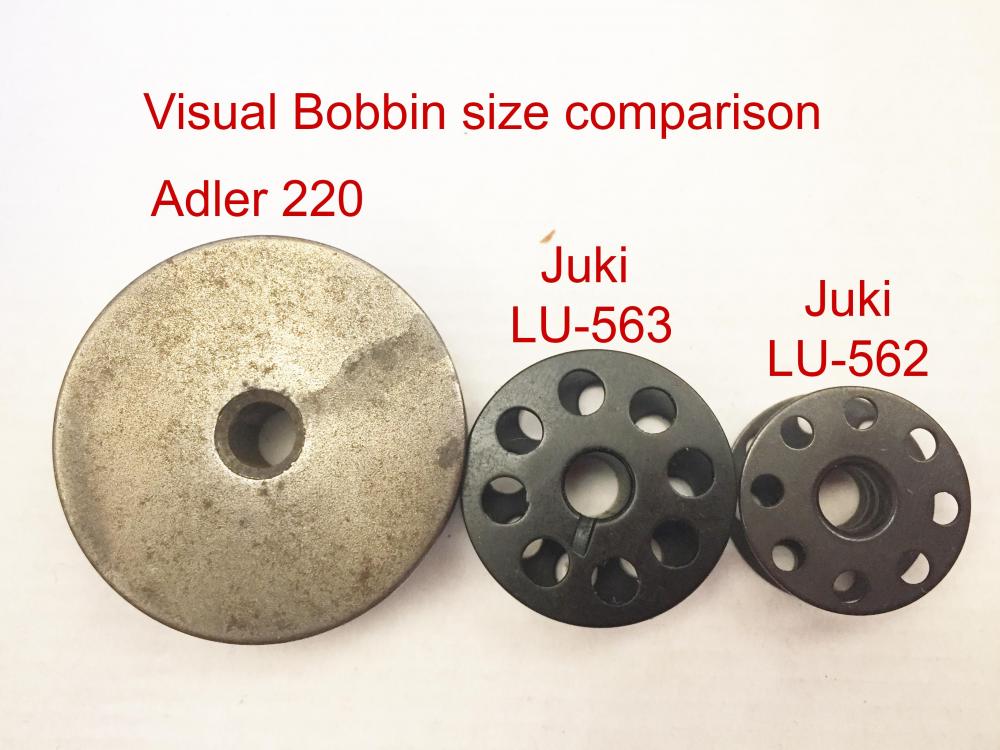
Here's a quick visual comparison of bobbin sizes:
-
We just really need to know what the measurements on that Ferdco machine are, otherwise it's just a mildly entertaining "guess what the dimensions of my obscure Ferdco machine are" game. It's kind of backwards.
-
I actually have one of the Harbor Freight hydraulic lift tables,which is super useful in many situations and it's great for moving heavy table-top machines like the Landis 16 or the Puritan from the storage shelf to the work surface. But that table actually weighs 190 lbs all by itself, so getting it in and out of my car for pickups and deliveries is a no-go. Also, the lowest it will go is about 11 inches off the ground. I'd love to have something compact and portable with lift arms that I can use with a sling to lift one of my 200+ pounds long arm beasts into and out of a table safely by myself. I also have a big manual pallet stacker, but that thing is way too big and will never make it inside the house.
-
Personally, the only clutch motors I like are the ones attached to fancy Efka controllers. Unless you have some nostalgic attachment to plain clutch motors, there's really no need to subject yourself to them. Even a $115 cheapo servo motor with a small 2" pulley will make a world of difference. For around $200 you can buy one of my personal favorites, a Sewpro 1,100W servo motor with plenty of low-end torque and very low 100rpm starting speed (most other servo motors start spinning with 300 rpm.)
-
Looking good! Love that lift cart, too - I need one of those. That's a very nice table setup, actually.
-
The Adler 220 machines do have reverse, just via foot pedal instead of hand lever (note the three pedals; foot lift, speed, reverse)
-
Here's the spec sheet for the Adler 220: Leaflet_Adler_class_220 (1).pdf It should have better specs than the Juki 562 all around. HUGE bobbins. Very desirable and capable machines in my mind. If that CL machine works, it's a steal at $650.
-
How about a few pictures of your and Ferdinand 900b Bull with close-up of the hook and needle plate area (hook cover cap open or removed?) We're just guessing otherwise. Ferdinand changed base machines for their modified version over time. If your machine is based on this version of the Consew 754r: then it's really a Seiko CH-7B: and that machine's business end looks more like an Adler 205 style to me: Adler 205 and Juki 441 style plates my still fit your Ferdinand, or fit with minor modifications. I have one flat-top harness maker throat plate that fits nicely on both Adler 205 and Juki 441 designs, you just have to use small washers or different throat plate mounting screws with larger heads on the 441 designs.
-
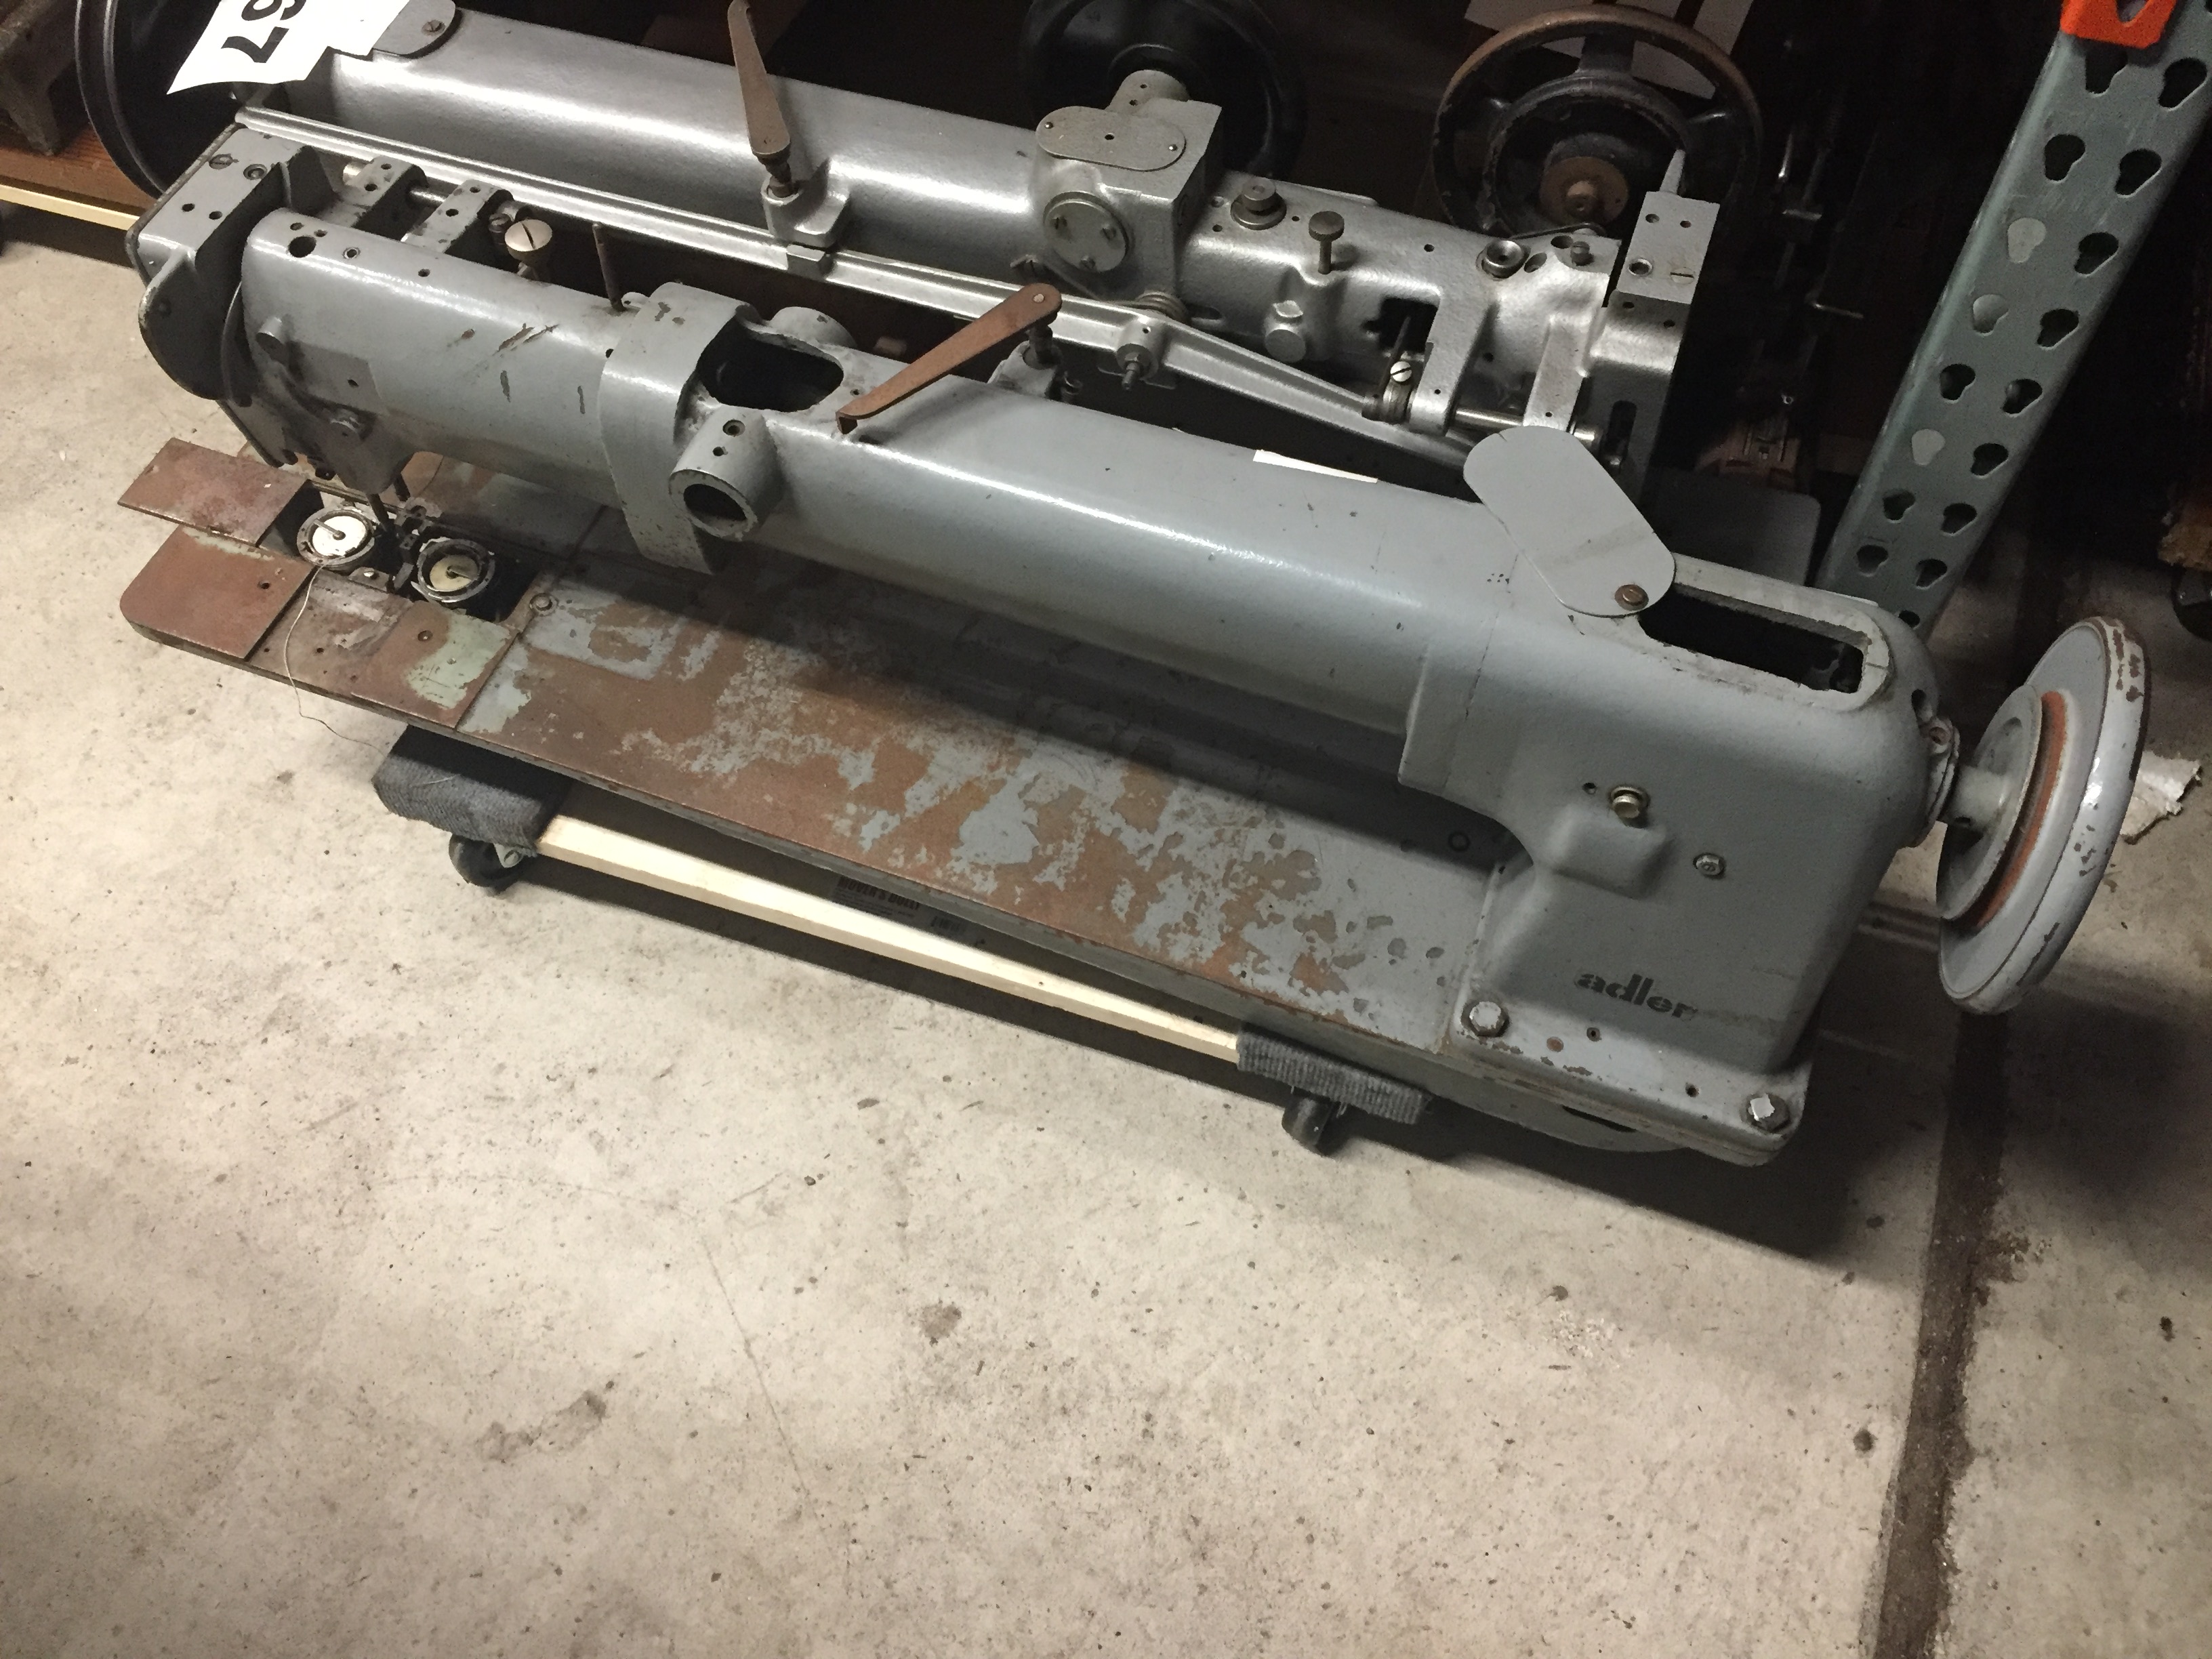
Never heard of Apex Tuffmaster before, but it sure looks just like an Adler 220 to me. Casting details are very close to mine, which is less complete and not quite as pretty right now. Perhaps a copy or a importer re-badge job just like Chandler's re-badge of the Adler 67. Might be worth checking out in person. Those machines are wicked heavy and awkward to move - I can barely lift one end of it myself. Don't just plop the head on the concrete floor either - the front end will be resting on fragile hook bits instead of sturdy frame casting parts.)