-
Posts
2,221 -
Joined
-
Last visited
Content Type
Profiles
Forums
Events
Blogs
Gallery
Store
Everything posted by Uwe
-
I stopped by the stand again today to take a closer look. The designer/engineer was there and offered some additional insights. The stand is rather over-engineered in a good way. There is a fair amount of complexity because certain parts are customized to the sewing machine head installed on the stand. So you can't just order a dozen of these stands and sell them to a bunch of people with very different machine heads. Purely hypothetical, if you were a manufacturer of a certain size and affluence in, say, Southern California, you could just order sixty of these stands, have them loaded onto containers and shipped to the Durkopp Adler NA headquarters in Georgia to be fitted with shiny new identical Durkopp Adler 669 cylinder arm machines and then delivered to your factory. That's the way to do it, purely hypothetical. The cost of the stand is only about a quarter of what that Durkopp Adler 669 and Efka drive system runs - a bargain in my opinion, especially if you buy sixty of them.
-
Having built my share of flatbed table attachments and sewing machine stands, I was duly impressed by the convertible sewing machine stand the French company Echo Positif (http://www.echo-positif.fr) showed at the TexProcess trade fair in Frankfurt, Germany today. The lady was very kind to let me film a demo:
-
The various bits that connect to the guides are listed on the Kwok Hing website: http://www.kwokhing.com/adler/da_guide.htm The zipper guide is called KG-BZ
-
It sure looks heavy duty to me. That motor can probably operate an elevator. Love that monster hand wheel.
-
Thank you Eric!
-
Yes, That Pfaff 335 is for light to medium use. That Adler 105-64 is well suited for heavy materials and 1500 Euro is not really that expensive (it's the Pfaff that's bloody cheap.)
-

Sewing machine advice for Leather Jackets, Trousers, and Shirts
Uwe replied to Adler's topic in Leather Sewing Machines
I'd recommend checking with Global Industrial Sewing Machines (http://globalsew.com) in Haarlem, Netherlands. They're just a two hour drive north of you. If you REALLY want to see everything make a day trip to Frankfurt and visit the TexProcess Trade Show that runs from May 9-12. I'll be there, like a kid in a candy store. That show only happens every two years in Europe. For flatbed wheel-driven machines, the Durkopp Adler 887 is one of the current reference machines: -

Help me get the right machine, my budget is $1,700
Uwe replied to EdwinKnight's topic in Leather Sewing Machines
The Consew 206RB-5 is a made-in-China copy of the original made-in-Japan Seiko STH-8BLD-3, which you can buy for around $1,500. Seiko made the older versions of the 206RB for Consew. So if you want a new Consew 206RB-5 with the same quality and reputation as the older ones, buy the Seiko STH-8BLD-3. Very nice machines. Made-in-China by itself is not bad thing per se. You just have to pick the right factory or suppliers. A few decades old is good when it comes to industrial sewing machines. Buy an Adler or Pfaff from the 70's or 80's when Engineers ruled and happy, well paid workers in Germany assembled the machines. TechSew has done their homework and picked good suppliers for their machines from what I can tell. -
There actually is a list of numerically sorted part numbers in that particular PDF file. I've seen the numerically sorted pages removed from many PDF scans. I just ran OCR (Optical Character Recognition) text recognition on the PDF file which makes it searchable. You can type in a part number and it should show up three times (or more): once in the grouped parts list, once in the numerically sorted parts list, and once in the picture plate pages. It worked for two of the three part numbers I tried out. Here's the OCR version of the SInger 97-10 parts list that should be text searchable: 97-1_10 OCR.pdf Having searchable PDF files is a step in the right direction. I can search my own PDF archive on my computer for certain mystery part numbers. But my archive of PDF parts lists is incomplete and nobody else has access to it. It would be preferable to have a centralized, online parts look-up system. But that may not be practical (unless Google decides they LOVE vintage sewing machine parts lists.) 97-1_10 OCR.pdf
-
I acquired a fair amount of Singer 97-10 parts last year along with a larger inventory purchase. Some used, some reproductions, some new old stock. The problem is that the parts are not organized or cataloged yet, but rather in a four-level, 900 sqft chinese puzzle (I have to move at least ten pieces to get to the one I want, if I even know where to look.) I did come across a box marked "Singer 97-10 races - new" yesterday. I counted about fifty new reproduction races that somebody had commissioned some time ago. Time will tell what else pops up in the other boxes and drawers. I was going to have things organized and cataloged over the winter, but here I am at the end of April and I've barely made a dent. I sure hope to actually own a complete Singer 97-10 machine some day. I'm glad to hear of people who still have and use these fantastical beasts. I also wish there was a reverse parts look-up tool where you can enter a part number and it spits out all the machines (or at least one) where that part was used.
-

Sewing machine advice for Leather Jackets, Trousers, and Shirts
Uwe replied to Adler's topic in Leather Sewing Machines
You may want to consider a Bottom+Needle feed machine. The full compound feed machines tend to be on the heavier side. For many industrial sewing machines, the manufacturers made various subclasses that handle different range of materials. Check the spec sheets to make sure your candidates support the needle system and sizes you want to use. The Durkopp Adler 272 is a modern incarnation of the Bottom+Needle feed design and supports the fine needle sizes you are looking for: The Singer 111W151 is the vintage version. Alexander Dyer made a nice video with this machine. -

DIY Electric Bobbin Winder - Singer 111 and 45K Type Bobbins
Uwe replied to Constabulary's topic in Leather Sewing Machines
Nice designs and beautiful workmanship @Constabulary ! That 45K bobbin in the video is wound to absolute perfection - not a single winding is out of place. -
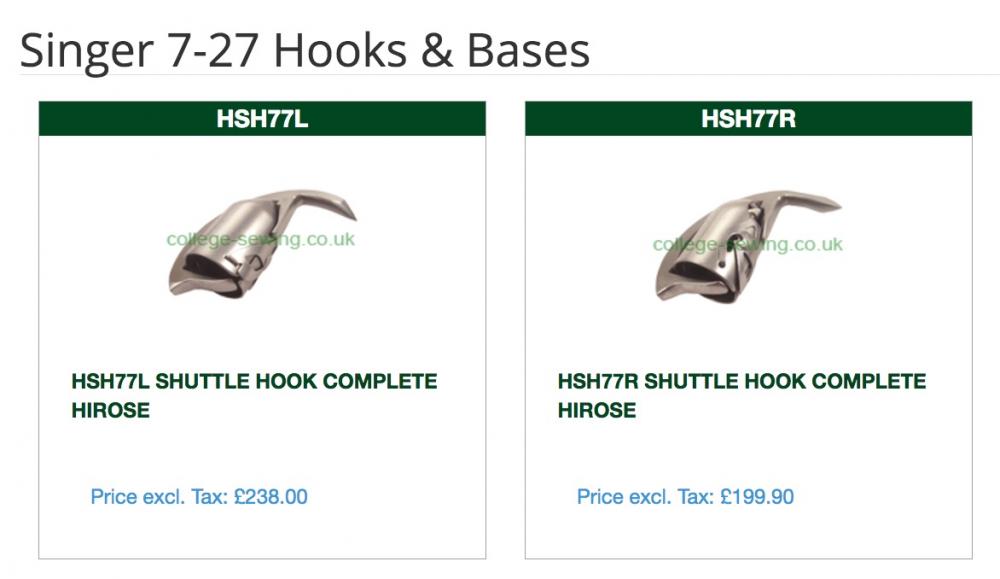
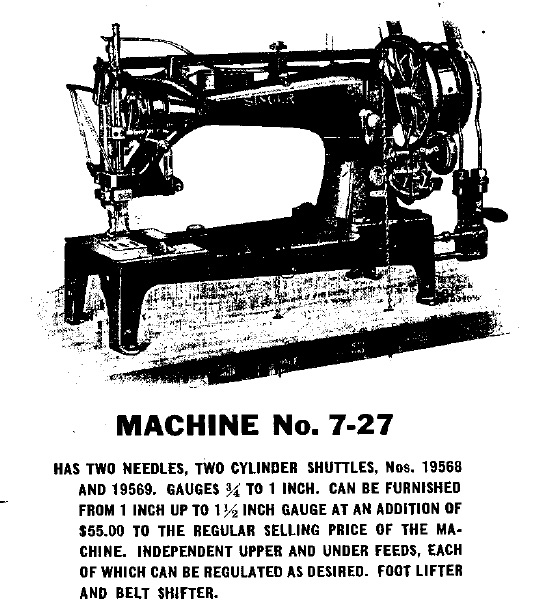
The Singer 7-27 is a two-needle machine according to the description in the Singer 7-27 part list (7-27_28_38_39.pdf). That description sounds positively intimidating from a maintenance perspective: Are you using both needles and hooks? Are you using parts with matching gauges (distance between needles?) If you're only using one needle, which side? There are two different hooks, left and right version. Are you sure you have the correct hook on the correct side installed? They may fit on either side, but they will only work on their intended side. A few close-up pictures would be great. Not all two-needle machines are happy sewing with just one needle, and often you can't just install parts for a centered, single needle setup. Without knowing where exactly your machine is at, it's hard to give more specific advice. As for terminology, we usually say that the hook picks up the loop from the needle to wrap it around the bobbin.
-
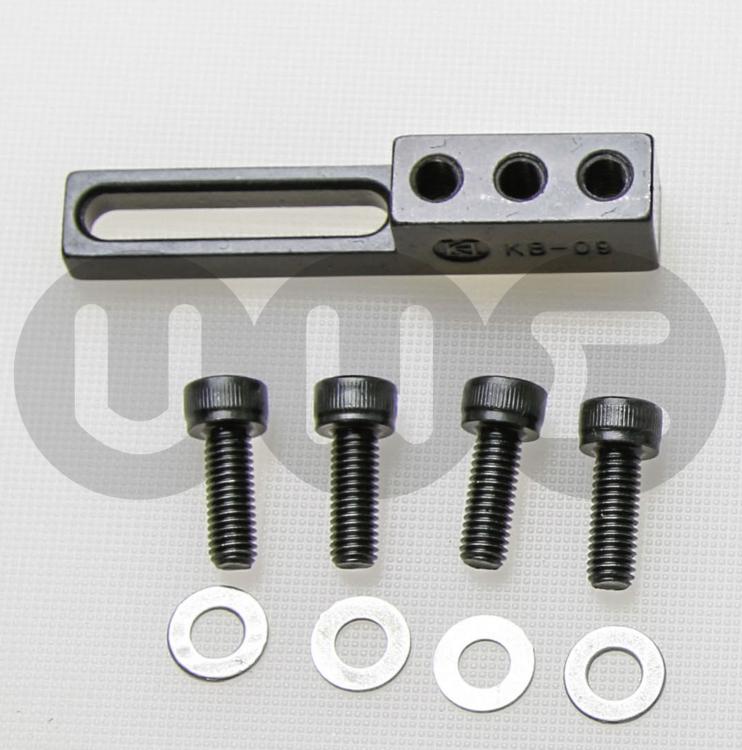
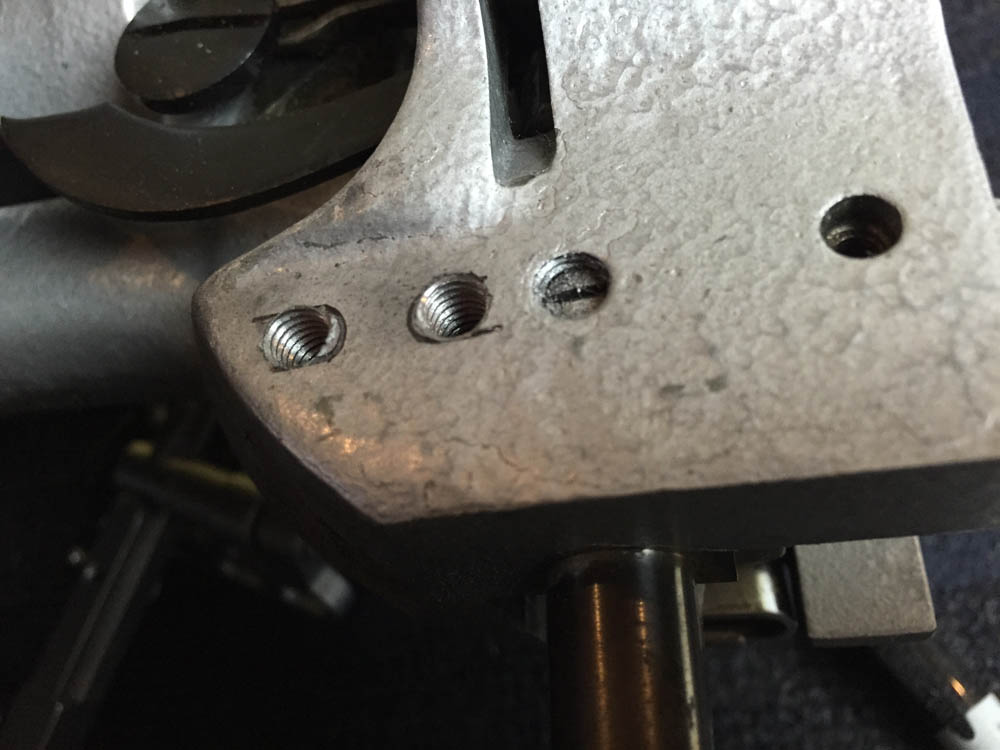
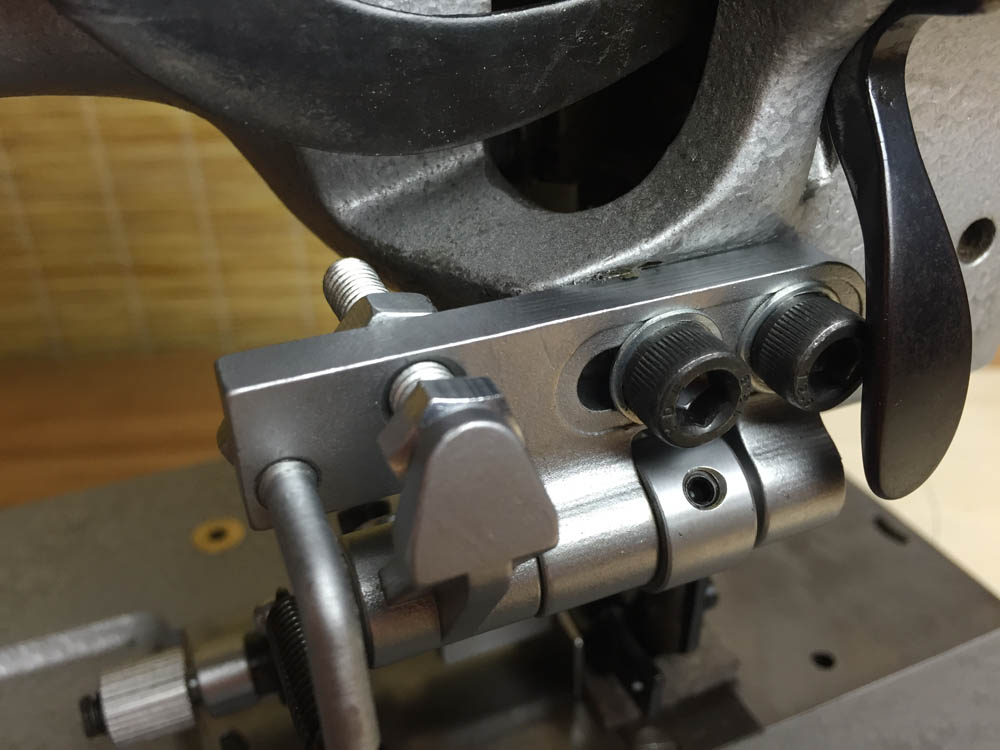
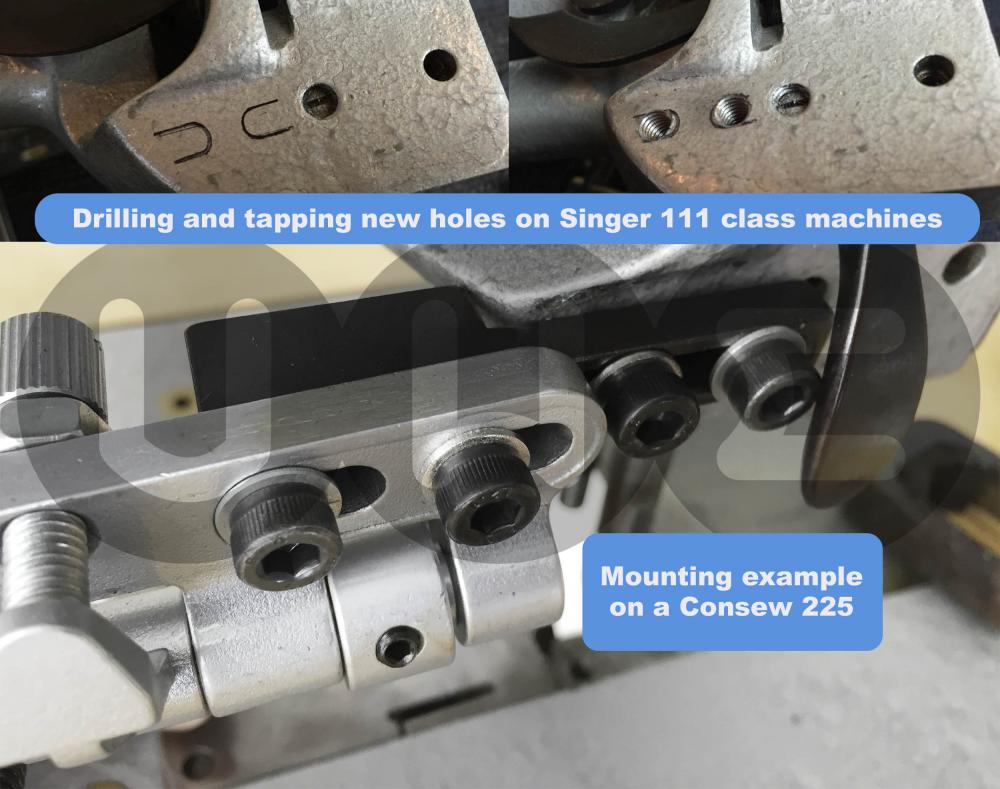
You might be able to install the guide directly without an adapter bracket . Here's some pictures of an install on a Consew 225, which has a similar top head to your Consew 227: You can also use an adapter bracket like the KB09:
-
It's a mystery to me how you can break those threads in normal use with just your hands. It seems you have to hit that thumb knob hard with a hammer to obliterate the threads on the shaft (they seem hard and brittle to me.) Perhaps tilting an unmounted head back to rest on the hand wheel is a common source of injury if the thumb knob hits the surface with any force.
-
The Singer 111W101 is a very early version of that general Singer 111 class. It's basic capabilities are not much different from later versions. The Singer 111W101 Manual (111w101.pdf) tells most of the story. Downsides of these early models include the stitch length adjustment mechanism, which is a real pain to use and fix - there's a reason they abandoned this design detail in later models. The other potential problem is the fabric timing belt, which, if it breaks, may be hard or close to impossible to replace. While replacement neoprene timing belts are available and cheap, the required surgery to replace the belt can be daunting and the patient may not survive. I have a Singer with the same design and the broken fabric timing belt rendered the machine all but useless. The upper timing belt pulley has fused to the main shaft and will not allow me to install a new belt. That motor is likely an electrical hazard and not worth bothering with. Plan to get a modern servo motor. A Juki LU-563 or Consew 206RB would be a much easier-to-use and less painful choice to start with.
-
The Nick-o-Sew NKS 441 belongs to the large group of Juki TSC-441 clones. Other examples include Cowboy 4500, Cobra Class 4, Techsew 5100, and many others. They're great machines overall with good availability of parts and accessories. There's little real-world difference between the various vendor versions. The NKS 441 has pre-drilled mounting holes for a swing-down edge guide, which is a nice touch.
-
-
Presser feet for the Pfaff 145/545/1245 series are readily available. To see what's available, try a search on Ebay like that looks this: Pfaff (145,545,1245) (feet,plate) You'll get an idea as to what's available. There are vendors on here (including me) who sell parts and can advise you. Get a new throat plate while you're at it, yours has seen better days. You piping/welting task is indeed different from what most leather and upholstery folks do. Most piping feet have the needle on the right side of the piping for upholstery work. Your graphic appears to be a domestic sewing foot. Many folks modify existing feet to fit specialty needs. A simple grinding wheel and polishing wheel, along with some practice and patience often yields good results. Here's the $38 Harbor Freight mini grinder/polisher I use most of the time to modify feet: You may be able to use a double welting foot like this and place your piping in the right channel (ignore or grind off the left channel). You can also try a left-toed foot like this (this is one of the feet I have for sale in my ebay store) : You can also start with a normal double-toed foot and then grind off one side to get the needle very close to the piping. It all depends on how close you need to get to your piping to make the seam work right. In my experience, Kwok Hing is one of the manufacturers who makes very nice quality parts (look for the Logo). Their full selection of Pfaff part is shown here: http://www.kwokhing.com/pfaff
-
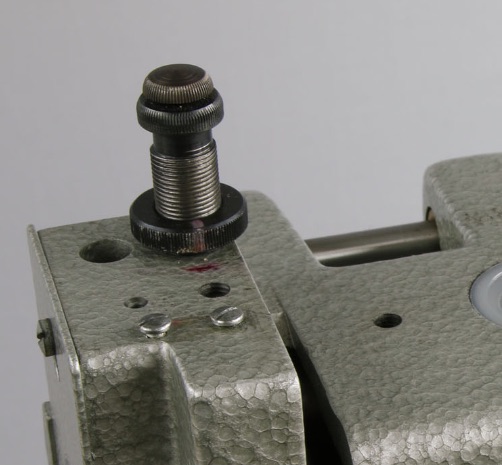
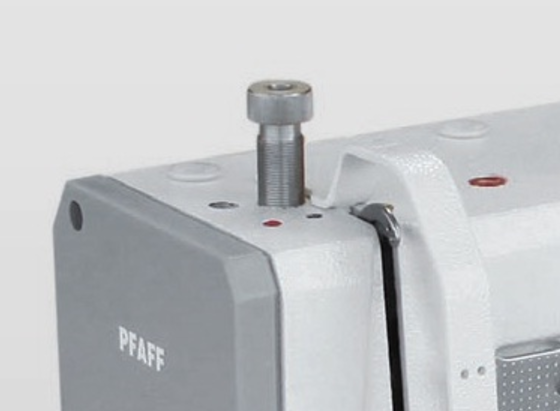
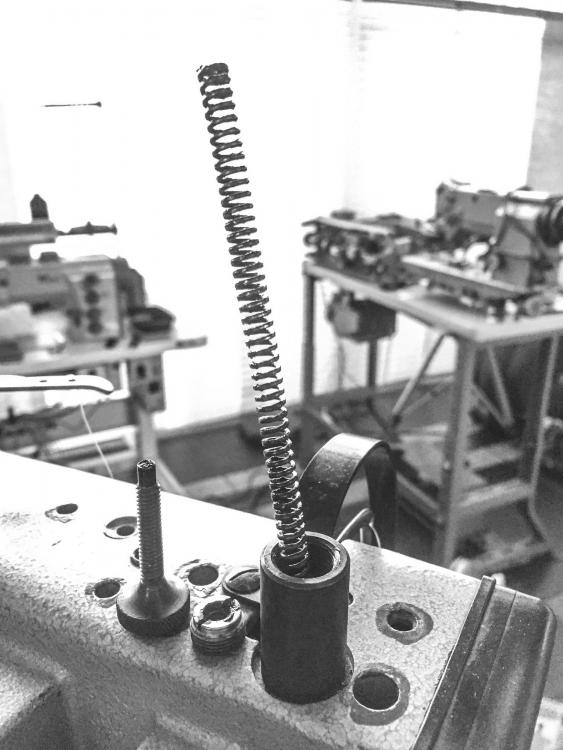
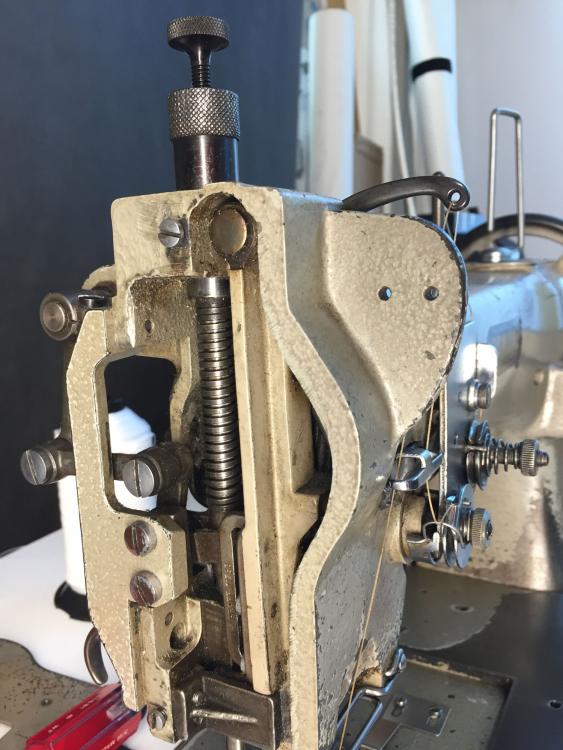
The Pfaff 335/145 series machines have two presser foot springs, one nested inside the other. It appears that on the old casting machines the outer, strong spring is not adjustable. If it is adjustable, I don't really see how. The inner spring is adjustable with the thumb screw, but that spring makes almost no difference. Either I'm missing something or I don't understand the design intent here (other than purposely locking the operator out from making that adjustment for some factory/production reason or saving $0.50 in production cost by not threading the hole and the sleeve.) Only my Pfaff 593 was cooperating in being taken apart to show the thin inner spring (pulled a little). On this machine the sleeve does not have a knurled top. I was able to loosen the set screw that appears to lock the sleeve in place, but the extension sleeve would not budge or move at all after loosening the set screw. On my Pfaff 145, the extension sleeve has a knurled top, which makes it look like it's intended to be manipulated somehow. Unfortunately the set screw that holds that extension sleeve in place is messed up and I can't loosen it. Maybe you are able to move that sleeve up and down to adjust the outer spring, and then lock the sleeve in place again with the set screw. None of my machines were cooperating in testing this theory. On the modern casting of Pfaff 335, the outer spring is adjustable and you can adjust foot pressure: This archive picture of my former Adler 69 shows how on that machine the inner and outer spring on that machine are adjustable with independent, nested, lockable adjustment screws. This seems how it should be, quite frankly. Maybe Adler filed a patent on that design to keep Pfaff from doing it.
-
So it turns out I don't know how to lower the foot pressure on a Pfaff 335 either! I removed the foot pressure adjustment screw on my Pfaff 145 and it made almost no difference at all in how strong the feet press down. This needs further investigation . . .
-
Try lowering your presser foot pressure. Many people have the foot pressure set much too high for what they're sewing. Many people don't even know how to change that setting (perhaps because the manual does not talk about it!) Dial back the screw on top of the head to the least amount of pressure that keeps the material from moving when it shouldn't. Support the material with your hands as you sew so the machine needs just a little bit of force to move the material. Don't push or pull on the material, let the machine do the feeding.
-

Servo Motor - Changing directions settings
Uwe replied to Mockingbird's topic in Leather Sewing Machines
-

Servo Motor - Changing directions settings
Uwe replied to Mockingbird's topic in Leather Sewing Machines
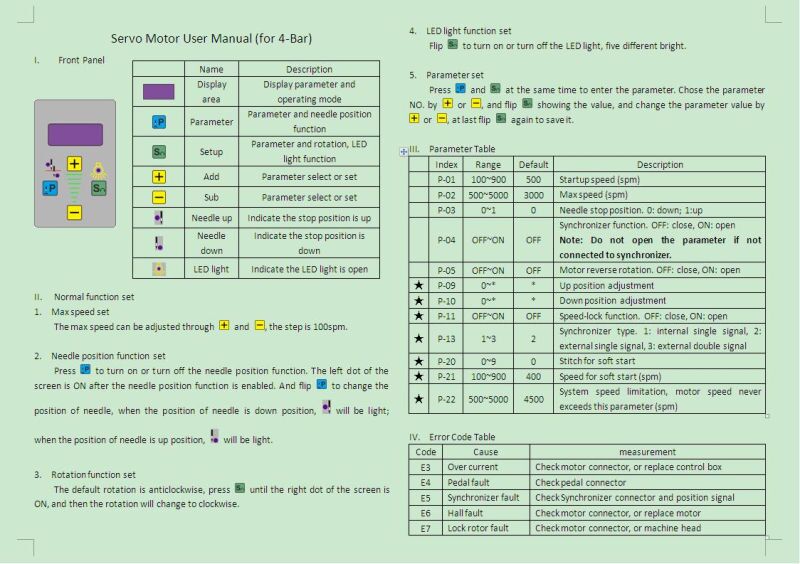
You'll need to give us more than "P S + -". Brand and model and a photo of the motor would be useful. It's nearly impossible to guess which settings the various manufacturers programmed into these control units. There are no standards, really. You may need to track down a manual. -

Where to buy Refurbished or off brand machines.
Uwe replied to Jordanball33's topic in Leather Sewing Machines
I'm guessing this is actually a Mitsubishi CU-865. If that's the case, $950 for that machine in nice working condition is a good price in my book. Florida (Miami) Sewing Machines wants $2,100 for their Mitsubishi CU-865 on Ebay. Parts are getting scarce, though. Make sure it's complete.


