Uwe
-
Posts
2,221 -
Joined
-
Last visited
Content Type
Profiles
Forums
Events
Blogs
Gallery
Store
Everything posted by Uwe
-

Machine Stitching - Need Tips On Finishing A Seam
Uwe replied to leatherchica's topic in Sewing Leather
That thread ZAP 2 thing looks neat! A soldering iron with an adjustable heat setting may work, too. I find a lighter hard to control, especially when I try to melt thread in a tight inside corner. With the lighter flame method, my white polyester thread occasionally turns an unsightly brown as it melts/burns, and my leather got burn marks on occasion as well. Polyester thread melts at around 450ºF (230ºC). Most soldering irons are designed to melt soldering tin at 700º or more and leather will get burn marks at that temperature, too. I bought this adjustable soldering iron to test with because it can be adjusted LOW enough to just melt but not burn polyester, but I haven't really had a chance to try it yet: -
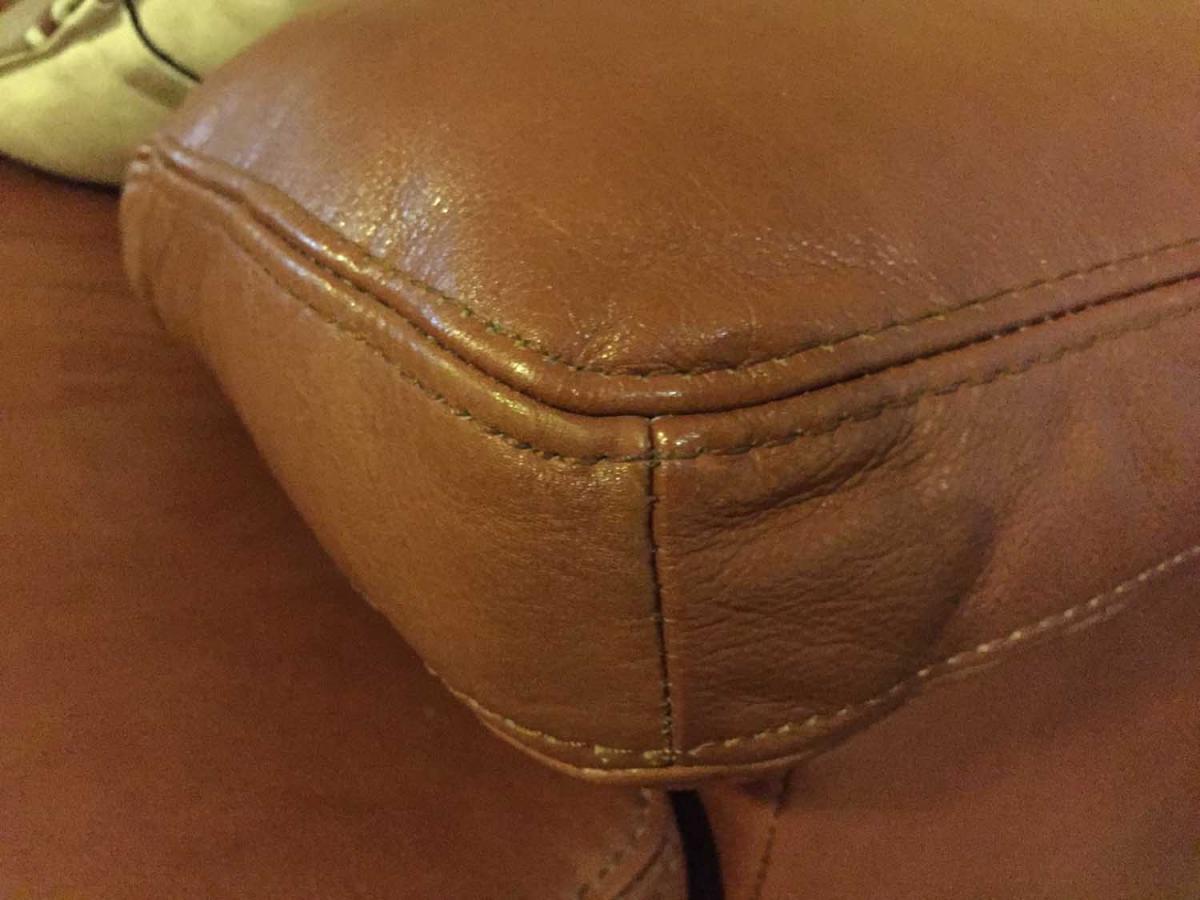
My sofa has french style seams and the arm rests almost look like a tote design with a gusset to give it some useful depth. All the corners are rounded to make the french seam practical:
-
The straight seams are easy enough it seems, it's the corners that get you. I'm having a hard time picturing how this seam would work on a 90 degree corner like your tote bag. If you're using a flatbed machine you'll be wrestling that material pretty well to make it lay flat as you move along the seams near the corner. Cutting the bottom "corner" with a radius rather that a sharp 90 degree corner may be a feasible solution. Then you can sew the entire seam in one relatively smooth line with soft curves rather than sharp corners. I did a test piece for a french seam recently. It's just a flat T-seam, but at least it shows the concept of this style seam:
-
I still have it and my confidence is waning that the original buyer is in the position to follow through on the purchase.
-
Yup, belts are a different story. A 441 class machine would be a great, well supported and capable choice. The 441 class of machines is based on the Juki TSC-441, which is still available new for around $6K. Copies include Cobra 4, Cowboy 3200/3500/4500, TechSew 5100, Weaver Master Lockstitch, and a few others. The copies run about $1,600 to $4,000 depending on brand and accessories. Pick the best tool for the job. Your hands are the best tool for those shields. The 441 is among the best tools for the belts.
-
Tacsew/juki 563 Hook Timing Problem: Stitch Length Affects Timing
Uwe replied to Uwe's topic in Leather Sewing Machines
All better now. I took the timing belt off one more time and advanced the bottom hook drive shaft one notch. Then I re-timed the hook for the seventh time today - I'm getting the hang of it. Here she is sewing as well as I had hoped for: I'm gonna give her (and me) a rest before I tackle that confounding reverse mechanism to balance forward and reverse stitch length. -
Tacsew/juki 563 Hook Timing Problem: Stitch Length Affects Timing
Uwe replied to Uwe's topic in Leather Sewing Machines
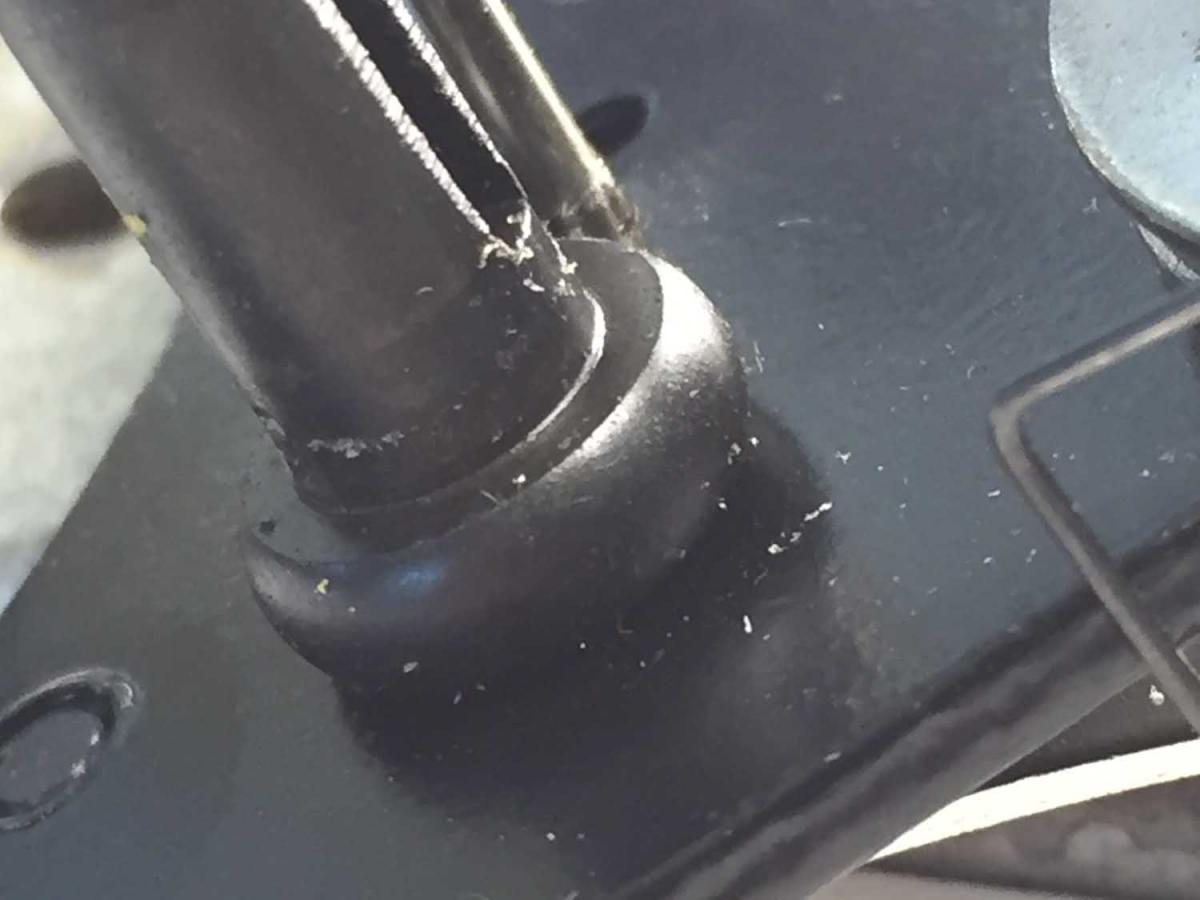
I certainly do enjoy blundering around in the dark, especially if the person I'm blundering with has great timing and knows how to adjust tension just so. @TinkerTailor: it sure looks like a rubber O-ring but it's actually metal and part of the threaded post. Not sure if it's a manufacturing or a design issue. I suppose I could just use a dremel and grind down the bulging ring: @ Gregg: Thanks for that suggestion. I checked that guide gib part on my machine and it appears to be doing exactly what it's supposed to. I actually made a good deal of progress this morning. I decided to put things together but leave out the broken thread release part. It's not exactly a vital organ and I can't see any reason why the machine should not function properly without it in place. I'll deal with the foot-up thread release manually, not a big deal. As I was putting things back together, I adjusted foot lift, timing of the inner presser foot (so it arrives at the material at the same time as the needle - it was way early before), re-timed the hook about four times with different top-bottom timing belt settings. Once I have it all figured out and can reproduce it reliably, I may make a little video showing how I made these adjustments. The machine actually makes a very nice, even stitch now, so I' think I'm about 90% there. The one thing that's still bothering me is that the thread seems tight wrapping around the bobbin and it snaps a little as it's being released from the thread cast-off nib on the hook (i cleaned and polished the nib, no burrs or anything). So it seems to me that I'm still just a little off on the timing to reach the buttery smoothness nirvana, but I'm not quite sure which adjustment will get me there. Should I advance hook timing a little or is this still due to an imperfect top-bottom timing belt position? I can't be far off. Here's a little video that hopefully shows what I'm talking about:
-
We'll get it worked out. I have the full Adobe Acrobat software to optimize and otherwise tweak PDF files for best possible quality at the smallest possible size.
-
The administrators of this site REALLY need to work on a mechanism that allows us to upload larger files for manuals and other special cases so we can share them with all users. Who owns this place?
-
Nice work on your hand sewing! I'm not sure using a machine will help you all that much - it may cause more trouble than help for your particular project. If each stitch line is only a few dozen stitches long and the stitches have to be as precise and pretty as your hand stitched ones, you *may* save a few minutes trying to use a machine but you'll almost certainly add and mountain of frustration over ruined badges/shields, messed up stitch lines and marked leather. You'll still have to finish the stitch lines by hand to get even close to your hand-stitched look. It seems like you put a LOT of effort into carving and otherwise preparing those leather badges and shields. I'd hate to see all that effort ruined by some machine at the very end. A machine that does very slow manual stitch placement like the Tippmann Boss line may indeed be one of the few workable options. I'd be tempted to make the hand stitching process easier or faster by creating some templates for stitch placement, or things along those lines.
-
Is this the machine that you broke two needles on yesterday? Maybe your safety clutch popped and timing slipped a little, or is still slipping as soon as the going gets tough? On my Tacsew, which was (and still is) having major timing problems, I noticed one setting where it made stitched, but the hook would occasionally catch the loop AGAIN after it had be pulled around the bobbin. If timing is off, no amount of thread tension adjustment will fix it. I'd flip the machine back and turn the stitches slowly by hand to make sure everything is happening exactly as it's supposed to on the underside.
-
Tacsew/juki 563 Hook Timing Problem: Stitch Length Affects Timing
Uwe replied to Uwe's topic in Leather Sewing Machines
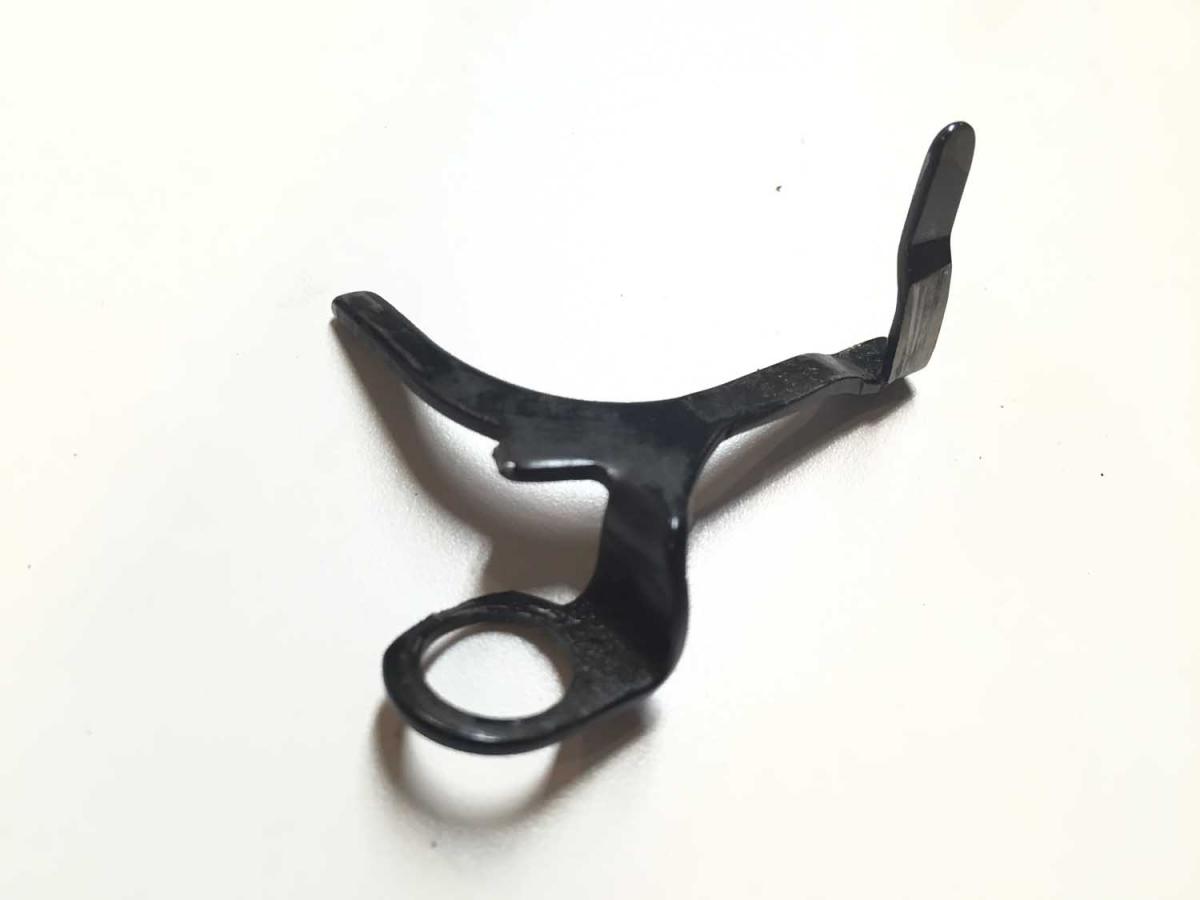
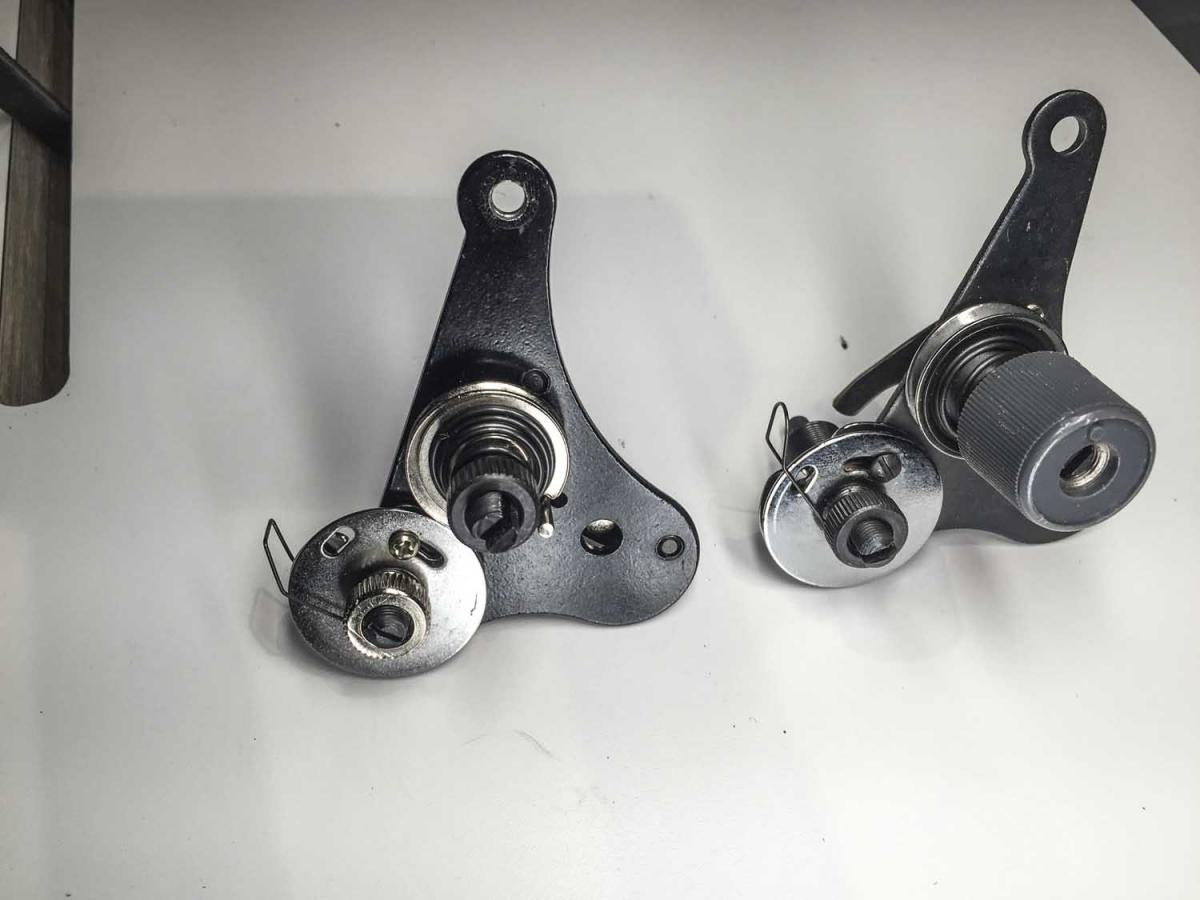
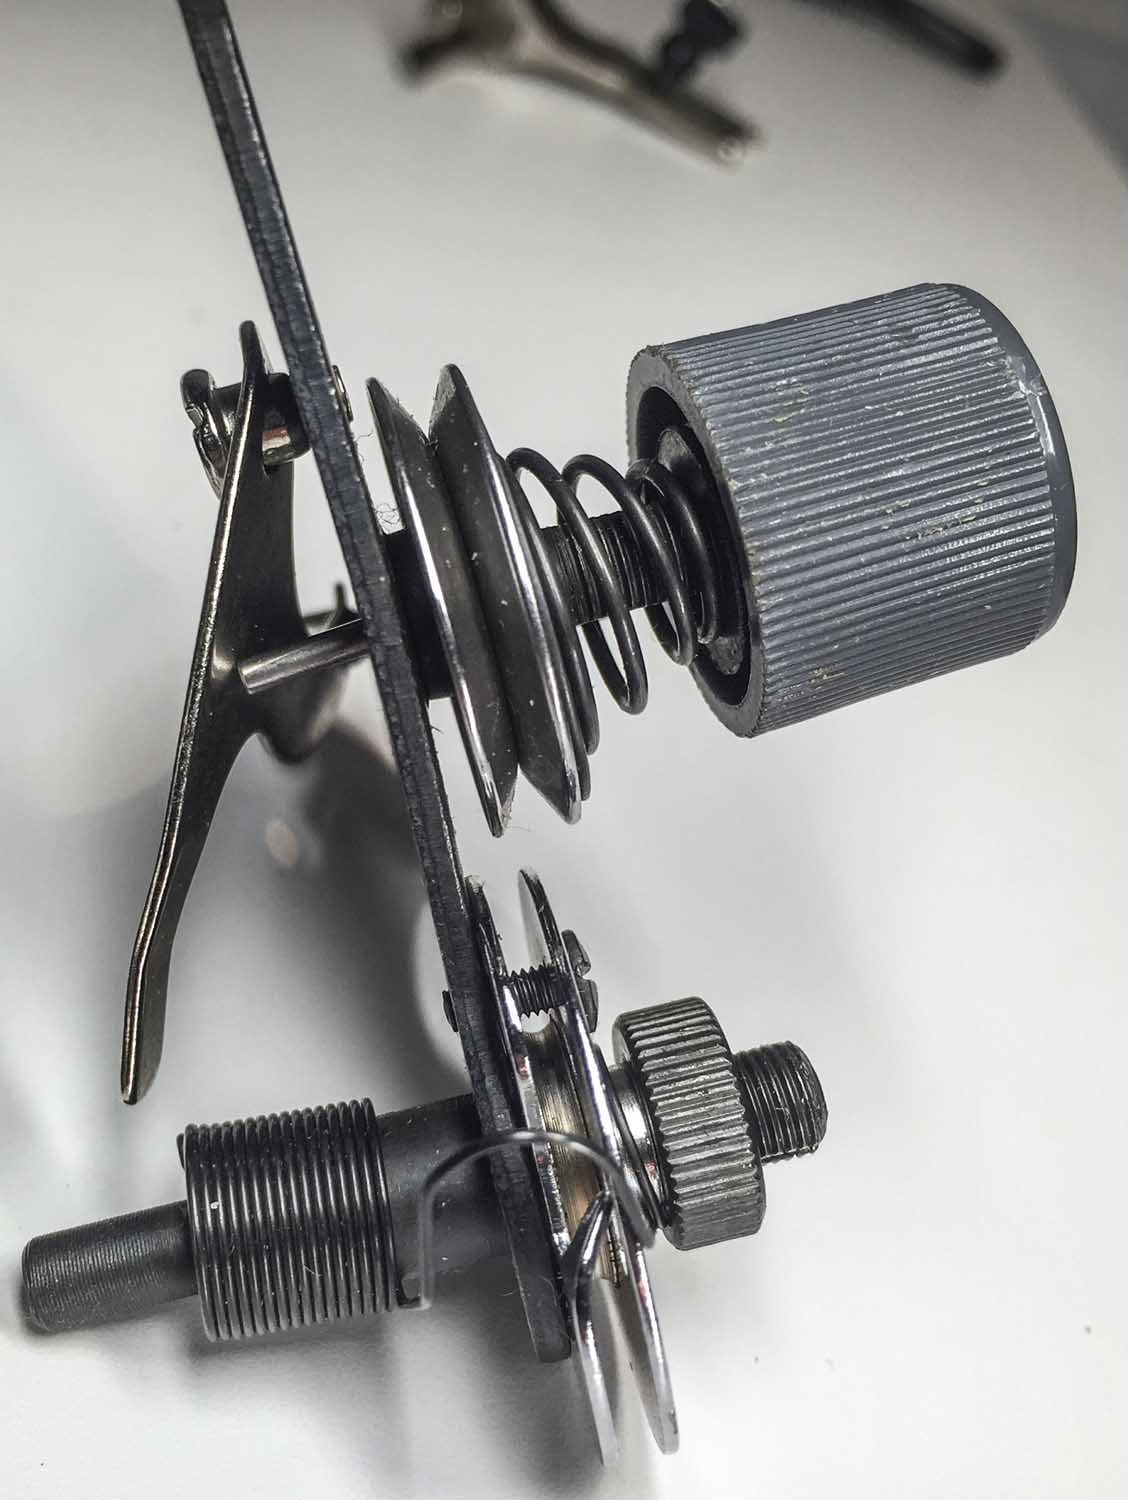
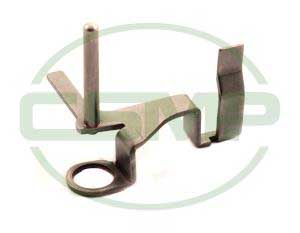
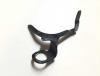
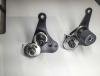
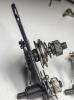
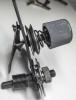
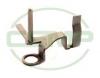
Some progress and a little detour. I installed the machine in a new tabletop, installed the new thread tension unit today and added a servo motor. A normal person would have started to sew, but my foot lift tension release was not working properly and next thing you know: But I did confirm that one suspect part was indeed broken: The little finger that sticks up to align things had broken off. This is what the part is supposed to look like: The new part is on order and I hope it arrives before I forget how to put things back together. Here are a few shots of the two different replacement thread tension units I had ordered. The one with the grey plastic knob on the right is a little better than the one on the left, but not because of the bigger knob: What irritated me about the first one received was the significant offset between the two sets of discs. Ideally the two disc sets would align to let the thread go from one to the other smoothly. This design had a really big ball of sorts to attach the tension disc post to the plate. It pushes the tension discs away from the base plate and makes for a large offset. On the original tension units the discs are basically right against the plate (but it was totally broken, so it did me no good). The second unit I got was a little better in that respect: I'm dismayed that there is no service manual available for this particular machine. I suspect it's a LU-563N copy. The LU563N was the successor to the LU-563, and it was a transitional design that incorporated some design elements that would also show up in the next big overhaul, the LU-1508. I found a parts diagram for the Juki LU-563N which is indeed closest to my Tacsew T1563 clone. Unfortunately, I'm striking out finding a copy of the service/engineer manual for the Juki LU-563N. The problem is that key adjustment procedures like timing belt synchronization, hook timing details, presser foot timing, etc. for the LU-563 and the LU-1508 are totally different, and I'm left to guess and trial/error my way to what actually works on my machine. The adventure continues . . .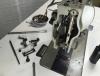
-
Tacsew/juki 563 Hook Timing Problem: Stitch Length Affects Timing
Uwe replied to Uwe's topic in Leather Sewing Machines
Not quite yet. I got side-tracked making that binding video on my Adler 205-370. I just carved a beautiful new white laminated plywood table top for her today and my replacement-replacement thread tension unit should arrive tomorrow. I'll have her mounted in the new table with a new servo motor on Thursday and then I'll check where I stand adjustment-wise. -
There's also a version of the Engineer manual for the Juki LU-1508 (not "N" or "NH"). I'm not sure what the difference really is to N or NH version, or if they matter for your particular issue, but it's always nice to have good quality manuals for your exact machine. Juki has a really good online presence with high quality service manuals - gotta give them props for that.
-
Video: Binding Operation On A Durkopp Adler 205-370
Uwe replied to Uwe's topic in Leather Sewing Machines
Thanks guys. My machines are unnaturally clean because I spend way more time oiling and cleaning them than actually sewing with them. I'm working on that. I'm using the KHF-205 binder setup made by Kwok Hing in the videos. Overall a nicely engineered and manufactured set of parts, with two small flaws (I had to file the feed dog a tiny bit to make it fit the feed dog holder and the three-fingered tape guide touches the arm at full stitch length). -
The hook part number is identical for Juki LU-563 and LU-1508 (B1830-563-0A0), so the hook oiling mechanism is likely the same. The bottom of the hook shaft/bushing dips into the oil bath and sucks up oil via the grooves in the hook shaft. It lubricates the hook and flings the excess oils sideways against splash shields surrounding the hook area, from where the oils drips back down into the oil bath pan. The felt pad or sponge in the pan is supposed to keep the oil from sloshing around in the oil pan and also acts as a filter to catch bits of thread and fabric that may fall down to keep them from getting sucked into the hook shaft. Whether this actually works at slow leather sewing speeds is another questions. It's designed to work running a full speed, I suspect. The little oil bottle that screws to the bottom of the big drip pan that covers the entire bottom is just collecting excess oil that may drip down from oiling all the other spots that need lubrication on the machine (other than the hook).
-
I finally got around to making a little sewing demo video for doing binding operations on a Durkopp Adler 205-370 using the Kwok Hing binder kit. I'm not an expert in binding operations, just in case you're wondering why I didn't show how to do corners and tight turns - I haven't figure it out yet! I also had ordered some 2 inch wide seat belt stock and regular nylon strap material, hoping to use it for the binding demo, but it really turned out to be too thick to feed through the folder. Still, this is likely one step up from what the usual suspects for binding operations like Pfaff 335 and Adler 69 machines can handle:
-
I'm with you. I'm looking forward to seeing those manuals in all their glorious details myself. Thanks for working on a good quality PDF scan of those documents. I'd be happy to help by hosting large PDF files on my server, in case they turn out to be too large for direct LW forum uploads. I can also run OCR on the PDF files to make them text searchable, in case your scanning setup doesn't have that capability.
-
This is also the first time I've seen one of those lube pots on top of an actual 111W155 machine. They seemed like mystical devices that only existed in parts diagrams.
-
1960's must have been towards the end of the production run for the 111x155 series in some factories. There are apparently some hybrid or mix&match Singers out there, too. Singer perhaps consolidated parts stock from factories that closed or changed production lines around the world to be use in the remaining factories for the 111, like shipping leftover flatbed parts form the Karlsruhe, Germany factory with a PB serial number to the US and then mated it to 111W155 heads in Bridgeport. Accounting for inflation, that $515 cost for the Singer in 1963 is just under $4,000 in today's money. That was and still is a good chunk of money for a sewing machine, so the $250 used price is a bargain. That is a HUGE motor on that machine!
-
The Juki LS-1341 actually IS a cylinder arm machine and it would be a very good candidate for a machine to fit just below your Adler 105 in material and thread handling capability. It's the Durkopp Adler 267 that is a flatbed machine, the cylinder arm version is called 269 and it is similar in capabilities to the Juki LS-1341. With any machine, you can't quite expect them to arrive set up perfectly for what you want to do, or stay that way forever. They will need some tweaking/adjusting upon arrival and they will need to be re-adjusted if you significantly change any aspect of what you're sewing. They are not set-it-once-and-forget-it types of machines. You really need to spend some quality time learning how to adjust the machine yourself, especially if you're far away from other folks who could do this for you. Make sure that proper documentation like a good service manual is available for the machine you're buying. That way you'll be able to check for and fix minor problems yourself and not have to send or take the machine in for service every time something is just a little off. Keep it simple and don't get auto tread-cutter and other finicky features.
-
Since you're in the U.K. you should get in touch with the folks at https://college-sewing.co.uk They carry the full line of Juki machines and can also help guide you toward specific well-suited models and answer specific questions about your particular needs. Support and parts sourcing will be good, I suspect. To get more specific advice you also need to tell us what specifically your don't like about your current stitch consistency. What exactly is it that you consider not consistent or decent in your current stitches? Otherwise we're just playing a very subjective guessing game. Most industrial machines also need to be carefully adjusted to produce the best possible results for a specific operation. Having somebody stop by with a couple machines (that's great service right there!!!!) and run a few test samples may not do the machine justice, as it may have been adjusted for a different task. You also do need to decide if you want/need a flatbed (Adler 267 style) or a cylinder arm (Juki 1341 style), otherwise comparisons will be hard to match up. If you don't need a cylinder arm, the flatbed machines often have beefier bits around the hook area, simply because there's much more room to work with under the flatbed, compared to very tight quarters inside a cylinder arm. Personally, I think the Juki LU-1508NH is a very interesting machine that just might meet your needs and deserves a closer look. Juki has put some serious engineering into that perfectly rectangular feed motion and it may help improve stitch quality on tricky materials. Another alternative for European sourced machines is Typical. They have a strong presence in Europe and make very good quality clones. I saw one of their TW1-1245HL14 (a long arm Pfaff 1245 clone) in a leather bag shop in Germany and I was seriously impressed with the apparent quality of construction and finish. The bottom line really is that many machines are capable of doing what you ask, but actually making them do it, however, is up to you and your sewing machine mechanic.
-
Source For 206Rb5? (Should I Consider A Different Machine?)
Uwe replied to Dougster's topic in Leather Sewing Machines
I have synapses firing that remind me of an acquaintance who keeps asking variations of the same question in the hopes of hearing the desired answer, and Alanis Morissette singing an ironic song in my head about some good advice not taken. -
The Hirose part number for the hook is HSH-11-55. Not sure if Hirose makes anything other than hooks. The Hirose PDF Catalog has the full list of hooks they make. The catalog also has some interesting general hook related information in the back about oiling schemes and adjustment guidelines.
-
Source For 206Rb5? (Should I Consider A Different Machine?)
Uwe replied to Dougster's topic in Leather Sewing Machines
Perhaps check out the Techsew 1660. It appears to be a very nicely done copy of the Juki 1508 with specs on par with the 206RB5, plus some nice "modern" features like a built-in bobbin winder. The whole design is a few decades younger than the RB and Juki engineers made a lot of good decisions over time, I think. Might be worth checking out. Personally, I'm partial to vertical-axis hooks with large bobbins in flatbed machines, but that's just me.