Uwe
-
Posts
2,221 -
Joined
-
Last visited
Content Type
Profiles
Forums
Events
Blogs
Gallery
Store
Everything posted by Uwe
-
MJ Foley has this tap kit with 20 popular sewing machine tap sizes in their catalog: They also sell all of the above and theses additional tap sizes individually: No dies, sorry. They also have a box of "popular" Union Special screws, but I don't know what thread sizes those part numbers correspond to:

-

Thoughts About Juki Ddl 227 And Singer 211G156?
Uwe replied to Dougster's topic in Leather Sewing Machines
Being in denial about the impending sewing machine addiction is very common among members who are new to this forum. -
Thoughts About Juki Ddl 227 And Singer 211G156?
Uwe replied to Dougster's topic in Leather Sewing Machines
I'd make a day trip to pick up this Phoenix area Craigslist gem: http://phoenix.craigslist.org/nph/for/5322409183.html For $75 bucks you seriously can't go wrong. The table alone is worth that. And the machine may just do all the sewing you need even though it is not a walking foot. -
Thoughts About Juki Ddl 227 And Singer 211G156?
Uwe replied to Dougster's topic in Leather Sewing Machines
Not sure where you're located - it makes a difference. Having something local to look at and touch is worth something. Not having seen pictures of the machine it's hard to judge, but the prices seem on the high end. For around $900 that Singer 211 had better be sparkling clean and sewing flawlessly! You can buy a brand new Consew 206RB5 head for $1035. Speed reducer pulleys are VERY nice to have with any motor if your goal is to sew slow. Expect to pay just as much for a speed reducer as a servo motor (not exactly sure why that is, actually.) -
Now I had to look up what a GB2972 is. I'll add it on my list of machines to avoid. Personally I find it really useful when people provide some basic context by filling out their profile or have a signature that gives some indication about location and business affiliations. Everything is "local" on the internet, but the physical world doesn't work that way. Many answers and questions depend on where somebody is located on planet earth. Some (not all) misunderstandings and ungrateful reactions due to unmet expectations can be avoided with basic context. There's also a thin line between helping and enabling, at times. Some threads apparently start with a thought process like "Golly, it'll take me five minutes to look this up myself. Let me just post a quick question on the forum instead and have ten people spend half an hour each researching and composing elaborate responses." It takes considerable effort to suppress a snarky "Let me google that for you" or "Let me look that up for you in the manual I gave you yesterday". Sewing machines also should come with warning labels like "Do not loosen that screw unless you know what it does" and "Do not take it apart unless you know how to put it back together" Ahhh, all better now. A little rant once in a while feels good.
-
211G Presser Foot Sticks In Up Position...
Uwe replied to Skylark53's topic in Leather Sewing Machines
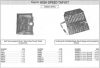
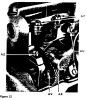
The feed dog can be adjusted sideways to center it with the opening in the (fixed-in-place) throat plate. If the feed dog is not centered it may hit the edge of the throat plate opening and push up on the throat plate. You can also adjust how high the feed dog moves during the stitch cycle. If it is set too high, it will touch the underside of the throat plate and bind (the AZ adjustment screw in Figure 22)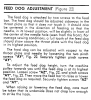
-
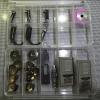
For sale is a Chandler branded Adler 67-GK373. This machine was made in Germany by Kochs Adler and imported to the US by Chandler. Everything is made by Adler except the Chandler stickers. I made a few YouTube videos with this machine. One of the videos is a hook timing video which shows the condition of the machine well: This is an unrestored original in excellent condition. I installed a new throat plate and feed dog. The presser feet and accessories shown in this picture are included as well: I drove all the way from Detroit to Cincinnati to pick this baby up and it pains me a little to put her up for sale. Alas, I have too many machines with nearly identical capabilities and I need to let a few go. The price is $850 for the head. I can box her up for shipping if you like, but you'll have to pay for shipping. I'd package her really well with foam pads and a box-within-a-box. The shipping weight is just under 70 lbs and the box has outer dimensions of about 13"x20"x24". If you're within 100 miles of Detroit, we can arrange pickup or delivery, or meet somewhere in the middle. If you're near the Detroit area, you have the option of buying this machine in a complete, ready-to-sew setup with a very nice table and servo motor for $975.
-
I've accumulated too many sewing machines with nearly identical capabilities and it's time to thin the herd. This machine sews like a champ and she has starred in several YouTube videos I've made over time. The hook timing video is perhaps the best one to watch to get an idea of the the condition she's in: This video shows how thick stack of veg tan leather she can sew: I've installed a new Hirose hook as well as a new feed dog, throat plate, and presser feet. I've gone through the adjustments as shown in the video. She received a careful repaint job a few months ago, so she looks all pretty in hammered silver. I tapped holes on the back to install a swing-down guide and I'll include a new KG-867 guide. The price is $550 for the head. I can box her up for shipping if you like, but you'll have to pay for shipping. I'd package her really well with foam pads and a box-within-a-box. The shipping weight is just under 70 lbs and the box has outer dimensions of about 13"x20"x24". If you're within 100 miles of Detroit, we can arrange pickup or delivery, or meet somewhere in the middle.
-
Problems With Pfaff 335 Presser Foot Action.
Uwe replied to johnbigsby's topic in Leather Sewing Machines
Information on the old 335's is sparse. It may require a little trial and error. Move the presser bar/clamp a little and see if it improves the situation or make it worse. Adjust until you like it or go back to the original setting. The only thing I could find is this technician instructions page: You can download the PDF versions of the Pfaff 335 (old casting) Instruction Book and the Pfaff technician instructions from my web site.
-
211G Presser Foot Sticks In Up Position...
Uwe replied to Skylark53's topic in Leather Sewing Machines
The Singer 211G156 Service manual would be a good place to start figuring out how to take things apart and put them back together. Often the presser bar/rod/shaft is held in place by a clamping block, which allows adjusting the presser bar height (or removal of the bar/rod/shaft). The Singer 211G156 Parts Manual will tell you which part numbers to look for. The presser bar is part # 208566 , which is available and cheap in case you need to replace it. -
Anything with a handwheel that large is worth saving from the heap.The rest is just details and I'm certainly looking forward to reports and pictures as the restoration story unfolds.
-
Thoughts About Juki Ddl 227 And Singer 211G156?
Uwe replied to Dougster's topic in Leather Sewing Machines
Start cheap and learn until you know what you're doing and really need/want. If the Juki makes a nice stitch on what you want to sew, go for it - buy a nice servo motor with the money you save. Later, if you decide you need a walking foot after all, just buy a head. You already have a nice table and servo motor. The Juki head by itself is worth perhaps $100-$200. You can swap heads in and out of a suitable industry standard table in just a few minutes. I bought a Sunstar machine similar to your Juki just for the table, actually. That nice table now holds my Chandler/Adler 67. I put the Sunstar head in the crappy table with clutch motor the Adler originally came in and sold it cheap. I now have a nice table/motor/adler setup. -
Show & Tell: Needle Feed Platform For Durkopp Adler 205-370
Uwe replied to Uwe's topic in Leather Sewing Machines
Some leather types are tanned to hold impressions and wet-molded shapes for making relief designs using stamps etc. (veg tan leather is usually in this category.) Other leather types are tanned more spongy/springy to resist impressions and bounce right back to the original surface shape (e.g. for sofas and car interiors). Some leathers fall between these extremes. The problem arises when folks use leather designed to hold impressions with machines that make unwanted impressions. Likewise, trying to make a relief design on a leather that doesn't hold an impression is a futile effort. -
You can also watch my timing video for the Adler 67 to get a rough idea of what's involved. Despite the 67 being a flatbed machine with a small bobbin, you'll recognize many details on your Adler 169. The hook design (and timing adjustment) is nearly identical to your Adler 169. Your hook timing spec calls for a needle rise of 2mm (instead of the 1.75mm in the video). Between the video and manual, you should get there most of the way.
-
The Adler 169 Service manual would be a good starting point. I'd compare the machine to the target settings to see which ones are off the mark and need adjustment. Then you follow the manual to make those adjustments.
-
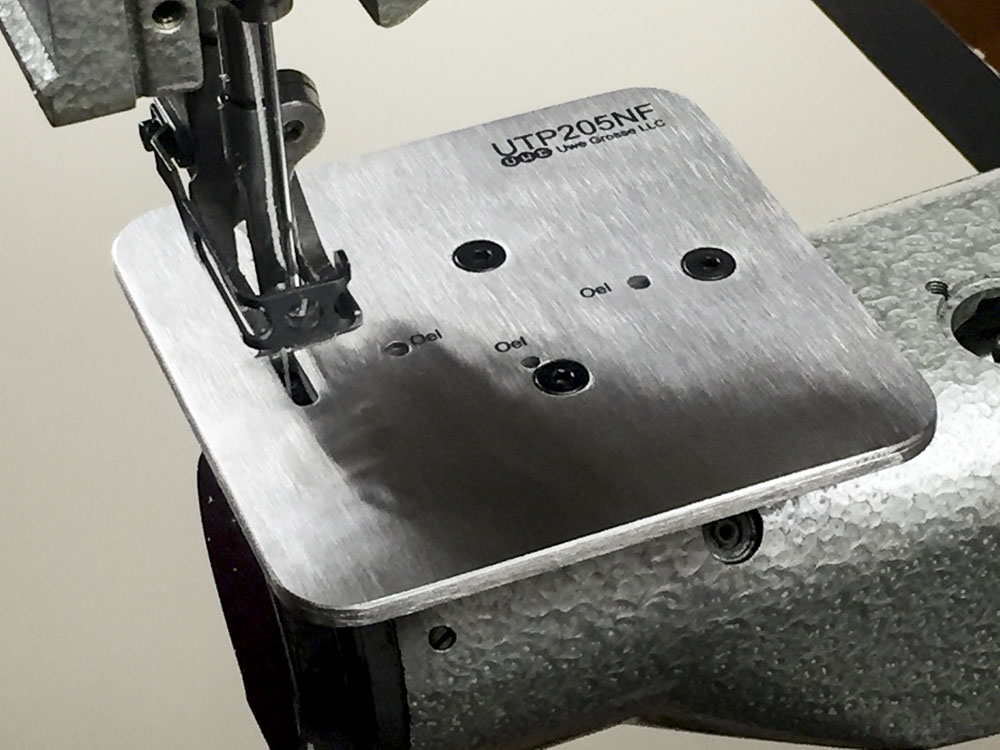
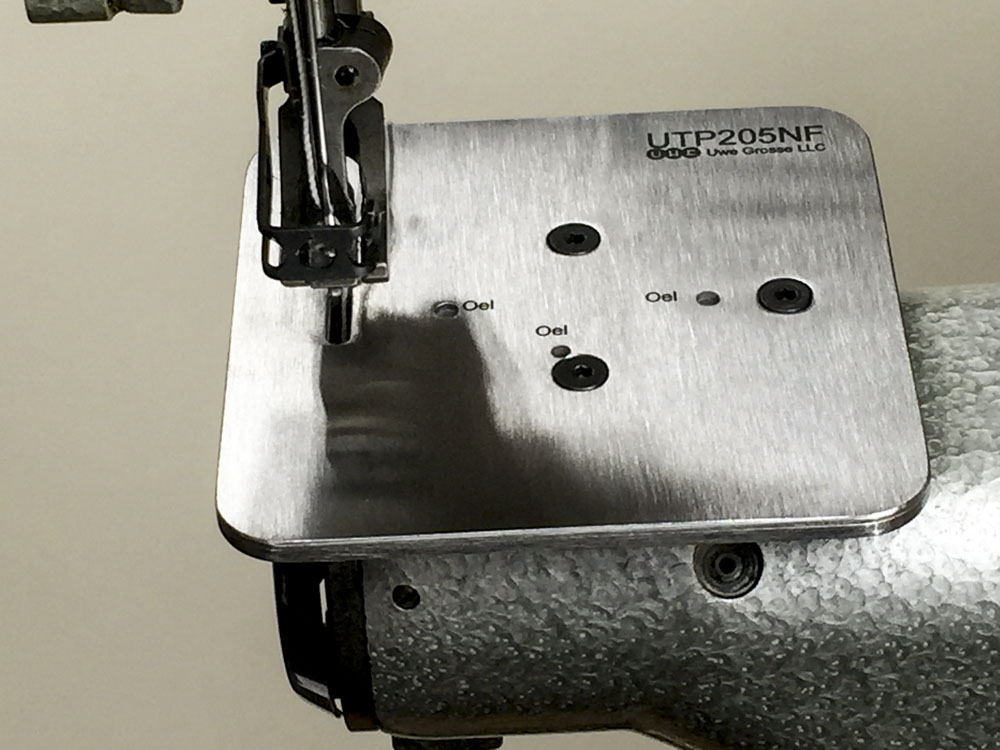
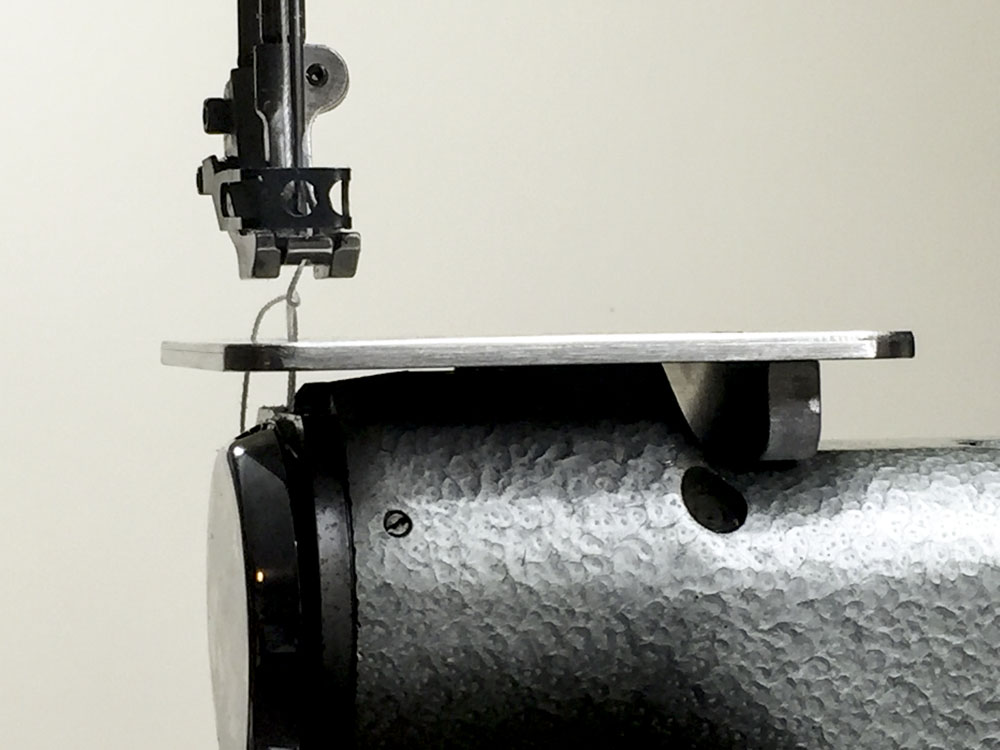
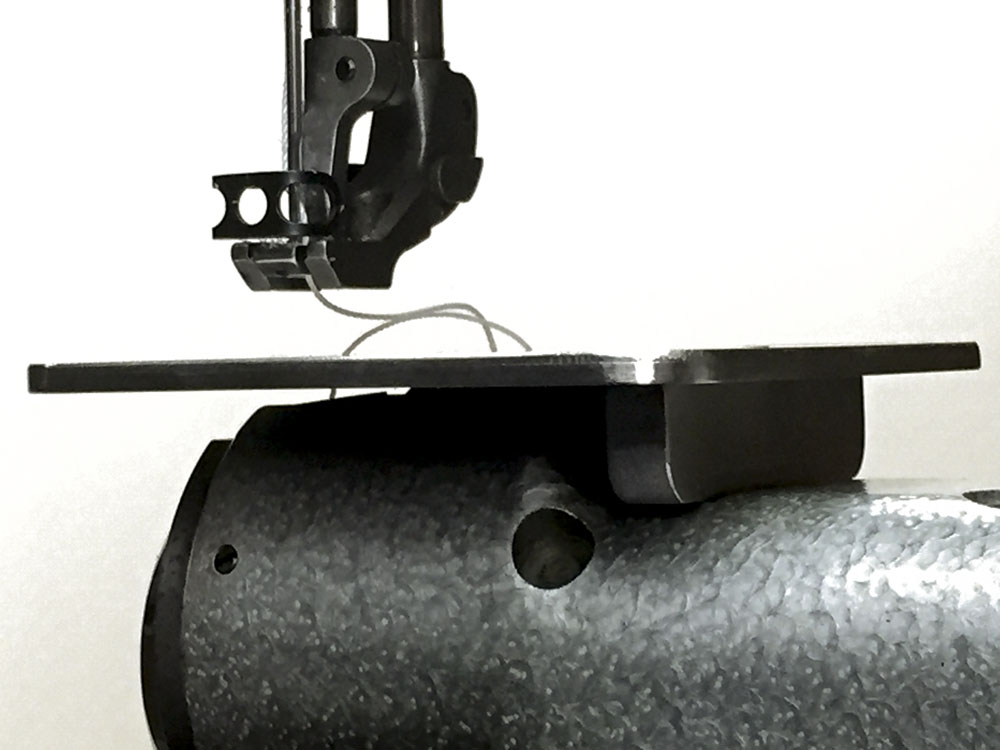
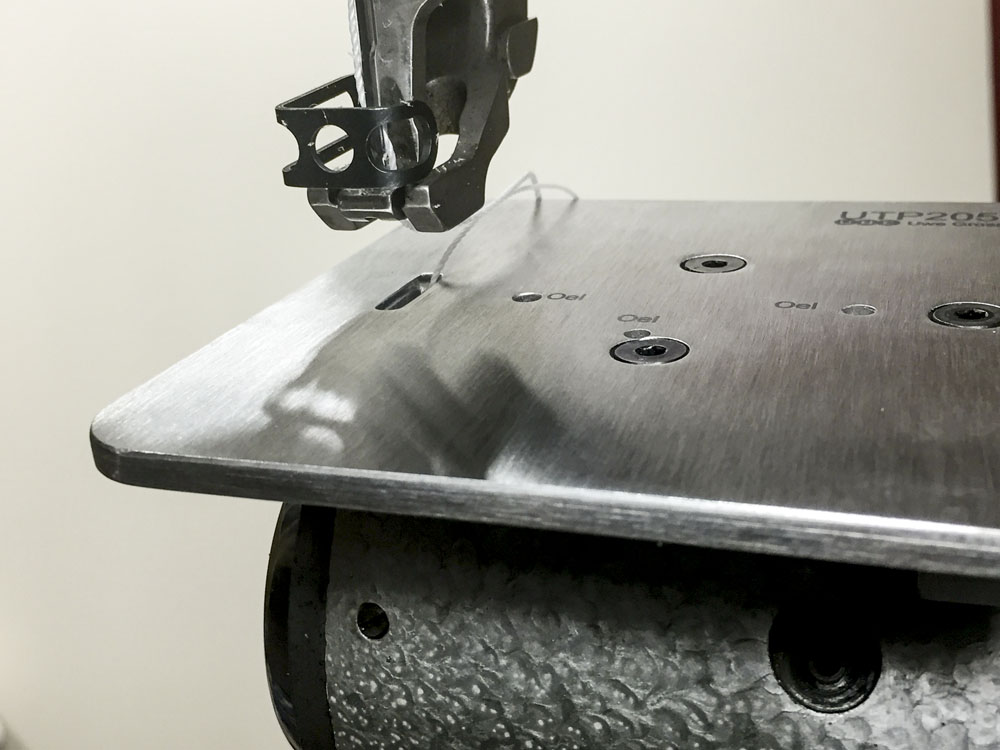
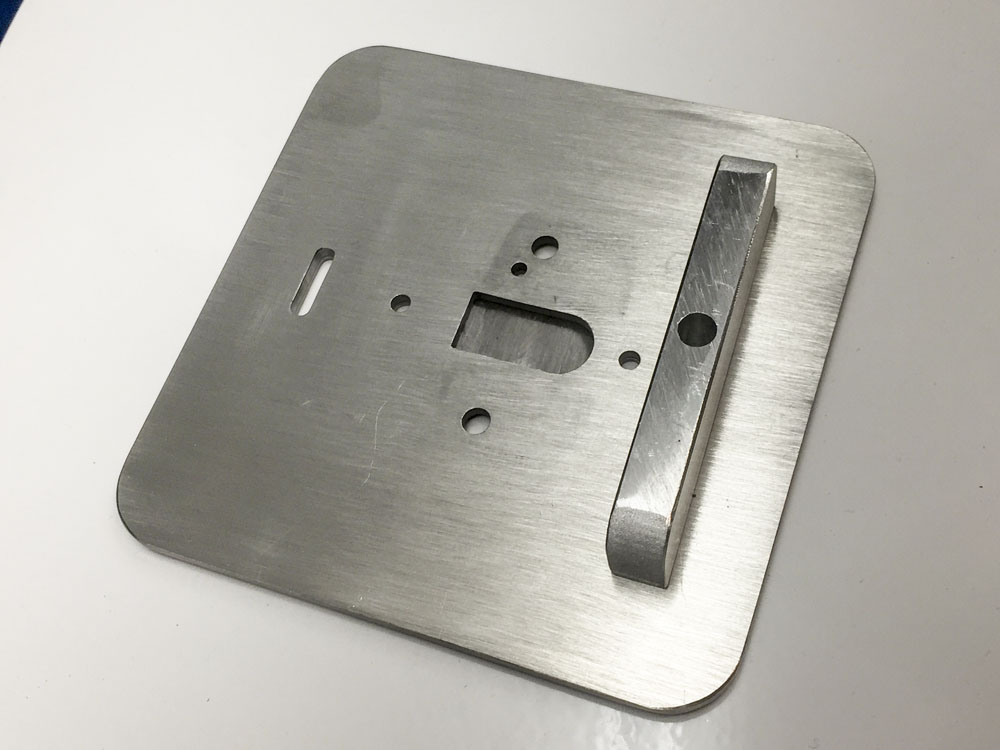
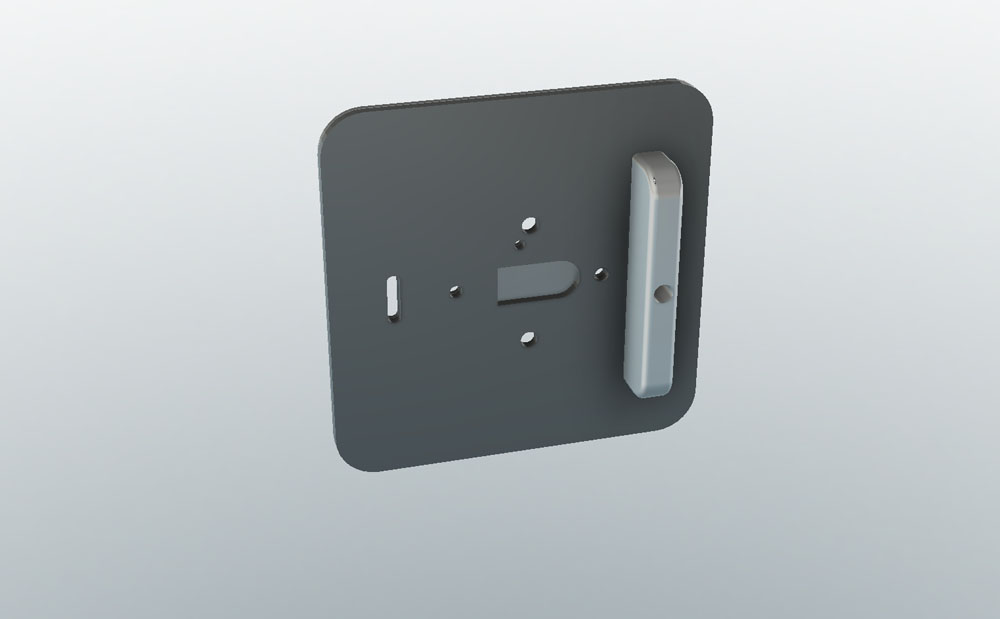
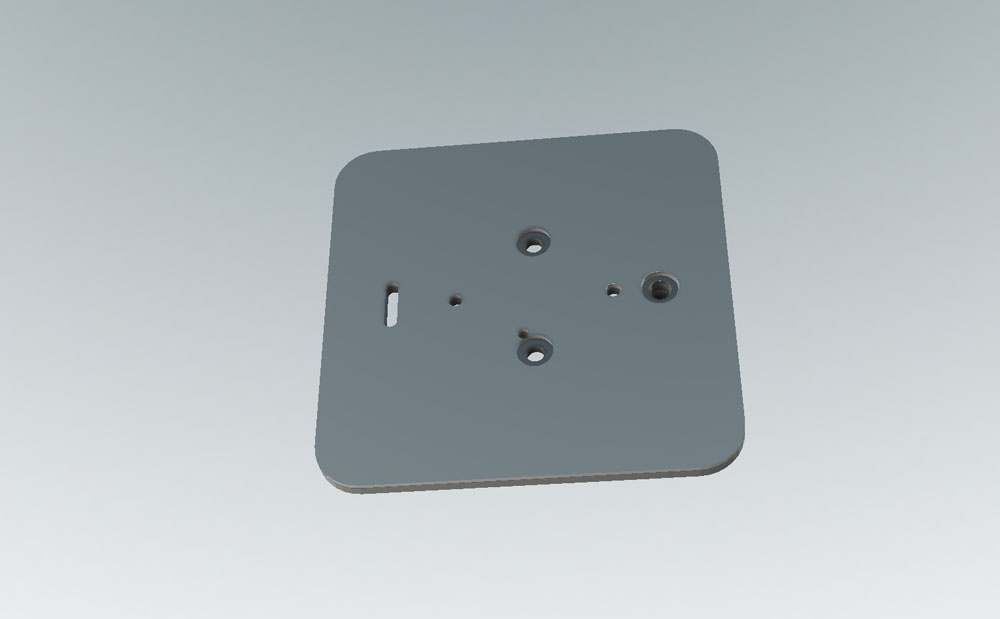
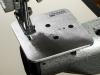
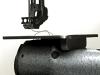
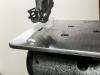
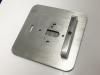
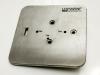
I made this little platform to allow using the Durkopp Adler 205-370 in Needle+Upper feed mode rather than compound feed. Turning off (removing) the bottom feed dog can help minimize marks on the bottom of the workpiece for certain sewing operations. The idea popped into my head while contemplating a topic in another thread about working with veg tan and prefinished leather. Here are some pictures of the platform:

-
Nice machine! If I were you, I'd explore the magnetic guide and edge guide feet option first. That nice flat bed really lends itself to a magnetic guide solution. A swing-down guide would be a minor pain to install.
-
If you click on the little link thingy it'll take you right there.
-
I hesitate a little to post this rare earth magnet option, since these magnets are so freaking strong (65 lbs of pull force) they'll probably turn off a pacemaker and can be dangerous with kids around. But they certainly won't move once they've latched onto your sewing machine. $3.72 plus shipping. These have mounting holes to attach a little knob to grab and move the thing:
-
Can you post a close-up picture of your machine bed near the needle are and one of the back of the arm near the foot lift lever? It'll help a great deal trying to figure out what options might work for you. Without pictures, we're all just guessing as to what you might have. You can either have a bed-mounted guide, or a swing-down guide that mount to the back of the arm. Deciding which is the better option (if at all) really depends on whether you have threaded mounting holes in a suitable place, either on the bed or on the back of the arm. There are some magnetic guides around too that don't require any mounting holes, just a good magnetic flat surface near the needle.
-
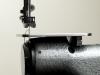
I'm experimenting with throat plates and video setups for my Durkopp Adler 205-370. I decided to make a transparent throat plate from a piece of plexiglas so I can film what's going on underneath. I removed some non-essential bits and pieces from the hook area, too. You don't want to actually sew with this setup, but it's great for documentary purposes:
-
Opinions: Smooth Needle Plate,feed Dog Walking Feet
Uwe replied to llucas's topic in Leather Sewing Machines
Most of these industrial sewing machine have some kind of thumb screw at the top that allows you to adjust how hard the presser feet push down. Many people never adjust that foot pressure because it works fine as it is for most tasks and some don't l know they even can adjust the foot pressure. The owner's manual for your machine probably talks about it. On the Adler 205, it's the screw that I'm removing at the beginning and then tighten again at the end of this video: -
So within days of deciding that I really should sell my flatbed machines (since I own two amazing cylinder arm machines with beautiful flatbed table attachments), I did what any self-respecting leather worker would do - I bought ANOTHER flatbed sewing machine! This new-to-me Tacsew T1563 was a curb rescue of sorts by way of Craigslist. The Tacsew T1563 appears to be a near perfect clone of a Juki 563 down to little details like oil drip guards, etc. I really like the large bobbin and reverse lever mechanism. It's actually in better shape (after a little cleaning & TLC) than my Consew 225 was when I got it. The mechanics are otherwise very similar to my Consew 225. So now I'm looking for a Juki 563 manual just to have proper documentation, but the ones I've found online are either just okay or really bad quality, especially the pictures. If anybody knows of the whereabouts of good, clean Juki 563 manual in PDF or printed form (buy or borrow), I'd love to hear about it. I'm also striking out finding much (any, really) information on Tacsew itself. Is this a rebadge outfit like Chandler or a standalone clone manufacturer/distributor? Where are/were they made? Any industry insider info would be appreciated.
-
According to the parts diagram it's the "thread releasing finger". It pulls back the bobbin case a little to let the thread slip through. Leif labs talks about this part in his blog
-
The only thing that makes sense based on those pictures is that the whole system uses single phase 220V. They just used a different plug to match whatever they had in the wall at the factory. Green is (should) always be Ground and there needs to be 220V between the blue and brown wires. There is no neutral wire (normally white). That's really all there is to it. So one of those transformers should work fine I think. Just change the plug from the four-pronged one to a three pronged one to fit the transformer outlet. A plug like this would be the right one, it's designed for 220V and 15A. The official name is NEMA 6-15P: