Uwe
-
Posts
2,221 -
Joined
-
Last visited
Content Type
Profiles
Forums
Events
Blogs
Gallery
Store
Everything posted by Uwe
-
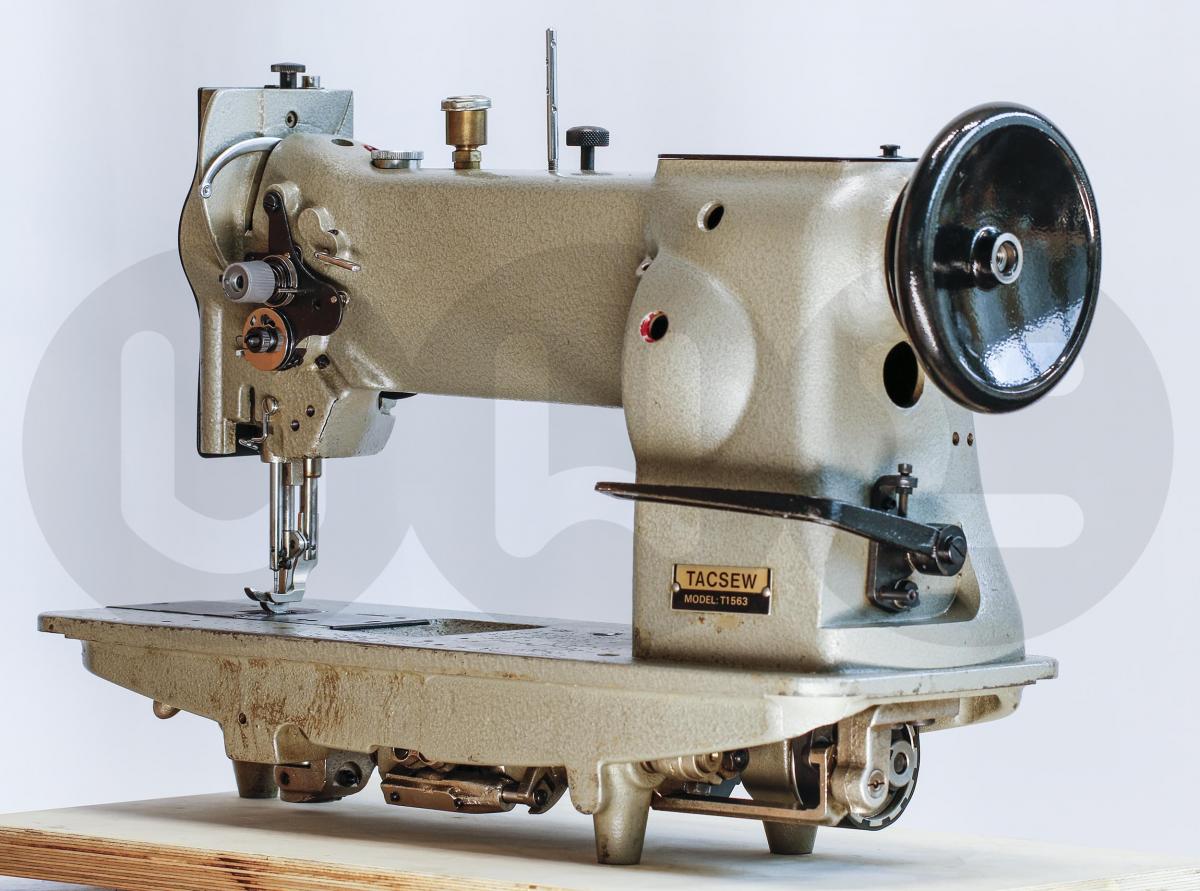
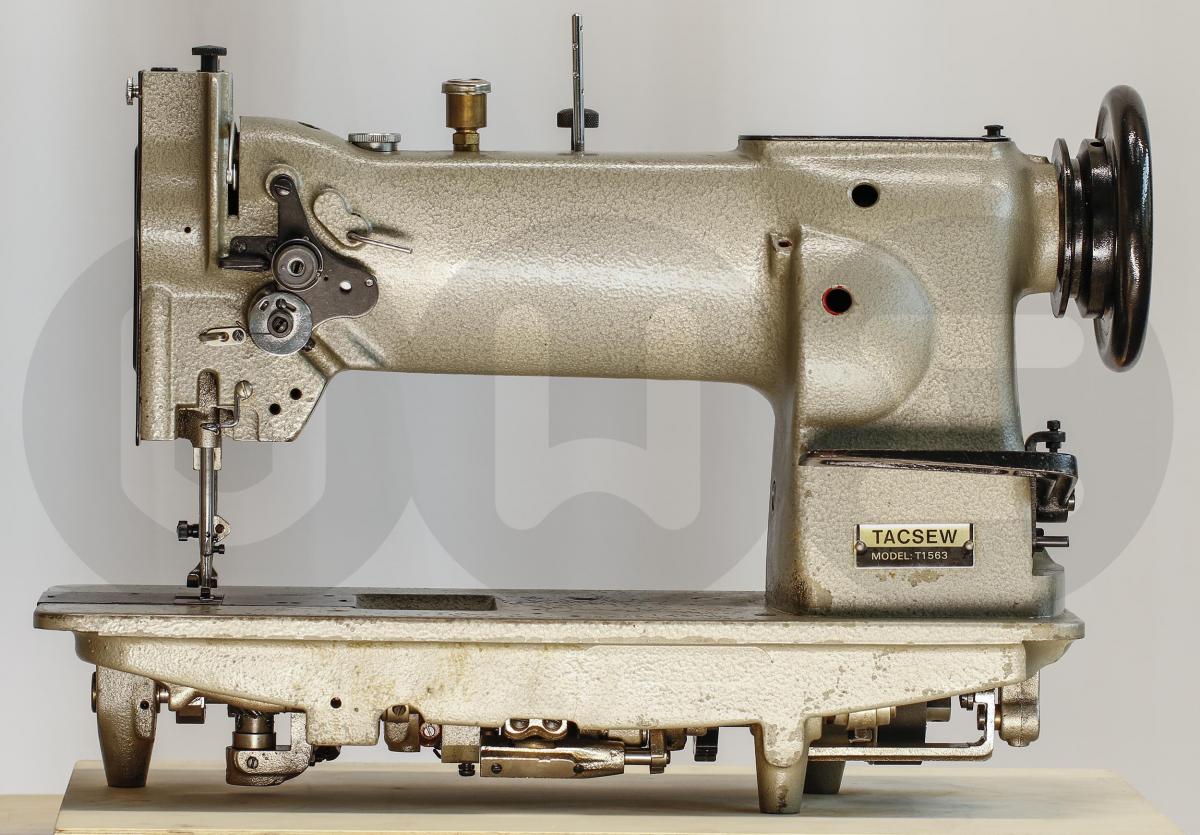
 This video shows how to adjust a Juki LU-563 class machine. I'm using my Tacsew T1563 in the demo video. The adjustments shown cover most things except hook timing (The Consew 225 Hook Timing video already covers that in great detail.) This video has been a while in the making. It took some time to wrap my brain around that confounding reverse stitch length adjustment and to come up with a set of repeatable steps to dial in equal forward and reverse stitch length. There were no instructions to be found anywhere on how to balance the forward/reverse stitch length, so made up my own by analyzing the design and a fair amount of trial and error. I'm using a little stitch length gauge in the video. You can make your own if you like using this PDF template: http://docs.uwe.net/SLG.pdf Just print it on some label stock and attach it to cardboard. Hopefully this video will take some of the mystery out of adjustments for that particular machine design.
 -
How To "test Drive" A Used Industrial Machine.
Uwe replied to nascenta's topic in Leather Sewing Machines
One quick and easy check you can easily do is to try to wiggle the needle bar by hand front/back and sideways. It should NOT move. A good machine will be "tight" as in turning over easily by hand, but without any noticeable play (the handwheel itself may have a little play as you change direction, but not the feed and needle bars). If you can move the needle bar by hand more than a millimeter, it indicates worn bushings and linkages - the machine in this case is unlikely to make consistent stitches and may require major repair work. -
How To "test Drive" A Used Industrial Machine.
Uwe replied to nascenta's topic in Leather Sewing Machines
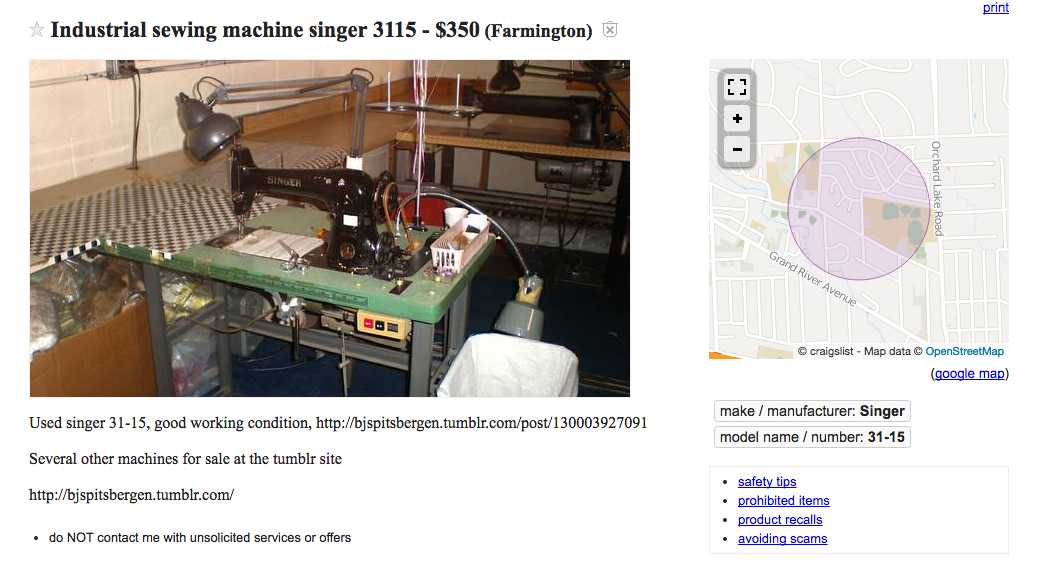
Just for reference, there's a Singer 31-15 for sale on my local Craigslist for $350 by somebody who used the machine to make a living, so presumable kept it in good working condition:
-
If you manage to get a Consew 227 to do binding operations with strips of bridle leather, PLEASE post a video of it because that I have got to see to believe. It took some coaxing to get my twice-as-big Adler 205 to do binding operations with soft goat skins leather:
-
How To "test Drive" A Used Industrial Machine.
Uwe replied to nascenta's topic in Leather Sewing Machines
Who you buy the machine from makes a difference. A long-time owner and operator selling some of their working, surplus machines is a different story than some shifty character meeting you at their hoarder's delight storage unit with no power or lights. "Works great and sews everything" are statements made by people who have no clue about sewing machines. Proceed with extra caution. If you're buying from a dealer, make them demonstrate that the machine works perfectly and then sew on it yourself. Price negotiating tactics is also a factor. If you spend an hour verifying that the machine is perfectly adjusted in every way, the seller will be less inclined to give you a price break. A brief sanity check and basic operation check followed by a quick summary of everything that could be wrong with the machine is a better negotiating position. Personally, I only check for very basic operation and missing/broken parts. If the basics are okay, cleaning, adjustments and fine tuning can be done after you get the machine home. So far I've been somewhat lucky as well in that all the machines I've bought none of them have turned out to be door stops. I did walk away from a few that were beyond reasonable repair even at a quick glance. -
How To "test Drive" A Used Industrial Machine.
Uwe replied to nascenta's topic in Leather Sewing Machines
If the machines actually sews, that's a really good sign right there. The rest are often details and adjustments, depending on the machine. Look up some key parts like shuttle hook etc. to see if you can buy them and how much they cost. I would go in with the expectation that you have to replace those parts. Mentally add the cost of these parts to your purchase price and see if you're still comfortable with it. If it turns out you don't have to replace them, good for you. Some wear parts are often readily available, like hook shuttles, tension assemblies, bobbins, needle bars, etc. I looked up a shuttle hook for your machine and they run $30 or so - that's cheap in the scheme of things. Other parts are often nearly impossible to get, like hook driving shafts and other internal major components or cast metal housing parts. If those are broken, missing or bent, just walk away. Old tables and old clutch motors are nearly worthless (at least to me) unless they're super nice. If the machine head is worth bothering with, plan to spend $300 for a nice table and motor in the long run. I stopped bringing nasty tables and clutch motors home. "Just the head, Ma'am" is my recent motto. Things that are easy to fix: Grime and dirt, oil residue, lack of lubrication (unless they ran the machine dry). Certain missing parts (standard thread tension assembly, bobbins, cover plates, etc.) Show stoppers in my book: The machine won't turn over at all or hits a hard stop that is not an obvious and easy fix. Bent arm shaft or hook driving shaft. Rusty hook or other signs of water/damp damage (left out in the rain during garage sales, flooded basements, etc.) Seriously abused bolts and screws underneath. Bad repaint to mask problems. The rest comes down to how much you're willing to gamble. It's good have a cheap machine that works and allows you to tinker with is without feeling super guilty if you mess up. You'll know MUCH more when you buy your next machine, which is only a matter of time. I'd be leery spending more than $200-300 on a machine like the Singer you're considering, unless it's super nice. Leave room to buy parts, new motor, and pay somebody to give it a thorough cleaning and adjusting at $90/hr. -
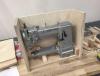
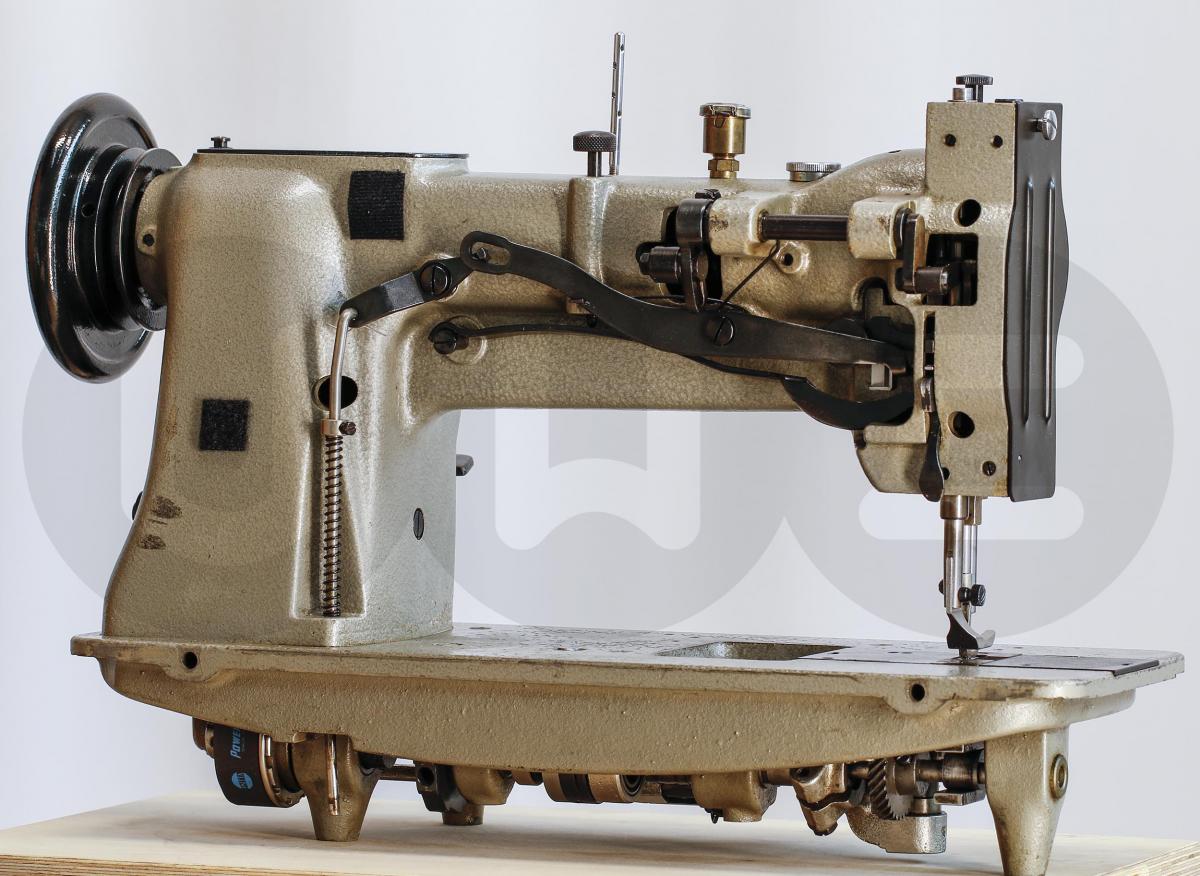
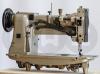
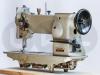
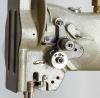
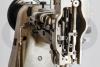
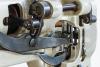
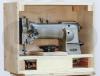
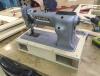
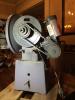
My Tacsew T1563 head is for sale for $550 to fellow leatherworkers. The Tacsew T1563 is a very well done copy of the Juki LU-563. For specs, manuals, and parts lists, you can refer to the Juki LU-563 documentation. I've spent a great deal of time with this machine, cleaning, adjusting, and replacing worn/broken/missing parts. I made a video of how I replaced the thread tension release guide, which gives you a good idea of what the insides of the head looks like: You can see this machine making stitches in my thumb control video (that motor setup is NOT for sale, sorry!): It is adjusted to perfection and makes perfectly matching forward and reverse stitches at a max of 7mm stitch length. The machine is ready to be shipped in the custom shipping crate I've built for it. The whole box weighs in at a hefty 97 lbs. Shipping will run between $70-100, depending on where in the continental U.S. you live. If you're in the Detroit area, I'll be happy to set this machine up in a table and a nice motor for an extra $250, but shipping a complete setup is not something I'm interested in. I'm set up to accept credit cards through my photography business. I can also send you a Paypal invoice if you prefer. Here are some detailed pictures: More pictures:

-
A simple Google search for "Durkopp 380" brings up Durkopp 380 Parts Lists and Durkopp 380 User Manual. With part numbers taken from the parts list you can search for vendors that might carry them. Repair manuals are rare or non-existent. The best you can generally hope for is an adjustment or service manual.
-
I also made a separate video on just the alternating foot lift adjustment for the Adler 205. The procedure adjusts the alternating feet to make sure they lift the same amount as they walk. Also, both feet should definitely lift off the material when you use the manual lever or the foot-operated foot lift. If they don't, something's wrong with your foot lift mechanism.
-
Show & Tell: Building A Shippping Crate For A Flatbed Sewing Machine
Uwe replied to Uwe's topic in Leather Sewing Machines
I hadn't seen that particular video yet - nice find! There's a few variations on the theme out there, mine is just a yet-another-crate version. My general approach is to sample and analyze various options and then pick the parts or methods that work for me, while trying to improve upon or simplify what others have done before. The oldest sewing machine packaging footage I've seen is part of the 70-Minute long Birth of a Sewing Machine silent film from 1934 where they show how Singer packed their machines in wooden crates around the 1 hour and 3 minute mark into the film. -
I'm voting for the single needle version of the Durkopp Adler H868 reinforced post-bed machine. Its specs include needle sizes up to 250 , 25mm foot lift, and a 3XL bobbin fit for size queens. Unfortunately, if you need to ask how much it is, you can't afford it. But if you need it, you need it.
-
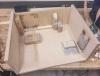
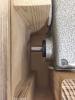
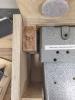
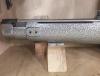
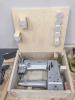
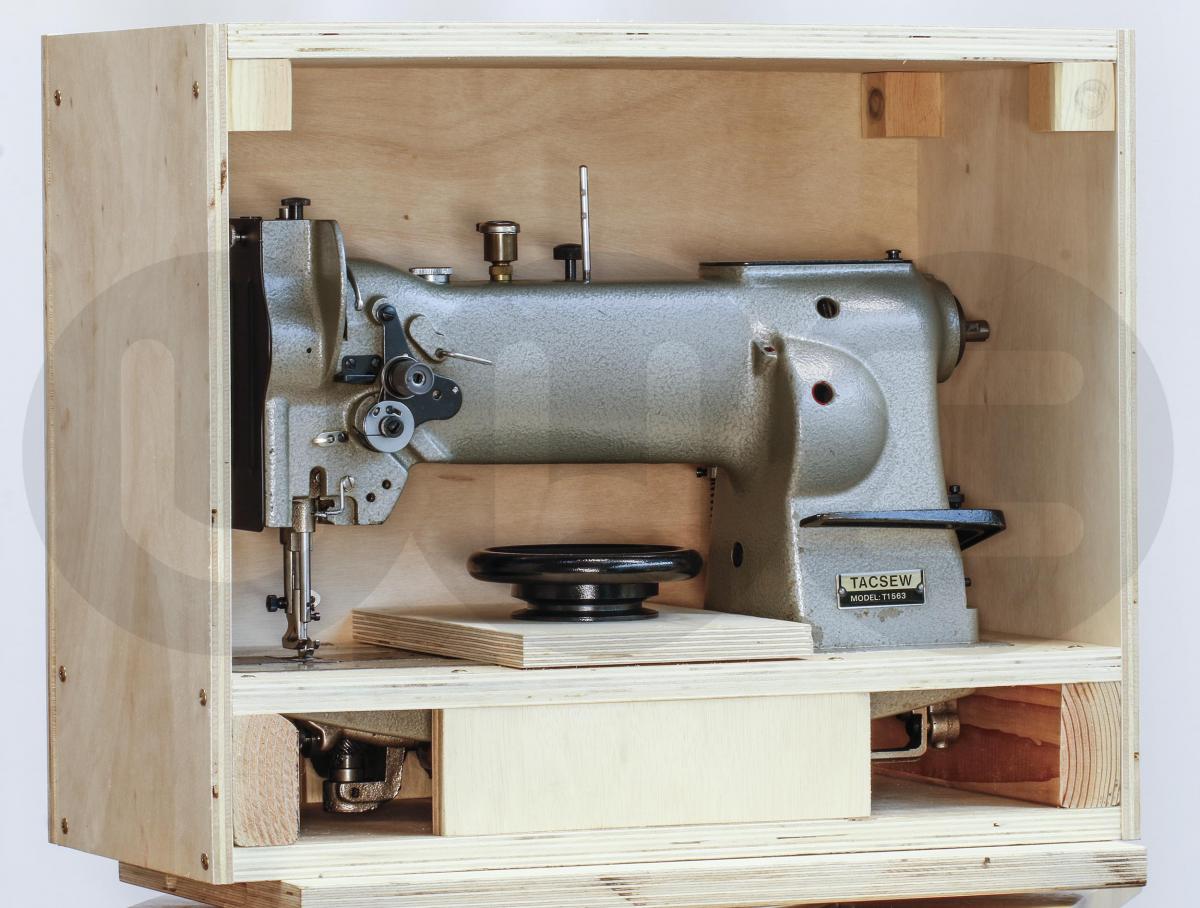
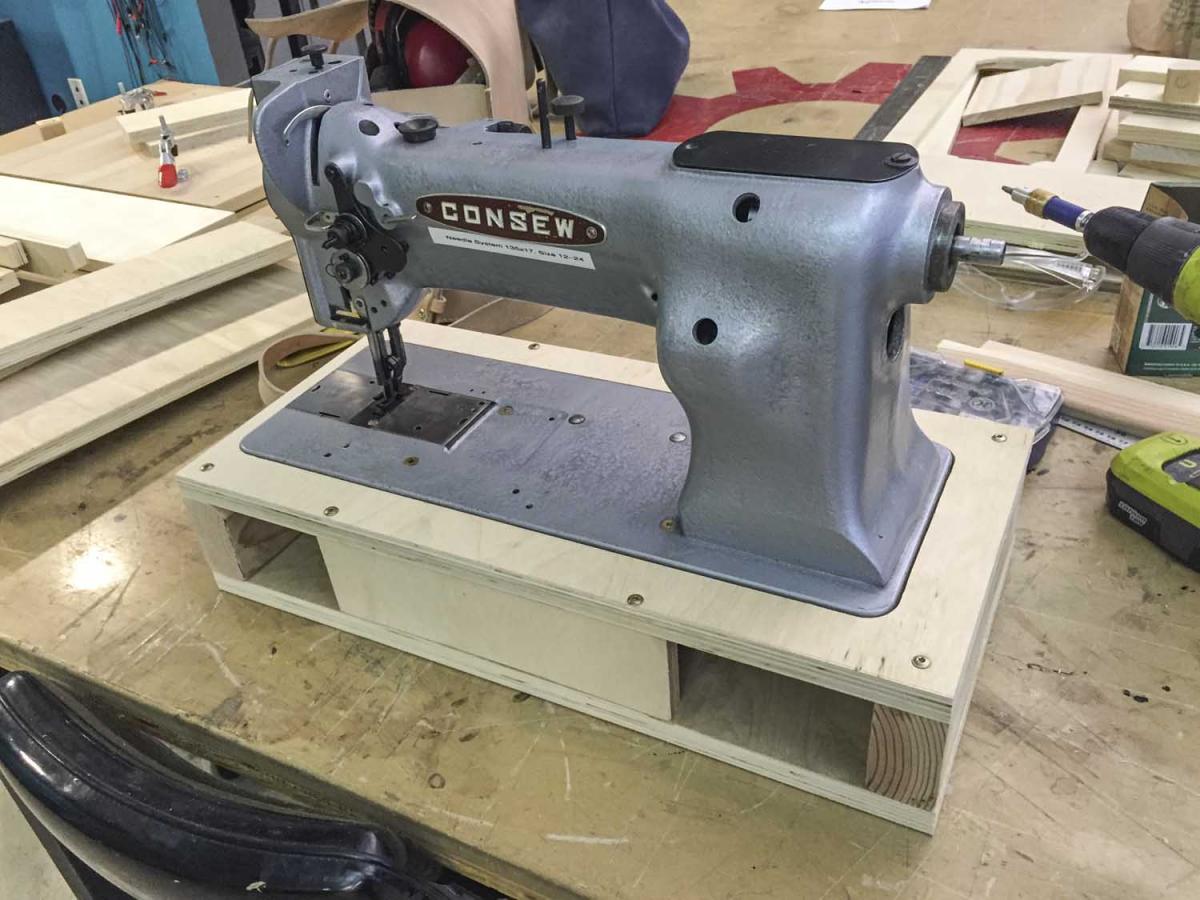
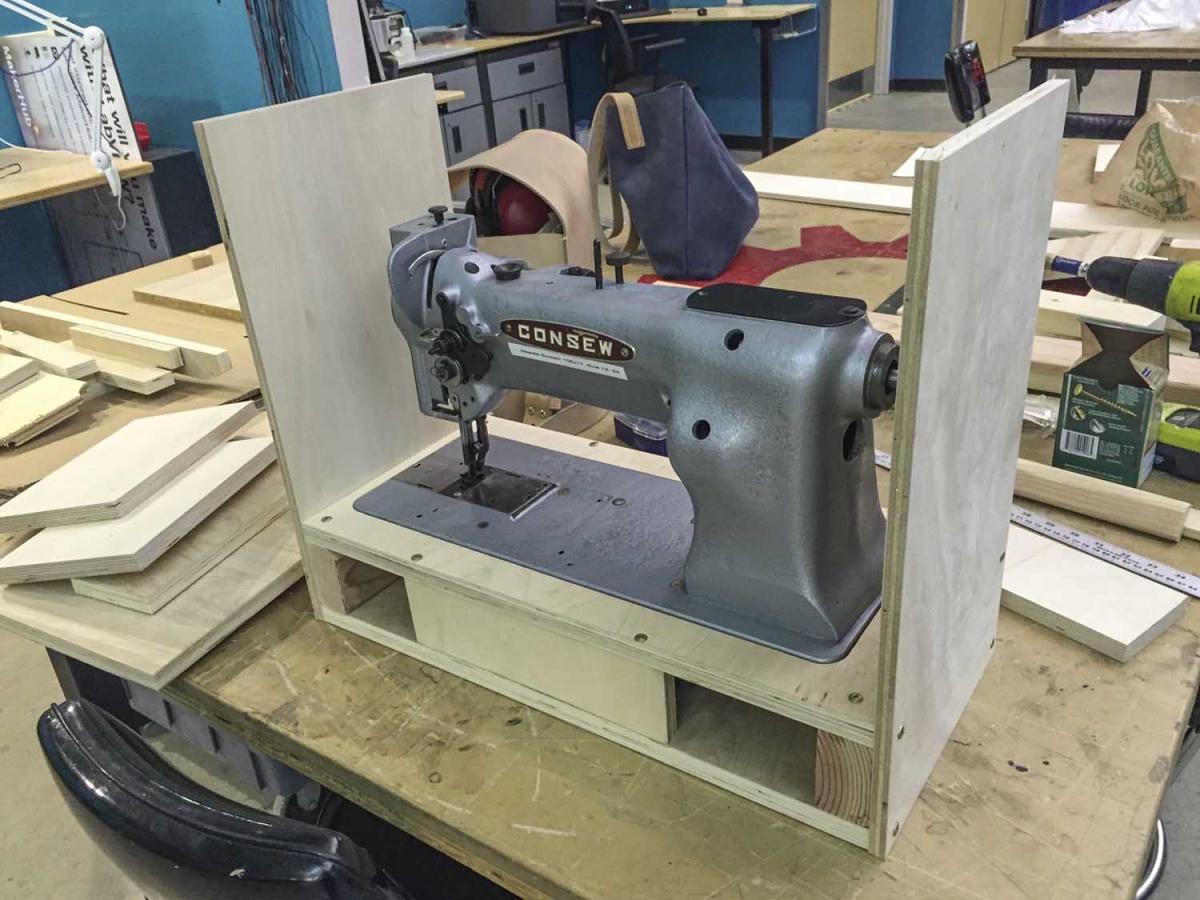
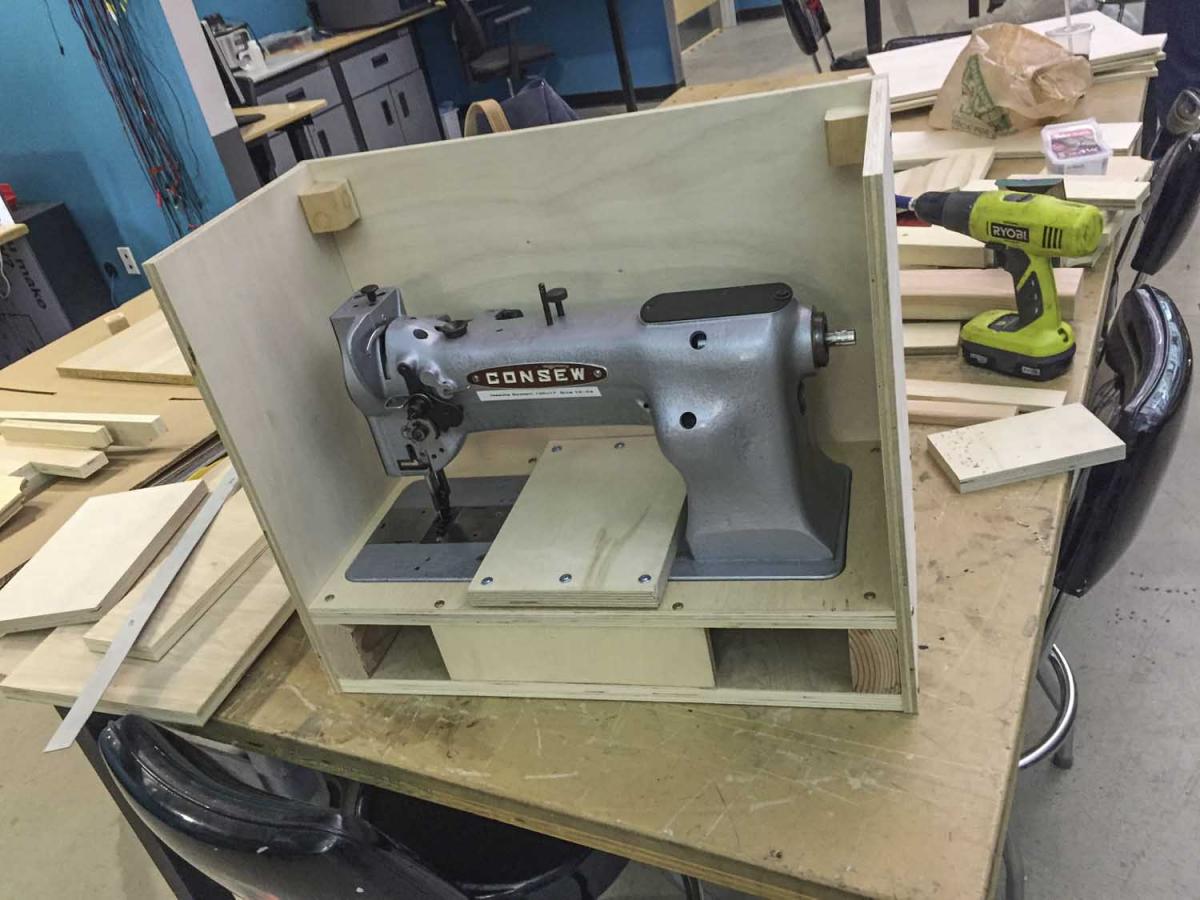
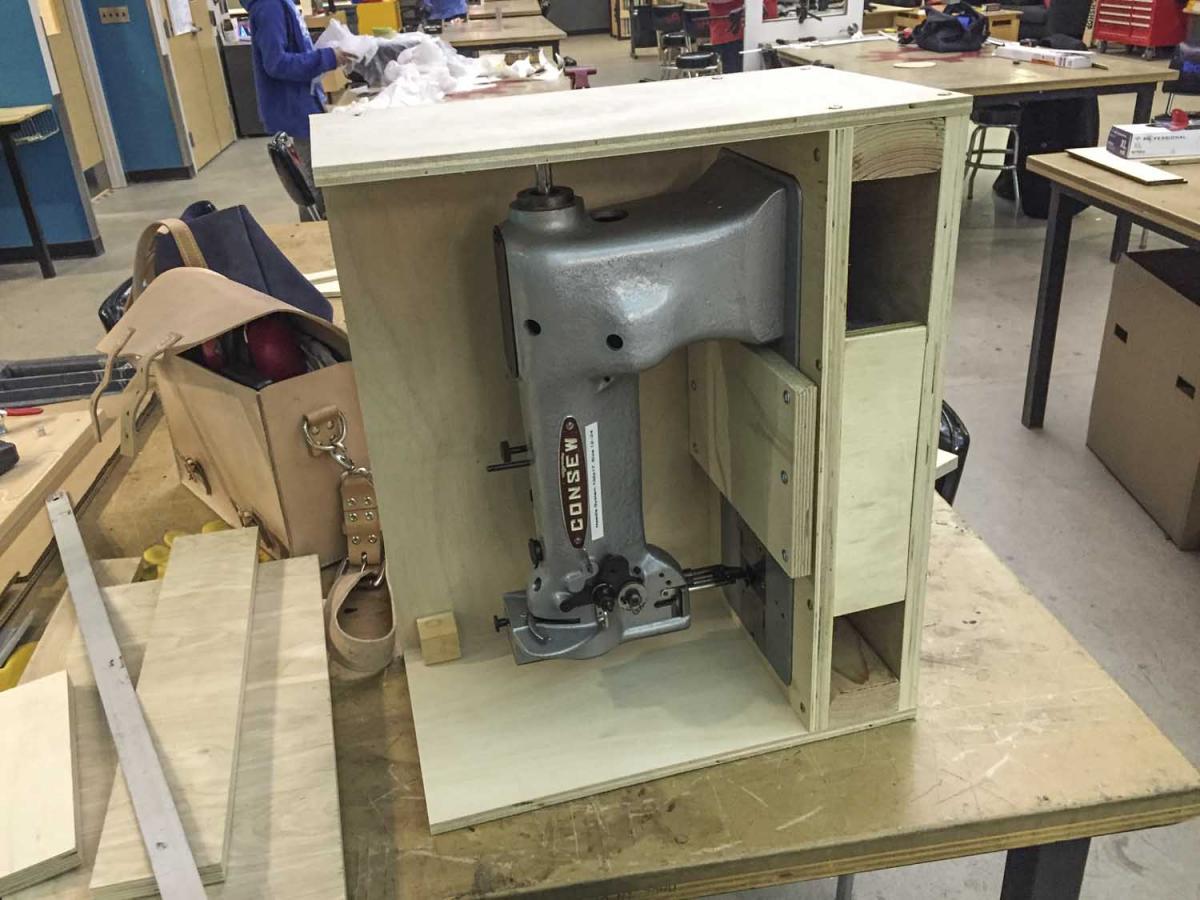
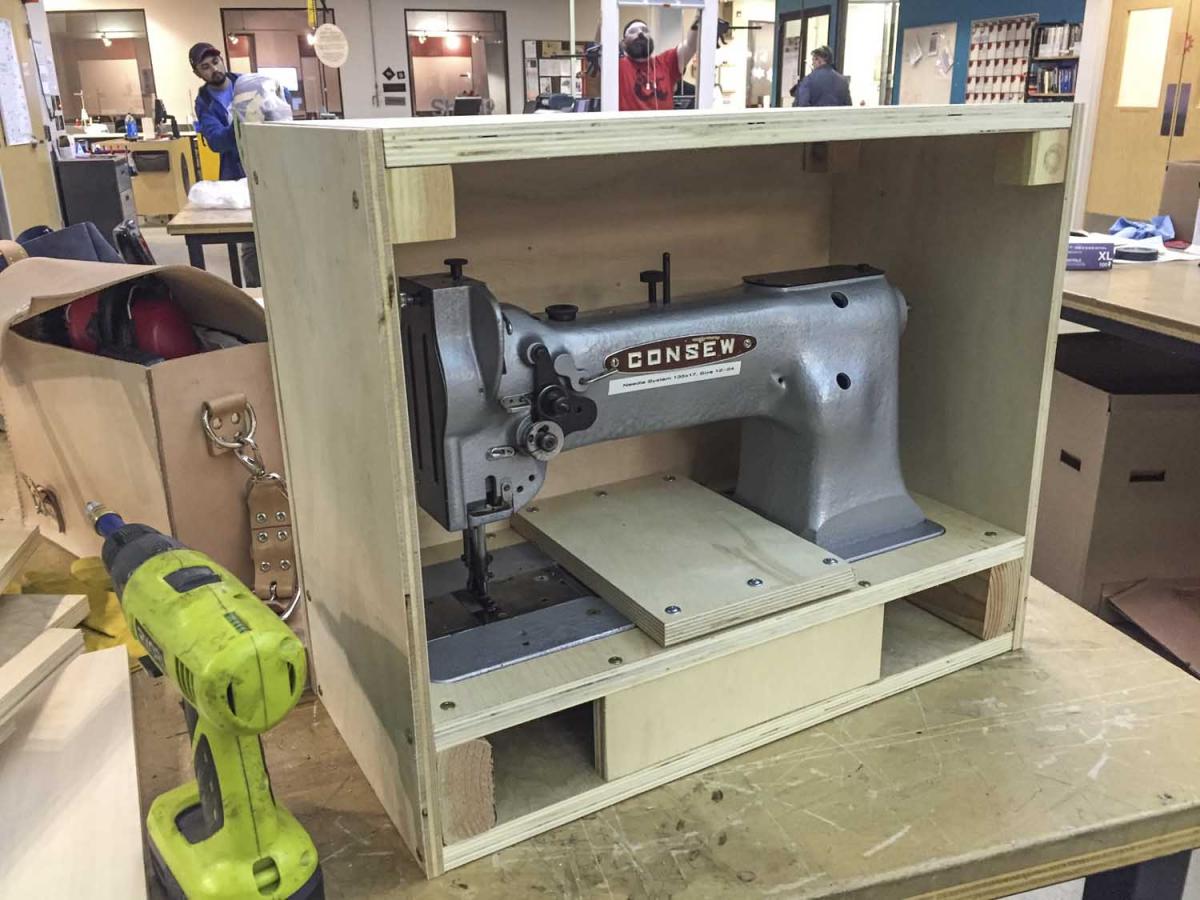
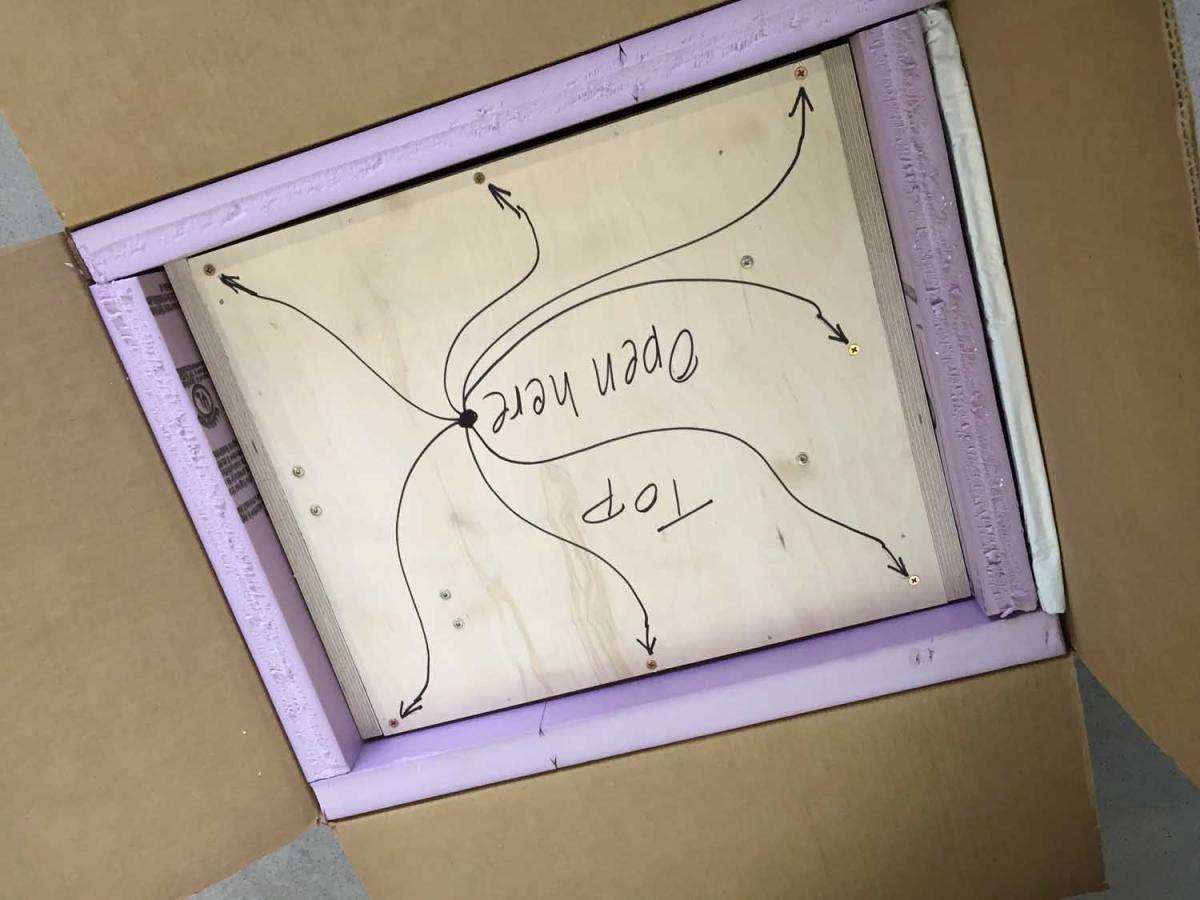
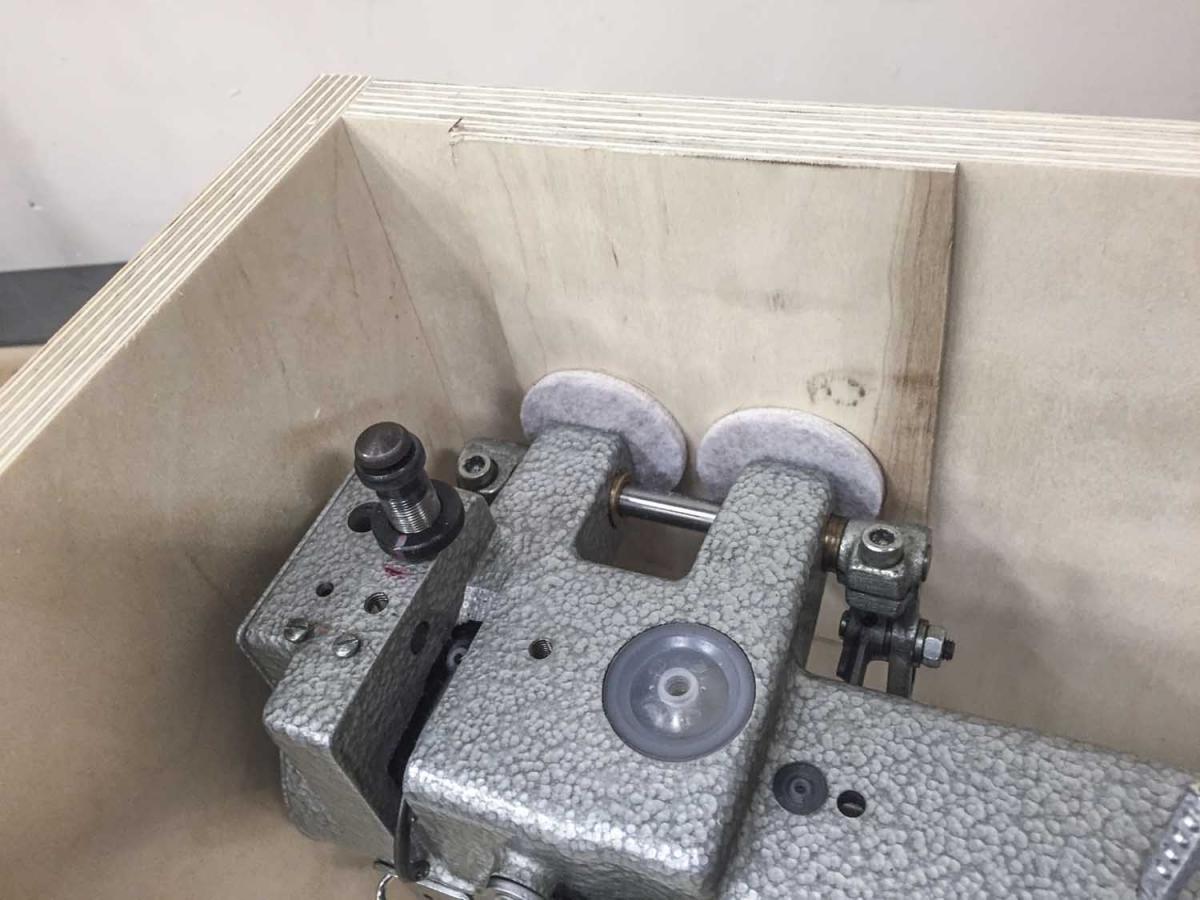
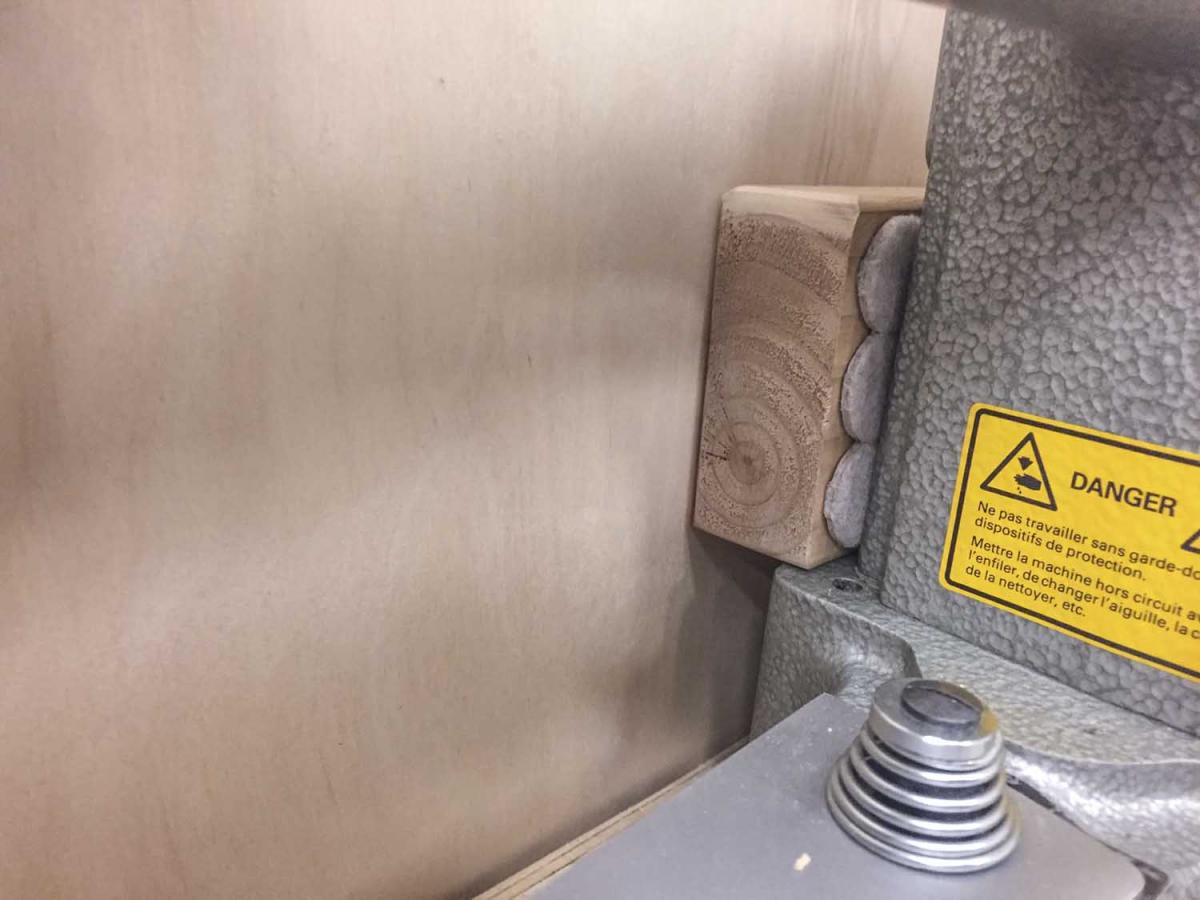
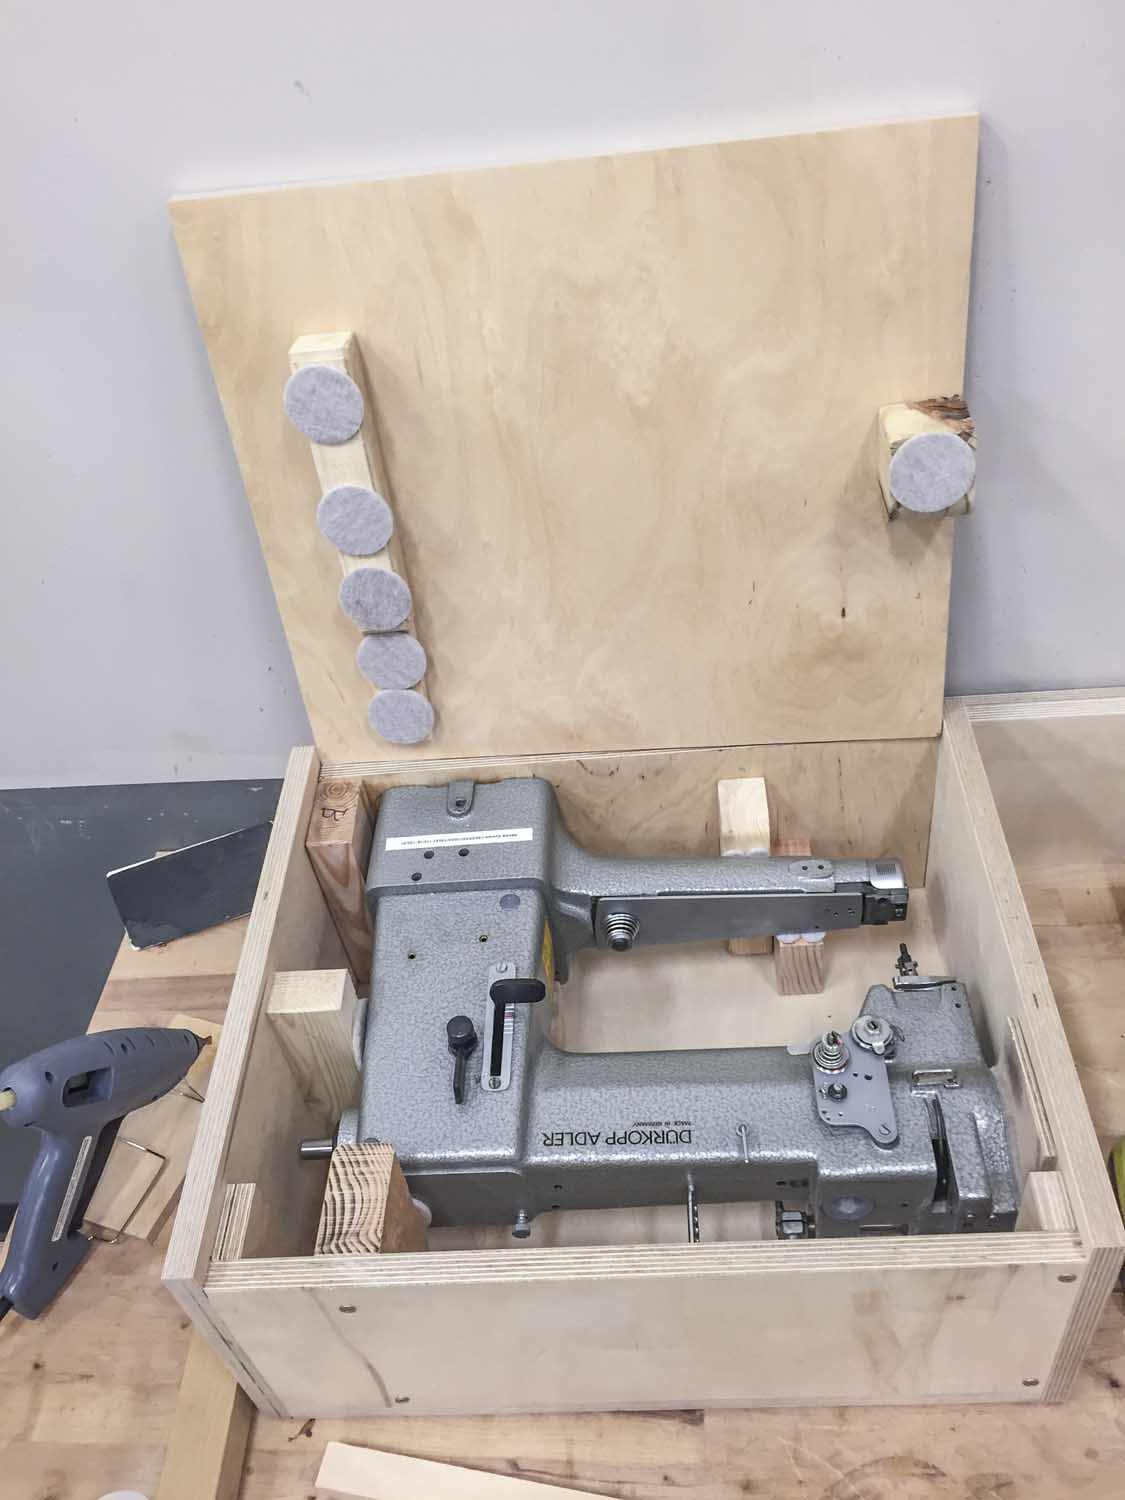
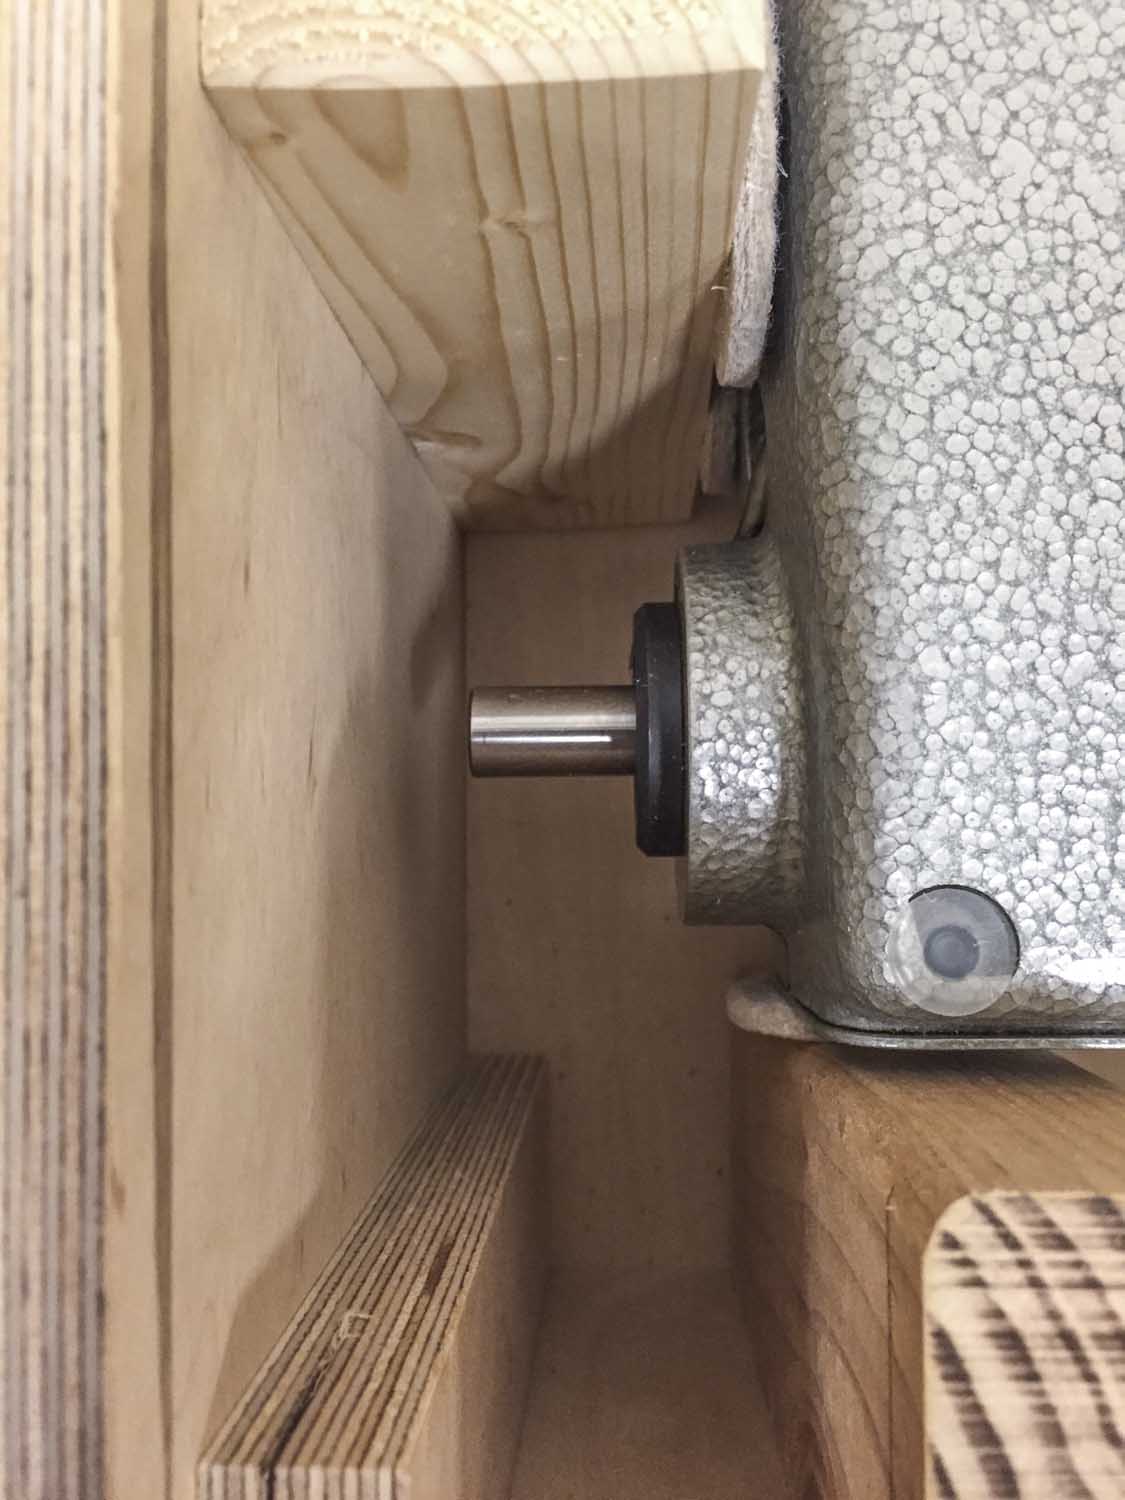
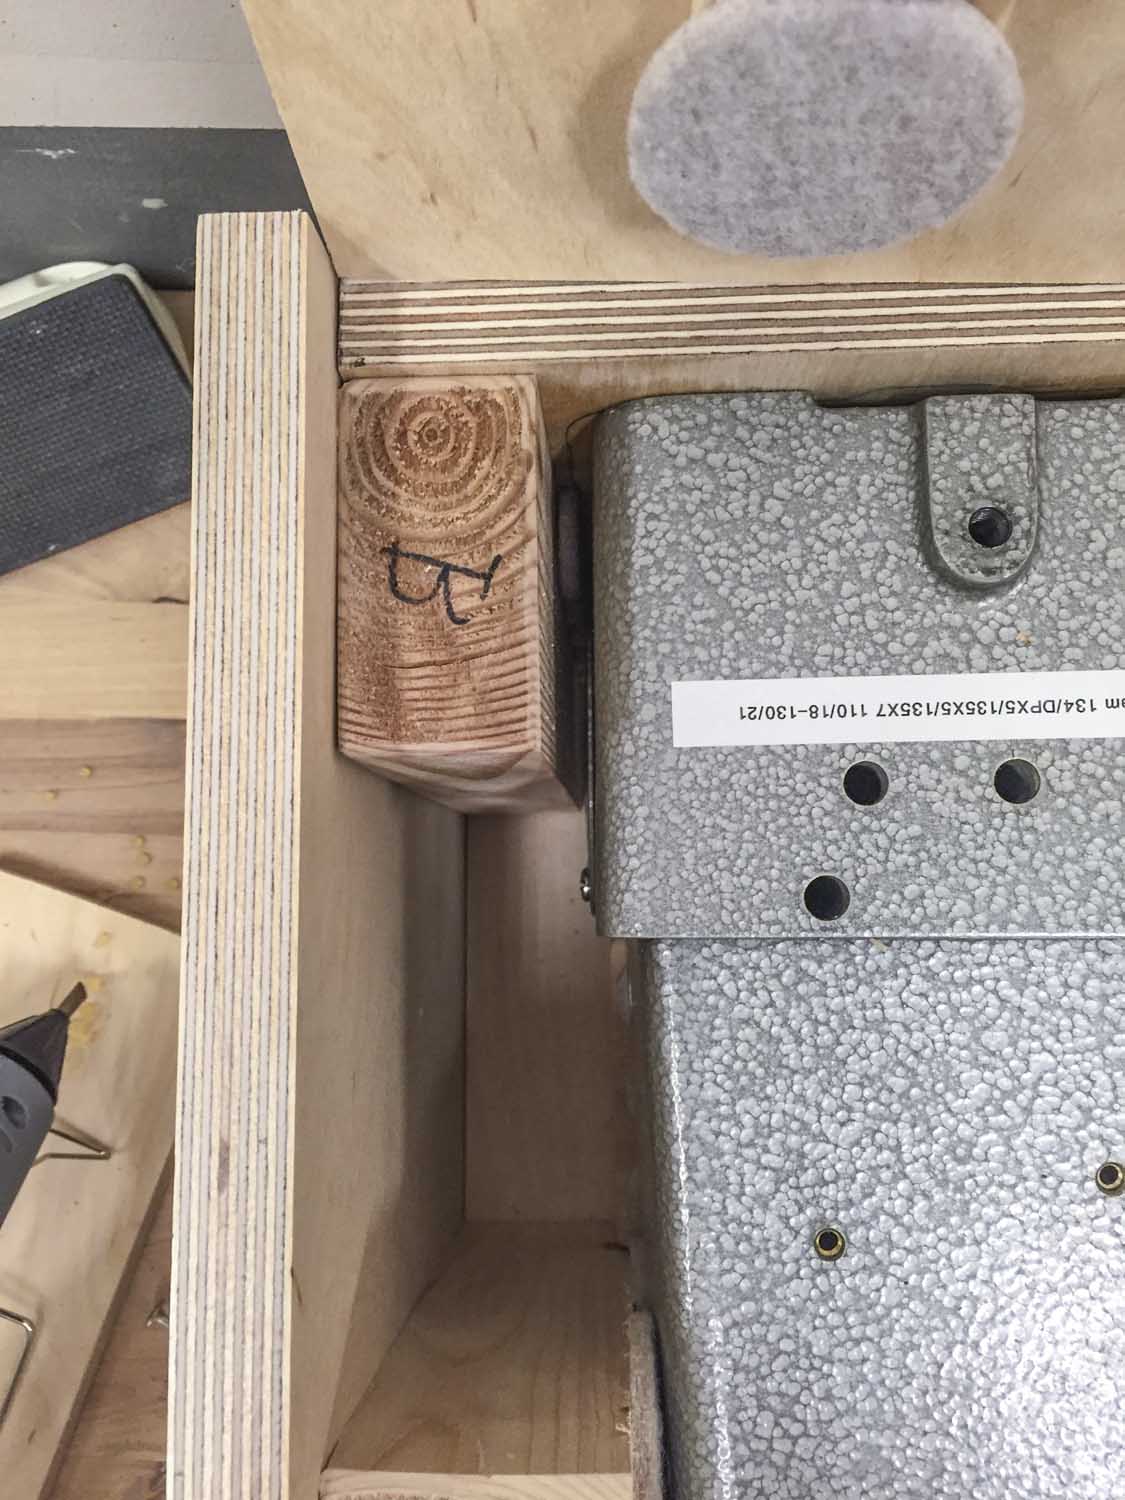
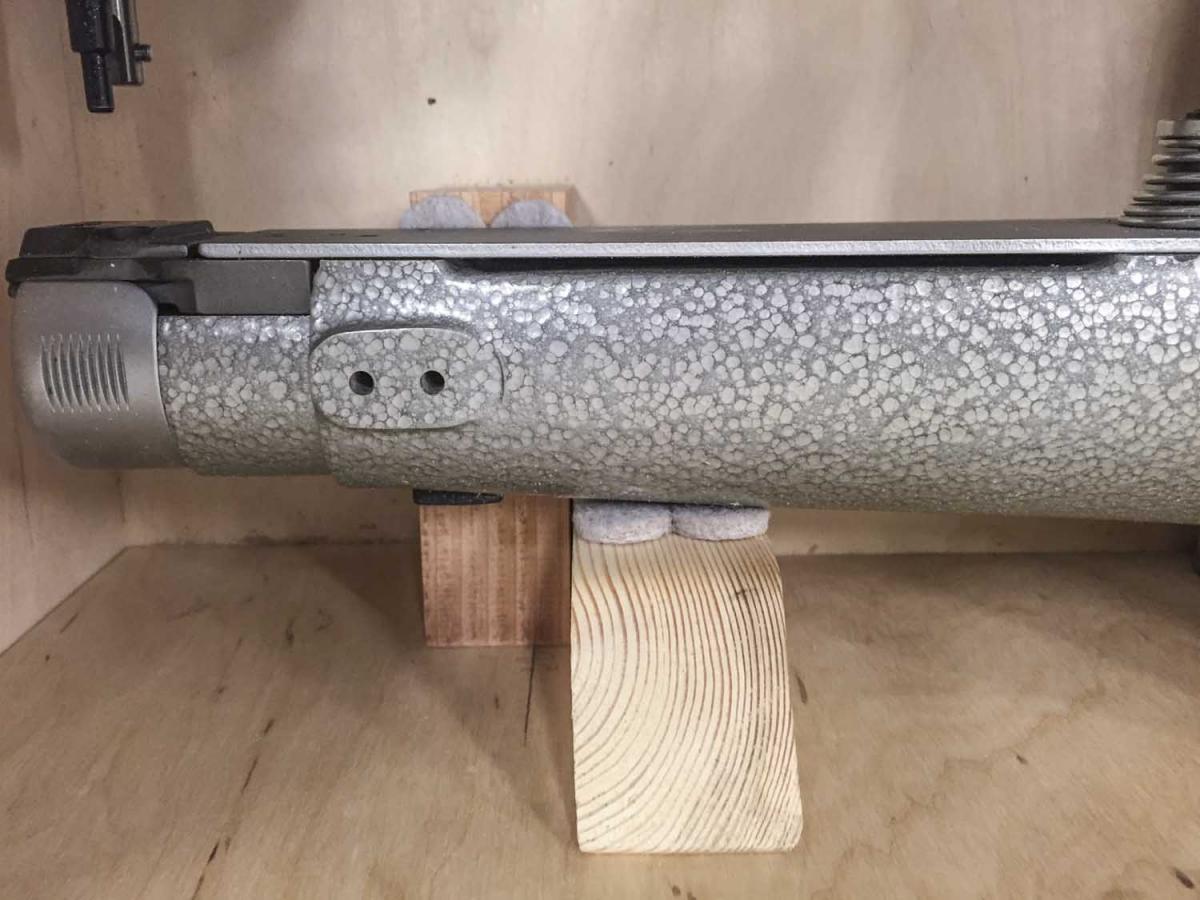
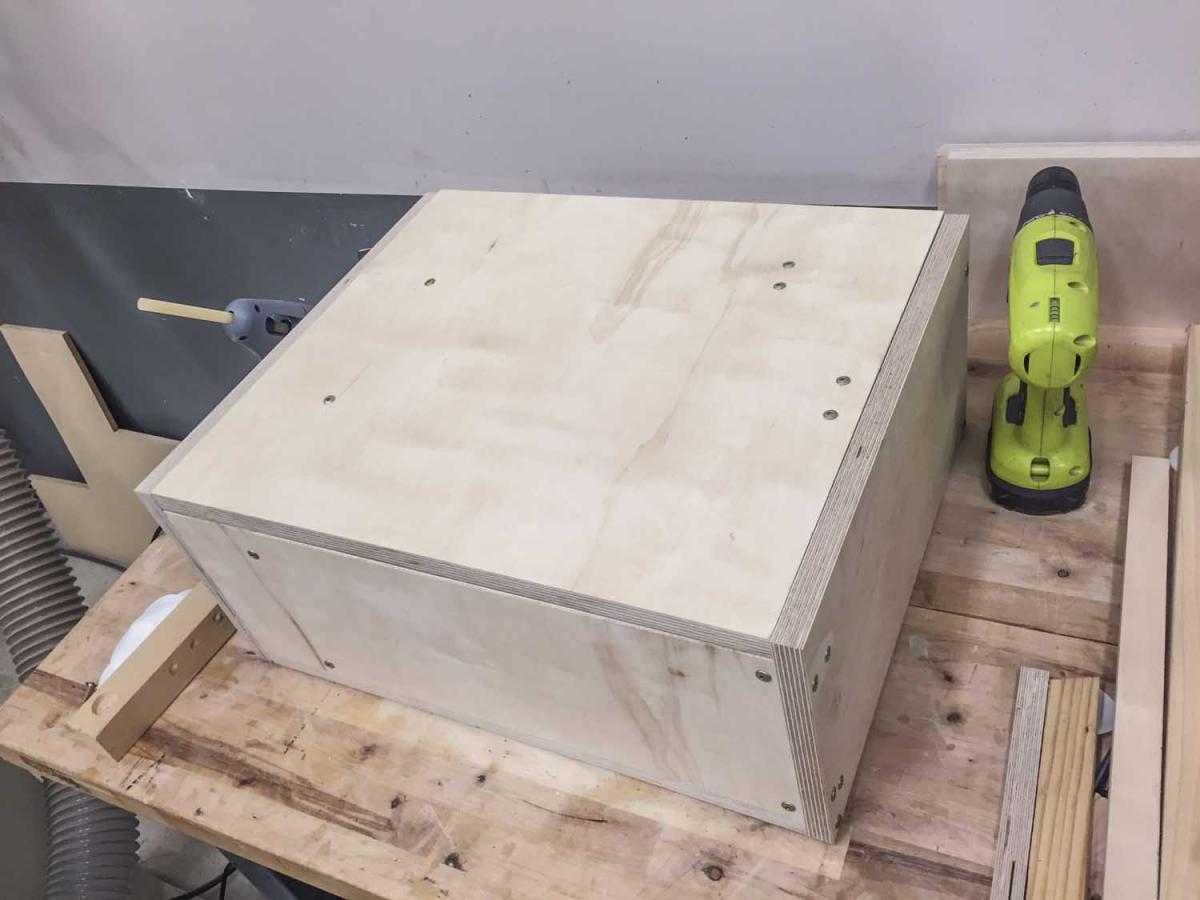
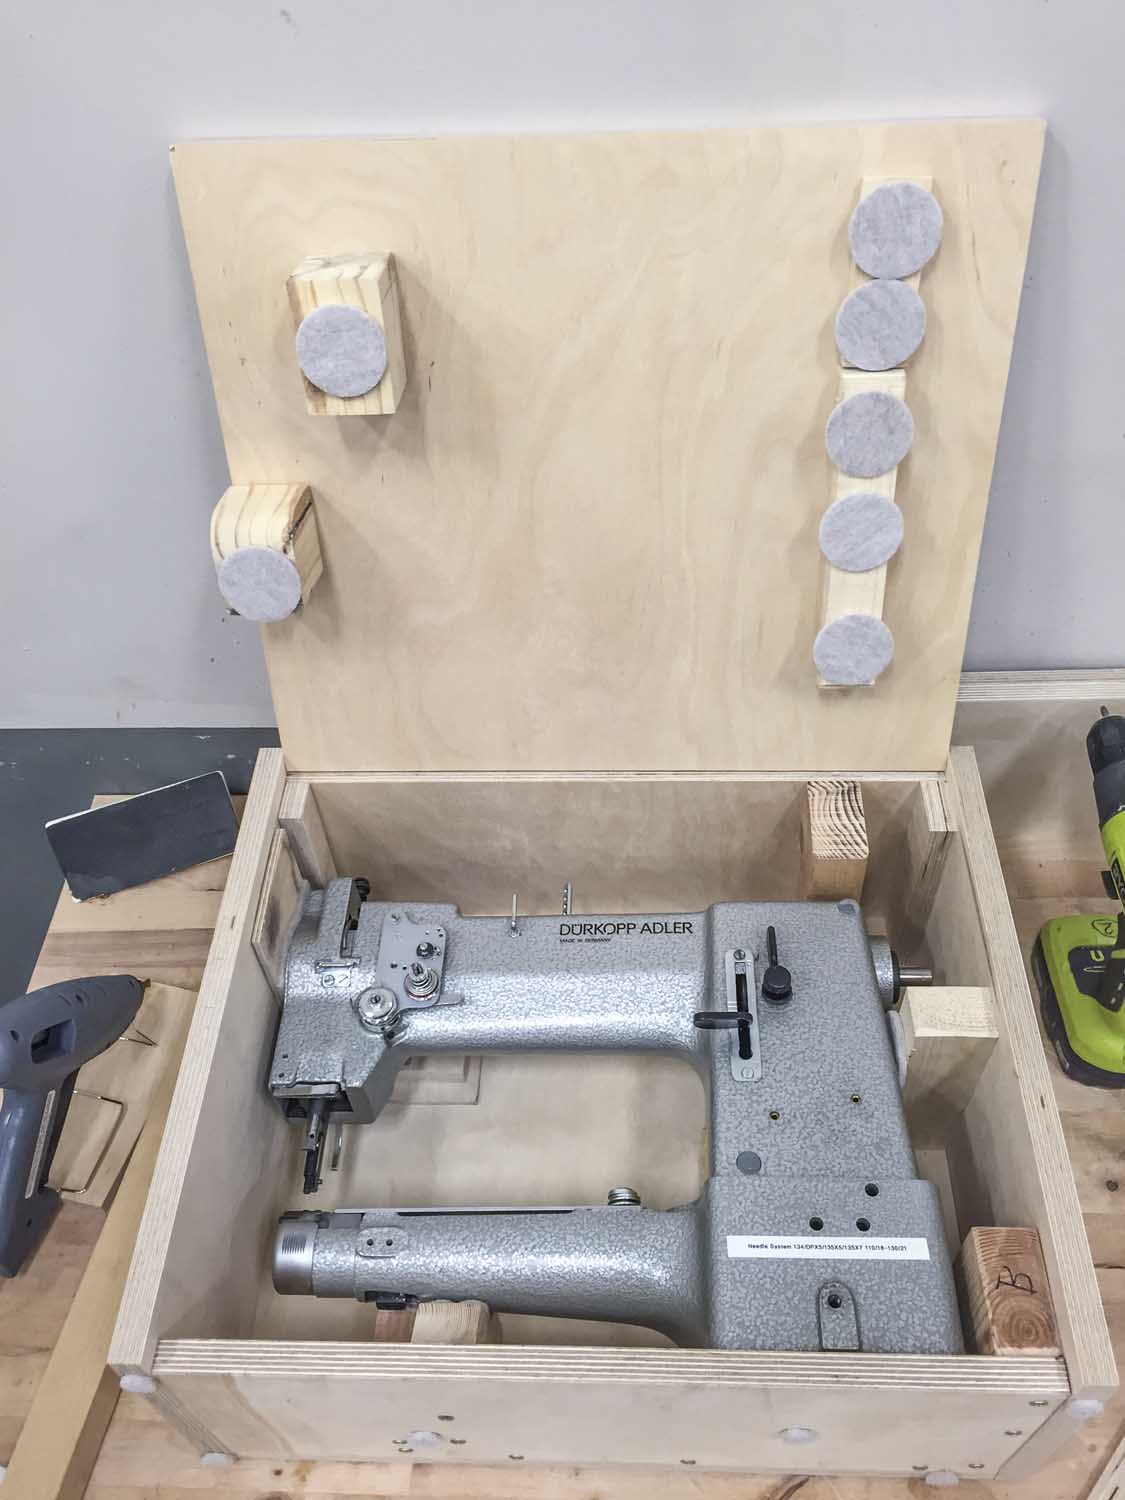
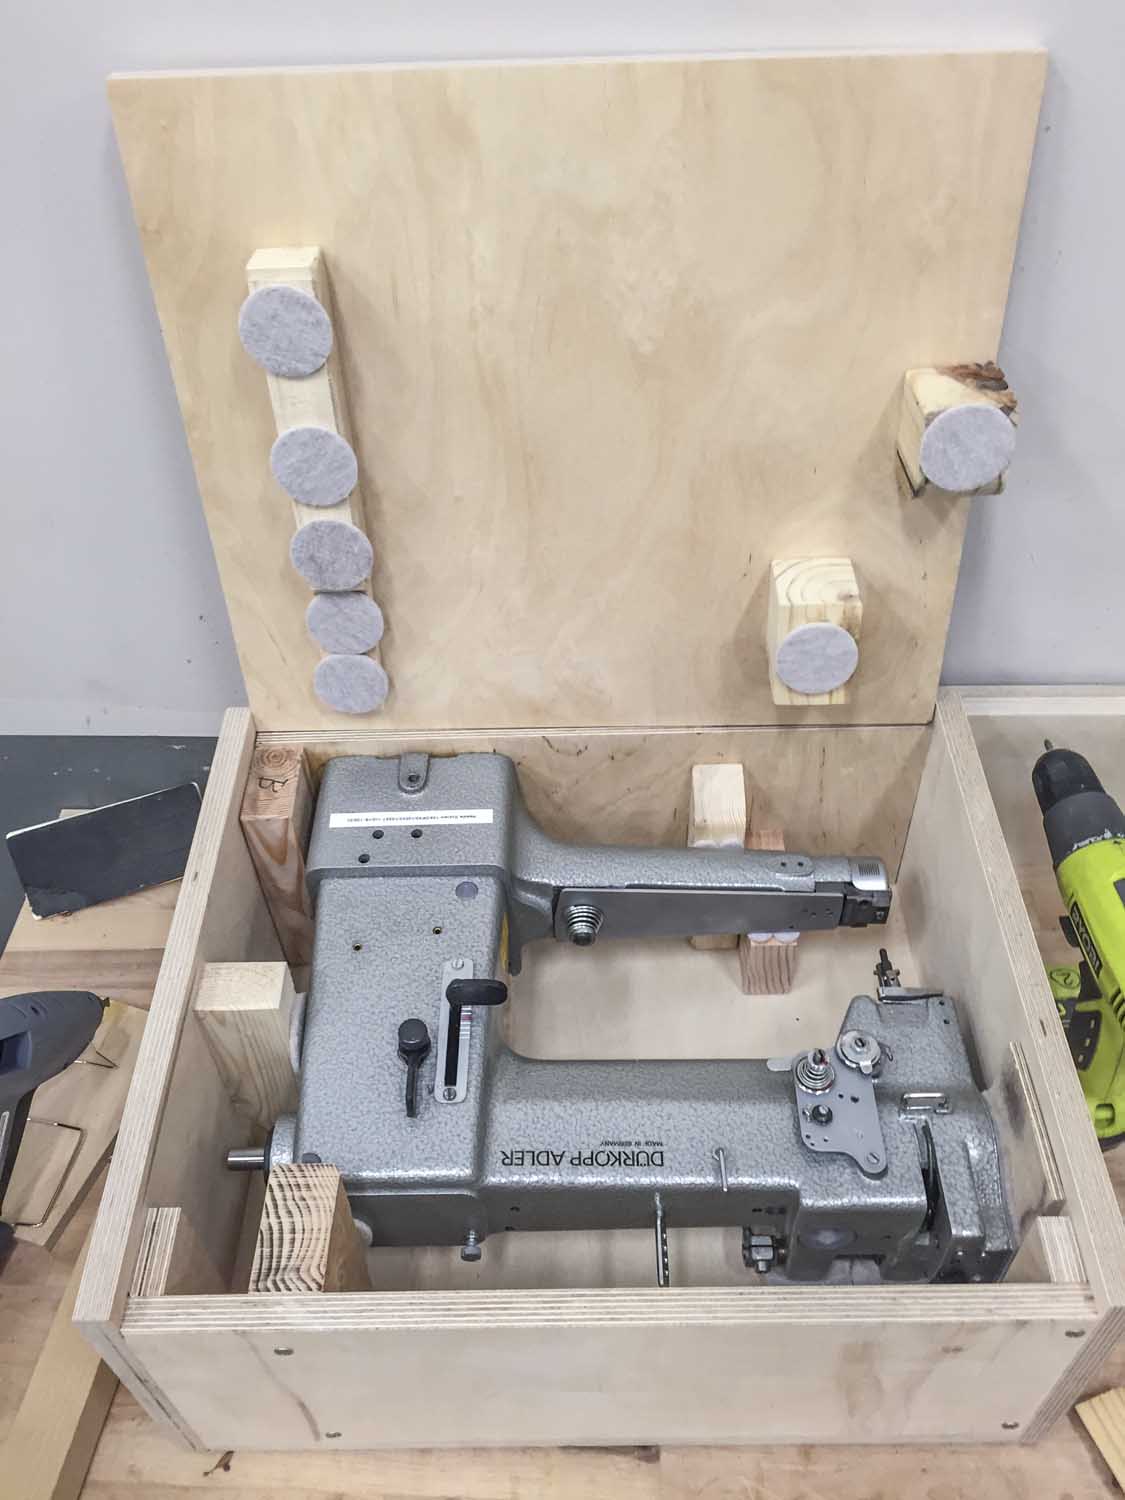
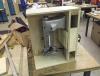
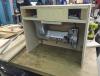
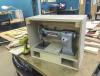
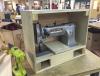
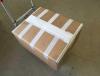
I decided to build a wooden shipping crate that will work for industry standard flatbed machines. I have a Consew 225 for sale, plus my Tacsew T1563 ( a Juki 563 clone) is ready to be adopted after starring in my upcoming stitch length adjustment and forward-reverse-balancing video. I also picked up two Craiglist finds (a Juki 562 and a Juki 563-3) a few days ago that I will put up for sale after refurbishing them (to finance my future Durkopp Adler 969, haha!) So, quite a few machines with identical shapes and dimensions that may need to be shipped. Might as well figure out how to ship them securely now! The concept is similar to the crate I built for the Adler 69, but the means of holding the machine firmly in place inside the crate is rather different. The board attached across the flatbed keeps the machine from moving vertically. The carved-out horizontal support board in the middle keeps the machine from moving horizontally. So the machine won't move at all, no matter which side is facing up. The upper portion of the head is suspended in mid-air without additional supports. The whole affair makes a rather solid impression on me and I have high confidence that this will protect the machines sufficiently during shipment. This wooden crate will go inside a foam board padded cardboard box as with the Adler 69. Here are some pictures: Here's a sketch of my initial build plan, which doesn't quite match what I actually built, because I usually make changes as I build stuff:


-
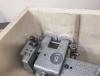
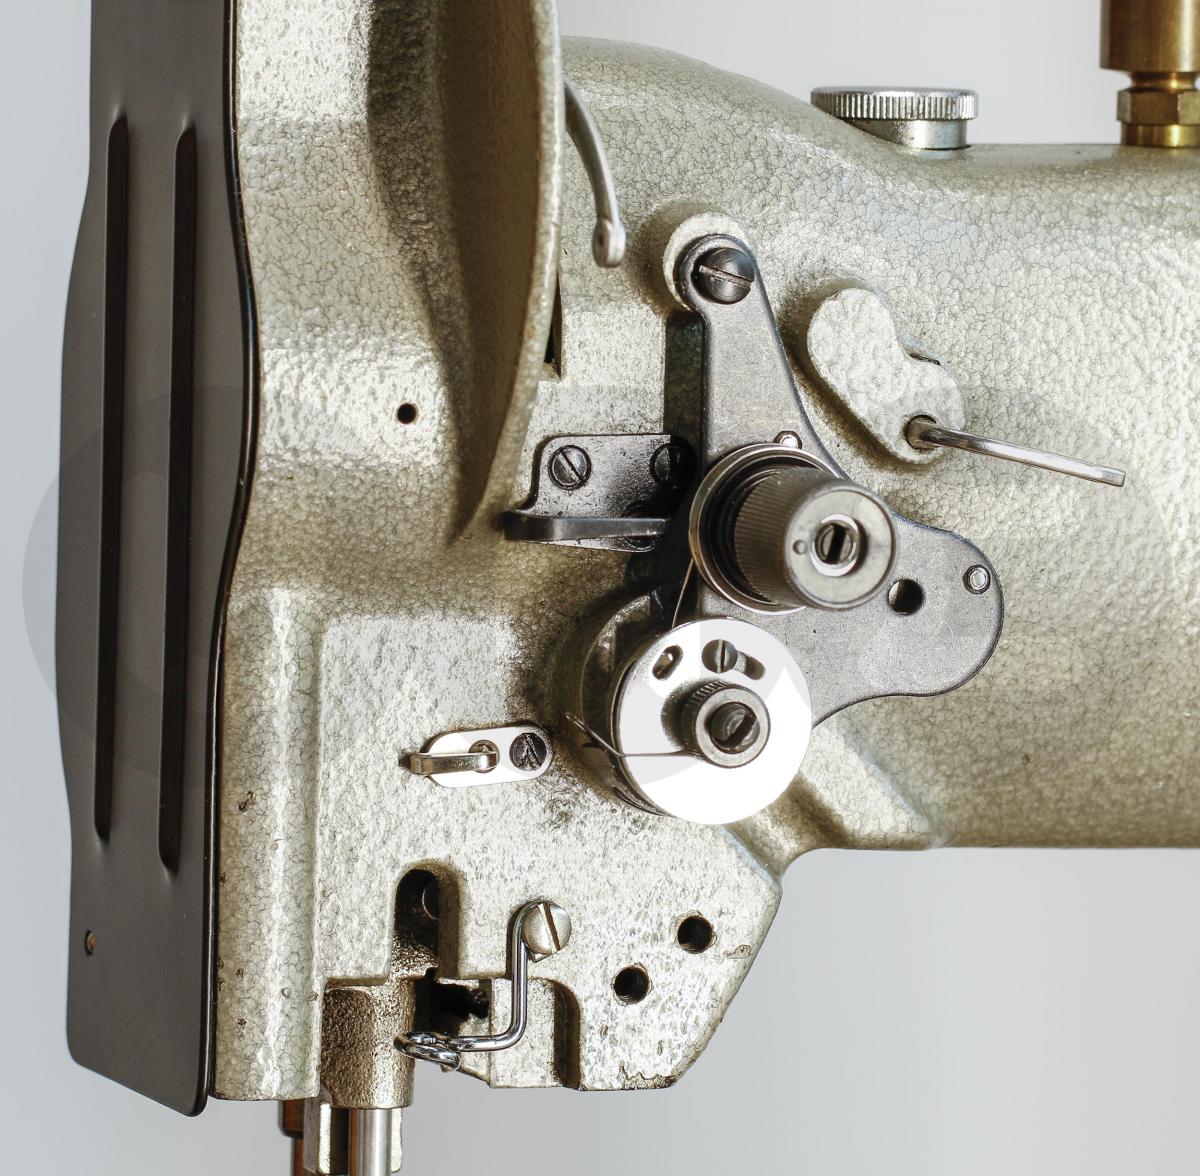
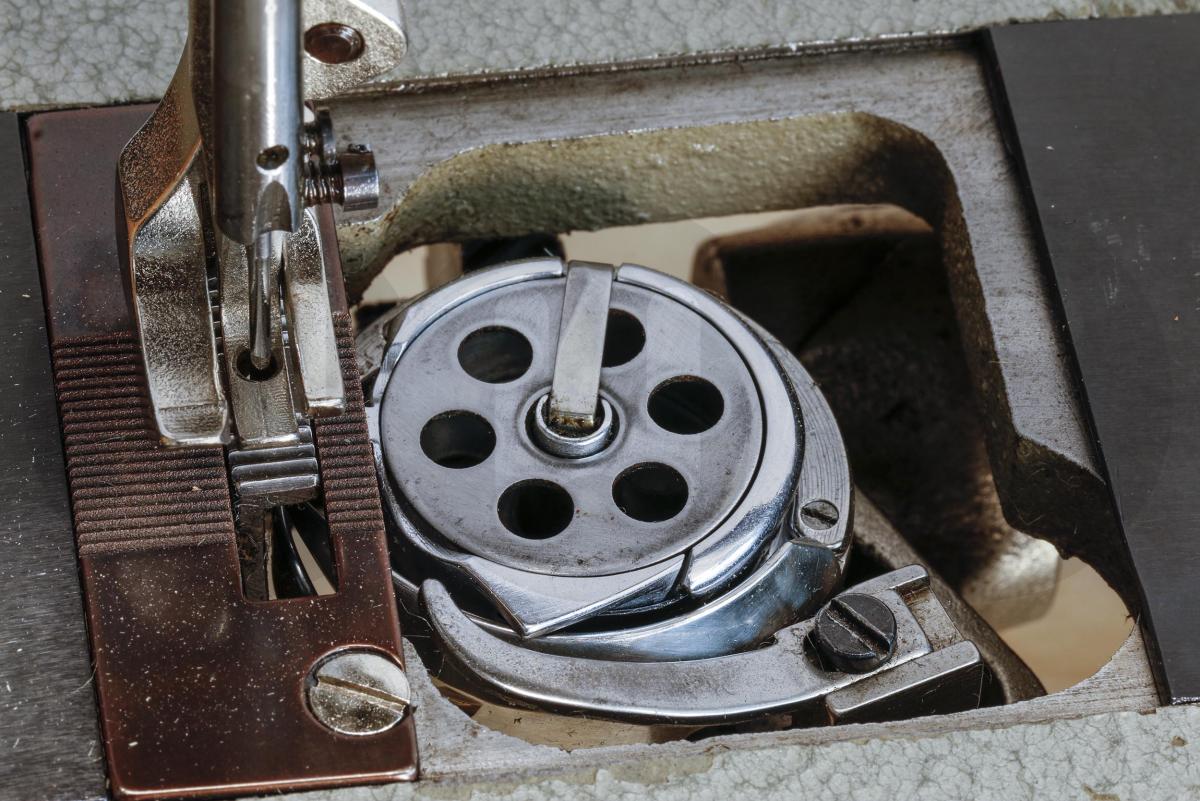
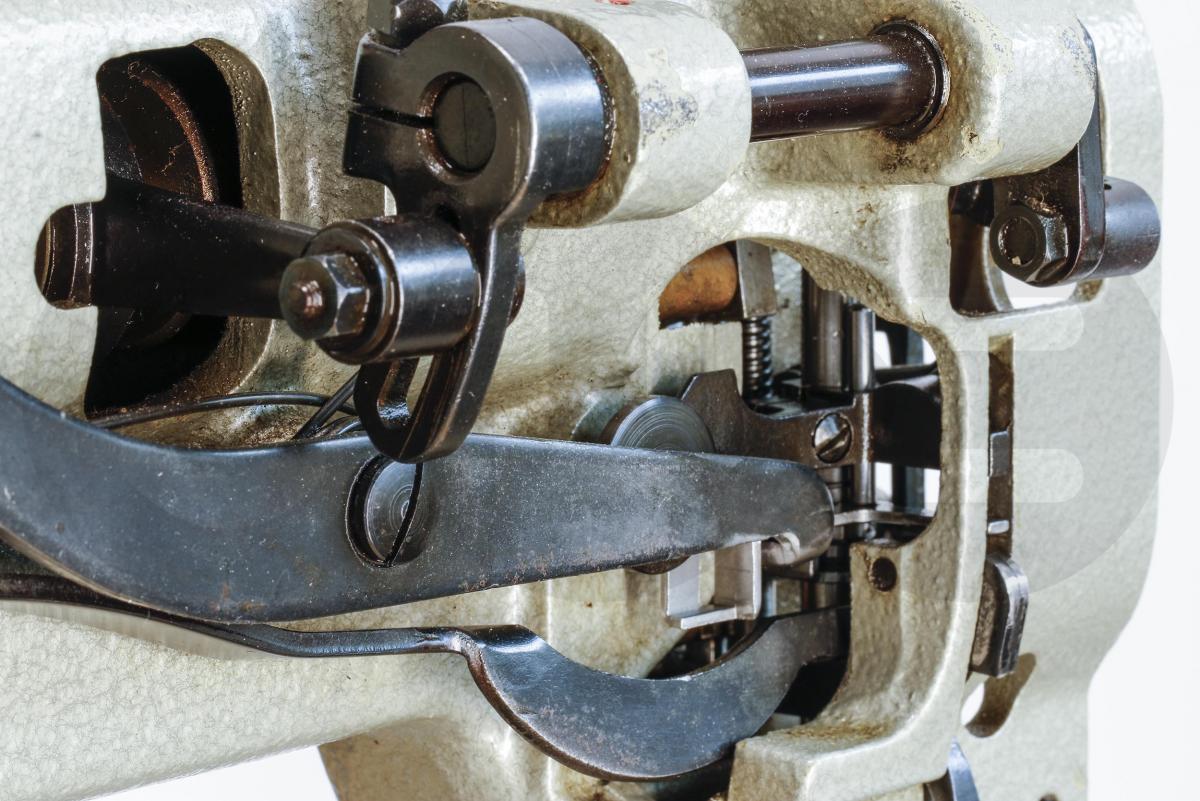
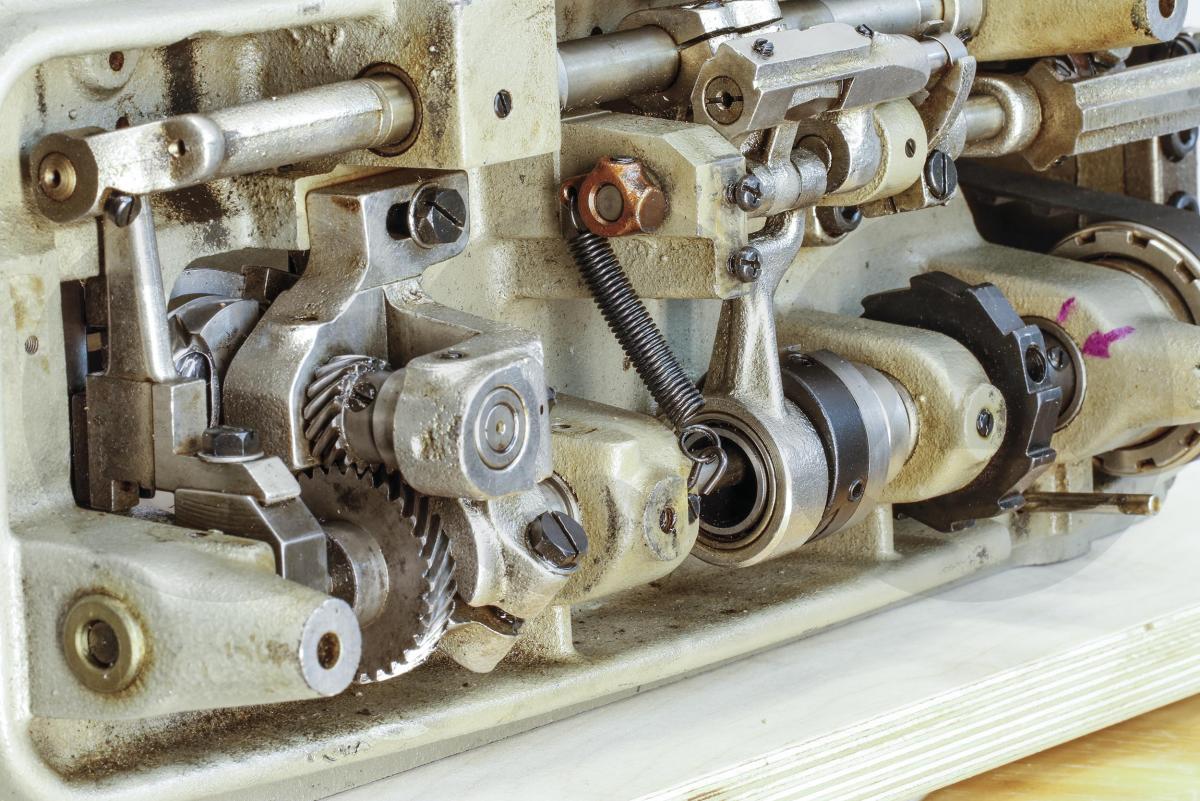
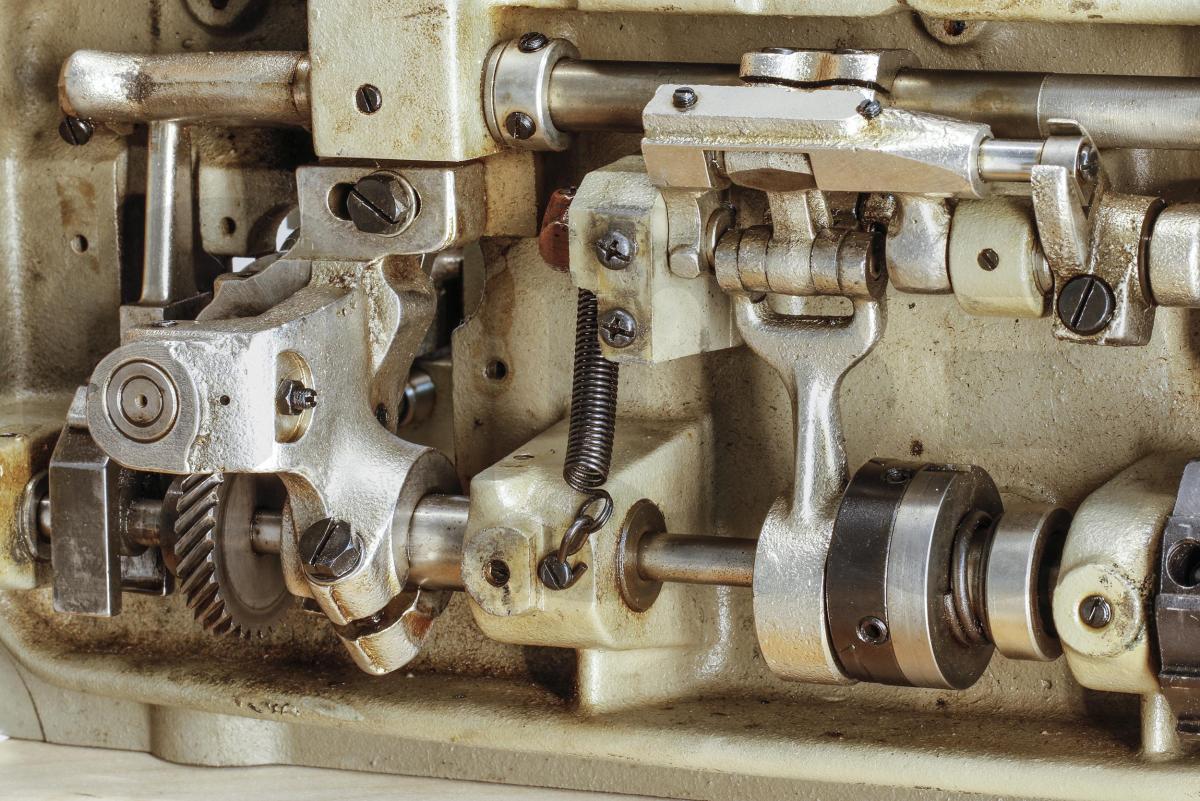
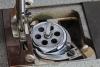
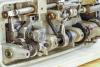
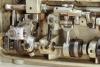
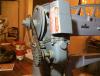
I finally found time to install the new (original Juki!) Thread Release Guide part on my Tacsew T1563, a Juki LU-563 clone. I made a video to celebrate the occasion and document the process. Since the part is somewhat deeply nested and connected in the head, I had to take apart and put back together a good portion of the head, including removing the presser foot bar and various connected parts. So the video might be useful even if you don't need to replace that particular part. My thread release guide works as intended and the manual foot lift movements no longer catch and annoy every time you lift the presser foot. The new part itself was cheap at $7.33, especially for an original Juki part. When I checked, ABC Sewing Machine was the only U.S. vendor who had this part (Juki Part Number B14602460A0) in stock AND listed on their online ordering system. So props to them for that. So here's the video for your viewing pleasure and edutainment:
-
The machine is sold, sorry.
-
Sewing With An Electrically Heated Inner Presser Foot !?
Uwe replied to Uwe's topic in Leather Sewing Machines
It certainly looks like a technology or method that was invented when operator safety was a secondary concern. For myself I've concluded that this particular oddity in sewing technology is skippable. I don't feel the need to add burn marks and electric shocks to my personal list of sewing hazards. I'll stick with cuts and punctures for now. -
New Dürkopp Adler 969 And 967 H Type Machines For X Heavy Work
Uwe replied to Trox's topic in Leather Sewing Machines
Weaver posted a few new videos on youtube last week, including a nice overview of the Durkopp Adler 969 Eco: https://www.youtube.com/watch?v=7kqHbL_47b0#t=24.306041 -
Sewing With An Electrically Heated Inner Presser Foot !?
Uwe replied to Uwe's topic in Leather Sewing Machines
Today must be Italian heated presser foot day. Another italian video shows a (broken and rather unsafe looking) heated presser foot machine in action at the 1:51 mark (what sewing machine is that?) I also realised that I'm not wearing nearly enough gold jewelry when I do my leatherwork. -
I came across this video by an Italian company Zallocco where they use an electrically heated inner presser foot to sew a belt. I haven't quite figured what the (heated) point of it is and my Italian is quite bad beyond ordering espresso based drinks. Are they just shaping the needle hole for visual appearance? Perhaps the presser foot has a specially shaped bottom to make an impression in the leather as you sew. They must not be using nylon or polyester thread with that heated foot. Has anybody else seen or used this, or know exactly what they're doing here? How does that heater rod even work with just one wire going to it? That modified, welded-on big-foot outer presser foot is interesting, too - definitely not leaving any marks on the leather! Too bad they don't show what the underside looks like.
-
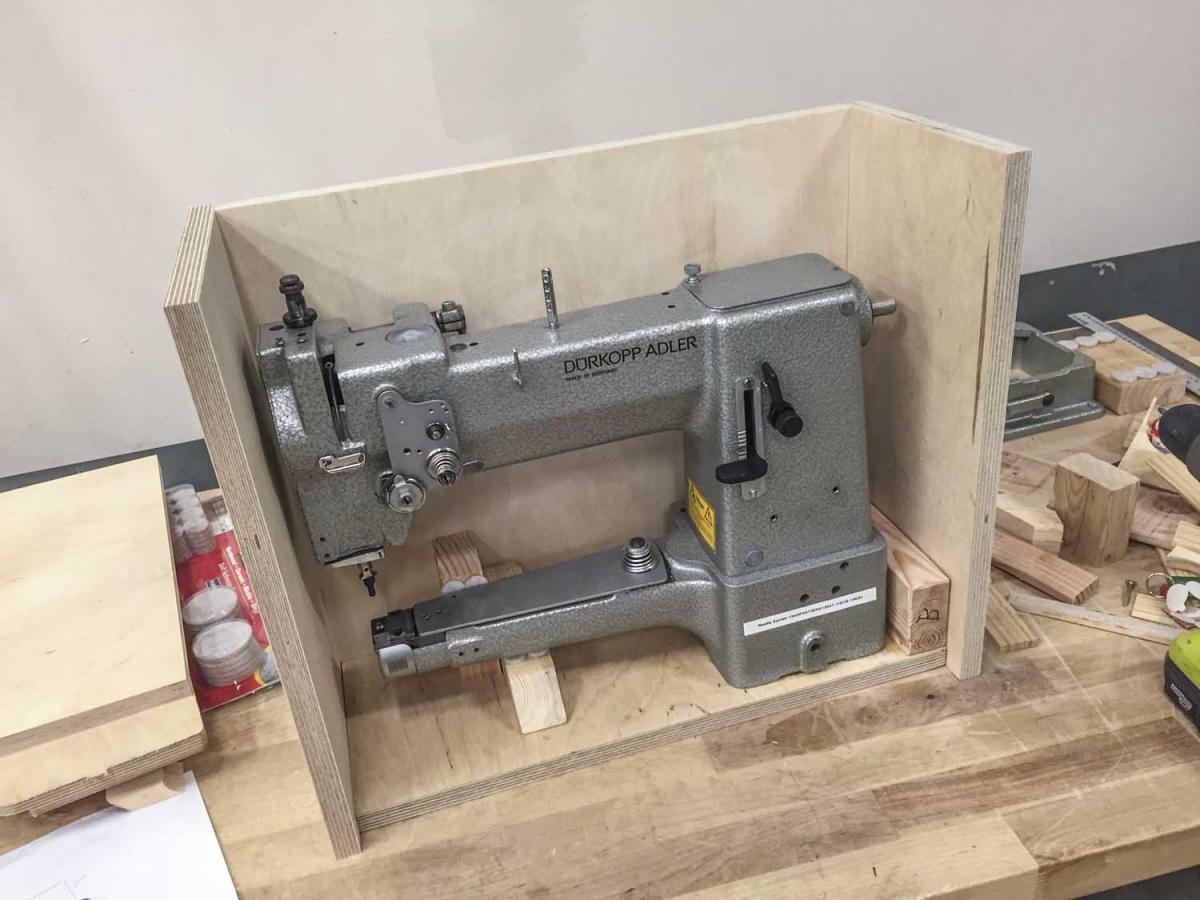
Show & Tell: Building A Shipping Crate For An Adler 69
Uwe replied to Uwe's topic in Leather Sewing Machines
Now I have trouble falling asleep because I'm like a kid who just got his allowance Options in no particular order: 1. Buy about 100 needles+awls and a set of cast-offs for the Puritan (and then one or two Starbucks drinks with the leftover money) 2. Buy a used Juki 1341, or a new clone thereof 3. Sell my Puritan too and buy a new Adler 869 4. Sell my Puritan and my Adler 205 and buy a new Adler 969 5. Fund my "No-Curb" rescue shelter for abandoned industrial sewing machines for another two years. -
Does Anyone Know Anything About Sewpro 1341? Sewpro Usa?
Uwe replied to suznu's topic in Leather Sewing Machines
Did you ever get to visit Sergey and check out his shop and product line? That 1341 looks like a nice machine! -
Show & Tell: Building A Shipping Crate For An Adler 69
Uwe replied to Uwe's topic in Leather Sewing Machines
Yup, it was kind of hard to let this one go. -
Show & Tell: Building A Shipping Crate For An Adler 69
Uwe replied to Uwe's topic in Leather Sewing Machines
I normally use that plywood to make my tabletops, mainly because the edge looks super nice and the baltic birch has very few internal voids as I carve the cutouts etc. I had trunk full of this stuff after my last trip to Toledo Plywood. The machine is in the hands of UPS now and I wish her safe travels to the east coast. Here are few more pictures of the final crating: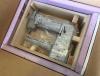

-
I stumbled across this ebay listing of a Adler 30-70 with a wicked chain drive and geared motor setup and wanted to share some pictures to preserve them in the LW archives. If the needle won't penetrate the material, it certainly won't be because of a weak motor or slipping belt! The price seems rather optimistic.
-
Wow, it sure makes a beautiful stitch!
-
Show & Tell: Building A Shipping Crate For An Adler 69
Uwe posted a topic in Leather Sewing Machines
I didn't sleep all that well after I realized that I had to ship my precious Durkopp Adler 69. I spent six hours today building a custom shipping crate, hoping it will greatly increase chances of survival while at the mercy of UPS or USPS. The crate is intended to keep the machine from moving around inside the box during shipment no matter which side is up, and to keep fragile bits away from hard walls in case it falls off the conveyor belt. The wooden crate will go inside a sturdy cardboard box with thick foam board pads all around. The small parts and accessories will go into a second box with regular bubble-wrap type packaging. There are no guarantees, only improved chances. Perhaps I'll be able to update this post with photos of what it looked like after arriving.