Uwe
-
Posts
2,221 -
Joined
-
Last visited
Content Type
Profiles
Forums
Events
Blogs
Gallery
Store
Everything posted by Uwe
-
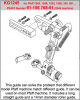
Hi Rick, Chances are good that the guide will fit a generation or two back from the current Pfaff 335. I don't have access to older Pfaff 335's to verify but images I found online indicate that the older machines have needle guard mounting holes in the same location as the current models. If you watch the installation video and compare the back of your machine to the one in the video, you should be able to tell if you have the same mounting holes. You probably won't have to deal with the back cover plate issue, since the older machines are more "open" in the back. In any case, if you buy one and it doesn't fit your machine, you can return it.
-
Just testing to see if I can embed a video directly into a post. Did not work on Chrome, testing firefox now. https://youtu.be/dfHOL9ZeDWI <iframe width="854" height="510" src="https://www.youtube.com/embed/dfHOL9ZeDWI" frameborder="0" allowfullscreen></iframe> Testing reply mode <iframe width="854" height="510" src="https://www.youtube.com/embed/dfHOL9ZeDWI" frameborder="0" allowfullscreen></iframe> https://youtu.be/dfHOL9ZeDWI <iframe width="854" height="510" src="https://www.youtube.com/embed/dfHOL9ZeDWI" frameborder="0" allowfullscreen></iframe> I was told it's a simple copy/paste, but it surely isn't working for me.
-
 I got an email from Yosemite this morning with a link to a video about their stable and saddlery shop. (youtube video ID: dfHOL9ZeDWI ) The red leather stitcher he uses looks and operates quite unusual - does anybody know what kind of machine that is? At the 1:00 minute mark you can also see his other machine needs some adjustment - it skipped quite a few stitches!
 -
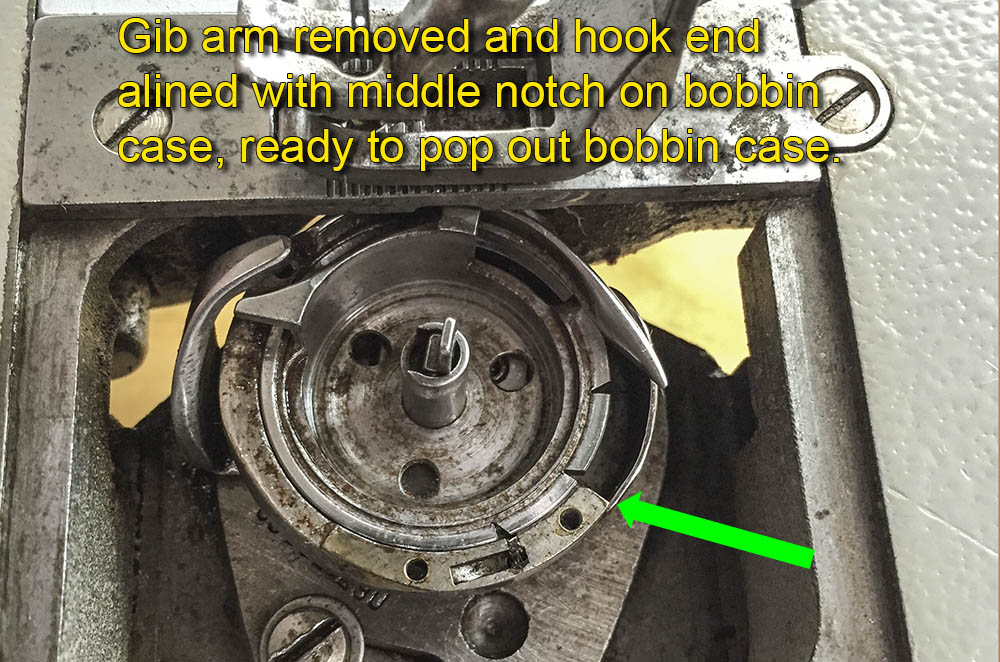
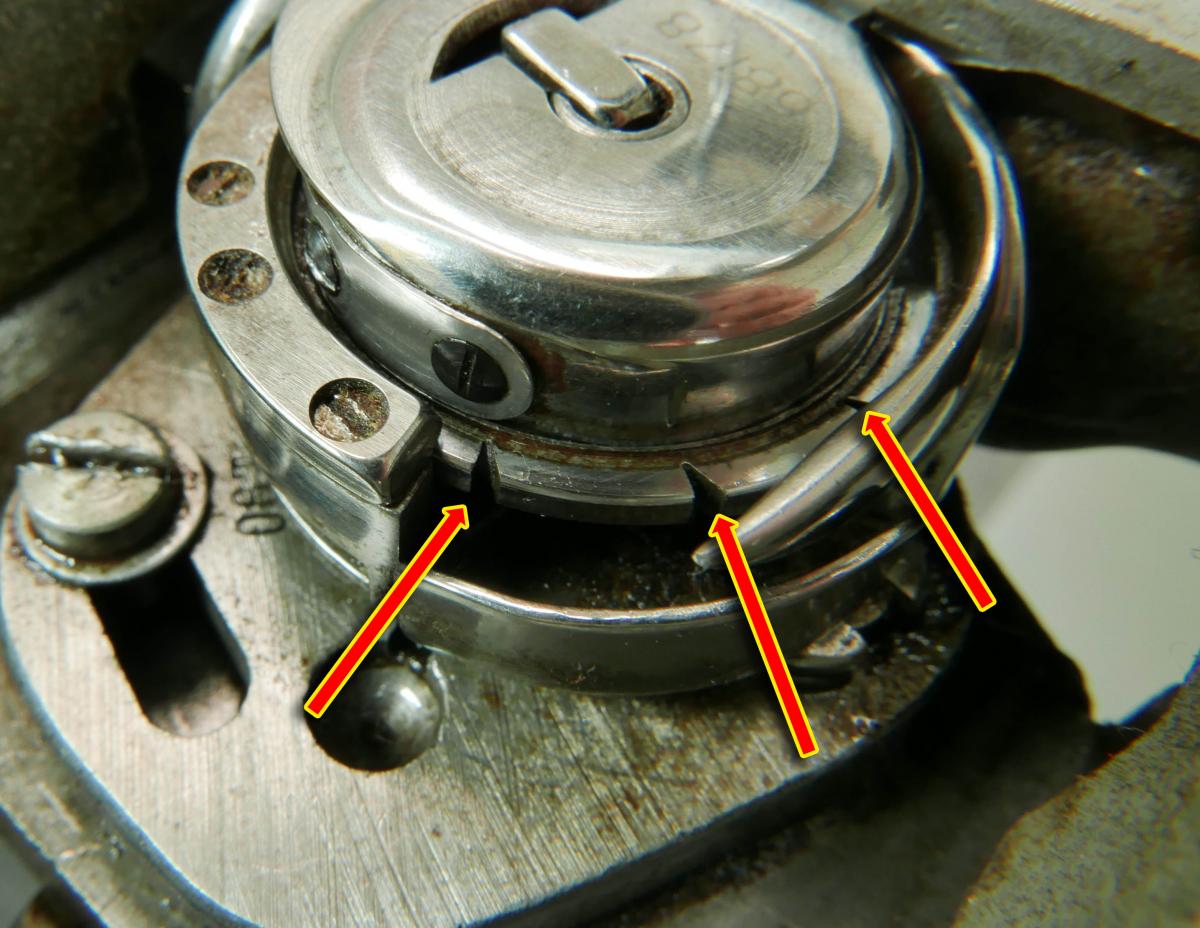
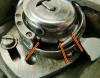
I tried it out and the bobbin case indeed popped out easily when aligned as shown in the picture. (The bobbin case needs a thorough cleaning!) I'm guessing the other two notches serve some other purpose for a different task. Thanks for everyone's input on this!

-
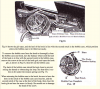
I finally found a reference to these bobbin case notches in a Singer 9W manual. Apparently they are used as a reference to line up the bobbin case in a certain position for removal. Here's a screen capture of the relevant portion:
-
New Dürkopp Adler 969 And 967 H Type Machines For X Heavy Work
Uwe replied to Trox's topic in Leather Sewing Machines
I appreciate old sewing machines designed and made by people who care about quality. Sewing machines are perhaps an exception in the industrial world because they are still usable and desirable after 50+ years. There is little else that endures like that in both usability and desirability. For daily use I want modern cars, airplanes, computers, phones, coffee machines, etc. Chinese manufacturing is quite capable of producing stupendous quality like no one else can right now, but only if the right people are in charge of design and run the manufacturing and quality control operation (my iPhone comes to mind - try making that in North America right now - it would cost over $5,000 and be ready in about five years.) If the wrong people run the operation you end up with a warehouse full of cracked-and-painted-over sewing machine castings, truckloads of 40-year-old occasionally frozen meat, dog food that kills dogs, and the like. I'm willing to spend more on a quality product, but then I'm one of those weird Europeans. Most U.S. americans want "a washing machine" or "a dishwasher" and they generally don't care how it works or how it's made as long as it's cheap and works for a while. You get what you ask for, and what you pay for. I'm glad Durkopp Adler created the 969 and I hope they sell a bunch of them. I also hope they work with manufacturers who deliver a quality product, regardless of where they are located. I want one just because it's so outrageous and shouldn't even exist. Alas, that USB port on the 969 will be pretty meaningless 50 years from now. -
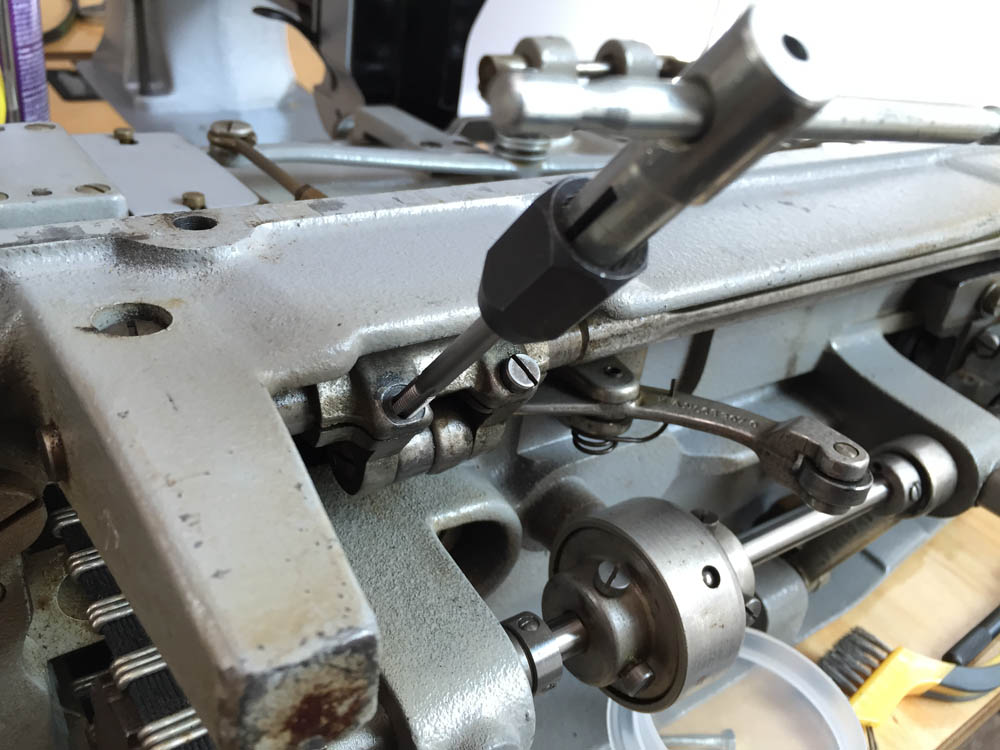
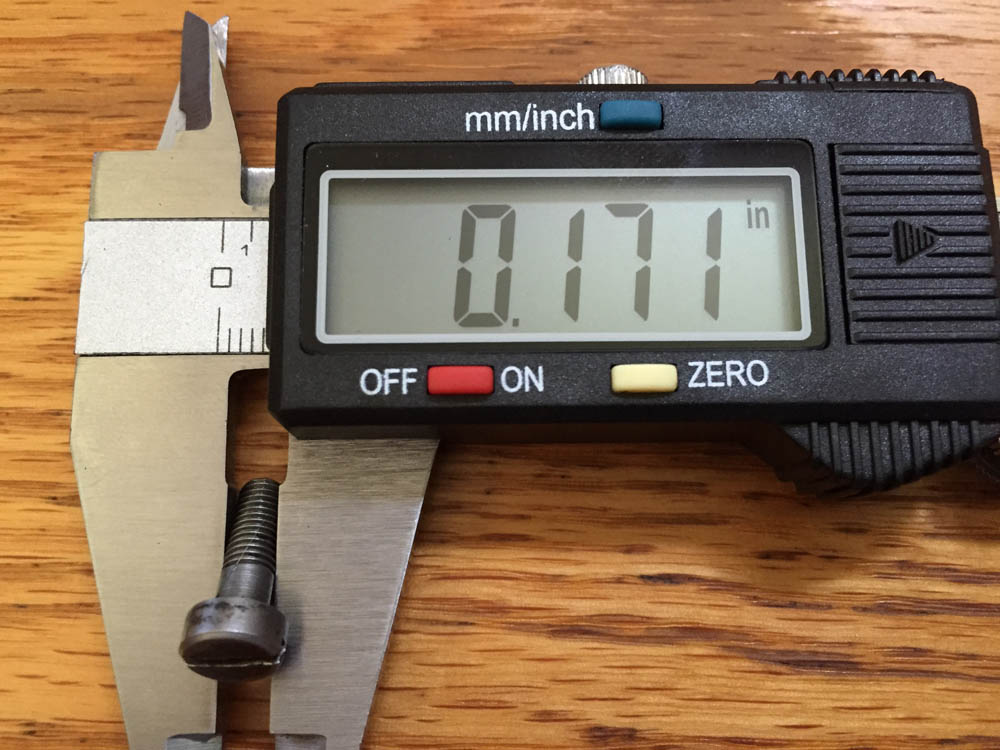
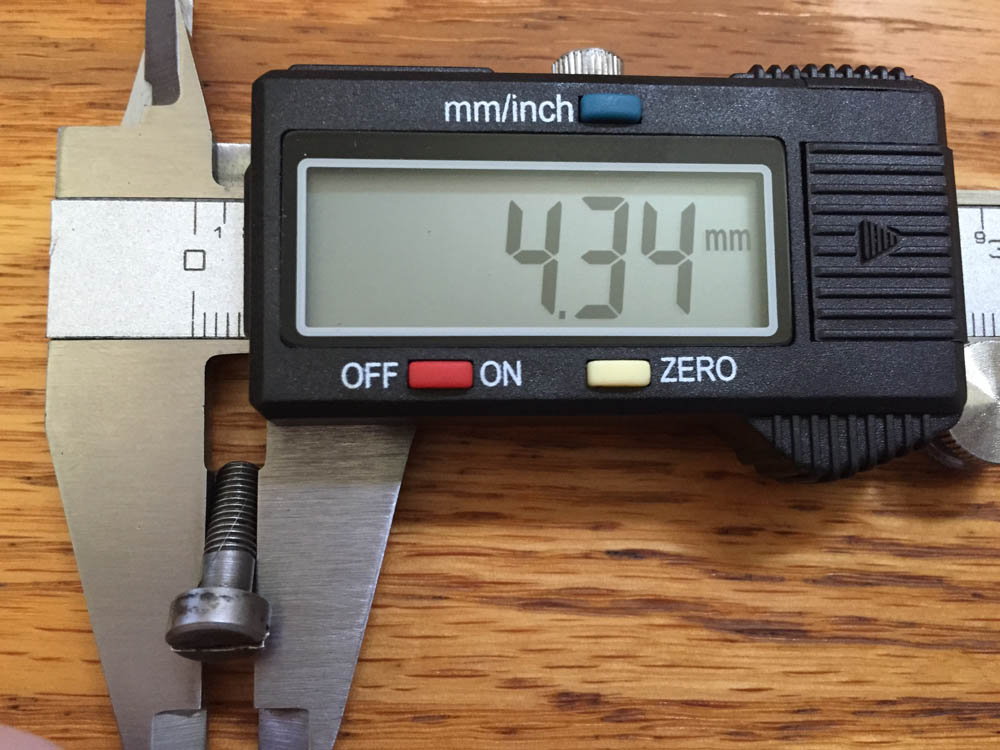
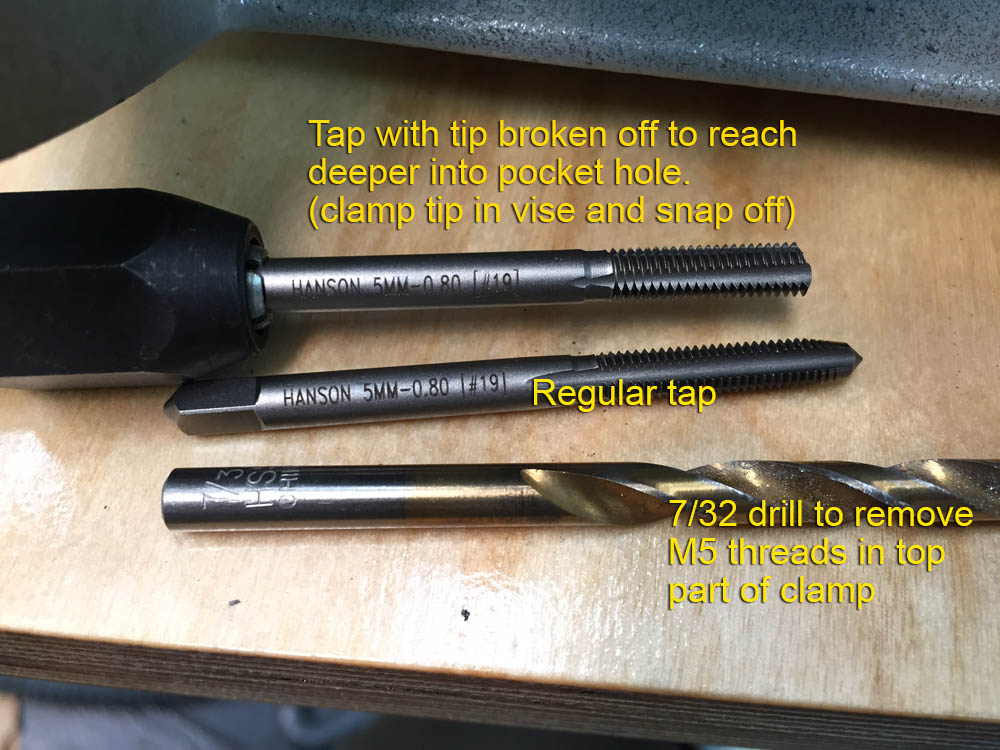
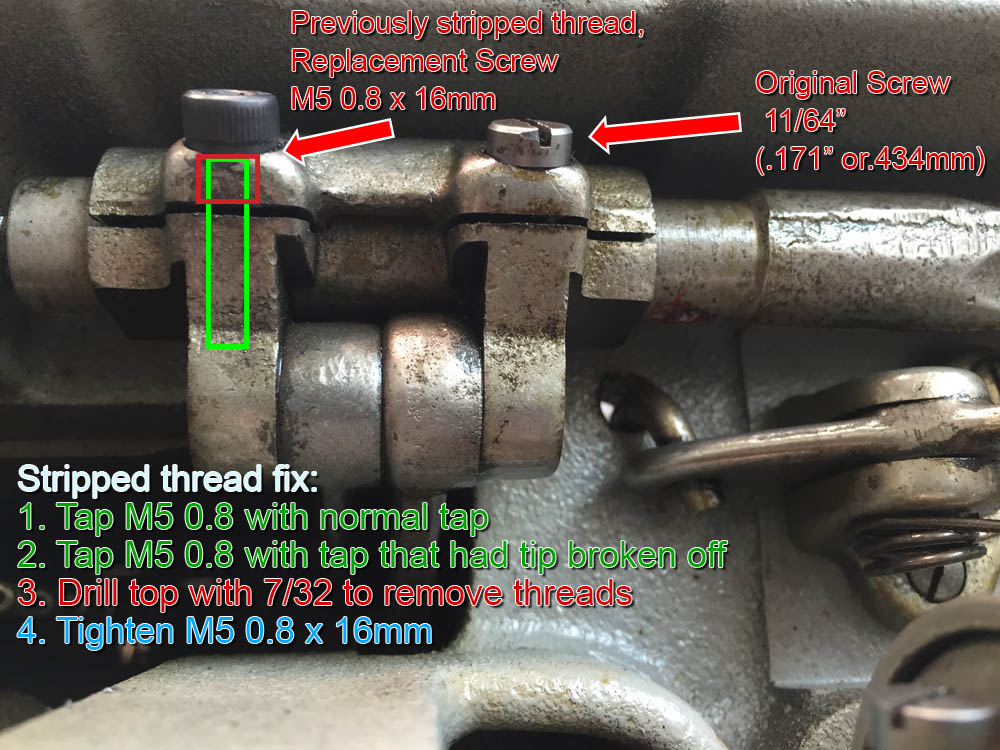
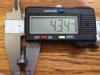
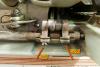
Thanks again for everybody's input on this! I fixed the stripped thread and I'm quite happy with how it turned out. The original screw was actually a 11/64" screw - a common sewing machine screw size but impossible to find at your local hardware store. I originally thought it was an M5, but I was mistaken. Since 11/64" is about 0.434mm, I decided to re-tap the hole with a 5mm M5-0.8 tap, and then remove the new threads in the top part of the clamp piece by re-drilling with a 7/32" drill bit. I did the tapping in two steps as suggested in a previous reply to get he full M5 thread as deep as possible into the blind pocket hole. The first tap is done with the regular tap bit, but the tip hits the bottom of the hole and it doesn't get to create a full-width thread on the entire length. The second tap pass using the bit with the broken-off tip uses the previous tapped threads to guide cleanly into the hole and then create a full threads to the bottom. I bought two identical M5-0.8 tap bits and purposely broke off the tip on one of them by clamping the tip in a vice and snapping it off. The tap bit tip (lol) broke quite cleanly. Luckily, I was able to do all this without having to take anything apart. The new screw has a solid feel and does its job of helping clamp down on the rod. I feel better now that two screws are doing that job instead of just one. I'm attaching a few annotated pictures that hopefully illustrate what I'm talking about.


-
How To Change A Feed Dog And Needle Plate On Durkopp Adler 205-370
Uwe replied to Uwe's topic in Leather Sewing Machines
Sorry Wiz, I don't know if needle plates and feed dogs are interchangeable between 205 and 441 machines and I don't have access to a 441 to verify. -
Some of the sewing machines Typical sells are copies/clones of other famous brands like Pfaff and Juki. The TW3-P335 is a Pfaff 335 copy/variation, the TW3-441 is a copy/variation on the Juki TSC-441. I can't place the GC2263. Out of the cylinder arm machines Typical sells, they neatly fit in the spectrum from light to very heavy duty with almost no overlap, at least as far as supported needle sizes go. The 335 class of machines is the lightest duty version of the trio, the 441 the heaviest duty version. Both 335 and 441 type machines are "popular" in the sense that many aftermarket manufacturers produce parts for them. Typical is basically a chinese manufacturer who produces a bunch of machines and does their own distribution/marketing/support. It seems to enjoy a good reputation, mostly in Europe. Typical has a fairly strong presence in Europe, and apparently has a sales office in North Africa, too. One specialty leather bag manufacturer/repair shop in my home town in Germany uses machines made by Typical, although I don't recall the exact models. None of the cylinder arm machines have really good commercially available flatbed table attachments available from what I can tell, at least not in the U.S.A. Some vendors sell attachment for the 441 type machines but they are are just poorly designed in my opinion and pain to attach/detach. Same for the Adler 205 class of machines. Some European suppliers/distributors are putting a little more effort into choosing/designing the tables and table attachments. Three nice examples I had bookmarked are an attachment for a 335 machine made by NTK, a table attachment for the Adler 205 class machine and a nice setup using an Adler 69-373 machine, both sold by Sieck. I made my own table attachment for my Adler 205 and It turned out quite nice. A good cylinder arm machine with a GOOD flatbed attachment will be your most versatile setup and I can't think of anything it won't be able to do that a plain flatbed machine with similar specifications can. Sometimes manufacturers make the same machine in flatbed and cylinder arm versions (e.g Pfaff 1245/335 and Durkopp Adler 204/205). Usually the flatbed version is slightly more heavy duty, since it's easier to package heavier duty hook components under the flatbed. The arm portion is usually identical. Your main problem may be to find a single machine that does both heavy leather exteriors and fine silky purse linings equally well, because many machines have a fairly narrow range of materials they can handle well. The three Typical cylinder arm machines have no overlap at all in their needle size specs (and thus thread size). You'd need all three to handle the full spectrum from very fine to heavy duty materials.
-
I made a how-to video on replacing the needle plate and feed dog on a Durkopp Adler 205-370. I made the video for a part I'm selling on eBay, but I figured the video might be useful for others who wonder how to take out the shuttle/hook assembly on that machine. You can watch the video on Youtube (If the link doesn't work, you can search Youtube for video ID: 5bayX4Ruw3A ). One of these days I will figure out how to embed a video in a forum post . . . In any case, enjoy the video if you like that sort of thing.
-
Thanks for the input folks! Re-tapping seems like the "proper" way to do it if I can access the hole without disassembling everything. The hacker in me is intrigued by the external clamping suggestion - definitely worth investigating. I'll do some tinkering and report back.
-
I noticed these notches on the bobbin basket on my new-to-me Adler 67. My Consew 225 has similar notches on bobbin basket. I previously assumed these were defects or damages of some sort. Now I'm wondering if the notches serve a purpose, but I can't think of one. Does anybody know if these notches are supposed to be there or if I should go shopping for a new bobbin basket?
-
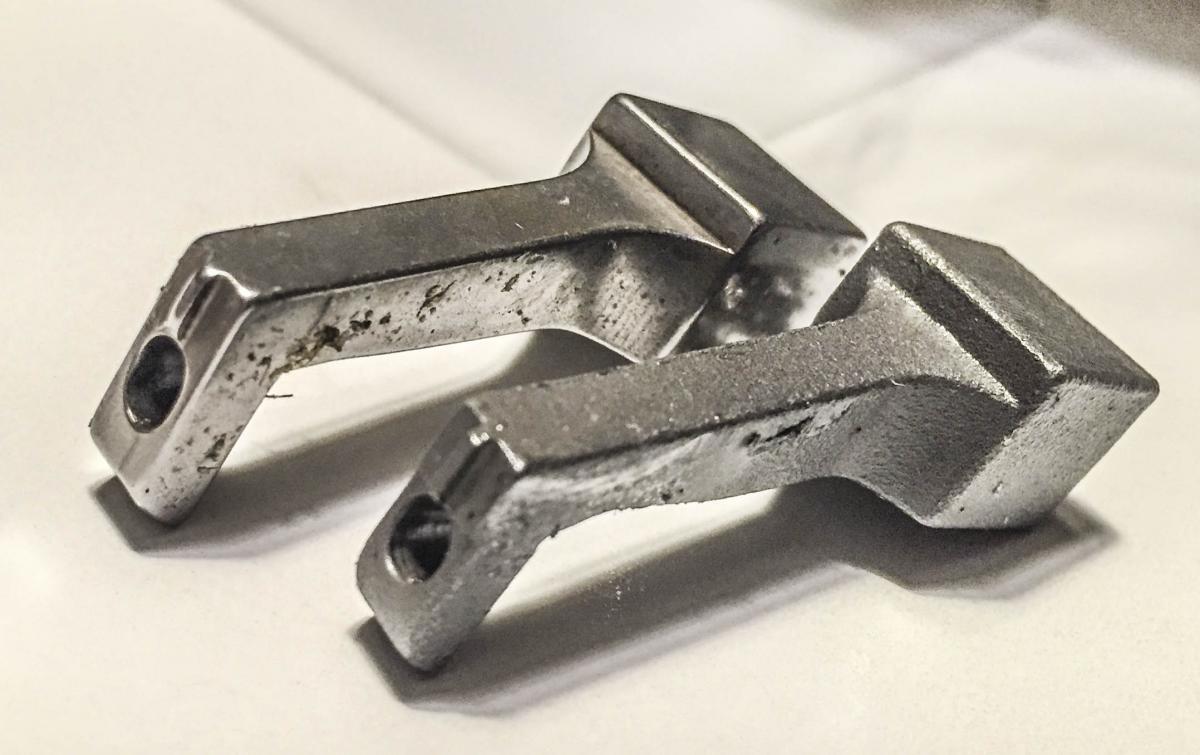
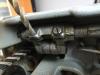
I picked up this nice Adler 67-GK373 yesterday and as I was going through it I notice a missing screw on a clamp piece. Turns out the screw is missing because the thread inside the hole is stripped. It's supposed to be an M5x12mm but with a finer pitch than the normal M5 (0.8) (Adler part number is 993 91 101 7, I believe). There's a second, identical screw that holds things together adequately for now and the machine actually works just fine, but I'd like to fix the thread and put that second screw back in place to keep it working fine. I'm sure I'm not the first one to encounter a stripped thread on a sewing machine. Replacing the actual clamp part is an option I suppose, but it seems to involve taking apart a good portion of interconnected parts in the machine, which I'm trying to avoid. I'm considering tapping the hole for a slightly bigger size screw or using one of the thread fix approaches (e.g. Loctite thread repair kit) If anybody has done this type of repair before, I'd love to hear what works best, as I'm trying not to screw this up (pun alert!) on a nice machine. Here's an annotated picture of the part that's in trouble:
-
New Dürkopp Adler 969 And 967 H Type Machines For X Heavy Work
Uwe replied to Trox's topic in Leather Sewing Machines
I had my first two sightings of a Durkopp Adler 969-ECO for sale in the wild this week, both run $12,650 - ouch! One is on Ebay and the other on the Weaver leather website. -
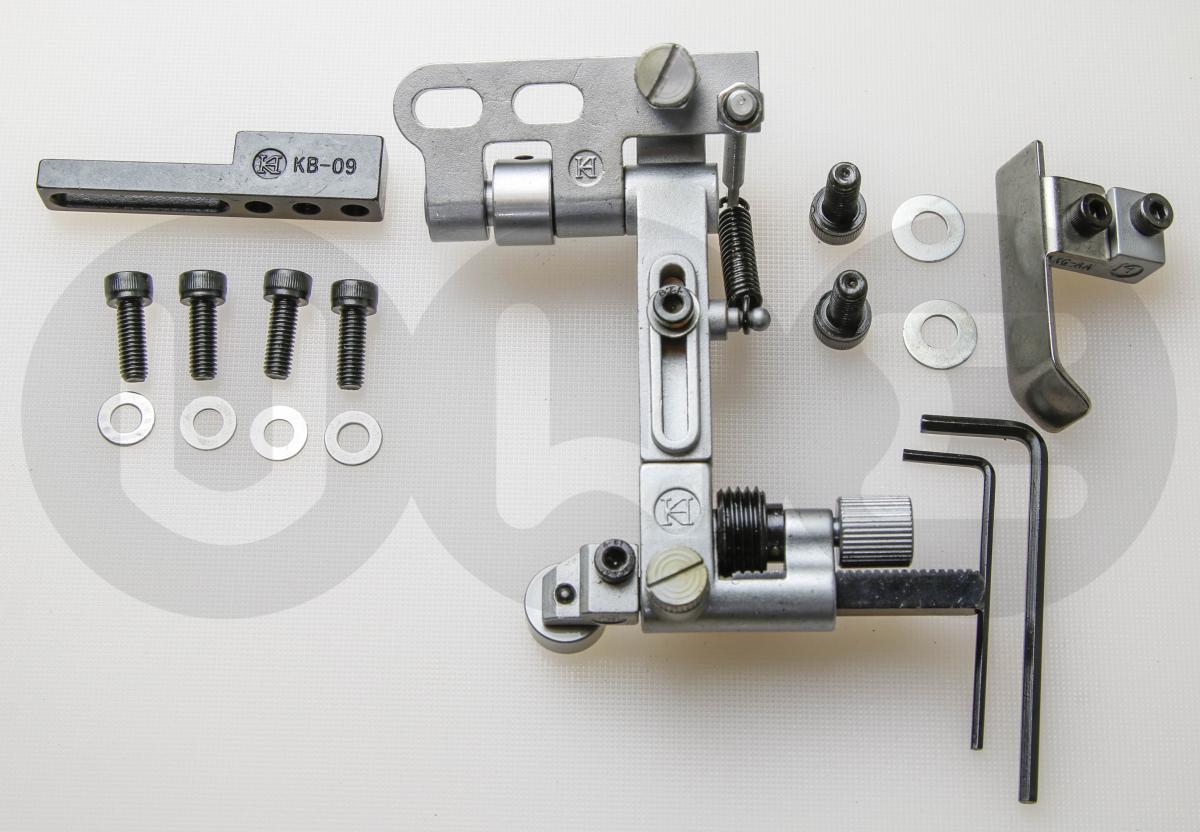
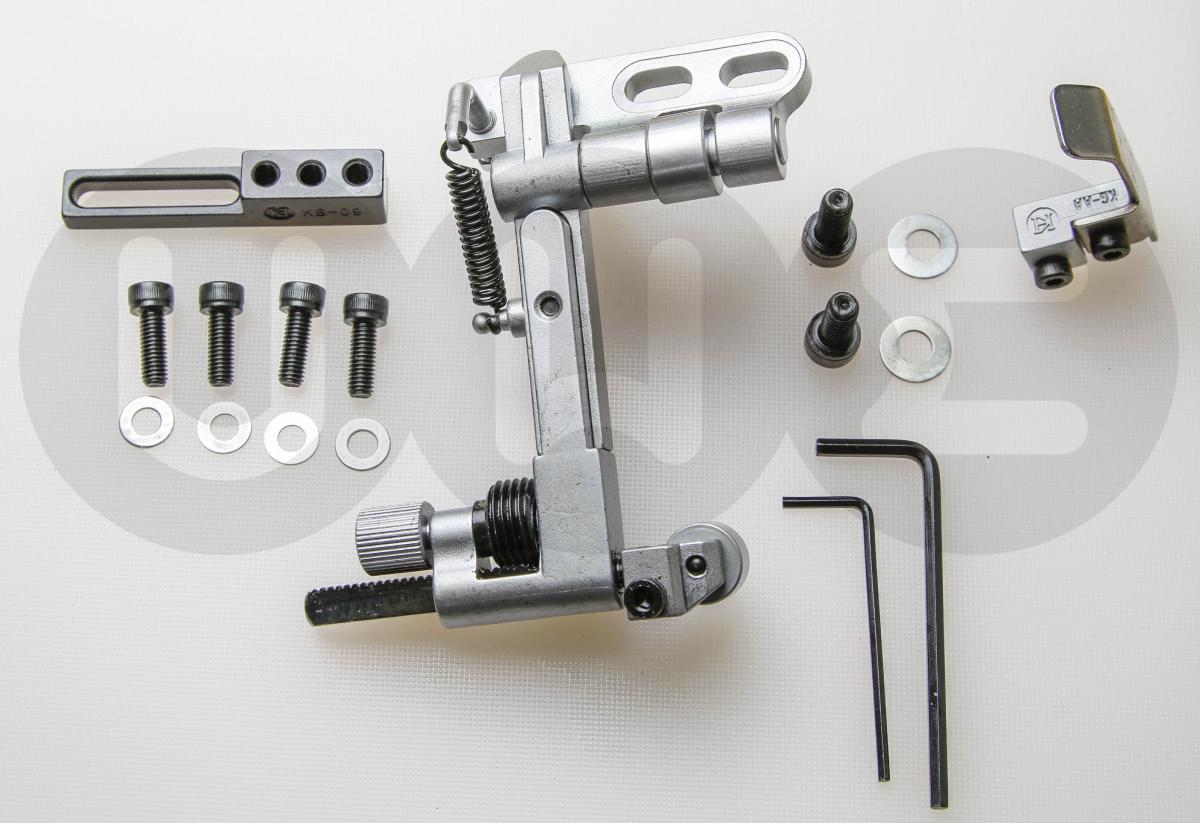
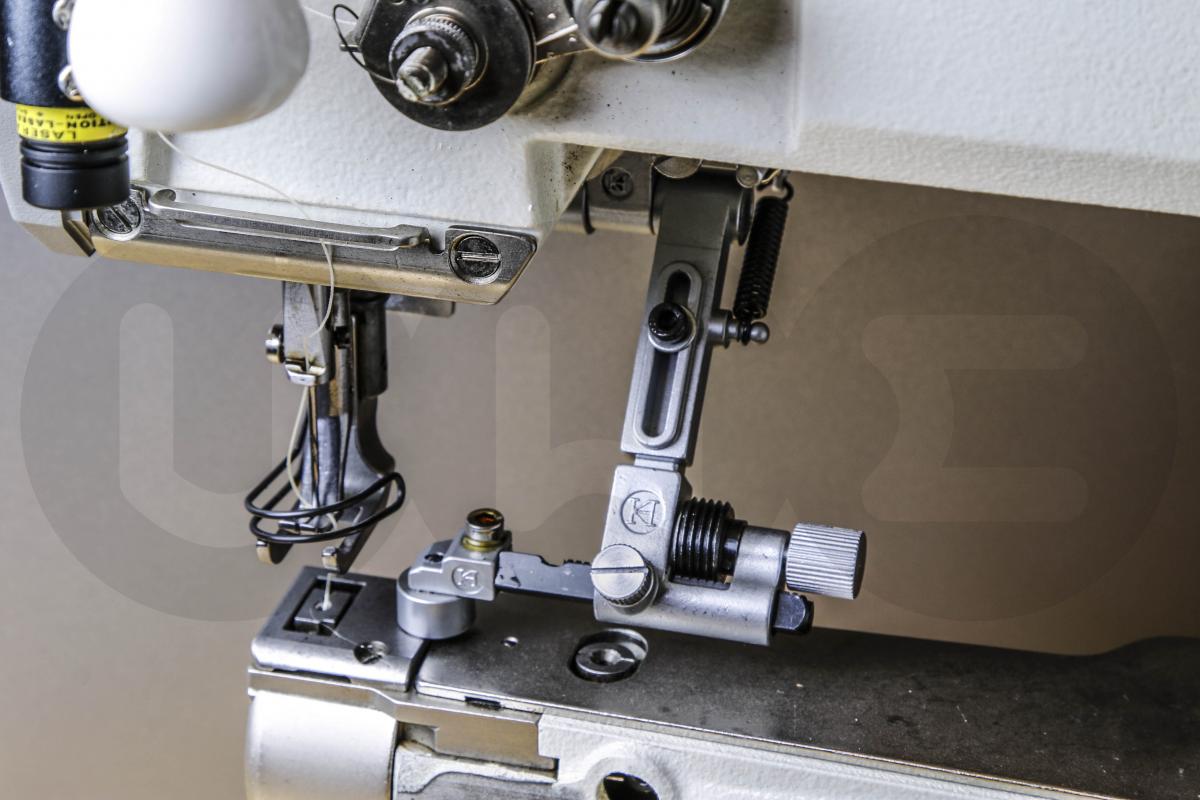
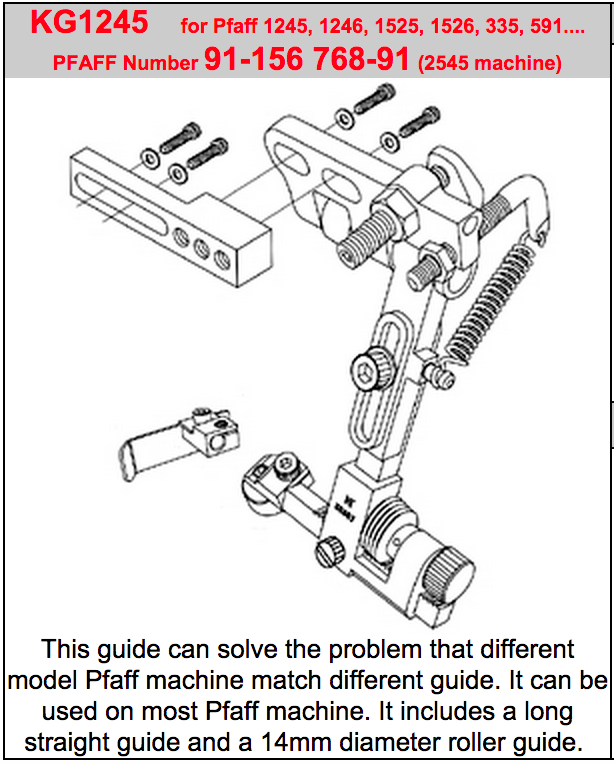
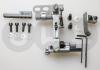
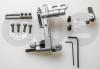
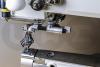
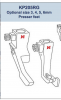
I ordered one of these for my machine from Kwok Hing a while back and got a few extras. This kit consists of the Kwok Hing KG1245 suspending edge guide with the matching KB09 adapter bracket for installing it on Pfaff 335, 1245, 1246, 1525, 1526, 335, 591, 2545, and a various other Pfaff machines. These edge guides are very nicely done and work well. I put my extras on Ebay and made a how-to video for installing this guide on a Pfaff 335. You can watch the video on Youtube. On modern (white) Pfaff 335's the back cover gets in the way and a small portion needs to be cut off. Not ideal, but not hard to do, either. Price for the kit is $75 for fellow LeatherWorkers ($85 in my Ebay store if you prefer) and includes free shipping within the U.S. I'm set up to take credit cards through my photography business. Send me a PM if you're interested or have questions.

-
Backstitch Looks Like Spaghetti On Underside.
Uwe replied to GaryNunn's topic in Leather Sewing Machines
It might make a difference depending on whether you go backwards first and then forward (e.g. at the beginning of the seam), or forward and then back (at the end of the seam). Reversing a machine is not exactly the same as turning the piece around stitching into the same holes, because when reversing you're only changing the direction of material feed, but you're not changing in which direction the knot is tied (which gives you the slightly diagonal thread orientation). The pictures don't look all that bad for the most part, really. I'm guessing some folks wished their machine backstitching looked that good. I often leave a longer thread dangling so that I can manually pull the last stitch tight or pull the knot into the hole. Also, the second time the needle goes through a hole is different because there's two threads in a knot already in that hole - it gets tight especially with thick thread and hard leather. The needle has to somehow go around (or through) that knot, and exactly how it does that is not so predictable or repeatable, even if your machine reverses perfectly into the same holes without thread. Getting a good looking backstitch by machine may be matter of luck to some degree even if it's perfectly adjusted. It also looks like you might be pulling the piece out before the last stitch was pulled tight. It's probably good practice to allow the thread take-up lever to go all the way past the top after a stitch (so it can tighten the knot) before you stop to pull out the piece. In my experience reversing with the machine is rarely "pretty." I tend to finish my seam ends by hand if I care what they look like (especially on the back side). Lastly, I found the sharp knife-edged leather point needles tend to partially cut the thread when stitching into holes again that already have thread in them - the sharp tip edges cut thread just as well as they cut leather. -
The problem with the many "Call Bob" answers to question is that they don't really contribute to the knowledge base on this forum and that they create a Toledo-centric view of Leatherworker.net, which is really a resource used worldwide. Once Bob retires, all the "Call Bob" answers will cease to be meaningful.
-
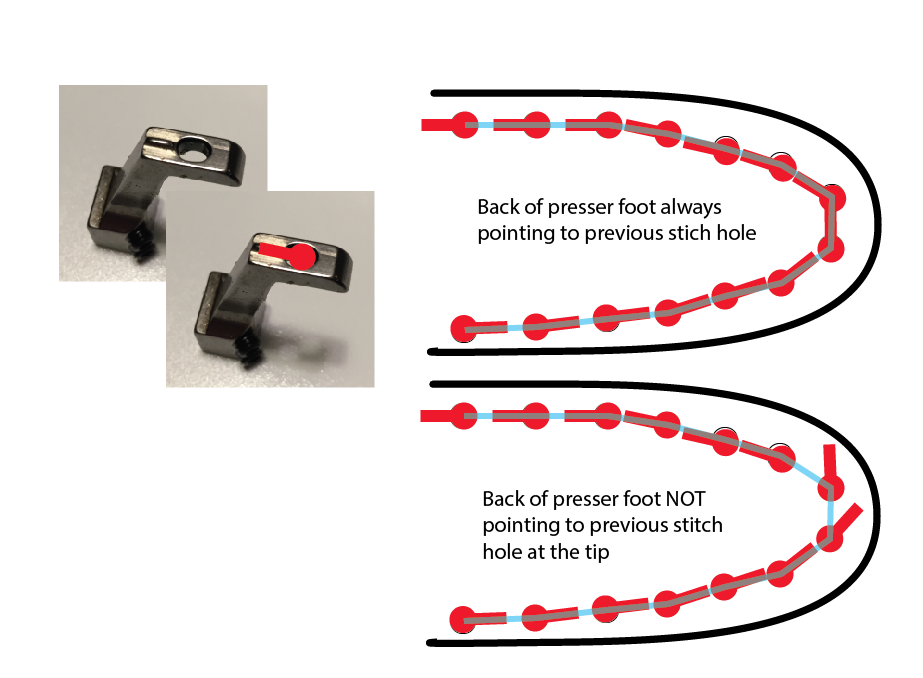
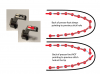
Forgive me for over-analyzing this, but I just had to figure out how this works and why the two belt tips turned out differently in my video. Normally, you want to turn your piece while the needle is in the DOWN position. For this belt tip application with a ridged presser foot you want to turn the piece when the needle is in the UP position, coming down for the next stitch hole. After looking at the video a few more times and thinking about how it works, it occurred to me that it's important to keep the back of the presser foot pointing toward the previous stitch hole. I didn't do that when I was sewing the red bridle tip (I turned the leather one hole too early, and too much), but I WAS doing that when I was sewing the tooling leather tip. Perhaps this little diagram helps illustrate what I am talking about:
-
Hmmm, let's try this again with a slightly different link: https://www.youtube.com/watch?v=I55V6FboCeE You can also just go to Youtube and find my channel by typing UweXY in the search box. The public videos will be listed there.
-
I was curious about the belt tip and corner thing and tried sewing a few sample belt tips. I don't normally do belts, and I don't claim to be an expert at this. It turns out the ridged harness feet can indeed sew a tight corner without leaving extra impressions, but it depends on how you move around the corner. I did the variations by accident, actually, and I'll have to watch my own video again to figure out how I did it, haha. Here's the video in glorious 1080P: https://youtu.be/I55V6FboCeE
-
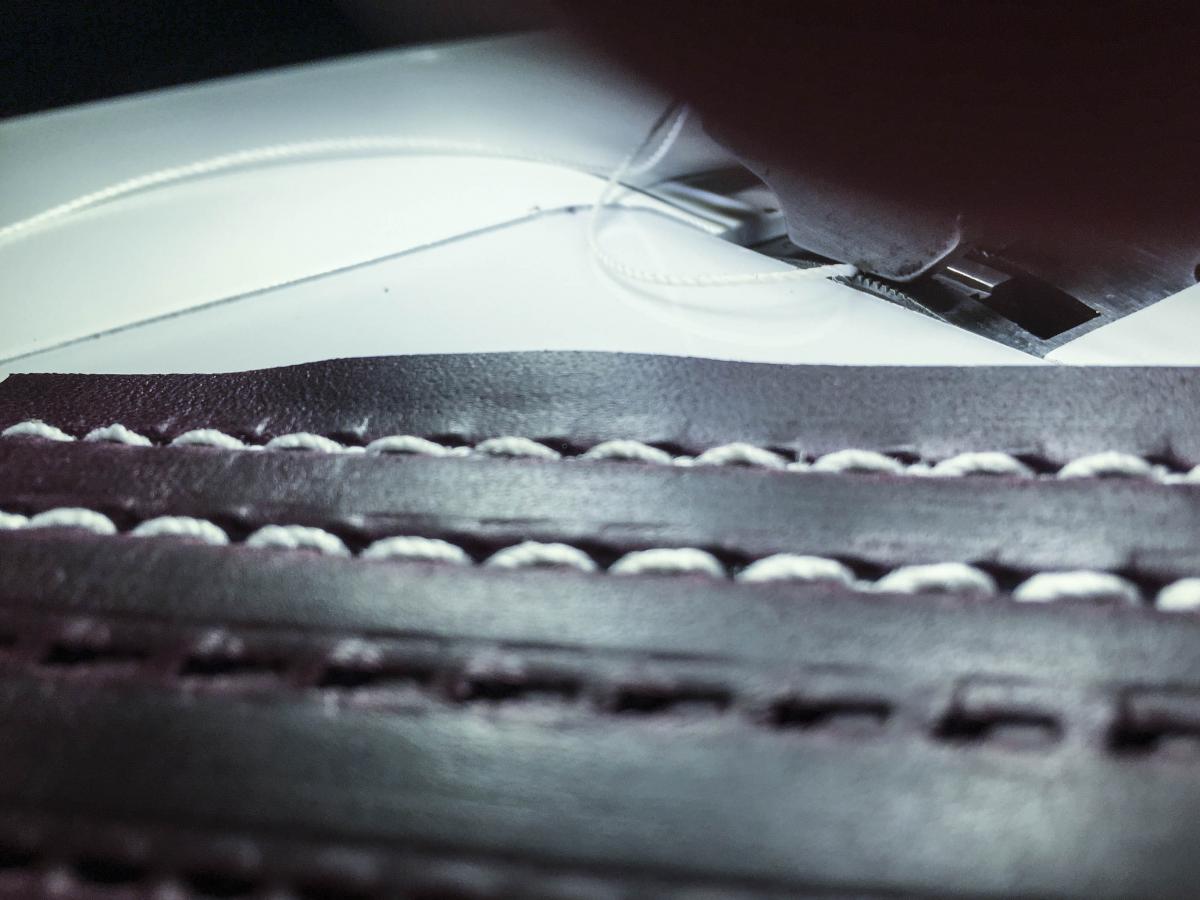
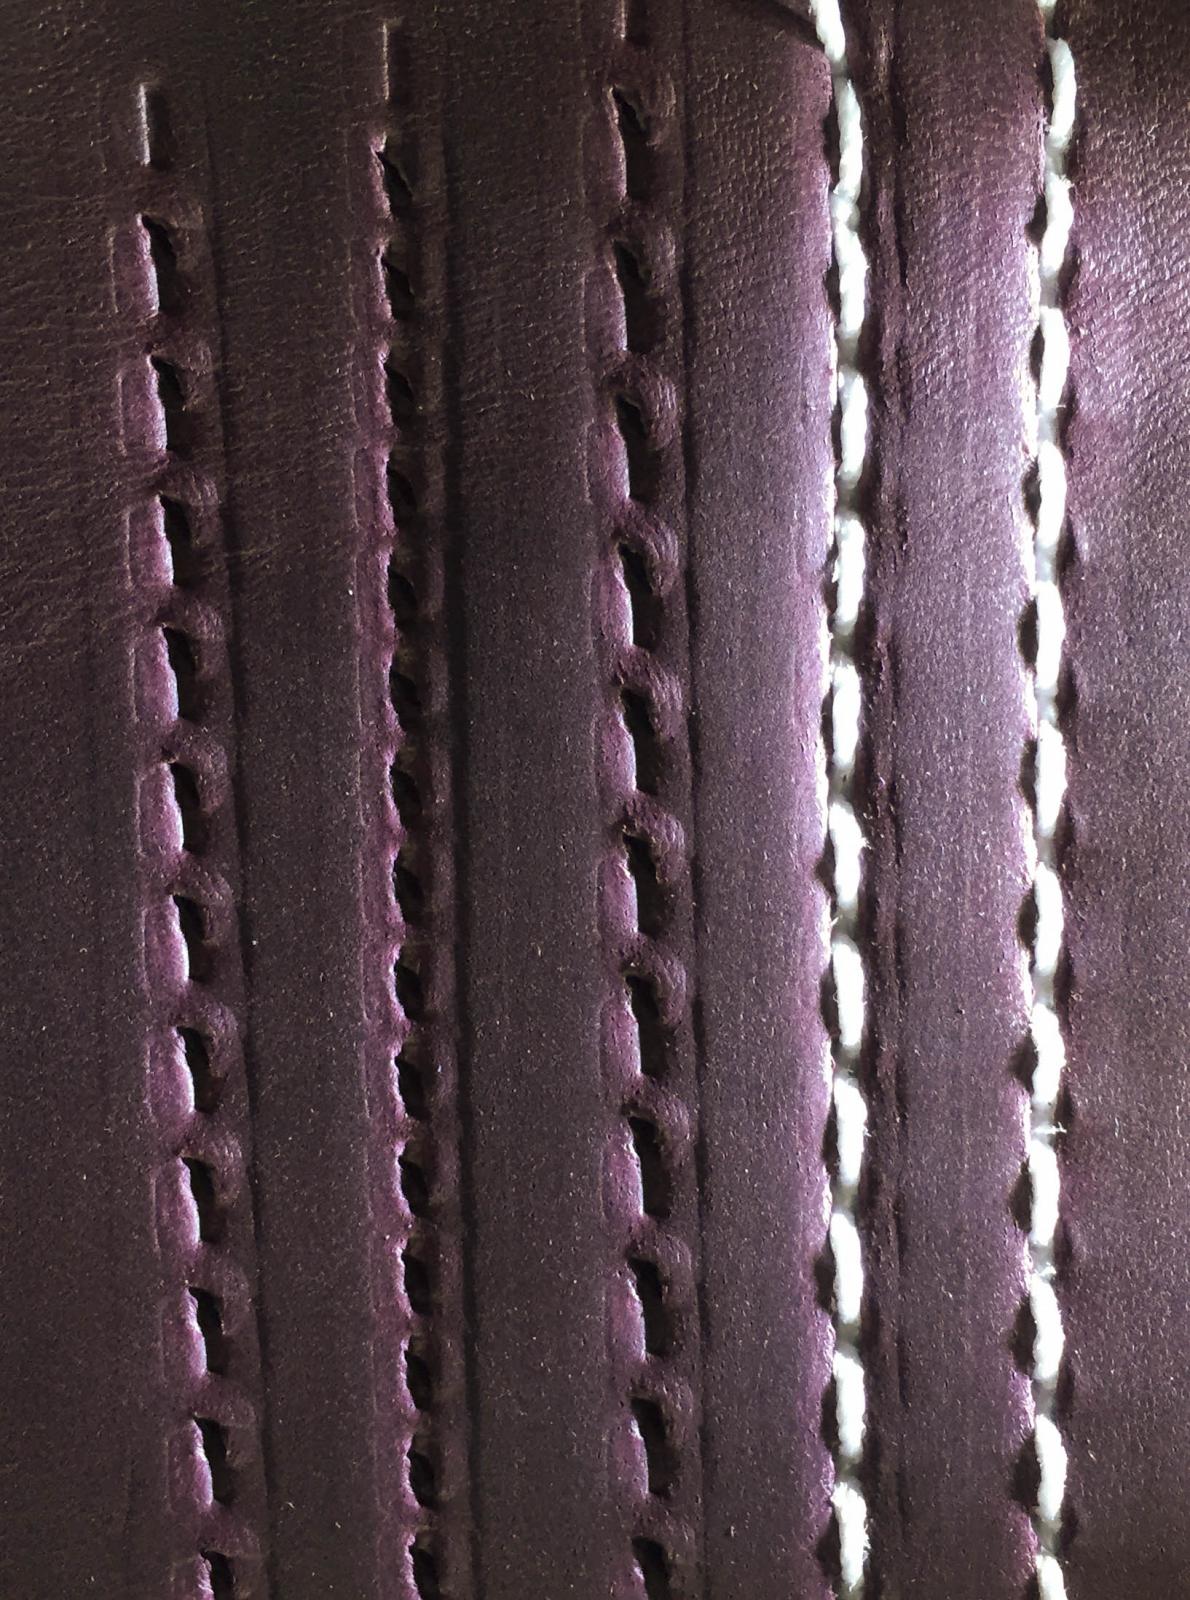
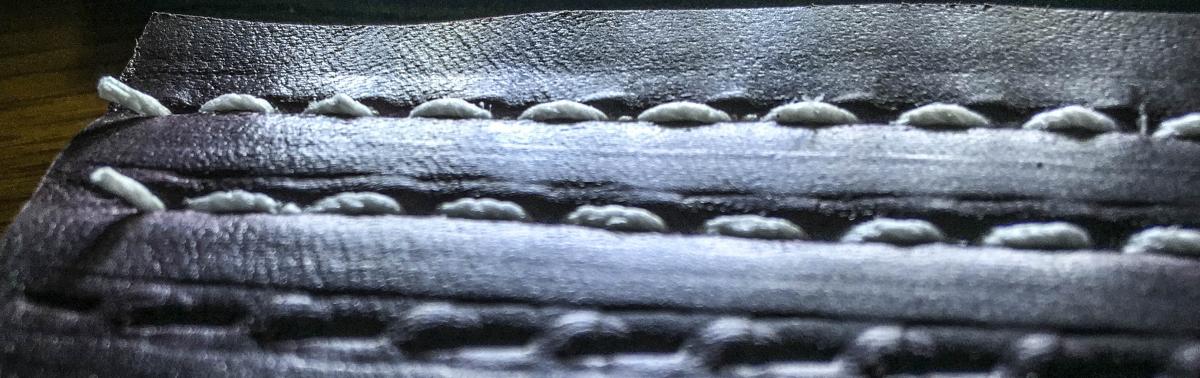
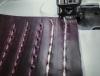
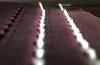
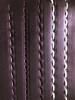
I'm glad to hear the edge guide worked out for you. I tried a few sample stitches with the different presser feet on my Adler 205. The difference is what I would call subtle, especially with 415 thread I have in my machine. I'm guessing smaller thread would lay deeper in the groove and not protrude above the leather at all. I can definitely feel the difference when I run my finger across the stitch line. The ridged stitch line feels considerably smoother. I'm not sure the pictures I took do the difference justice. In the pictures, the right (or top)-most stitch line is done with my regular presser foot without the ridge at the bottom. All the other stitch lines are done with the ridged harness presser foot from Weaver, some without thread and different stitch lengths so you can see the groove impression the ridge makes. The leather is two layers of 6oz Horween Cavalier.


-
Ebay is your friend if you want options for sourcing sewing related items like bobbins and such. Some folks are more comfortable with a phone call, and buying things without ever seeing them. If you're going to tinker with the machine and do your own work, a good manual is essential. The best ones I came across for the 225 are the original Consew 225 Manual and the Navy repair manual USNavySinger111WConsew225REPAIR.pdf for the 225 class of machines. Here's a handy parts chart for the Consew 225: 225 parts.pdf
-
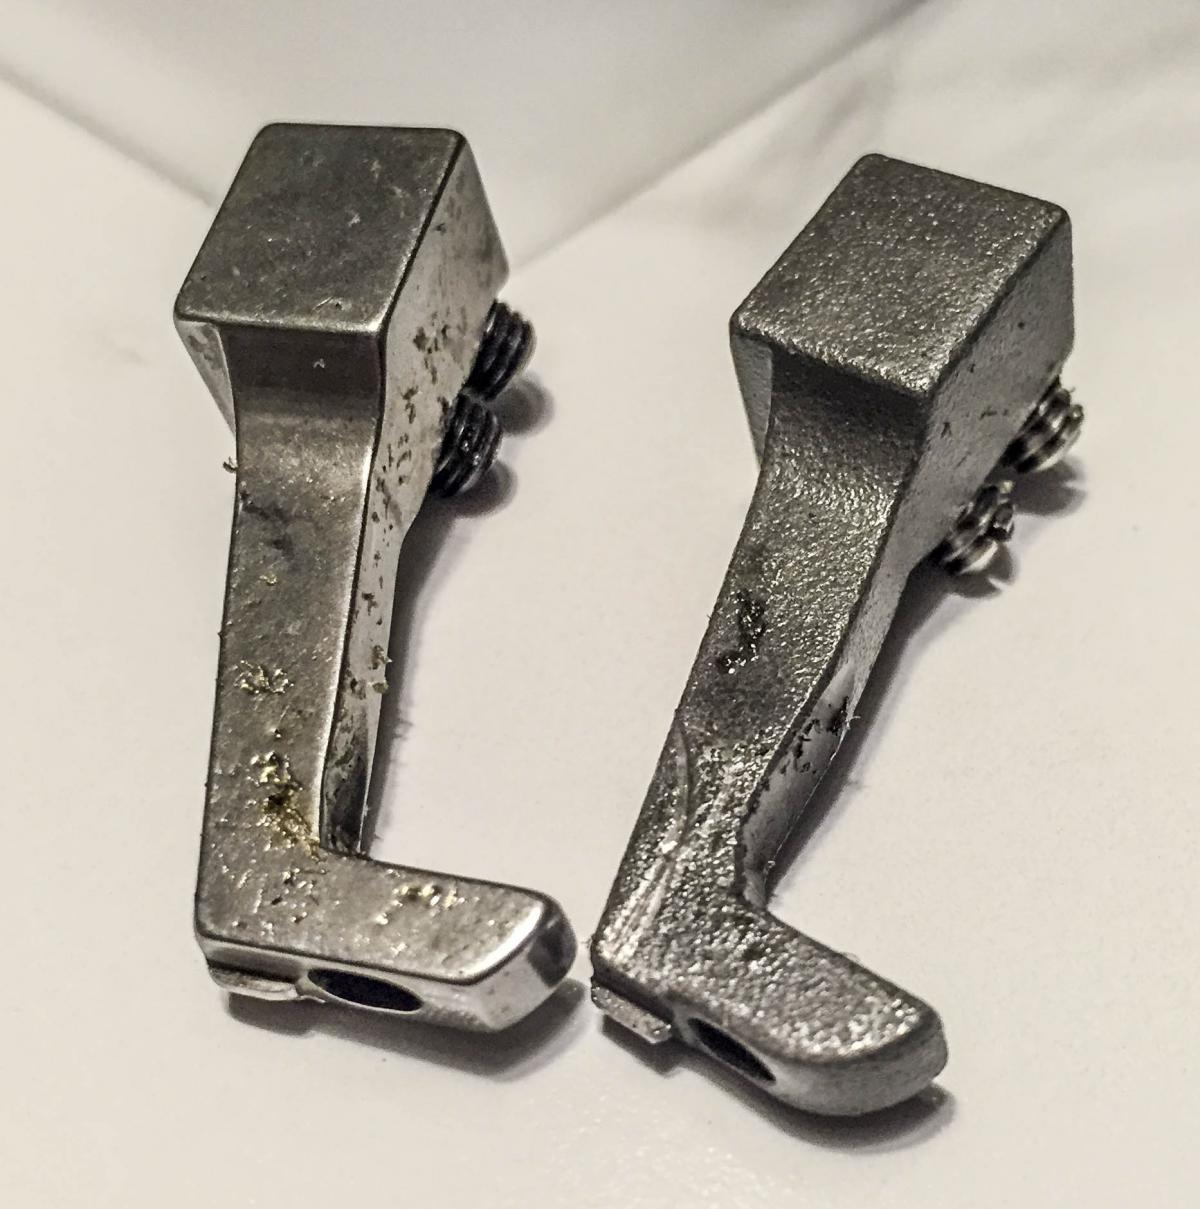
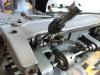
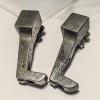
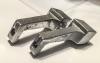
Getting your stitches to perfectly align with a groove you cut ahead of time with a separate tool may be very tricky and take a lot of practice. The point of the groove is generally to have the thread not lay on top of the leather where it may get rubbed and wear more quickly. The thread laying in a groove also looks a little cleaner. I have presser feet for my Adler 205 that have a ridge at the bottom which makes a groove impression (not a cut) in the leather as you sew, and the groove is always perfectly aligned with the stitches and the thread that lies in the groove. Here are some pictures of my ridged presser feet ( One from Toledo Bob, the other from Weaver Leather, both are narrow harness feet). There are also presser feet with a slit in the front which may make it easier to line up the stitches with an existing, pre-cut groove. This one made by Kwok Hing also has a built-in guide to follow the material edge:
-
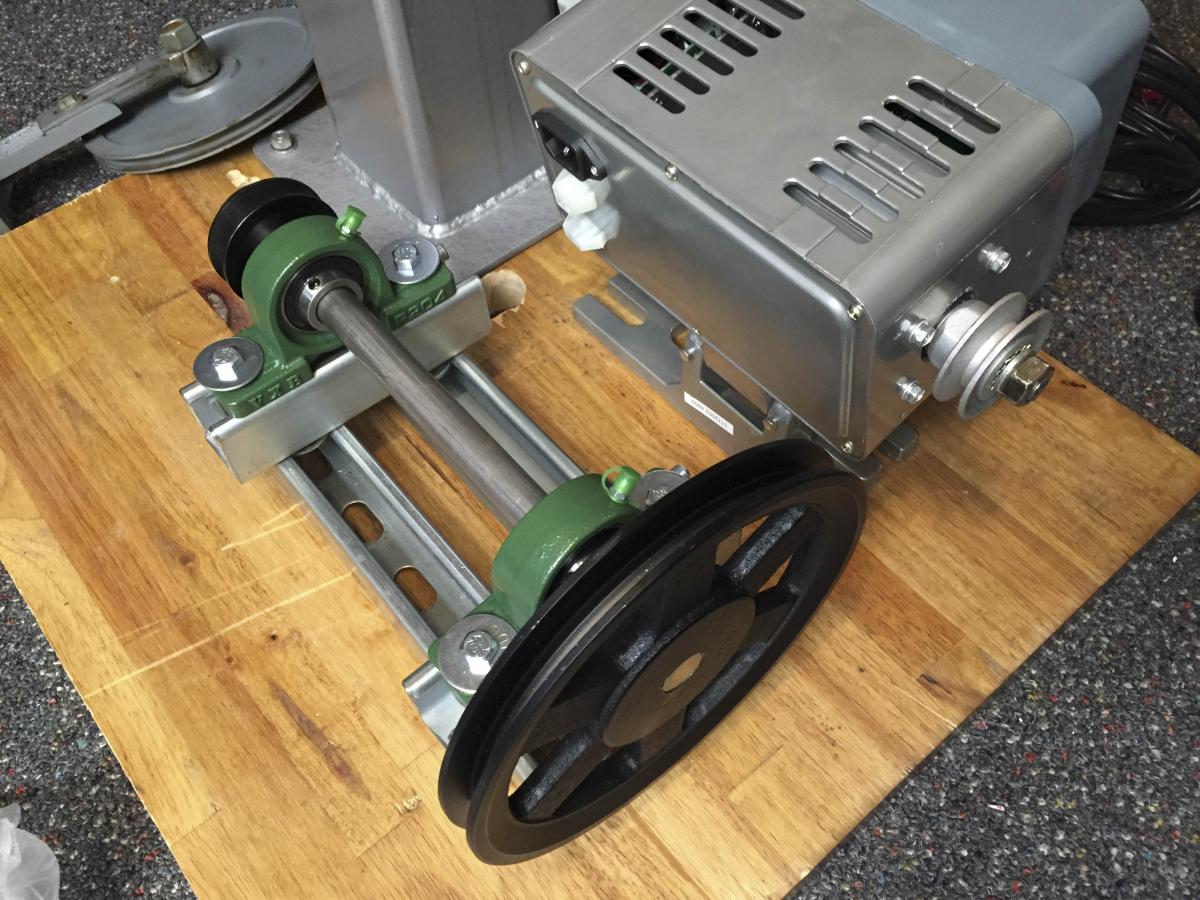
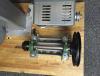
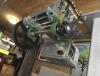
SARK9 - those are super nice speed reducers you made - well done! I made a speed reducer similar to DannyGray for my Adler 205. It works well and no machining required, but the SARK9 version looks way nicer and is much more compact and easier to adjust. Alas, my particular configuration of the stand did not lend itself to using the compact version the machine came with when I switched to a servo motor. Here are some pictures of my speed reducer, made from parts sourced on Amazon.com and my local Home Depot:

-
Looking For Advise On The Aftermarket Foot Sets For Pfaff 335
Uwe replied to DrmCa's topic in Leather Sewing Machines
The end user should not be in charge of quality control. Parts with oval holes that should be round should never leave the factory.