-
Posts
240 -
Joined
-
Last visited
Content Type
Profiles
Forums
Events
Blogs
Gallery
Store
Everything posted by Instinctive
-
I just worked out a pattern for this. https://wallaceriverleather.wordpress.com/2017/04/03/outside-in-wallet/ If that is what you were looking for, I can send you a PDF file of the pattern to print.
-
I have had the original wooden version (link #2) that was made in California for about 40 years. It still works very well.
-
Photoshop Express will give you good editing and enhancing/correcting capabilities.
-

Samsung J3 case
Instinctive replied to MartinHrcka's topic in Purses, Wallets, Belts and Miscellaneous Pocket Items
Very nice. Can I ask how much extra you added to the width of the phone? -
I like the old hardware. Can you show us a picture of Barney?
-

Scout carry sheath
Instinctive replied to battlemunky's topic in Gun Holsters, Rifle Slings and Knife Sheathes
Here is a picture of the chisel and a sample piece I was recently playing with. Holes are chiseled on the back exactly the same way. In this case I was opening the hole a bit with a thin round awl after both sides were punched. Total leather thickness is 12mm. My chisel tines are 8mm long. -

Scout carry sheath
Instinctive replied to battlemunky's topic in Gun Holsters, Rifle Slings and Knife Sheathes
That right but a lacing chisel gives you a '-' and I find that works perfectly with this heavy leather. You don't need a '/'. See my next post. -

Scout carry sheath
Instinctive replied to battlemunky's topic in Gun Holsters, Rifle Slings and Knife Sheathes
2 mm (3/32") lacing chisel. Really sharp and well honed. -

Scout carry sheath
Instinctive replied to battlemunky's topic in Gun Holsters, Rifle Slings and Knife Sheathes
I use really good 3/32" lacing chisels to punch holes from both sides to meet in the middle. I have been consistently able to do this with very good results with a total thickness up to 30oz. My process is: Everything is glued first and clamped over night. Sand the edged with a drum sander. Groove both sides 3/16" from the edge. Use a 1, 2 and 3 prong 3/32 chisel set to punch holes down one side. Use a stitching awl to punch through the first start point hole for the back side and then punch the holes on the back side. I use .045 (1.1mm) thread to saddle stitch. I keep the awl handy to open any holes that may need it. Slow, patent chisel work is key to making this work. This is a typical result. -
Not everyone is going to be your customer. 99.9% of the world will never know the difference between a crap piece of leather and good piece of leather, or the difference between machine stitched and hand stitched. Premium pricing does not come from "hand made". So what are they buying? It has been my experience that those that are buying a thing simply to hold their gun (or money, knife, etc.) mostly could care less about what kind of leather, burnished edges, hand stitching, etc. They just want to get the thing out of their hands and into something to hold it and don't care about what others think about it. They will most likely talk about what a "great deal" they got, not how great it looks, the quality, etc. Most likely not your customer unless you can (and want to) provide it. I believe that people buy hand worked leather not because of what it does, but because of how it makes them feel when they are using it and wearing it and, more importantly, what other people say about when they see it. That is the value you need to need to deliver to the customer to command premium, hand worked, pricing. A Colt Peacemaker is like any other Peacemaker unless you put a fancy handle on it, chrome it or put it in a really nice holster. One of the great questions I have had asked of me by a sales trainer years ago was "Why, given all the options available to me today, would I want to buy from you"? There will always be something made cheaper by somebody, somewhere. Don't sell a $100 holster. Deliver a $100 feeling that will last your customer a lifetime. Those that understand that, will pay for it.
-
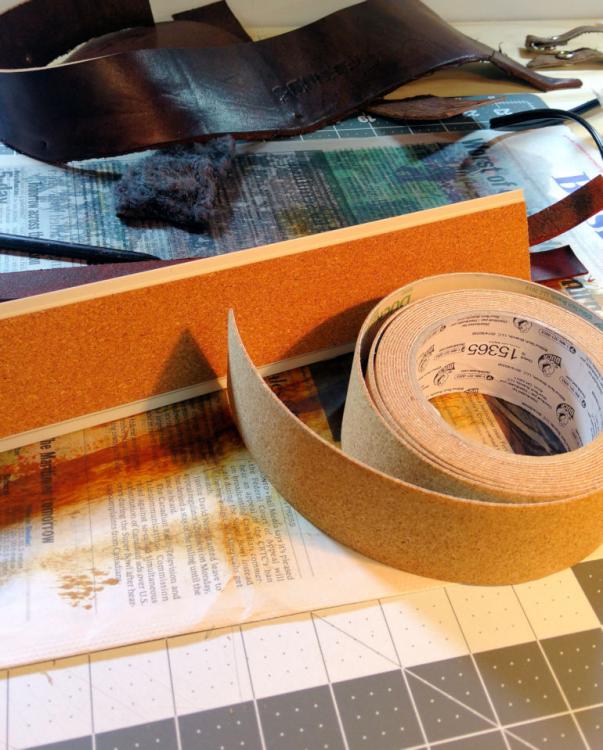
In my quest to keep some of my favorite straight edges from sliding around, I found Duck Cork Tape. Very thin and it works great. Who knew.
-
I have had a 45mm Fiskar for about 30 years that has worked really well. Recently purchased a pack of 10 blades off ebay for about $5 and they work just as well as the brand name blades I was buying.
-

come help , experts in painting and dying
Instinctive replied to Katlyn4jc's topic in How Do I Do That?
They are very permanent, oil based paints. I have not used it on leather but just tried on a piece of unfinished veg tan and it wrote on it without running. I suspect sealed leather will be best then seal over top. As with all new technique, experiment to be sure. -

come help , experts in painting and dying
Instinctive replied to Katlyn4jc's topic in How Do I Do That?
You might want to try the Pilot paint maker's with a super fine point. https://is.gd/fSIvue I've had one on my archery tackle box for years to number my arrows. -
Here's mine. I think this is it's 40th anniversary. I still have it (retired now). I got into because I didn't want to take a language class in high school so went to art class. Mrs. Wallace was multi-talented include some leather and I learned the basic from her. Got better and started small business which I retired from a few years later to focus on work in the real world (I'm an engineer). Packed away all of my tools for about 25 years then sold my last business and semi-retired. Blew the dust off of the gear, resharpened some edges and have been trying to relearn what I forgot since. I regret ever stopping. Therapy for the mind.
-

Drink Sling
Instinctive replied to Instinctive's topic in Purses, Wallets, Belts and Miscellaneous Pocket Items
Open carry in it's truest form. Just remember no liquids at the security counter. I really looking forward to the Weaponized/Survivor Koozie Forum. -

Drink Sling
Instinctive replied to Instinctive's topic in Purses, Wallets, Belts and Miscellaneous Pocket Items
I'm going to have to make one now. -

Drink Sling
Instinctive replied to Instinctive's topic in Purses, Wallets, Belts and Miscellaneous Pocket Items
They exist. Knurled metal. Black with a a very sharp titanium top that can be used as a "glass breaker". Very fierce looking. -

Drink Sling
Instinctive replied to Instinctive's topic in Purses, Wallets, Belts and Miscellaneous Pocket Items
Add a pouch for knife and a tactical pen and the "man-purse" will be no more. -

Drink Sling
Instinctive replied to Instinctive's topic in Purses, Wallets, Belts and Miscellaneous Pocket Items
Yep bikermutt07. A couple more d-loops to clip stuff too and it becomes an an accessorized cup holder. Sort of a bag without the bag. There seems to be a trend toward minimalist carry. That may work. -
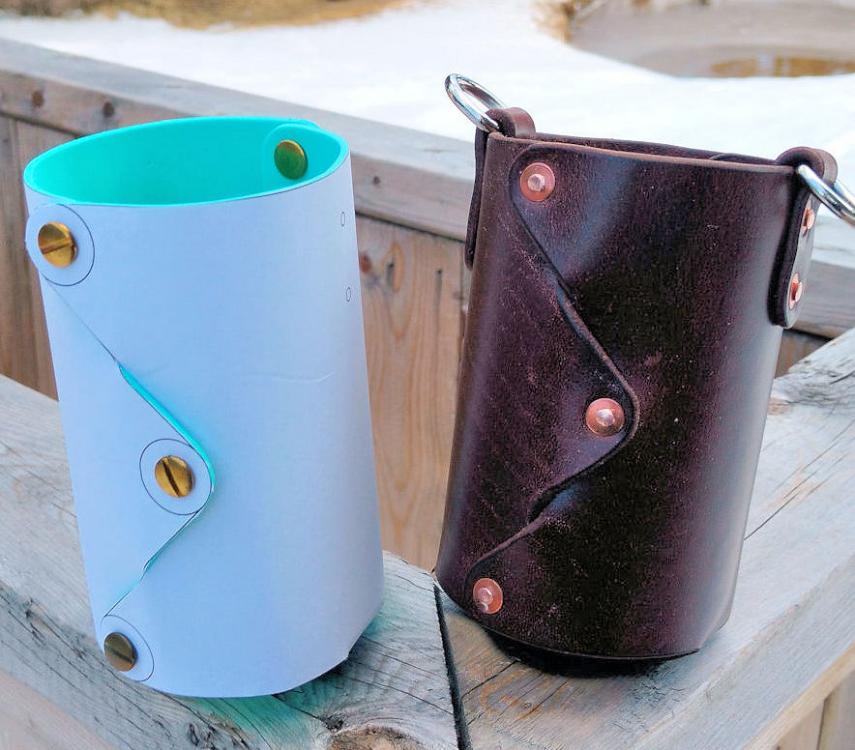
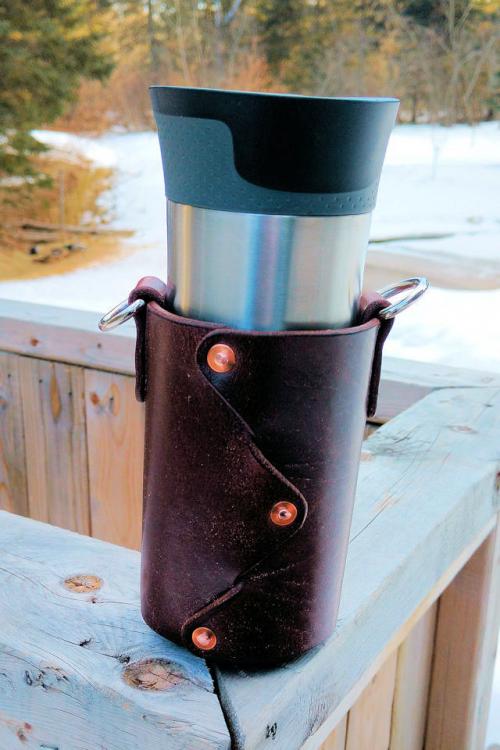
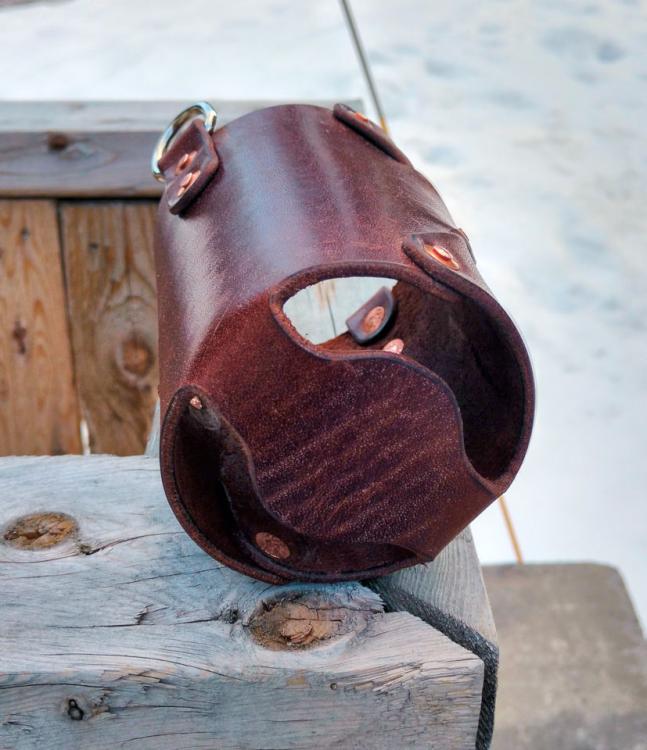
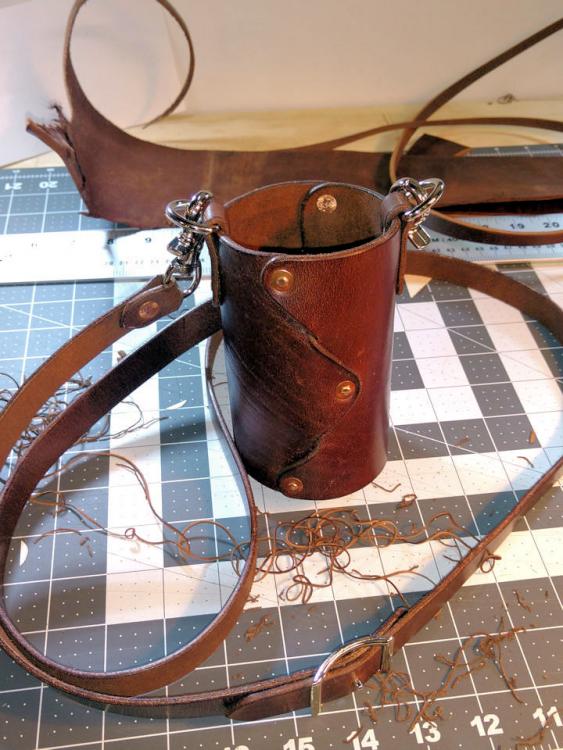
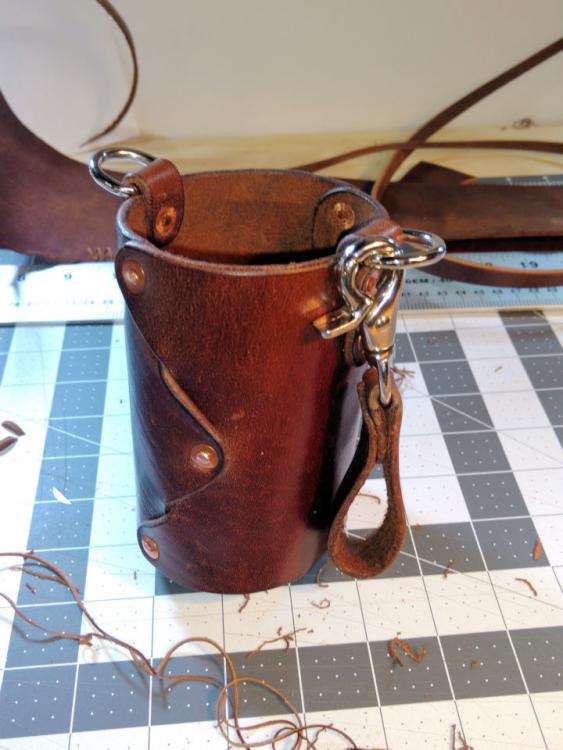
I got tried of leaving my coffee cup on assorted tables at the farmers market so decided it was time to free up the hands and make a drink sling. I also wanted a project to try copper riveting for the first time. Made it with a shoulder strap and optional belt loop carry. Pattern drawn on my CAD system and prototype first out of craft foam which I am pretty sure is something I read about on this forum. While designed for my coffee cup I am very certain it will be more than suitable for a variety of beverage container. Lawn mowing will be a better experience this summer.
-
Thank for the quick response.
-
-

Fiebings dye
Instinctive replied to Jack142's topic in Dyes, Antiques, Stains, Glues, Waxes, Finishes and Conditioners.
How old is the leather? It may be too dry? A tip I got from my local leather guru was to always dampen the leather a bit either with neatsfoot oil or even water before applying the dye. It opens the pores on the leather surface and helps the dye absorb in to the leather. My favorite technique lately has been to apply a lcoat of neatsfoot oil with a piece of sheep wool. Let that soak in for an hour or so. Then using the oil saturated sheep wool, apply the dye (put the dye on the sheep wool with the oil). It's been giving me an amazing "worn" look to the leather with the Fiebings medium brown spirit dye. Let it sit for 24 hours before you do anything else with it.




.thumb.jpg.8d222224f05ec804900d0e089a3bf4d6.jpg)
