dougfergy
-
Posts
145 -
Joined
-
Last visited
Content Type
Profiles
Forums
Events
Blogs
Gallery
Store
Everything posted by dougfergy
-
 Very nice! I'd like to see a better picture of the holster if you don't mind? I want to build one like that with the two belt clips but with a thumb break added. I've got some single clip tuckable holsters I've built but I wanna do a double clip with my glock 36 as long as I'm carrying hardware!
 -
Holster Stories 'n' such
dougfergy replied to JLSleather's topic in Gun Holsters, Rifle Slings and Knife Sheathes
And some suspenders! -
Knife sheath
dougfergy replied to Dave Richardson's topic in Gun Holsters, Rifle Slings and Knife Sheathes
Very nice Dave! I do like the thickness and I can only imagine what it was like to stitch all that! For your sake I'm glad they knives were a little stubby. I'm going to be making a similar sheath for a 15" bowie soon and I am going to try to skive the extra layer taper in pretty quick down to just the two layers with the welt for most of the blade. (mostly to save me from the hassle of stitching all those layers) If it weren't for the pain in hand stitching, I would go full blade with the extra layers. It looks awesome! My plan is to also have two rows of stitches. Hurts a little thinking about it. The guard on this bowie is 7/8" wide. I haven't quite finished the bowie yet but I'm stealing ideas from you guys in preparation for the sheath. You guys rock! Love this site! -
What Knives are popular with customers?
dougfergy replied to MrLentz's topic in Gun Holsters, Rifle Slings and Knife Sheathes
Yep, just do a search in amazon for bowie knife or hunting knife and you'll see lots of knock off blades you can probably afford to work on your skills. Then you'll have something to show and not gone broke doing it. -
Holster Stories 'n' such
dougfergy replied to JLSleather's topic in Gun Holsters, Rifle Slings and Knife Sheathes
That's pretty awesome, and a pocket full. Dang. That is a lot of size and weight in a pocket, probably around 2 lbs with a loaded weapon. The idea is nuts but your work is stellar! -
Finished Sheath for Customer!
dougfergy replied to YinTx's topic in Gun Holsters, Rifle Slings and Knife Sheathes
Well as long as we are resurrecting a thread, I am impressed and as usual, humbled by your work Y! I stared at the tool work and didn't even catch the Browning logo because it was so superbly done and decorated, trimmed by your beautiful stitching etc. Had to go back and look again. And again... I agree with the "hole". Dang! But you have to do what your client wants and sometimes it goes against your better judgement. Now the knife. So much going on there that I can't understand. For a standard knife I would think it would be cumbersome to use with that knuckle guard, but for a gut hook, that would be just awful trying to use it turned backwards in your hand. And the gut hook is almost halfway up the blade and the blade has a geometry to the point that looks like you'd be dragging that razor point through the, well let's say "animal parts", that you wouldn't want to be taking a chance of slicing while you are skinning with the gut hook. I had to laugh when I saw the blade. But, I own other knives that are not practical, in fact I've built a few, like an couple of 15 inch bowie's that are really for looking at and nothing more unless you have this thing about carving a turkey like you were Mik Dundee. So, I'm sure your client is both proud of his knife and that fantastic piece of art it now gets to live in! -
What the heck is going on here!!!?!?!?Help???
dougfergy replied to YinTx's topic in How Do I Do That?
Couldn't you just do the math and figure out by the strap you already cut, how much curve the strap is going to have and build a curve into your strap in the opposite direction when you cut which will be straight once the strap is cut and the tension is released? -
Farting around with leather.
dougfergy replied to hawgrider's topic in Gun Holsters, Rifle Slings and Knife Sheathes
In response to the stitching alignment problem mentioned earlier in this thread... I watched a video on someone punching their holes with a pricking fork and they would make the line to place the fork in then look down the line (think looking down the railroad tracks) and making sure the fork was standing straight up each time so that your holes are consistent on the bottom. I'm still trying to get my holes consistent on the bottom myself so I'm no expert by any means. I've started lining up my fork shaft with a vertical line on the wall behind my work table to try and make sure my fork is as straight up as possible along with the train track idea. For thick projects, someone suggested going a layer at a time with your fork using the marks from the previous layer's hole punching to line up and do the next layer. It all does take time, that's for sure. As far as the finish cracking, it definitely sounds like the coating. Although, I just had a piece of clearance sale leather from Tandy that when I water formed and let it dry, it had some very razor like slits in the surface that I didn't notice before. I hadn't dyed or oiled it yet when it was formed. -
Yeah, I think that came out great!
-
First sheath of this type
dougfergy replied to dougfergy's topic in Gun Holsters, Rifle Slings and Knife Sheathes
You'd never know but I've used the drill for years on and off. Just never enough to master it. I usually do use the grover and stitch wheel to make my marks for the holes. I just started using the pricking forks and an awl a few months ago. I got caught in the middle of nowhere on this piece and it looks like I drilled during an earthquake. I'll be practicing the methods y'all have mentioned and watching the videos. Thanks by the way! -
First sheath of this type
dougfergy replied to dougfergy's topic in Gun Holsters, Rifle Slings and Knife Sheathes
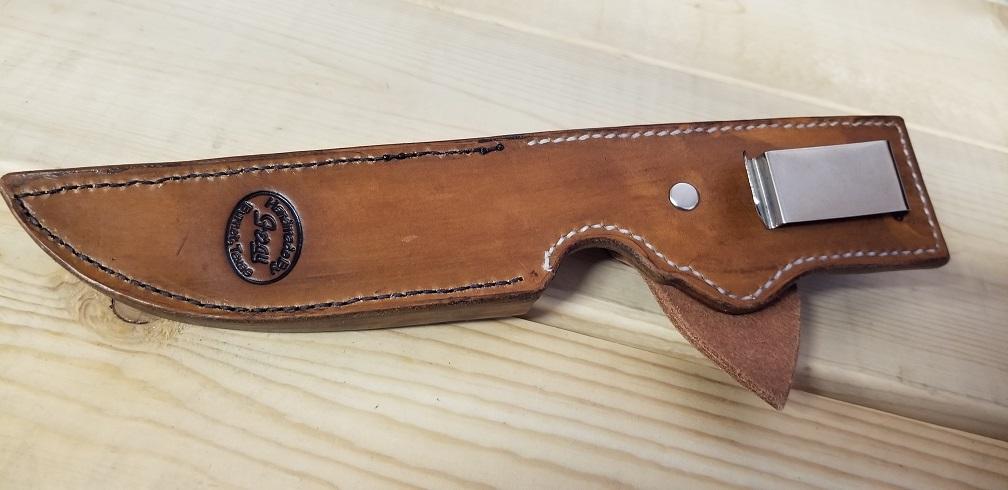
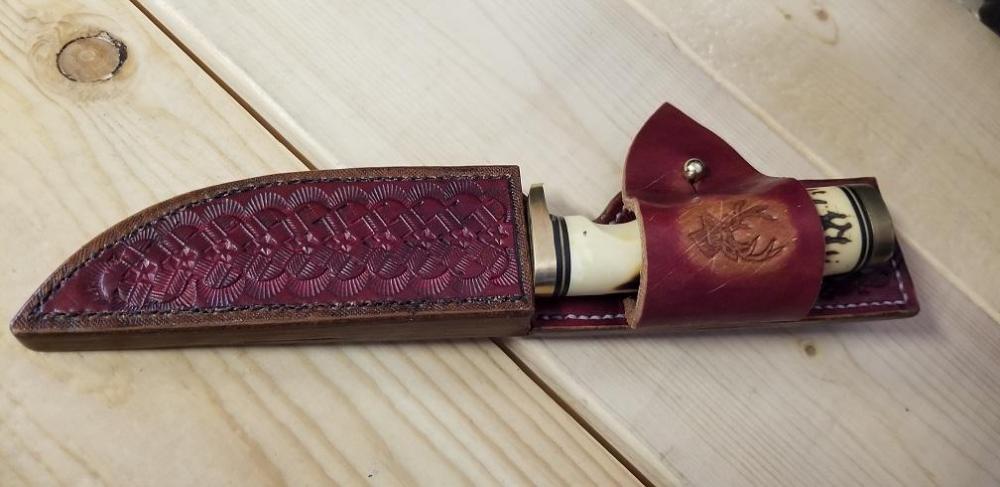
That's a great point. I actually have a reason for the clip on this one. It is an overly fancy case for a hunting knife that will spend most of its life in my backpack until I need to get it out to field dress a deer. Both my regular hunting knife that I've used for years and the spike fit this sheath. Being able to clip it on my belt, or pocket, or if it is cold, my jacket or overalls pocket temporarily without having to unstrap my belt is why I use a clip. My current hunting knife that I built years ago has a wet formed wrap around sheath that is built with the clip for the same reason. Problem has always been that when I want to unsheath the knife the sheath is so well formed around the knife guard the whole sheath and knife come off my belt or whatever I have it clipped to. I went with the straight, non-tight sheath to be able to put the knife in or out without the sheath coming off with the knife. I usually get in the truck after field dressing a deer and unclip the knife/sheath from my pants and clip it on my visor as a reminder that when I get home I need to take it in and wash the knife before I leave it in my backpack for any period of time! My EDC sheaths or pouches are all solid loops that you have to slide on a belt. Cool! Thanks for that. I definitely will be watching those videos. I'm a star junkie. Had to find somewhere to put a star. I think the star was my first stamp... and I'm from Texas. -
Challenging Knife sheath Build
dougfergy replied to Vikefan's topic in Gun Holsters, Rifle Slings and Knife Sheathes
I like the finish on your sheath too. Is that Neatsfoot oil? -
Challenging Knife sheath Build
dougfergy replied to Vikefan's topic in Gun Holsters, Rifle Slings and Knife Sheathes
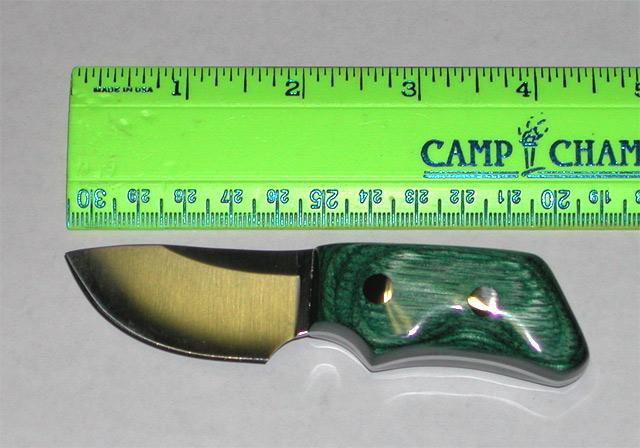
Thanks! I made that for someone I worked with years ago. He picked it out along with a peanut folder, both for Christmas gifts. Both of them tiny. The peanut was a major pain to build, like a ship in a bottle! and pink scales to boot! You know a peanut is a tiny knife (photo is quite blown up) and I went through maybe 10 pieces of handle material before I got two of them to fit. One tiny mistake sanding and you've taken too much off and chunk them and start over. I think I charged him 50 bucks for the knife and I had like 500 bucks worth of time in it!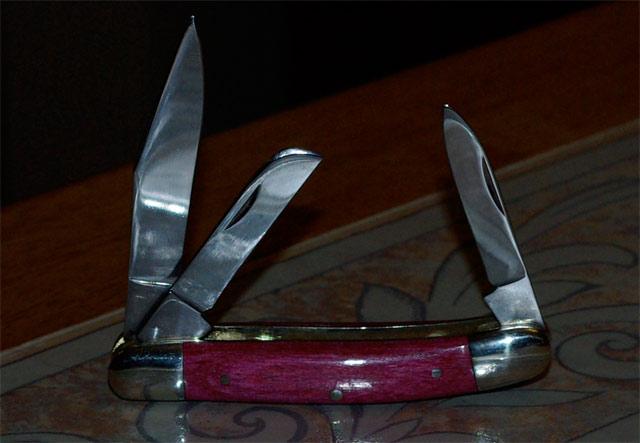
-
First sheath of this type
dougfergy replied to dougfergy's topic in Gun Holsters, Rifle Slings and Knife Sheathes
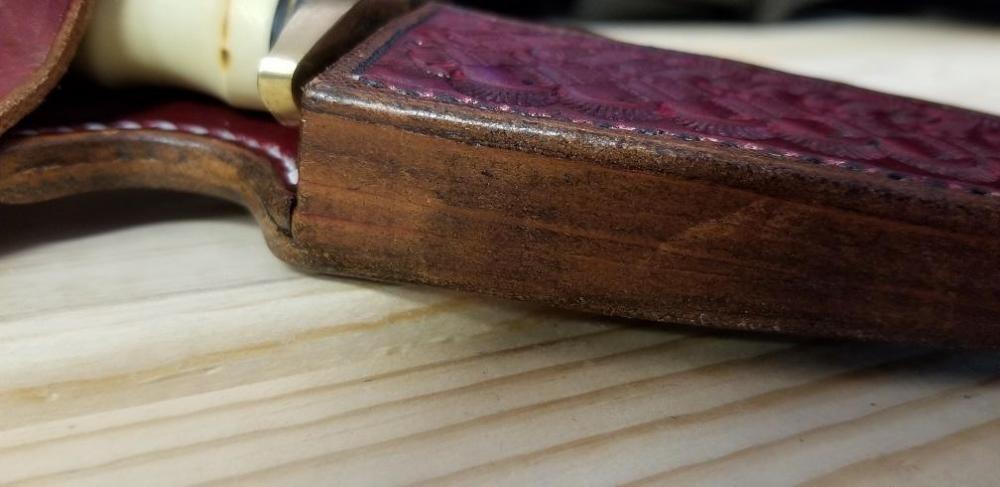
I was trying to hide the bad hole drilling I did on the lower part. The holes were pretty straight on the front, but crooked enough that I went with brown thread so the crookedness wouldn't stand out on the front. No hiding the back. When I make one from the patterns with my notes on what not to do (like cutting two back pieces and no front--second back piece had the flap attached but facing the wrong way, fuzzy side out! stuff like that) cause I was all over the place with this one, I will be able to make it better and use one color of thread! -
Challenging Knife sheath Build
dougfergy replied to Vikefan's topic in Gun Holsters, Rifle Slings and Knife Sheathes
I am afraid of posting a copyrighted photo of them from the web. If you google search "corby bolts" and click on images at the top, you'll see several versions. They are brass or stainless or silver male/female shoulder bolts that screw into each other and take a special shoulder bit to drill part way into scales so that the screw part goes all the way through and the shoulder part only goes down maybe 1/8" or so leaving the slotted exterior for you to sand off when finishing your handles. Wait a minute, I have some examples: Here the corby's are screwed on and epoxied, with the scales ready for grinding off. Finished off!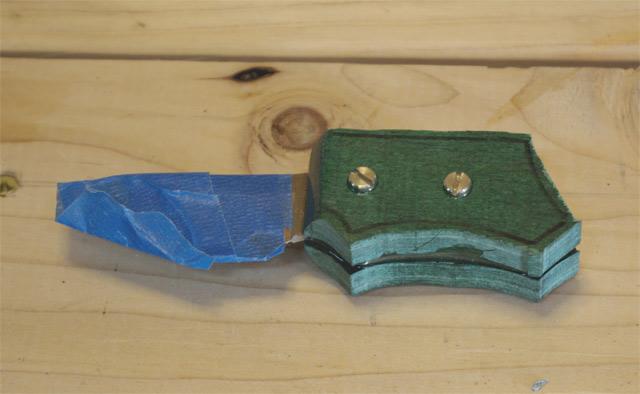
-
I'm floored! Goodnight nurse, that's a lot of work. Absolutely amazing!
-
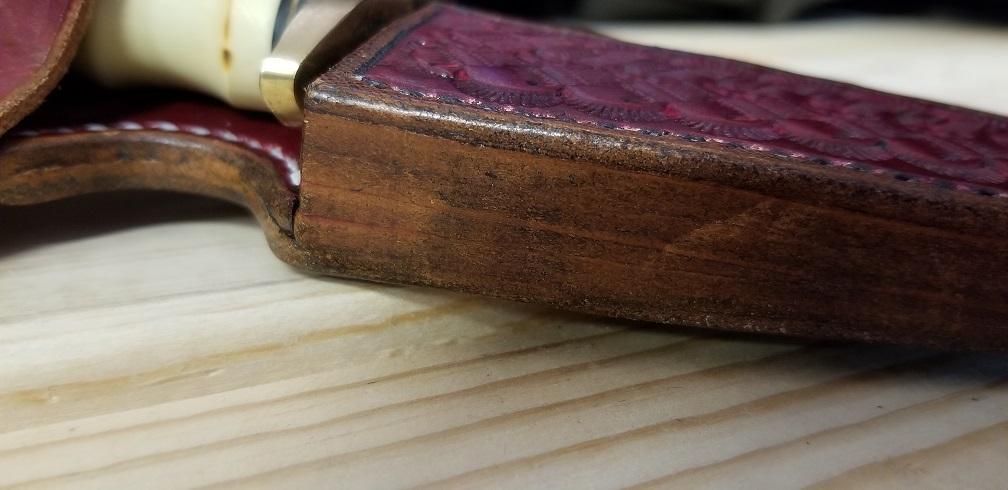
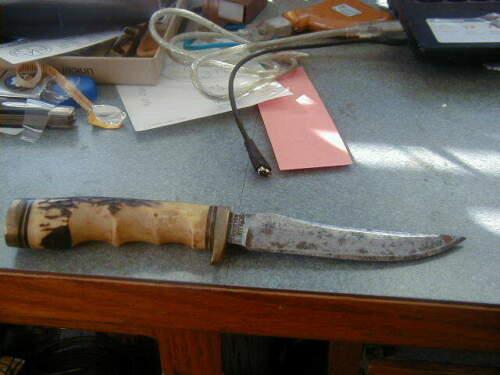
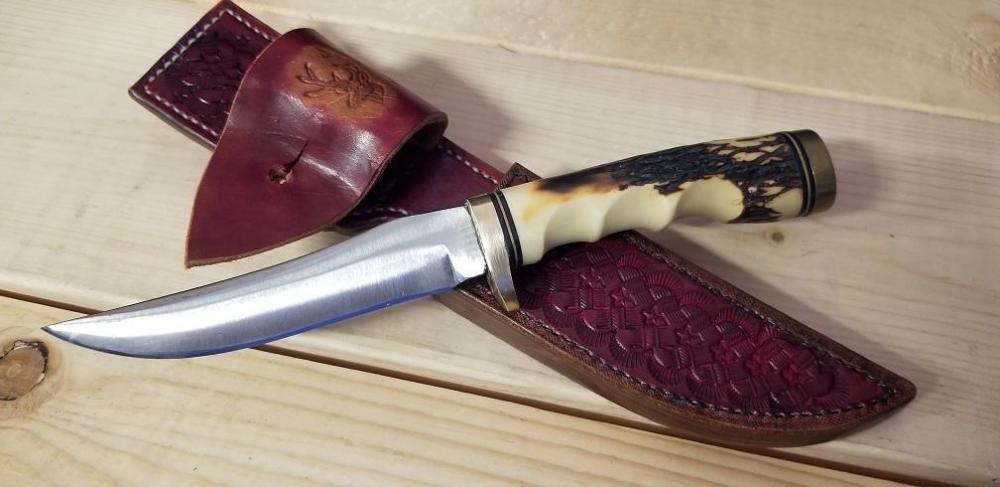
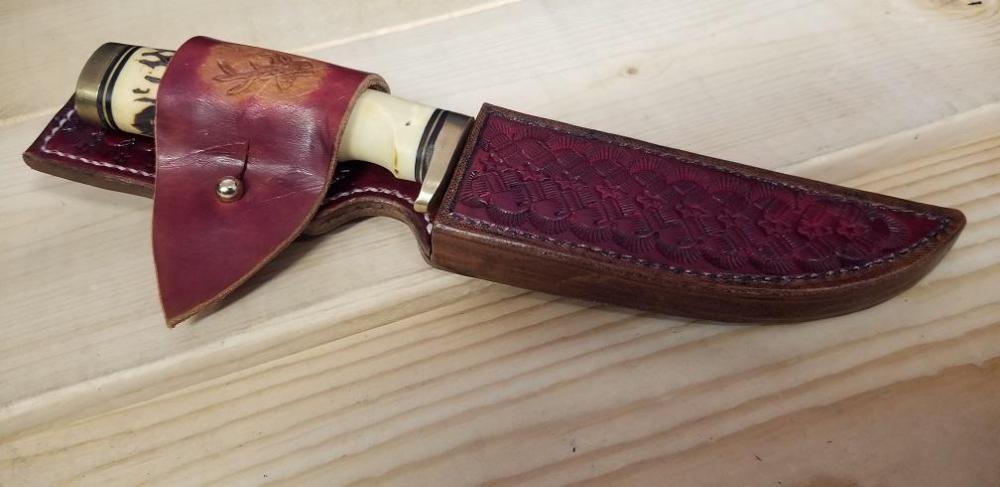
I usually make wrapped, wet formed knife sheaths that hug the guard to keep the knife secure. I saw a video someone made of this type build and I decided to give it a try. I have a pretty old Golden Spike that I got used and abused and have been sanding the pits off the blade and cleaning it up so I decided this could be its new home. This sheath is a comedy of errors, and if I had only taken notes while watching the video, most could have been avoided, but it is how I learn most of the time. The lower back stitching makes me want to gag because it had to be drilled with my press and the holes never quite match up on the bottom, thus the darker thread to try and hide behind. Upper part is hand stitched which, I'm getting better at each time I think. The flap idea was out of the blue, and the piece of scrap leather turned out to have several very thin slices going through its surface. Didn't see a hint of this until after wet forming and letting it dry. (could be a testimonial on why you shouldn't buy cheap leather, which I did) I might be doing a more traditional flap next time with the thumb stud on the lower and the strap coming across diagonal like most everyone else would have. The layers were a major pain to stitch and pliers were a necessity, and with the difficulty I have drilling holes, I'm thinking that punching the holes a layer at a time as I add the next layer, using the previous holes as pilots to punch the next layer etc. might be the way to go. I just can't seem to use the drill press to any degree of accuracy. Looks good going in, but out the other side could be anywhere. I need help here. Maybe my drill press is wobbly. It turns true but maybe the bearings are allowing the bit to pick a path, so to speak. It seems deadly accurate drilling wood etc. Leather usually isn't perfectly flat when I drill it so maybe it is just a geometry issue that I can't get past. Like learning how to play raquetball, I ran myself nearly to death and felt totally worthless until I mastered the geometry. This is what the spike looked like when I got it: I still have some work to do on the spike but it looks way better: AAK! Feedback appreciated! P.S. the center is Fiebings oxblood dye then the entire case is coated with Eco-Flow Antique Hi-Lite stain Briar Brown and wiped off after a minute or two with a paper towel to get the light brown antique color. The stain darkens the oxblood just a little, which I kindof like. The flap is neatsfoot oiled then dabbed around the edges with the oxblood stain using a paper towel. And I just noticed that I didn't burnish the edges of the flap yet! Thanks,

-
Challenging Knife sheath Build
dougfergy replied to Vikefan's topic in Gun Holsters, Rifle Slings and Knife Sheathes
Man, that's some nice work! Curvy knife and lumpy handle and you pulled it off. Ingenious leather latch too. I can hear myself trying to talk the owner into letting me thin the scales down some but hey, he's a hands guy being a chiro so he's probably got big hands. Are those corby scews? Nice job! -
My First Post!
dougfergy replied to SkinBender's topic in Gun Holsters, Rifle Slings and Knife Sheathes
Sweet! -
machine - belt or bench sander edges?
dougfergy replied to christine1ca's topic in How Do I Do That?
I have used belt sanders, both the 4 inch and the 1 inch for most of my projects for years. I also use an old, worn out 4 inch belt to pre-finish edges that are relatively flat. It doesn't make the leather furry. Once your edges are glued and ready for stitching, I would use the sander to flatten and smooth your edges, then mark them for stitching so your stitches are uniform from the edge all the way around. For the inside curves, I use drum sanding bits on my drill press. I bought these years ago and still have quite a pile of sand tubes for them. They don't work fast really, but inside curves you generally don't want to get too crazy sanding anyway. You can get these cheap for a set at Home Depot and lots of other places. I think I bought mine at Jantz Knife Building Supply.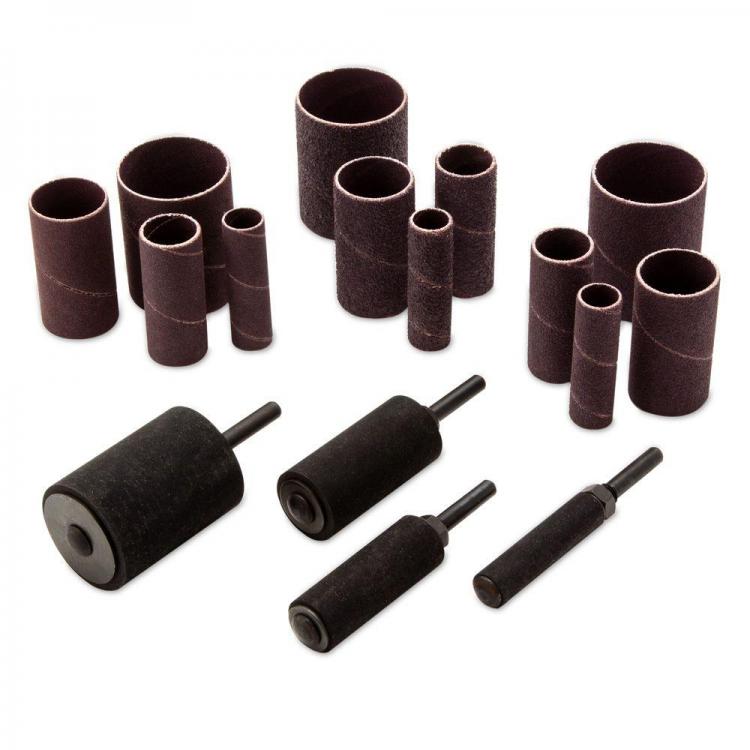
-
This is where you've got to experiment with your design on some scrap leather pieces until you get exactly what you want and then go do it on your project. Nice work by the way!
-
Best Method to add sharpener or marlin spike to knife sheath
dougfergy replied to lawman133's topic in How Do I Do That?
Going by the picture you attached, for the welt, if you were to use a thinner piece of leather for the welt that you could double over with the loop in between the two sides, once doubled over it would provide the thickness you might desire for the welt and a loop for the fire starter/sharpener. Might take a few experiments to get it exact. Here's what I'm talking about: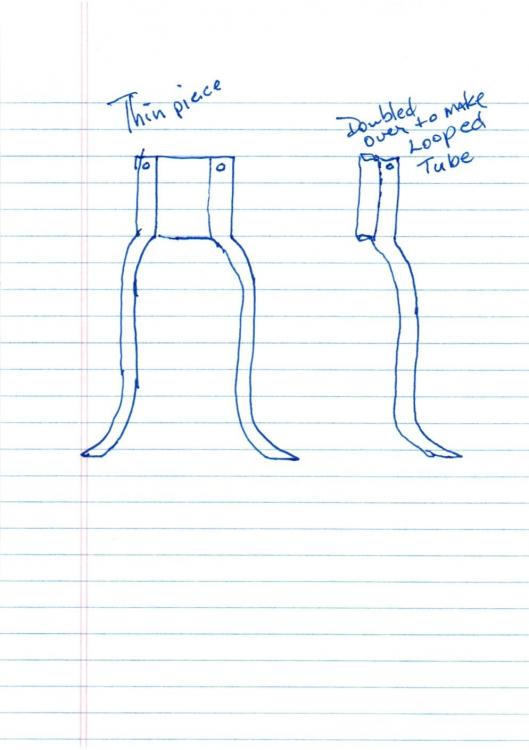
-
Probably not, and if so , not evenly, in my opinion. I'm going with what was said about the antique being a sort of finish that the dye has a hard time penetrating. Then you put super sheen (finish) on top of that. You might be able to scrub off some of the finishes with alcohol or leather cleaner/deglazer from Fiebings, maybe? Then use pro dye again and see what you end up with. I've used antique finish as a base coating and it always ends up looking somewhat blotchy and "antique" which I was going for. For a solid coloring, it's best to use pro dye. A sponge brush might work for that large a piece.
-
Knife Sheath - Whoops!
dougfergy replied to stormdevil's topic in Gun Holsters, Rifle Slings and Knife Sheathes
LOL! -
My First Post!
dougfergy replied to SkinBender's topic in Gun Holsters, Rifle Slings and Knife Sheathes
I think you've got the student part mastered! Not any criticism for you except X3 or X4 on the knives. Also, I'll bet you have other styles you've made besides variations of that one pattern, right? I'd also like to see how your closure looks under the strap with it open. I am a copier mostly. I hope you don't mind! Always looking for new ideas. Sensational work!